1
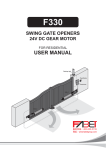
SWING GATE OPENERS
24V DC GEAR MOTOR
FOR RESIDENTIAL
USER MANUAL
Flashing Light
Push Button
Control box
Gate 2
Gate 1
Index
Warnings
2
5.
Technical Characteristics
1.
Product Description and Applications
5.1
PW220
1.1
Applications
5.2
PW230
1.2
Description of The Automation
5.3
PC160 Control Box
1.3
Description of Devices
3
3
3
3
5.4
PH-1 Photocells
1.3.1
PW220/PW230 Electromechanical
5.5
PKS-1 Key Selector
4
4
4
4
5
5
5
5
5.6
PPB-1 Push Button
5.7
PF-1 Flashing Light
5.8
PR-1 Radio Transmitter
5.9
PEL-1 Electric Latch
6.
Annexes
6.1
CE Declaration of Conformity
Gear Motors
1.3.2
PC160 Control Box
1.3.3
PH-1 Photocells
1.3.4
PR-1 Radio Transmitter
1.3.5
PF-1 Flashing Light
1.3.6
PKS-1 Key Selector
1.3.7
PPB-1 Push Button
1.3.8
PEL-1 Electric Latch and PS-1 Stopper
2.
Installation
2.1
Notes of Motors in Operation
2.1.1
Tools in Installing
2.1.2
Motors, Components and Its Installation
in Illustration
2.2
Power Connection
2.2.1
Notes for Power Connection
2.3
Installation
2.3.1
Preparation for Motor Installation
2.3.2
Installation of The Gear Motors
2.3.3
PKS-1 Key Selector
2.3.4
PPB-1 Push Button
2.3.5
PF-1 Flashing Light
2.3.6
PH-1 Photocells
2.3.7
PEL-1 Electric Latch and PS-1 Stopper
2.3.8
PC160 Control Box
3.
Dip Switch Setting
6
6
6
7
7
9
11
12
12
13
14
16
3.5
4.
Trouble Shooting
3.2
3.3
3.4
23
23
5
5
6
18
Functional Switch and LED lights Introduction 18
Transmitter Memorizing and Erasing Process 19
System Learning Process
19
Gate Operation
20
Gate-moving Logic
20
3.1
21
21
21
21
21
21
21
22
22
22
20
INSTRUCTIONS PW220/PW230
1
Warnings
Please read this instruction manual carefully before the
installation of gate-automated system.
Do not make any modifications to any components except
that it is mentioned in this manual.
This manual is exclusively for qualified installation
personnel. Powertech Electronics Inc. is not responsible for
improper installation and failure to comply with local
electrical and building regulations.
Do not try to manually open or close the gates before you
release the gear motor.
Keep all the components of PW220/230 system and this
manual for further consultation.
In this manual, please pay extra attention to the contents
marked by the symbol:
If there is a failure that cannot be solved and is not
mentioned in this manual, please contact qualified
installation personnel.
Do not use the gate-automated system before all the
procedures and instructions have been carried out and
thoroughly read.
Test the gate-automated system weekly and have
qualified installation personnel to check and maintain the
system at least every 6-month.
Be aware of the hazards that may exist in the procedures
of installation and operation of the gate-automated
system. Besides, the installation must be carried out in
conformity with local standards and regulations.
If the system is correctly installed and used following all
the standards and regulations, it will ensure a high degree
of safety.
Make sure that the gates works properly before installing
the gate-automated system and confirm the gates are
appropriate for the application.
Do not let children operate
gate-automated system.
or
play
with
the
Do not cross the path of the gate-automated system when
operating.
Please keep all the control devices and any other pulse
generator away from children to avoid the gate-automated
system being activated accidentally.
2
INSTRUCTIONS PW220/PW230
Install warning signs (if necessary) on the both sides of
the gate to warn the people in the area of potential
hazards.
1) Product Description and Applications
1.1 Applications
PW220/PW230 is applied for residential automation of single or dual leaf gate. PW220/PW230 has to be operated
with electricity and it’s forbidden to be operated by back-up batteries for normal use. Back-up batteries are only
allowed for emergent operation when there is a power failure, and the gear motors can be released by special keys
to move the gate manually.
1.2 Description of the Automation
The following diagram of PW220/PW230 typical installation describes some terms and accessories of a gate
automation system:
G
E
Figure 1
H
F
C
I
A
A
J
1.3 Description of Devices
PW220/PW230 includes the accessories shown in Figure 2.
Please check the accessories the same as the package provided.
Attention: Some accessories of PW220/PW230 are not included due to local regulations or customized order.
A) 2 PW220/PW230 electromechanical gear motors with mounting brackets.
Figure 2
B) 2 release keys.
C) 1 pair of PH-1photocells.(one TX and one RX)
C
D
B
D) 2 PR-1 radio transmitters.
E) 1 PKS-1 key selector with two keys.
F) 1 PPB-1 push button switch.
G) 1 PF-1 flashing light.
A
H) 1 Control box
E
F
I) 1 PEL-1 electric latch.
J) 1 PS-1 stopper.
K) Various small parts: bolts, nuts, etc.
See Tables 1, 2, 3, 4, 5, 6.
I
G
H
J
K
INSTRUCTIONS PW220/PW230
3
1.3.1 PW220/PW230 Electromechanical Gear Motors
PW220/PW230 consists of a worm screw reduction
gear and a 24V direct current motor. The gear motor
could be released manually by special release keys
when there is a power failure.
1)PW220
Figure 3
The gear motor is installed with two post brackets, one
rear plate and one front plate for the installation.
Table 1: List of small parts
PW220
PW230
Front plate
2pcs
2pcs
Rear plate
4pcs
2pcs
Post bracket
4pcs
4pcs
M8*25L hex bolt
4pcs
4pcs
M8 self-locking nut
2pcs
4pcs
M12 *25L hex bolt
0
2pcs
M12 self-locking nut
2pcs
2pcs
Release key
2pcs
2pcs
1.3.2 Control Box
Control box consists of one control panel with
incorporated receiver, one transformer and two back-up
batteries.
Provides the complete automation of the gear motors
and other accessories of PW220/PW230 kit.
To connect separate terminals on the control panel and
activate the gear motors and other accessories, the
installation manual has to be carefully read beforehand.
Table 2: List of small parts for Control Box
2)PW230
3)Release Key
Figure 4
Quantity
5*30 Screw
4 pcs
Nylon screw anchor
4 pcs
Figure 5
1.3.3 PH-1 Photocells
The pair of PH-1 photocells has to be installed on the
wall and connected to the control panel. The function of
the photocells is to detect the obstacles found on the
optical axis between the transmitter (TX) and the
receiver (RX).
1.3.4 PR-1 Radio Transmitter
PR-1 radio transmitter is used for the remote control of
the gate movement. To use the transmitter, press and
hold the button for 1 second. There are two buttons on
the transmitter and (A) button is “open-stop-close
mode” and (B) button is “pedestrian mode”.
4
INSTRUCTIONS PW220/PW230
TX
RX
Figure 6
Figure 7
1.3.5 PF-1 Flashing Light
PF-1 flashing light is controlled by control box and blinks
when the gate is moving. The flashing light stops
blinking when the gates finish opening or closing.
Table 2: List of small parts for PF-1
Quantity
3*20 Screw
3 pcs
Nylon screw anchor
3 pcs
1.3.6 PKS-1 Key selector
The PKS-1 key selector is used for opening the gate
outdoors without the radio transmitter. PKS-1 key
selector is supplied with two keys
Table 3: List of small parts for PKS-1
Quantity
3*20 Screw
3 pcs
Nylon screw anchor
3 pcs
Keys
2 pcs
1.3.7 PPB-1 Push Button
The PPB-1 push button is used for opening the gate
indoors without the radio transmitter.
Table 4: List of small parts for PPB-1
Figure 8
Figure 9
Quantity
3*20 Screw
3 pcs
Nylon screw anchor
3 pcs
1.3.8 PEL-1 Electric Latch and PS-1 Stopper
PEL-1 electric latch is used to lock the gate and it has to be used
with PS-1 stopper and installed on the master gate.
Table 6: List of small parts for PEL-1 and PS-1
Figure 10
Quantity
M8*25L hex bolt
3 pcs
M8 self-locking nut
Key
3 pcs
2 pcs
2) Installation:
2.1 Notes of Motors in Operation
The PW220/PW230 gate openers are applicable to per leaf of 2.5/3.5 meters in width and 200/300 kg in weight which
can be opened up to 110 degrees primarily for residential use; where the performance shall be influenced by the
factors such as gate dimension, weight and climate that the driven torque is necessarily to be adjusted properly.
INSTRUCTIONS PW220/PW230
5
2.1.1 Tools in Installing
Please make sure all tools and cables are ready and conform to the industrial safety standard before installation.
Please refer to Figure 11.
Figure 11
2.1.2 Motors, Components and Its Installation in Illustration
The installation procedure of PW220/PW230 may be changed due to various accessories and quantities installed.
The basic wiring diagram is shown in Figure 12.
No wiring cables for accessories are supplied with KIT PW220/PW230.
Figure 12
2.2 Power Connection
PW220/PW230 is required to connect two cores wires, which requires very low voltage that no professionally trained
personnel is required in installation; however, the users are advised to read the installation manual carefully before
going for it. After getting to know all accessories and their positions, suggest starting from cable conduit arrangement
to prevent the cables from being broken or damaged
2.2.1 Notes for Power Connection
1. The installation of power supply cable to the motor should be carried out by a qualified professional electrician.
2. The power supply cable of the motor should be equipped with short circuit protection and leakage protection.
Please make sure to shut off the power before going installation or maintenance.
6
INSTRUCTIONS PW220/PW230
2.3 Installation
2.3.1 Preparation for Motor Installation
PW220/PW230 is not applicable to a gate which is inefficient or unsafe, neither to solve the defects due to incorrect
installation nor poor maintenance.
Check the following items before going for installation:
1). Make sure the weight and dimensions of the gate conform to the operation range of PW220/PW230. Don’t use
PW220/PW230 if the gate specifications do not meet the requirements.
2). Make sure the gate structure conform to the criteria of automatic operation and force regulations.
3). Make sure there is no serious friction existing in the opening or closing travel of the gate leaves.
4). Make sure the gate is at horizontal level that the gate will not move aside at any position.
5). Make sure the gate can bear the impact of the motor torque when it is installed on any hole of the bracket which
the surface is sufficiently sturdy.
6). Make sure the photo sensors are installed on flat surfaces to ensure the two ends of receiving and transmitting
corresponded to each other.
7). Check the dimensions of the motors as below.
PW220
Figure 13
PW230
8). Make sure to leave enough space when the gate is opening.
PW220
Figure 14 (Aerial View)
150mm(Max)
Min
150mm
PW230
150mm(Max)
Min
150mm
INSTRUCTIONS PW220/PW230
7
9). If the gate is OPENED OUTWARD, please leave at least 70mm between the post brackets and the gate.
Figure 15 (Aerial View)
PW220
Min
70mm
PW230
Min
70mm
10) . Using the leaf-opening angle as criteria to make sure all criteria in Figure 17 can be met.
Figure 16 (Aerial View)
PW220
PW230
Figure 17
11). “C” value is 139mm.
12). “D” can be measured from the gate easily.
13). “A” = “C” + “D”
14). The value of “B” can be calculated from the value of “A” and the leaves opening angle. Ex. If “A”=160mm with
the leaves opening angle of 100 degrees, then the value of “B” is approximate 190mm.
**Please make sure “B” and “A” are similar or the same in value that the leaves can be operated smoothly,
also to reduce the burden of the motor.
8
INSTRUCTIONS PW220/PW230
2.3.2 Installation of The Gear Motors
1. Choose the correct dimensions of the motors and position to be installed.
2. Check if the mounting surface the brackets to be installed is smooth, vertical and rigid.
3. Arrange the cable conduit for power supply cable of the motors.
4. In order to obtain the optimal supporting from the rear plate, please assemble two post brackets and one rear metal
plate according to Figure 18.
5. Loosen the two screws and remove the back cover of the motor as shown in Figure 19.
6. Place the leaves in the closed position.
Figure 20
Figure 19
139
Figure 18
7. Refer to the distance of “B” in Figure 17, place the rear plate in the correct position on the mounting surface.
Inspect if the distance is proper as shown in Figure 23 i.e. the position the front plate of the motor to be installed.
8. Place two post brackets on the surface to be installed and mark the drilling points, then drill minimum diameter
of 8mm holes by four on the mounting surface to be installed and fasten up the brackets with screws and washers.
9. Please make sure the front plate is completely installed horizontally.
Figure 22
Figure 21
PW230
PW220
10. Refer to Figure 23, the distance between front plate of the motor and rear plate is 735mm (PW220) / 798mm
(PW230), the difference in height is 18.3mm (PW220) / 22.5mm (PW230).
22.5mm
PW230
43mm
Figure 23
18.3mm
43mm
PW220
735mm
798mm
11. Clamp and fix the motor front plate on the door temporarily.
PW220
Figure 24
PW230
INSTRUCTIONS PW220/PW230
9
12. Lift up the motor and insert the screws into the front plate.
13. Open the gear motor cover and release the screw, then take out the bolt as below Figure25. Lift the motor
overhead and push the gate to the end until the screw holes of the motor end matches the holes on the rear plate
as shown in Figure 25.1 and fasten the motor to the rear plate with bolt and screw as shown in Figure25.2.
3
1
Figure 25
Figure 25.1
Figure 25.2
1
3
2
2
14. Fasten the nut tightly and loosen it for half round for motor supporting in rotating.
15. Fasten the motor front end to the front plate with the bolt (A) and nut (B) tightly. Fully tighten the screw.
Figure 26
PW220
PW230
A
B
B
21. Connect the motor power cable as shown in Figure27.
22. Close the gear motor cover by tightening the two screws as shown in Figure28.
Figure 27
Motor
Figure 28
White(+)
Yellow(-)
23. Gear Motor Release
1) Turn the round plate on the release part to “OPEN” position. See Figure 29.
2) Push out the release part to the end. See Figure 30.
3) Use the release key to turn the pin anti-clockwise to the end. See Figure 31.
Figure 29
10
INSTRUCTIONS PW220/PW230
Figure 30
Figure 31
2.3.3 PKS-1 Key Selector
1). PKS-1 key selector is installed outside and close to the gate at the height of about 100cm, so that it could be used
by most people. Decide the installation position of PKS-1 first. See Figure 2.3.3 (1).
2). Remove the round cover (A) by prizing it out with a screwdriver. See Figure 2.3.3 (2).
3). Unscrew the two screws beside the lock body. See Figure 2.3.3 (3).
4). Turn the key and separate the bottom of the shell with the lock body. See Figure 2.3.3 (4).
Figure 2.3.3 (1)
1000mm
Figure 2.3.3 (2)
Figure 2.3.3 (3)
A
Figure 2.3.3 (4)
5). Breach the three holes at the bottom and mark the points by the holes as reference.
6). Drill the holes in the wall and fix the bottom to the wall by three screws. See Figure 2.3.3 (5).
7). Connect the electric wires to the terminals as shown in Figure 2.3.3(6), and it’s not required to distinguish any
polarity. The terminals can be removed for connecting the wires easily.
8). Turn the key and insert the shell on the bottom. Turn the key back to the center position and the shell will be fixed
to the bottom.
9). Tighten the lock body with the two screws and insert the round cover by pressing it to attach to the whole unit.
Figure 2.3.3 (5)
Figure 2.3.3 (6)
INSTRUCTIONS PW220/PW230
11
2.3.4 PPB-1 Push Button
1). PPB-1 push button is installed indoors at the height of about 100cm, so that it could be used by most people.
2). Remove the round cover (A) by prizing it out with a screwdriver. See Figure 2.3.4 (1).
3). Unscrew the two screws beside the button.
4). Separate the upper shell with the bottom. See Figure 2.3.4 (2).
5). Breach the three holes at the bottom and mark the points by the holes as reference.
6). Drill the holes in the wall and fix the bottom to the wall by three screws. See Figure 2.3.4 (3).
7). Connect the electric wires to the terminals as shown in Figure 2.3.4 (4), and it’s not required to distinguish any
polarity. The terminals can be removed for connecting the wires easily.
8). Attach the upper shell to the bottom and screw them up by two screws and insert the round cover by pressing
it to attach to the whole unit.
Figure 2.3.4 (1)
A
Figure 2.3.4 (3)
Figure 2.3.4 (4)
2.3.5 PF-1 Flashing Light
1). Decide the installation position of the flashing light. The flashing light has to be installed near the gate and easy
to be seen by users and passersby. The flashing light can be installed horizontally or vertically. See Figure 2.3.5 (1).
2). Unscrew the four screws on the light base and separate the base with the bottom as shown in Figure 2.3.5 (2).
3.) Connect the wires and penetrate the wires into the hole of the base. See Figure 2.3.5 (3).
4.) Drill the holes in the wall and fix the bottom to the wall by three screws. See Figure 2.3.5 (4).
Figure 2.3.5 (1)
12
Figure 2.3.5 (2)
INSTRUCTIONS PW220/PW230
Figure 2.3.5 (3)
Figure 2.3.5 (4)
5). Connect the four wires of the light and the antenna to the PCB terminals and place the wires into the conduit if
necessary. See Figure 2.3.5 (5).
6). Tighten the four screws back on the light base. Figure 2.3.5 (6)
7). Replacing the bulb set. See Figure 2.3.5 (7)
7.1) Unscrew the flashing light wires from the PCB terminals and make sure the power of the light is off.
7.2) Release the three screws (A)、(B)、(C) of the flashing light cover.
7.3) Separate the flashing light cover and replace the bulb set with a new one.
7.4) Tighten the three screws (A)、(B)、(C) of the flashing light cover.
A
C
B
Figure 2.3.5 (5)
Figure 2.3.5 (6)
Figure 2.3.5 (7)
2.3.6 PH-1 Photocells
1). Decide the installation position of the photocells. See Figure 2.3.6 (1).
2). Unscrew the screws and secure the photocells on the post A, B or C. See Figure 2.3.6 (2) and (3).
Figure 2.3.6 (1)
Figure 2.3.6 (2)
Figure 2.3.6 (3)
B
A
C
3). Wiring connection:
TX: Connect terminals 1 and 2 on the transmitter with the terminals GND and 24V on the PC160 PCB.
RX: Connect terminals 1, 2 and 4 on the receiver with the terminals GND, 24V and phot1 on the
PC160 PCB. And use an extra wire to connect terminals 2 and 5 on the receiver as a bridge.
See Figure 2.3.6 (4) Figure 2.3.6 (5) and Figure 2.3.8 (5)
Figure 2.3.6 (5)
Transmitter
Figure 2.3.6 (4)
CA
CC
1
2
NA
NC
C
3
4
5
NA: Normal Open
NC: Normal Close
: DC(+) Input Voltage
: DC(-) Input Voltage
O
R
I
Z
C: Common
CA: AC(12~24)
CC: DC(12~24)
VERT:Vertical
ORIZ:Horizontal
Receiver
V
E
R
T
V
E
R
T
CA
CC
NA NC
1
2
3
4
C
5
CA
CC
O
R
I
Z
NA NC
1
Power LED: Green
2
3
4
C
5
O
R
I
Z
Vertical Adjustment
Horizontal Adjustment
LED:Red(Beam Alignment)
INSTRUCTIONS PW220/PW230
13
2.3.7 PEL-1 Electric Latch and PS-1 Stopper
1. Stopper:
1). Before installing the stopper, please make sure the gates are in close positions and the surface to be installed is flat.
2). Place the stopper on the ground using the bottom as reference, and mark the 3 drilling points.
See Figure 2.3.7 (1) For the gate opened inward.
See Figure 2.3.7 (2) For the gate opened outward.
Note: If the gate is opened outward, place the stopper in opposite direction.
3). Drill the 3 marked points, and then securely attach the stopper to the ground with screws and washers.
See Figure 2.3.7 (3)
2. Electric Latch:
(If the gate is opened outward)
1). If the gate is opened outward, please change the spring inside and screw it in the different place.
See Figure 2.3.7 (4), Figure 2.3.7 (5), Figure 2.3.7 (6) & Figure 2.3.7 (7)
Figure2.3.7(4) Unscrew the screws.
Figure2.3.7(5) Take the casing off.
Figure2.3.7(7)
Change the spring and screw it in the different place.
14
INSTRUCTIONS PW220/PW230
(Installation)
Figure2.3.7(6)
The location of the spring.
2). Weld the back plate of the electric latch to the surface on the master gate. See Figure 2.3.7 (8).
Please avoid melting the wires by the heat of the fixed plate.
Figure2.3.7(8) For the gate opened inward.
Figure2.3.7(9) For the gate opened Outward.
3). The gap between the bottom of electric latch and the stopper should be less than 7mm. See Figure 2.3.7 (10)
Figure2.3.7(10) For the gate opened inward.
7mm
Figure2.3.7(11) For the gate opened Outward.
7mm
4). Connect the wires of the electric latch to the terminal LAT(+) and LAT(-) on the PCB.
INSTRUCTIONS PW220/PW230
15
2.3.8 PC160 Control Box
1. Decide the installation position of PC160 control box first, it is suggested to be installed near the gate and should
be protected from possible damage. Be aware of the motor cable length before deciding the installation position.
2. Remove the cover by unscrewing the four screws on the cover. See Figure 2.3.8 (1).
3. Use a screwdriver to puncture the holes beneath the bottom of the control box. See Figure 2.3.8 (2).
4. Secure it on the wall. See Figure 2.3.8 (3).
Figure 2.3.8 (1)
Figure 2.3.8 (2)
Figure 2.3.8 (3)
5. Wiring Connection:
Prepare all the wires of the accessories beforehand and connect the wires to the gear motors and accessories on
the PCB as shown in Figure 2.3.8 (4). All of the wiring connections of the accessories are not requested to
distinguish the positive (+) and the negative (-) polarity.
1). PF-1 Flashing light: Connect the two wires from the flashing light to the terminal LIT (+) and LIT (-) on the PCB.
2). PEL-1 Electric Latch: Connect the two wires from the electric latch to the terminal LAT (+) and LAT (-) on the PCB.
3). PW220/PW230 Gear Motors:
Refer to Figure 2.3.8 (5) and connect the wires separately to the terminals on the PCB.
M1: Connect the motor wire (White +) to the terminals M1 (+), and (Yellow -) to the M1 (-).
M2: Connect the motor wire (White +) to the terminals M2 (+), and (Yellow -) to the M2 (-).
Notes:
For gates opened outward,
M1: Connect the motor wire (Yellow -) to the terminals M1 (+), and (White +) to the terminals M1 (-).
M2: Connect the motor wire (Yellow -) to the terminals M2 (+), and (White +) to the terminals M2 (-).
4). PH-1 Photocells:
Please remove the cover of JP1 and connect the wires to proper terminals.
5). PKS-1 Key Selector:
For Single leaf operationRefer to Figure 2.3.8 (4) and connect the two wires from the key selector to the terminal BUTT1
and GND (J7) on the PCB.
For Dual leaf operationRefer to Figure 2.3.8 (4) and connect the two wires from the key selector to the terminal BUTT2
and GND (J7) on the PCB.
6). PPB-1 Push Button:
For Single leaf operationRefer to Figure 2.3.8 (4) and connect the two wires from the key selector to the terminal BUTT1
and GND (J7) on the PCB.
For Dual leaf operationRefer to Figure 2.3.8 (4) and connect the two wires from the key selector to the terminal BUTT2
and GND (J7) on the PCB.
7). JP2 Jumper Socket: If there is any external device connecting to stop/GND/close/open terminals on the PCBA,
please remove JP2 cover to make the device effective.
16
INSTRUCTIONS PW220/PW230
Figure 2.3.8(4)
J1
J2
JP2
JP1
Red
Yellow
LIGHT DELAY OFF
OPENING PHOTO OFF
SLOW DOWN SPEED OFF
ON
AUTO CLOSE1 OFF
ON
AUTO CLOSE2 OFF
ON
ON
ON
Green
M1
M2
INSTRUCTIONS PW220/PW230
17
Figure 1(5)
M1
3). Dip Switch Setting
DIP SWITCH1
ON
OFF
LIGHT DELAY
DIP SWITCH2
ON
OFF
OPENING PHOTO
DIP SWITCH3
ON
OFF
SLOW DOWN SPEED
DIP SWITCH4
ON
OFF
LIGHT DELAY: (Factory Default: OFF)
ON: The flashing light blinks for 5 seconds before the gate moves.
OFF: The flashing light blinks and the gate moves simultaneously.
OPENING PHOTO: (Factory Default: OFF)
ON: In the opening phase, the gate will stop when the photo sensor is activated.
In the closing phase, the gate will stop and open to the end when the photo
sensor is activated.
OFF: In the opening phase, the gate will not stop when the photo sensor is activated.
In the closing phase, the gate will stop and open to the end when the photo
sensor is activated.
SLOW DOWN SPEED: (Factory Default: ON)
The final speed can be set when the gate is moving at slow-down speed.
ON: The final speed = 55% normal speed.
OFF: The final speed = 70% normal speed.
AUTO CLOSE1: (Factory Default: OFF)
The function of auto close or without auto close can be selected.
AUTO CLOSE1
DIP SWITCH5
ON
OFF
AUTO CLOSE2: (Factory Default: OFF)
The function of auto close or without auto close can be selected.
AUTO CLOSE2
DIP4 (Auto close1)
DIP5 (Auto close2)
OFF
OFF
Without auto close function
OFF
ON
Auto close On, waiting time 50 seconds
ON
OFF
Auto close On, waiting time 25 seconds
ON
ON
Auto close On, waiting time 12 seconds
NC: No Connection
18
Function
INSTRUCTIONS PW220/PW230
3.1 Functional Switch and LED lights Introduction
SW2
VR1
VR2
VR3
VR4
LED1 (Red)
LED2 (Yellow)
LED3 (Green)
The button of transmitter memorizing and erasing.
Close delay of two leaves can be adjusted from min 0 second to Max. 7 second.
The over-current sensitivity of Slave Gate (M2) could be adjusted from 1.8 second to 3.8 second.
The over-current sensitivity of Master Gate (M1) could be adjusted from 1.8 second to 3.8 second.
Over-current limit can be adjusted from min 0.8Amp to Max 4.2 Amp.
LED1 is ON when AC input is in. And LED1 blinks quickly when the gate is in slow-down speed.
When the photocells are triggered, LED2 will be on.
When the transmitter/push button/key selector is triggered, LED3 will be on.
Notes:
1. VR1,VR2,VR3 will be adjusted to 10 o’clock direction as the factory default.
2. VR2 will be adjusted to 2 o’clock direction as the factory default.
3.2 Transmitter Memorizing and Erasing Process
RF Transmitter Memorizing & Erasing
3.2.1 Press button SW2 for 1 second, the blue LED light on the receiver board will be on and receiver module
will be changed to “Learning Mode” for 10 seconds. During the period of learning mode, press the left
button on the transmitter, then the transmitter can be memorized by receiver module. (Up to 200 different
transmitter can be memorized) The blue light on the receiver board will blink twice after pressing the
button on the transmitter. The blue light on the receiver board will go off when the transmitter memorizing
is done.
3.2.2 The memory can be cleared completely if the SW2 (code learning) is pressed continuously for 10 seconds
after the blue light.
Self-Learning mode for gate operation systems
Step1:
Step2:
Setp3:
Step4:
Step5:
Step 6:
Connect the wires of two motors with terminal M1+/M1- & M2+/M2Connect 230VAC with terminal J1 and battery with J2.
In single leaf installation, just connect the motor wires with terminal M1+/M1Press SW2 button for more than 1 second and the blue light on the receiver board is on. Press the left button
on the transmitter to memorize the transmitter with the receiver board. The blue light will be off after the
transmitter memorizing is done.
In Single or Dual leaf installation, please press the left button of the remote control for system learning. After
pressing the left button, system learning will be executed step by step as follows:
1. Dual Gate:
Slave Gate Close → Master Gate Close → Master Gate Open → Slave Gate Open → Slave Gate Close
→ Master Gate Close
2. Single Mode :
Master Gate Close → Master Gate Open → Master Gate Close
If motor stops during the learning mode, please adjust the over current switch to proper position.
3.3 System Learning Process
Connect the master motor wires to M1 terminals and the slave motor wires to M2 terminals correctly. If only one
gate is installed, the motor wires have to be connected to M1 terminals.
In system learning mode, the gates will proceed with the following procedures.
(A) Dual-Gate Mode: Slave Gate closes→ Master Gate closes→ Master Gate opens →Slave Gate opens →
Slave Gate closes→ Master Gate closes.
(B) Single-Gate Mode: Master Gate closes→ Master Gate opens→ Master Gate closes.
Notes: System learning fails and needs to be learned again when an unpredictable interruption occurs.
INSTRUCTIONS PW220/PW230
19
3.4 Gate Operation
In dual gate installation:
Press the button “A” on the transmitter for dual-gate operation.
Press the button “B” on the transmitter for single-gate operation.
In single gate installation:
Press the button “A” on the transmitter for single-gate operation.
A
B
PR-1
3.5 Gate-moving Logic
(A) In gate-opening phase: The gates stop if the transmitter/push button/key selector is activated, and close when
the transmitter/push button/key selector is reactivated.
(B) In gate-closing phase: The gates stop if the transmitter/push button/key selector is activated, and open when
the transmitter/push button/key selector is reactivated.
(C) In gate-opening or gate-closing phase: For safety purpose, the gates stop if encountering obstacles.
4. Trouble Shooting
Symptoms
Overheated Back-up Batteries
The gate doesn’t move when pressing the
button of the transmitter
Check the wiring connection of the batteries.
1. Check if the voltage of the batteries is below 21V.
2. Check if LED1 is “ON”.
3. Make sure all the wiring connections are firmly connected to the
terminals on the PCB.
4. Make sure the fuse is workable.
The Flashing light does not work
1. Check if the wiring connection of the flashing light is correct.
2. Check if the bulb is burned.
The leaves shall be closed instead of opening
Change the polarity connection of the positive (+) with the negative (-)
of the gear motors.
The leaves does not move or only move toward
one direction
1. Check if the “RESET” socket is activated.
2. Make sure the wiring connection of the gear motors is firm.
3. The GND terminal of the photocells on the PCB must be
short-circuited if no photocells installed.
The master gate closes to the end first and the
slave gate stops, the flashing light blinks fast for
five seconds.
Cut off the AC input power and the output of the batteries. Release the
master gate and slave gate manually, then open the master to the end
and close the slave gate to the end by hand, then power the whole
unit by connecting the AC and battery terminals.
The gear motors does not run and the relay is
noisy when operating the gate opening and
closing.
20
Recommended checks and possible solution
INSTRUCTIONS PW220/PW230
Check if the fuse is burned.
5. Technical Characteristics
5.1/5.2 PW220 / PW230
Motor
Gear type
Peak thrust
Nominal thrust
Stroke length
Power supply
Maximum operating current
Maximum gate weight
Maximum gate length
Duty cycle
Operating Temperature
Dimension
Weight
PW220
24Vdc motor with mechanical release
Worm gear
2500N
2000N
356mm with mechanical stop/400mm
without mechanical stop.
24Vdc
4A for maximum 10 seconds.
200 kg per leaf
2.5 meters
20%
-20℃~+50℃
819mm * 115mm * 106mm
6.0kg
PW230
24Vdc motor with mechanical release
Worm gear
3000N
2500N
350mm
24Vdc
4A for maximum 10 seconds.
300 kg per leaf
3 meters
20%
-20℃~+50℃
844mm * 115mm * 106mm
6.25kg
5.3 PC160 Control Box
Application
Main power supply
Back-up battery
Transformer
Receiver board
Installation
Operating Temperature
Dimension
For PW220/PW230 power supply
230Vac/110Vac, 50Hz/60Hz
2pcs of batteries for emergency operation, 1.2A each
4.2A, 24V
433.92MHz; 200 transmitters memory
Wall mounted vertically
-20℃~+50℃
275mm * 195mm * 102mm
5.4 PH-1 Photocells
Detection type
Operating distance
Response time
Input voltage
Operating Temperature
Protection class
Dimension
Through beam
30 meters
100ms
AC/DC 12~24V
-20℃~+60℃
IP66
59mm * 87mm * 38mm
5.5 PKS-1 Key Selector
Application
Installation
Operating Temperature
Dimension
For outdoor use
Wall mounted vertically
-20℃~+50℃
85mm*60.5mm*40.5mm
5.6 PPB-1 Push Button
Application
Installation
Operating Temperature
Dimension
For indoor use
Wall mounted vertically
-20℃~+50℃
85mm*60.5mm*40.0mm
INSTRUCTIONS PW220/PW230
21
5.7 PF-1 Flashing Light
Application
Lamp
Operating Temperature
Installation
Dimension
For warning purpose during leaves movement
24Vdc Halogens bulb
-20℃~+50℃
horizontally or vertically installed
205mm * 80mm * 75mm
5.8 PR-1 Radio Transmitter
Application
Frequency
Coding
Buttons
Power Supply
Operating Temperature
Dimension
Radio transmitter for remote control of PW220/PW230
433.92Mhz
Rolling code
2, for single-gate or dual-gate operation
3V with one CR2032 button type lithium battery
-20℃~+50℃
71.5mm * 33mm * 14mm
5.9 PEL-1 Electric Latch
Application
Power Supply
Operating Temperature
Operating Current
Dimension
22
For locking the gate.
24Vdc
-20℃~+50℃
5A
61mm * 55mm * 120mm
INSTRUCTIONS PW220/PW230
Declaration of Conformity
Applicant: Powertech Electronics Inc.
Manufacturer: Timotion Technology Co., Ltd.
Address: Shiyong Minying Industrial Zone, Hengli Town, DongGuan City, GuangDong, China
Model: PW220; PW230; PC160; PR-1
1. Certificate of conformity of a product with the essential requirements art. 3.2 of the R&TTE Directive 1999/5/EC.
2. The above product has been tested with the listed standards and in compliance with the European Directive LVD
2006/95/EC.
3. The submitted sample of the above product has been tasted for CE marking according to the following European Directives:
2006/42/EC Machinery Directive.
Comply with the following Standards:
EN 301489-1 V1.8.1: 2008
EN 301489-3 V1.4.1: 2002
EN 300220-1 V2.1.1: 2006
EN 300220-2 V2.1.2: 2007
EN 60335-1: 2002+A11:2004+A1:2004+A12:2006+A2:2006+A13:2008
EN 60335-2-103: 2003
EN 62233: 2008
EN 12445: 2001
EN 12453: 2001
And also declare that the machinery may not be put into service until the machine, which will be integrated or become one of
the components, and announced to comply with the provisions as the required.
Taiwan, November 30, 2012
David Lan
(Deputy Managing Director)
INSTRUCTIONS PW220/PW230
23
24
INSTRUCTIONS PW220/PW230
INSTRUCTIONS PW220/PW230
25