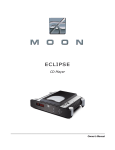
1
i-5080 Integrated Amplifier ___________________________________________________________________________ Owner’s Manual MOON i-5080 Integrated Amplifier Table of Contents Congratulations........................................... 3 Introduction ............................................... 4 Unpacking and Warnings .............................. 5 Installation Tips ........................................ 6 Front Panel Controls .................................... 7 Rear Panel Connections................................ 9 Operating the i-5080 ................................ 10 Remote Control Operation .......................... 11 Specifications .......................................... 12 Service and Warranty ................................ 13 www.simaudio.com IMPORTANT: Please read this entire manual before using this product. Installation and operating instructions inside. ____________________________________________________________________________________ MOON i-5080 Integrated Amplifier Congratulations! Thank you for selecting the MOON i-5080 integrated amplifier as a part of your hi-fi reproduction system. This integrated amplifier has been designed to offer state-of-the-art high-end performance, at a reduced cost, while retaining all the sonic hallmarks on which Simaudio has made its reputation. We have spared no effort to ensure that it is among the finest two-channel integrated amplifiers available. We have been building high performance audio equipment for over 20 years, and the know-how gained through our cumulative experience is an important reason why MOON integrated amplifiers are so musically satisfying. The performance of your i-5080 will continue to improve during the first six weeks of use. This is the result of a “break-in” period required for the numerous high quality electronic parts used throughout this amplifier. Please read this manual thoroughly to acquaint yourself with this product’s features prior to using it. We hope you enjoy listening to the MOON i-5080 integrated amplifier as much as the pride we have taken in creating this fine audio product. We understand the power and emotion of music and build our products with the goal of reproducing these elusive qualities. ____________________________________________________________________________________ Congratulations 3 MOON i-5080 Integrated Amplifier Introduction Your MOON i-5080 integrated amplifier incorporates many significant design features to achieve its “world class” level of performance. This is an abbreviated list of the more important features: Proprietary “Advanced Renaissance” Technology which eliminates feedback. The results are as follows: Real-time amplification is achieved since interactions from the speaker back to the amplifier are virtually eliminated; More accurate musical reproduction with respect to tonality; Virtually non-existent transient intermodulation distortion (which is far more degrading to sonic performance than harmonic distortion); The elimination of common phase errors resulting from feedback. A custom proprietary toroidal transformer design with lower magnetic, electrical and thermal loss, yielding a much better power transfer and lower regulation factor, resulting in improved current speed and better dynamics. An oversized power supply. An extremely short capacitor-free signal path measuring under twenty inches in length, from input RCA connectors to output binding posts, for a faster transient response. A gain section that uses a Crystal microprocessor functioning as a “shunt to ground” that doesn't degrade sonic performance regardless of the selected setting. J-FET input devices in the preamplifier section. Precision matched Bipolar output devices, in the amplifier section, which offer superb linearity throughout the entire audio frequency spectrum. One single-ended audio input which functions as a “pass-through”, bypassing the gain stage to accommodate a component such as a home-theater processor, whose own volume control is used instead. Class A output to 5 watts to maintain efficiency. Precision matched Bipolar output devices which offer superb linearity throughout the entire audio frequency spectrum. A symmetrical circuit design with accurate matching of the very finest high quality electronic components. Pure copper circuit board tracings with extremely low impedance characteristics. Designed to be powered up at all times for optimal performance. Low operating temperature for a longer than normal life expectancy. ____________________________________________________________________________________ Introduction 4 MOON i-5080 Integrated Amplifier Unpacking and Warning! The MOON i-5080 Stereo integrated amplifier should be removed from its box with care. The following accessories should be included inside the box with your integrated amplifier: 9 AC power cable ‘SRM’ Full Function remote control with two ‘AAA’ batteries (USA and Canada only) 9 This owner’s manual 9 Warranty card (USA and Canada only) 9 As soon as the integrated amplifier is safely removed from its box and placed down, perform a thorough physical inspection and report any physical damage to your dealer immediately. We suggest that you keep the original packaging, and that it should be stored in a safe, dry place in case you’re required to transport the integrated amplifier. The customized packaging is specially designed to protect the integrated amplifier from potential damage that can arise when shipping such a product. ________________________________________________________________ WARNING! To reduce the risk of fire or electric shock, do not expose this product to rain or moisture. Do not attempt to “lift the ground” by removing the ground pin from the AC cable. Make sure that your household electrical wiring supports proper AC grounding techniques before plugging in this product. Keep the heat sinks and top cover free of dust to allow for proper heat dissipation. Never expose this product to extreme temperatures. Always connect the audio signal path cables prior to connecting the AC mains. CAUTION! No user-serviceable parts inside. Do not remove top cover, as severe electrical shock may result. IMPORTANT! Make sure that your local AC voltage complies with the unit’s label. Damage caused by plugging thus amplifier into an AC receptacle of the wrong voltage will not be covered by warranty. ____________________________________________________________________________________ Unpacking and Warning 5 MOON i-5080 Integrated Amplifier Installation Tips The MOON i-5080 Stereo integrated amplifier should be placed on a rigid surface to prevent any accidents such as falling over. It is highly recommended that it sits on its own dedicated shelf. This integrated amplifier has side-mounted heat sinks; Consequently, it should both be placed in a location with empty space it for proper heat dissipation. You should never place another component on top of this integrated amplifier. As well, you should avoid placing it near a heat source or inside a closed cabinet that is not well ventilated. This could compromise the amplifier’s performance and reliability. Since household dust is an excellent insulator of heat, we suggest that you clean both of the curved side-mounted heat sinks on a regular basis. A smooth nylon brush with long bristles (ie. paint brush) is recommended for this task. Finally, you should make all of your audio signal connections prior to making the AC connection between the i-5080 and the AC wall outlet. ____________________________________________________________________________________ Installation Tips 6 MOON i-5080 Integrated Amplifier Front Panel Controls Figure 1: Front panel of Moon i-5080 Integrated amplifier The front rear panel will look similar to Figure 1 (above). The large digital display window indicates the relative gain setting (from ‘0’ to ‘50’) for both the left and right channels. As well, whenever you change the selected input source, it’s number will appear in the window for 3 seconds before reverting back to the gain setting. The “Stand by/On” button disengages the input section from the rest of the i-5080’s circuitry and turns off the digital display. However, when in “Stand by” mode all audio circuitry remains powered up to help maintain optimal performance. When switching back from “Stand by” to the “on” mode, both the ‘input’ and gain level settings will be memorized from the previous listening session. The red pilot LED will not be illuminated when the i-5080 is in “Stand by” mode. When the i-5080 is in “on” mode, holding down the “Stand by/On” for two (2) seconds will turn off the front panel digital display. Repeating this procedure will turn the front panel digital display back on. The sonic performance of the MOON i-5080 may improve slightly when the display is turned off. ____________________________________________________________________________________ Front Panel Controls 7 MOON i-5080 Integrated Amplifier Front Panel Controls (continued) The “Input” selector button allows you to choose which input source you wish to listen to. The MOON i-5080 integrated amplifier has six (6) inputs. The A4 input is a ‘pass-through’ which bypasses the i-5080’s gain section, allowing you to control the gain setting via the source component’s own volume control – a home theater processor for example. Adjusting the volume on the i-5080 will have no effect whatsoever when the A4 input is selected. You may reconfigure the A4 input to function like the five (5) other inputs as follows: Simply press and hold down the “Mute” button for approximately 5 seconds; you don’t have to be on the A4 setting to do this. You can convert this input back to ‘passthrough’ mode by repeating the procedure. As well, powering down the i-5080 via the rear panel rocker switch will reset the the A4 to the factory default of ‘pass-through’ mode. Pressing the “Input” selector button allows you to sequentially cascade through each of the possible inputs in the following order: CD, A1, A2, A3, A4 and A5. Holding down the “Input” will allow only a single change of the selected input. You must press the button again to select the next input. The “Vol Up” and “Vol Down” buttons control the gain setting, which ranges from ‘0’ (no output) to ‘50’ (full output). This control doesn’t function like a typical volume: When you press either of these volume control buttons, you’re selecting a specific gain setting on a shunt-to-ground based microprocessor circuit. This gain circuit, known as RGB-cs, doesn’t degrade the audio signal regardless of the setting, unlike all potentiometer based circuits. The range of fifty (50) unique gain settings is based on neither a linear nor logarithmic scale. Instead, we decided on relatively small variations for each of the lower position settings from ‘1’ to ‘35’. The variations are somewhat larger from positions ‘36’ through ‘50’. ____________________________________________________________________________________ Front Panel Controls 8 MOON i-5080 Integrated Amplifier Rear Panel Connections Figure 2: Rear panel of Moon i-5080 Stereo Integrated amplifier The rear panel looks similar to Figure 2 (above). There are six (6) pairs of single-ended inputs on RCA connectors labeled CD, A1, A2, A3, A4 and A5. The left channel inputs are located on top and the corresponding right channel inputs are located directly below. The A4 input, as previously mentioned, bypasses the gain stage and is intended to be used with a component, such as a home theater processor, that has its own volume/gain control. The MOON i-5080 integrated amplifier has two pairs of non-amplified outputs; One single-ended pair of RCA connectors labeled ‘Pre Out’, located next to the A4 input, is designated for output to a power amplifier with single-ended RCA inputs in the event that you wish to use your MOON i-5080 as a preamplifier. The output level of the ‘Pre Out’ is dependant on the volume control setting. A second single-ended pair if RCA connectors labeled ‘Tape Out’, located next to the ‘Pre Out’ connectors, is intended as an input to a recording device such as a cassette tape deck or CD-Recordable Player. Keep in mind that the output level on the ‘Tape Out’ is fixed and cannot be adjusted by the i-5080’s volume control. As well, don’t hesitate to use high quality interconnect cables. Poor quality interconnect cables can degrade the overall sonic performance of your system. You will notice that all RCA input and output connectors on the rear panel have been color coded: ‘white’ for the left channel and ‘red’ for the right channel. On each side of the group of RCA connectors, there is a pair of binding posts. Connect your loudspeakers, with the cables of your choice, to these binding posts. Take care to respect the polarity (“+” , “-” ) of the output. Once again, don’t hesitate to use high quality speaker cables. Poor quality speaker cables can degrade the overall sonic performance of your system. ____________________________________________________________________________________ Rear Panel Connections 9 MOON i-5080 Integrated Amplifier Operating the i-5080 Making the AC Connection 1. Connect the supplied AC power cable to the IEC receptacle, located on the rear panel of the integrated amplifier’s chassis. Alternatively, if you wish, you may use a dedicated highperformance AC cable designed for integrated amplifiers. Ensure that the AC wall outlet you use has a functioning ground. For the best sonic performance, it is preferable that you plug your MOON i-5080 directly into a dedicated AC outlet and avoid using an extension cord. 2. In order to obtain the maximum performance from your audio system, we strongly recommend that the detachable power cord not come into physical contact with any of the interconnect and speaker cables running to and from your i-5080. In the event that this can’t be avoided, you should ensure that any cables coming into contact with each other are crossed at ninety degree angles to minimize the contact area. Turning on your MOON i-5080 for the first time Prior to turning the integrated amplifier on for the first time, make sure that every cable is properly connected to avoid any problems. Then turn on your integrated amplifier in the following manner: 1) Flick the main rocker switch labeled “POWER” to the ‘1’ (on) position on the rear of the i-5080. 2) Press the push button labeled “Stand by/On” on the i-5080. The red LED will illuminate and the digital display will indicate a gain setting of ‘0’ and the ‘CD’ as the default input. On and Off Sequence To avoid having any annoying noises (i.e. “thumps” and “pops”) emanate from your speakers when powering your i-5080 on or off, you should 1) Always power up your i-5080 integrated amplifier after powering up your source component(s). 2) Always power down your i-5080 before powering down your source component(s). We recommend that you leave your MOON i-5080 integrated amplifier powered up at all times to maintain optimal performance. In the event that you plan to be away from your home for a few days, powering off the i-5080 may not be a bad idea. Once fully “broken-in”, please keep in mind that your i-5080 will require several hours of playing time before it reaches its peak performance after you’ve powered it up again. ____________________________________________________________________________________ Operating The i-5080 10 MOON i-5080 Integrated Amplifier Remote Control Operation The MOON i-5080 Stereo integrated amplifier uses the ‘SRM’ simple function, all aluminum remote control (figure 3). It operates on the Philips RC-5 communication protocol and is can be used with other Simaudio MOON components such as the P-3 preamplifier and the i-5 integrated amplifier. The ‘SRM’ remote uses two AAA batteries (included). To install them, use the supplied Allen key to remove the three screws located on the back plate; insert the batteries in the correct direction and then screw the back plate back into place. The POWER button located on the upper left will switch the integrated amplifier to either ‘Stand by’ or ‘On’ mode. The INPUT button performs in exactly the same way as the ‘Input’ button located on the i-5080’s front panel, sequentially cascading through each of the integrated amplifier’s inputs. Figure 3: SRM Remote Control The VOL+ and VOL– buttons increase and decrease, respectively, the volume level. The and buttons control channel balance; Pressing the left arrow button causes a decrease in the volume level of the right channel; pressing the right arrow button causes a decrease in the volume level of the right channel. When favoring the left channel, the display window will indicate a value ranging from 1.0 thru 9.0, where the higher value represents more emphasis to the left channel. Conversely, when placing more emphasis on the right channel, the display window value will range from 0.1 thru 0.9, where the higher value represents more emphasis to the left channel. The MUTE button, located in the middle of the volume and balance buttons, triggers a decrease in the output gain setting to a factor of 10% of the current setting. For example, if your current setting was ‘30’ and you pressed the “Mute” button, the gain setting will drop to ‘3’. Pressing the “Mute” button a second time will reinstate the output gain level back to ‘30’. ____________________________________________________________________________________ Remote Control Operation 11 MOON i-5080 Integrated Amplifier Specifications Configuration ........................................... Power Supply Transformer ........................ Power Supply Capacitance ........................ Class Of Operation - Preamplifier ............... Class Of Operation - Amplifier .................... Single-ended inputs .................................. Input Device Type - Preamplifier ................ Input Sensitivity ...................................... Input Impedance ..................................... Tape Output ............................................ Preamplifier output .................................. Output Device Type ................................... Output Binding Posts ................................ Output Power @ 8Ω .................................. Output Power @ 4Ω .................................. Output Impedance .................................... Damping Factor ........................................ Gain Control ............................................ Gain ......................................................... Dynamic Headroom .................................. Signal-to-noise Ratio ................................ Maximum Output Voltage .......................... Slew Rate ................................................. Maximum Current – Peak ......................... Maximum Current – Continuous ................ Frequency Response ................................ Crosstalk @ 1kHz ..................................... Intermodulation Distortion ....................... THD (20Hz - 20kHz @ 1 watt) ................. Remote Control ....................................... Optional Phono Section ............................. AC Power Requirements ........................... Fuse Replacement - 120V ......................... Fuse Replacement - 230V ......................... Shipping Weight ...................................... Dimensions (W x H x D, inches) ................ Stereo 0.5kVA 40,000µF Class A Class A/B 6 (RCA) J-FET 250mV – 3.0V RMS 12,000Ω 1 (RCA) 1 (RCA) Bipolar – 4 per channel 1 set per channel 80 Watts per channel 140 Watts per channel 0.05Ω > 160 RGB cs – “Shunt-To-Ground” 34dB 6dB 95dB @ full power 26 Volts 20V/µs 20 amperes 11 amperes 10Hz - 80kHz +0/-3dB -60dB Unmeasureable < 0.15% All Aluminum Simple-Function MOON IPS - external 120V / 60Hz or 240V / 50Hz 4A long fast blow (3AG type) 2 long fast blow (3AG type) 22 lb. / 10 Kg. 17 x 3 x 15.5 ____________________________________________________________________________________ Specifications 12 MOON i-5080 Integrated Amplifier Service and Warranty (U.S.A and Canada only) Please take the time to complete and mail the warranty card supplied with your MOON i-5080 integrated amplifier. This card is necessary to activate your full warranty, as well as allowing you to receive information on new products and services. Alternatively, you may visit our website www.simaudio.com and go to the “warranty registration” section where you can register on-line. If you experience a problem with your i-5080, contact your dealer first. Most often, problems are merely minor oversights that are easily solved, and this will save you both the time and the cost of shipping the amplifier back to us. If your dealer is not able to diagnose the problem, please feel free to contact our service department. If required, service must be performed by a Simaudio Ltd. authorized center such as your national distributor. In order to prevent any damage during transport, the i-5080 must be packed with all of its original internal materials and shipped in the original box. Please keep your box and shipping materials. MOON i-5080 integrated amplifiers are guaranteed against defective materials and workmanship for a period of THREE (3) years, parts and labor, to the original owner. Upon receiving your registration card (either by mail or via our on-line warranty registration), this warranty is immediately upgraded to TEN (10) years, parts and labor to the original owner only. Additionally, your i-5080 must be purchased from an authorized MOON dealer to qualify for warranties. These warranties are voided in the case of accident, or if the unit was tampered with, somewhere other than at an authorized Simaudio service center. This warranty is valid only in Canada and USA. In other countries, the warranty conditions are defined and limited only by the local distributor. Simaudio Ltd. limits its liability to the repair or replacement of the MOON i-5080 integrated amplifier. Simaudio Ltd. cannot be held responsible for any damages caused to any other equipment, whatever the circumstances and/or causes arising thereof. Canada Simaudio Ltd. 95 Chemin Du Tremblay, Unit 3 Boucherville (Québec) J4B 7K4 USA Simaudio USA 21 Lawrence Paquette Drive Champlain, NY 12919 Tel. (450) 449-2212 Fax (450) 449-9947 E-mail: [email protected] ____________________________________________________________________________________ Service and Warranty 13