1
recording
Pattern
Mode
modes
at
a
glance
Pattern
Sound Source/
Setting Symbol
Direction
22
Recording
Applications
conference calls
field recordings events/orchestras
OMNIDIRECTIONAL
interviews
BIDIRECTIONAL
instruments
vocal duets
Stereo
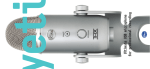
Description: The Stereo mode is great for capturing a realistic stereo
image. To start, point the microphone at the sound source that you want
to record (the “front” of the microphone is the side of the microphone
with the Blue Microphones Logo). Depending on the instrument and/
or sound that you want to achieve, place the grill of the microphone
anywhere from 2 inches to several feet in front of the sound source. By
centering the sound source, you will get equal amounts of signal in both
the left and right channels. If you want a little more of the signal in the
right channel, move the sound source a little to the right side of the mic
(as if one is behind the microphone), and if you want a little more of the
signal in the left channel, move the sound source to the left (as if you
are behind the microphone). Alternatively, you can record everything as
centered as possible, and easily adjust the position when you’re mixing
the recording. If you want the sound in the right or left channel only, you
should try using the cardioid, bidirectional or the omnidirectional setting,
and use your software to hard-pan the sound to the left or the right.
23
These charts are only a starting point for the sound provided. How the microphone reacts in a particular
application will differ greatly because of many variables, like room acoustics, distance from sound source
(proximity), tuning of instruments, mic cabling and other factors. For more tips on miking and recording
techniques, check out the Blue website.