1
aphona
funkwerk
Declaration of Conformity and CE Mark
This device meets the requirements of R&TTE Directive 1999/5/EC:
„Directive 1999/5/EC of the European Parliament and of the Council of 9 March 1999 on radio
equipment and telecommunications terminal equipment and the mutual recognition of their
conformity“.
The Declaration of Conformity can be viewed at the following web address: http://www.aphona.net.
The crossed-out waste bin icon on the device indicates that the device must be disposed of separately
from normal household waste at the disposal sites provided at the end of its service life.
Guarantee
Subject to changes. Funkwerk Aphona Communications GmbH accepts no guarantee for the information contained
in this user manual.
Funkwerk Aphona Communications GmbH accepts no liability for direct, indirect, collateral consequential or other
damages associated with the delivery, supply or use of this user manual.
2010 Copyright © Funkwerk Aphona Communications GmbH
All rights associated with the data contained herein - in particular copying and distribution - are reserved to
Funkwerk Aphona Communications GmbH.
2
Table of contents
Table of contents
Telephone user interface . . . . . . . . . . . . . . . . . . . . . . . . . . . . . . . . . . . . . . . 1
Description and installation. . . . . . . . . . . . . . . . . . . . . . . . . . . . . . . . . . . . . 3
Extensions for the system telephone. . . . . . . . . . . . . . . . . . . . . . . . . . . . . . . . . . . . . . . . . . . 4
Safety notices . . . . . . . . . . . . . . . . . . . . . . . . . . . . . . . . . . . . . . . . . . . . . 5
Unpacking and positioning the system telephone . . . . . . . . . . . . . . . . . . . . . . . . 6
Connecting the system telephone to a PC . . . . . . . . . . . . . . . . . . . . . . . . . . . . . . . . . . . . . . . . 9
Changing the label field . . . . . . . . . . . . . . . . . . . . . . . . . . . . . . . . . . . . . . . . . . . . . . . . . 11
Pictograms . . . . . . . . . . . . . . . . . . . . . . . . . . . . . . . . . . . . . . . . . . . . . . . . . . . . . . . . 11
System telephone settings . . . . . . . . . . . . . . . . . . . . . . . . . . . . . . . . . . . . . 13
Setting the display language. . . . . . . . . . . . . . . . . . . . . . . . . . . . . . . . . . . . . . . . . . . . . . . 14
Additional keyboard . . . . . . . . . . . . . . . . . . . . . . . . . . . . . . . . . . . . . . . . 18
Telephoning . . . . . . . . . . . . . . . . . . . . . . . . . . . . . . . . . . . . . . . . . . . . . 20
Initiate a call . . . . . . . . . . . . . . . . . . . . . . . . . . . . . . . . . . . . . . . . . . . . . . . . . . . . . . .
Accepting/rejecting a call . . . . . . . . . . . . . . . . . . . . . . . . . . . . . . . . . . . . . . . . . . . . . . . .
Forwarding a call (Call Deflection) . . . . . . . . . . . . . . . . . . . . . . . . . . . . . . . . . . . . . . . . . . .
Suppressing the call number (anonymous call) . . . . . . . . . . . . . . . . . . . . . . . . . . . . . . . . . . . .
Initiating a call with a fixed call number (MSN) . . . . . . . . . . . . . . . . . . . . . . . . . . . . . . . . . . .
Redialling . . . . . . . . . . . . . . . . . . . . . . . . . . . . . . . . . . . . . . . . . . . . . . . . . . . . . . . . .
Switching the microphone on/off, loudspeaker and hands free . . . . . . . . . . . . . . . . . . . . . . . . . . .
Using the headset. . . . . . . . . . . . . . . . . . . . . . . . . . . . . . . . . . . . . . . . . . . . . . . . . . . . .
Announcement . . . . . . . . . . . . . . . . . . . . . . . . . . . . . . . . . . . . . . . . . . . . . . . . . . . . . .
Simplex operation . . . . . . . . . . . . . . . . . . . . . . . . . . . . . . . . . . . . . . . . . . . . . . . . . . . .
Automatic callback . . . . . . . . . . . . . . . . . . . . . . . . . . . . . . . . . . . . . . . . . . . . . . . . . . . .
Park (only elmeg CS410and CS410-U) . . . . . . . . . . . . . . . . . . . . . . . . . . . . . . . . . . . . . . . . .
Intercept (MCID) (only via the S/U connector) . . . . . . . . . . . . . . . . . . . . . . . . . . . . . . . . . . . .
Keypad and tone dialling (MFC dialling) . . . . . . . . . . . . . . . . . . . . . . . . . . . . . . . . . . . . . . .
20
22
22
22
22
23
24
25
25
26
27
28
28
29
Telephoning with several people . . . . . . . . . . . . . . . . . . . . . . . . . . . . . . . . . 30
Call Waiting. . . . . . . . . . .
Hold for enquiry . . . . . . . .
Call forwarding (call transfer)
Brokering . . . . . . . . . . . .
Conference . . . . . . . . . . .
.
.
.
.
.
.
.
.
.
.
.
.
.
.
.
.
.
.
.
.
.
.
.
.
.
.
.
.
.
.
.
.
.
.
.
.
.
.
.
.
.
.
.
.
.
.
.
.
.
.
.
.
.
.
.
.
.
.
.
.
.
.
.
.
.
.
.
.
.
.
.
.
.
.
.
.
.
.
.
.
.
.
.
.
.
.
.
.
.
.
.
.
.
.
.
.
.
.
.
.
.
.
.
.
.
.
.
.
.
.
.
.
.
.
.
.
.
.
.
.
.
.
.
.
.
.
.
.
.
.
.
.
.
.
.
.
.
.
.
.
.
.
.
.
.
.
.
.
.
.
.
.
.
.
.
.
.
.
.
.
.
.
.
.
.
.
.
.
.
.
.
.
.
.
.
.
.
.
.
.
.
.
.
.
.
.
.
.
.
.
.
.
.
.
.
.
.
.
.
.
.
.
.
.
.
.
.
.
.
.
.
.
.
.
.
.
.
.
.
.
.
.
.
.
.
30
30
30
30
31
Operate system telephone . . . . . . . . . . . . . . . . . . . . . . . . . . . . . . . . . . . . . 32
Phone book . . . . . . . . . . . . . . . . . . . . . . . . . . . . . . . . . . . . . . . . . . . . . . . . . . . . . . . . 32
VIP memory . . . . . . . . . . . . . . . . . . . . . . . . . . . . . . . . . . . . . . . . . . . . . . . . . . . . . . . 34
Caller and message list. . . . . . . . . . . . . . . . . . . . . . . . . . . . . . . . . . . . . . . . . . . . . . . . . . 35
I
Table of contents
SMS and UUS1 text messages . . . . . . . . . . . . . . . . . . . . . . . . . . . . . . . . . . . . . . . . . . . . . . 39
Do not disturb . . . . . . . . . . . . . . . . . . . . . . . . . . . . . . . . . . . . . . . . . . . . . . . . . . . . . . 44
Checking costs . . . . . . . . . . . . . . . . . . . . . . . . . . . . . . . . . . . . . . . . . . . . 45
Viewing and deleting costs . . . . . . . . . . . . .
Set up tariff factor and denomination . . . . . . .
Setting the call costs account for a number . . . .
Release or block call number (MSN) for dialling .
Call and cost display . . . . . . . . . . . . . . . . .
.
.
.
.
.
.
.
.
.
.
.
.
.
.
.
.
.
.
.
.
.
.
.
.
.
.
.
.
.
.
.
.
.
.
.
.
.
.
.
.
.
.
.
.
.
.
.
.
.
.
.
.
.
.
.
.
.
.
.
.
.
.
.
.
.
.
.
.
.
.
.
.
.
.
.
.
.
.
.
.
.
.
.
.
.
.
.
.
.
.
.
.
.
.
.
.
.
.
.
.
.
.
.
.
.
.
.
.
.
.
.
.
.
.
.
.
.
.
.
.
.
.
.
.
.
.
.
.
.
.
.
.
.
.
.
.
.
.
.
.
.
.
.
.
.
.
.
.
.
.
.
.
.
.
.
.
.
.
.
.
.
.
.
.
.
.
.
.
.
.
45
46
46
47
47
System telephony . . . . . . . . . . . . . . . . . . . . . . . . . . . . . . . . . . . . . . . . . . 50
Function keys . . . . . . . . . . . . . . . . . . . . . . . . . . . . . . . . . . . . . . . . . . . . . . . . . . . . . . . 50
Function keys when connecting to a elmeg hybird or PABX . . . . . . . . . . . . . . . . . . . . . . . . . . . . 50
System menu on elmegPABX with system telephony . . . . . . . . . . . . . . . . . . . . . 60
Advanced configuration . . . . . . . . . . . . . . . . . . . . . . . . . . . . . . . . . . . . . . 62
Settings . . . . . . . . . . . . . . . . . . . . . . . . . . . . . . . . . . . . . . . . . . . . . . . . . . . . . . . . . . 62
Operation . . . . . . . . . . . . . . . . . . . . . . . . . . . . . . . . . . . . . . . . . . . . . . . . . . . . . . . . . 63
Block . . . . . . . . . . . . . . . . . . . . . . . . . . . . . . . . . . . . . . . . . . . . . . . . . . . . . . . . . . . . 63
Configuring and setting the system telephone . . . . . . . . . . . . . . . . . . . . . . . . . 65
Acoustic . . . . . . . . . . . . . . . . . . . . . . . . . . . . . . . . . . . . . . . . . . . . . . . . . . . . . . . . . . 65
settings . . . . . . . . . . . . . . . . . . . . . . . . . . . . . . . . . . . . . . . . . . . . . . . . . . . . . . . . . . 69
Configuration . . . . . . . . . . . . . . . . . . . . . . . . . . . . . . . . . . . . . . . . . . . . 76
elmeg IP-S400 configuration . . . . . . . . . . . . . . . . . . . . . . . . . . . . . . . . . . . . . . . . . . . . . . 83
Number programming . . . . . . . . . . . . . . . . . . . . . . . . . . . . . . . . . . . . . . . 86
Macro . . . . . . . . . . . . . . . . . . . . . . . . . . . . . . . . . . . . . . . . . . . . . . . . . 88
Macro programming. . . . . . . . . . . . . . . . . . . . . . . . . . . . . . . . . . . . . . . . . . . . . . . . . . . 88
System telephone and PC . . . . . . . . . . . . . . . . . . . . . . . . . . . . . . . . . . . . . . 91
CTI / TAPI via the USB connector on the system telephone. . . . . . . . . . . . . . . . . . . . . . . . . . . . .
CTI via the USB connector on the system telephone . . . . . . . . . . . . . . . . . . . . . . . . . . . . . . . . .
Audio applications via the audio connectors on the system telephone . . . . . . . . . . . . . . . . . . . . . . .
Content of WIN-Tools CD-ROM . . . . . . . . . . . . . . . . . . . . . . . . . . . . . . . . . . . . . . . . . . . .
Installing the program from the CD-ROM . . . . . . . . . . . . . . . . . . . . . . . . . . . . . . . . . . . . . .
91
91
91
92
93
Basic system telephone settings . . . . . . . . . . . . . . . . . . . . . . . . . . . . . . . . . . 95
Technical Data . . . . . . . . . . . . . . . . . . . . . . . . . . . . . . . . . . . . . . . . . . . . . . . . . . . . . . 96
Answering machine . . . . . . . . . . . . . . . . . . . . . . . . . . . . . . . . . . . . . . . . . 98
General configuration . . . . . . . . . . . . . . . . . . . . . . . . . . . . . . . . . . . . . . . . . . . . . . . . . . 99
Announcements, information messages and dictations . . . . . . . . . . . . . . . . . . . . . . . . . . . . . . 102
Activating message recording for each number (MSN). . . . . . . . . . . . . . . . . . . . . . . . . . . . . . . 104
Operation . . . . . . . . . . . . . . . . . . . . . . . . . . . . . . . . . . . . . . . . . . . . . . . . . . . . . . . . 110
Remote operation . . . . . . . . . . . . . . . . . . . . . . . . . . . . . . . . . . . . . . . . . . . . . . . . . . . . 113
Remote operation access numbers . . . . . . . . . . . . . . . . . . . . . . . . . . . . . . . . . . . . . . . . . . 115
Use answering machine through another telephone . . . . . . . . . . . . . . . . . . . . . . . . . . . . . . . . 116
II
Table of contents
Software . . . . . . . . . . . . . . . . . . . . . . . . . . . . . . . . . . . . . . . . . . . . . . . 119
System telephone menu . . . . . . . . . . . . . . . . . . . . . . . . . . . . . . . . . . . . . . . . . . . . . . . . 123
EN-Optionen . . . . . . . . . . . . . . . . . . . . . . . . . . . . . . . . . . . . . . . . . . . . 128
Quick Install Guide. . . . . . . . . . . . . . . . . . . . . . . . . . . . . . . . . . . . . . . . . 134
III
Table of contents
IV
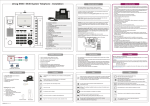
Telephone user interface
4
3
01.01.10 10:10
Info
-r-iTelefonbuch
Ruhe
VIP
Anruferliste
5
2
ESC
R
<
>
1
2
3
4
5
6
7
8
9
*
°
6
7
8
9
0
ß
OK
$
%
&
/
Q
C
=
0
1
M
§
°
)
(
Bild: 1
1
2
3
4
5
6
Loudspeaker
7
ESC key: By pressing the ESC key (Escape key), the system telephone is once again at rest during programming.
80
Right/left arrow keys: The arrows „“ and „“ in the right-hand corner of the top line of the display show
you that you can access other functions in the bottom line by using the arrow keys.
9
ß
OK key: Pressing this button confirms an entry and stores a setting in the system telephone.
°
§
$
%
&
/
(
)
Star key / hash key.
Receiver with connector cord
The PABX menu is called for CS400xt.
6 softkeys
7-line display with background lighting
Menu key: Open the programming menu by pressing this key. If you are already in a menu and press
this key, the functions available in this menu will be displayed or you will be taken back one programming step.
C-key: You can go back one menu step by pressing this key in any menu. If you are in input mode, you
can delete individual characters using this key.
Dialling keys.
Loudspeaker / hands free key.
Disconnect key.
Redial key.
Hold for enquiry key.
Microphone.
elmeg CS410 / CS410-U, IP-S400: 5 programmable function keys with LEDs: Each key has a two-colour LED (Level 1 - Red / Level 2 - Yellow). These LEDs can be used to indicate specific functions.
1
Telephone user interface
CS400xt: 5 programmable function keys with LEDs:
Each key has a (red) LED available. These LEDs can be used to indicate specific functions.
The LEDs for both of the lower function keys have two colours (Level 1 - Red / Level 2 - Yellow).
=
Q
2
Label field for function keys.
Status LED, LED for call signalling, signalling received messages UUS, SMS and MWI (red) and answering machine (yellow). The desired function display for messages and calls can be configured.
Description and installation
The system telephone can be operated by an internal connector of a elmegPABX that supports system functions.
Together with the elmegPABX, the system telephone provides various performance features that are typical of this
system.
The internal connector on the elmegPABX is simultaneous and automatically the system interface for the system
telephone. Please consult the user’s guide for your elmegPABX to see whether or not this offers the typical system
performance features combined with various system telephones.
A complete configuration of the CS400xtPABX and directly via the system telephone is possible on all
elmegPABX (excluding elmeg hybird) using the Professional Configurator.
A complete configuration of the telephone using the elmeg hybird is not possible. Some of the performance features can only be set up using the telephone’s own interfaces. However, this is only possible
if the system telephone has a USB or Ethernet interface.
Functions that cannot be fully configured via the elmeg hybird are marked at appropriate points in
the text.
Differences in configuration between the elmegPABX and the elmeg hybird
Press a softkey or anarrow key. On the elmeg hybird this key does not have to be pressed again if the display
is different, as the function is already displayed or is not available.
The following message indicates if differences exist.
Cannot be configured using the system telephone on the elmeg hybird!
A summary of these functions can be found on page "EN_Optionen" under „Restricted system telephone configuration“.
elmeg CS410
This system telephone is designed for connection to an internal S-connector (4-wire cable) on a elmeg PABX. If you
want to use the telephone on an internal Up0 connection, you must install the internal module „Up0/S0" on the
telephone or use the external “Up0/S0" converter.
CS410-U
This system telephone is designed for connection to an internal U-connector (2-wire cable) on a elmeg PABX. You
then no longer require the internal module „Up0/S0" or the external “Up0<$]Tiefgestellt>/S0 converter".
Settings / Configuration elmeg CS410, CS410-U. CS400xt
On the system telephone itself, you can only perform a restricted configuration of the supported performance
features. A full configuration is only possible with the Professional Configurator from the WIN-Tools CD-ROM via
the USB interface on the system telephone or the internal S/U-connector (please refer to page B to see whether or not
this function is supported) on a PABX.
3
Description and installation
Extensions for the system telephone
elmeg IP-S400
This system telephone is connected to the corresponding LAN connector (or network) of the PABX via a Cat. 5 cable.
The system telephone has a PC output to which further IP terminals can be connected. The system telephone has a
hands free function.
Power supplied via plug-in power supply unit, or via Ethernet PoE (Power over Ethernet).
further description on configuring the system telephone can be found in the detailed user guide on the
ACD-ROM.
Extensions for the system telephone
Module Up0/S0 (elmeg CS410, CS410-U, CS400xt)
· To connect the system telephone to a U-connector on a PABX, you can install the „Up0/S0" module on your system telephone. You then no longer need the external “Up0/S0-Converter".
Answering machine module (only elmeg CS410, CS410-U)
· This module expands your system telephone with a digital answering machine offering nume-
rous functions.
E.g.: Individual configuration for each number of the system telephone, time control of the announcement for each number, automatic notice for recorded calls, recording of dictations, listening in on calls, PIN-protected remote operation.
A special key and an LED are provided for the operation of the answering machine.
Key extension T400
· The key extension has 20 keys with LEDs that can be used in two layers as function keys. The LED
is assigned to the first key layer. Two other LEDs are used to display additional information.
You can connect up to three key extensions in sequence (cascading) to your system telephone. A
plug power supply unit must be used if using more than two key extensions. Only use the plug power supply unit (220872.5) or T1-UK (220873.3) available as an accessory.
Key extension T400/2
· The key extension has 10 keys with LEDs that can be used in two layers as function keys. The LED
is assigned to the first key layer. Two other LEDs are used to display additional information.
4
Extensions for the system telephone
Safety notices
· Note the ambient temperature for the storage and operation of the device in the specifications.
The device must only be connected once the permissible ambient operating temperature is
reached.
· Please note that when switching from cold to warm temperatures, condensation may form on or
in the device. Only remove the device from the packaging when the permissible ambient operating temperature has been reached.
· During a storm, you should not connect or disconnect any cables and do not make any calls.
· Only connect the cords to the connectors provided.
· Lay the cords so that they are protected in the event of an accident.
· Avoid the following influencing factors:
Direct sunlight
Source of heat (e.g. radiator)
Electronic devices (e.g. sound systems, office equipment or microwave devices)
Penetrating moisture or liquids
Aggressive liquids or vapours
High levels of dust
· Do not use the device in humid rooms or in explosive atmospheres.
· Only open the areas of the device indicated in the assembly/operating instructions.
· Do not touch the plug contacts with sharp, metal or damp objects.
· If the device is not permanently mounted, position the device or the accessory on a non-slip
surface.
· Please ensure that you only clean the system with a slightly damp cloth.
· Please ensure you only use approved accessories.
· Only terminals that offer SELV (safety extra low voltage) and/or meet ETS 300047 may be connected to the device. Correct use of the permitted terminals meets these requirements.
Plug power supply unit
· Only use the plug power supply unit supplied or available as an accessory (DSA-0101F-05 UP or
L15 D52 AB DDLAWO).
· Do not use any plug power supply units that show signs of damage (breaks or cracks in the casing).
Electrostatic charges (ESD protection)
The system telephone is supplied with ESD protection above the permissible values against the effects of electrostatic
charges. In spite of this, be sure to avoid excessive static charges. Various causes can result in the electrostatic charge
achieving values that far exceed the permissible values required and that exceed interference immunity of the system
telephone. The causes or circumstances such as low humidity or carpets must be eliminated. The manufacturer of
the system telephone accepts no liability for damages resulting from these causes.
5
Unpacking and positioning the system telephone
Extensions for the system telephone
Unpacking
· System telephone.
· Receiver with cord.
· 2 device feet.
· S-connector cord, approx. 6 m (only elmeg CS410 and CS410-U).
· Cat.5 connector cord, approx. 2 m (only elmeg CS410 and CS410-U).
· PC connector cord, USB cable, approx. 3m (only elmeg CS410 and CS410-U).
· PC audio cord, 3.5mm stereo jack plug, approx. 2.5m (only elmeg CS410 and CS410-U).
· Adapter cable for headsets with 4-pin cord, 8-pin / 4-pin.
· Cable clip, after removing the adhesive protective film (only elmeg CS410 and CS410-U).
· User’s guide and labels for function keys.
· WIN-Tools CD-ROM, including:
Professional Configurator, phone book, download and sound managers,
TAPI, USB, CAPI and NDISWAN drivers, Adobe Acrobat Reader,
Operator’s manual and Adobe Acrobat file for printing your own labels.
Setting up the system telephone
Before setting up the rear device feet must be mounted on the system telephone 2 in the positions marked 6 in the
picture.
Please remember that the system telephone device feet may leave marks on delicate surfaces, such as on fittings for
examples. The system telephone manufacturer shall not be liable for any such damage. Please ensure therefore that
you place your system telephone on a non-slip surface.
Cleaning the system telephone
The system telephone has been designed for normal usage conditions. Only clean the device when necessary with a
slightly damp cloth or use an anti-static cloth. Never use solvents. Never use a dry cloth; the electrostatic charge could
cause electronic faults. Make sure that no moisture can enter the system telephone and cause damage.
Connecting the system telephone (connector and receiver cord)
In order to operate your system telephone, you must insert the cords for the telephone connector and the receiver.
Connecting the receiver cord
Connect the receiver cord 1 as shown in Fig. 2. Place the receiver cord in the cable guide 4 and clamp it securely
under the cable clips 5
6
Extensions for the system telephone
4
2
Unpacking and positioning the system telephone
6 3
5
7 1
6
4
Figure: 2
Connecting the cord
S-connector
6
2
1
3
56
Figure: 3
Connect the S-cord 2 as shown in Fig. 2 (socket S0). Please note that the longer ISDN plug must be inserted in the
ISDN socket and the shorter ISDN plug must be inserted in the ISDN socket on the system telephone. Next place the
S-cord cable in the cable guide 4 and clamp it securely under the cable clips 5.
7
Unpacking and positioning the system telephone
Extensions for the system telephone
Up0-connectorCS410-U, telephone with „Up0/S0" module)
1
2
3
5
4
Figure: 4
Connect the S-cord 1 as shown in Fig. 4 (socket Up0). Please note that the longer ISDN plug must be inserted in the
ISDN socket and the shorter ISDN plug must be inserted in the ISDN socket on the system telephone. Next place the
S-cord cable in the cable guide 2 and clamp it securely under the cable clips 3.
elmeg CS410 with „Up0/S0" module and the CS410-U may no longer be connected to an ISDN connec The
tor via an S0 socket (e.g. internal S-connector of the PABX).
can connect a further ISDN terminal with S-interface (e.g. an ISDN card or another system telephone)
You
to the S0 socket on the system telephone. The power supply at this connector for another ISDN terminal is 1
Watt.
Connecting and setting the headset (not included)
You can connect a headset to the system telephone. Please ask your dealer or consult the Internet to find out which
headsets are compatible.
The headset connector on the system telephone is an 8-pin socket. Headsets with DSHG interface (e.g. cordless DECT
headsets) can be connected directly to the system telephone without any accessories. For standard headsets (4-pin
cord, e.g. U10PS) use the adapter cable supplied.
optional answering machine module and a headset with DSHG interface can be connection to/installed
The
on the CS410-U simultaneously.
Connecting the headset
The headset is connected to the separate headset socket on the system telephone as shown on page 7 in Fig. 2. Next
place the headset cable 3 in the cable guide 4 and clamp it securely under the cable clips 5.
If the headset cord does not fit in the cable guide, stick the adhesive cable clip supplied on to the base of the system
telephone 7. Then lay the headset cord under this clip.
Configuring the headset connector elmeg CS410/CS410-U
8
Connecting the system telephone to a PC
8
7
65
4
23
1
Unpacking and positioning the system telephone
8
7
6
5
4
3
2
1
DSHG transmitter
V+ (3.3V)
Microphone - (Ground)
Receiver (3,3V switchable over resistance)
Receiver (Ground)
Microphone +
Earth (Ground)
DSHG receiver
Figure: 7
Configuring the headset connector CS400xt
4
23
1
4
3
2
1
Microphone - (Ground)
Receiver (3,3V switchable over resistance)
Receiver (Ground)
Microphone +
Figure: 6
Other settings for the use of the headset
You can use either the receiver or the headset to make a call. When using a headset, the following settings are required
or available:
· In the configuration of the system telephone, set up a function key for operating the headset (headset key, see page 53).
· The connected headset can be used automatically for certain operations on the system telephone
(see page 60).
· If special support is saved in the system telephone for your headset, enter the corresponding type
of headset (see page 63).
e.g. the LED in the microphone of the „Firefly F142 N“ from Plantronics is switched through the
system telephone.
· If you want to use the headset to automatically receive calls, set the time to automatic pickup (see
page 71). In the configuration of the system telephone, set up a function key for activating or deactivating automatic call pickup.
· Using the headset the answering machine can be queried if automatic headset operation is set up.
Connecting the system telephone to a PC
Connecting the PC connecting cord (USB)
the USB cable supplied to connect the system telephone to the PC or a hub. If you use another USB cable,
Use
note that the distance between the system telephone and PC or telephone and hub must not exceed five metres depending on the type of USB cable used.
9
Unpacking and positioning the system telephone
Connecting the system telephone to a PC
Connect the USB cable (4) as shown in Fig. 9 (socket PC). Insert the USB plug (type A) into the corresponding
connector on your PC and the USB plug (type B) into the USB connector on the back of the system telephone (1). If
both devices (system telephone and PC) are switched on, the PC recognises the connected system telephone
automatically.
connecting the system telephone to a PC for the first time, the device driver installation starts auto When
matically. Insert the WIN-Tools CD-ROM for the system telephone and follow the instructions on screen.
If you want to use several USB terminals on your PC, you will require a hub (USB distributor). The hub is connected
to the USB port on the PC. You can connect other USB terminals to the hub, including the system telephone.
elmeg CS410, CS410-UConnecting the audio cable (Audio in / Audio out)
The system telephone has an input 2 and an output 3 for audio signals. These connectors are designed for 3.5 mm
stereo jack plugs. When using the optional answering machine module, you can connect the system telephone over
this connection to the sound card on your PC in order to transfer announcements to the system telephone or to save
recorded messages to the PC.
You can also use specific functions on the system telephone from the audio-out output (see page 66). Connect the
loudspeaker (5) using a 3.5mm jack plug to the audio-out connector on the system telephone (3) as shown in Fig. 7.
1 23
4
5
6
Figure: 7
elmeg IP-S400 on the Ethernet connector
The elmeg IP-S400 can be powered via the Ethernet connector in accordance with IEEE Std 802.3af-2003 (PoE). The
power supply is then provided over Ethernet from the hub or switch. „Alternative A“ and „Alternative B“ are
supported on the connector in accordance with IEEE Std 802.3af-2003 and „Power classification 1" (up to 4 W). The
PoE connector is polarity-independent.
10
Changing the label field
PIN configuration PoE
Unpacking and positioning the system telephone
8
7
65
4
23
1
1 Transmit Data +
2 Transmit Data 3 Receive Data +
6 Receive Data 45 Power supply (connected)
78 Power supply (connected)
Figure: 10
elmeg IP-S400Audio in / Audio out
The system telephone has an input 2 and an output 3 for audio signals. These connectors are intended as a headset
connector 6. The sockets are connected to the corresponding socket connectors for the headset on the base of the
system telephone.
1
2
3
4
5
6
1 3 5
2
4
Plug power supply unit connector
Plug power supply unit
Ethernet PC connector
PC or additional elmeg IP-S400
Ethernet PABX connector
PABX
6
Figure: 9
Changing the label field
The labels for the function keys can be found on the sheet enclosed with this user guide. Remove the selected
nameplate.
To change the plate, pull the flexible cover between thumb and forefinger and lift the cover upwards. The nameplate
can then be changed.
In the Professional Configurator you can complete the label for your system telephone individually and then print it
out. The WIN Tools CD ROM also contains an Adobe Acrobat file with templates that you can also complete and
print.
Pictograms
In order to be able to demonstrate some of the processes involved for setting up and operating the system telephone
in this user guide, the following pictograms (symbols) listed below were used.
b
Lift receiver or start preparing to dial.
a
Replace receiver. The system telephone is idle.
11
Unpacking and positioning the system telephone
12
Pictograms
l
g
d
q
t
X
A call is signalled. The call melody sounds.
09
*#
s
Press a specific key on the dialling pad.
Pressasoftkeyoranarrowkey.DependingonthePABX,thiskeydoesnothavetobepressedagainifthedisplay is different, as the function is already displayed or is not available.
#
If you entera call numberto dial via a SIP provider, the numberdialled is outputapprox. 5 secondsafter enteringthelastdigit. Ifyouendthecallnumberwiththehashkey,thesystemdialsautomatically.Theterminal must be able to dial the hash key in to the PABX.
You are in a call.
A conference call is initiated.
You will hear the positive or negative acknowledgement tone.
Choose call number, code, character or text.
This symbol tells you to dial a particular code or character.
Press a softkey.
Pictograms
System telephone settings
Connection and operation of the elmeg IP-S400 to the PABX / elmeg hybird (Basic operation with DHCP)
Please ensure your read the PABX assembly instructions in order to see which connectors are provided for
connection to the elmeg IP-S400. Connect the connector to the Ethernet PABX connector on the system telephone.
· Configure the PABX for use with IP system telephones.
· Set the MSN of the IPS system telephones in the PABX.
· Connect the power supply (plug power supply unit) to the IP system telephone and wait until the
system telephone has initialised.
If the IP system telephone is initialised, you will be prompted to choose a language in the display.
Select the display language. Press the arrow keys to select the languages that are available and confirm with
O.
Which language? }
Italiano
Español
Deutsch
®English
Français
Nederlands
Enter one of the MSN entered in the PABX
(in the example 12).
Confirm your entry with O.
If no PIN is entered in the system configuration, press
O and O again when prompted.
Programm dial number
MSN-1>12
IPS login PIN for sys
server
MSN-1>
Switch on ‘Use DHCP’.
Select „on“.
Use automatic IP
address setting
off
on®
Telephone and PABX are synchronised.
System telephone and PABX are synchronised.
If there is no connection to the PABX (no LAN connection or the system telephone is not registered), the
time in the display is replaced by „©©©-/ /©-‰“.
You can now use the IP system telephone like a system telephone on ISDN or UP0.
A complete description of the configuration can be found on page 81.
Possible error:
IP address, IP gateway, IP subnet mask, IP SYS server.
MSN is not entered in the PABX or is used multiple times.
A PIN / login name is entered in the PABX but not in the telephone.
No extension is set up in the PABX.
You can now use the IP system telephone like a system telephone on S or UP0 connectors.
13
System telephone settings
Setting the display language
Setting the display language
You can choose in which language the display is to appear.
Start as follows:
a
s
s
s
s
Configuration
Display
Audio
Press the arrow keys to see the languages that are available.
Press the softkey next to the chosen language. The display is immediately switched to the chosen language.
Which language?
Italiano
Español
Deutsch
English
Français
Nederlands
System telephone display
1
2
3
4
29.05.06 07:41
}
™Info
-T-S-r-
5
Telefonbuch
™
Ruhe‰
VIP
™
1 Date.
2 Time.
3 21 characters per line.
4 Arrow: Other menu items can be accessed using the arrow keys.
5 Answering machine button on system telephone (optional
6
6
module).
Arrow: Information on softkey that can be pressed in the current menu.
Anruferliste‰
A cross „®“ behind a display text indicates that this performance
feature is enabled.
The system telephone has a 7-line display with background lighting. Background lighting is switched on or off
automatically.
After connecting to the internal S/U connection, the PABX shows the date and time on the display. Both the date and
time are automatically copied from the PABX. The other lines always contain the text displayed for a function next to
the corresponding softkey. If you press the softkey, the next level is then displayed. If not all of the characters can be
shown in the display, this is indicated by „“„ or “„“. To view the other characters, press the R key and then the
corresponding arrow key.
Various displays for the system telephone are included in this user guide to help explain the settings and operation. If
only a few lines of the display are shown (the display is not shown with all 7 lines), this is indicated by a wavy line at
the top or bottom.
Special feature when showing lists in the display
Multiple entries are shown simultaneously in the display for certain settings or operations. These lists are required,
for example, for settings in the phone book or in the VIP memory.
14
Setting the display language
System telephone settings
The active (currently selected) entry is displayed with inverted
colours. You can display other functions or selected an entry
using the Menu or Ok keys.
VIP digit to select {}
V0:
V1:...........0123456
V2:Beatrice..........
V3:
¬¬¬¬¬¬¬¬¬¬¬¬¬¬¬¬¬¬¬¬¬¬¬
¬
Special features for modifying existing entries
Various options are available for modifying existing entries (e.g. names or numbers).
Example 1:
You modify the number of a phone book entry, as the subscriber has moved.
Use the keypad to enter the first digit of the new number if the existing number is deleted completely. Enter the other
digits of the new number.
Example 2:
You modify parts of the name of a phone book entry, as the surname has changed (e.g. after a marriage).
Press the arrow keys to select the entry position. You can overwrite the current surname immediately or delete the
existing entry with the C key and then enter the new name.
Entering letters and numbers
If you press a key several times, you will see characters (letters or numbers) displayed in sequence.
For the text entry of letters, digits and special characters, the keys are assigned as follows:
Key
First press
Second
press
Third press Fourth press Fifth press
Sixth press Seventh
press
1
1
2
A
B
C
2
Ä
3
D
E
F
3
€
4
G
H
I
4
5
J
K
L
5
6
M
N
O
6
Ö
Ø
7
P
Q
R
S
7
ß
8
T
U
V
8
Ü
9
W
X
Y
Z
9
*
*
#
#
Å
Æ
$
¥
The 0 key has a number of special characters on it.
E.g.: »!«, »&«, »?«, »+«, »-«, »=«, »(«, »)«, »@«, »$«, ...
When the 0 is first pressed it inserts a space. If the key is pressed a second time, several special characters are
shown in the display. To select a special character, press the allocated keys 1 ... 9. If you want to view other
special characters, press the 0 key.
15
System telephone settings
Setting the display language
Input mode for letters
There are various options available for entering letters. The current input mode is shown at the top right of the
display (no display, „Abc“ or „ABC“).
No display
All of the letters entered are displayed in lowercase.
Example: »dean, james„.
»Abc„
The next letter entered is displayed in uppercase, all other entries are lowercase.
Example: »Dean, James„.
»ABC„
All of the letters entered are displayed in uppercase.
Example: »DEAN, JAMES„.
of text input, the input mode „
AtTotheinsertstarta character,
press the C-key in „
Abc“ is always active. To change the input mode, press the R key.
Abc“ mode.
Call signalling
Calls are signalled using the ring tone set in the system telephone for the dialled number (MSN).
If you use the system telephone on the internal S-connector of the PABX, you can set a separate ring tone for internal
and external calls for each number (MSN).
Function keys and LEDs
You can program the five function keys in two layers with various functions using the PC configuration for the
system telephone. Each key has a two-colour LED that can be used to display the functions. Each colour is assigned to
a layer of the function key (layer 1 - red / layer 2 - yellow).
You can reach the second layer of function keys by pressing the keys twice. This must be done quickly.
LED for call signalling and answering machine
Flashes red:
Incoming calls
Lights up yellow:
Answering machine on
Flashes yellow:
New messages on the answering machine
Acknowledgment tones
Entries or settings on the system telephone can be confirmed with acknowledgment tones.
Positive acknowledgment tone (1 long tone):
The positive acknowledgment tone indicates that your entry was accepted and saved on the system telephone.
Negative acknowledgment tone (3 short tones):
You hear the negative acknowledgment tone if your entry has not been accepted by the system telephone or an
incorrect entry has been made.
16
Setting the display language
System telephone settings
Display of the performance features set up
s
When the system telephone is at rest, additional information on
the functions that are set up / performance functions are displayed in the „Info“ line of the display. Example: »-T-S-r-„.
For further information on the functions set, press the “Info„
softkey .
29.05.07 07:21
Info-T-S-rTel. drctry
Idle
VIP
Caller list
If several functions are set, press the arrow keys to see the various
settings.
ªªªªªªªªªªªªªªªªªªªªªªªªªª
Inhibit/Menu access:
Guard for modification
¬¬¬¬¬¬¬¬¬¬¬¬¬¬¬¬¬¬¬¬¬¬
Additional display information
When the telephone is at rest, additional information on the functions that are set up is displayed in the top line of the
display.
Display
Function set up
„T“
Active appointment set.
„S“
Dial control or call filter activated,
Access to system telephone menus protected
„r“
„Do not disturb“ function (only attention tone) set .
»R«
„Do not disturb“ function (complete) set.
(All call tones are deactivated)
„U“
Call forwarding set up.
„I“
Information about programmed function keys
E.g.: Announcement permitted / not permitted.
„I“
Information about messages (MWI) e.g. on your T-Netbox
„a“
Answering machine, time control, call forwarding or remote operation (optional module) on .
17
Additional keyboard
Setting the display language
The additional keyboard is designed for being connected to the elmeg ISDN telephones CS400, CS410 and CS410-U.
These telephones are equipped with a separate port for connecting the additional keypad.
The additional keypad is equipped with keys with inset LEDs:
M47plus = 20 keys
Safety notes
Observe the safety notices and instructions in the user’s manual for your telephone.
Unpacking and placing the additional keyboard
Unpacking
Additional keyboard, connection cable (8-wire, RJ45 - RJ45), 3 screws, support, assembly instructions.
Placing and cleaning
For placing and cleaning the telephone, please observe the instructions given in the operating instructions. These
notes apply also to the additional keyboard.
Connecting the additional keyboard
2
0
0
3
9
8
4
7
6
1
4
1
2
3
4
5
6
7
5
3
8
9
0
Bottom of telephone
Bottom of additional keyboard
Hole and studs (3 studs) for mounting the additional keyboard
Connection cable
Cable holder
Jack for the additional keyboard (input)
Only T400: Jack for another additional keyboard
(output)
Mounting location for rubber support
Power supply connector
Studs (3 studs) for mounting another additional
keypad
Installation procedure
Unplug the ISDN connector for the telephone from the ISDN outlet.
Place the front of telephone and the additional keypad on a soft surface. The nameplates must be able to be read from
the front (see figure).
The additional keypad must be placed to the left of the telephone. The fixing holes in the additional keypad must be
positioned over the corresponding screw domes on the telephone 3.
Secure the additional keyboard with the supplied studs to the telephone 3.
Connect the connection cable 4 as shown in the figure and secure it under the cable holder 5.
Fasten the support 8.
Now turn the telephone and additional keypad over and set them on the rubber supports.
18
Setting the display language
Additional keyboard
Plug the ISDN connector of your phone back into the ISDN outlet. After initialization (start-up) of your telephone the
phone and the additional keypad are immediately ready for operation.
Programming the additional keyboard
Configure the function keys and the LEDs for the additional keypad using the Professional Configurator on the
WIN-Tools CD-ROM for your telephone.
Changing the label
The label panels for the function keys are included on a separate sheet enclosed in the operating instructions. Cut out
the label you wish to use.
To change the label panel, press the flexible cover together between your index finger and thumb and lift it out. The
label panel can now be changed.
You can fill out and then print the label for your additional keypad using the Professional Configurator. Also
available on the WIN-Tools CD-ROM is an Adobe Acrobat file containing templates that you can also fill in and print
out.
Connecting further button boards (cascading)
Up to three additional keypads can be connected (cascaded) to your telephone. The additional T400/2 keypad is
designed for operation at the end of a cascading line. A plug-in power supply is required if you use more than one
additional keypad. Use only the approved power supply units available as accessory
(Plug-in power supply unit T400 / Ident-Number: 220872.5
Plug-in power supply unit T400-UK / Ident-Nummer: 220873.3).
Installation procedure
Unplug the ISDN connector for the telephone from the ISDN outlet. Remove the plug-in power supply (if available).
Proceed as described for the telephone and additional keypad.
Secure the additional keyboard at the positions 0 marked in the illustration. Connect the connecting cord to the left
jack 7 of the existing additional keypad and to the right jack 6 of the new module.
Plug the plug-in power supply unit into the appropriate jack 9 for an additional keypad.
Plug the ISDN connector of your phone back into the ISDN outlet. After initialization (start-up) of your telephone the
phone and the additional keypad are immediately ready for operation.
19
Telephoning
Initiate a call
Initiate a call
Dial call number - without option to make a correction
b
t
g
Dial call number
Dial call number - with option to make a correction
a
t
b
g
Dial call number
To amend the call number or to correct an incorrect entry, select the incorrect digit with the arrow keys and press the
C key to delete it. Then enter the correct digit.
If you want to carry out the call using the receiver, life the receiver after entering the call number. At any time during a
call, you can switch back and forth between hands free, receiver and loudspeaker.
After you have entered a call number, you can also press the loudspeaker key in order to be able to select the call
number and use the hands free system.
If it is not possible to connect a call (e.g. call number blocked by dial control) or the cost account of the number/MSN
is empty), a message to this effect will appear in the telephone display; e.g.: »Blocked: Call no.„, if the dial
control is activated.
If you have lifted the receiver and you are not connected, you can accept a call waiting via the „accept“ softkey
without having to replace the receiver. You will be notified of the call by a brief message. If you set up a connection key
or a corresponding macro key, you can accept the call straight away by pressing the key.
Other options for dialling when the receiver is replaced
It is also possible to dial a number when the receiver is replaced and to correct or supplement a call number before
dialling when calling:
· From the redial memory (see page 21).
· From the caller/message list (see page 33).
· From the phone book (see page 30).
· From the VIP memory (see page 32).
· Using the function keys (see page 19).
· Via the PABX CTI (TAPI) function (see page 88).
If you want to use one of these options, you can make further entries before initiating the call. You can determine, for
example, whether or not a call number (MSN) is to be transmitted to the called party.
You can use the Professional Systel-Configurator to determine which functions are saved directly under the „Phone
book“ softkey: „local“ or „PABX“. You can reach the second layer of functions by pressing the R key.
20
Initiate a call
Telephoning
Select from the phone book on the PABX / elmeg hybird
If you are using the system telephone on a PABX with system telephony, you can dial from the phone book on the
PABX.
R
a
s
t
O
Phonebook
Enter the initial
letters
O
b
g
Entry
select
Select from the phone book on the system telephone
You can save up to 250 names and telephone numbers in the phone book of your system telephone. To select a name,
you can scroll with the arrow keys or enter the initial letter of the name you are looking for using the keypad.
s
t
Phonebook
Enter the initial
letters
a
O
O
b
g
Entry
select
The procedure for programming and setting up the phone book is described on page 30of this user guide.
Dialling from the VIP memory
You can programme a VIP entry for each of the 10 dialling keys consisting of a name (max. 20 characters) and a call
number (max. 26 digits).
s
a
or
VIP
VIP destination
select
t
b
g
VIP destination
select
The procedure for programming VIP entries is described on page 32of this user guide.
Speed dial with function keys
Speed dialling is initiated using the function keys. You can programme functions or speed dials under each of the five
keys.
Z
a
b
g
Pressing the function keys
Dial the required call number using the function keys.
If you want to dial a number in the second layer, press the desired key twice. This must be done quickly.
Programming of the speed dial/function keys is done via the PC configuration or the advanced configuration of the
system telephone.
Select from the caller/message list
The system telephone has a combined caller and note history. A maximum of 30 entries (calls, messages, SMS or
UUS1 text messages) shall be possible in this list. Entries in the caller/note history are shown on the display by
pressing the „Caller history“ softkey.
a
s
Caller list
b
g
Select entry
You will find further information on the caller /message list on page 33of this user guide.
21
Telephoning
Accepting/rejecting a call
Accepting/rejecting a call
With respect to the system telephone’s basic settings, each call shall be signalled irrespective of the dialled call
number (MSN). If two calls are signalled simultaneously, the first call is accepted when the receiver is lifted. The
second call may continue to be signalled by means of the call waiting signal.
The number of the caller and the number dialled by the caller (MSN-1 … MSN-10, or assigned name) are shown on
the system telephone display.
a
l
b
g
If you are unable to or do not wish to accept a call, you can reject the call. Press the „reject“ softkey and the call will
no longer be signalled to your system telephone. If you are a member of a team, the call is signalled to other
telephones in the team. If the call was only signalled to your system telephone, Busy is signalled to the caller after it
has been rejected.
a
s
l
reject
Forwarding a call (Call Deflection)
If you are unable to or do not wish to accept a call, you can forward the call. Press the „transfer“ softkey in order to
forward the call directly to another extension. The call number to which the call is due to be forwarded can be preset
in the system telephone configuration for each call number (MSN).
After pressing the „transfer“ softkey you can either forward the call to the preset call number or enter a new call
number.
a
l
s
t
transfer
Dial call number
O
Suppressing the call number (anonymous call)
If you do not want your call number to be sent to the called party, you can suppress the transmission of your call
number. You can set this function specifically for the next call or permanently (see page ).
Suppressing transmission of the call number for the next call
You can perform internal or external dialling so that the call number (MSN) is not transmitted from your system
telephone to the called party.
a
O
t
M
s
b
g
Secret
Dial
dial
If a call is signalled, you can decide before accepting the call whether or not your call number should be transmitted to
the caller. If your system telephone is the destination of a call diversion, you can use this procedure to prevent the call
seeing the call number of the diversion destination (your number).
a
l
s
b
g
Secret
Initiating a call with a fixed call number (MSN)
You can perform internal or external dialling so that a specific number is transmitted from your system telephone to
the called party. This call number must first be entered in your system telephone. During selection you will see the
call number transmitted („MSN-1“..."MSN-10„) or the name you have assigned to this call number (MSN).
You can initiate dialling with a fixed number as described below or use a programmed function key.
In the WIN-Tools phone book manager you can assign an outgoing number (MSN) to each record.
22
Redialling
Telephoning
a
O
t
M
Dial call number
s
s
MSN
MSN-1 …
MSN-10
b
g
Redialling
The last number dialled is stored in the redial memory.
a
W
b
g
Advanced redialling
The call numbers of the last 20 calls, connections (calls) or text messages are stored in the extended redialling option.
You can view and automatically dial these entries by pressing the redial key or the arrow key.
W
a
W
O
b
g
Select entry
The first entry displayed is the entry that was added most recently. A letter is displayed at the end of the second row to
indicate the status of the entry.
»v„
Connection (Call)
»A„
Call
»M„
Mail (call numbers to which an SMS or UUS1 text message has been sent)
»|«
Calls for which automatic redialling has been set up.
no entry
You have called an extension, but not been able to reach it or the extension was busy.
Delete call number from the extended redialling option or transfer as message
W
a
W
M
s
s
or
delete?
Select entry
Note?
Press the „delete?“ softkey to delete the displayed entry straight away. To transfer the entry to the message list,
press the „Message?“ softkey. The entry is deleted once it has been transferred to the message list. You will now see
the next entry.
An entry in the message list of the system telephone is displayed with „Caller
list“.
Transfer call number from the extended redialling option to the phone book
You can transfer a number the appears in the extended redialling list to the phone book of the system telephone (see
page 30).
Start as follows:
a
W
W
Select entry
t
O
Enter the name.
Example: »Dean„.
Confirm your entries with OK.
M
s
Phonebook
Input telephone book
Name>Dean`
¬¬¬¬¬¬¬¬¬¬¬¬¬¬¬¬¬¬¬¬¬
23
Telephoning
Switching the microphone on/off, loudspeaker and hands free
The corresponding name is now displayed in the redialling option instead of the number.
5/Dean
Memo?
Tel. drctry
¬¬¬¬¬¬¬¬¬¬¬¬¬¬¬¬¬¬¬¬¬
Automatic redialling
If you have selected an extension who is busy or who does not answer the call, you can initiate an automatic dial
function in which the desired extension is selected again after approx. 10 seconds.
a
W
t
g
Dial call number
Extension busy
s
or
a
Autom.
redial
After approx. 10 seconds, the hands free function is switched on and the call number is automatically dialled. The
system attempts to reach the extension for approx. 2 minutes.
If the extension is not reached, up to 20 call attempts are made. After 20 unsuccessful attempts, automatic redialling
is terminated with a negative acknowledgment tone.
dialling is switched on, this is indicated in the display by the „
“ softkey. Press the
Ifrightautomatic
arrow key or the „
“ softkey to show the normal display in the idle state of the system
autodial
Continue
telephone.
Interrupt automatic redialling
You can interrupt automatic redialling at any time by making another call. In this case press the loudspeaker/hands
free key during automatic dialling.
At the end of the call, automatic redial is continued.
Deactivate automatic redialling
You can deactivate automatic redialling at any time. No other call attempts will then be made.
To deactivate automatic redialling during an automatic call, press the ESC key.
If you wish to deactivate the automatic redialling function when the system telephone is idle, please proceed as
follows:
a
s
s
Autom.
redial
Yes
Switching the microphone on/off, loudspeaker and hands free
Switching the microphone on/off
You can disable the receiver microphone or the microphone on the system telephone during a call. This prevents the
called party from hearing any discussions in the room. You continue to hear the called party however.
g
s
Microphone off
Room query
s
Microphone on
The call duration or cost meter will continue to run whilst the microphone is switched off.
24
g
Using the headset
Telephoning
Loudspeaker
If other persons in the room wish to hear the call, switch on the loudspeaker. You continue to use the receiver during
the call. You can change the volume during the call, as described on page 63.|
Inform the other party that you are switching on the loudspeaker. The activated loudspeaker is shown in the display
by „|“.
L
L
Activate loudspeaker
Deactivate loudspeaker
g
g
If you replace the receiver whilst the loudspeaker is activated, the receiver and loudspeaker are deactivated.
Hands free
When using hands free, the receiver is not used. The built-in microphone and the loudspeaker are activated. This can
only be operated by using the loudspeaker / hands free button. You can switch to normal „receiver mode“ whilst in
hands free mode by lifting the receiver. If you want to switch to hands free mode when in normal „receiver mode“,
replace the receiver whilst pressing the loudspeaker / hands free button. In hands free mode, acoustic signals such as
the call waiting signal are not transmitted.
Inform the other party that you are switching to hands-free. The activated hands-free function is shown in the
display by „|“.
L
t
L
Start hands free
Dial call number
End hands free
a
Using the headset
You can connect a headset to the system telephone. The headset is connected and set up as described on page 6.
You can use either the receiver or the headset to make a call.
Switching the headset on/off
In order to operate the headset, a system telephone function key shall be set up in the form of a headset key. The LED
assigned to this button indicates whether the headset is switched on or off (LED on/off).
z
t
g
z
Switch on the headset
Dial call number
Call using headset
Switch off headset
a
Switch loudspeaker on or off whilst using the headset
L
g
Call over
Headset
g
L
Switch on loudspeaker Call using headset and Switch off loudspeaker
loudspeaker
g
z
Call over
Headset
Switch off headset
Announcement
The announcement function allows the internal connection to other telephones without them having to actively
accept this connection (i.e. lift receiver, switch loudspeaker/hands free on). This is a one-sided connection in which
only the extension initiating the announcement is heard.
As soon as a telephone has accepted the announcement, the connection is established. With an announcement, enter
the internal number of the desired extension. Even if there is an automatic outside line, you must only enter the
internal number. E.g. „22“ instead of „*22“.
If your system telephone is the destination for an announcement, the call number of the announcer appears on the
display. The announcement can be terminated with the ESC key.
The announcement is accepted automatically by activating the „loudspeaker“ function, if:
25
Telephoning
Simplex operation
· the system telephone is idle.
· the announcement is permitted in the PABX (can be controlled by the „allow announcement“ function key).
· the „Do not disturb“ function is not active.
If the „Allow announcement“ function key is programmed and enabled, announcements can be received when the
„Do not disturb“ function is on.
You can initiate an announcement using the procedure described below or using a programmed function key. An
announcement can also be initiated during an existing connection (in hold for enquiry) using the function keys.
can only use this function if the announcement is released for your internal number (MSN) in the
You
PABX.
Start as follows:
M
a
s
>
s
Acoustic
t
Announcement
Enter the number on which the announcement is to be made and
select an entry from the phone book.
| Message to
MSN-1
Tel. drctry
¬¬¬¬¬¬¬¬¬¬¬¬¬¬¬¬¬¬¬¬¬¬
g
L
If at least one system telephone has accepted the announcement,
the connection is established.
To end an announcement, press the loudspeaker/hands-free key.
| Message 22
00.24
MSN-1
Display
memo
¬¬¬¬¬¬¬¬¬¬¬¬¬¬¬¬¬¬¬¬¬¬
Simplex operation
The simplex operation function allows an internal connection to be established to another system telephone without
it having to actively accept this connection (i.e. lift receiver, switch loudspeaker/hands free on). This connection
allows both parties to speak.
As soon as a system telephone has accepted the simplex call, the connection is established. If either party picks up the
receiver during the simplex call, the call is converted to a standard connection.
simplex operation, enter the internal number of the desired extension. Even if there is an automatic
With
outside line, you must only enter the internal number. E.g. „ “ instead of „
“.
22
*22
If your system telephone is the destination for a simplex operation call, the call number or name of the caller appears
on the display. Simplex operation can be terminated with the ESC key. Simplex operation calls are accepted
automatically by by activating the „Hands free“ function, if:
· the system telephone is idle.
· simplex operation is permitted in the PABX (can be controlled by the „allow simplex operation“
function key).
· the „Do not disturb“ function is not active.
If the „Allow simplex operation“ function key is programmed and enabled, simplex operation calls can be received
when the „Do not disturb“ function is on.
26
Automatic callback
Telephoning
You can initiate simplex operation using the procedure described below or using a programmed function key.
can only use this function if simplex operation with system telephones is released for your internal
You
number (MSN) in the PABX.
Start as follows:
M
a
s
>
Acoustic
t
s
Simplex operation
Enter the number on which the simplex operation is to be carried
out and select an entry from the phone book.
| Speak to
MSN-1
Tel. drctry
¬¬¬¬¬¬¬¬¬¬¬¬¬¬¬¬¬¬¬¬¬¬¬
g
L
If the system telephone has accepted simplex operation, the connection is established.
To end a simplex call, press the loudspeaker/hands-free key.
| Intercom 22
00.25
MSN-1
Display
memo
¬¬¬¬¬¬¬¬¬¬¬¬¬¬¬¬¬¬¬¬¬¬¬
Automatic callback
You can reach a subscriber who is currently busy or not close to his phone by using the automatic callback function.
You then receive a message stating that the extension for which a callback has been set up can now be called. This
message is displayed for external callbacks from the exchange and for internal callbacks from the PABX.
The system telephone display then indicates „Autom. repeat request“. This display alternates every 2 seconds
between the number or name of the desired party. As soon as you accept this notice (by lifting the receiver, for
example), the selected subscriber is called automatically.
Completion of call to busy subscriber (CCBS)
When you call the desired connection, you hear the engaged tone. With „Callback on Busy“ you can reach the
engaged person once they have replaced the receiver at the end of the call.
Call completion on no response (CCNR)
When you call them, you always hear the ringing tone, but your business partner is not close to the telephone and
does not pick up. With „Callback on no reply“, you can reach the subscriber as soon as they have completed a call or
lifted and replaced the receiver of their telephone.
Setting up callback
b
t
g
s
Dial call number
Extension is busy or no
reply
Callback
a
The „Callback“ softkey is only displayed if it is possible to set up an automatic callback in the exchange or in the
PABX. For external calls the performance feature „Callback on busy“ or „Callback on no reply“ must be requested
from your network provider.
You can define up to 3 callbacks. If you use an LCR procedure, an automatic callback is always performed via the
standard network operator.
automatic callback is switched on, this is indicated in the display by the „
“ softkey. Press the
Ifright
arrow key or the „
“ softkey to show the normal display in the idle state of the system
Callback
Continue
telephone.
27
Telephoning
Park (only elmeg CS410and CS410-U)
Viewing and deleting initiated callbacks
When the system telephone is at rest, initiated callbacks are indicated in the display by the „Callback“ softkey. To
view callbacks, press this softkey. You can now view the individual callbacks using the arrow keys. If you wish to
delete a callback, you can select this by using the arrow keys, then press the Menu key and finally the „delete?“
softkey.
Initiated callbacks are deleted automatically after a specified time. This time is defined for external callbacks by the
network operator and for internal callbacks by the PABX.
system telephone is disconnected from the ISDN network (e.g. system telephone ISDN plugs unplug Ifged,thePABX
switched off or reset), then any requested callbacks are deleted.
Park (only elmeg CS410and CS410-U)
Parking allows you to interrupt a call for up to 3 minutes. You can then remove the system telephone connector from
the ISDN socket and reconnect the system telephone in another room. After „unparking, you can then continue this
call. A parked call can also be “unparked" on another system telephone and continued from there.
Parking is only possible if only one connection exists on your system telephone. After unparking, the number of the
parked extension is no longer displayed.
To ensure that you can reconnect to your call, if two calls are parked each call is assigned a „park code“ from 0 to 99
when parked. The park code 55 is entered in the basic settings.
parked two calls on an ISDN bus, this bus must be blocked for calls. Unparking is only possible
Ifonyouthehave
bus on which the call was parked. Parking is only possible if only one connection exists on your system telephone.
Parking
g
s
t
O
Call
park
Enter park code
Remove and reinsert connector
a
Unpark
a
>
s
t
unpark
Enter park code
O
b
g
Call
Intercept (MCID) (only via the S/U connector)
This performance feature is not currently supported by elmeg hybird!
If you receive a malicious call, you can save the caller’s number in the exchange.
The Trace (MCID) performance feature must be requested from the network provider for your ISDN connection.
Identification is carried out in the exchange and is recorded under the caller’s number, date and time.
You can use this performance feature in two situations.
28
Keypad and tone dialling (MFC dialling)
Telephoning
During a call
>s
You want to identify
the extension.
g
The call number can now be
determined in the exchange.
a
intercept
Call with extension
After the caller has replaced the receiver
You want to identify the extension, but
the caller has already replaced the receiver.
g
s
The call number can now be
determined in the exchange.
a
intercept
Call with extension
Ifcall.you make a call using hands free on the system telephone, you can only initiate an intercept during the
Keypad and tone dialling (MFC dialling)
When connected you can use other performance features by using keypad sequences or MFC dialling. When
configuring the system telephone you can determine in the basic settings whether keypad sequences or MFC dialling
are possible or not when connected. The display shows which functions (keypad or MFC) are available.
Softkey „Keypad“ is displayed.
MFC sequences can be entered immediately. The keypad is only
displayed after pressing the softkey.
Softkey „MFC“ is displayed.
Keypad sequences can be entered immediately. MFC is only displayed after pressing the softkey.
and MFC sequences can also be stored on the function keys so that they remain available when con Keypad
nected.
Keypad
The keypad function allows you to control service or performance features in the PABX or in the operator’s network
by entering character and digit strings. Consult your network operator or check out the PABX user guide to see if
„Keypad“ is supported or not.
g
s
t
Keypad
Enter character and digit string
Tone dialling (MFC dialling)
By using the MFC dialling function you can send multifrequency signals (MFC) during an existing connection (call)
in order to request an answering machine for example or to use a mail system. If there is a call waiting whilst there is
an existing connection on the system telephone, you cannot use the MFC option.
g
s
t
MFC
Enter character and digit string
29
Telephoning with several people
Call Waiting
Call Waiting
If you have enabled call waiting for your system telephone (see page 70), you are available to other callers during an
existing connection.
s
Call waiting
(Extension 2)
g
g
accept
Call with extension 1
Call with extension 2;
Extension 1 is on hold
can accept, reject or transfer a waiting call to another extension. If you already have four connections
You
on your system telephone, you cannot transfer any more calls (pass).
Hold for enquiry
During an existing call, you can put up to three further connections on hold. To initiate a hold for enquiry connection
you can use the MSN key or a line key.
g
R
t
g
Call with extension
Extension 1 is on hold
Dial call number
Call with extension 2
If you want to establish other connections, proceed as described.
Pressing the Disconnect button ends the active connection and returns you to the last held connection. As soon as
there is no held connection, a new connection is established.
Call transfer in hold for enquiry to an engaged extension
This performance feature is only possible with an extension on hold. You want to forward a call in hold for enquiry to
another engaged extension.
g
R
Call with extension 1 Extension 1 is on
hold
t
g
s
a
Dial
dial
Extension 2 is
busy
transfer
Replace receiver
Extension who is on hold shall hear music on hold. If Extension 2 hangs up, the call with Extension 1 then takes place.
Call forwarding (call transfer)
When transferring a call, the active extension and the extension of the last held connection are always connected.
You can carry out a hold for enquiry (e.g. to announce the call) or transfer the call directly without announcement.
g
R
t
g
s
Call with extension 1
Extension 1 is on
hold
Dial call number
Call with extension 2
transfer
note that when transferring two external parties, this performance feature (ECT - Explicit Call Trans Please
fer) must be supported by the PABX or, if you use the system telephone directly on the NTBA, by the
network operator.
Brokering
If you have more than one active connection on your system telephone as a result of call waiting or holding (max. 4
connections), you can speak alternatively with these extensions (brokering). Depending on the number of
connections on hold, there are up to 4 softkeys („conn1“,... „conn4“) available to you. If the number of name of the
called party is recognised, the name or number is displayed in place of the text „ Connection“.
30
Conference
Telephoning with several people
>
g
Call with extension
s
Connection 1
...
Connection 4
g
Call with desired extension
>
s
Connection 1
...
Connection 4
g
Call with desired extension
If you have set up line keys, transferring between the various extensions is also possible using these keys.
To terminate an active connection, press the disconnect key. You then return to the last held connection.
In addition to the softkeys, you can set up up to four „Connection keys“ on the system telephone or the extension.
This provides keys that allow the status of the connection (no connection, active connection, rest) to be identified
from the assigned LEDs.
Conference
If you have a connection on hold on your system telephone (see hold for enquiry page ) and an active connection, you
can initiate a conference call with both extensions. All three extensions can speak to one another.
Conference calls are not possible with more than two (2) connections at your system phone.
g
s
d
Call with extension 1/extension 2 is on
hold
Conference
Conference with extension 1 and extension 2
In order to end the conference, press the „back to“ softkey. You are then reconnected to the extension with the last
active connection. The other extension is now back on hold.
31
Operate system telephone
Phone book
Phone book
You can save up to 250 names and telephone numbers in the phone book of your system telephone. To select a phone
book entry, you can scroll with the arrow keys or enter the initial letter of the name you are looking for using the
keypad.
when a call is received the caller’s name is displayed instead of the number, it means that the name and
Ifnumber
of the caller must be entered in the phone book. The phone number must be saved with an area
code and if using a PABX with a dialling code.
The caller’s name is only displayed if the number transmitted matches the number stored in the telephone
book.
If the system telephone is disconnected from the ISDN network and then reconnected, or if data for the phone book is
transferred via the PC program to the phone book, the phone book is reorganised internally. This process is carried
out automatically and may take several minutes. During this time, you will not be able to access the phone book on
the system telephone.
Name and number
Each phone book record consists of a name (max. 20 characters) and a number (max. 26 digits). For the text entry of
letters, digits or special characters, the keys are assigned as described on page .
Outgoing call number (MSN assignment)
You can assign a number to each entry („MSN-1“ ... „MSN-10“), which is then transmitted to the called party when
making an outgoing call. To establish a connection with this preset number (MSN), first dial the selected phone book
record in the dial preparation and then lift the receiver. If you establish a connection using a MSN assignment key,
the number (MSN) for this key is transmitted to the called party.
The setting for the number („MSN-1“ ... „MSN-10“) that is transmitted to the called party, is made using the phone
book manager on the WIN-Tools CD-ROM. If you do not assign a number or assign an incorrect number (not
available in the system telephone) to an entry, the first number entered in the system telephone („MSN-1“) is
transmitted.
Special ring tone (VIP ring tone)
For each entry you can set a special ring tone and volume. If a caller transmits the corresponding number, the call is
signalled with the special ring tone. This take priority over the call melody assigned to the dialled number (MSN).
Information message
You can save an information message for each entry. The information message is displayed if:
· A phone book record is selected during dial preparation with the OK key.
· The „Info“ softkey is pressed when signalling a call.
· The „Display“ softkey is pressed during a connection.
The length of the information message is limited to 42 characters. For the text entry of letters, digits or special
characters, the keys are assigned as described on page .
32
Phone book
Operate system telephone
Add phone book record
Start as follows:
M
a
t
s
s
s
Number prog.
Phonebook
New
Enter the name.
Example: »Mustermann„.
Confirm your entries with OK.
O
Input telephone book
Name>Dean_
¬¬¬¬¬¬¬¬¬¬¬¬¬¬¬¬¬¬¬¬¬
t
Enter the call number.
Example: »0123456«.
Confirm your entries with OK.
O
Input telephone book
Number>01122334455_
¬¬¬¬¬¬¬¬¬¬¬¬¬¬¬¬¬¬¬¬¬
Only free keys can be configured over the system telephone on the elmeg hybird.
Edit phone book record
Start as follows:
a M
t
O
s
s
s
t
Program
nos.
Phonebook
List
O
Enter the initial
letters
O
Select entry
Change the name as described on page 12.
Example: »Dean, James„.
Confirm your entries with OK.
Change tbook data
input
(Abc)
Name>Dean, James
¬¬¬¬¬¬¬¬¬¬¬¬¬¬¬¬¬¬¬¬¬
t
O
Change the call number as described on page 12.
Example: »01122334455«.
Confirm your entries with OK.
Change tbook data
input
Number>01122334455_
¬¬¬¬¬¬¬¬¬¬¬¬¬¬¬¬¬¬¬¬¬
Delete phone book record
Start as follows:
a
M
s
Program
nos.
s
s
Phonebook Deleting
t
Enter the initial
letters
O
O
Select entry
Set up special ring tone (VIP ring tone) for phone book entry
Start as follows:
a
M
s
s
s
Program
nos.
Phonebook
Special
ring tone
O
Select entry
33
Operate system telephone
O
VIP memory
Press the arrow keys to select the call melody.
Confirm your selection with OK.
Dean, James
Melody
{}
12
©
¬¬¬¬¬¬¬¬¬¬¬¬¬¬¬¬¬¬¬¬¬¬¬
¬
O
Press the arrow keys to set the volume.
Confirm your entries with OK.
Dean, James
volume
{}
- ©©© - +
¬¬¬¬¬¬¬¬¬¬¬¬¬¬¬¬¬¬¬¬¬
Set up information message for phone book record
Start as follows:
a
t
M
s
s
s
t
Program
nos.
Phonebook
Info
Enter the initial letters
Enter the corresponding information for the phone book record.
Confirm your entries with OK.
O
O
Select entry
Add. info. for tbook
entry
Senior engineer,test
Birthday15.05.1955_
¬¬¬¬¬¬¬¬¬¬¬¬¬¬¬¬¬¬¬¬¬
VIP memory
You can programme a VIP entry for each of the 10 dialling keys consisting of a name (max. 20 characters) and a call
number (max. 26 digits).
This performance feature is not stored in the elmeg hybird.
Programme VIP entry
Start as follows:
a
t
O
M
s
s
s
Program
nos.
VIP
New
Enter the name for the selected VIP destination. Example:
»Dean„.
Confirm your entries with OK.
O
Select VIP destination
Program VIP name
program
V0>Dean_
V1:
¬¬¬¬¬¬¬¬¬¬¬¬¬¬¬¬¬¬¬¬¬¬
t
O
34
Enter the call number.
Example: »012345«.
Confirm your entries with OK.
Program VIP number
V0>012345_
¬¬¬¬¬¬¬¬¬¬¬¬¬¬¬¬¬¬¬¬¬
Caller and message list
Operate system telephone
Edit VIP entry
Start as follows:
M
a
t
O
s
s
s
Program
nos.
VIP
List
O
Select VIP destination
Change the name as described on page 12.
Example: »Dean, James„.
Confirm your entries with OK.
Program VIP name
V0>Dean, James_
¬¬¬¬¬¬¬¬¬¬¬¬¬¬¬¬¬¬¬¬¬¬
t
O
Change the call number as described on page 12.
Example: »01122334455«.
Confirm your entries with OK.
Program VIP number
V0>01122334455_
¬¬¬¬¬¬¬¬¬¬¬¬¬¬¬¬¬¬¬¬¬¬
Caller and message list
The system telephone has a combined caller and note history. A maximum of 30 entries (calls, messages, SMS short
messages or UUS1 text messages) shall be possible in this list. Entries in the caller/note history are shown on the
display by pressing the „Caller history“ softkey. The most recent entries made are always in the list. The last
entry added is displayed first.
When you press this softkey the number of new calls and memos is shown on the display (for example: „New
calls: 4!“) and together with the number of new SMS or UUS1 messages (for example: „ Messages: 2“).
You will also see the number of the entry and the number of all entries in the list before each entry.
E.g.: »3/10: 1122334455...... *«.
If the call number of an entry in this list is the same as the call number of a phone book record (phone book on the
system telephone or PABX), the corresponding name is displayed instead of the call number. You can view the time,
date and further information (provided it is available) for each entry. If you lift the receiver whilst viewing an entry,
the corresponding number is dialled automatically. Individual entries can be deleted individually from the list.
Caller history
Calls that you do not accept that you intentionally reject are saved in the caller history.
If a call is completed with a subscriber in the caller list (you call him or he calls you), the entry is deleted automatically
and carried over to the redial memory.
Message list
In the message list you can save call numbers. You cannot save letters or other characters in a message entry. If a call is
completed with a subscriber in the message list (you call him or he call you), the entry is deleted automatically and
carried over to the redial memory.
You can enter a memo during a call or whilst the system telephone is idle. The following entries can be made in the
memo list:
· Manual entry.
· Number from the VIP memory.
· Number from the phone book.
· Number from the destination number memory (function keys).
35
Operate system telephone
Caller and message list
· Number from the redial memory.
SMS/UUS1 messages
This performance feature is not currently supported by elmeg hybird!
If you have received new messages, the number of messages received is displayed when the system telephone is idle.
In the caller history you can see the number or the name of the sender and an indication of the message type (SMS or
UUS1). After pressing the menu key you can read the message received either straight away or you can save it in the
list of SMS or UUS1 messages to read later.
If you have already viewed a new message in the list of saved UUS1 or SMS messages, the corresponding entry in the
caller list is deleted.
UUS1 block
You can approve and block the receipt of internal and external UUS1 messages using the Professional Configurator
or the system telephone. MWI - Message Waiting Indication (e.g.T-NetBox).
The T-NetBox is an answering machine that is available in T-Com, the network of Deutsche Telekom AG. The
performance feature MWI displays a notice as soon as a new message is received in your T-NetBox.
The notice is saved as an entry in the caller list. By selecting the entry and lifting the receiver, you can connect to your
T-NetBox, for example, in order to listen to new messages. The entry in the caller list is automatically deleted, if no
new messages appear, e.g. on the T-NetBox. You can also delete the entry manually.
You can only use this function if your network provider and the PABX support the MWI performance feature.
Viewing the caller history
a
s
The system telephone is idle. The „Caller list“ softkey in the
bottom line of the display indicates if an entry exists in the caller
history.
Press this softkey.
UUS:2
08:00
{}
Tel. drctry
Idle
VIP
Caller list
The entries in the caller list are displayed at the bottom of the
screen. The active entry (selected with the arrow keys) is displayed with inverted colours.
Call Today
07:21
{}
MSN-1
1/09:Miller office..
2/09:BEATRICE.....
*
3/09:123456.......
n
4/09:Purchasing..... *
In the first line of the display you will see the selected entry type („Call“, „Message“, „UUS“, „SMS“ ), the date (for
the first two days „Today“ or „Yesterday“), the time and the dialled number (MSN).
»*«
»a„
»n“
»I„
»I“
new call, UUS1 or SMS text message.
Call.
Memo
Call rejected via the call filter.
Information about messages e.g. on your T-Netbox (MWI).
you view the caller history again, call entries that you have already seen but not deleted will be mar When
ked with „ “ instead of with „ “.
a
36
*
Caller and message list
Operate system telephone
You can view other entries by using the arrow keys.
UUS Yesterday
15:24
{}
5/09:112233445566.
n
6/09:Sales
*
¬¬¬¬¬¬¬¬¬¬¬¬¬¬¬¬¬¬¬¬¬
Further information about a call / message
M
If you want to view the information for a record, select this with
the arrow keys and then confirm with the menu key.
Call Today
07:21
{}
MSN-1
1/09:Miller office
2/09:BEATRICE.....
*
*
¬¬¬¬¬¬¬¬¬¬¬¬¬¬¬¬¬¬¬¬¬
s
You can delete the number, transfer it to the phone book or view
additional information on the selected entry.
Press the „Info“ softkey for example.
1/Miller office
}
Call today 07:21
MSN-1
Info
Tel. drctry
delete?
continue
C
You will now see information on the call. If not all information
can be displayed, press the arrow keys to display further information.
Press the C key to exit the menu. You can then use one of the other
options.
1/Miller office
0123456789
to MSN-1
(& MSN-2)
Call today
»delete?„
The entry is deleted immediately.
»Info„
Viewing other information on the received call.
E.g.: The number for which the message was sent and the number of the sender.
»Phonebook„
07:21
( 2 x Call)
Transfer the caller’s number to the system telephone phone book.
»continue „ View the next record in the caller history.
Further information on a text message (SMS / UUS1)
M
If you want to view the information for a record, select this with
the arrow keys and then confirm with the menu key.
UUS Yesterday
15:24
{}
MSN-5
5/09:112233445566
n
6/09:Sales
*
s
Press the „read“ softkey for example.
Note: After pressing the right arrow, you will also see the „Tel.
drctry“ softkey.
1/Sales
UUS Yesterday
MSN-5
}
15:24
Info
read
Save
delete?
continue
The arrow („{“) in the first line shows that a text message has
been received.
* UUS 01/06 †
Sales.............
Thanks! Let’s meet
at 15.30
¬¬¬¬¬¬¬¬¬¬¬¬¬¬¬¬¬¬¬¬¬¬¬
37
Operate system telephone
Caller and message list
O
If not all of the message is displayed, press the arrow keys to view the full message.
To stop displaying the message, press OK. You can then use one of the other options.
»save„
Save the message in the corresponding text message list and delete the entry from the caller list.
»delete?„
The message is deleted immediately and is not added to the text message list.
»Info„
Viewing other information on the received message.
E.g.: The number for which the message was sent and the number of the sender.
»Tel. drctry„
Transfer the sender’s number to the system telephone phone book.
»next„
View the next record in the caller list.
Delete the caller/message list
Deleting an entry
s
a
M
Caller list
s
delete?
Select entry
Delete all call records
You can delete all call records in the caller/message list together. Received text messages (SMS / UUS1) are not
deleted.
s
a
M
Caller list
>
s
Delete all
calls?
Choose call record
Transfer number to the system telephone phone book
Start as follows:
a
s
Caller list
t
O
M
Select entry
Enter the name.
Example: Dean.
Confirm your entries with OK.
s
Phonebook
Input telephone book
Name>Dean`
¬¬¬¬¬¬¬¬¬¬¬¬¬¬¬¬¬¬¬¬¬¬
The corresponding name is now displayed in the caller/message
list instead of the number.
5/Dean
Call today
08:12
Info
¬¬¬¬¬¬¬¬¬¬¬¬¬¬¬¬¬¬¬¬¬¬
Add message
You can add a message number from:
· The system telephone phone book (softkey „Phone book“).
· The speed dial memory / function keys (softkey „Speed dial“).
· The VIP memory (softkey „VIP“).
38
SMS and UUS1 text messages
Operate system telephone
· The redial list (softkey „Retry“ or redial key).
· or enter a new number (softkey „New“).
A new number is added as a message in the following example.
Start as follows:
>
a
t
O
s
s
Note
New
Enter the number to be saved as a message.
Example: »0123456«.
Confirm your entries with OK.
Memo number create
>0123456_
¬¬¬¬¬¬¬¬¬¬¬¬¬¬¬¬¬¬¬¬¬¬
SMS and UUS1 text messages
You can use the system telephone to send or receive SMS or UUS1 text messages (SMS - Short Message Service, UUS1
- User to User Signalling). A text message is entered using the system telephone keypad. For the text entry of letters,
digits or special characters, the keys are assigned as described on page .
You can only send and receive text messages if the sender transmits his number and if this is displayed to the
recipient. Text messages without a transmitted call number are not transmitted or displayed in the system telephone.
The receipt of a text message is signalled with two short attention tones on the system telephone. When the system
telephone is idle, the number of messages received is displayed and a reference to these is displayed in the list of
callers.
SMS text messages (available depending on the network operator)
SMS enables you to send text messages to other telephones in the fixed network or to mobile telephones, and to
receive these messages from them. The length of an SMS is limited to 160 characters. Up to 4 SMS can be linked
automatically with up to 612 characters. Switch from one SMS to the next using the softkey.
You can only send and receive SMS text messages:
· If you are using the system telephone on a PABX with system telephony that supports the SMS
performance feature.
· If you have registered for this performance feature with the network operator or the provider of
the SMS centre for your ISDN connection.
· If the call number of the SMS centre is saved in the system telephone.
Please consult the provider of the SMS centre to find out in which networks (mobile, fixed) SMS messages can be sent
and the cost of sending and receiving SMS messages. The system telephone does not support the transmission of SMS
messages with special content (e.g. pictures, ring tones).
The SMS messages that are received and sent are saved in two separate lists in the system telephone. 10 received SMS
messages and 10 sent SMS messages can be saved. A maximum of 5 linked SMS can be saved (in twos or fours).
System telephones that do not support linked SMS will receive these as individual SMS.
Please note that there must be free memory available in order to be able to save SMS messages. If you have already
saved 10 received SMS messages then you cannot receive any more SMS messages.
After sending an SMS, you can save this in the list of sent SMS. If this list is full, the last sent SMS is saved temporarily.
39
Operate system telephone
SMS and UUS1 text messages
UUS1 text messages
You can send text messages from one system telephone to another without having to call this extension. The length of
an UUS1 text message is limited to 31 characters.
sending of UUS1 text messages shall be possible to both internal and external telephones. You can only
The
make use of this performance feature to external telephones if „UUS1 (User to User Signalling)“ is activated
for your ISDN connection.
Please note that all terminals involved (system telephones and PABX) must support the performance feature „UUS1
(User to User Signalling)“.
The UUS1 text messages that are received and sent are saved in two separate lists in the system telephone. 10 received
UUS1 messages and 10 sent UUS1 messages can be saved.
Please note that there must be free memory available in order to be able to save UUS1 text messages. If you have
already saved 10 received UUS messages then you cannot receive any more UUS1 messages.
After sending an UUS1 text message, you can save this in the list of sent messages. If this list is full, the last sent UUS1
message is saved temporarily.
Creating and sending a text message
You can send a text message to a call number saved in the system telephone (VIP memory, function key or automatic
dialling list) or enter a new call number to send it to. In the „Send mail“ menu press the corresponding softkey
„Phone book“, „Speed dialling“, „VIP“, „New“ or „Redial“.
To select a number assigned to a function key („destination“) or stored under the redial button, you can also
press that corresponding key.
sending a text message, the first („
When
ned via the user key is transmitted.
MS.-1“) entered in the system telephone or the call number defi-
Start as follows:
a
>
s
s
s
Messages
SMS or UUS
Send mail
Example: Create UUS1 text message
t
O
Enter the text.
Example: »Meeting 9.30 a.m. to 11.00 a.m. George„.
Confirm your entries with OK.
Send mail
UUS>Meeting 9.30 a.m.
to 11. 00 a. m. Geor_
¬¬¬¬¬¬¬¬¬¬¬¬¬¬¬¬¬¬¬¬¬¬
40
SMS and UUS1 text messages
s
Press the corresponding softkey to dial a call number saved in the
system telephone or the „new“ softkey to enter a new call number. E.g.: »New„.
Operate system telephone
Send mail / UUS
Repeat
Tel. drctry
New
VIP
direct
t
O
s
Enter the call number.
E.g.: »2200«.
Confirm your entries with OK. The text message is sent to the recipient.
You can then save the text message in the corresponding list of
sent messages (softkey „Yes“) or temporarily (softkey „No“).
Define targt. numb.
>2200_
¬¬¬¬¬¬¬¬¬¬¬¬¬¬¬¬¬¬¬¬¬
Save memo?
No
ok
¬¬¬¬¬¬¬¬¬¬¬¬¬¬¬¬¬¬¬¬¬
Important notes on entering the call number for sending SMS messages
If the performance feature „Automatic Outside Line“ for your system telephone is switched off in the PABX, you
must enter the dialling code before entering the destination number. In addition the dialling code must be saved in
the system telephone.
When the telephone is connected to a PABX with automatic outside line, you can enter the destination number
directly.
Send linked SMS
You can link up to 4 SMS. A counter in the display shows the number of characters remaining. At the end of the first
mail, you are prompted to specify whether or not a linked mail should be sent. If you answer yes, a message showing
the free capacity remaining is displayed. If you answer no, the entry of the last character is ignored and the SMS is sent
as described for non-linked SMS.
In the example „451 available“ shows the number of free
characters remaining and indicates the first SMS block out of 2
used. You can scroll between the blocks using the arrow keys. If
insufficient memory is available to save a linked SMS, the message is only saved temporarily.
Send mail
451 free
(Abc)
You can link up to 4
SMS messages
together. A counter
in the display space
indicates therem
View new text messages received
You can view a new message from the caller history (see page 33) or from the list of received text messages. If you have
already viewed a new message in the list of received text messages, the corresponding entry in the caller history is
deleted.
Viewing received or sent text messages
When viewing received or sent text messages, you can access the following functions:
· Resend a text message.
Before sending, the text message can be modified.
· Delete a text message.
41
Operate system telephone
SMS and UUS1 text messages
· Transfer the number to which a text message has been sent or from which has text has been received to the system telephone phone book.
· Transfer text message to the list of saved text messages (only UUS1).
Start as follows:
>
a
s
s
Messages
SMS or UUS
s
read,Received
or
read,Sent
Example: Read received UUS1 text message
The text message added last is displayed first. A new text message that has not been read is marked with „*“. The
following information can be displayed for a text message:
· Number of the text message in the list (Example: »01/06«).
· Received („† “) or sent („‡ “) text message (in the example: »† «).
· Call number to which a text message was transmitted (Example: »MS-1„).
· Call number of the sender / Recipient of the text message (Example: »2200«).
O
Press the arrow keys to see the full text message.
Press OK to access a menu with further options.
* UUS 01/06 †
MSN-1
2200.................
I’LL PROBABLY BE 30
MINUTES late.
¬¬¬¬¬¬¬¬¬¬¬¬¬¬¬¬¬¬¬¬¬
In the top line of the display you will see the date and time at
which you received the message. To select an action, confirm with
the corresponding softkey.
UUS 01/06 today
}
†
10:36
MSN-1
Save text
send
delete?
continue
42
»send„
Modify and then send text message.
To send the text message, proceed as described under „Creating and sending text messages“ (see page 38).
»delete?„
Delete the text message.
»Tel. drctry„
If you wish to transfer the number of the sender / recipient to the phone book, press the
right arrow key and then the „Phone book“ softkey. Next enter the name for the phone
book record and confirm your entry with the OK key.
»next„
View next temporary saved text message.
»Text
Save„
(only UUS1)
Transfer the text message to the list of saved messages. To do this, select the desired memory location using the arrow keys and confirm your selection with the OK key.
SMS and UUS1 text messages
Operate system telephone
Permanently saved text messages (only UUS1)
Up to five UUS1 text messages can be saved in the system telephone. You can edit, delete or send these text messages.
Text messages that are already saved can only be entered directly on the system telephone.
Start as follows:
>
a
s
s
s
Messages
UUS
Select text
Press the arrow keys to select a text message.
Select text
{}
1:
2:
3:
¬¬¬¬¬¬¬¬¬¬¬¬¬¬¬¬¬¬¬¬¬
O
PresstheOKkeyinordertoenteroramendtheselectedtextmessage.PresstheOKkeytoconfirmyourfinal
entries.
M
Press the menu key in order to send or delete a message.
ªªªªªªªªªªªªªªªªªªªªªª
send
delete?
¬¬¬¬¬¬¬¬¬¬¬¬¬¬¬¬¬¬¬¬¬
»send„
Modify and then send text message.
To send the text message, proceed as described under „Creating and sending text messages“ (see page
38).
»delete?„
Delete the text message.
Send text messages automatically (only UUS1)
When on a call, you can automatically send a UUS1 text message to the caller. To do this, the text 1 from the list of
permanently saved text messages is always used.
Start as follows:
a
s
>
s
s
Messages
UUS
Press the „Incoming“ softkey to switch automatic sending on or
off.
»Incoming„: Automatic sending active.
»Incoming“: Automatic sending not active.
>
s
Incoming
Messages / UUS
{
Incoming
Inhibit reception
¬¬¬¬¬¬¬¬¬¬¬¬¬¬¬¬¬¬¬¬¬
Set receipt for text messages (only UUS1)
You can configure whether external or internal UUS1 text messages are received by the system telephone or not.
Receipt can be blocked separately for external and internal text messages. You can allow certain text messages to be
received using the system telephone phone book.
If you have blocked receipt, external or internal text messages can only be received if the number of the sender is
saved in the phone book with a special ring tone.
43
Operate system telephone
Do not disturb
Start as follows:
>
a
s
s
s
Messages
UUS
Press the „External“ or „Internal“ softkey to switch the receipt of UUS1 text messages on or off. E.g.:
»external„: Receipt of external messages inhibited.
»internal“: Receipt of internal messages is possible.
>
s
Block receipt
Inhib. receiv. / UUS
external
internal
¬¬¬¬¬¬¬¬¬¬¬¬¬¬¬¬¬¬¬¬¬
Error sending and receiving an SMS
Error transmitting an SMS
If you are unable to transmit an SMS message, a corresponding error code is displayed. Consult the SMS service of
your network operator / provider to find out which error codes are displayed.
Error receiving an SMS message
If you are unable to receive an SMS message or only as voice output, there may be several reasons:
· The SMS performance feature has not been registered with the network operator and/or the provider of the SMS centre for your ISDN connection.
· The SMS message was transmitted by a third-party service provider, which failed to transmit this
message as an SMS message.
· Permanent number suppression is activated for your ISDN connection.
· You have already saved 10 SMS messages in your system telephone and cannot receive any more
SMS messages.
Do not disturb
If you want calls not to be signalled with the selected call melody and volume, you can set this on your system
telephone with the function „Do not disturb“. All calls are then signalled on screen only (on the display) or with an
attention tone depending on the setting. The volume of the attention tone can be set as described on page 64. When
the system telephone is at rest, „r“ or „R on the display indicates that the “Do not disturb" function is enabled.
»No„
The „Do not disturb“ function is not active.
»Yes, call tone off„Calls are only signalled on the display („R“ shown on the display).
»Yes, with attention toneCalls
„ are first signalled with a short attention tone, then only on the display („r“
shown on the display).
Only for MS-1
a
The functions above are set up only for the MS-1. This requires that multiple MS are set up
in the system telephone.
s
s
Idle
No / Yes, with attention tone / Yes, call tone
off
Only for MS-1
44
Viewing and deleting costs
Checking costs
You can obtain details on accumulated call costs on your system telephone. You can only use this function if the
performance feature is activated for your ISDN connection by the network operator.
Consult your network operator to find out what options are available for transmitting cost information. Please note
that the transfer of all cost information from the exchange to your system telephone is no longer possible for
technical reasons. Any price reductions received, special tariffs used and special features may lead to deviations
between the data saved in the system telephone and the data stated on the telephone bill.
Procedure for transmitting cost information
There are various procedures for transmitting cost information. The same procedure is normally always applied to a
connector. This procedure is automatically recognised by the system telephone and is saved for future use.
If the transmission of cost information during a procedure occurs that is not saved in the system telephone, then
„Incorrect cost type“ is shown in the display.
In this case delete all of the cost information stored in the system telephone (see also: Viewing/deleting total costs).
Recognition and saving of the procedure used to transmit cost information is then re-activated.
You can set up the tariff factor and denomination via the PC configuration of the system telephone.
Viewing and deleting costs
Cannot be configured using the system telephone on the elmeg hybird!
If you have protected configuration of the system telephone with a PIN (see page 75), cost accounts can only be
deleted using the PIN. After pressing the „delete?“ softkey, you must then enter the PIN of the system telephone.
You can also delete the call costs via the Professional Configurator.
View/delete costs of last call
Start as follows:
a
>
s
Charge
The cost of the last call is displayed. If you want to delete these
costs, press the „delete?“ softkey.
Last conn::
0,18 EUR
}
Last conn.
Total
delete?
¬¬¬¬¬¬¬¬¬¬¬¬¬¬¬¬¬¬¬¬¬
View/delete total costs
Start as follows:
a
>
s
s
Cost
Total
You can view the total cost for all call numbers (MS). If you want
to delete these costs, press the „delete?“ softkey.
Total:
}
1,55 EUR
Last conn.
Total
delete?
¬¬¬¬¬¬¬¬¬¬¬¬¬¬¬¬¬¬¬¬¬
45
Checking costs
Set up tariff factor and denomination
total cost is deleted, all MSN cost accounts are deleted at the same time. The recognition and saving of
Ifthetheprocedure
for transmitting cost information is re-activated.
View/delete costs of individual call numbers (MS)
Start as follows:
a
>
s
>
s
Cost
MS-2
You can view the total cost for a single call number. Example for
„MS-2“.
MSN-2:
0,31 EUR
}
MSN-3
MSN-1
MSN-4
MSN-2
¬¬¬¬¬¬¬¬¬¬¬¬¬¬¬¬¬¬¬¬
s
If you wish to delete the total costs for the selected number (example MS-2), press the left arrow key and then the „delete?“
softkey.
MSN-2:
{}
0,31 EUR
Last conn.
Total
delete?
Set up tariff factor and denomination
Start as follows:
a
»Tariff„
M
s
s
Configuration
Cost
s
EnterthetarifffactorandconfirmyourentrywithOK.Thelengthofthetarifffactorislimitedto4characters. Press the asterisk key to enter a comma.
»Currency„ Enter the denomination and confirm your entry with OK. The length of the name is limited to 6 characters. For the text entry of letters, digits or special characters, the keys are assigned as described on
page .
»delete?„
All cost information saved in the system telephone will be deleted. Recognition and saving of the procedure used to transmit cost information (see page 43) is re-activated.
Setting the call costs account for a number
Cannot be configured using the system telephone on the elmeg hybird!
You can set up a cost account for each number (MS) entered in the system telephone. In this cost account the number
(MS) is allocated an amount in the specified currency that is available for making calls. Once the allocated amount
has been used, only free calls can be used from this outgoing number (MS). If dial control is set up, chargeable calls
can be made to the free call numbers in dial control.
If the amount of the cost account is exceeded during a call, this call can still be completed.
Once the amount has been increased or the cost account has been deleted, paying calls can be made.
Not all providers send cost information. If you telephone using a provider that does not supply cost
Caution:
information, the cost account is not applicable.
The setting up of a cost account for a number (MS) is described below using the example of the call number MS-1.
46
Release or block call number (MSN) for dialling
Checking costs
Start as follows:
M
a
t
s
s
s
Configuration
MSN
>
MS-1 ... MS-10
Enter the amount to be allocated for making calls.
Confirm your entries with OK.
O
s
Cost
Dial inhib. by charge
Limit/EUR>10`
¬¬¬¬¬¬¬¬¬¬¬¬¬¬¬¬¬¬¬¬¬
If you enter „0“ as the amount to be allocated for making calls, the call costs account is not active.
Release or block call number (MSN) for dialling
Each number saved in the system telephone („MSN-1“ ... „MSN-10“) can be released or blocked for outgoing
connections. If you have blocked a number (MSN) for outgoing calls, no outgoing calls can be initiated when
transmitting this number (e.g. MSN assignment using function keys). Incoming calls continue to be possible for
these numbers.
If you attempt to set up a call using a number that has been inhibited for dialling, the following message is shown in
the display „Inhibit: MSN“.
Enabling or inhibiting of a number for outgoing calls is protected by an MSN-specific PIN. You must enter this PIN in
advance during configuration of the number (MSN). After that, you can inhibit or enable dialling of external
numbers (outgoing calls) for this MSN.
Start as follows:
a
>
s
s
t
Block
MSN-1 … MSN-10
O
Enter MSN-specific PIN
The cross next to a softkey indicates which setting is currently activated.
s
If you want to block outgoing calls for the number (MSN), press
the „block“ softkey. To release a blocked number for dialling,
press the „release“ softkey.
MSN-1?
inhibit
enable
¬¬¬¬¬¬¬¬¬¬¬¬¬¬¬¬¬¬¬¬¬
Call and cost display
Possible displays during a call:
Call display for call numbers
(»0123456«).
0123456
MSN-1
Memo
show
¬¬¬¬¬¬¬¬¬¬¬¬¬¬¬¬¬¬¬¬¬¬¬
¬
Call display for call numbers
(»0123456„) and time (“07:41„).
0123456
07:41
MSN-1
Memo
show
¬¬¬¬¬¬¬¬¬¬¬¬¬¬¬¬¬¬¬¬¬
Call display for call numbers
(»0123456„) and duration (“32.43„) of the call.
The call duration can be displayed, for example, for incoming
connections or if there is no cost information
available.
0123456
32.43
MSN-1
Memo
show
¬¬¬¬¬¬¬¬¬¬¬¬¬¬¬¬¬¬¬¬¬
47
Checking costs
Call display for call numbers
(»0123456„) and charges (“0.36
Call and cost display
EUR„).
0123456
0,36 EUR
MSN-1
Memo
show
¬¬¬¬¬¬¬¬¬¬¬¬¬¬¬¬¬¬¬¬¬
Call display for date („29.05.06“) and
time („07:41“).
29.05.06
07:41
}
MSN-1
Memo
show
¬¬¬¬¬¬¬¬¬¬¬¬¬¬¬¬¬¬¬¬¬
You can only see costs if you have registered with your network provider to transmit costs during the call.
View display during a call
following displays during a call depend on the settings and respective connection and may therefore
The
differ from connection to connection. You can only see costs if you have registered for cost transmissions
during the call.
g
s
During a call, you will see the number or name of the called party
at the top of the display „BEATRICE“) and the duration of the call
(„0.24“).
Press the „display“ softkey.
BEATRICE
02.43
}
MSN-1
Memo
show
Keypad
Mute
park
You will now see further information available on the current
connection.
Date („29.05.06“), time („07:41“),
associated number („0987654321“),
Costs („0.36 EUR“), call duration
(»02.55«)
BEATRICE
to MSN-1
29.05.06 07:41
0987654321
0,36 EUR
02.55
Press the arrow keys to display further information (if available).
If you are the destination of a call forwarding, you will see the diverted number („U{123“) if this is
transmitted.
You will see the normal display during the connection.
BEATRICE 06.33
06:33
}
Memo
display
¬¬¬¬¬¬¬¬¬¬¬¬¬¬¬¬¬¬¬¬¬
a
48
At the end of the call, the adjacent display will appear for approx.
5 seconds.
ªªªªªªªªªªªªªªªªªªªªªª
BEATRICE
Costs
0.36 EUR
Call and cost display
Checking costs
Setting up transmission of the call number (CLIP/CLIR/COLP/COLR)
Start as follows:
a
M
s
s
s
Configuration
Display
Call number
s
»Incoming„ By pressing the „Incoming“ softkey, the display of the caller’s number is switched on or off. If a cross
is shown next to the softkey, call number display is activated.
»Outgoing„ By pressingthe „Outgoing“softkey, the display of the called party’snumberis switched onor off. If a
cross is shown next to the softkey, call number display is activated.
49
System telephony
Function keys
The system telephone is ready for connection to the corresponding internal connector of the PABX / elmeg hybird .
On the PABX / elmeg hybirdthe system telephone provides various performance features that are typical of this
system. For example:
· Select from the phone book on the PABX (see page 18).
· Announcement and simplex operation (see page 23, 24).
· Special function keys (see page 48).
· Access to the system menu on the PABX (see page 58).
consult the user’s guide for your PABX to see whether this system telephony is supported in con Please
junction with this telephone.
Operating the function keys
Press the corresponding function key. The function programmed on the key is executed. If an LED function is also
associated with this function, the LED is switched on or off according to the function executed.
You can reach the second layer of function keys by pressing the keys twice. This must be done quickly.
Important notes on LED functions
The states of the LEDs are not permanently refreshed in the system telephone. If these functions are modified or
switched by a code or PC configuration on the PABX, the state of the LED does not change. If the system telephone is
disconnected from the ISDN network (e.g. parking a call), the LEDs are off when reconnecting the system telephone.
Pressing a function key updates the display of the assigned LEDs and the performance feature in the PABX is
activated or deactivated.
Example: You can switch the announcement function on your system telephone on and off using the function key
through the PC configuration of the PABX. Pressing the function key switches off the announcement and the
assigned LED is updated.
Function keys
The system telephone has five function keys that can be assigned with various functions in two layers.
Each key has a two-colour LED that can be used to display the functions of the keys. Each colour is assigned to a layer
of the function key.
Examples for operating function keys
· Speed dial keys (see page 19).
· MFC/ Keypad sequences (see page 27).
· Announcement (operation see page 23).
· Simplex operation (operation see page 24).
Function keys when connecting to a elmeg hybird or PABX
50
This section only describes the functions on the elmeg hybird or the PABX.
Function keys when connecting to a elmeg hybird or PABX
System telephony
Line key (Subscriber line key)
You can set up dialling to an internal extension using a line key. After pressing the corresponding key, hands free is
switched on and the internal extension entered is selected.
If already on a call, the call is held and the destination extension call after pressing the line key.
If a call is signalled on the internal extension you have entered, you can pick this up by pressing the line key.
Call waiting signals are indicated by a flickering LED on the line key. By pressing this key you can pick up the call from
any extension within the group.
Held calls are not indicated by the LED.
Line key (Team line key)
A team key is a normal line key to which the internal number of a team is assigned. After pressing the corresponding
key, hands free is switched on and the team entered is selected. If a call is signalled for the entered team, you can pick
this up by pressing the team key.
LED functions
The LED on the key indicates the respective status:
LED off:
No connection.
LED on:
Existing connection.
LED flashes:
Connection on hold.
LED flickers:
Incoming call / call waiting.
Line key
PABX
This performance feature is not currently supported by elmeg hybird!
A B-channel of an external ISDN connection is set up using a line key. If this key is pressed, hands free is switched on
automatically and the corresponding B-channel of the ISDN connection is assigned. You then hear the external
dialling tone.
If an external call is signalled on another internal system telephone, you can pick this up by pressing the line key.
LED functions
The LED on the key indicates the respective status:
LED off:
No connection.
LED on:
All B-channels are assigned.
LED flashes:
Connection on hold.
LED flickers:
Incoming call / call waiting.
Line key
elmeg hybird
If this key is pressed, hands free is switched on automatically and the corresponding external connection (ISDN, SIP
or FXO) is assigned. You then hear the external dialling tone.
If an external call is signalled on the LED of the line key, you can pick this up by pressing the key. Here you can pick up
up to 4 calls by pressing the line key. If you pick up 4 calls, this is displayed by the lights on the LED.
LED functions
The LED on the key indicates the respective status:
LED off:
No connection.
51
System telephony
LED on:
Function keys when connecting to a elmeg hybird or PABX
On ISDN connections, the LED only lights up when all B-channels are assigned.
If a connection limit is set up in the elmeg hybird with the SIP provider, the LED
lights up when the maximum number of connections is reached.
LED flickers:
Incoming call / call waiting.
MSN assignment (Set call number for next call)
PABX
This performance feature is not currently supported by elmeg hybird!
You can perform internal or external dialling so that a specific number is transmitted from your system telephone to
the called party. This number must first be entered in your system telephone.
LED functions
The LED on the key indicates the respective status:
LED off:
No connection.
LED on:
Connection set up using keys.
Day/Night all
PABX
This performance feature is not currently supported by elmeg hybird!
You can set up a key so that when pressing this key, the call assignments on the PABX are switched (day/night call
assignment). You have various options for this switching: Day/Night all: All performance features that differentiate
between day call assignment and night call assignment (AVA, Teams, TFE) are switched together.
LED functions
The LED on the key indicates the respective status:
LED off:
Day active.
LED on:
Night active.
Day/Night Team
PABX
This performance feature is not currently supported by elmeg hybird!
When entering a team number, the call variant is only switched for this team. If you do not enter a team number, the
call assignment is switched for all team.
LED functions
The LED on the key indicates the respective status:
LED off:
Day active.
LED on:
Night active.
Team on/off
PABX
This performance feature is not currently supported by elmeg hybird!
If you are entered as an extension in the call assignments for one or more teams, you can set up a key so that you can
control the call signalling of your system telephone. If you are logged in, team calls will be signalled to your system
telephone. If you are logged out, no team calls will be signalled.
The call numbers entered in the telephone can be logged in/logged out from a team using a set function key
(„MSN-1"...“MSN-9"). Before entering a team number, you must select the telephone call number index (MSN) that
is entered in the corresponding team call assignments.
52
Function keys when connecting to a elmeg hybird or PABX
System telephony
LED functions
The LED on the key indicates the respective status:
LED off:
Logged out.
LED on:
Logged in.
Allow announcement on/off
You can block or allow the announcement on your system telephone using a function key.
LED functions
The LED on the key indicates the respective status:
LED off:
Blocked.
LED on:
Allowed.
Announcement (operation see page 23).
LED functions
The LED on the key indicates the respective status:
LED off:
No announcement.
LED on:
Announcement.
Allow simplex operation on/off
You can block or allow simplex operation on your system telephone using a function key.
LED functions
The LED on the key indicates the respective status:
LED off:
Inhibited.
LED on:
Allowed.
Simplex operation (operation see page 24).
LED functions
The LED on the key indicates the respective status:
LED off:
No simplex operation.
LED on:
Simplex operation.
Boss-connector
This function manages the interaction between the system telephones of the boss and the secretary. The secretary’s
system telephone is assigned a special line key with the number of the boss and the boss’ system telephone is assigned
a special line key with the number of the secretary.
LED functions
The LED on the key indicates the respective status of the connection:
LED off:
No connection.
LED on:
Existing connection.
LED flashes:
Connection on hold.
53
System telephony
LED flickers:
Function keys when connecting to a elmeg hybird or PABX
Call.
Secretary
In conjunction with a „Boss Key“ this key allows the user to specify whether calls are routed directly to the boss or are
signalled to the secretary.
Secretary redirection
LED functions
The LED on the key indicates the respective status of the connection:
LED off:
No connection.
LED on:
Calls are redirected from the boss to the secretary.
Call filter
PABX
The functions are saved in the system telephone, but not in the elmeg hybird.
With the call filter, you can reject or allow specific calls to your system telephone. A rejected caller receives the
engaged tone and is saved in a caller list with a special flag. The call filter is set up using the PC configuration of the
system telephone and can be switched on or off using this function key.
LED functions
The LED on the key indicates the respective status:
LED off:
Switched off.
LED on:
Switched on.
Call diversion (call forwarding)
You can set up a key so that call forwarding is set up for a specific number on your system telephone. Call forwarding
(see page 68) is switched on or off by pressing the key.
LED functions
The LED on the key indicates the respective status:
LED off:
Switched off.
LED on:
Switched on.
Direct call
Automatic direct dialling on the system telephone can be set up using a programmed function key. Before setting up
automatic direct dialling using a function key, it is important that the speed dial number is saved in the system
telephone. Automatic direct dialling can be switched off as described in the section „Automatic direct dialling“ (see
page 68).
LED functions
The LED on the key indicates the respective status:
54
LED off:
Switched off.
LED on:
Switched on.
Function keys when connecting to a elmeg hybird or PABX
Voicemail
System telephony
PABX
This performance feature is not currently supported by elmeg hybird!
If you use a voice system on the PABX to which the system telephone is connected (e.g. from the company
Discofone), you can set up a key to control the voicemail function. By pressing the key you can establish a connection
to the voicemail box.
Headset
If you have set up and connected a headset to your system telephone, the headset is operated using a function key.
These are set up in the ex works settings for the keys 4 (Headset) and 5 (Automatic call acceptance).
Press the headset key to initiate, pick up and end calls.
LED functions
The LED on the key indicates the respective status:
LED off:
No connection.
LED on:
Connection or connection setup.
Automatic call acceptance
Your system telephone can accept calls automatically without you having to lift the receiver or press the loudspeaker
key. The time after which calls are accepted automatically is set up in the configuration of the system telephone.
Automatic call acceptance is switched on or off using the function key assigned.
LED functions
The LED on the key indicates the respective status:
LED off:
Switched off.
LED on:
Switched on.
Voicemail
PABX
This performance feature is not currently supported by elmeg hybird!
If you use a voice system on the PABX to which the system telephone is connected (e.g. from the company
Discofone), you can set up a key to control the voicemail function. By pressing the key you can establish a connection
to the voicemail box.
LED functions
The LED on the „Voicemail“ button indicates the respective status:
LED off:
No connection.
LED on:
Connection to voice box.
LED flashes:
Voice box, new message available.
Line AB
PABX
This performance feature is not currently supported by elmeg hybird!
This key is a special line key to which the internal number of an answering machine is assigned. An MFC sequence
can also be assigned to this key.
After pressing the key, the number of the answering machine is dialled and then the saved MFC sequence is
transmitted. The MFC sequence allows you to activate remote operation of the answering machine and to listen new
55
System telephony
Function keys when connecting to a elmeg hybird or PABX
messages. The loudspeaker is switched on when calling the answering machine, but the microphone remains off. By
pressing this key, you can also pick up a call that is signalled to the allocated answering machine.
LED functions
The LED on the „Line AB“ button indicates the respective status:
LED off:
No connection.
LED on:
Connection to AB.
LED flashes:
AB has an active connection to the caller.
LED flickers:
Incoming call AB.
User on/off
Normally the first number entered in the system telephone (MSN-1) is used as the default number for all settings and
operations. You can set the default number of the system telephone with the user key. By pressing this key, the default
number of the system telephone is modified on the corresponding call number. When initiating a call and when
sending SMS or UUS1 text messages, the modified default number is used.
LED functions
The LED on the key indicates the respective status:
LED off:
Default number.
LED on:
Modified number.
Bundle key
elmeg hybird
If one or more external connections (ISDN, FXS or SIP provider) are grouped into bundles, they can be assigned to a
bundle key. If this key is pressed, hands free is switched on automatically and a free external connection is assigned in
the bundle in the order of entry. You then hear the external dialling tone. If a call is made in this bundle (the LED on
the bundle key flashes), this connection cannot be transferred by pressing the bundle key.
A busy status is signalled as described under „Line key“.
LED functions
The LED on the key indicates the respective status:
LED off:
no bundle assigned.
LED on:
No external connection free.
LED flickers:
Incoming call.
Bundle key
PABX
This performance feature is not currently supported by elmeg hybird!
If one or more external connections are grouped into bundles, they can be assigned to a bundle key. If this key is
pressed, hands free is switched on automatically and a free external connection is assigned on the corresponding
bundle. You then hear the external dialling tone.
LED functions
The LED on the key indicates the respective status:
56
LED off:
no bundle assigned.
LED on:
No B-channel free.
LED flickers:
Incoming call.
Function keys when connecting to a elmeg hybird or PABX
System telephony
Status info
PABX
This performance feature is not currently supported by elmeg hybird!
Recording
You can set up the „router key“ (code 01) or „record key“(code 02) under this key.
Router key (01),(only PABX)
Ifyouhavesetupastatusinfokeyintheconfiguration,youcanpressthekeytodisconnectexistingInternet
connection and to set up new connections over the registered provider. The LEDs on the function button
indicate the status of the Internet connection (LED off: No connection, LED on: Connection over WAN).
Record key (02), (only PABX)
(Only if the PABX supports this function) If you press the Record key during an existing connection, recording is started (the LED lights up).
LED functions
The LED on the key indicates the respective status:
LED off:
No connection.
LED on:
Connection active
or
Recording switched on.
Connection
In addition to the softkeys „Connection 1...“, you can also set up function keys on the system telephone or the
extension for operation when brokering. Here two to four of these keys must always be set up.
· No other keys must be set up between the connection keys.
· The number of possible connections depends on the number of connection keys set up. If more
than 4 keys are set up, the call waiting and hold for enquiry functions are restricted.
· If multiple connections have the „Calling“ status, the first call signalled is accepted when the receiver is lifted.
· If multiple connection keys are available, the connection key is used to select between multiple
waiting calls. Note that only one ISDN system telephone is operated on the S/U connection, only a
single call waiting signal is set up. This is the only way that a second call waiting can take priority
over an existing call (both callers require a B-channel).
· If a call is signalled, another connection can be established using another connection key when
the receiver is replaced.
· Brokering can be carried out using the connection keys.
· The assignment given to a connection or a call is retained until the end, unless with softkeys
„Connection 1...“.
· A connection can be set up using the connection key and then pressing a line key.
· You can also press the connection key during a call to set up another connection.
· Pressing the disconnect key to disconnect the existing connection and the connection with the
last held connection.
· If an existing and a held connection are connected with each other, the softkey „Transfer“ must
then be pressed followed by the connection key for the held connection.
LED functions
57
System telephony
Function keys when connecting to a elmeg hybird or PABX
The LED on the key indicates the respective status of the connection:
LED off:
No connection.
LED on:
Existing connection.
LED flashes:
Connection on hold.
LED flickers:
Call status.
Open hold for enquiry (Open.Hold)
The called party is put on hold for enquiry and dials a code. The system telephone is now free for other operations, e.g.
an announcement. Another party can accept the call, if he lifts the receiver and dials the relevant code of the held call.
The codes assigned by the PABX can also be entered in the function keys of one or more system telephones. If a call is
set to open hold for enquiry by pressing the function key, this is indicated by flashing LEDs on the function keys for
the system telephones set up for this. The call is transferred by pressing the corresponding function key. This
performance feature is only possible if only one call is on hold.
LED functions
The LED on the key indicates the respective status:
LED off:
No connection.
LED flashes:
Held call in open hold for enquiry.
Hotel room
The hotel room key can only be used on system telephones that are set up as reception telephones. A key can be set up
for each hotel room for which check-in, check-out, wake-up call and call functions can be set up by pressing the
relevant key.
second layer of the key function „Hotel room“ is assigned permanently as a line key and cannot be set up
The
for any other functions.
LED functions
The LED on the key indicates the respective status of the room:
LED off:
Room is free.
LED on:
Room is occupied.
LED flashes:
Room is being cleaned.
Key functions
The LED is switched off:
Pressing the hotel room key opens the „Check-out“ and „Wake-up call“ menu.
LED on:
Pressing the hotel room key opens the „Check-in“ menu.
The LED flashes:
No function when pressing the hotel room key.
For all LED displays:
The room telephone is called by pressing the key twice.
Post-processing time of the agent (post-processing time)
This key can only be used by the agents of the mini call centre.
LED functions
The LED on the key indicates the respective status of the agent:
LED off:
58
The agent is free and can be called.
elmeg hybird
Function keys when connecting to a elmeg hybird or PABX
LED on:
System telephony
The agent is post-processing and cannot be called.
Key functions
The LED is switched off:
Pressing the key starts the post-processing time.
LED on:
Pressing the key ends the post-processing time.
LED on:
The post-processing time is restarted by pressing the button twice.
The LED is switched off:
Pressing the key twice has no function.
The second layer of the key function is assigned permanently and cannot be set up for any other functions.
Night operation
elmeg hybird
This key centrally switches all of the extensions configured for this. All existing external call assignments, the team
call assignments and the door assignments are switched together.
LED functions
The LED on the key indicates that night operation is activated:
LED off:
Night operation deactivated, the call assignments previously set up apply.
LED on:
Night operation activated (by key or calendar on elmeg hybird).
The LED on the „Night operation“ key lights up when night operation is activated using the calendar on elmeg
hybird. Pressing the „Night operation“ key deactivates night operation. The current „calendar function“ set is
applied again the next time operation is switched using the calendar.
Macro functions
The function keys on the system telephone can be set up as self-programmed function keys. These self-programmed
functions are referred to as macro functions (macros). Macros allow fixed sequences to be saved on a function key.
For example, you can save frequently used codes on the PABX or fixed operating sequences on your system telephone
as macros and then call these by pressing the corresponding function key.
function key with automatic LED functions (e.g. line keys) can only be programmed once for each sys Each
tem (system telephone and key extensions).
59
System menu on elmegPABX with system telephony Function keys when connecting to a elmeg hybird or
PABX
Cannot be configured using the system telephone on the elmeg hybird.
The system telephone is ready for connection to the internal S/U / IP connector of the PABXs. These PABX
provide a special menu with properties that are typical of the system. This menu and the performance features it
contains are managed entirely in the PABX.
description of the menu and the performance feature that is available in this menu can be found in the
The
user guide for your PABX.
Connection to a PABX
This performance feature is normally set in the PABX. If this is not possible, the setting can also be made on the
telephone. An AKZ must be entered first in order to do this.
Start as follows:
a
M
s
>
s
Configuration
PABX
PABX
Type-ID
Tel. drctry
External line
Numb. length
s
s
s
s
Type ID:
PABX type (softkey „Type-ID“)
Type 0: The PABX does not transmit a dialling code for incoming
calls. The dialling code must be entered in the system telephone.
Type 1: The PABX transmits a dialling code for incoming calls. No
dialling code must be entered in the system telephone.
Tel. drctry:
This setting determines whether the PABX telephone book or the
telephone book of the system telephone is called when pressing
the „Telephone book“ softkey.
Numb. length:
Maximum length of internal numbers that are allocated to other
extensions in the PABX.
PABX-type-nummer
>0
¬¬¬¬¬¬¬¬¬¬¬¬¬¬¬¬¬¬¬¬¬
Softkey selects pabx
phone directory?
No
yes
¬¬¬¬¬¬¬¬¬¬¬¬¬¬¬¬¬¬¬¬¬
PABX number length
>4
¬¬¬¬¬¬¬¬¬¬¬¬¬¬¬¬¬¬¬¬¬
External line:
Dialling code of the PABX
For external calls the dialling code is entered automatically before
the called party’s number.
Input external line
>
¬¬¬¬¬¬¬¬¬¬¬¬¬¬¬¬¬¬¬¬¬
60
phony
Function keys when connecting to a elmeg hybird or PABXSystem menu on elmegPABX with system tele-
Dial number from the phone book of elmeg hybird
In the configuration of the elmeg hybird, you can enter an external private number and a mobile number for each
user. These numbers are then shown in the display of the system telephone in the system phone book. (M) is inserted
after the mobile number and (H) after the home number.
Two two numbers cannot be viewed and set up via the phone book in the configuration.
61
Advanced configuration
Settings
This performance feature is not currently supported by elmeg hybird!
For a full configuration of the system telephone you can use one of the following options:
· PC configuration via the USB connector on the system telephone.
· PC configuration via the internal ISDN/Ethernet connection on a PABX.
· Advanced configuration directly on the system telephone. Thus must be enabled by entered a
code depending on the system telephone.
If the system telephone is recognised as a system telephone when connecting to a system PABX, only a restricted
configuration is permitted. Advanced configuration on the system telephone is only possible after entering a code.
If the system telephone is not recognised as a system telephone (e.g. when connecting to the NTBA or an internal
S-connector on a non-system PABX), the advanced configuration is activated automatically. It is then not necessary
to enter the codes to switch advanced configuration on or off.
Switching the advanced configuration on
Enter the code „**46 782 551 ##“ (Vanity-Format „**INSTALL1##“).
Activation lasts 30 minutes.
Deactivating the extended configuration
Enter the code „**46 782 550 ##“ (Vanity-Format „**INSTALL0##“).
If the system telephone is disconnected from the ISDN network (e.g. system telephone ISDN plugs unplugged, PABX
switched off or reset), then the advanced configuration mode is automatically switched off.
configuration described below underlines performance features and functions that can be set up fully
The
or partially only via the „Advanced configuration“.
Example:
s
The display shows the performance feature „Speed dialling“,
which can only be set up via the „Advanced configuration“ or via
the „Professional Configurator“. This performance feature is not
shown in the display in the „Normal configuration“.
Program tnumbs
Tel. drctry
VIP
direct
Settings
Headset
Cannot be configured using the system telephone on the elmeg hybird (only shown)!
If you have connected a headset to your system telephone, you can set automatic use of the headset for specific
operations.
Automatic use of headset enabled:
The connection is accepted over the headset after pressing a line key or with automatic call acceptance.
Automatic use of headset disabled:
The connection is accepted over the loudspeaker / hands-free system of the telephone after pressing a line key or with
automatic call acceptance.
62
Operation
Advanced configuration
Start as follows:
M
a
s
>
Setting
Headset
The cross next to a softkey indicates which setting is currently activated.
s
Press the corresponding softkey to enable or disable automatic
headset operation.
Use headset
automatically ?
No
ok
Operation
Start as follows:
M
a
s
>
s
Setting
Operation
Use variants
Keypad
Mute
Caller list
¬¬¬¬¬¬¬¬¬¬¬¬¬¬¬¬¬¬¬¬¬
s
Keypad / MFV:
Basic settings when connected („Keypad“ or DTMF„ softkey)
Select whether in the initial settings “DTMF„ or “keypad„ is possible during an ongoing call.
Use variants
DTMF
Mute
Caller list
s
Mute:
Dialling with receiver replaced („Mute“ softkey)
Set whether the microphone is activated with the handset in place
(e. g. hands-free calling), or whether it must be switched on by
pressing the softkey „speak“.
s
Caller list:
Press the „Caller list“ softkey. If you select „Only
ges“, this applies to the settings „Off“ or „On“.
With hands-free?
Speak
Mute
¬¬¬¬¬¬¬¬¬¬¬¬¬¬¬¬¬¬¬¬¬
Caller list LED?
messa-
Messages only
Off
On
¬¬¬¬¬¬¬¬¬¬¬¬¬¬¬¬¬¬¬¬¬
Block
Outgoing
Cannot be configured using the system telephone on the elmeg hybird.
Here you can specify which dial ranges you would like to set up.
Start as follows:
a
s
M
Only whitelist number:
Select „unrestr. nos.
s
s
t
s
Configuration
Inhibit
PIN
Outgoing
Only“
if you wish to enable all unre-
63
Advanced configuration
Block
stricted numbers for outgoing calls. If no unrestricted numbers
have been entered, no further calls can be made. Numbers specified as unrestricted have priority over restricted numbers.
inhib. outgoing calls?
unrestr. nos. Only
No
List
s
No:
Dial ranges switched off.
s
List:
The number entered in the list are restricted or unrestricted.
If you press the softkey twice, you can view the list.
List
Cannot be configured using the system telephone on the elmeg hybird.
The system telephone has a range of 7 whitelist numbers and 7 blacklist numbers for dialling.
Start as follows:
a
M
s
s
t
s
Configuration
Inhibit
PIN
List
Use the arrow keys to select the desired number or a free field and
confirm with O.
Then enter the new number or delete or edit an existing number.
Restricted/
unrestricted number
inhibit-6:
inhibit-7:0190
Free-1:01901
Free-2:
Free-3:
64
Acoustic
Configuring and setting the system telephone
Acoustic
Headset
If special support is saved in the system telephone for your headset, enter the corresponding type of headset.
e.g. the LED in the microphone of the „Firefly F142 N“ from Plantronics is switched through the system telephone.
Start as follows:
a
M
s
s
Acoustic
Headset
The cross next to a softkey indicates which setting is currently activated.
s
Press the corresponding softkey to set the type of headset that is
connected.
headset / Acoustic?
Plantronics Firefly
Default
GN Netcom 2100/2200
Silicomp
¬¬¬¬¬¬¬¬¬¬¬¬¬¬¬¬¬¬¬¬¬
Loudspeaker
Fix volume
Start as follows:
a
>
O
M
s
s
Acoustic
Loudspeaker
Press the arrow keys to set the volume. The bar in the display
shows the current status.
Confirm your entries with OK.
Speaker
vol.
- ©©©
{}
+
¬¬¬¬¬¬¬¬¬¬¬¬¬¬¬¬¬¬¬¬¬
Set volume temporarily
During a call you can adjust the volume of the receiver or the volume of the loudspeaker (if activated).
Start as follows:
g
M
Call
E
Press the arrow keys to set the volume.
Confirm your entries with ESC. If you confirm with the OK button instead of the ESC button, you will overwrite the current
value.
Loudspeaker
vol.
- ©©©
{}
+
¬¬¬¬¬¬¬¬¬¬¬¬¬¬¬¬¬¬¬¬¬
Set acknowledgement tone
You can set on your system telephone whether the acknowledgement tones are switched on permanently, never or in
the event of an incorrect entry. The acknowledgment tones are always active in the basic settings.
65
Configuring and setting the system telephone
Acoustic
Start as follows:
a
M
s
s
Acoustic
Acknowledgment tones
The cross next to a softkey indicates which setting is currently activated.
s
Press the softkey for the chosen function:
»No„: Acknowledgment tone never active.
»Yes“: Acknowledgment tone always active.
»only error tone„: Acknowledgment tone for incorrect
entry active.
Acknowledge signal ac
No
ok
Only error tn
¬¬¬¬¬¬¬¬¬¬¬¬¬¬¬¬¬¬¬¬¬
Setting call waiting
If you have enabled call waiting for your system telephone (see page 70), you can set the call waiting tone volume. You
can also choose whether a call waiting is signalled once or several times.
Start as follows:
a
s
M
s
s
Acoustic
Call waiting
The cross next to „retry˜“ shows that a call waiting is signalled
several times.
If you press the softkey again, a call waiting is only signalled once.
The checkmark next to „repeat“ is deleted.
Call wait. tone
Volume
repeat˜
s
Press the „Volume“ softkey.
O
Press the arrow keys to set the call waiting tone volume. The bar
in the display shows the current status.
Confirm your entries with OK.
Call wait. tone
vol.
{}
- ©©© - +
¬¬¬¬¬¬¬¬¬¬¬¬¬¬¬¬¬¬¬¬¬
Idle
Attention tone volume for the „Do not disturb“ function
You can set various options of the „Do not disturb“ function on your system telephone (see page 42). If incoming calls
are signalled with an attention tone when the „Do not disturb“ function is enabled, you can set the volume of this
tone.
Start as follows:
a
O
M
s
s
Acoustic
Idle
Press the arrow keys to set the volume. The bar in the display
shows the current status.
Confirm your entries with OK.
Idle tone volume {}
- ©©© - +
¬¬¬¬¬¬¬¬¬¬¬¬¬¬¬¬¬¬¬¬¬¬
66
Acoustic
Configuring and setting the system telephone
Receiver
Fix volume
Start as follows:
M
a
O
s
s
Acoustic
Receiver
Press the arrow keys to set the volume. The bar in the display
shows the current status.
Confirm your entries with OK.
Handset loudness
{}
- ©©© +
¬¬¬¬¬¬¬¬¬¬¬¬¬¬¬¬¬¬¬¬¬¬
Set volume temporarily
bg You lift the receiver or are on a call.
M
Press the menu key.
You can set the receiver volume by pressing the arrow keys. The
bar in the display shows the current status.
Handset loudness {}
- ©©© +
¬¬¬¬¬¬¬¬¬¬¬¬¬¬¬¬¬¬¬¬¬
E
Toreturntothenormaldisplayduringacall,presstheESCbutton.IfyouconfirmwiththeOKbuttoninstead of the ESC button, you will overwrite the current value.
Attention tone (announcement and simplex operation)
You can set the attention tone volume heard during simplex operation. The „Simplex operation“ setting applies to
announcements and simplex operation.
Start as follows:
a
M
s
Acoustic
O
Press the arrow keys to set the volume. The bar in the display
shows the current status.
Confirm your entries with OK.
>
s
Attention tone
Notice tone
volume
-Intercom
}
- ©©- +
¬¬¬¬¬¬¬¬¬¬¬¬¬¬¬¬¬¬¬¬¬¬¬
Announcement
Simplex operation
„Announcement“ and „Simplex operation“ menu options are not settings, but operate „see page 23/24)
The
the performance feature
Answering machine
You can set the acknowledgement tone volume on the answering machine.
67
Configuring and setting the system telephone
Acoustic
Start as follows:
a
M
s
>
Acoustic
O
s
Answering machine
Press the arrow keys to set the volume. The bar in the display
shows the current status.
Confirm your entries with OK.
Volume AnsMc ackn.}
tone
- ©©© +
¬¬¬¬¬¬¬¬¬¬¬¬¬¬¬¬¬¬¬¬¬
Deadline
Appointment call volume
You can set various appointments on your system telephone (see page 71) that are signalled acoustically and visually
when the specified date and time is reached. The volume used to signal the specified appointment can be set as
described below.
Start as follows:
a
M
s
>
s
Acoustic
O
Deadline
Press the arrow keys to set the volume. The bar in the display
shows the current status.
Confirm your entries with OK.
Appt. call volume{}
- ©©© - +
¬¬¬¬¬¬¬¬¬¬¬¬¬¬¬¬¬¬¬¬¬
Audio-Out
Functions via the audio output
The system telephone has an audio output (audio out). This output can be used for the acoustic functions of the
system telephone in parallel with the local loudspeaker. For example, you can connect external loudspeakers so that
an announcement can be heard throughout the office.
The following functions can be used via the audio output:
· Announcement, loudspeaker, hands free, call tones.
Start as follows:
a
M
s
Acoustic
s
Press the required softkey to enable or disable external output.
If a checkmark is displayed next to a softkey, this indicates that
the corresponding function is output over the audio-out connector. To switch off audio output, press the appropriate softkey
again. The checkmark next to the softkey is deleted.
>
s
Audio-Out
Setting for using
Audio Out
Answering machine
Message
Hands-free calling
Signaling tones
Speaker function
68
settings
Configuring and setting the system telephone
Loudspeaker playback from audio-in
When the system telephone is in the rest state, you can listen to audio signals from the input directly over the
loudspeaker on the system telephone. If your PC is not equipped with loudspeaker boxes, you can listen to MOH
announcements or Internet music using this method.
Setting the volume
Start as follows:
a
M
s
>
>
s
Acoustic
s
Switch on the loudspeaker setting.
Audio-In
Audio-In IdleVolume
©©©©©-Off©©©©
- ©©©- +
¬¬¬¬¬¬¬¬¬¬¬¬¬¬¬¬¬¬¬¬
<
Press the arrow keys to set the desired volume.
Audio-In IdleVolume
- ©©©© +
¬¬¬¬¬¬¬¬¬¬¬¬¬¬¬¬¬¬¬¬
settings
Direct call
Cannot be configured using the system telephone on the elmeg hybird!
You can set up automatic direct dialling in the system telephone so that when pressing any key (except the ESC key
and Menu key) a set number is dialled. If automatic direct dialling is enabled, only one connection to the specific
number can be established. If you want to establish a connection to another number, automatic direct dialling must
first be disabled.
Active automatic direct dialling on the system telephone is PIN-protected (see page 74). Automatic direct dialling
can only be disabled after entering this PIN. If the PIN is set to „0000“ (basic setting), the PIN does not have to be
entered and can be skipped by pressing the OK key.
When automatic direct dialling is switched on, the following functions are available:
· Automatic dialling of the specific number by lifting the receiver or pressing any key (except the
ESC key and Menu key).
· Receiving calls as long as these are not suppressed by the call filter.
· Signalling of preset appointments.
functions (e.g.: function keys, TAPI function or headset operation) are not possible when automatic
Other
direct dialling is enabled.
Set up number for automatic direct dialling
69
Configuring and setting the system telephone
settings
Start as follows:
a
t
O
M
s
s
s
Setting
Direct call
Call number
Enter the call number.
Example: »098765«.
Confirm your entries with OK.
Dir. call-in number
Direct cal>098765
¬¬¬¬¬¬¬¬¬¬¬¬¬¬¬¬¬¬¬¬¬
the system telephone on a PABX without automatic outside line, you must enter the dialling
Ifcodeyouofaretheusing
PABX before the speed dial number.
Enable automatic direct dialling
a
M
s
s
s
Setting
Direct cal
Yes
Automatic direct dialling is now active. In the second line of the
display you will see the speed dial number that is set up.
07:41
098765
Dir. call
¬¬¬¬¬¬¬¬¬¬¬¬¬¬¬¬¬¬¬¬¬
Disable automatic direct dialling
M
You will see the idle display when automatic direct dialling is disabled.
Press the menu key.
07:41
098765
Dir. call
¬¬¬¬¬¬¬¬¬¬¬¬¬¬¬¬¬¬¬¬¬
t
O
Enter the PIN (Example: »0000«).
Confirm your entries with OK.
Input PIN please
>****_
¬¬¬¬¬¬¬¬¬¬¬¬¬¬¬¬¬¬¬¬¬
s
Press the „Yes“ softkey to switch off automatic direct dialling.
End direct call-in?
No
ok
¬¬¬¬¬¬¬¬¬¬¬¬¬¬¬¬¬¬¬¬¬¬
Call diversion (call forwarding)
The system telephone enables you to be reached even if you are not in the vicinity of your telephone. You achieve this
by automatically forwarding your calls to another call number.
Call forwarding can be set up separately for each of the numbers entered. In order to be able to use call forwarding,
you can have set up at least one number.
The following settings are possible for each number:
70
»Delayed„
Call diversion delayed:
All calls for the number are signalled for the time defined in the exchange or in the PABX
before being forwarded.
»Busy„
Call diversion on busy:
Calls to a number are only forwarded if the system telephone is busy.
(E.g.: a connection and call waiting are not permitted or two existing connections)
settings
Configuring and setting the system telephone
»Direct„
Direct call diversion:
All calls for the number for which a permanent call forwarding is set up are diverted. Your
system telephone no longer rings when calls are received for this number.
You can configure delayed call diversion and call diversion on busy at the same time. If you have set up a fixed call
diversion, delete this before you set up a new (different) call diversion.
you are using your system telephone on a PABX, refer to the notes on call diversion (call forwarding) in the
IfPABX
user guide.
If you have connected your system telephone directly to the ISDN connector (NTBA), follow the corresponding instructions of the network provider.
Switch on call diversion
The following example describes how to set up a fixed call diversion for call number MSN-1.
Start as follows:
M
a
t
s
s
s
s
Setting
Call diversion
Immediately
MSN-1
Enter the number to which calls are to be diverted.
Example: »0123456789«.
Call forwarding direct
MSN-1>0123456789_
¬¬¬¬¬¬¬¬¬¬¬¬¬¬¬¬¬¬¬¬¬¬¬
¬
O
Confirm your entries with OK.
The call forwarding is registered. The three points in the bottom
right will start to blink alternately.
Call forwarding direct
MSN-1}0123456789
...
¬¬¬¬¬¬¬¬¬¬¬¬¬¬¬¬¬¬¬¬¬¬¬
¬
View current call diversion
When the system telephone is at rest, „U“ is displayed in the second line of the display which indicates that a call
diversion is set up. You can view additional information on the call diversion set up by pressing the „Info“ softkey.
Switch off call diversion
The following example describes how to switch off a fixed call diversion for call number MSN-1.
a
M
s
s
s
s
s
Setting
Call forwarding
Off
All
MSN-1
Special features for the Swiss version
The basic settings of the system telephone are set up for operation on the internal S-connector of a PABX. If you want
to use the system telephone on the NTBA or another PABX, the protocol for call diversion („Keypad“ or „ETSI“)
must be switched as follows.
Operation on the point-to-multipoint connection (NTBA)
a
M
s
s
Configuration
Service
t
Telephone PIN
O
>
s
s
Call
forwarding
Keypad
71
Configuring and setting the system telephone
settings
Operation on a PABX
M
a
s
s
Configu- Service
ration
t
O
>
Telephone PIN
s
s
Call
forwarding
ETSI
Call Waiting
Cannot be configured using the system telephone on the elmeg hybird.
If during a connection other calls for you are received, you are notified of other calls by the „Call waiting allowed“
setting. If the „Call waiting not allowed“ setting is enabled, the caller will receive the engaged tone.
The call waiting is signalled by an attention tone via the receiver and on the display. You can set up the call waiting
tone volume and can also choose whether a call waiting is signalled just once or several times (see page 64).
If the „Do not disturb“ function is active, the call is signalled as described for this performance feature. If you have set
up hands free for the active connection, waiting calls will only be signalled in the display.
The following settings for the call waiting are possible:
Start as follows:
a
s
M
s
Setting
Call waiting
Press the softkey under the chosen variant for call waiting. The
cross next to a softkey indicates which setting is currently activated for the selection in the line. If the settings differ, first choose the
variant in the first line and the function in the bottom line. Repeat
this process until you have reached the desired setting for all
variants.
Call waiting
enable?
internal=externalNo
ok
OK, extended
s
External, Internal
Internal=External:
You can choose which settings are to be changed for call waiting, only internal, only external or internal and external.
s
No:
No further calls are signalled either during an existing connection or when a connection is
being set up.
s
Yes:
Call waiting for only one extension is only possible, if:
there are only one or two active connections and no call waiting connection to your system
telephone.
s
Yes, Extended:
On your system telephone you can have up to 4 connections at the same time.
e.g. if there are two connections, a further two connections can be signalled by call waiting.
Display contrast
The contrast of the display can be set individually.
72
s
settings
Configuring and setting the system telephone
Start as follows:
M
a
O
s
s
Setting
Contrast
Press the arrow keys to set the contrast.
Confirm your entries with OK.
Display contrast
{}
- ©©©©©- +
¬¬¬¬¬¬¬¬¬¬¬¬¬¬¬¬¬¬¬¬¬
Deadline
You can set three different appointments on your system telephone.
· The set appointment is signalled daily.
· The set appointment is signalled once.
· The set appointment is signalled weekly at the time specified (date, time).
If the date and time of the appointment are reached, you are notified of this by acoustic and visual signals (with a fixed
melody). The volume used to signal the specified appointment can be adjusted (see page 66). A text can also be saved
for each appointment (max. 42 characters) that is displayed when the appointment is reached.
Press the ESC key to interrupt signalling for the appointment and continue later as a reminder. To end the signalling
of an appointment, press the OK button. An appointment is also signalled during a connection or if the „Do not
disturb“ function is set.
When the system telephone is idle, „T“ is displayed in the information bar of the display which indicates that an
active appointment is set up.
Activate appointment
In the following example, appointment 1 is set up as a weekly appointment.
Start as follows:
a
t
O
M
s
s
Setting
Deadline
O
Select deadline
Enter the time of the appointment.
Example: »0930«.
Confirm your entries with OK.
s
Weekly
Set appointment 1
Time>09:30
¬¬¬¬¬¬¬¬¬¬¬¬¬¬¬¬¬¬¬¬¬¬
t
O
Enter the date of the appointment.
In the example: „030606“.
Confirm your entries with OK.
Set appointment 1
Date>03.06.08
¬¬¬¬¬¬¬¬¬¬¬¬¬¬¬¬¬¬¬¬¬¬
t
O
Enter the information message for appointment 1 (max. 42 characters)
Example: »Telephone project meeting„.
Confirm your entries with OK.
Set appointment 1
Explanation for appoi1
Telephone project
Telephone
¬¬¬¬¬¬¬¬¬¬¬¬¬¬¬¬¬¬¬¬¬
modify the information message for an existing appointment, select this with the arrow
Ifkeysyouandwantthento only
confirm with the menu key.
73
Configuring and setting the system telephone
settings
Select appointment
M
a
s
s
Setting
Deadline
O
s
Off
Select deadline
Automatic call acceptance
Cannot be configured using the system telephone on the elmeg hybird.
Your system telephone can accept calls automatically without you having to lift the receiver or press the loudspeaker
key (Headset key). Automatic call acceptance is switched on or off using the function key assigned.
Start as follows:
M
a
s
s
Setting
Automatic call acceptance
The cross next to a softkey indicates which setting is currently activated.
s
Press the corresponding softkey to set the desired time for automatic call acceptance.
Time until call
accepted
5 seconds
?
immediately
10 seconds
¬¬¬¬¬¬¬¬¬¬¬¬¬¬¬¬¬¬¬¬¬
s
Set time
Cannot be configured using the system telephone on the elmeg hybird!
Start as follows:
a
M
s
>
s
Setting
t
Enter the time and confirm your entry with OK.
Time
Set time
O
Time>07:41_
¬¬¬¬¬¬¬¬¬¬¬¬¬¬¬¬¬¬¬¬¬
t
Enter the date and confirm your entry with OK.
Set time
O
Date>29.05.06__
¬¬¬¬¬¬¬¬¬¬¬¬¬¬¬¬¬¬¬¬¬
Call filter
This performance feature is not stored in the elmeg hybird.
The call filter allows specific calls to be passed or rejected based on the number transmitted.
You can enter up to five filter numbers (max. 26 digits) in the call filter. Filter numbers can be local area codes or
partial or complete numbers. When you enter „****“ you can include calls which do not transmit the number (caller
ID) in the call filter. Using the call filter, calls whose numbers, or beginning numbers concur with the filter numbers
entered in the system, can be rejected or accepted.
Rejected calls are saved in the caller list with a special flag. If the call was only signalled to your system telephone,
Busy is signalled to the caller after it has been rejected by the call filter. If you are a member of a team, the call is
signalled to other telephones in the team.
74
settings
Configuring and setting the system telephone
Call filter operating modes
»No„
All calls are signalled.
»reject„
Calls the number for which matches a saved filter number or starts with this number are
rejected. All other calls are signalled.
»pass„
Calls the number for which matches a saved filter number or starts with this number are
signalled. All other calls are rejected.
»All calls„
No calls are signalled to your system telephone.
Configure filter number
You can set up a new filter number or use a number already in the system telephone (redialling, phone book, VIP or
speed dial memory).
A new filter number is entered in the following example.
Start as follows:
aM
s
>
Setting
t
O
s
s
Call filter
New
O
Filter number
select
Enter the filter number. Example: »012345«.
Confirm your entries with OK.
s
New
Enter filter no.
>012345_
¬¬¬¬¬¬¬¬¬¬¬¬¬¬¬¬¬¬¬¬¬
Set up call filter operating mode
Start as follows:
a
M
s
>
Setting
s
s
Call filter
Incoming
The cross next to a softkey indicates which setting is currently activated.
s
To set the call filter to the desired operating mode, press the corresponding softkey.
Filter incoming
calls
?
All calls
No
forward
reject
¬¬¬¬¬¬¬¬¬¬¬¬¬¬¬¬¬¬¬¬¬
75
Configuration
settings
Start as follows:
M
a
s
Configuration
The display shows the configuration options. Pressing the desired softkey takes you to the next display.
Park code. Cannot be configured using the system telephone
on the PABX 2!
Configuration
Inhibit
}
MSN
Display
Charge
Call-Parking
Service
Park code, Costs
Cannot be configured using the system telephone on the PABX 2 (not shown)!
Block
Start as follows:
a
s
M
s
s
t
Configuration
Inhibit
PIN
Press the „Block“ softkey and enter the PIN for „Block“ (ex
works setting 0000).
Config. inhibit filter
PIN
Menu
PIN
(Password) of the system telephone
Various settings and operations on the system telephone are protected by a PIN (password).
· Menu access on the system telephone (see page 75)
· Disable automatic direct dialling (see page 68)
· Remote operation of the answering machine (optional module)
· Access to the „Service“ menu (see page ).
In this menu you can set up your individual PIN (0000....9999). Please make a note of the PIN. If you forget the PIN,
you will not be able to access all PIN-protected settings. In this case your retailer or the distributor.
Start as follows:
a
76
M
s
s
s
Configuration
Block
PIN
settings
t
Configuration
Enter the new PIN.
Example: »1234«.
Confirm your entries with OK.
O
Change PIN
>1234_
¬¬¬¬¬¬¬¬¬¬¬¬¬¬¬¬¬¬¬¬¬
Caution: After performing a reset to restore the basic settings (see page ) the PIN is also reset (0000).
Menu
Access to a menu with PIN:
This user guide describes how the access the menus without a PIN. If you set PIN protection for a menu, you can
access this menu as described in the example below.
Start as follows:
a
M
s
s
t
s
Configuration
Inhibit
PIN
Menu
Protect menu access on the system telephone by PIN
Using the PIN on the system telephone you an protect access to the individual menus on the system telephone
(„Configuration“, „Setting“ or „Number programming“) and the deleting of saved costs. After entering a
menu (e.g. Menu key and softkey „Configuration“) you must enter the PIN if access is protected.
Protection for menu access can be set separately for the menus „Configuration“, „Setting“ and „Number
programming“. The menus „Block“ and „Service“ are always protected by the system telephone PIN. If access
to the „Configuration“ menu is protected, the deletion of saved costs is also PIN-protected.
s
Press the „Configuration“ softkey, for example, to disable or
enable protection.
ªªªªªªªªªªªªªªªªªªªªª
Configuration
Setting
Program nos.
s
¬¬¬¬¬¬¬¬¬¬¬¬¬¬¬¬¬¬¬¬¬
If a cross is shown next to („Configuration“), protection is
enabled.
To switch off configuration protection, press the „Configuration“ softkey again.
Display
Call number
Cannot be configured using the system telephone on the PABX 2.
By using „Incoming“ and „Outgoing“ you can specify whether or not your call number is sent and the caller’s
number is displayed. If the function is enabled, this is indicated by a cross in the display (Example outgoing.
a
M
s
s
s
Configuration
Display
Call number
Call-Number transfer
Incoming
Outgoing
¬¬¬¬¬¬¬¬¬¬¬¬¬¬¬¬¬¬¬¬¬
77
Configuration
settings
Language
You can choose in which language the display is to appear.
Start as follows:
a
s
M
s
s
s
Configuration
Display
Audio
Press the arrow keys to see the languages that are available.
Press the softkey next to the chosen language. The display is immediately switched to the chosen language.
Which language? }
Italiano
Español
Deutsch
English
Français
Nederland
Character set
For certain languages, the Latin character set (Western Europe) is not sufficient for displaying characters. You can
choose which character set is used for your chosen language.
Start as follows:
a
s
M
s
s
s
Configuration
Display
Character set
Press the arrow keys to see the character sets that are available.
Press the softkey next to the chosen language. The display is immediately switched to the chosen language.
Standard character
Greek
Cyrillic
Standard
Call
Set call and cost display
Start as follows:
a
M
s
s
s
Configuration
Display
Concersation
Conservation display
Duration
Conversation
End
¬¬¬¬¬¬¬¬¬¬¬¬¬¬¬¬¬¬¬¬
s
s
78
Conversation:
Setting the call display.
The following call displays are possible:
»date+time„, “„Tel.numb.
only“, „Tnumb+Time“
or „Tnumb+Charge“.
Duration:
Setting the call duration display.
The following types of call duration display are possible:
»Always„: During a call only the duration is displayed.
Normal Display
Tel.numb. only
date+time
Tnumb+Time
Tnumb+Charge
settings
Configuration
»Never“: Possible costs are displayed during a call. The duration
is never displayed.
»for cost„: Possible call charges are displayed. If no cost information is available, the call duration is displayed.
Conversation time
display
?
Always
for Charge
Never
¬¬¬¬¬¬¬¬¬¬¬¬¬¬¬¬¬¬¬¬¬
s
End:
Displaying information at the end of a call.
After a call is terminated, information about this connection (e.g.
call length or costs incurred) can be seen in the display.
Info at end of call?
No
ok
¬¬¬¬¬¬¬¬¬¬¬¬¬¬¬¬¬¬¬¬¬
Park code (basic setting)
Cannot be configured using the system telephone on the elmeg hybird.
In the basic setting, the park code is set to 55. You can modify the preset park code to a single digit or double digit
code.
Start as follows:
a
t
O
M
s
s
Configuration
Park code
The basic setting for the park code is displayed: »55«.
Enter the new park code and confirm with OK.
Standard call-parking
Call-Parking>55
MSN (numbers)
Cannot be configured using the system telephone on the elmeg hybird (only shown).
You can enter up to 10 call numbers (MSN) in your system telephone. By entering a number in your system telephone
you indicate that your system telephone is reachable when dialling with this number (MSN). If you enter more than
one call number in your system telephone, your system telephone will ring when dialling with any of the entered
numbers.
You must enter the internal number of your system telephone on the PABX into the internal S/U IP connector on a
PABX. Please see the information on the user guide of your PABX.
If you call an extension, you can select a specific number (MSN) that is transmitted to the called extension (e.g. for
separate accounting). If you do not select a specific call number, the first number entered in the system telephone
(MSN-1) is used.
The setting of a call number (MSN) is described below using the example of the call number „
MSN-1“.
Enter and view number (MSN)
Cannot be configured using the system telephone on the elmeg hybird (the number is only shown).
79
Configuration
settings
The numbers of the system telephone can only be entered via the Professional Configurator of the WIN-Tools
CD-ROM. On the system telephone you can view the numbers that are set up. You can enter the number of the MSN
after entering a code using the „Advanced Configuration“ (see page 77).
Start as follows:
M
a
O
s
s
s
s
Configuration
MSN
MSN-1
Call number
The number set up is displayed.
Exit the menu by pressing OK.
Programm dial number
MSN-1>222
¬¬¬¬¬¬¬¬¬¬¬¬¬¬¬¬¬¬¬¬¬
Other settings (e.g. call melody, volume, name) can only be made if the number is already set up.
Set up call melodies and volume
For each call number you can choose its own call melody and volume. You can set up the ring tone and volume for
internal calls separately on the internal connector of the PABX / elmeg hybird.
10 different melodies are saved for the ring tone in the basic settings of the system telephone. These 10 melodies
cannot be changed. Another 10 melodies can be loaded onto the system telephone via a PC. You can create your own
melodies on the PC using the Sound-Manager on the WIN-Tools CD-ROM and then load these onto the system
telephone. These melodies are saved in the system telephone as melodies 11 to 20. The installation directory of
WIN-Tools contains prepared melody profiles that you can load onto the system telephone.
that is not saved in the system telephone is assigned to a number (MSN), the first melody sa Ifveda callin themelody
system telephone is used.
Set call melodies (tone)
Start as follows:
M
a
O
s
s
s
s
Configuration
MSN
MSN-1
Tone
Press the arrow keys to set the desired melody. The bar in the display shows the current status.
Confirm your selection with OK.
s
s
or
External
Internal
Select melody {}
MSN-1,Internal
3
©©©©-©©©©©©-
¬¬¬¬¬¬¬¬¬¬¬¬¬¬¬¬¬¬¬¬¬
Set volume
Start as follows:
a
>
O
M
s
s
s
s
Configuration
MSN
MSN-1
Volume
Press the arrow keys to set the desired volume of the call melody.
The bar in the display shows the current status.
Confirm your selection with OK.
s
External
s
or
Internal
Select call signal
MSN-1
{}
- ©©©© +
¬¬¬¬¬¬¬¬¬¬¬¬¬¬¬¬¬¬¬¬¬
80
settings
Configuration
In addition to a steady volume, you can also set up an increasing ring tone. The volume of the ring tone is increased
automatically whilst signalling. As the volume increases, „©©©©©©“ is displayed.
Assign name to call number (MSN)
Cannot be configured using the system telephone on the elmeg hybird (the name is only shown).
You can assign each number a name of max. 8 characters.
Each key on the keypad has on it three or four letters of the alphabet. If you press a key several times, you will see the
characters displayed in sequence . If two consecutive letters are located on the same key of the keypad, after entering
the first letter press the right arrow key and then enter the following letter.
Start as follows:
M
a
t
s
s
s
s
Configuration
MSN
MSN-1
MSN Name
Enter the desired name.
Example: »private„.
Confirm your entries with OK.
O
Own MSN esignation
MSN-1>Privat
¬¬¬¬¬¬¬¬¬¬¬¬¬¬¬¬¬¬¬¬¬
Presetting a number for forwarding calls
If you do not wish to accept a call, you can forward this call directly to another call number (see page 20).
If you frequently forward calls to the same number, you can preset this number in the system telephone. If you then
want to forward a call, you will first be offered the preset number.
This preset is separate for each of the numbers entered in the system telephone.
Start as follows:
M
a
t
s
s
s
s
Configuration
MSN
MSN-1
transfer
Enter the desired call number. Press the C key to delete an existing
number.
Example: »0123456«.
Confirm your entries with OK.
O
Call forward. number
MSN-1>0123456_
¬¬¬¬¬¬¬¬¬¬¬¬¬¬¬¬¬¬¬¬¬¬
Enter specific PIN for a number (MSN)
You can assign a separate PIN to each number on the system telephone. Using this PIN you can release or block a
number (MSN) for outgoing connections.
In the basic settings, all MSN-specific PINs are set to „
0000“.
Start as follows:
a
t
O
M
s
s
s
Configuration
MSN
MSN-1
Enter the specific PIN for „MSN-1“ (basic setting „0000“). If you
have set up the MSN-specific PIN, you can access this menu using
the individual PIN on the system telephone.
Confirm your entries with OK.
>
s
PIN
Input PIN please
>****_
¬¬¬¬¬¬¬¬¬¬¬¬¬¬¬¬¬¬¬¬¬¬
81
Configuration
t
O
Enter the 4-digit specific PIN for MSN-1.
Example: »1234«.
Confirm your entries with OK.
settings
Change PIN
MSN-1>1234_
¬¬¬¬¬¬¬¬¬¬¬¬¬¬¬¬¬¬¬¬¬¬
82
elmeg IP-S400 configuration
Configuration
elmeg IP-S400 configuration
If you have only pressed O when switching on the system telephone (see page 8) instead of entering the MSN, you
can complete the log-on and assign this MSN to the system telephone.
©GUEST© 10:27
{}
You recognise the incomplete log-on in the title bar of the display
on your system telephone.
Start as follows:
M
a
t
O
s
s
s
s
Configuration
MSN
MSN-1.. MSN10
Call number
Enter the MSN. „12" in the example.
This MSN must be assigned as an “internal number" during the
PC configuration of the system telephone or assigned subsequently. The MSN is „inactive“ until the same MSN (internal
number) is entered during PC configuration.
Program MSN-1
> 12
Logon
The following entries are optional and are used for system security. They are not mandatory.
On page 8describes the simple login process over DHCP. If a PIN has already been entered under „Allow
configuration“ and the „log-in name“ has been entered under „Extension name“ for log-on in the „Professional
Configurator“, these entries must also be entered in the elmeg IP-S400. As name you must enter the MSN (only digits
are permitted). This can be carried out using the „Professional Systel-Configurator“ or the system telephone. If you
enter the „IPS-Log-In PIN“ in the system telephone first, you must then also enter this in the PABX configuration.
Entry of IPS Log-In PIN
Start as follows:
a
t
O
M
s
s
s
Configuration
MSN
MSN-1...MSN10
Enter the system telephone PIN under „PIN“. The entry may only
consist of digits. In the example (basic setting) „0000".
Confirm your entries with OK.
>
s
IPS Log-In PIN
Input PIN please
> 0000
Entry of the „Sys-Server Log-In PIN from IPS“
When entering the PIN, you must take note of the different names:
Name of PIN in the configuration with the
system telephone:
Login PIN.
Name of PIN in the configuration using the
„Professional System Configurator“ on the
system telephone:
Login PIN
Name of PIN in the setup of the extension
using the „Professional System Configurator“ on the
PABX:
83
Configuration
elmeg IP-S400 configuration
PIN
t
O
E
Enter the Log-In PIN. If you press the 0 key several times, you are
shown the special characters available and their current position
on the keypad. Each time you press the 0 key, you are shown up to
4 layers. Then press one of the keys 0 to 9 to enter the character
displayed. Wait until the cursor has moved on to the next field before entering the next character. Only the current character can
be seen and the characters already entered are covered with an asterisk.
Example: Press the 0 key once followed by the 6 key, the @
character is applied.
Please enter
login PIN
MSN-1> *@_
Please enter
login PIN
1=! 2=% 3=?
4=
5=: 6=@
7=, 8=. 9=0
Confirm your entries with OK.
press the E key.
· System telephone and PABX are synchronised.
Note that registration and synchronisation make tame some time!
is no connection to the PABX (no LAN connection or the system telephone is not registered), the
Iftimetherein the
display is replaced by „
“.
©©-/ /©‰
elmeg IP-S400 Configure without DHCP
On page 8 describes the simple login process over DHCP. If the settings of your PABX differ, you can enter these here.
You can query the data and IP addresses or modify these, if DHCP is disabled, when the IP system telephone is logged
in over DHCP.
Start as follows:
a
s
M
s
s
Configuration
TCP/IP settings
Press the desired softkey.
Main TCP/IP and
Network settings
Sys-Server
DHCP Server
Gateway
Own IP-address
Netmask
Sys-Server:
s
If the gateway of the PABX is also the Sys server, you do not have to make any entries here. Otherwise you must press
84
elmeg IP-S400 configuration
Configuration
the „No“ softkey and enter the IP address of the Sys server here. Or the IP address of the gateway if connected directly
to a PABX.
Act gateway as Sys
server too (IP)
?
No
ok
DHCP Server:
s
Here you can choose whether your system telephone is assigned its IP address automatically by the system („On“) or
whether you want to carry out the configuration manually („Off“).
Use automatic
IP address setting?
Off
On
Gateway:
s
If „DHCP“ is not active, you must enter here the IP address of the network in which the IP system telephone is located.
IP address of
gateway
INA>192.168.1.250!
Own IP Address:
s
If you have selected „Off“ under „DHCP“, you must enter here the IP address of the system telephone according to the
default from the PABX or the network in which the IP system is located.
Own IP address (IPSPhone)
INA>192.168.1.51
Net mask:
s
The netmask/subnet mask is obtained from the PABX in the „DHCP“ setting. If „DHCP“ is disabled, you can make the
appropriate entries here.
Subnet mask
INA>255.255.255.0
85
Number programming
elmeg IP-S400 configuration
Programming of function keys
Start as follows:
a
s
M
s
s
Number prog.
Speed dialling
Select the required menu using the softkeys.
Program keys
T400
function
New
macro
list
List, function
Cannot be configured using the system telephone on the elmeg hybird (not shown)!
The „T400" menu is only available when the key extension is connected.
s
Function:
Function keys (softkey „Function“)
First select a function key and confirm with OK.
function new prog {}
1_:.................
2_:.................
3_:.................
4_:.................
¬¬¬¬¬¬¬¬¬¬¬¬¬¬¬¬¬¬¬¬¬
O
You can then select the function for the key.(line key, etc). Other
entries may be required depending on the type of function selected, e.g. the entry of the call number for line keys.
Confirm your entry with the OK key.
Function for button
1_
?
......Extension key
Line key........
.........MSN
assignment
day/night all.......
¬¬¬¬¬¬¬¬¬¬¬¬¬¬¬¬¬¬¬¬¬¬
Function keys and other entries
Function
MSN assignment
Carrier/provider code
Call filter
Call diversion
Display
»MSN
other entries
assignment„
Index of number (MSN-1…MSN-9)
to be transmitted.
»msn-assignment„
Index of number (MSN-1…MSN-9)
and code of the required provider
(e.g. 01033).
»Call
»Call
filter„
forwarding„
Index of number (MSN-1…MSN-9),
Type of cal diversion (1 - fixed, 2 delayed, 3 - on busy) and
Destination of the call forwarding.
Direct call
86
»Direct
call„
elmeg IP-S400 configuration
Headset
Automatic call acceptance
User key
Number programming
»Headset„
»Automatic
»User
call acceptance„
on/off„
Index of number (MSN-1…MSN-9)
for which calls are to be accepted automatically.
Index of number (MSN-1…MSN-9)
to be used for other operations.
87
Macro
Macro programming
Macro programming
Only free keys can be configured over the system telephone on the elmeg hybird.
s
Macro:
Programming the macro keys („macro“ softkey)
First select a function key. First enter the name of the macro (max.
20 characters). You can then enter the individual macro commands.
The command chain of a macro can consist of up to 26 characters.
A command of a key press always consists of two characters. Therefore you can link up to 13 commands together or 7 commands /
key presses with another 12 digits, for example.
Commands and keys for macro programming
A macro consists of various commands or key presses that are combined to form a command chain and are saved on
a function key. When pressing the function key, the system performs the individual commands of the macro in
sequence.
The following commands are available for macro programming:
88
»B„
Initiate connection (similar to lifting the receiver).
»D„
Terminate connection (similar to replacing the receiver).
»ELSE„
Alternative command, if a requested condition (e.g. „IFLA“ or „IFLB“) is not met.
»IFLA„
»IFLB“
Only runmacroif LEDonthe firstkeylayerisdisabled („IFLA“)or flashes(„IFLB“).Ifthe condition isnot
met, the macro is interrupted or continued after the command „ELSE“ (if any).
»K„
Keypad sequence; All following characters/digits are transmitted as a keypad sequence.
»LA„
Switch off LED.
»LB„
LED flashes.
»LE„
Switch on LED.
»LZ„
Switch on LED for two seconds.
»N„
Wildcard for a call number.
If a number is entered before executing the macro (e.g. or chosen from the system telephone), this number
is used instead of the wildcard in the macro.
»P„
Pause (1 second) in the command chain (between two characters/commands).
»RE„
Establish rest status of the system telephone.
When there is an active connection on the system telephone, the execution of the macro is interrupted at
this point.
»SE„
Switch on loudspeaker (normal volume).
»SA„
Switch on loudspeaker (quiet volume).
»T„
MFV sequence: All following characters/digits are transmitted as MFV suffix dialling.
»TS„
Test a connection.
Once the active connection has been terminated or an outgoing call is not connected (e.g. the extension is
busy), the execution of the macro is interrupted at this point.
Macro programming
Macro
If you want to integrate a key on the system telephone into a macro, press the corresponding key whilst programming
the macro (this is shown in the display with „s5" for example). Keys that are required to control the system telephone
during macro programming (e.g. save, change input position, delete entry or cancel) can only be integrated into a
macro using the commands described below.
»c„
Press the C key.
»esc„
Press the ESC key.
»f„
Press the menu key.
»«
Press the „left“ arrow key.
»ok„
Press the OK key.
»«
Press the „right“ arrow key.
»r„
Select second layer of function keys (press key twice).
Key assignment for macro programming
Key
1. Printing
1
2
3
4
5
6
7
8
9
0
*
#
1
2. Printing
3. Printing
2
B
c
3
D
ELSE
4
IFLA
IFLB
5
6
menu
7
8
T
4. Printing
5. Printing
6. Printing
7. Printing
LB
LE
LZ
IN
SA
SE
esc
K
LA
N
ok
P
r
TS
9
0
*
#
89
Macro
Macro programming
Examples for programmed macros:
90
Function
Command chain for the macro
Configuration key for a call number
(E.g.: 012345 and switch on LED for two seconds)
RE,B,0,1,2,3,4,5,LZ
Set up appointment
RE,menu,s3,s5
Read new text messages (UUS1)
RE,,s6,s6,s2
Block system telephone for outgoing connections
»N„: Password of the system telephone
(Key for layer 1, switch on LED)
RE,menu,s5,s1,N,ok,s5,s4,LE,esc
Remove block on system telephone for outgoing connections
„N“: Password of the system telephone
(Key for layer 2, switch off LED)
RE,menu,s5,s1,N,ok,s5,s2,LA,esc
Add phonebook record
RE,menu,s6,s2,s5
Enable/disable rest state „Yes“ and LED display
RE,s5,IFLA,s5,ELSE,s2
CTI / TAPI via the USB connector on the system telephone
System telephone and PC
If the system telephone has no USB interface, the functions cannot be used via USB.
CTI / TAPI via the USB connector on the system telephone
The abbreviations CTI and TAPI refer to the standard interface for telephony applications defined by Microsoft
under Windows. The system telephone and your computer can co-operate directly.
CTI: Computer Telephony Integration
TAPI: Telephony Application Programming Interface
This allows you to dial directly from TAPI-compatible Windows programs, and the calls can be used by the software.
Consequently, setting up a connection via TAPI is considerably faster than with normal calling. TAPI, with its
standard Microsoft interface, has the advantage that it is already supported by a large number of programs and this
number is growing all the time.
TAPI functionality on the system telephone is available as soon as it is connected to the PC and the TAPI
The
driver has been installed and does not require any further activation on the system telephone.
CTI via the USB connector on the system telephone
You do not require an additional ISDN card on your PC. The system telephone has an integrated USB connection to
connect with the PC. Depending on the programs and drivers installed, you can surf the Internet, transfer data, send
and receives faxes or set up an answering machine on the PC using the system telephone.
CAPI: Common Application Programming Interface
· To ensure the continuous reachability of the system telephone, only one B-channel is available for
all applications. This B-channel can be used in turn by the applications.
· The same numbers (MSN) cannot be used in these PC applications as in the system telephone.
· If a CAPI application is enabled and used on the PC, this is displayed on the system telephone
with „ONLINE“. During this period, only one B-channel is available for telephony.
Fax and data applications (not included)
By using a fax program, you can send or receive faxes from or using various applications. With a data transmission /
file transfer program you can transfer files from one PC to another or receive files from a PC. To ensure that these or
other applications can be used in conjunction with your system telephone, the following drivers must be installed:
· USB driver and CAPI driver of the system telephone
Internet Access
You can surf the Internet using the system telephone. To do this, you can use the software from your provider (e.g.
T-Online, AOL) or the DCN network of your Windows operating system. To ensure that you can surf the Internet
with the system telephone, the following drivers must be installed:
· USB driver and CAPI driver of the system telephone
· NDISWAN driver (only required for access over the DCN network)
Audio applications via the audio connectors on the system telephone
The system telephone has one input (2) and one output (3) for audio signals. These connectors are designed for 3.5
mm stereo jack plugs. When using the optional answering machine module, you can connect the system telephone
over this connection to the sound card on your PC in order to transfer announcements to the system telephone or to
save recorded messages to the PC.
91
System telephone and PC
Content of WIN-Tools CD-ROM
You can also use specific functions on the system telephone from the audio-out output (see page 66).
Content of WIN-Tools CD-ROM
This user guide provides a brief overview of the software included. The software programs are not described in this
user guide. If you encounter difficulties or queries whilst using the program, you can refer to the online help for the
individual programs. All programs offer extensive online help.
Program for setting up the system telephone (WIN-Tools)
· Professional Configurator:
Setting and configuration of the phone’s individual performance features are done in the configuration process. You can set up MSN extension numbers or program VIP keys and function keys.
You can also configure the phone’s displays, set the volume of various signals, select dialling options (when the phone is connected to a PABX) or set the parameters for dial ranges and charge
logging.
The Professional Configurator is also used for programming an optional answering machine or
the optional n keyboard extensions.
· Phone Book Manager:
Use the phone directory manager to create new entries for the phone directory (see page 30) or
assign a special dial tone (VIP dial tone) to individual numbers. With the import / export function
you can also import data from other programs or export data for further processing.
· Download Manager:
Use this program for loading new firmware for the telephone with your PC. Anew firmware is
loaded via the phone’s PC port.
· Sound Manager:
You can use the sound manager to create your own call signalling melodies at the PC and then
load these melodies into your telephone.
data transmission, the system telephone is reorganised internally (e.g. phone book data). This process
After
runs automatically and may take several minutes. During this time, you will not be able to access several
functions on the system telephone (e.g. phone book).
Application program
· Adobe Acrobat Reader
Program for viewing and printing PDF documents.
Driver
· CAPI-driver(Common ISDN Application Programming Interface)
Links the telephone to programs that provide data communication functions.
For example CAPI software (not included in the package)
· NDISWAN driver (NDIS - Network Device Interface Specification / WAN - Wide Area Networking)
Integration of the telephone into the PC as a special ISDN network card
e.g. Connection to the Internet via the Windows dial-up network
· TAPI driver (Telephony Application Programmer’s Interface)
Interfacing to programs that provide computer-aided telephony.
e.g. Windows dialling assistant, CTI software (not included in the package)
92
Installing the program from the CD-ROM
System telephone and PC
· USB driver (Universal Serial Bus)
Recognition and control of the phone after connecting to the USB port of the PC.
e.g. WIN-Tools programs
Important note on installing the CAPI driver:
Before installing the new driver, you must remove any existing CAPI drivers (e.g. the driver for an installed ISDN
card), as Windows only supports one installed CAPI.
Refer to the operating instructions for the device concerned, or for the operating system, for details on removing
drivers.
some cases, the inserted ISDN card make have to removed from the PC in addition to removing the
Indriver.
Installing the program from the CD-ROM
Microsoft Windows operating systems are currently supported for connecting a PC to the system tele Only
phone via the USB connector.
PC requirements:
· IBM or 100% compatible PC.
· Pentium processor or similar processor with min. 133 MHz clock speed
· Min. 32 MB RAM
· CD ROM drive.
· Free USB connector.
· Operating system Windows 98SE / ME / 2000 / XP.
· Min. 80 MB free space for the installation.
Installation sequence
· Start your PC.
· Place the CD-ROM provided in the CD-ROM drive of your PC.
· Wait until the program is launched automatically. If autostart is disabled on your PC, run the file
„setup.exe“ directly from the directory on the CD-ROM in Windows Explorer (double-click the
file) or select the Run" option in the Windows Start menu.
· After executing the file, the start screen of the CD-ROM will appear.
· Install the driver and program in the following sequence:
CAPI driver
WIN-Tools programs
TAPI driver
CTI software (not included in the package)
CAPI software (not included in the package)
NDISWAN driver
93
System telephone and PC
Installing the program from the CD-ROM
· Set up the USB connection between the system telephone and PC as described on page 7. The PC
automatically recognises the connection system telephone.
connecting the system telephone to a PC for the first time, the device driver installation starts auto When
matically. The device driver can be found in the directory on the CD-ROM. Follow the instructions on the
screen.
· You can now use the system telephone in conjunction with the installed PC programs.
94
Installing the program from the CD-ROM
Basic system telephone settings
· Name of system telephone matches serial number of system telephone.
· Display language: German
· Country-specific settings: German
· No numbers (MSN) saved.
Call melody volume: Level 3, call melody: Number 1; no forwarding or call diversion numbers, no
MSN name, MSN cost account deactivated, MSN PIN: 0000, MSN not blocked for dialling
· No entries in the caller/message list and the redial list.
· No entries in phone book or in VIP memory.
· Function keys not programmed (speed dial, functions, macros).
· 10 call melodies saved. 10 free memory slots for other melodies.
· No UUS1 text messages saved.
Text messages can be received from internal (PABX) and external senders.
No automatic sending of text message with a call.
· Do not disturb is switched off.
· Display contrast: Level 4
· Loudspeaker volume: Level 4 Receiver volume: Level 2
· Acknowledgement and error tones active
· Appointment call volume: Level 3
· Attention tone volume for do not disturb: Level 3
· Waiting tone volume: Level 3, waiting tone retry activated
· No output of audio signals via the audio-out connector
· The call number is transmitted for incoming and outgoing connections (CLIP / COLP).
· Display for telephone number and costs set up. The call duration is displayed if no cost information is available.
· Information is displayed at the end of the call (e.g. duration)
· Cost information: Tariff 0.062 and currency EUR
· Call waiting deactivated.
· Appointments deactivated. No appointment information saved.
Date: 11.11.02 / Time: 11:11
· Time for automatic call pick-up: immediately
· Headset use not set up. Headset type: Default
· Dialling status during a connection: Tone dialling (MFC)
· Microphone switched off after dialling with receiver replaced.
· Call filter deactivated, no filter number saved.
· Automatic direct dialling deactivated, no speed dial numbers saved.
· System telephone PIN: 0000
95
Basic system telephone settings
· Dial control deactivated, no blacklist/whitelist numbers saved.
· Menu access not protected by PIN.
· PABX dialling code: button is pressed.
· Length of internal extension to PABX: 4
· Park code: 55
Technical Data
Dimensions (W x H x D):
approx. 255 mm x 180 mm x 100 mm
Weight:
approx. 0,8 kg
Temperature range
Operation:
Storage:
+5°C … +40°C
-25°C … +70°C
S-connector
Length of connecting cord:
approx. 6 metres
S-connector:
Protocol DSS1, point-to-multipoint connection
Channel structure:
B+B+D
Power consumption:
<=1 Watt
U-connector (CS410-U)
Length of connecting cord:
approx. 6 metres
U-connector:
DSS1 protocol, point-to-point
Channel structure:
B+B+D
Power consumption:
<=1 Watt
Output:
S-connector, DSS1 protocol, point-to-multipoint connection
Output power supply:
max. 1 Watt
USB connector
Length of PC connecting cord: approx. 3 metres
Terminal:
Self-powered terminal
Speed class:
Full Speed
USB standard:
1.1
Audio connectors
Length of PC audio cable:
96
approx. 2.5 metres, 3.5 mm stereo jack plug
Technical Data
Technical Data
Basic system telephone settings
Ethernet connection
Ethernet connection interface
Cat.5 approx. 3 metres
97
Answering machine
Firmware > V4.20 is required on your system telephone to operate this module.
The answering machine module allows you to expand your system telephone with a digital answering machine
offering numerous functions. This documentation describes how to use the module in system telephones elmeg
CS410and CS410-U. Support for the answering machine module is already prepared in the software for this system
telephone
However, the scope of functions offered by the answering machine depends on the software used on the system
telephone. The functions described in this document are based on the latest software version of the system telephone
at the time of writing or printing.
Answering machine functions
· Up to 48 minutes recording capacity for normal voice recordings.
· Special answering machine button for switching on or off.
· Advanced functions of the call LED. This LED lights up in another colour if the answering machine is switched on and flashes when a new message is available.
· 10 announcements, 4 information messages, forwarding message, termination message and
message when the answering machine is full.
· Recording of dictations.
· Individual configuration and consultation of recorded messages for each call number (MSN).
· Time control of announcements for each call number (daily) or for the call numbers „MSN-1“ to
„MSN-3“ (weekly profile).
· Adjustable recording quality of announcements (normal, good, excellent).
· Recording calls.
· Listening in during recording.
· Remote access protected by PIN.
· Automatic notification (retransmission) for recorded calls via call, UUS1 or SMS.
98
General configuration
Answering machine
General configuration
Switch answering machine on/off
a
To switch the answering machine on or off, press the answering machine button (top right softkey). The
call LED lights up when the answering machine is switched off.
can only switch on the answering machine if call recording has been activated for at least one number
You
(MSN) (see page 104).
Setting listening in
You can listen in when a message is being recorded over the telephone loudspeaker. You can set this function in the
configuration for all incoming calls or during a recording for individual calls.
Start as follows:
M
a
>
Answering machine
Answ. machine menu
{}
Listen
Messge. contin.
Delete texts
Remote polling
Press the „Listen in“ softkey. Listening in is switched on or off.
If a cross („®“) is shown next to the softkey, the function is activated. Press the softkey again to deactivate the function
again. The cross is deleted.
Automatic notification (retransmission) of recorded messages
You can set the answering machine so that it forwards calls to a preset number when a certain number of recorded
calls (messages) is reached.
Start as follows:
a
M
>
Answering machine
Retransmission
If a cross („®“) is shown next to the softkey, the function is activated.
The first line shows the current setting („Off“).
Messge. contin.:
Off
Number of calls:
to>_
10
Off
save
back
t
Usethe keypadonthe telephone to enterthe number(max.20 digits) to which callsareto beretransmitted.
If a number already exists, delete this by pressing the left arrow button.
99
Answering machine
General configuration
Press the „Number of calls:“ softkey to set the number of calls (messages)at which automatic retransmission should start. The various options are displayed in turn by pressing the softkey.
E.g.: »1„, “2„, ...., “10„, “15„, “20„ or “30„.
Pressthe„Off“softkeytodeactivateretransmission.Thevariousoptionsaredisplayedinturnbypressing
the softkey.
»On,announcement„
Retransmission is carried out by initiating a call with the forwarding message or a
request tone. The new messages can then be listened to.
»On,message/SMS„
You are notified of the new message by SMS.
»On,message/UUS„
You are notified of the new message by UUS1.
Press the „Save“ softkey to apply the new settings. Press the „Back“ softkey to exit the menu without saving the settings.
automatic notification is switched on, this is indicated on the display by „ “ when not in use. The costs in Ifcurred
from automatic notification are allocated to the ISDN connection (the MSN) to which the telephone
x
is connected.
Retransmission process
If the set number of recorded messages is reached, automatic notification is initiated to the preset number (call,
UUS1 or SMS). Following successful retransmission, the counter for the number of recorded messages is deleted.
The next notification is sent when the set number of messages is reached.
If retransmission cannot be completed (e.g. the extension is busy on a call), up to five retries are made. After five
unsuccessful retries, retransmission is aborted and restarted when the next new message is received.
Save text message for retransmission (SMS / UUS1)
Start as follows:
>
a
t
O
Messages
Text on retransmission
Enter the text. The length of the text is limited to 160 characters
(SMS) or 31 characters (UUS1).
Example: »Five new messages on your answering machine at home.„.
Confirm your entries with OK.
Text on forwarding
Answering machine
SMS>Five new messages
on your answering
machine at home
¬¬¬¬¬¬¬¬¬¬¬¬¬¬¬¬¬¬¬¬¬¬
If no text is saved, a standard text saved on the telephone is used to send the text message (SMS or UUS1).
Delete all calls, all dictations or all texts
You can delete calls, dictations or all texts on the answering machine.
Start as follows:
a
M
Answering machine
100
>
Delete texts
General configuration
Answering machine
Choose whether you want to delete calls, dictations or all texts on
the answering machine by pressing the respective softkey.
E.g.: »Delete all?„.
Delete texts
Delete all texts
Delete all calls
Delete all dictations
back
If you want to delete anyway, press the „Yes“ softkey.
If you do not want to delete the saved calls, press the „no“ softkey.
Delete all calls?
No
Yes
¬¬¬¬¬¬¬¬¬¬¬¬¬¬¬¬¬¬¬¬¬¬
If you delete all texts, this will also delete all of the settings on the answering machine. This resto Caution:
res the basic settings on the answering machine.
Configuring remote operation
You can configure the answering machine so that it can be operated remotely from another telephone.
operation of the answering machine is protected by the telephone PIN and is only available by dial Remote
ling the first number recorded in the telephone („
“).
MSN-1
Remote operation: e.g. Switch answering machine on/off, listen to or delete messages, listen to, delete or record
announcements, activate announcements for individual MSNs, set up automatic notifications for recorded
messages
Start as follows:
a
M
>
Answering machine
Answ. machine menu
Listen
Messge. contin.
Delete texts
Remote polling
Press the „Remote operation“ softkey. Remote operation is switched on or off.
If a cross („®“) is shown next to the softkey, the function is activated. Press the softkey again to deactivate the function
again. The cross is deleted.
If remote operation is switched on, this is indicated on the display by „ “ when not in use.
x
Setting the voice quality of announcements
You can set three different voice qualities („Normal“, „Good“ or „Excellent“) for all of the texts recorded on the
telephone (announcements, information messages and dictations). As the voice quality increases, the maximum
number of recorded messages decreases.
Recorded messages from callers and recordings are always recorded at „Normal“ quality.
101
Answering machine
Announcements, information messages and dictations
Start as follows:
a
M
>
Answering machine
Press the softkey for the chosen voice quality: The cross indicates
the current status. E.g. »Good ®„.
To exit the menu, press the “back„ softkey.
Voice quality
Speech quality
time rem. 48:54
normal
very good
good
back
In addition to the „Voice quality“ softkey, the „Answering machine menu“ also shows the current status (No
character - Normal, „+“ - Good, „++“ - Excellent).
Listening to calls / messages sorted by number (MSN)
Messages left on the answering machine are saved in listed. You can configure these lists to be sorted by the call
number (MSN) for which a message has been left when listening back to messages.
Start as follows:
a
M
>
Answering machine
Answ. machine menu
Speech quality
Calls sort. by MSNs
Press the „Calls MSN-sorted“ softkey.
If a cross („®“) is shown next to the softkey, the function is activated. Press the softkey again to deactivate the function
again. The cross is deleted.
In the basic answering machine settings, messages for all numbers (MSN) are saved in a single list. If you have set up
message sorting by number (MSN), you can select the corresponding number (MSN) of the messages you would like
to hear before listening back to the messages.
Announcements, information messages and dictations
You can save various announcements, information messages or dictations on the answering machine.
Announcements:
You can save to 10 announcements. If the answering machine receives a call, the caller hears the announcement that is assigned to the number (MSN) dialled.
Closing message:
Special announcement that a caller receives after leaving a message, if the recording
time is limited.
Forwarding message:
Special announcement that can be used for information at the start of an automatic
notification (see page 99). After recording, this announcement must be activated.
Announcement when AM full: Announcement that a caller receives when the memory is full.
1.) if less than 30 seconds of recording capacity is free before a message is left.
2.) if there is no memory left whilst recording a message.
After recording, this announcement must be activated.
102
Announcements, information messages and dictations
Answering machine
Information messages:
Recording of up to four messages that are saved individually and can be enabled or
disabled as messages for other users of the telephone.
Dictations:
Recording of messages that are saved in sequence (max. 99 depending on the memory remaining).
recording of announcements, information messages or dictations is described below using the exam The
ple of announcement message 1.
Recording, listening to or deleting announcements
Start as follows:
a
M
Answering machine
Announcements
Select announcement
Announcement 1
Record announcement on telephone:
b
Lift the receiver of the telephone and then press the „Record“
softkey.
Anncm.-1
Time rem. 48:54
Record, Audio In
Record
¬¬¬¬¬¬¬¬¬¬¬¬¬¬¬¬¬¬¬¬¬¬
Speak the announcement over the telephone receiver. End recording by pressing the „Stop“ softkey.
Anncm.-1
©©©Recording©©
Stop
Load announcement of the audio connector (audio in):
You can load announcements from a PC to the telephone via the audio-in connector on the telephone. The enclosed
CD-ROM contains WAV files that you can load on to the telephone as greeting or termination messages.
Use a suitable programme to transfer the WAV files (e.g. Media Player).
Press the „Recording,Audio-In“ softkey and start the playback of the desired file on the PC.
Anncm.-1
Time rem. 48:54
Record, Audio In
Record
¬¬¬¬¬¬¬¬¬¬¬¬¬¬¬¬¬¬¬¬¬¬
End recording by pressing the „Stop“ softkey.
Anncm.-1
©©©Recording©©
Audio In
Stop
103
Answering machine
Activating message recording for each number (MSN)
Listening to or deleting announcements
If you want to listen to the recorded announcement, press the „Listen“ softkey. To delete the save announcement,
press the „delete“ softkey.
Anncm.-1
Time rem. 48:01
Record
delete
listen
the menus, a cross next to a corresponding entry (e.g. „
Insaved
for this entry.
Announcement-1 ®“) means that a message is
Information messages and dictations
Start as follows:
a
M
Answering machine
Local
Record/Set local
message
Info-3
Info-1
Info-4
Info-2
Dicts.
Press the corresponding softkey to record information messages or dictations. For recording proceed as described
for announcement 1.
After recording, the information message must be activated.
Activating message recording for each number (MSN)
You can configure the answering machine for each number (MSN) saved separately or jointly for all saved numbers.
The answering machine can only be configured, if:
· the number (MSN) is saved in the telephone configuration. If you have assigned a name to a number in the telephone configuration, the softkey names „MSN-1“ ... „MSN-10“ are replaced with
the corresponding names in the menus.
· At least one announcement has been saved (see page 102).
Start as follows:
a
104
M
Answering machine
Activation
Activating message recording for each number (MSN)
Answering machine
Activate
announcement
MSN-3
MSN-1
MSN-4
MSN-2
MSN-5
The softkey for an MSN is only displayed if the MSN is saved in the telephone configuration.
The procedure for configuring the answering machine is described below using the example of number MSN-1.
Press the „MSN-1“ softkey.
The first line shows the status of the answering machine for the number dialled („MSN-1:Off“). The other lines
allow you to make various settings using the respective softkeys.
Setting MSN-1:
Off
Speak
2 sec
Active after:
ON
Anncm. dial
Options
Press the „Options“ softkey to access a menu with other settings. The status for the corresponding function is
displayed in the line under each softkey.
Press the C key to exit a menu.
Options for MSN-1
Sign-off :
Off
Time-controlled:
Off
Message length:
infinite
Setting the operating mode
Press the „Record“ softkey to set the operating mode of the answering machine. The various options are
displayed in turn by pressing the softkey.
»Record„
A caller hears the configured announcement and can leave a message after the tone.
»Announcement only„A caller hears the configured announcement only and cannot leave a message.
Setting the duration of call signalling
Press the „Active after:“ softkey to configure the time (in seconds) after which the answering machineshouldacceptacall.Thefollowingoptionsaredisplayedinturnandconfiguredbypressingthesoftkey.
»0 sec„, “2 sec„, “5 sec„, “10 sec„, “15 sec„, “20 sec„, “25 sec„, “30 sec„, “60 sec„ or “120
sec„.
Select announcement
Press the „Select announcement“ softkey to select the announcementthat you want the caller to hear.
Ifseveralannouncementsareavailable, youcandisplay all of the savedannouncementsinturnbypressing
the „Next announcement“ softkey. At the same time you will hear the selected announcement over the
105
Answering machine
Activating message recording for each number (MSN)
loudspeaker or receiver of the telephone.
E.g.: »Anncmt.-1„, “Anncmt.-2„, ...., “Anncmt.-9„ or “Anncmt.-10„.
Activating an announcement for a number (MSN)
Press the „Enable“ softkey to enable the announcementfor the number MSN-1. In the first line the status
is changed to „MSN-1: On“ and the softkey in „Off“. Press this softkey to disable the announcement.
After configuring the answering machine, you will see important information e.g. the adjacent display.
Press the „Options“ softkey to make further settings.
Setting MSN-1:
On
Speak
20sec
Active after:
OFF
Anncm.-2
Options
Activating the termination message
The termination message is a special announcement that a caller hears in addition to the announcement configured
for the number (MSN) dialled. The termination message can only be activated if it has been recorded in advance.
If the „Record“ setting is configured, a caller hears the configured announcement first and can leave a message after
the tone. If the permissible message length is reached and a termination message is saved, the caller hears the
message.
If the setting „Announcement only“ is configured, a caller cannot leave a message. He hears the announcement
and then the saved termination message.
Start as follows:
M
a
Answering machine
Activation
MSN-1
Options
Press the „Termination message“ softkey. The termination
message is enabled or disabled.
The status of the function („On“ or „Off“) is displayed in the line
under the softkey.
Options for MSN-1
Sign-off :
Off
Time-controlled
Off
Message length
infinite
Message length
You can configure how much time a caller has available to record a message. Depending on the operating mode
selected, recording ends after the configured time.
the basic answering machine settings, the message length is set to
„. In the “
„ operating
Inmode
and when the termination message is enabled, the message length in the basic setting is configured to
Endless
“30
Record
secs„.
Start as follows:
a
106
M
Answering machine
Activation
MSN-1
Options
Message
length
Activating message recording for each number (MSN)
Answering machine
Press the softkey for the chosen message length: A cross indicates
the current setting.
Limit message
30 sec
120 sec
60 sec
infinite
C
Once the settings have been configured, you will see the adjacent
message. Press the C key to exist the „Options“ menu.
Options for MSN-1
Sign-off :
Off
Time-controlled:
Off
Message length
60 sec
Time control
Time control allows you to specify that the caller hears different announcements at various times of day. Time
control can only be enabled if the answering machine has already be enabled for the dialled number (MSN).
If the time control is switched on, this is indicated on the display by „ “ when not in use.
x
Start as follows:
M
a
Answering
machine
Activation
MSN-1
Options
Time control
In this menu you can configure the periods and time control for a number (MSN). A weekly profile can only be set up
for numbers MSN-1 to MSN-3.
Time-controlled
Weekly prof.:
Off
Daily:
Off
Define times
¬¬¬¬¬¬¬¬¬¬¬¬¬¬¬¬¬¬¬¬¬¬
Set time
On your telephone you can set up nine different periods („Time 1“ ... „Time 9“) that you can then use in the time
controls for individual numbers (MSN).
The periods set up apply to all numbers (MSN). If you change a time that is already used for another time control, this
change also applies to the other time control.
Press the „Set
O
time“ softkey in the Time control„ menu.
Select a period with the arrows and confirm with OK.
Example: »Time 1„.
Define times
Time 1:
{}
13:00 to 13:30
Time 2:
13:00 to 13:30
¬¬¬¬¬¬¬¬¬¬¬¬¬¬¬¬¬¬¬¬¬¬
107
Answering machine
t
O
Activating message recording for each number (MSN)
Enter the desired period using the keypad. The cursor below the
time indicates the current input position.
Confirm your entries with OK.
Define times:
Time 1
Time fr.
14:00 to 18:00
back
times for a define period always apply to the same day. If you assign the period 18:00 to 08:00 to Mon The
day, for example, this means: Monday morning 00:00 to 08:00 and Monday evening 18:00 to 24:00.
Time control „Daily“
For this time control you assign a period to a number (MSN) (to so-called „Primary time“) during which callers
receive a specific announcement. For other times outside of this period (the so-called „Remaining time“) you can
configure another announcement. This time control applies to each day and can be set up for all numbers (MSN).
Press the „Daily“ softkey in the Time
control„ menu.
Press the corresponding softkey to set up time control.
Daily/MSN-1:
Off
Main time:
Off
not active
(-)
ON
Remaining:
Off
¬¬¬¬¬¬¬¬¬¬¬¬¬¬¬¬¬¬¬¬¬¬
The periods configured are displayed in turn by pressing the „Inactive“ softkey.
Press the „Primary time“ softkey to select the announcementthat you want the caller to hear during the
chosen period. Press the „Remaining time“ softkey to select the announcementthat you want the caller
to hear outside of this period.
If several announcementsare available, you candisplay/listen to all of the savedannouncementsin turnby
pressing the „Next announc.“ softkey.
E.g.: »Anncmt.-1„, “Anncmt.-2„, ...., “Anncmt.-9„ or “Anncmt.-10„.
Press the „Enable“ softkey to enable the time control. In the first line the status is changed to „On“ and the
corresponding softkey is changed to „Disable“.
Press this softkey to disable the weekly profile.
O
Confirm the settings with OK to exit the time control menu.
Daily/MSN-1:
On
Main time:
Anncm.- 1
13:00 to 13:30
(2)
OFF
Remaining: Anncm.- 3
¬¬¬¬¬¬¬¬¬¬¬¬¬¬¬¬¬¬¬¬¬¬
Time control „Weekly profile“
Alternatively you can set a weekly profile as time control for the numbers „MSN-1“, „MSN-2“ and „MSN-3“. In a
weekly profile, you can assign different periods to each day during which various announcements can be heard (the
so-called primary time).
During the time outside of the period selected (the so-called „Remaining time“) you can set up another
announcement. This announcement is identical for all days of the weekly profile. Like the main time, you can also
assign another operating mode to the remaining time in a weekly profile. For example, during the main time you can
allow messages to be left, whilst during the remaining time no messages can be recorded.
108
Activating message recording for each number (MSN)
Press the „Weekly
Answering machine
profile“ softkey in the Time control„ menu.
Press the corresponding softkey to configure the primary/remaining times or to enable time control.
Weekly prof./MSN-1:
Off
Define main times
ON
Define rem. Time
Pressthe„Define primary times“softkeytodefine theperiodsfor theindividual daysof theweekand
the announcement for the so-called primary time.
To set up announcements and operating modes for the remaining periods of all days of the week, press the
„Define remaining time“ softkey.
Press the „Enable“ softkey to enable the weekly profile. In the first line the status is changed to „On“ and
the corresponding softkey is changed to „Disable“.
Press this softkey to disable the weekly profile.
If you enable the weekly profile, any activated daily time controls are disabled automatically.
Setting up primary times
Press the „Define
primary times“ softkey in the Weekly profile„ menu.
Press the corresponding keys and softkeys to define the announcements and the periods for the so-called primary
time for the individual days of the week. Example: »Monday„
Define
main times:
Monday
not active
(-)
not active
(-)
Ans. mach. inactive
¬¬¬¬¬¬¬¬¬¬¬¬¬¬¬¬¬¬¬¬¬¬
Press the „Answering machine inactive“ softkey to select the announcement that you want the caller to hear during the chosen period.
Ifseveralannouncementsareavailable, youcandisplay all of the savedannouncementsinturnbypressing
the „Next announc.“ softkey.
E.g.: »Anncmt.-1„, “Anncmt.-2„, ...., “Anncmt.-9„ or “Anncmt.-10„.
The periods configured are displayed in turn by pressing the „Inactive“ softkey. E.g.: »Time 1„, “Time
2„, ... , “Time 9„.
You can define two periods during which a caller will hear the selected announcement.
If you want to configure other days, press the arrow keys.
O
Confirm the configuration of the primary times for the weekly
profile with OK.
Define
main times:
{}
Sunday
13:00 to 13:30
(1)
15:00 to 18:00
(4)
Anncm.-1
¬¬¬¬¬¬¬¬¬¬¬¬¬¬¬¬¬¬¬¬¬¬
Configuring the remaining time
Press the „Define
remaining time“ softkey in the Weekly profile„ menu.
109
Answering machine
Press the corresponding softkey to define the operating mode and
the announcement for the remaining time. These settings apply
to all days of the week.
Operation
Define rem. Time
Speak
Sign-off :
Off
Remaining:
Ans. mach. inactive
Press the „Record“ softkey to set the operating mode during the remaining time. The various options are
displayed in turn by pressing the softkey (see page 105).
Pressthe„Termination message“softkeytoenableordisabletheterminationmessage(seepage106).
Press the „Remaining time“ softkey to select the announcementthat you want the caller to hear outside
of the configured primary times.
Ifseveralannouncementsareavailable, youcandisplay all of the savedannouncementsinturnbypressing
the „Next announc.“ softkey.
E.g.: »Anncmt.-1„, “Anncmt.-2„, ...., “Anncmt.-9„ or “Anncmt.-10„.
O
Confirm the configuration of the remaining times for the weekly
profile with OK.
Define rem. Time
Speak
Sign-off :
On
Remaining:
Anncm.-4
Operation
If new messages, new dictations or enabled information messages exist on the answering machine, these are
signalled by a flashing call LED when the answering machine is switched on. Information on the number of new
messages appears on the display.
messages on the answering machine that are shorted than two seconds are not saved. E.g.: A caller ter New
minates the connection after the tone without leaving a message.
Whilst listening to message, you can adjust the volume of the loudspeaker or receiver.
To do this, press the menu key followed by the arrow keys. To return to the normal display whilst listening, press the
ESC button. If you confirm with the OK button instead of the ESC button, you will overwrite the current value (see
acoustic settings on your telephone).
Listening to new messages
The number of new messages appears on the display.
Press the „Ans. Mac. Mess.“ softkey.
01.01.09 07:21
}
Info
-T-S-r-×Ans.mac.mess.:8
Tel. drctry
¬¬¬¬¬¬¬¬¬¬¬¬¬¬¬¬¬¬¬¬¬¬
You will only see the following display if several new messages are saved on the answering machine.
110
You will now see detailed information on the type of new messages.
Operation
Answering machine
Press the softkey next to the message that you would like to listen
to.
Answering machine
New calls
=4
New dictations
=3
Info texts
=1
¬¬¬¬¬¬¬¬¬¬¬¬¬¬¬¬¬¬¬¬¬¬
If you have configured MSN sorting for listening to messages,
press the softkey for the call number (MSN) for which you would
like to listen to the messages.
New calls sorted
{}
MSN-3=00
02=MSN-1
MSN-4=01
¬¬¬¬¬¬¬¬¬¬¬¬¬¬¬¬¬¬¬¬¬¬
for listening to messages is described below using the example of new calls. Press the „
The procedure
“ softkey.
New
calls
After pressing this softkey, all new messages are played back automatically in turn. Press another button
automatically ends playback. You can now control message playback manually using the keys described below.
New call-01
{}
Date: 01.01.09 07:21
MSN-1
Pause
repeat
delete
Stop
»<
Tast4
You can switch to the previous
>
(„<
Tast4
>
t
t
t
ssa
»Pause„
Press the „Pause“ softkey to stop listening to a message.
If you want to continue listening to the message, press the „END PAUSE“ softkey.
»repeat„
Press the „repeat“ softkey to listen to the last message again from the beginning.
»Stop„
Press the „Stop“ softkey to end playback of the message.
Inthefollowingmenu,youcanlistentothemessageagain,deletethemessageorviewthecaller’snumber. To do this, press the corresponding softkey „listen“, „delete“ or „number“.
If you have listened to a new message in full, this is deleted from the list of new messages and moved to the list of old
messages.
If you have listened to all new calls, you will see the adjacent display. To listen to more new messages, proceed as
described for „New calls“.
Answering machine
New calls
=0
New dictations
=3
¬¬¬¬¬¬¬¬¬¬¬¬¬¬¬¬¬¬¬¬¬¬
Listen to all messages, dictations, information messages or recordings
Start as follows:
a
M
Answering machine
Messages
111
Answering machine
Operation
Poll message
Calls
}
New=00
Dicts.
Old=04
New=03
Infos
Old=00
On=01
Off=00
>
You can see the type and number of new and old (played) messages. After pressing the right arrow, you will see the number of call
recordings (see page 113).
Poll message
{
Logs
=00
Audio-Out:
Off
Pressthecorrespondingsoftkeytolistentothemessages.Tolistentothemessages,proceedasdescribedon
page 110.
Output messages via the audio connector (audio out)
The telephone has an audio output (audio out). Recorded messages can be played back via this output and saved on a
PC, for example, with sound ports (see page 100).
Start as follows:
a
M
Answering machine
Messages
Press the „Audio-Out“ softkey to switch message output on or
off. In addition to the softkey you will see the current setting.
»On„: Loudspeaker/receiver and audio-out.
»Off“: Only loudspeaker/receiver.
>
Audio-Out
Poll message
Logs
Audio-Out:
{
=01
On
can only be output via the „Audio-Out“ connector when the receiver is replaced („loudspeaker“
Messages
function).
Use a suitable program to record messages on the PC.
Picking up a call from the answering machine
To accept a call that is currently leaving a message on the answering machine, listening in must be enabled (see page
99). You can set listening in in the configuration for all incoming calls or during a recording for individual calls.
When recording on the answering machine you will see the adja2200
©©©Recording©©
cent display.
Listening in:
»Listen ON„ indicates that listening in can be activated by pressing this key.
»Listen OFF“ indicates that listening in is already activated and
can be switched off by pressing this key.
Caller MSN-1
Listen ON
¬¬¬¬¬¬¬¬¬¬¬¬¬¬¬¬¬¬¬¬¬¬
Caller MSN-1
Listen OFF
¬¬¬¬¬¬¬¬¬¬¬¬¬¬¬¬¬¬¬¬¬¬
112
Remote operation
bg
Answering machine
To pick up the call, lift the telephone receiver when listening in is
enabled.
2200
00:35
}
MSN-1
Memo
display
¬¬¬¬¬¬¬¬¬¬¬¬¬¬¬¬¬¬¬¬¬¬
Passing a call to the answering machine
You can only pass a call to the answering machine if an announcement has been assigned and activated for the
signalled number (MSN). This is also possible when the answering machine is switched off.
a
l
>
Pass to AM
Recording a call
If you have accepted a call, you can record the conversation. The call is saved on the answering machine.
Inform the calling party that you are recording the call. You may only record calls if the answering
Caution:
machine is not already recording.
a
l
b
g
Call without recording
>C
Press the right arrow key and then the „record“ softkey to start
recording the call.
2200
00:55
}
MSN-1
display
Memo
¬¬¬¬¬¬¬¬¬¬¬¬¬¬¬¬¬¬¬¬¬¬
Press the „Stop“ softkey to end and save the recording. If you
want to end recording without saving it, press the „delete“ softkey.
Log-01
©©©Recording©©
delete
Stop
g
You can now continue the call. The display returns to normal during a connection.
2200
03:51
{
edit
¬¬¬¬¬¬¬¬¬¬¬¬¬¬¬¬¬¬¬¬¬¬
Calls can be recording when telephoning one or more parties (conference).
To listen to a recording, proceed as described on page 111of this user guide.
Remote operation
You can access the answering machine remotely from any telephone using MFC suffix dialling, for example, in order
to listen to messages. Remote operation is only available via the number „MSN-1“ entered first in the telephone.
operation of the answering machine is protected by the telephone PIN and is only available if this is
Remote
enabled on the telephone (see page 101).
113
Answering machine
Remote operation
The following conditions/settings are possible remotely:
· Switch answering machine on/off
· Query available memory capacity
· Listen to new and old messages or enabled information messages
· Delete individual messages
· Delete all messages
· Listen to, delete or record announcements
· Enable / disable announcements for a number (MSN)
· Enable / disable or configure automatic notification (retransmission)
Tones during remote operation
During remote operation you hear various tones that notify you of the status of individual entries or actions.
Positive acknowledgment The
toneentry has been accepted and saved by the telephone.
(1 long tone):
Request tone
(2 short tones):
The telephone expects a code to be entered or a new announcement to be recorded.
Negative acknowledgmentThe
toneentry was incorrect and has not bee accepted by the telephone. The code entered or the
requested action cannot be performed.
(4 short tones):
E.g.: Activation of an announcement for a number that is not saved in the telephone.
Initiate remote operation (answering machine enabled)
b
t
g
#
Dial call number
(MSN-1)
Answering machine announcement
t
#
q
Enter PIN
Caution: The „# PIN #“ must be entered during the announcement. After the positive acknowledgment tone has
sounded you can carry out other procedures remotely.
Switching on a disabled answering machine remotely
b
after approx.
90 seconds
t
Dial call number 1
(MSN-1)
q
# PtIN
Request tone
PIN
enter
q
*01
q
Switch on answering
machine
A disabled answering machine can only be operated remotely if if an announcement has been set up and activated for
the number 1 (MSN-1).
After the positive acknowledgment tone has sounded you can carry out other procedures remotely.
Accept automatic notification (retransmission)
l
b
g
You hear a request tone or the
forwarding message
114
#
t
Enter PIN
#
q
Remote operation access numbers
Answering machine
Once recorded, the „Forwardingmessage“ is played at the start of the message. If this announcement is not
recorded and enabled, you will hear a request tone.
If the notice is picked up by entering the „# PIN #“, you can dial the other remote polling access numbers.
Remote operation access numbers
Once the remote control has been initiated successfully, you can operate the individual functions with the following
access codes.
To end remote polling, replace the receiver after entering the last access number.
Inserted codes can only be used when listening to texts (messages, announcements, info texts).
General codes
*00q
Switch answering machine off
*02q
Query available memory capacity
Theavailablememorycapacityforleavingmessagesisindicatedbyindividualtones.Eachtonerepresents three minutes of memory capacity.
Listen to or delete messages, hear info texts
10q
Listen to new messages
11q
Listen to old messages
12q
Listen to enabled information messages
#q
Listen to the next message
*q
Listen to the previous message
0q
End retransmission of the current message
2q
Delete the message already listened to
22q
Delete all old messages
Listen to, delete or record announcements
The current playback/recording of an announcement is ended by pressing the „0“ button. If the „2“ button is pressed
during playback/recording, this announcement is deleted.
When deleting an announcement, which is already assigned to a number, all corresponding settings (e.g. operating
mode, duration of call signal, message length and time control) are deleted.
If you want to modify an existing announcement, you can record a new message without first deleting the current
announcement. The „old“ announcement is overwritten by the new recorded announcement. All corresponding
settings for this announcement and the assigned number (e.g. operating mode, duration of call signal, message
length and time control) are retained.
0q
2q
13Xq
End retransmission/playback of the current announcement
Delete the announcement currently being listened to/played back
Listen to announcement
X: ! … ), = Select announcement (1...9, 10)
115
Answering machine
23Xq
33Xq
Use answering machine through another telephone
Delete announcement
X: ! … ), = Select announcement (1...9, 10)
Playback announcement
X: ! … ), = Select announcement (1...9, 10)
The announcement assigned to the first number (MSN-1) cannot be deleted remotely.
Enable / disable announcements for a number (MSN)
An announcement can only be enabled/disabled during its retransmission for a call (MSN). An announcement for a
number (MSN) is enabled with the following permanent settings:
Duration of call signalling: „05 seconds“, operating mode: „Record“, message length: „Infinite“ and time control
deactivated.
**X*q
*#X*q
Enabling the current announcement for a number:
X: ! … ), = Select number (1...9, 10)
or * for all numbers (MSN)
Disabling the current announcement for a number:
X: ! … ), = Select number (1...9, 10)
or * for all numbers (MSN)
The announcement assigned to the first number (MSN-1) cannot be disabled remotely.
Automatic notification (retransmission)
Please note that the number of calls / messages (1 .... 10) and the number to which retransmission should occur must
be entered before switching on automatic notification.
*51q
*52q
*53Xq
*54t
*q
#
*55q
*56q
Activate retransmission of calls. Retransmission is carried out with the forwarding message.
Switch off retransmission of calls
Configure retransmission of calls
X: ! … ), = Number of calls after which retransmission should occur (1...9, 10)
Configure destination number for retransmission
t: Number to which retransmission should occur (max. 20 digits)
Cancel entry of number for call retransmission
Activate retransmission of calls. Retransmission is carried out by sending a UUS1 message.
Activate retransmission of calls. Retransmission is carried out by sending a SMS message.
Use answering machine through another telephone
You can use the answering machine on the telephone together with another telephone. The „MSN-10" of your
telephone is set up as a “Voicemail box" and provided to the other telephone as an answering machine. This
telephone can then forward its calls by call diversion or a team call variant (to elmeg PABX) on this „MSN-10" and
thus to the corresponding answering machine.
If the voicemail box for „MSN-10" and the answering machine are set up and switched on:
· if no other telephony settings (e.g. tone, volume) are possible for „MSN-10".
· if the calls for MSN-10 are only signalled on the answering machine. A message about the call appears in the display.
· if the „listen“ function cannot be used for call for „MSN-10" and the call cannot be transferred.
116
Use answering machine through another telephone
Answering machine
· if the remote operation of the answering machine is activated automatically for „MSN-10". The
other telephone can then listen to or delete messages remotely.
· if the messages for „MSN-10" cannot be played back when the answering machine is operated remotely.
· if the answering machine is only switched off when the voicemail box for MSN-10 is not required.
However, individual MSNs can be disabled so that the voicemail box for MSN-10 remains
accessible.
Enable voicemail box for „MSN-10"
Start as follows:
a
t
O
M
Configuration
MSN
>
MSN-10
Enter the number of the telephone which is to use the answering
machine. E.g.: »1234«.
Confirm your entries with OK.
>
Voicemail
AnsMc Voice-box
user
MSN-10>1234_
¬¬¬¬¬¬¬¬¬¬¬¬¬¬¬¬¬¬¬¬¬¬
In the menu „Program MSN-10“ settings can now only be configured using the softkeys „Call number“, „MSN
Name“ and „Voicemail“. The MSN-10 is highlighted in the menu with „x“. The answering machine for „MSN-10"
is set up and activated as described in the “Answering machine" section of the user guide. In the „Answering
machine“ - „Activation“ menu, the reference „Voicemail“ is displayed in place of the name for „MSN-10".
Important Information
Joint use of the answering machine is based on trust. When listening to message locally, it is also possible to list to
messages on all number (MSNs). We therefore recommend sorting messages by call number („Calls MSN-sorted“)
so that you can choose the corresponding number (MSN) of the messages you would like to hear before listening back
to the messages.
If you have enabled the answering machine for „All MSN“, the other telephone will no longer be able to use the
answering machine for „MSN-10".
The messages for „MSN-10" cannot be played back when the answering machine is operated remotely (for “MSN-1"
to „MSN-9"). If the code “22" is sent remotely to delete all messages, the messages for „MSN-10" are also deleted.
If the messages for „MSN-10" are played back remotely, the telephone cannot be used for the duration of remote
operation.
Use voicemail box from another telephone
The other telephone can only use the voicemail box with the number entered in the answering machine phone book
as „AM joint user“. Calls for this telephone can be forwarded by call diversion or a team call variant (elmeg PABX) to
the answering machine.
When there is a new message on the answering machine the other telephone is notified by a UUS text message.
If the other telephone is a system telephone (e.g. elmeg CS410), you can identify the status of the answering machine
from this using the function key „Line AM“. Pressing this key allows you to accept a call and establish a connection to
the answering machine (e.g. to listen to messages). Carrying over calls is only available in version 6 of the PABX and
above.
The answering machine for „MSN-10" can also be operated remotely as follows:
117
Answering machine
Use answering machine through another telephone
Initiate remote operation (answering machine enabled)
b
t
g
Dial call number 10 Answering machine
(MSN-10)
announcement
#
t
#
q
Enter PIN
Caution: The „# PIN #“ must be entered during the announcement. Once the remote control has been initiated
successfully (positive acknowledgment tone), you can operate the individual functions with the following access
codes.
To end remote polling, replace the receiver after entering the last access number.
Inserted codes can only be used when listening to texts (messages, announcements, info texts).
Listen to or delete messages, hear info texts
10q
Listen to new messages
11q
Listen to old messages
#q
Listen to the next message
*q
Listen to the previous message
0q
End retransmission of the current message
2q
Delete the message already listened to
118
Software
Download new firmware
Telekom Austria:
The company provides a Server PC which you can use to load new firmware in the elmeg CS410 and CS410-U. In this
case the firmware is loaded over the S/U connection and takes approx. 12 minutes depending on the size of the
firmware file. Note that connection fees may apply when downloading the firmware over an external ISDN
connection.
For the elmeg IP-S400 you can download the firmware using the Professional Configurator (WIN-Tools on the
PABX) under „System telephone“, „Indirect software download“. Whilst in the configurator you can specify the
internet address where the firmware can be found. No operations must be carried out on the system telephone.
information on downloading firmware can be found in the description „Firmware download IP“ on
Other
your CD-ROM.
· During data transmission, you must not press any keys and plug or unplug any connectors unless
requested to do so. Should there be an interruption whilst downloading, restart the download
program and proceed as described below.
· After the new firmware is loaded the system telephone automatically carries out a RESET and is
then available for use again.
· In some cases, all data in the system telephone is selected when carrying out a firmware downlo-
ad. If this is the case then you will receive information in the telephone display before
downloading commences. If you do not have any backup files for the system telephone configuration settings (configuration, phone book), please ensure you only begin the download once you
have backed up this data.
Download of new firmware via the USB connector on the system telephone
You can load a new firmware version on to your system telephone over the PC interface of the system telephone and
the WIN-Tools CD-ROM supplied.
· Connect the system telephone to the PC.
· Load the new firmware to your PC (e.g. from the internet).
· Start the Download Manager for WIN-Tools.
· Set the interface to „USB“ in the „Connection Type“ field.
· Select the menu options „File“ -> „Open“ and select the folder into which the new firmware is to
be saved.
· Press „Start Download“ in the „Status“ field to load the new firmware.
Download of new firmware over the Server PC
Telekom Austria:
The company provides a Server PC which you can use to load new firmware in the system telephone. In this case the
firmware is loaded over the S/U connection and takes approx. 12 minutes depending on the size of the firmware file.
Note that connection fees may apply when downloading the firmware over an external ISDN connection.
119
Software
You can also download the firmware using the Professional Configurator under „System telephone“, „Indirect
software download“. No operations must be carried out on the system telephone.
information for export assignments:
Important
Please ask your dealer/distributor for the access number of the
download server in your country!
Download-Server
Call number
Funkwerk Server-PC
++49-(0)5171-901190
Start download of new firmware to the system telephone:
Start as follows:
a
M
s
s
t
Configuration
Service
Telephone PIN
O
s
s
Software
Yes
The system telephone is now reset in BIOS mode.
s
Press the „Update“ softkey.
Cx410-bios 1.02 by ps
UPDATE
INFO
¬¬¬¬¬¬¬¬¬¬¬¬¬¬¬¬¬¬¬¬¬¬¬
t
Enter the call number of the download server including the dialling code for the external assignment of the PABX.
Example: »005171901190«.
If you have set up an automatic outside line for your system telephone in the PABX, enter the number of the download server without automatic outside line.
In order to interrupt a download that has been started, press the „
Cx410-bios 1.02 by ps
Firmware Updaste
Please dial
005171901190
Abort
Abort“ softkey or the ESC key.
In some cases, all data in the system telephone is selected when carrying out a firmware download. If this is the case,
the following message will be displayed before the download starts: »All data will be deleted Continue?„.
The firmware download will only commence once you have confirmed acceptance of this message by pressing the
“Yes„ softkey. If the system telephone data is not deleted when downloading, the download will begin without any
flashing message.
System telephone BIOS
The system telephone has a BIOS mode (basic functions) in English. The various BIOS functions shall remain
available to you even if the system telephone firmware is not functioning correctly or if new firmware has not been
fully downloaded (e.g. if the PC fails during download).
120
Software
The following functions are available in the system telephone BIOS mode
· All telephone calls are signalled. No call numbers (MSN) need to be entered in the system telephone.
· It is possible to make outgoing calls once the receiver is lifted (no dial preparation, no loudspeaker or hands free).
· Loading of new firmware via the PC interface on the system telephone or the S/U connector.
Download of new firmware over the PC interface
To load new firmware into the system telephone BIOS via the PC interface, proceed as described on page 1of this user
guide.
Download of new firmware via the S/U connector
s
You will see the BIOS menu of the system telephone.
If you would like to load new firmware via the S/U connection,
press the „Update“ softkey.
Cx410-bios 1.13 by ps
Update
Info
¬¬¬¬¬¬¬¬¬¬¬¬¬¬¬¬¬¬¬¬¬¬¬
¬
Now proceed as described on page 120 of this user guide.
The settings under the „
“ softkey are provided for service and diagnostics. If you configure or
Caution:
modify settings in this menu, this will affect the functionality of the system telephone. In some cases, the
Set
system telephone may no longer work.
Country
Cannot be configured using the system telephone on the elmeg hybird!
Country-specific settings
If the system telephone is to be used in a country that deviates from the basic settings, country-specific settings shall
therefore be necessary.
This sets the language, the currency and country-specific features in the ISDN network to the basic settings of your
chosen country.
As described below, please check whether country-specific settings are possible for the country in which the system
telephone is to be used.
Start as follows:
a
M
s
s
t
Configuration
Service
Telephone PIN
O
>
s
Country
121
Software
s
Press the arrow keys to see the countries for which special settings
are available.
Press the softkey for the desired country, e.g. „UK“.
Which Country?
Italy
}
Spain
Germany
UK
France
Netherlands
The system telephone is then rebooted!
The specific settings of the chosen country are established immediately.
The system telephone data is not deleted.
29.05.10 07:41
}
Tel. drctry
Quiet
VIP
122
System telephone menu
System telephone menu
„Configuration“ menu
M
»Konfiguration«
Konfiguration
Sperren
Einstellungen zum TCP
/IP Netzzugang
Sys-Server
DHCP-Server
Gateway
Eigene IP-Adresse
Netzmaske
}
MSN
Anzeige
Kosten
Park-Code
Service
IP-S400 = TCP/IP Einstellungen
Standard Park-Code
Rufnummern prog.
}
MSN-3
Park-Code>55
MSN-1
MSN-4
MSN-2
MSN-5
Display-Anzeige
Rufnummern prog.
{
MSN-8
Rufnummer
MSN-6
Gespräch
MSN-9
Sprache
MSN-7
MSN-10
PIN eingeben
Beispiel MSN-6
Sperren einrichten
MSN-6 programmieren }
übergeben
PIN
Lautstärke
Menü
Klang
MSN Name
Rufnummer
PIN eingeben
Service-Funktionen
}
MSN-6 programmieren{
Version
Name
PIN
Daten
SMS
Software
*
Kosten
IPS Log-In PIN
IPS Log-In Name
Service-Funktionen {
Country
*
Kosten
Tarif
Währung
löschen
* = Nur IP-S400
123
System telephone menu
„Acoustic“ menu
M
»Akustik«
Lautstärke etc.
}
Headset
Quittungstöne
Lautsprecher
Ruhe
Anklopfen
Hörer
Anklopfton
Wiederholen ˜
Durchsage
Termin
Wechselsprechen
Audio-Out
{}
Durchsage ˜
Freisprechen ˜
Ruftöne
Lauthören
Terminruflautstärke{}
- ©©©---- +
- ©©©--- +
Headset / Akustik?
PLANTRONICS FIREFLY
Standard ˜
GN Netcom 2100/2200
SILICOMP
DECT Headset (DSHG)
Hörer Lautstärke
- ©©-- +
124
{
Einstellung der
Audo-Out Nutzung
Lautstärke
Lautsprecher
Lautstärke
Lautstärke etc.
{}
Quittungstöne aktiv?
Nein
Ja ˜
Nur Fehlerton
Ruheton Lautstärke {}
- ©©©--- +
System telephone menu
„Settings“ menu
M
»Einstellung«
Einstellung
}
Direktruf
Kontrast
Rufumleitung
Termin
Anklopfen
Auto-Rufannahme
Einstellung
Headset
Anklopfen
ermöglichen
?
Ja,Erweitert
Nein ˜
Ja
Anruffilter
{
Zeit
Filter
Kommend
Neu
Headset automatisch
nutzen
?
Rufumleitung
Nein
Aus
Ja
Direkt
Verzögert
Besetzt
Rufumleitung
verzögert
Display-Kontrast
{}
MSN-3
MSN-1
- ©©©©----- +
MSN-4
MSN-2
MSN-5
Direktruf aktivieren?
Nein
Ja
Rufnummer
Zeit bis zur
Rufannahme
?
5 Sekunden
Sofort ˜
10 Sekunden
Termin auswählen
1: 11:11 11.11.02
{}
Aus
2: 11:11 11.11.02
Aus
3: 11:11 11.11.02
Aus
Weckart von Termin 1?
Aus
Einmalig
Täglich
Wöchentlich
125
System telephone menu
„Number progr.“ menu
M
»Nummernprog.«
Rufnr. programmieren
Telefonbuch
VIP
Telefonbuch
237 Einträge frei
Sondertonruf
Info
Neu
löschen
Liste
VIPs programmieren
Tbuch.eintrag
{}
löschen
?
···········Aaaaaaaaaa
Bbbbb················
·······Ccccccc,cccccc
Ddddd, Dddd··········
·················Eeee
VIP auswählen
Namen auswählen
Liste
{}
V0:
V1:
V2:
V3:
V4:
VIP neu
programmieren
{}
{}
Aaaaaaaaaa
0123456
Info - Info - Info Info - Info - Info
V0:
V1:
V2:
V3:
V4:
Telefonbuch eingeben
Sondertonruf einst.{}
Name>Aaaaaaa_
Zusatzinfo für Tbuch.
einrag (abc)
Info - Info - Info -_
126
Neu
···········Aaaaaaaaaa
Bbbbb················
·······Ccccccc,cccccc
Ddddd, Dddd··········
·················Eeee
System telephone menu
127
EN-Optionen
Add phone book record . . . . . . . . . . . . . 33
Anruffilter . . . . . . . . . . . . . . . . . . . . . 74
Assign name to call number (MSN). . . . . . . 81
Automatische Rufannahme . . . . . . . . . . . 74
Block . . . . . . . . . . . . . . . . . . . . . . . . 76
Boss-connector . . . . . . . . . . . . . . . . . . 53
Call waiting . . . . . . . . . . . . . . . . . . . . 72
Connection to a PABX . . . . . . . . . . . . . . 79
Country . . . . . . . . . . . . . . . . . . . . . . 121
Direktruf . . . . . . . . . . . . . . . . . . . . . . 69
Display / Call number . . . . . . . . . . . . . . 77
Enter and view number (MSN) . . . . . . . . . 79
Erweiterte Konfigurierung . . . . . . . . . 62 - 64
Gehend . . . . . . . . . . . . . . . . . . . . . . . 77
Konfiguration . . . . . . . . . . . . . . . . . . . 76
Kosten ansehen und löschen. . . . . . . . . . . 45
Macro. . . . . . . . . . . . . . . . . . . . . . . . 88
MSN (numbers) . . . . . . . . . . . . . . . . . . 79
Number programming . . . . . . . . . . . . . . 86
Outgoing . . . . . . . . . . . . . . . . . . . . . . 63
Park code (basic setting) . . . . . . . . . . . . . 79
Secretary redirection . . . . . . . . . . . . . . . 54
Set call costs account for a number . . . . . . . 46
Set time. . . . . . . . . . . . . . . . . . . . . . . 74
VIP memory . . . . . . . . . . . . . . . . . . . . 34
128
129
130
131
132
133
Quick Install Guide
Inquiry
b
R
g
t
g
Enter call number
Brokering
b g R
t
>
g
s
Connection -1...
Connection -4
Enter call number
Conference
b
R
g
t
s
g
Conference
Enter call number
Transfer with call notice
b
t
R
g
t
Enter call number
g
s
transfer
Enter call number
Parking
b
g
s
t
O
park
Enter park code
a
Unpark
>
a
s
t
O
unpark
Enter park code
b
g
Forward calls
a
s
t
transfer
Enter call number
l
O
Extended redialling
W
a
W
O
or
Search for desired call number
b
g
Search for desired
call number
Callback on Busy
t
g
s
Enter call number
Extension busy
Callback
b
a
Dialling the outgoing call number (MSN assignment)
a
O
t
M
Enter call number
s
s
MSN
MSN-1...
MSN-10
b
g
Switch on call diversion
a
M
s
s
s
s
t
Setting
Call
diversion
Delayed
Busy Direct
MSN-1...
MSN-10
Enter call number
O
Switch off call diversion
a
134
M
s
s
s
s
Setting
Call
diversion
Off
MSN-1...
MSN-10
O
Quick Install Guide
Do not disturb
a
s
s
Idle
No
,ok
Ringing signal off
Dial from the caller history, phone book or VIP memory
a
s
Caller list
Phone book/VIP
b
g
Select entry
135
Telekom Austria
Postfach 1001
1011 Wien
Hotline: 0800 100 120
Ausgabe 1
010608