1
COPY II PLUS [Version 5]
APPLE DISK BACKUP SYSTEM
*
Completely automatic
*
All parameters are stored on disk
*
Finds sync bytes automatically
*
Can copy 1/4 and 3/4 tracks
*
Fast two-pass copy on //c
*
DOS 3.3 utilities
CENTRAL POINT
Software, Inc.
Copy II PLUS
Written by:
Phil Thompson
Alan Silver
Michael Brown
APPLE DISK BACKUP SYSTEM
CENTRAL POINT
Software, Inc.
9700 SW Capitol Hwy., #100
SYSTEM REQUIREMENTS
Portland, OR 97219
503/244-5782
Apple II Computer, 64K Memory
One or two disk drives
COPY ][ PLUS COPYRIGHT 1982-1985
Central Point Software. Inc.
9700 S.W. Capitol Hwy., #100 / Portland, OR 97219
PHONE 503/244-5782
Disclaimer of all Warranties and Liability
Central Point Software Inc. makes no Warranties, either expressed or
implied, with respect to the software described in this manual, its
quality, performance, merchantability or fitness for any particular
purpose. This software is licensed "as is". The entire risk as to
the quality and performance of the software is with the buyer.
Should the software prove defective following its purchase, the
buyer, and not Central Point Software, Inc., assumes the entire cost
of all necessary servicings, repair or correction and any incidental
or consequential damages. In no event, will Central Point Software
Inc. be liable for direct, indirect, incidental or consequential
damages resulting from any defect in the software even if they have
been advised of the possibility of such damages. Some states do not
allow the exclusion or limitation of implied warranties or
liabilities for incidental or consequential damages, so the above
limitation or exclusion may not apply to you.
Notice
Central Point Software reserves the right to make improvements in
the product described in this manual at any time and without notice.
The word Apple and the Apple logo are registered trademarks of Apple
Computer, Inc.
Apple Computer Inc. makes no Warranties, either expressed or
implied, regarding the enclosed computer software package, its
merchantability or its fitness for any particular purpose.
DOS 3.3 is a copyrighted program of Apple Computer, Inc. licensed to
Central Point Software, Inc. to distribute for use only in
combination with Copy II Plus. Apple Software shall not be copied
onto another diskette (except for archive purposes) or into memory
unless as part of the execution of Copy II Plus. When Copy II Plus
has completed execution Apple Software shall not be used by any
other program.
DOS 3.3 Copyright 1980-81 Apple Computer, Inc.
TABLE OF CONTENTS
Chapter One: Introduction
Hardware Requirements
What You Need to Know
About This Manual
Starting Up
Differences with Copy ][ Plus Version 4
Chapter Two: Dos Utilities
Status Display
NEW DISK INFO
CATALOG
NORMAL
WITH FILE LENGTHS
WITH DELETED FILES
WITH HIDDEN CHARACTERS
COPY
COPY FILES
COPY DISK
COPY DOS
DELETE
DELETE FILES
DELETE DISK
DELETE DOS
LOCK/UNLOCK FILES
RENAME FILES
ALPHABETIZE CATALOG
FORMAT DISK
VERIFY
VERIFY DISK
VERIFY FILES
VERIFY IDENTICAL FILES
VERIFY DRIVE SPEED
VIEW FILES
TRACK/SECTOR MAP
SECTOR EDITOR
Reading Sectors
Moving the Cursor
Reading Again
Changing Bytes
Writing
How to Edit a Sector
Follow Files
Disassembly
Printer Dump
Scan for Bytes
Patch
How to Set "Patched" Routines
Custom Patching
FIX FILE SIZES
CHANGE BOOT PROGRAM
UNDELETE FILES
QUIT
Chapter Three: Bit Copy
6
7
7
7
8
9
10
11
11
12
12
12
13
13
13
14
15
16
16
16
17
17
17
18
18
19
20
20
20
21
21
22
23
24
25
26
27
27
27
27
28
28
29
29
29
31
31
32
32
32
33
34
Overview: Parameters
AUTO COPY
Copy Status
Errors and Error Numbers
Comments
AUTO COPYing again
If a Program is Not Listed
PARTIAL AUTO COPY
MANUAL BIT COPY
MANUAL SECTOR COPY
NIBBLE EDITOR
HI-RES DISK SCAN
Parameter Entries
Sector Edit Parameters
LOAD PARM ENTRY
EDIT PARM ENTRY'
CREATE NEW PARM ENTRY
SAVE PARM ENTRY
RENAME PARM ENTRY
DELETE PARM ENTRY
Possible Parameter List Errors
QUIT
APPENDIX A: DISKS AND DISK HARDWARE
Apple DOS, Files, Tracks, Sectors
Disk Hardware, Reading and Writing Bytes, Disk Speed
Contents of a Sector
Reading, Writing, and Formatting
Differences in DOS 3.2 Format
APPENDIX B: DISK PROTECTION SCHEMES
Protection?
Perfection?
Changed Address and Data Headers
Changed Sync Bytes
Synchronized Tracks
Half Tracks
An Extra Track?
Bit Insertion
Nibble Counting
Long Tracks
Write-Protect Check
"Non-sync Sync"
Spiral Tracks
APPENDIX C: ROUTINES AND PARAMETERS
APPENDIX D: SUMMARY OF PARAMETERS
APPENDIX E: NUMBER CONVERSION TABLES
34
35
37
37
38
38
38
39
40
42
43
46
47
49
50
52
52
53
53
53
53
55
56
56
57
58
60
61
63
63
63
64
64
65
65
65
66
66
66
67
67
67
69
74
78
Chapter One: Introduction
This manual describes Copy ][ Plus Version 5, which includes both a
powerful DOS disk utility package and a sophisticated Bit Copy,
program. The DOS utilities allow you to manipulate DOS 3.3 and DOS
3.2 files and disks quickly and easily. The Bit Copy program can
make backups of valuable software that has been copy-protected.
With the utilities, you can:
Copy any 16 sector or 13 sector unprotected disk
Copy DOS onto a disk
Copy files
Catalog a disk
Catalog showing file lengths
Catalog showing any hidden control characters
Catalog showing deleted files
Delete files
Delete DOS to free up more space for files
Delete all information from a disk
Lock or unlock files
Rename files
Alphabetize the catalog
Format a disk
Verify, that the disk is good
Verify that files are good
Verify whether or not two files are identical
Check disk drive speed
View the contents of files
See a map of what files are stored where on the disk
Edit any sector or any file
Fix file sizes, to free up wasted disk space
Change the boot program on the disk
Undelete files, to recover files that were accidentally deleted
Most of these options are for standard DOS 3.3 or DOS 3.2 disks.
However, the utility options COPY DISK, VERIFY DISK, and SECTOR
EDITOR can be used with any 13 or 16 sector unprotected disks,
including DOS 3.3, 3.2, ProDOS, SOS, CP/M, and Pascal format disks.
The Bit Copy program includes a new AUTO COPY feature. Parameters
for copying many programs are included on the Copy ][ Plus disk. All
you need to do is type in the name of the program you want to back
up, and Copy ][ Plus does the rest! Updated parameter disks will be
available every 3 months from Central Point Software. If you want,
you can enter your own parameters to copy a disk, or use the nibble
editor or hi-res disk scan options to examine how a disk is
formatted.
(Note:
Copy ][ Plus is designed to work with standard 35-track
floppy disk drives. It doesn't support hard disks or RAM disks
because of the special software installation and other restrictions
these require to work. Copy ][ Plus instead accesses the floppy
drives directly for best performance.)
Hardware Requirements
To use Copy ][ Plus, you need a 64K Apple II series computer. This
can be:
Apple ][ with 16K (or larger) memory card, or
Apple ][ Plus with 16K (or larger) memory card, or
Apple //e, or
Apple //c, or
Apple compatible computer with at least 64K or memory.
You need only one disk drive, though a second drive is helpful when
copying disks.
What You Need to Know
To use the DOS utilities, we assume that you are generally familiar
with DOS 3.3 and the standard DOS commands. If you want to examine
disks with the SECTOR EDITOR option, you will want to be more
familiar with the format of files and disks.
Using the Bit Copy program to copy most protected disks doesn't
require any technical knowledge, if the program you want to copy is
included in our list of parameter entries. If it is not, we provide
a few suggestions for how, to copy new programs.
If these suggestions don't work, or if you want to learn more about
disk protection schemes, then you'll need to learn and understand a
number of uncomfortably technical concepts. Protection schemes are
an inexact and rather sneaky art, rather than a science. Most
reasonable people will not be interested in learning it. We do,
however, provide some reference material on disks and disk
protection in the appendices. (If you're having problems backing up
a disk, remember that we also have updated parameter entries
available every three months.)
Hexadecimal number notation is used throughout the Bit Copy program
and occasionally in the DOS utilities. (Following usual computerese
conventions, the hexadecimal numbers are preceded with a dollar
sign, as in "$D5".) Understanding hex numbers is helpful, but not
necessary. Appendix E contains a table that lets you convert between
decimal and hex.
For users interested in learning more, we recommend:
DOS Programmer's Manual, by Apple Computer, for information on DOS
commands, with an appendix on disk file storage.
Beneath Apple DOS, by Quality Software, for information on DOS files
and track and sector formatting,
Understanding the Apple II, also by Quality Software, with a chapter
of in-depth information on disk hardware.
About This Manual
This manual will show you how to use each option step-by-step. In
nearly every case, Copy ][ Plus will show "reminder" prompts as to
what commands or menu options are valid. We encourage you to
carefully read through this manual to take advantage of all of Copy
][ Plus's features.
This manual is divided into three chapters and five appendices.
This chapter, Chapter One, is an introduction to Copy ][ Plus, and
explains how to start up the utilities and the Bit Copy program.
Chapter Two describes the utilities in depth with information on how
to use each utility option.
Chapter Three explains using the Bit Copy program to make backups of
protected disks.
Appendix A is a reference on disks and disk hardware.
Appendix B briefly explains many disk protection schemes.
Appendix C describes the methods that the Bit Copy program uses to
copy a protected disk, and discusses the various parameters used.
Appendix D is a summary of the Bit Copy parameters.
Appendix E is a table of numbers from 0 to 255, with their
hexadecimal and binary equivalents, and the DOS 4-and-4 encoded
equivalent. (Appendix A explains 4-and-4 encoding.)
Starting Up
To access either the DOS utilities or the bit copy program, begin by
booting the Copy ][ Plus disk. In a few seconds, the DOS utilities
menu will appear. (If you have two disk drives, the second drive
will whir for a moment. This is normal and will not hurt any disk in
the drive.) To use the utilities, read on to Chapter Two.
To go from the utilities to the bit copy program, next press the
[RETURN] key three times. The display will change each time, and
after the third time the disk will whir as the Bit Copy program is
loaded. Skip to Chapter Three for instructions on using Bit Copy.
A few words need to be said about the Bit Copy program and copyprotected software. Under the copyright law, you are entitled to
make backups of software for your own use, so that if a disk is
damaged or accidentally erased, the information is not lost. Some
software companies, in efforts to prevent illegal duplication, "copyprotect" their disks so that they cannot be copied using normal copy
methods. The Bit Copy program is designed for copying these
protected disks. It is provided only to help you make backups of
protected disks for your own use, not for illegal copying. (Schools
and institutions wishing to copy a program for educational use on a
number of computers should check with the software publisher for
their educational copying policy.)
The Copy ][ Plus disk is a standard DOS 3.3 disk and is not copyprotected in any way. You can make a backup of Copy ][ Plus using
the COPY DISK option in the DOS utilities, or with any other
standard disk copy program. We encourage you to back up Copy ][ Plus
right away, then put the original disk in your bomb shelter, in case
anything happens to your copy.
Differences with Copy ][ Plus Version 4
For users who are updating from Copy ][ Plus Version 4, here is a
brief summary of the major differences in Version 5:
Version 5 requires 64K of memory, rather than 48K.
The Copy ][ Plus disk is now a standard DOS 3.3 disk, and can be
copied using the COPY DISK option or any normal copy program.
The Bit Copy program can copy more disks than before, and does
"nibble counting" more reliably.
An AUTO COPY feature has been added to the Bit Copy program. Rather
than entering parameters from the Backup Book by hand, just select
the program you want to copy from the "parameter entry" list. Copy
][ Plus fills in the parameters for you. It will even do sector
editing automatically.
A SECTOR COPY option has been added to the Bit Copy program. This
copies the protected programs which used to be copied with the COPY
DISK option from the utilities.
COPY DISK is more reliable and requires fewer passes to copy a disk.
On an Apple //e with 128K of memory or an Apple //c, the entire disk
is copied in two passes. It does not copy protected disks any more.
Use the SECTOR COPY option from the Bit Copy program instead.
The ALPHABETIZE CATALOG option has been added.
The Sector Editor is much more sophisticated yet easier to use. You
can edit absolute sectors on the disk, or follow a file sector by
sector. Other features include disassembly, scanning the disk or a
file for a pattern of bytes, and making specific changes to the
read/write routines for accessing many protected disks. Positioning
the cursor to a specific address is simpler.
Filenames and commands can now be entered using either upper or
lower case characters. Up and down arrow keys can be used (as well
as the left and right arrow keys) for scrolling through menus.
Track and sector numbers are always printed in hexadecimal.
Chapter Two: Dos Utilities
When you boot Copy ][ Plus, the disk will whir for several seconds
as the Copy ][ Plus utilities are loaded into the computer. (If you
have two disk drives, the second drive will whir for a moment, too.
It does this to check if there is a second drive connected. It won't
hurt any disk that might be in the drive.)
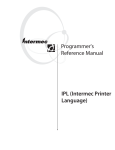
The main utilities menu will appear next:
COPY ][ PLUS 5.n
(C) 1982-5 CENTRAL POINT SOFTWARE, INC.
--------------------------------------COPY
USE ARROW KEYS
CATALOG DISK
& [RETURN] TO
DELETE
SELECT FUNCTION
LOCK/UNLOCK FILES
RENAME FILES
ALPHABETIZE CATALOG
FORMAT DISK
VERIFY
VIEW FILES
TRACK/SECTOR MAP
SECTOR EDITOR
FIX FILE SIZES
CHANGE BOOT PROGRAM
UNDELETE FILES
NEW DISK INFO
QUIT
DISK SLOT DRIVE DOS FREE&USED
3.3
3.3
PRINTER
OFF
Along the left side of the screen are the 16 main options. With some
of these options are sub-menus to select specific functions.
Throughout Copy ][ Plus, you can press the Escape key ([ESC]) to
back safely out of the sub-menu or current option.
One of the menu items is always displayed using inverse (black-onwhite) letters. If you want to select that option, just press
[RETURN]. If you want to select another option, pressing the arrow
keys will move the inverse field to that option. Try pressing the
arrow keys a few times. The left arrow (and up arrow if your Apple
has one) moves the inverse field up, and the right (and down) arrow
moves it down. Once the option you want is displayed in inverse,
then press [RETURN] to run it. Note the prompt in the upper-right:
USE ARROW KEYS
& [RETURN] TO
SELECT FUNCTION
Status Display
At the bottom of the screen will be a display similar to the follow
ing. (The slot numbers shown will be the slot used to boot Copy ][
Plus.)
DISK SLOT DRIVE DOS FREE&USED
A
6
1
3.3
B
6
2
3.3
PRINTER
OFF
Copy ][ Plus uses "names" for the disk drives being accessed. The
names are simply "A" and "B". In the above example, drive A refers
to the disk drive in slot 6, drive 1. Drive B is slot 6, drive 2.
Rather than asking for slot and drive numbers for every option, Copy
][ Plus allows you to quickly select drive A or B as a menu option.
Any time you need to (for example, if you have drives connected to
other slots), you can change drives A and B to be different drives
using the "NEW DISK INFO" option.
(Note: If you have an Apple //c, there are no "slots" for disk
drives. The built-in drive is the same as slot 6, drive 1 on other
Apples. If you have an external drive connected, it's the same as
slot 6, drive 2.)
If you have only one disk drive, then when you boot Copy ][ Plus, it
will select drive 1 for both A and B. Then it doesn't matter whether
you use A or B. They're both the same drive.
You can also access disks in either DOS 3.3 or DOS 3.2 format. In
the example. both drives are selected to read DOS 3.3 disks. If you
want to read a DOS 3.2 disk, simply choose the drive you will use
and select as DOS 3.2 with "NEW DISK I NFO".
The "FREE&USED" area shows how many free and used sectors there are
on disks A and B. If a disk has not been read, this area will be
blank.
NEW DISK INFO
To select the NEW DISK INFO option (second from the bottom), press
the arrow keys until this option is displayed in inverse, then press
[RETURN]. The slot number for drive A will begin flashing. If you
want to change the slot number, you can type a new number, and it
will replace the old. If you want to keep the current slot number,
just press [RETURN]. (If you enter an invalid slot number, the Apple
speaker will beep.)
Next, the drive number for drive A will flash. You can enter a new
drive number or press [RETURN] to accept the one displayed.
The second digit of the DOS version will flash next. This allows you
to select between DOS 3.3 or DOS 3.2. You can enter a 3 to select
3.3, a 2 to select 3.2, or press [RETURN]. If, for example, you
select drive A as DOS 3.2, then you will want to insert your 3.2
disks in drive A to be read. DOS 3.2 and 3.3 are not compatible with
each other. This means that if a DOS 3.2 disk is in a drive selected
as DOS 3.3 (or vice versa), any disk access will cause I/O errors
(Input/Output errors).
After selecting slot, drive, and DOS numbers for drive A, repeat the
process for drive B. If you have only one disk drive, you will want
to leave drive B selected as the same disk drive as A.
Next, the word "OFF" underneath the PRINTER label will change to
"SLOT 0" and the "0" will flash. Copy ][ Plus will let you print the
displays from CATALOG, VIEW FILES, TRACK/SECTOR MAP and SECTOR
EDITOR if desired. If you intend to use the printer with Cop ][
Plus, type the slot number that the printer interface card is in. If
you don't want to use the printer, press [RETURN] or type "0". The
zero is used to designate "no printer", since printer cards cannot
be used in slot 0.
(Note: If you have an Apple //c with a printer connected to port 1,
then you should select SLOT 1 if you want to use the printer from
COPY ][ Plus.)
After selecting the printer slot, the main menu will become active
again. (If a printer was not selected, the slot number will change
back to "OFF".) You're now ready to use the drives you've designated
as A and B.
CATALOG
To get a catalog of the disk, select the CATALOG option. A sub-menu
will appear on the right of the screen. The options are:
Normal
With file lengths
With deleted files
With hidden characters
Once again, use the arrow keys and [RETURN] to choose the option.
Next you will be asked if the catalog is for disk A or B. Select the
drive with the arrow keys and [RETURN]. If the printer is "off", the
catalog will be displayed. If the printer is "on" (selected with NEW
DISK INFO), you will be asked whether or not you want a printout of
the catalog. Answer Y (yes) or N (no).
NORMAL
The "normal" catalog is similar to the standard DOS "CATALOG"
command. The disk volume number is shown, then for each file, the
optional "locked" asterisk, the filetype letter, the file length (in
sectors), and finally the filename are shown, one line for each
file. The catalog pauses after every 20 files. You can continue by
pressing any key (except [ESC], which will stop the catalog and
return you to the main menu). If the catalog is being sent to the
printer, it will not pause.
WITH FILE LENGTHS
The catalog "with file lengths" shows all the same information as
the normal catalog. For all Basic files, it also shows the actual
length of the program in bytes, using both decimal and hexadecimal
notation. For binary files, it shows both the starting memory
address of the file and its length. Here is an example catalog
listing for a couple of files:
*A 006 HELLO
L1137 (L$0471)
*B 003 CHAIN
A2056, L456 (A$0808, L$01C8)
This shows that the Basic file HELLO is 1137 bytes long ($471 in
hex), and the binary file CHAIN has a starting address of 2056 and a
length of 456 (with corresponding hex numbers in parentheses.)
WITH DELETED FILES
The catalog "with deleted files" includes the files on the disk
which have been marked as deleted. but have not yet been overwritten by a new file entry. Any deleted files are marked in this
display with the letter "D" to the left of the entry. (Note that in
some cases, deleted files can safely be recovered and made active
again using the UNDELETE FILES option, explained later.)
WITH HIDDEN CHARACTERS
A catalog "with hidden characters" allows you to see any imbedded
control characters, which are normally not printed by Copy ][ Plus.
The control characters show up as inverse characters. If the Printer
is on, control characters are translated to lower-case.
COPY
The main COPY option gives you four separate choices:
Bit Copy
Copy files
Copy disk
Copy DOS
If you want to go to the Bit Copy program, select the BIT COPY
option. A prompt will appear. Insert the Copy ][ Plus disk in the
appropriate drive and press [RETURN]. The Bit Copy program will be
loaded from the disk.
For the other three choices, COPY FILES, COPY DISK, and COPY DOS,
you can copy from disk A to disk B, or from B to A, selected by the
next menu:
SELECT DISK:
A TO B
B TO A
If you have only one disk drive and both A and B are set to that
drive, then it doesn't matter whether you copy "A TO B" or "B TO A".
COPY FILES
The copy files option allows you to copy standard DOS files from one
disk to another quickly and easily. You should have the disks in the
drives before finishing the menu selections. (If you have only one
drive, you should have the source disk, the one containing the files
to be copied, in the drive.) The source drive will whir for a
moment, then a "catalog display" for the source disk will appear
with a prompt below.
The catalog display is used in various ways throughout Copy ][ Plus
for selecting files to be worked with. Here it is used to determine
which files to copy. Note that the first file in the catalog is
displayed in inverse. By using the arrow keys, you can cause any
file in the catalog to be in inverse. If you repeatedly press the
arrow keys, the display will scroll.
The prompt below the display reads:
[RETURN]-MARK, [D]ELETE, [E]NTER
FILENAME, NUMBER-INSERT, [G]O,
[ESC]-EXIT
These commands allow you to select not only which files to copy, but
in what order to copy them! This is a handy feature if you want
files to appear in a certain order on the catalog of a disk.
Pressing [RETURN] will place a number to the left of the current
(inverse) file. The first [RETURN] will place the number 1, the
second a 2, etc. These numbers represent the order the files will be
copied in. If you accidentally press [RETURN] to number a file you
don't want to copy you can remove the number by moving the inverse
field to that file and pressing [D] for Delete Number. You can also
make insertions in the list of numbers by typing a number directly
then pressing [RETURN].
In addition, you can select one or more files by pressing [E], for
Enter filename. You can type a single filename and the program will
look for that name in- the catalog display and mark it with the next
available number. You can also enter filename "patterns".
A pattern is a filename with one or more equals signs ("=")
in it. The equals sign is a special "wildcard" character that
will match any number of characters in the catalog, as long
as the rest of the filename matches. For example, the pattern
"AB=" will match the files "AB", "ABCDE", and "ABRAHAM". The
pattern "=N=" will match the files "N", "OH NO", or any
filename containing the letter N. The pattern "=" will match
anything, and can be used when you want to copy every file on
the disk.
In addition, patterns can specify what filetypes to match. If you
want a pattern to match only certain filetypes, finish the pattern
by typing a comma, followed by the filetype letters used in the
catalog:
A
I
B
T
-
Applesoft
Integer
Binary
Text
For example, the pattern "=XYZ,BT" will match any file whose name
ends in "XYZ" and is a binary or text file. The pattern "=,A" will
match any Applesoft file.
After you enter the pattern and press [RETURN], the program will
scan through the display marking all matching files. The inverse
field will then jump to the last file matched. If no files match,
the inverse field will return to the file that was in inverse before
you pressed [E].
When you've selected all the files that you want to copy, press [G]
for Go to begin the copy. If only one drive is being used, you will
be prompted to insert the proper disk.
The first file to be copied (or as much of it as will fit in memory)
will be read, then the catalog on the destination disk will be read.
At this point, the program will check to see if any of the files
being copied already reside on the destination disk. If not, copying
will continue. If there are duplicate filenames, you will be
prompted, as in this example:
FILE HELLO
ALREADY EXISTS. NOW WHAT?
[C]OPY ANYWAY, [N]EW NAME, [D]ON'T COPY,
[ESC]-EXIT COPY
(If the duplicate file is locked, the program will say "IS LOCKED"
instead of "ALREADY EXISTS".)
If you select to Copy anyway, the original will be deleted, then the
new file copied. If you select New name, you will be asked to type
in a new name for the file. Selecting Don't copy will simply not
copy this file, and pressing [ESC] will exit out of the entire copy
option.
Note that if several duplicate files are on the destination disk,
Copy ][ Plus will ask about all of these files before doing any
copying. This means that once the questions have been answered, the
program will copy all of the files without requiring your attention.
As the files are being copied. they are displayed in the "file
queue", a straightforward list of the files, with the file currently
being copied displayed in inverse.
COPY DISK
Copy Disk is a fast, reliable routine for copying any standard 13 or
16 sector disks. (DOS 3.3, ProDOS, SOS, CP/M, and Pascal disks all
use a 16 sector format. To copy any of these disks, make sure that
drives A and B are set to DOS 3.3 before selecting COPY DISK. DOS
3.2 disks use a 13 sector format.)
Copy Disk automatically, formats as it copies, so disks do not have
to be formatted ahead of time. To copy a disk, simply select the
option, insert the disks, and press [RETURN]. If for some reason you
wish to stop the copying, pressing [ESC] will return you to the main
menu. If you're copying using only one drive, Copy ][ Plus will
tell you when to insert each disk.
There are 35 tracks on a disk, numbered in hexadecimal from $00 to
$22. As the Copy Disk option makes the copy it first reads a number
of tracks from the "source" disk into memory, then writes those
tracks to the "destination" disk. It repeats this process until all
the tracks are copied. As it reads or writes each track, Copy ][
Plus displays the track number at the bottom of the screen. On a
128K Apple (an Apple //e with extended 80-column card, or an Apple
//c), it reads and writes 18 tracks at a time, and copies the entire
disk in just 2 "passes". On a 64K Apple, it reads and writes 7
tracks at a time, and copies the disk in 5 passes.
Copy Disk also checks for errors as it copies. If an error occurs, a
message will be displayed showing what kind of error it is (Read
error or Write error) and what track on the disk it occurred on. The
program will continue copying the rest of the disk. A read error
means that one or more sectors on the source disk are unreadable.
The disk media itself may or may not be damaged. If a write error
occurs, then the media on the destination disk is most likely
damaged. Double-check everything, then try again.
Even if the Copy Disk routine reads a bad sector, it will still
write a "good" sector to the destination disk. That is, some of the
data in that sector may be inaccurate, but an I/O error will usually
not occur if that sector on the destination disk is read.
If a disk is getting old and begins to create I/O errors, the data
should be copied to a new disk using Copy Disk.
COPY DOS
Copy DOS is similar to Copy disk, but it copies only the first three
tracks of a disk. This is where the Disk Operating System is stored
on DOS 3.3 and 3.2 disks. You can use COPY DOS to add DOS to a disk
that was formatted with the Copy ][ Plus FORMAT option. (See FORMAT
DISK below for more information.) You can copy a new DOS onto a disk
that has somehow had its DOS tracks damaged or erased. You can also
convert an initialized, or "slave", disk into a "master" disk. (The
difference between initialized and master disks is not important in
most applications. See the Apple DOS manual for more information.)
To copy the DOS from one disk to another, insert a disk that
contains the DOS into the source drive and the disk to "receive" the
DOS into the destination drive, then select the COPY DOS option. The
DOS will be copied onto the destination disk.
DELETE
The main DELETE option has four sub-options:
Delete files
Delete disk
Delete DOS
DELETE FILES
This option is equivalent to the standard DOS "DELETE" command,
except that a number of files can be deleted at one time. After
selecting the Delete Files option and drive A or B, a catalog
display appears, similar to the one used in Copy Files. The prompt
reads:
[RETURN] TOGGLES MARKER, [E]NTER
FILENAME, [G]O, [ESC]-EXIT
Pressing [RETURN] causes an arrow "->" to appear to the left of the
file entry. The arrow marks the file to be deleted. Repeatedly
pressing [RETURN] toggles the arrow on and off. A number of files
are marked by using the arrow keys and [RETURN]. A filename or
pattern can also be entered with [E]. The rules for the pattern are
the same as for Copy Files. Any file that matches the pattern will
be marked to be deleted.
To carry out the deletion, press [G] for Go. All files marked will
be deleted. The "file queue" display will show the filenames as the
files are deleted.
DELETE DISK
The Delete disk option cleanly erases all the "record-keeping"
information on the disk, including the names and locations of the
files, and the presence or absence of DOS. Deleting a disk is
similar to reformatting it to start over, but takes less time. (An
unformatted disk, however, must be formatted before it can be used.)
An extra warning prompt will appear on the screen to prevent data
from inadvertently being destroyed:
INSERT DISK TO BE DELETED
READY TO DELETE DISK (Y/N)?
Answer "Y" to delete the disk.
DELETE DOS
As mentioned above, DOS uses the first three tracks on a disk. The
Delete DOS option "frees" two of those tracks so that files can use
them. The first track (track 0) is not accessible to files, and is
not freed. Deleting the DOS increases the storage capacity of a disk
by 8 kilobytes, but the disk cannot be booted, since there is no
longer any DOS to boot. if you try to boot a disk that has had its
DOS deleted with Copy ][ Plus, it will print this message on the
screen:
THIS DISK HAS NO DOS TO BOOT.
INSERT ANOTHER DISK AND
PRESS A KEY TO REBOOT.
LOCK/UNLOCK FILES
If you wish to lock or unlock one or more files, select this option
and select disk A or B. The drive will whir and a catalog display
for the disk will appear. As in a normal catalog, an asterisk to the
left of the filetype letter designates each file that is locked. A
new prompt is displayed:
[RETURN]-TOGGLE ASTERISK, [E]NTER
FILENAME, [G]O, [ESC]-EXIT
Use the arrow keys to select a file, then press [RETURN] to toggle
its 'locked' asterisk on or off. You can use these keys to set the
desired locked status for every file on the disk.
To lock, or unlock a number of files automatically, press [E].
You'll be prompted for a filename, with the same pattern
capabilities as discussed above. After entering a filename, you will
see:
[L]OCK OR [U]NLOCK?
Press [L] to lock, all of the files that match the pattern; press
[U] to unlock- them.
After setting all of the desired files. press [G] for Go. The
catalog will be written back to the disk, with the proper files
locked and unlocked.
RENAME FILES
To rename files, select this option and select disk A or B. The
usual catalog display will appear, with yet another prompt:
[RETURN]-SELECT TO RENAME, [E]NTER
FILENAME, [G]0, [ESC]-EXIT
(RENAMED FILES ARE MARKED)
To rename a file, move the inverse field to that file with the arrow
keys, then press [RETURN]. You will be asked what to rename the file
as. Enter a new name and press [RETURN]. This must be a legal DOS
filename; ie. it must begin with a letter and cannot contain a
comma. If you enter a bad filename, the warning message "INVALID
FILENAME" will appear and you will be prompted for another filename.
If you decide that you do not want to rename the file, press [ESC].
For every file that is renamed, an arrow ("->") appears to the left
of the file. This simply serves as a reminder as to which files have
been renamed.
The Enter filename option is available, but since files must be
renamed manually, the [E] option stops at the first file that
matches the pattern. leaving that file displayed in inverse. From
here you can press [RETURN] to rename the file.
To make the changes permanent, press [G] for Go. The new filenames
will be written to the disk.
ALPHABETIZE CATALOG
This option alphabetizes the file entries stored on the disk so that
when you do a CATALOG, the files will appear in alphabetical order.
Select this option and disk A or B. Copy ][ Plus will read the
current catalog, alphabetize it in the computer's memory, and show
you what the alphabetized catalog will look like. Press [RETURN] if
necessary to see the entire catalog until you see:
[G]-GO, [ESC]-EXIT
If you want this alphabetized catalog made permanent on your disk,
press [G]. If you change your mind and don't want the alphabetized
catalog, press [ESC]. Copy ][ Plus will return you to the main menu
without changing the disk.
FORMAT DISK
This option formats a disk so that files can be stored onto it. A
blank disk must be formatted before it can be used. If a formatted
disk already contains information, then formatting it again will
completely wipe out the old information.
After you select the disk to be formatted (A or B), an extra prompt
message will appear, to verify that you want to format the disk. The
disk will format using whichever DOS is selected (from New Disk
Info) for that drive.
Formatting a disk is not quite the same as initializing one. If
you're unfamiliar with the differences between formatting and
initializing, here is some information that might be helpful:
The FORMAT DISK option:
1.
Lays down track and sector marks so the disk can be written to
and read from (this is the actual formatting),
2.
Writes the catalog track, which is a place to record the names
of the files that will go on the disk,
3.
Writes a "boot sector", so that if you try to boot the disk, it
will print a message saying there is no DOS on this disk to boot.
The DOS INIT command:
1.
2.
3.
Lays down track and sector marks,
Writes the catalog track,
Puts a copy of DOS (Disk Operating System) onto the disk so the
disk will boot,
4.
Saves whatever Basic program is in memory onto the disk,
5.
Sets up DOS so that the Basic program will run automatically
(as the "greeting" program) whenever the disk is booted.
Using Copy ][ Plus, you can make bootable DOS disks. You will need
another disk that already contains DOS and a greeting program.
1.
2.
Format the disk with the FORMAT DISK option.
Use the COPY DOS option to copy the DOS from another DOS disk
onto the new disk. (The Copy ][ Plus disk is itself a standard DOS
3.3 disk, and can be used for this.)
3.
Copy a Basic greeting program onto the disk with the COPY FILES
option.
4.
If necessary, use CHANGE BOOT PROGRAM (described later) to
change the name of the program DOS runs to the name of the file you
saved.
VERIFY
The Verify option is used to select one of four sub-options:
Verify
Verify
Verify
Verify
disk
files
identical files
drive speed
VERIFY DISK
This option is used to check if any
quickly reads each of the 35 tracks
hexadecimal $00 to $22) in turn. As
number is displayed near the bottom
sectors on the disk are bad. It
(numbered 0 to 34, or
it reads, the current track
of the screen:
VERIFYING TRACK $03
If bad sectors are found on any track, their track and sector
numbers will be displayed in hexadecimal in the middle of the
screen, as in this example:
ERROR TRACK $03
SECTOR $5 7 B
This message means there were errors on track $03, sectors $5, $7,
and $B.
When finished, the program will show the total number of errors. If
you want to exit out of the verify before it's finished, you can
press [ESC] at any time.
VERIFY DISK will only work with standard 13 sector (DOS 3.2) or 16
sector (DOS 3.3, ProDOS, SOS, CP/M, and Pascal) disks. Blank
(unformatted) disks will produce errors, since there are no sectors
written on the disk to verify. Most copy-protected disks will also
produce errors, since the formatting on these disks is often
different than the standard Apple 13 or 16 sector format.
If a normal DOS disk you're using is giving DOS I/O errors, it can
be one of three things: bad data, bad sectors, or a physically
damaged disk. Bad data means the catalog or file information is
wrong, for example, telling the DOS to look for a file on track 200!
A bad sector is one that simply can't be read (possibly caused by a
"power glitch" or by opening the drive door or pressing Reset while
the drive was writing) even though the disk is still capable of
storing good data. A disk can also be permanently damaged from
improper handling, fingerprints, heat, spilled coffee, rabid dogs,
etc.
It's a good idea to verify suspect disks to see where the errors
are. If VERIFY DISK displays errors for a DOS disk, then you have
either bad sectors or a damaged disk. You should use COPY FILES or
COPY DISK to save as much of the information as you can, then try to
reformat the disk. If the formatting fails, then the disk is most
likely permanently damaged.
VERIFY FILES
Verify Files checks the data and sectors used by individual files.
After selecting disk A or B, the drive will whir and a catalog
display will appear. Here, the files to be verified can be selected
with [RETURN] the same way the files to be deleted were selected in
the Delete Files option. An arrow will appear by all selected files.
The Enter filename command can also be used to select files, with
the usual multi-file pattern capabilities. To begin verifying those
files, press [G].
The file queue display will show each file in inverse as it is
verified. If an error occurs, the track and sector number for the
error will appear. You can press [RETURN] to continue verifying the
file, [SPACE] to move to the next file, or [ESC] to return to the
main menu.
VERIFY IDENTICAL FILES
This option determines whether or not two files are identical. This
is useful when you have files on different disks with a similar
name, and you don't know whether they are copies of the same file or
are different.
To use Verify Identical Files, insert the disks in A and B, and
select the Verify Identical Files option. Single drive users (who
have both A and B set to the same drive) should insert one of the
two disks in the drive. You will be prompted when to switch disks.
A catalog display for disk A will appear. To select the desired file
from this disk, use the arrow keys to move the inverse field to the
file, then press [G]. The file will be read into memory, then a
catalog display for disk B will come up. In the same way as for the
first disk, select the file to be checked. The two selected files
will then be compared.
A message will appear informing you of whether the files are
identical or different. If they are different, the message will say
how many bytes into the file the first difference was found. (If you
want, you can then use the View Files option. discussed below, to
see what the difference is.)
If the files have different file types (eg. if one file is a Basic
program and the other is a textfile) they cannot be compared, and
the following message will be displayed:
THE FILES HAVE DIFFERENT FILETYPES
You can also use VERIFY IDENTICAL FILES if you want to verify that
two files on the same disk are identical. First use NEW DISK INFO to
set disks A and B to the same drive, insert the disk you want to
verify, then select VERIFY IDENTICAL FILES. When it asks you to
insert the "other" disk, just press [RETURN].
VERIFY DRIVE SPEED
To properly read the data on disks, the disk drive must spin at the
right speed. This speed is 5 revolutions per second, or 1 revolution
every 200 milliseconds. This speed was set at the factory, but with
time, the drive speed can drift. If the speed is too far from 200
milliseconds, I/O errors can occur, or data can be written that is
unreadable on a normal-speed drive.
The Verify Drive Speed option allows you to periodically check the
speed of your disk drives. Select the option and disk A or B, then
insert a blank or unused disk into the appropriate drive and press
[RETURN]. (Do not use a valuable disk. This option writes over a
part of the disk!) In a few seconds, the drive speed will be
displayed. Note that for normal use, the drive speed can vary from
198 to 202 milliseconds (ms.). Small fluctuations in the speed are
also normal. The speed will be displayed until you press [ESC].
If the speed is out of bounds, this procedure can be followed to
adjust the drive speed on Apple Disk II drives, or you can take the
drive to your Apple dealer for adjustment.
1.
Turn off the power to your computer, and disconnect the drive
from the disk controller card.
2.
Remove the drive cover. There are four screws on the bottom of
Apple drives or on the side of Micro-Sci A-2 drives. After removing
them, the cover may be slid off towards the back of the drive.
3.
Now reconnect the drive to the controller card, and reboot your
Copy ][ Plus disk, selecting the VERIFY DISK SPEED option.
4.
The drive speed can be adjusted by turning the speed control
potentiometer. This is a small ceramic box with a tiny adjustment
screw at
the back
Turn the
speed is
5.
one end. It can be found on the smaller circuit board at
of the drive (right side of the drive, far lower corner).
screw with a screwdriver or your fingernail until the drive
correct.
Re-install the cover on your disk drive.
(Note: In Franklin computers, the processor itself runs at a
slightly different speed. This affects both the optimal speed for
the drives and the timing of the VERIFY DISK SPEED option itself.
Most Franklin drives are preset so that the drive speed reads at
about 198 Ms. per revolution. If you have problems accessing or
backing up commercial disks on a Franklin computer, adjusting the
speed closer to 200 ms. may help.)
A more technical discussion of drive speed is included in Appendix A
for interested readers.
VIEW FILES
The View Files option allows you to quickly and easily look at the
data in any file. This is useful for double-checking exactly what is
in a file before copying it, deleting it, etc. View Files has two
sub-options, for viewing the data as values or as text. The values
option shows both the hexadecimal numbers and the ASCII characters
in the file. The text option prints just the characters in a more
readable form. In addition, if the printer is selected, the data can
be sent to the printer.
To view one or more files, select the View Files option, then the
Values or Text sub-option, then disk A or B. A catalog display for
the disk will appear. Use the arrow keys and [RETURN] to select the
file you want to view, then press [G]. If the printer is selected
(with NEW DISK INFO), you'll be asked whether or not you want a
print-out of this file. Answer "Y" for Yes to get a print-out.
The file is displayed a page at a time. You can press [RETURN] to
see another page, or [ESC] to return to the catalog display.
When using the View Values option, the file is displayed as
hexadecimal bytes, 8 bytes per line, with the equivalent ASCII
characters to the right. Control characters are replaced with
periods. In the View Text mode, the characters are printed out in
standard 40-character lines. Control characters are not printed,
except for carriage returns.
In the upper right portion of the screen is a running "byte count",
showing how many bytes in the file have been printed. This can be
used to find the approximate locations of text strings or bytes in
the file.
At the end of the file, there may be a few funny characters,
including inverse "@" signs. These are extra characters beyond the
end of the real end-of-file. They were not suppressed because random
access text files have end-of-file markers interspersed throughout
the file, before the file has actually ended. These files can still
be viewed. The View Files option stops reading when there are no
more data sectors to read.
When you've finished viewing one file, the program returns to the
catalog display. From here, you can select another file to view, or
press [ESC] to go back to the main menu.
Note for Apple //e and Apple //c users: The "rules" used to
determine when an ASCII number represents a character, an inverse
character, or a flashing character on an Apple are not always
consistent from one program or file to another. Apple //e and //c
computers can display some of these values in two possible ways.
When using VIEW FILES or any DOS utilities option, you can press
[CTRL-@] to switch back and forth between these two ways. You can
see the difference if inverse lowercase or flashing characters are
on the screen.
TRACK/SECTOR MAP
The Track/Sector Map gives you an informative display showing what
sectors on the disk are used by which files, and which sectors are
free for use. It can also be used to spot potential disk problems.
For example, a bad disk may have a sector that is used by a file but
still marked as "free for use". That means the data sector is in
danger of being overwritten, and the file should be copied to
another disk.
To see the Track/Sector Map, select the option and the desired disk.
A catalog of the disk will appear first. To the left of each file is
a letter of the alphabet. (If there are more than 26 files, then
inverse letters, then flashing letters, etc. are used.) The letters
by the files will correspond to the letters in the last display, as
you'll see in a moment.
After the catalog, press [RETURN]. Now you will see a grid-like map
of all the sectors on the disk, with the track numbers ($0 to $22)
across the top row and the sector numbers ($0 to $C or $F) along the
left edge. In the grid, every sector on the disk that is marked as
"in use" is shown as a white rectangle (an inverse space). If the
disk is mostly full, large areas of the grid will be filled in with
white. You can see whether or not any given sector is in use by
following the track number down and the sector number across and
noting whether or not an inverse space is there.
After looking at this displays press [RETURN] again. Now the file
information on the disk will be read (ie. the Track/Sector Lists).
With each file, the letter that was shown for the file in the
previous catalog will be placed over every sector that the file
uses. The used sectors, the inverse spaces on the grid, will be
overwritten with the appropriate file letters. For example, if the
file "HELLO" was labelled "A" in the catalog, then every square in
the grid that contains the letter "A" represents a sector used by
the file "HELLO".
When finished, the grid should contain two areas that are still
white. The stripe in the middle, marking every sector in track $11,
represents the catalog track, where the file names and other data
are stored. There should also be a stripe along the left slide. If
the disk contains DOS, then the stripe will cover tracks 0, 1, and
2. If not, the stripe will cover only, track 0. (Track 0 is
unavailable for file data storage.)
Possible problems:
If there are still inverse spaces in other portions of the grid,
this represents other sectors on the disk which are marked as "in
use", but are not being used by any file. If the disk is a
commercial Product, it is possible that the sectors are being used
for storing some kind of special data. They are marked as in use to
keep them from being overwritten. This is rare.
If a file uses a sector that is not marked "in use", a plus sign
appears in that sector of the grid and the warning message "FREE
SECTOR" and the filename are printed. This means that the sector
could be overwritten if more data is written to the disk. The file
should be copied to another disk. You have the option to continue
the Track/Sector Map or return to the main menu.
If two files reference the same sector, a plus sign will appear in
that sector, and the message "SECTOR CONFLICT" will appear. Since
two files cannot (legally) use the same sector, at least one of the
files is damaged. You should copy both files to a new disk and check
them for accuracy.
If the error "INVALID NUMBER" occurs, with a track or sector number
out of bounds, this means that either the catalog information or a
track/sector list are damaged. If no letters for that file appear
yet on the grid, then it is the catalog information that is in
trouble, and the file is lost. Otherwise, the track/sector list is
bad, and some of the file may still be readable.
The errors discussed above do not occur very often. The Track/Sector
Map can be used to help understand disk usage, and catch possible
errors before they crash a disk or destroy additional data.
If you've selected a printer slot with NEW DISK INFO, you can also
print the Track/Sector Map to your printer. You'll be asked "DO YOU
WANT A PRINT-OUT?". Answer "Y"(yes). The catalog and the two screens
will be sent to the printer. Since printers don't print inverse and
flashing letters very well, the "in-use" sectors are marked as
asterisks instead of inverse spaces, and only printable characters
are used for the files.
SECTOR EDITOR
The Sector Editor allows you to directly view and change the data on
any sector of the disk. This is handy for people interested in
poking around files or Track/Sector Lists, etc. to learn more or to
fix problems. It can also be used with the Bit Copy program for
copying certain protected disks. You should use care when working
with the Sector Editor, to avoid accidentally erasing or modifying
important data on the disk.
A good knowledge of hexadecimal, bytes, and ASCII is helpful when
using the Sector Editor. Information specifically on how sector
editing can help back up protected disks is provided in Chapter
Three.
To use the Sector Editor, select the option and disk A or B. The
Sector Editor display will appear, with the sector buffer (256
bytes) cleared to zeros. This display will be explained shortly.
Notice the help prompt at the bottom of the screen:
[?]-HELP SCREEN
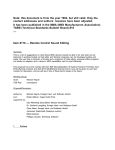
Press [?] to see the help screen, which shows what commands are
available.
SECTOR EDITOR HELP SCREEN
I
J K
M
MOVE CURSOR
B
E
A
R
+
W
F
P
H
T
L
D
S
ESC
JUMP TO BEGINNING
JUMP TO END
JUMP TO ADDRESS
READ SECTOR
READ NEXT SECTOR
READ PREVIOUS SECTOR
WRITE SECTOR
FOLLOW FILE
PATCH READ/WRITE
ENTER HEX VALUES
ENTER TEXT
LIST (DISASSEMBLE)
DUMP TO PRINTER
SCAN FOR BYTES
QUIT
PRESS RETURN
Press [RETURN] to go back- to the Sector Editor buffer display.
Reading Sectors
To read a sector on the disk, press [R] for Read. You will be
prompted to enter the track and sector numbers of the sector you
want to read. Enter the hexadecimal track number and press [RETURN],
then enter the hex sector number and press [RETURN]. (All numbers
used in the Sector Editor are hexadecimal.) An invalid character or
an invalid number will cause the speaker to beep. After you enter
the track and sector numbers, the sector will be read from the disk
into the buffer.
As an example, insert the Copy.][ Plus disk into the drive and
select to read track $ll, sector $F. (This sector is part of the
disk's catalog information.)
Press [R] for Read,
Type "11" for the track number,
Press [RETURN],
Type "F" for the sector number,
Press [RETURN].
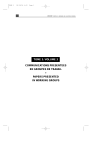
The disk will whir and you should see a display similar to:
SECTOR
00- 00
08- 00
10- CC
18- A0
20- A0
28- A0
30- 04
38- C4
40- A0
48- A0
50- 00
58- D5
60- D3
EDITOR
11 0E 00
00 00 12
CC CF A0
A0 A0 A0
A0 A0 A0
A0 A0 A0
C3 D0 D3
C5 D2 A0
A0 A0 A0
A0 A0 A0
12 0B 04
D4 C9 CC
A0 A0 A0
00
0F
A0
A0
A0
02
A0
A0
A0
A0
C3
C9
A0
00
02
A0
A0
A0
00
CC
A0
A0
A0
D0
D4
A0
00
C8
A0
A0
A0
12
CF
A0
A0
A0
D3
C9
A0
00
C5
A0
A0
A0
0D
C1
A0
A0
02
A0
C5
A0
DISK A
@QN@@@@@
@@@ROBHE
LLO
B@RM
DCPS LOA
DER
B
@RKDCPS
UTILITIE
S
68707880-
A0
A0
D0
CF
A0
A0
D3
D0
A0
55
A0
D9
A0
00
C2
A0
A0
17
C9
A0
A0
07
D4
A0
TRACK $11, SECTOR $F
[?]-HELP SCREEN
A0
04
A0
A0
A0
C3
U@WFDC
C3 PS BIT C
A0 OPY
DOS 3.3
The track and sector number you just read is shown at the bottom of
the screen along with the DOS "patched" option, which in this
example is "DOS 3.3". The Patch option is explained later.
Seventeen lines of the sector are displayed at a time, consisting of
a hex "address" followed by a dash, then 8 hex data bytes (each byte
is a two digit hexadecimal number), then the same 8 bytes as ASCII
characters on the right. The "double cursor" appears in inverse over
both the first hex value and the first character. The characters on
the right may or may not make sense. (In the example above, the
filenames for this disk can be read on the right, along with other
values that were never intended to be printed as characters.)
To understand the address on the left, think of the data bytes
numbered from $00 as the first byte of the sector to $FF as the last
byte. The top line shows the first 8 bytes, bytes $00 through $07;
the next line shows bytes $08 through $0F; the next shows bytes $10
through $17, etc. The address number before the dash tells you how
many bytes into the sector each line is ($00-, $08-, $10-, etc.).
The address number of a byte is not the same as the value of that
byte. In the example, the addresses of the first four bytes on the
first line are $00, $01, $02, and $03. The values of those bytes are
$00, $11, $0E, and $00.
Moving the Cursor
The inverse cursor can be moved through the buffer with the [I],
[J}, [K], and [M] keys. [I] moves the cursor up, [J] to the left,
[K] to the right, and [M] down. (Notice that these four keys make a
diamond pattern on your keyboard. This will help you remember which
direction each key goes.) The buffer display will scroll up or down
to keep the cursor on the screen. [B] moves the cursor directly to
the beginning of the buffer; [E] moves the cursor to the end.
You can also move the cursor to any address in the sector or find
out what address the cursor is currently at. Press [A] for Address.
You'll see:
ENTER ADDRESS: nn
with an address number displayed. This address is simply how many
bytes into the sector the cursor is. If you don't want to move the
cursor, just press [RETURN]. If you want to move to a new address,
type the new address number, then press [RETURN]. The cursor will
immediately jump to the new position in the buffer.
Reading Again
If you want to read a different sector from the disk, you can press
[R] again, and enter new track and sector numbers. You can also read
the next higher numbered sector on the disk by pressing [+] or read
the previous sector by pressing [-].
Changing Bytes
You can change the data in the sector buffer by entering either new
hex values or new text characters. To enter hex values, move the
cursor to the appropriate place and press [H] for Hex. The cursor
over the hexadecimal value will flash. Now enter the new value over
the old. Pressing the space bar will advance you to the next byte,
and pressing [RETURN] will take you out of hex entry.
To enter characters, position the cursor and press [T] for Text. The
cursor over the text character will flash. Typing new characters
will enter those characters into the buffer and advance the cursor.
Press [RETURN] to finish text entry.
Note: While entering text, any control characters typed (including
the arrow keys but not including [RETURN] or [ESC]) will be placed
directly into the buffer.
Another Note: Quite often the text area on the right will contain
funny inverse or flashing characters. The text cursor, which is also
inverse or flashing, might blend right in so you can't tell where it
is. By looking at the position of the hex cursor in the eight data
bytes, however, you can judge the corresponding position of the text
cursor.
Writing
To write a sector back to the disk, press [W] for Write. You will
again be prompted for track and sector numbers. If you want to write
back to the same sector, just press [RETURN] twice. If you want to
write to a different sector, enter new values. The disk will whir as
the sector is written.
How to Edit a Sector
With the options presented so far, you can do most sector editing.
Editing a sector consists of reading the sector, changing the
appropriate bytes, then writing the changed sector back to the disk.
Here's a step-by-step method for making a change to a sector on the
disk:
1.
Do not sector edit a commercial disk! Make a copy of the disk
first, then sector edit the copy.
2.
Select SECTOR EDITOR from Copy ][ Plus, and insert the disk you
want to edit.
3.
Press [R] for Read, and enter the track and sector numbers of
the sector you want to edit. Copy ][ Plus will read the sector into
the memory buffer.
4.
Position the cursor (using [I], [J], [K], [M]; and [B], [E],
[A]) to the address where you want to make changes.
5.
Press [H] and enter new hex values, or press [T] and type new
text characters, to replace the old. If you're entering several hex
values in a row you can press [SPACE] after entering each byte to
advance to the next position. Press [RETURN] to finish the entry.
6.
Press [W] for Write, to write this changed sector back to the
disk.
Follow Files
You can also instruct the Sector Editor to follow and read the
sectors from a file, rather than the absolute sectors on the disk.
(This option is for normal DOS 3.3 and 3.2 disks.)
Press [F] for Follow Files. The disk will whir and a catalogs
display will appear. Use the arrow keys to select the file you want
to sector edit, then press [G] for Go. Copy ][ Plus will read the
first sector of the file and provide the usual sector buffer display
so you can see and change the data. The name of the file is shown
right above the current track and sector numbers, to remind you that
the Sector Editor is following a file.
When following files, the [+] and [-] keys behave a little
differently. Pressing the [+] key will read the next sector from the
file. If you're already at the last sector, [+] does nothing.
Pressing the [-] key reads the previous sector from the file. If
you're at the beginning of the file, nothing happens. By using the
[+] and [-] keys, you can move to any sector of the file. If you
want to change the contents of any of the sectors, use [H] or [T] to
modify the buffer, then write it out by pressing [W], then [RETURN]
twice.
If you want to follow a different file, press [F] again and select
the new file. If you want to go back to reading absolute sectors
from the disk, just press [R] for Read and enter the track and
sector numbers. The sector will be read, the filename will disappear
from the screen, and the [+] and [-] keys will act as before.
Disassembly
The Sector Editor can disassemble and list any 6502 machine language
code that may be in a sector. Position the cursor on the first byte
you want to disassemble and press [L] for List Disassembly. The
sector buffer display will be replaced by 20 lines of disassembled
code. The cursor also advances through the sector by the number of
bytes disassembled. Press [L] to disassemble another 20 lines, or
[RETURN] to go back to the buffer display.
Printer Dump
Using the Printer Dump option, you can print either the buffer
display or a disassembly listing. The printer slot must be set with
NEW DISK INFO before you can use this option.
To print the sector buffer, press [D] for printer Dump. All 32 lines
(256 bytes) of the sector will be printed. To print a disassembly
listing, first press [L] to disassemble the code on the screen, then
press [D]. Twenty lines of disassembly listings will be printed.
Press either [L] or [D] to print another 20 lines. Press [RETURN] to
stop printing and return to the screen buffer display.
Scan for Bytes
An extra feature added to the Sector Editor is the ability to scan
for a pattern of bytes anywhere on the disk, or within a file. If
you haven't read any sectors yet, this option will scan the entire
disk. If you have read a sector, it will scan from the current
position to the end of the disk. If you're following files, it will
scan from the current position in this file to the end of the file.
To scan for Bytes, Press [S] for Scan. You can enter the bytes to
scan for as either hex values or text characters.
A question will appear:
SCAN FOR [H]EX OR [T]EXT?
Type [H] or [T]. If you select
Type in the hex values (one or
scan for, separated by spaces.
TEXT:". Type in the characters
[H], it will then ask "ENTER HEX:".
two digits each) that you want to
If you select [T], it will ask "ENTER
you want to scan for.
You can use the left-arrow key to go back and correct mistakes, and
the right-arrow key to go over values already typed. Press [RETURN].
The program will then rapidly scan the disk, looking for the bytes
you specified. If it finds them, it will stop and display that
sector, with the cursor over the last byte of the pattern. If it
can't find the pattern, it will say "BYTES NOT FOUND".
If you want to scan for another occurrence of the same pattern, just
press [S], then press [RETURN] twice to accept the previous answers
you gave to the two questions. The program will continue scanning.
Patch
Another Sector Editor option is [P], for Patch Read/Write Routines.
Normally the Sector Editor can read only standard DOS 3.3 or 3.2
sectors. Some protected programs use a slightly modified sector
format, so that the disk cannot be read with a normal DOS. The Patch
option lets you read or write these changed sectors. Other protected
disks might use a very different disk format that does not contain
"sectors" at all! The Sector Editor cannot read these disks.
We recommend that you use the Patch option only if (1) you're sector
editing a backup of a commercial program and you have instructions
on what Patch option to use, or (2) you're familiar with disk and
sector formatting. Appendices A and B provide information about
sector formats.
To show how the patch option works, remove the disks from your
drives (we're beining safe here!) and press [P] for Patch. A screen
similar to the following will appear:
SECTOR EDITOR PATCHER
DISK A
DOS 3.3
DOS 3.3 PATCHED
DOS 3.2
DOS 3.2 PATCHED
CUSTOM
-------------------------------------------DOS 3.3
ADDRESS
PROLOG: D5 AA 96
WANTED EPILOG: DE AA
READ EPILOG= DE AA
DATA
D5 AA AD
DE AA EB FF FF
DE AA EB FF ED
CHECK CHECKSUM? YES
YES
CHECK EPILOG? YES
YES
CHECK TRACK? YES
DATA ENCODING: 6&2
CHECKSUM SEED: 00
CHECKSUM RESULT= 00
USE ARROW KEYS & [RETURN] TO SELECT
PATCH OPTION, [ESC]-EXIT
The menu at the top of the screen lets you select what type of
sector you can read or write. You can select normal DOS 3.3 or 3.2
sectors, or DOS 3.3 PATCHED or DOS 3.2 PATCHED. The "PATCHED" items
adjust the Copy ][ Plus read/write routines enough to read many
protected disks, while still reading normal sectors almost as
reliably. (For users who have upgraded from Copy ][ Plus Version 4,
this is the same as the old patch option.)
Right below the dashed line, it shows which patch option is
currently selected (in the example, DOS 3.3). The rest of the
display shows the internal values and settings that make up that
particular patch option.
If you want to select another patch option, use the arrow keys to
display that option in inverse, then press [RETURN]. The display
below the dashed line will change to reflect the new patch option.
For this example, select "DOS 3.2 PATCHED". Notice that it now says
"DOS 3.2 PATCHED" below the dashed line.
Press [ESC] to go back to the Sector Editor screen. Beside the track
and sector numbers, it now shows "DOS 3.2 PATCHED", which is the new
patch option you just selected.
Note: When you leave the Sector Editor, the Copy ][ Plus read/write
routines become "un-patched", and work normally again.
How to Set "Patched" Routines
1.
2.
3.
Press [P].
Press the arrow keys until the option you want is in inverse.
Press [RETURN]. The display below the dashed line will change
to show the new option.
4.
Press [ESC] to go back to the Sector Editor screen. You can now
read or write sectors using the new patch option.
Custom Patching
The fifth option in the Patch menu is CUSTOM. Custom patching lets
you tailor the read/write routines to access a wide variety of
possible protected-sector formats. A good technical understanding of
sector address and data fields is essential for what follows.
The sector "parameters" on the screen are used by Copy ][ Plus when
either reading or writing sectors. The READ EPILOG and CHECKSUM
RESULT fields give you information about the sector that was last
read. They're blank if you haven't read any sector yet. You can
change all of the other fields to determine what kind of sector to
read.
When you select CUSTOM from the patch menu, an inverse cursor
appears over one of the data values. To move the inverse cursor
forward through the list of values, you can press [RETURN], [SPACE],
or the right-arrow key. To move backwards, press the left-arrow key.
When the cursor is over any hex value, you can type a new value to
change it. If the cursor is over a YES-NO response, typing [Y] will
change it to YES and [N] to NO. If the cursor is at the DATA
ENCODING question, you can type [5] to use 5&3 encoding, or [6] to
use 6&2 encoding. Press [ESC] to leave CUSTOM patching and go back
to the patch menu. Press [ESC] again if you want to return to the
Sector Edit buffer display.
When reading, both address and data prologues must match the PROLOG
fields. Volume is ignored. Track number is "partially" ignored if
you answer NO to the CHECK TRACK question. That is, Copy ][ Plus
will seek to the proper track, but will not reseek if the track
number in the address field differs. Sector number must match.
Address and data field checksums and epilogs can be checked or
ignored. If epilogs are checked, then the first two bytes of each
epilog must match the first two bytes in the WANTED EPILOG fields.
The actual epilog bytes read appear in the READ EPILOG fields. The
CHECKSUM SEED value is the starting value used when exclusive-ORing
the data field into memory. It can range from $00 to $3F for 6&2
encoding or $00 to $1F for 5&3 encoding. For normal DOS sectors,
this byte should be $00 to read the data correctly. The data
CHECKSUM RESULT is formed by exclusive-ORing the running data
checksum with the checksum byte on disk. If this byte is nonzero,
the data checksum test fails. This means either the sector was
written with a different CHECKSUM SEED value, or there's an error in
the data field, or the data checksum byte on the disk is wrong.
When reading a sector, Copy ][ Plus tries to find an address and
data field pair on the track that passes all the tests. If it fails
after many tries, it gives up and prints an "I/O ERROR" message. You
can sometimes find out how far it got by checking the Patch display
after you get the error. If it can find a correct address prolog, it
will finish reading the address field and the address READ EPILOG
values will be filled in. If it finds a correct data prolog, it will
read the rest of the data field and the data READ EPILOG and
CHECKSUM RESULT values will be filled in.
When writing, it must first read the appropriate address field, then
write a new data field over the old. The address field parameters
behave as described above. The new data field prolog is written
using the data PROLOG bytes. The data is exclusive-OR'ed and written
using CHECKSUM SEED as a starting value. This should be $00 to write
normal sectors. If the data CHECK EPILOG field is set to YES, then
the WANTED EPILOG bytes will be written as the data epilog. If CHECK
EPILOG is set to NO, then the READ EPILOG bytes are used. This
allows the routines to automatically write the same epilog it read.
It writes 5 epilog bytes (rather than 2 or 3) because a few
protected disks check for these extra bytes.
FIX FILE SIZES
When a short program is saved over the top of a long one, Apple DOS
does not free the extra sectors that are no longer used. They
continue to use space on the disk. Usually the only way to recover
the space is to load the file, delete it, and save it back to disk.
The Fix File Sizes option is also designed to recover unused space
at the end of files. It will free extra space from Basic and Binary
files, but not textfiles. As mentioned earlier, the true lengths of
textfiles cannot readily be determined, because random access
textfiles can have end-of-file markers anywhere in the file.
To free up extra space, simply select Fix File Sizes and disk A or
B. The "file queue" will show each file in turn as the program
checks the file and recovers any extra space. The file queue will
quickly skip over any textfiles on the disk, as they are not
checked.
CHANGE BOOT PROGRAM
When a standard initialized DOS disk is booted, it automatically,
runs whatever Basic program the disk was initialized with. For
example, a disk that was initialized with the command "INIT HELLO"
will run the program "HELLO" whenever it is booted. Using the Change
Boot Program option, you change the DOS to boot a different Basic
program, or even BRUN a binary file or EXEC a textfile on boot-up!
Select the Change Booting Program option and disk A or B. A catalog
display for the disk will appear. At the bottom of screen, the name
of the file that the disk currently boots up with will be printed.
To select a new booting program, use the arrow keys to place the
inverse field over the desired file. You can also Enter a filename
or a pattern. The inverse field will stop at the first filename that
matches the pattern.
Press [G] to save this file as the booting program. Copy ][ Plus
will automatically, check the filetype of the file, and set either
the RUN, BRUN, or EXEC command for boot-up.
UNDELETE FILES
When a file is deleted, it is not immediately erased. It is instead
marked internally as a deleted file, and its sectors are marked as
free to be re-used. If other data does not later overwrite part of
the file, it can still be recovered and made an active file. If a
file has just been accidentally deleted, and no other disk writing
has occurred, the file can always be recovered, or "undeleted". That
is what the Undelete Files option is for.
To undelete one or more files, select the option and disk A or B. A
catalog display will come on the screen, this time containing a list
of all the deleted files still stored invisibly in the catalog. (If
there are no deleted files in the catalogs, the message "NO FILES"
will appear.) Use the arrow keys, the Enter filename command, and
[RETURN] to select the files to be undeleted. Press [G].
The file queue will show the files as the program attempts to
undelete them. If a deleted file has already been partly or
completely overwritten with other data, Copy ][ Plus will not
undelete it, since the data is not recoverable. If any of the files
cannot be undeleted, they will then be listed with the label "LOST
FILES". The rest of the files will be active.
QUIT
When you want to exit Copy ][ Plus and run another program without
turning your Apple off, select the QUIT option. You will be prompted
to insert a new disk to boot, using the same drive that Copy ][ Plus
was booted in. Press [RETURN] and the disk will be booted.
Chapter Three: Bit Copy
The Copy ][ Plus Bit Copy program is designed to allow you to make
backups of software which, due to copy-protection schemes, does not
copy using standard disk duplication programs. The Bit Copy program
is easy to use, yet is capable of being adjusted to handle nearly
every type of protection scheme currently in use.
Overview: Parameters
Copy ][ Plus can backup many protected disks automatically However,
with the increasingly complicated protection schemes used, no one
automatic method can copy, every disk. Some protected disks can't be
copied correctly unless certain "parameters" are changed first.
These parameters are values that Copy ][ Plus uses in deciding how
to copy, a disk-. If you change one or more of the parameters, this
in effect tells Copy ][ Plus: "Don't copy the disk in the usual way;
do it this way instead."
Earlier versions of Copy ][ Plus included a Backup Book, which
listed many programs with the parameter changes needed to back them
up. You would run the Bit Copy program and follow the instructions
in the Backup Book for copying any particular disk. Entering
parameters by hand was simple and easy, but it could become a little
tedious after a while.
With Copy ][ Plus Version 5, the parameter entries are stored right
on the disk. All you need to do is select the name of the program
you want to back up. Copy ][ Plus will look up the parameter changes
for that program, make those changes for you, and copy, the disk. If
there is no parameter entry listed for a program you want to back
up, we also provide a number of "try this" entries. Updated
parameter entries are available on disk every three months from
Central Point Software. The original "manual mode" is also included
for typing in parameter changes yourself if you want.
To start up the Bit Copy program, first boot the Copy ][ Plus disk.
In a few moments, the DOS utilities menu will appear. Leaving the
disk in the drive, press [RETURN] three times. The disk will whir as
the Bit Copy program is loaded, and you will see the following menu:
COPY ][ PLUS BIT COPY PROGRAMS 5.0
(C)1982-5 CENTRAL.POINT SOFTWARE, INC.
-------------------------------------AUTO COPY
PARTIAL AUTO COPY
MANUAL BIT COPY
MANUAL SECTOR COPY
NIBBLE EDITOR
HI-RES DISK SCAN
CREATE NEW PARM ENTRY
EDIT PARM ENTRY
LOAD PARM ENTRY
SAVE PARM ENTRY
RENAME PARM ENTRY
DELETE PARM ENTRY
QUIT
USE ARROW KEYS & [RETURN] TO
SELECT FUNCTION
The AUTO COPY and PARTIAL AUTO COPY options are used when you want
to select a parameter entry from the Copy ][ Plus disk to back up a
program. MANUAL BIT COPY and MANUAL SECTOR COPY provide two ways to
copy a disk, and let you chance parameters and other options
yourself. The NIBBLE EDITOR and DISK SCAN features are useful for
people who want to investigate disk formatting and protection
schemes themselves. The next six options on the menu let you change
or add to the list of parameter entries on the disk. ("PARM" is an
abbreviation for "parameter".) The QUIT option is used when you want
to leave the Bit Copy program and boot another disk.
Selecting a Bit Copy option works the same way as in the DOS
utilities. One of the options is always displayed using inverse
(black-on-white) letters. Pressing the right and left arrow keys
(and up and down arrow keys, if available) moves the inverse field
to a different option. Once the option you want is displayed in
inverse, press [RETURN] to select it.
AUTO COPY
Select AUTO COPY when you want to copy a program from the Copy ][
Plus parameter list. A new screen will appear:
AUTO COPY
NAME:
Notice the help lines at the bottom of the screen:
ENTER PARM ENTRY NAME OR
PRESS [RETURN] FOR LIST OF ENTRIES
If you know that the program you want to back up is included in the
parameter list, type the name of the program and press [RETURN]. If
you instead want to see the list of parameter entries, just press
[RETURN].
If you press [RETURN] without entering a name, the disk will whir
and a display, of all available parameter entries will appear
(similar to the "catalog display" from the DOS utilities). Note that
the first entry name is displayed in inverse. By using the arrow
keys, you can cause any name in the list to be in inverse. If you
repeatedly press the arrow keys, the display will scroll to show you
all of the entries. Pressing [CTRL-B] will display the beginning of
the list; pressing [CTRL-E] will display the end of the list. Use
these keys to move the inverse bar to the entry you want, then Press
[RETURN] to select it.
You can also select to see just a part of the parameter entry list.
This is especially helpful when you're not quite sure of the
spelling for the entry you want. When you're asked for the name,
type in just the first few letters of the entry name, then press
[RETURN]. Copy ][ Plus will show you only those entries that begin
with the characters you typed. You can then use the arrow keys and
[RETURN] to select from that list.
Once you've selected the entry name - either by typing it in or by
selecting it from the list - the disk will whir again as the
parameters to copy that program are loaded from the disk.
A new display appears now for you to select which drives you'll be
using for copying the disk. If you have two drives, you'll usually
want to copy from the original disk in drive 1 to a duplicate disk
in drive 2. You can change this if you like. If you have only one
drive, you'll of course use drive 1 for both the original and
duplicate disks. Copy ][ Plus will then tell you when to insert each
disk.
On the screen you'll see:
ORIGINAL DRIVE: 1
If you want the original disk in drive 1, type "1" or just press
[RETURN]. If you want to use drive 2, type "2". The next question
is:
DUPLICATE DRIVE: 2
Similarly press [RETURN] to accept drive 2 for the duplicate disk if
you have two drives, or type a new drive number.
After you've answered the DUPLICATE DRIVE question, a few other
questions, along with the correct answers for copying this disk,
will pop immediately onto the screen. The parameter entry you
selected is filling in the answers for you. At the bottom of the
screen you'll see:
-- INSERT DISKETTES -RETURN TO BEGIN
ESC
TO RESTART
Q TO QUIT
/ TO MODIFY
You don't need the "Q" or "/" commands here. They're explained later
under MANUAL BIT COPY. If you decide you don't want to copy the
disk, press [ESC] to go back to the main Bit Copy menu.
To copy the disk, now insert the original disk you're copying into
the "original drive", and insert a blank or "scratch" disk (one you
don't mind writing over) into the "duplicate drive". Press [RETURN]
to start copying.
(Note:
It's sometimes all too easy to insert the wrong disk in
the wrong drive and end up copying a blank duplicate disk over your
original. If you want to be extra safe, put a write-protect tab over
the notch on your original disk before you copy the disk. The writeprotect tab is an excellent safeguard, the electronics in the disk
drive will prevent any program from writing onto a write-protected
disk.)
Copy Status
Copy Plus uses the middle of the screen to give you detailed
information about each track of the disk as it is read and analyzed,
and the bottom of the screen gives you status information. Copy ][
Plus goes through several stages when copying each track. It must
"read" each track into memory from the original disk, then it must
"analyze" the track before "writing" it out to the duplicate drive.
Lastly, it must "verify" that the track was written correctly then
it can go on to the next track. For some disks, the copy process
will include "Synchronizing" to each track before reading or
writing.
As the copy process continues, you will see the following letters
appear on the track/status display on the lower portion of the
screen.
S
R
A
W
V
Synchronizing track (doesn't always appear)
Reading track
Analyzing track
Writing track
Verifying track
In some cases, the verifying takes only a fraction of a second, so
you may or may not be able to see the "V" in the status display.)
Errors and Error Numbers
In addition, as each track is finished, a track status (error)
number will be left on the display. The numbers, and their meanings,
are:
0
2
3
4
tab.
5
6
7
No error. Track copied correctly.
Read error. Cannot read the track with these parameters.
Track too long.
Duplicate disk is write-protected. Remove the write-protect
Write verify error.
Nibble count error.
Sector edit I/O error.
(Error number 1 is no longer used.)
A couple of things to Keep in mind: 1) Even if you get errors on one
or more tracks, the duplicate disk, may still work. 2) If you don't
get any errors, it's still possible that the duplicate disk won't
work. With protected software, remember that Copy ][ Plus is trying
to copy a disk that was designed not to be copied. It may give an
error copying a part of a disk that's ignored by the program anyway;
or (without the correct parameters set) it may "miss" a piece of
"hidden" formatting that the program does need in order to boot. The
best test is always to boot the duplicate disk to see if it runs
correctly.
Comments
When the AUTO COPY is finished, it will display the message "PRESS
RETURN" at the bottom of the screen. AUTO COPY also has the
capability to print a comment on the screen. If a comment was
included in the parameter entry, then Copy ][ Plus will print the
comment. The comments are usually helpful hints in getting the backups to work. You might see comments like:
PUT WRITE-PROTECT TAB ON BACKUP
BEFORE USING.
or
IF BACKUP DOESN'T BOOT, TRY
RE-COPYING TRACK 1.
AUTO COPYing again
If you select AUTO COPY again while still in the Bit Copy- program,
it behaves a little differently. Suppose you're making two backups
of a program called "VIDEO GAME". The first time, you can either
type the name VIDEO GAME or select it from the parameter list. After
the first copy is made, though, the parameters for copying VIDEO
GAME are already loaded. When you select AUTO COPY second time,
you'll see:
AUTO COPY
USE 'VIDEO GAME'? Y
Press [Y] for Yes, or just press [RETURN], to use the VIDEO GAME
parameter entry again.
Whenever a parameter entry is already loaded in the computer you'll
be asked this question so that you can use the entry again without
having to reload it.
If you instead want to AUTO COPY different program from the
parameter list, you'll need to reinsert your Copy ][ Plus disk so it
can load the parameter list. Press [N] for No in response to the
above question. Then you can select a new parameter entry name as
you did before.
If a Program is Not Listed
You may want to back up a program that is not included in the Copy
][ Plus parameter list. Or if the software publisher of the disk has
changed the protection scheme, the parameter entry provided may not
work with your new version. In either case, we've provided a few
"sample" parameter entries that will copy many protected disks. Each
entry begins with the word "TRY", as in "TRY SYNC" or "TRY HEADER".
You should try backing up your disk using each of the "TRY"
parameter entries, testing the duplicate disk after each copy.
If these don't work, remember that updated parameter entries are
available every three months from Central Point Software. The
appendices also provide information which can help you figure out
what parameter changes to try. (Many parameter entries are supplied
by users who are kind enough to share their discoveries. These
entries have not been verified by Central Point Software.)
PARTIAL AUTO COPY
It's just another aspect of Murphy's Law that with a few of the
protected disks, you may need to try copying the disk a couple of
times before you get a copy that works. Because of the critical disk
timing (measured in millionths of a second) and other floppy
factors, some disks will not copy exactly the same way every time.
If a backup doesn't work, quite often it's only one track or one
group of tracks that wasn't copied correctly. The rest of the disk
may be fine. In this case, all you need to do is recopy those tracks
on the same duplicate disk. The parameter entries for these disks
will usually include a comment telling you what tracks will need to
be recopied. (See "Comments" above)
Anytime you want to recopy just a range of tracks on a disk, select
the PARTIAL AUTO COPY option from the main menu. PARTIAL AUTO COPY
lets you choose what range of tracks to copy but fills in the rest
of the parameters for you, like AUTO COPY.
To select PARTIAL AUTO COPY, use the arrow keys to display this
option in inverse, then press [RETURN]. You'll be asked for the
parameter entry name. Select the entry as you did in AUTO COPY.
Next, answer the ORIGINAL DRIVE and DUPLICATE DRIVE questions.
The next question is not filled in for you as it was before. The
prompt reads:
ENTER START TRACK: 0
Type in the number of the track you want to start copying on. You
can just press [RETURN] if you want to start with track 0. The next
question is:
ENTER END TRACK: 22
Type the number of the last track you want copied, or press [RETURN]
to copy up to track $22. If you enter the same number for both start
and end tracks, then only the one track will be copied.
(Note: Some programs don't use every track on the disk, and the
parameter entries for those programs won't copy the unused tracks.
If the track range you enter is not found in the parameter entry at
all. then nothing will be copied.)
The last three questions are filled in for you as before. Insert
your original and duplicate disks (or just the original if you have
only one drive), then press [RETURN] to start copying. Copy ][ Plus
will copy just the range of tracks you specified, setting all the
parameters that apply to those tracks.
MANUAL BIT COPY
MANUAL BIT COPY is the option to use if you want to set the
parameters yourself before copying a disk. Perhaps you have
parameters for backing up a program written down on paper, but not
stored as a parameter entry on disk. Or if you're familiar with the
Copy ][ Plus parameters, you may want to experiment with changing
them while copying disks. MANUAL BIT COPY lets you enter these
changes.
When you select MANUAL BIT COPY from the menu, the usual Bit Copy
screen will appear. You'll be asked to enter:
ORIGINAL DRIVE:
DUPLICATE DRIVE:
ENTER START TRACK:
ENTER END
TRACK:
TRACK INCREMENT: 0
SYNCHRONIZE TRACKS?
KEEP TRACK LENGTH?
If you make a mistake when answering any of these questions, press
[ESC]. You can then go through the questions again.
The first four prompts have been discussed earlier. Select which
drives you want to use for the original and the duplicate disks.
Then enter the start and end tracks for the range you want to copy.
To copy the entire disk, just press [RETURN] twice to accept a start
track of $0 and an end track of $22.
The next question, TRACK INCREMENT, determines what kind of spacing
to use. Most disks use adjacent tracks (tracks 0, 1, 2, 3, etc.).
These are copied with a track increment of 1. However, Apple drives
can be positioned to read from any half-track or even quarter-track
boundary. The only limitation is that in most cases, to work
reliably, the tracks of information must be spaced at least one
track increment apart. For example, a protected disk could use
tracks 0, 1.5, 3, 4.5, etc. This would be copied with a track
increment of 1.5.
You can enter half-tracks and quarter-tracks in response to the
START TRACK, END TRACK, and TRACK INCREMENT questions. Half-tracks
are numbers that end in ".6"; quarter-tracks end in ".25" or ".75".
The next question is SYNCHRONIZE TRACKS? If you answer [Y] for Yes,
Copy ][ Plus will maintain the track-to-track alignment of the data
from the original disk to the duplicate. Synchronizing tracks slows
down the copying somewhat, so you'll probably want to use it only
when you think the disk you're copying requires it.
The last question is KEEP TRACK LENGTH? This is also known as
"nibble counting", and if selected, it will cause the duplicate
disk, to have the same number of "nibbles" per track as the original
disk. Nibble counting will help back up disks that require it, but
takes longer and can otherwise make the disk slightly less reliable.
Answer [Y] for Yes if you want to keep the track length.
(Note: For interested readers, more information on track spacing,
synchronized tracks, and nibble counting- can be found in Appendix
B.)
After you've answered all of these questions, you'll see the same
prompt at the bottom as before:
-- INSERT DISKETTES -RETURN TO BEGIN
Q TO QUIT
ESC
TO RESTART
/ TO MODIFY
Press [Q] if you want to quit out of the Bit Copy program altogether
and boot another disk. Press [ESC] if you want to go back to the Bit
Copy, main menu.
You may need to change one or more parameters before copying the
disk. Every parameter has both a parameter number and a value. For
example, parameter number $31 determines whether or not Copy ][ Plus
will fix "invalid" bytes on the disk. If the value of parameter $31
is 1, then Copy ][ Plus will fix invalid bytes, if the value of
parameter $31 is 0, then it won't. Other parameters have different
effects. (Each parameter is explained in Appendix C.)
To change parameters, press the [/] (slash) key. You'll see:
-- PARAMETER CHANGE -CHANGE WHAT PARAMETER:
Type the number of the parameter you want to change and press
[RETURN]. Copy ][ Plus then asks:
TO WHAT VALUE:
The current value of the parameter is displayed under the flashing
cursor. To change it, type the new value and press [RETURN]. If you
want to keep the current value, just press [RETURN].
After you've entered the new value, it will go back to the CHANGE
WHAT PARAMETER question so that you can change another parameter.
When you're finished changing the parameters you want, just press
[RETURN] instead of typing a parameter number.
Now you'll be back to this menu:
-- INSERT DISKETTES -RETURN TO BEGIN
ESC
TO RESTART
Q TO QUIT
/ TO MODIFY
Insert the disk you want to copy into the 'original drive' and
insert a blank disk into the 'duplicate drive'. Press [RETURN] to
begin copying.
As each track is copied, you'll see the copy status letters and
error numbers appear across the bottom of the screen (described
earlier under AUTO COPY). Additional technical information (see the
appendices) appears in the middle window. It may look something
like:
TRACK:00
FF
D5
AA
FF
AD
CF
9A
START: 6C48
FF
AA
FF
FF
B6
97
AB
SOURCE: 1881
FF
96
FE
FF
DB
9A
97
FF
FF
DE
FF
DC
AE
B2
FF
FE
AA
FF
F4
AE
B2
LENGTH: 1824
FF
AA
EB
FF
F3
96
AD
OBJECT:
FF
AA
FF
D5
BB
AD
AB
FF
AA
FF
AA
BD
AC
9A
SYNC
The TRACK number simply tells you which track is being copied. The
START value is the address within the memory buffer that Copy ][
Plus found the start of the track. The LENGTH value is how many
bytes long (minus any "big gap") the track data is.
Next is a block of hexadecimal bytes from the disk which Copy ][
Plus determined to be the track start. "Sync" bytes are shown in
inverse, and the actual track start is the first byte in the second
row.
On the last line, the SOURCE number is the total number of bytes on
the original track, including a possible sync field before the data.
A number will also appear for OBJECT, showing the number of bytes
that were written to the duplicate disk. When nibble counting is
used (when you answer Yes to the KEEP TRACK LENGTH question), this
number will change as Copy ][ Plus adjusts the number of bytes being
written to match the SOURCE byte count. On the right, you'll see
either "HEADER", "SYNC", or "GAP" for each track. This describes
which method Copy ][ Plus used to determine the start of the track.
MANUAL SECTOR COPY
The MANUAL SECTOR COPY option provides an alternate way of copying
some protected disks. Rather than reading an entire track at a time,
MANUAL SECTOR COPY reads each sector from the track. It then formats
and writes each sector on the duplicate disk. This option can back
up normal, or "almost normal", disks more reliably, and can handle a
few protection schemes more readily than MANUAL BIT COPY. However,
MANUAL SECTOR COPY is not designed to copy disks whose formatting
differs too greatly from DOS sectors.
After selecting MANUAL SECTOR COPY you need to tell Copy ][ Plus
which drives to use and what tracks to copy:
ORIGINAL DRIVE:
DUPLICATE DRIVE:
ENTER START TRACK:
ENTER END
TRACK:
TRACK INCREMENT:
You'll then see:
USING SECTOR COPY
followed by the usual -- INSERT DISKETTES -- display. If you need to
change any parameters before starting the sector copy, press [/] to
change them now. Otherwise, insert your disks into the appropriate
drives, then press [RETURN] to start the copy.
Note: When you use MANUAL BIT COPY or MANUAL SECTOR COPY, Copy ][
Plus does not change the parameters back to their original values.
If you need to copy, more than one range of tracks, the parameters
you set for the first range will still be set unless you change them
again. However, when you copy a program with AUTO COPY or PARTIAL
AUTO COPY, Copy ][ Plus restores all parameters to their original
values before it reads the new parameter settings from the parameter
entry. That way, you can AUTO COPY several disks in a row without
worrying about the previous parameter settings. The entry, you
choose will also automatically select either Bit Copy or Sector Copy
for you.
If you want to restore all parameters from MANUAL BIT COPY or MANUAL
SECTOR COPY, press [/] and select to change parameter $FF. This is a
special parameter. Instead of asking CHANGE WHAT VALUE, it will
display:
-- RESTORE PARAMETERS -ARE YOU SURE? Y
Press [Y] or [RETURN] to restore all parameters to their original
values.
NIBBLE EDITOR
You can use the NIBBLE EDITOR option to see the actual bytes stored
on any track of the disk. This can be invaluable for learning about
disk formatting, or helping to determine what protection scheme or
schemes a disk uses. When you select the NIBBLE EDITOR option, you
can view the track data, but you can't change it. Later we'll
explain how to use the nibble editor from within a disk copy so that
you can make changes to the disk itself. (By the way, it's called a
nibble editor because the disk bytes are sometimes referred to as
"nibbles".)
When you select the NIBBLE EDITOR option from the main Bit copy
menu, you'll be asked:
ORIGINAL DRIVE:
ENTER START TRACK:
ENTER END
TRACK:
TRACK INCREMENT:
SYNCHRONIZE TRACKS?
It doesn't ask for a duplicate drive since you're not doing any
copying. It does ask for start track, end track, and track increment
so that you can nibble edit several tracks in a row if you want. If
you answer Yes to the SYNCHRONIZE TRACKS question, it will "align"
the track immediately before reading the data. (See below.)
After answering the above questions, you'll set the usual -- INSERT
DISKETTES -- prompt. Insert the disk you want to examine into the
appropriate drive and press [RETURN]. The disk, will whir as the
track is read into the memory buffer, or track buffer.
The memory buffer is simply a large portion of the Apple's memory
set aside for storing the bytes that are read in from the track. (In
Copy ][ Plus Version 5.0, this buffer is from address $5F00 to
$BF00.) The nibble editor reads two or three revolutions of the
track into this buffer. In most cases it starts reading from any
arbitrary point on the circular track. This means if you read the
same track twice the data will probably not be in the same place in
the buffer each time.
If you selected SYNCHRONIZED TRACKS, then the nibble editor will
seek and synchronize itself to a point on another track (Usually
track 0), then immediately seek back- and begin reading. If you read
the same track twice using SYNCHRONIZED TRACKS, the data will appear
within a few bytes of the same place each time. (This is also the
same synchronizing that's done during a bit copy.)
You'll then see a display similar to:
COPY ][ PLUS BIT COPY PROGRAMS 5.n
(C) 1982-5 CENTRAL POINT SOFTWARE, INC.
--------------------------------------TRACK: 00 START: 5F00 LENGTH: 44FF
5EE0: 80 80 80 80 80 80 80 80
VIEW
5EE8: 80 80 80 80 80 80 80 80
5EF0: 80 80 80 80 80 80 80 80
5EF8: 80 80 80 80 80 80 80 80
5F00: 9E AE AE DC E6 AF AB B9 <- 5F00
5F08: F5 E6 E6 DF DA F6 CF F9
5F10: 03 00 FE EF F3 B5 F6 CF
5F18: F7 B5 F3 CE 07 FC CE EA
5F20: DE 96 FA BE F3 CE F7 B5
--------------------------------------A TO ANALYZE DATA
? FOR HELP SCREEN
Q FOR NEXT TRACK
ESC TO QUIT
/ CHANGE PARMS
SPACE TO RE-READ
The first fine of the nibble editor display indicates what track you
are currently editing, its start address in Apple memory, and its
length. Since no analysis has been done yet, this is the start
address and length of the entire buffer, not of the track data.
Beneath this is the actual track image. It is shown as the Apple
memory address followed by 8 hexadecimal bytes per line. The word
"VIEW"' to the right lets you know you are in VIEW mode (there is
also a CHANGE mode, described below), and you can scroll through the
track buffer. The address at the right marked by "<-" is the actual
memory address of the byte that's under the flashing cursor.
Several options are displayed in the bottom window. You can ask Copy
][ Plus to perform its track analysis by pressing [A]. The track
analysis routines, using the current parameter settings, determine
the start and end of the track data, then move the cursor to the
track start and change the START and LENGTH values at the top to
reflect the track size rather than the memory buffer size.
Pressing [Q] will quit this edit and move on to the next track.
[ESC] will exit the editor and return you to the main Bit Copy menu,
and [SPACE] will re-read the track. [/] operates just as it does
when copying disks, allowing you to chance parameters.
If you press [?], you will be presented with a help screen which
shows you what other commands are available from the nibble editor:
NIBBLE EDITOR COMMANDS
BEGINNING B
C
UP 32
T
F
UP
I
LEFT
J K RIGHT
DOWN
M
S
DOWN 32
V
Q
END
E
?
RESET BEG CTRL-B P
RESET END CTRL-E RTN
CHANGE NIBBLE
FIND NIBBLES
R REPEAT FIND
TOGGLE SYNC
NEXT TRACK
HELP
PRINT TRACK
RETURN TO EDIT
The cursor moving commands (B, T, I, J, K, M, V, and E) are quite
straightforward, and let you move anywhere within the track buffer
with a minimum of effort. [CTRL-B] and [CTRL-E] can be used to
establish a new track beginning or track end at the current cursor
position. The START and LENGTH values will change, so you can. use
these commands to calculate the "distance" (in bytes) between any
two bytes in the buffer.
[C] allows you to change nibbles, and you will notice the "VIEW"
status becomes "CHANGE" when [C] is pressed. You may then enter any
string of hex bytes separated by spaces and they will be placed at
the current cursor position.
[F] allows you to find a string of bytes in the buffer. You will see
the prompt "FIND" appear in the lower right of the nibble edit
display. You can enter any 1 to 3 byte sequence for the editor to
find. Spaces are optional. If the string is found, the cursor is
moved to the first byte of the string. If it is not found, the
cursor is moved to the end of the track buffer. You can also enter
the single byte "80" to find the next sync byte in the buffer.
Pressing [R] will repeat the find command for the last specified
string.
[S] will toggle the byte at the current cursor position between sync
(shown in inverse) and standard (normal), converting standard bytes
to sync, and sync bytes to standard.
[P] allows you to print a track. It will start printing at the
current cursor location and extend to the end of the buffer if no
analysis has been done, or to the track end if analysis has been
performed. The printer slot number and page length are Copy ][ Plus
parameters and may be changed at any time. The sync bytes in the
buffer are printed with their high bits cleared. (For example, a
sync $FF will be printed as a $7F.)
When examining a track with the nibble editor, using [/], [SPACE],
and [A] in sequence allows you to view a track, make any parameter
chances you wish, then re-read and analyze the track using the new
parameters. This analysis is the same that Copy ][ Plus uses when
copying a disk.
As mentioned earlier, if you select the NIBBLE EDITOR option from
the main Bit Copy menu, you can read the track and make changes to
it in memory, but you can't write those chances back to the disk. If
you do want to make changes to the disk itself, there is a different
method for entering the nibble editor. Select MANUAL BIT COPY,
selecting the tracks you want to edit, then set parameter $0B to 2.
This tells Copy ][ Plus to "copy with nibble editor entry". It will
read a track from the original disk, then pop you into the nibble
editor so you can edit that track. When you're finished editing,
press [Q] to quit out the editor. It will resume the copy process,
writing the edited track to the duplicate disk. (If you want to read
and write the same disk, then set both the original and duplicate
drives to the same drive number.)
When using the editor from MANUAL BIT COPY rather than the NIBBLE
EDITOR option, the [A] to analyze, [/] to change parameters, and
[SPACE] to re-read commands are not available. Copy ][ Plus has
already set parameters and read and analyzed the track as part of
the copying process before entering the nibble editor.
(If you're interested in better understanding disk formatting and
protection schemes, we suggest you begin by using the nibble editor
to examine a standard DOS disk, identifying the various address and
data fields described in Appendix A. Then try examining and
comparing the formats of various protected disks.)
HI-RES DISK SCAN
The HI-RES DISK SCAN option is a quick graphical tool to help you
determine which tracks or half-tracks on a disk contain useful data,
and which tracks are "blank". It does this by showing you the
general pattern of sync bytes and invalid bytes on any tracks you
specify.
HI-RES DISK SCAN reads each track into the track buffer, then
divides it into groups of 41 bytes each. If there are any invalid
bytes or sync bytes in the group, Copy ][ Plus plots a dot on the
high-resolution graphics screen. If there are no invalid or sync
bytes in the group, it leaves that point black. The dots for each
track are plotted in a vertical line, from top to bottom of the
screen.
To use HI-RES DISK SCAN, select the option from the main Bit Copy
menu, then answer the questions concerning drive, track range, and
synchronized tracks. Insert the disk you want to scan, then press
[RETURN]. The DISK SCAN screen will appear, with the hexadecimal
track numbers ($00 to $23) at the bottom of the screen. Vertical
lines or dots will appear above each track number as the track is
scanned. Press [ESC] if you want to exit out before it's finished,
or press any key to exit when it's done.
Here is a picture of a DISK SCAN of a normal DOS 3.3 16-sector disk.
Each track is plotted in a vertical line over the track number. Any
normal 16-sector disk will produce a display similar to this. The
white dots are the sync fields between the sectors. The short stripe
on each track is the longer sync field at the start of the track.
If you scan a normal DOS disk on the (unwritten) half-tracks, you'll
see irregular patterns of stripes and dots. This is caused by the
drive trying to read bytes from the whole tracks on either side of
the half-track, leaning toward one track or the other.
(Note: The patterns .will not line up from one track to the next.
The timing used when stepping from track to track is not the same as
when the disk was written, so each pattern begins at a different
point around the circular track.)
If you scan a disk that has never been formatted or written to, you
will see a solid stripe for each track. This is because an
unformatted disk contains many invalid bytes around each track,
which show up as white. Unused tracks on a protected disk will also
appear as white stripes.
The HI-RES DISK SCAN option provides you with a quick way to see
some of the peculiarities of a protected disk. You can use DISK SCAN
to help locate the more "interesting" tracks, then use the nibble
editor to examine those tracks more closely.
Parameter Entries
Several options in the Bit Copy menu are provided so that you can
create and edit your own AUTO COPY parameter entries, and add these
to the list of parameter entries already on the Copy ][ Plus disk.
You can also build new lists of parameter entries on other disks if
you want to keep them separate from the Copy ][ Plus disk. We
suggest you make a "work copy" of your Copy ][ Plus disk and make
any changes to the work copy rather than the original.
Each parameter entry is a set of special instructions which Copy ][
Plus can use when backing up a particular program with AUTO COPY.
The instructions tell Copy ][ Plus how to set start and end track,
track increment, any parameter changes, etc., before copying the
disk.
Here are the main instructions used in parameter entries. Each
instruction is described first, then followed by short examples
where appropriate.
Txx-Tyy
T0-T22
T11-T1B
T1.5-T7.5
T3.75-TE.75
Copy from track xx to track yy. In other words, select
a START TRACK of xx and an END TRACK of yy.
copies from track $0 to track $22.
copies from track $11 to track $1B.
copies from track 1.5 to track 7.5. (These are halftracks).
copies from track 3.75 to track E.75 (quarter-tracks).
T4-T5
copies tracks $4 and $5.
Tx
Copy only track xx. Set both START TRACK and END TRACK
to xx.
copies only track $0.
copies only track $21.
T0
T21
STEP zz
STEP 2
STEP 1.5
Select a track increment of zz.
selects a track increment of 2 (which would copy every
other track).
selects a track increment of 1.5.
SYNC
Answer Yes to the SYNCHRONIZE TRACKS question.
KEEP
Answer Yes to the KEEP TRACK LENGTH question.
xx=yy
3E=2
10=97
Set parameter number xx to value yy.
sets parameter $3E to 2.
sets parameter $10 to $97.
RESTORE
Restore all parameters to their original values. This
command should always be on a line by itself.
SECTOR COPY
Do a sector copy rather than a bit copy-. If no tracks
are specified (see below), then it copies tracks $0 to
$22. If tracks are listed, it only sector copies those
tracks.
"COMMENT"
Any comments in the parameter entry should be in quotes
and on separate lines. The comments will be displayed
on the screen during copying. You can have more than
one line of comments, but each line should be enclosed
in quotes.
The instructions that do a copy need to be separated by commas. Here
are a few examples of instructions alone or combined together:
T0
T0-T22
TA-TE, SYNC
T0-T22, KEEP
T4-T5, SYNC, KEEP
TO-T8, STEP 2
Tl.5-T7.5, STEP 1.5
T0, 3E=2
T2-T22, E=D4, F=AB, 10=97
SECTOR COPY
T0-T3, SECTOR COPY
T0-T3, SECTOR COPY, 57=D4
Remember that some protected disks use different protection schemes
on different tracks of the disk. These disks often require several
"passes" through the bit copy, each pass selecting a different track
range and setting different parameters. When Copy ][ Plus reads a
parameter entry to copy a disk, it reads all of the instructions
from one line of the entry, sets the appropriate track numbers,
parameters, etc., then does the copy. Then it reads the next line of
the entry to do the next pass (if there is one). When creating the
entry, you need to remember that all the instructions for one pass
should be together on a line, and different passes should be on
different ones.
Here is an example of a multi-pass parameter entry:
T0
First copy just track 0, no parameter
changes.
T1.5-T7.5, 3E=2, 10=97
Then copy half-tracks 1.5 to 7.5, after
setting parameter $3E to $2 and $10 to $97.
T11-T21, SECTOR COPY
Then sector copy tracks $11 to $21.
T22, KEEP, 9=1
Lastly copy track $22, keeping track length
(do nibble counting), after setting
parameter 9 to 1.
The best examples can be found in the parameter entries stored on
the Copy ][ Plus disk. We'll explain shortly how you can load and
see these parameter entries.
Sector Edit Parameters
The Bit Copy program can also do automatic sector editing to the
duplicate drive, controlled by a parameter entry with AUTO COPY.
Sector editing is a novel method used to help back up certain
protected disks.
On some protected disks, most of the program is stored using fairly
normal DOS-type sectors, but one or two tracks contain special marks
which a bit copy program may have trouble duplicating. When the
program is loaded, it looks for these special marks on the disk. If
it doesn't find them, it "knows" that this is a copy and not the
original disk, and will refuse to run.
The sector edit approach is to actually modify part of the program
stored on the duplicate disk so that when it boots, it simply
ignores the fact that the marks are absent. The modification can
either remove the protection check, or ignore the results of the
check after the test has been done. Determining what kind of change
to make to a specific disk is usually a major programming task. If
you already know what needs to be changed, though, it's fairly easy
to make the change. (The SECTOR EDITOR option in the Copy ][ Plus
DOS utilities lets you make changes by hand.)
If an AUTO COPY parameter entry calls for sector editing, Copy ][
Plus will automatically do the sector edit to the duplicate disk The
only time you need to be aware of this is if you want to create your
own parameter entries that include sector editing.
The sector edit instructions need to specify: which track and sector
is to be modified, whether it is a DOS 3.3 or 3.2 type sector, if
the read/write routines should be "patched" (see the SECTOR EDITOR
section in Chapter Two for a description of "patched"), any other
parameters that may need to be set (for "custom" patching), and
lastly the addresses in the sector to be changed along with their
new values. Here, in the correct order, are the parameter entry
instructions needed to do sector editing:
SECTOR EDIT,
TRACK xx,
SECTOR yy,
DOS 3.n,
This starts the sector edit.
Track number,
Sector number,
DOS 3.3 for 16 sector disks, DOS 3.2 for 13
sector disks,
(optional) PATCHED,
PATCHED option if desired,
(optional parameter changes),
Any other parameter changes,
aa:dd,
aa:dd/dd/dd
The position (address) in the sector to
change, and the data to change it to,
Changes to adjacent bytes in the sector.
Here are a couple of examples to clarify this:
SECTOR EDIT, TRACK 0, SECTOR 8, DOS 3.3, A0:60
This example edits the sector at track 0, sector 8, which is a DOS
3.3-type sector. The byte at address $A0 is changed to a $60, then
the sector is written back to the disk.
SECTOR EDIT, TRACK 22, SECTOR 1, DOS 3.2,
PATCHED, 59=97, 14:00, D5:2F/AF/32
This edits track $22, sector 1 as a DOS 3.2-type sector, using
"patched" read/write routines. Parameter $59 is set to $97. The byte
at address $14 is changed to a $00, then the three bytes starting at
address $D5 are changed to $2F, $AF, and $32.
If an I/O error occurs while Copy ][ Plus is trying to sector edit
the duplicate disk, an error "7" will appear in the status display.
Sector editing should always be done to a copy of a commercial disk,
never to the original!
LOAD PARM ENTRY
This Bit Copy option lets you select a parameter entry from the
disk, load it into memory, then see and modify the instructions that
make up the entry. When you select LOAD PARM ENTRY, a new screen
appears:
LOAD PARM ENTRY
NAME:
Enter the name of the parameter entry you want to load, or press
[RETURN] to see a list of all of the parameter entries. You can
select the entry name from the list, just as in AUTO COPY. The disk
will whir as the entry is loaded, then the "parameter entry edit
screen" appears. Here is a sample edit screen:
NAME: RASTER BLASTER
BY: BUDGECO
---------------------------------------T0
T5-Tll, STEP 4, A=2, E=AD, F=DE, 55=3, 4
4=1, 45=10
T6-Tl2, STEP 4
T7.5-TF.5, STEP 4
Tl.5-T3.5 STEP 2
"RETRY TRACK ZERO UNTIL BOOTS"
The first line shows the name of the parameter entry,. The "BY" line
shows the software publisher's name. (This line may be blank in some
entries.) Below the dashed line are the bit copy instructions that
make up the entry. Notice that the second instruction line was too
long and wrapped around to the next line on the screen.
You can make changes to the parameter entry in memory if you want.
If you press [RETURN] twice, that will keep the same entry name and
"BY" name. You can also type new names over the old. This is handy
if you want to create a new parameter entry by editing an old one.
The original entry on disk will remain unchanged.
The name and the BY line can be up to 29 characters long, and
contain any characters except "*" and "_". After you enter a new
entry name, a "*" will appear by the name. (Parameters on the Copy
][ Plus disk that were submitted by users all have a "*" by the
name. Parameters that were tested and verified by Central Point
Software do not have a "*".)
Once the cursor is down in the instruction area it acts like a
miniature word processor. Typing characters inserts those characters
into the line. The left-arrow key deletes characters, and the rightarrow key can be used to restore them if you deleted more than you
wanted to. (You can also move the cursor then restore the deleted
characters at the new cursor position.)
To move the cursor, press [ESC]. The blinking underline cursor will
change to a flashing plus-sign. Pressing [I], [J], [K], [M] will
move the cursor up, left, right, down. (The diamond pattern these
four keys make on the keyboard will help you remember which
direction they move.) Press any other key to change back to a normal
cursor.
After you've pressed [ESC] to make the cursor a flashing plus-sign,
you can also press [?] to see a help screen of "PARM ENTRY EDITOR
COMMANDS".
When you press [RETURN] to end a line or use [ESC] to move the
cursor to another line, Copy ][ Plus checks the line to make sure it
contains only valid parameter entry instructions. If there is an
error, Copy ][ Plus will print an error message at the bottom of the
screen and leave the cursor on the line with the error. Here are
some examples of incorrect instructions with the error messages they
produce:
T6-T5
END TRACK < START TRACK
The start track number needs to be less than the end track number.
TQ
BAD TRACK NUMBER
"Q" is not a valid track number.
99=66
ILLEGAL PARM NUMBER ( < 7F)
The parameter number is too big. The largest valid parameter number
is $7F.
SA31RPQ SYNTAX ERROR
Copy ][ Plus can't make sense of what you typed. It's not a valid
parameter entry instruction.
You can also print the parameter entry on your printer. Press [CTRLP] anytime the cursor is in the instruction area. Copy ][ Plus will
display the printer slot number (slot 1, unless you change it) and
ask you to press [RETURN] to print the entry.
Press [CTRL-Q] when you want to quit out of parameter editing and go
back to the Bit Copy menu.
EDIT PARM ENTRY'
Whenever you use AUTO COPY, PARTIAL AUTO COPY, or LOAD AUTO COPY,
the parameter entry you last selected is stored in the computer, in
case you want to use it again. With the EDIT PARM ENTRY option, you
can look at or modify whatever parameter entry is currently stored
in memory. When you select PARM EDIT ENTRY from the Bit Copy menu,
Copy ][ Plus displays the parameter entry edit screen, the same one
used in LOAD PARM ENTRY. As before, you can change the NAME and BY
lines, or press [RETURN] to accept the current lines. Then you can
use the editing keys to change the instructions that make up the
parameter entry. Press [CTRL-Q] to exit.
CREATE NEW PARM ENTRY
Select this option when you want to create a new parameter entry
from scratch.
Copy ][ Plus will show you a blank parameter entry edit screen with
the cursor flashing on the NAME line. Type the name you want to give
this new parameter entry. You must type at least one character for
this field. Then fill in the BY line. This can be blank if you want.
Now type in the copying instructions for the parameter entry,
following the rules that were given earlier under "Parameter
Entries" and "LOAD COPY". As before, press [CTRL-Q] to exit the
editor.
If you create a new parameter entry, you can use AUTO COPY to test
it out if you want, before saving the entry to disk.
SAVE PARM ENTRY
After you've made changes to a parameter entry; or create your own
parameter entry, select SAVE PARM ENTRY if you want to save it back
to the disk to make it permanent. The disk will whir as Copy ][ Plus
saves the parameter entry.
If there is already a parameter entry with that name stored on the
disk, Copy ][ Plus will print:
ENTRY ALREADY EXISTS
REPLACE IT?
Press [Y] or [RETURN] to replace the old entry with the new; press
any other key if you don't want to save it.
Note: You should normally save parameter entries onto your work copy
of Copy ][ Plus. The entries themselves are recorded in two files on
the disk, called PARM.KEY and PARM.DATA. The Bit Copy program looks
for these files when it saves an entry. If it can't find the files,
then it creates them on the disk, then saves the Parameter entry
into them. This is handy if you want to store your own parameter
entries onto another DOS disk or if the Copy ][ Plus becomes full.
However, if you always want to save the entry onto the Copy ][ Plus
disk, you need to be sure the disk is in the drive before you select
SAVE PARM ENTRY.
RENAME PARM ENTRY
Select RENAME PARM ENTRY if you want to change the name of one of
the parameter entries stored on disk. To choose which parameter
entry to rename, you can either type in the old name or press
[RETURN] and select the name from the entry list. Then Copy ][ Plus
will ask for NEW NAME. Type the new entry name. Remember that this
can be 1 to 29 characters long, and can include any printing
character except for an asterisk or underline. When you press
[RETURN], the disk will whir as Copy ][ Plus renames the entry.
DELETE PARM ENTRY
To delete a parameter entry from the entry list, select DELETE PARM
ENTRY, then type the name of the entry to delete or press [RETURN]
to choose from the parameter entry list. The entry then will be
deleted.
Possible Parameter List Errors
If there is a problem when loading or saving a parameter entry, Copy
][ Plus will print an error message. Here is a summary of possible
errors:
- WRITE PROTECT ERROR PLEASE REMOVE
WRITE PROTECT TAB
FROM DISKETTE
This error will occur if you're trying to save, rename, or delete a
parameter entry on the disk. Remove the write-protect tab from the
disk and try again.
THE PARM ENTRIES ON
THIS DISKETTE HAVE
BEEN DESTROYED
This not-very-pleasant message means that the files that contain the
parameter entries are somehow damaged. The parameter entry you
requested cannot be loaded. You should make a new work copy from
your original Copy ][ Plus disk and use this new copy from now on.
- WRONG DISKETTE PLEASE INSERT A
PARM FILE DISKETTE
Copy ][ Plus could not find the parameter entries on this disk. You
probably have the wrong disk in the drive.
- I/O ERROR UNABLE TO LOAD OR
SAVE PARM ENTRY
It can't read this disk. Either the information on the disk- has
been damaged, or the wrong disk is in the drive.
- DISKETTE FULL -
INSERT ANOTHER DISKETTE
TO SAVE PARM ENTRY
There is no more room on this disk for saving parameter entries.
You'll need to either delete any entries that you don't want, or
start saving new entries onto another DOS disk. (See "SAVE PARM
ENTRY" for more information.)
- PARM ENTRY DIRECTORY FULL Copy ][ Plus can keep track of up to 752 parameter entries on a
disk. You just tried to save the 753rd entry. Delete the entries you
don't want any more, or start saving new entries onto another DOS
disk.
- PARM ENTRY NOT FOUND You typed in a parameter entry name (or the first few letters of the
entry name), and Copy ][ Plus couldn't find it in the list. You may
have misspelled the name of the entry.
- ENTRY ALREADY EXISTS You're trying to rename a parameter entry, and the name you chose is
already in the parameter entry list. You can't have two entries with
the same name.
QUIT
Use the QUIT option from the main Bit Copy menu when you want to
exit out of Bit Copy and boot another program. When you select QUIT,
the following message appears:
PRESS [RETURN] TO BOOT DISK, OR
PRESS [SPACE] TO RE-ENTER BIT COPY
Insert the disk you want to boot into drive 1, then press [RETURN].
If you don't want to exit the Bit Copy program, press the space bar.
APPENDIX A: DISKS AND DISK HARDWARE
This appendix is included as a concise reference on disks and disk
hardware. It explains disk formatting and storage, and most of the
terms needed before exploring disk protection schemes. It is,
however, a reference rather than a tutorial. For more complete
information and some useful examples, we suggest the book "Beneath
Apple DOS" by Quality Software. Also, an appendix in Apple's DOS
Programmer's manual describes DOS file formats, and "Understanding
the Apple II" (also by Quality Software) describes the disk hardware
in greater depth.
This reference assumes that you are familiar with computer concepts
such as hexadecimal, binary, bytes, bits, and subroutines.
Apple DOS, Files, Tracks, Sectors
The Apple Disk Operating System performs a number of tasks,
including saving or writing files onto the floppy disk, loading or
reading files from the disk, and keeping track of where on the disk
the files are stored.
Depending on what program is being run, DOS may need to access
anywhere from one byte up to thousands of bytes from the disk at any
one time. What is needed is a way to divide the information into
manageable chunks. These chunks are called "sectors".
The data on a normal DOS disk is stored in 35 circular tracks,
numbered 0 through 34 ($00 through $22 in hexadecimal). The
outermost track is track $00; the innermost track is track $22.
The disk drive, controlled by DOS, can position the read/write head
(similar to the tape head in a cassette deck) over any one of the
tracks. As the disk spins underneath, the drive can read or write
the information on that track.
Each circular track is divided (like a pie) into 16 sectors. The
sectors on each track are numbered 0 through 15 ($00 through $0F).
Each sector stores 256 bytes of usable data. DOS always reads and
writes information a sector at a time.
There are (35 tracks * 16 sectors =) 560 sectors on a DOS 3.3 disk.
A disk can store a total of (560 sectors * 256 bytes per sector =)
143,360 bytes (140K). However, DOS itself takes up 3 tracks (tracks
$00-$02) and the catalog takes up another track (track $11).
Therefore, on an initialized DOS disk, 126,976 bytes (124K) are free
for files.
When a file is saved to disk, DOS breaks the file into 256-byte
chunks, looks on the disk for sectors that are not currently "in
use", saves the chunks into the free sectors, makes a record on the
disk of which sectors the file uses (so it can find the file later),
and marks the sectors "in use".
When you CATALOG a disk, the 3-digit number to the left of each
filename is the number of sectors on the disk that the file uses.
Apple DOS 3.3, Apple Pascal, ProDOS, CP/M, and Apple /// SOS all use
the same track and sector formatting. However, the way the sectors
are used for file storage varies greatly with each operating system.
Disk Hardware, Reading and Writing Bytes, Disk Speed
The disk spins at about 5 revolutions per second, or 0.2 seconds =
200 milliseconds per revolution.
The bytes on the disk (and the bits that make up those bytes) must
be written at evenly spaced intervals around the circular track.
Since the disk media is passing under the read/write head at a
fairly constant speed, that means each bit must be written onto the
media at the right moment, in order to be placed onto the correct
spot on the disk.
The timing involved in accessing the disk, especially when writing,
must be precise. This makes disk access very "timing critical".
When writing a single byte to the disk, DOS sends the byte to a
special "data latch" on the disk controller card. The hardware on
the card then writes the 8 bits of the byte, one bit at a time, onto
the disk media passing under the head. The hardware writes one bit
every 4 usec (microseconds, or millionths of a second). It takes 32
microseconds to write all 8 bits of the byte (4 usec per bit * 8
bits per byte).
To write many bytes, DOS sends bytes to the data latch at exact 32
microsecond intervals, so that when the hardware has finished
writing one byte, it receives the next byte to write.
If another byte isn't sent to the latch at the end of 32
microseconds, then the hardware begins writing individual zero bits
onto the disk, a zero bit every 4 microseconds, until another byte
is sent to the latch.
Any byte value can be written to the disk. However, only some values
can be read back reliably, due to the Apple disk format and the
nature of floppy disks in general.
When reading, the disk hardware waits until it reads a one bit from
the disk, then gathers the next 7 bits to form an 8-bit byte. This
is one of the fundamental limitations. Every byte read from the disk
has its high bit set. If a byte is to be read back correctly, it
must be written to the disk with its high bit set.
The other limitation is that the circuitry can't reliably read more
than 2 zero bits in a row. If there are too many zeros in a row, the
circuitry will begin reading some of them incorrectly as ones.
Bytes that have more than 2 consecutive zero bits are considered
"Invalid bytes", because they cannot be read reliably. If an invalid
byte stored on the disk is read back, it might be read correctly, or
it might be read incorrectly, as another invalid byte or as a valid
byte.
[sic] stored on the disk, though it may not be the byte that was
read (since the circuitry may have read it wrong).
Since not all possible byte values can be read correctly,
information being written to the disk must usually be "encoded" in
some way first, so that only valid bytes are written. DOS does this
encoding for every sector it writes.
Another problem in reading the disk is finding where one byte ends
and the next byte begins. The data on the disk is stored simply as a
long stream of bits. Here is an example bit stream:
1 1 0 1 0 1 0 1 1 0 1 0 1 0 1 0 1 0 0 1 0 1 1 0
The hardware could read a byte starting with any of the one bits. If
the starting point is wrong, then the bytes read will be completely
wrong. What is needed is a way to "synchronize" the hardware to the
correct byte boundaries.
To synchronize the hardware to the bytes when reading, special bytes
called "sync bytes" are written onto the disk with every sector. A
sync byte is written by sending an $FF (binary 11111111) to the disk
data latch, then waiting 40 microseconds before writing the next
byte. The $FF is written during the first 32 microseconds, then the
hardware writes 2 zeros to the disk before a new byte is sent to the
latch. Sync bytes are sometimes referred to as 10-bit bytes (8 bits
for the $FF + 2 zero bits).
If several sync bytes are written one after another, the following
pattern will be stored on the disk:
1 1 1 1 1 1 1 1 0 0 1 1 1 1 1 1 1 1 0 0 1 1 1 1 1 1 1 1 0 0
etc.
When reading this pattern from the disk, if the hardware is already
"in sync". it will read 8 ones (to make an $FF byte), skip the 2
zeros (because it's waiting for another one bit), read the next 8
ones (to make another $FF), skip 2 more zeros, and so on. To DOS,
sync $FF's look just like normal $FF's.
Often, however, the hardware will be "out of sync" when it begins
reading the sync bytes. (For example, it may begin with the fifth
one bit of the above pattern, and read back binary 1 1 1 1 0 0 1 1,
or $F3.) Because of the 10-bit pattern being read 8 bits at a time,
sync bytes have an interesting property. After reading at most 5
sync bytes, the hardware will always fall into sync with the bytes
stored on the disk.
Other 9 and 10 bit patterns can also be used to synchronize the disk
hardware, but 10-bit $FF's are the most common.
The total number of bits that can fit on a track is determined by
how fast the disk is spinning when it is written to. If the disk is
spinning at a slower than usual speed, then the bits will be written
more closely together on the track. This means more bits are written
before the track has completed a full revolution.
Unfortunately, the quality of the disk, media imposes limits on how
closely the bits can be packed reliably on the disk. The standard
disk speed of 200 milliseconds per revolution was chosen as a good
compromise between reliability and high data storage.
A standard disk speed also needs to be maintained for compatibility
from one disk drive to the next. For example, a drive spinning at
the slow speed of 210 milliseconds per revolution might be able to
format, read, and write its own disks reliably but it will have
great difficulties reading a disk that was made on a drive that
spins at a correct 200 milliseconds.
If a drive spins at the correct speed, 50000 bits will fit around
the track. This can translate to 6520 ($1978,) 32-usec bytes, or
5000 ($1388) 40-usec sync bytes.
Contents of a Sector
In order to read any given sector, DOS must move the read/write head
to the right track, then begin reading bytes, waiting for that
sector to pass under the head.
Every sector is made up of an address field and a data field. The
address field contains information such as which sector this is and
what the volume number of the disk is. The data field contains the
actual information desired, such as a part of a file.
Here is a breakdown of a sector:
Sync field: between 5 and 40 sync $FF's. This guarantees that the
hardware is in sync before reading the address field.
Address Field:
Prologue: D5 AA 96. These three bytes act as a marker that says "A
Sector Begins Here". The DOS read routines look for this pattern
first. When it finds the pattern, it knows that the rest of the
address field follows.
Volume number: 2 bytes. The volume number of the disk is stored next
(in every sector) in an encoded form that uses only valid disk
bytes. The encoding used here is called "4-and-4 encoding", and uses
2 bytes to store the 1-byte volume number. (A table of 4-and-4
encoded numbers is in Appendix E.)
Track- number: 2 bytes. The track number is also stored in the
address field of each sector, using 4-and-4 encoding. It is included
so that in case the read/write head is "lost" and over the wrong
track, DOS can find which track it's on by reading an address field,
then move from there to the correct track.
Sector number: 2 bytes. The "hard" sector number, 4-and-4 encoded.
(See below for hard and soft sectors.)
Checksum: 2 bytes. Another 4-and-4 encoded number that is used to
verify that the volume, track, and sector numbers are correct.
Epilogue: DE AA. This marks the end of the address field.
Possible glitch bytes: See below.
Sync field: about 5 to 10 more sync $FF's.
Data Field:Prologue: D5 AA AD. These three bytes mark the beginnings
of the data field. The encoded data always follows.Data: 342 bytes.
The 256 bytes of information are stored here, encoded as 342 valid
disk bytes. The encoding scheme used is called "6-and-2 encoding",
and involves some rather complicated bit rearranging, exclusiveORing, and table look-ups. The part of DOS that does the encoding
and decoding is fast and efficient, but the 342 disk bytes bear
little resemblance to the 256 data bytes they represent.
Checksum: 1 byte. This byte is used to help verify that there are no
errors in the 342 data bytes.
Epilogue: DE AA. These bytes mark the end of the data field and the
end of the sector.
Reading, Writing, and Formatting
When either reading or writing a sector, DOS must first find the
correct sector. It calls a read address field routine that looks for
and reads the next address field to pass under the read/write head.
DOS then checks the track and sector numbers from this address field
to see if this is the desired sector. If it is not, DOS continues to
look for the correct one. If it can't find the desired sector in a
certain amount of time, it gives up and returns an error.
When reading, after DOS finds the right address field, it calls a
routine to read the data field, which will be passing under the
read/write head within a couple hundred microseconds.
When writing, after finding the correct address field, DOS calls a
routine to write a new data field over the old one. The calls
themselves aren't timed exactly, so DOS might begin writing the new
data field a few bits earlier or later than the old data field. This
produces a "glitch" on the disk where writing begins, since the new
bits aren't in sync with the previous bits on the disk.
Another glitch occurs at the end of the data field, when DOS stops
writing new information.
When DOS reads the disk, these glitches often throw the hardware out
of sync with the bytes on the disk. That's why both address and data
fields are preceded with sync fields, so that the hardware can get
back into sync.
Notice that during normal use, data fields are rewritten, but not
address fields. When a disk is formatted, both address and data
fields are written onto the disk.
In formatting each track, DOS writes a very large initial sync
field, then the 16 sectors in order from $0 to $F, in one revolution
of the disk. This "wipes clean" any old information that might have
been on the track. The data fields written are "empty". (When read
and decoded, the sectors contain all zero bytes.)
The initial sync field is large enough that the last sector put onto
the track will overwrite the beginning of the sync field as the disk
completes one full revolution.
If the disk is spinning too fast, then the entire initial sync field
(and possibly part of the first sector) will be overwritten, which
means the formatting failed.
If the disk is spinning more slowly than usual, then the remaining
part of the sync field which was not overwritten will be very large.
When DOS 3.3 begins formatting a disk, it writes and rereads the
first track a few times, adjusting the sizes of the sync fields
between each sector (changing the amount of data written onto the
track) so that the remaining initial sync field is about the same
size as the other sync fields. This certainly isn't necessary, but
it spaces the sectors around the track a little more evenly.
Before writing a sector, DOS must "pre-nibblize" the 256 data bytes
into 342 disk bytes to be written. After reading a sector, DOS must
"post-nibblize" the 342 disk bytes back into 256 data bytes. Because
of the time this takes, the next sector to read or write has already
passed by before DOS is ready to access it. DOS is fast enough,
though, to access every other sector as it passes under the head.
To make disk access fast yet simple, DOS "re-maps" the sector
numbers in memory so that if a program asks for consecutive sector
numbers, DOS will actually access every other disk sector for speed.
The sector numbers asked for by a program (including the Copy ][
Plus DOS utilities) are called "soft sectors". The sector numbers
actually stored on the disk are called "hard sectors".
For example, if you access soft sectors $7, $6, $5, and $4 in that
order, DOS will look on the disk for hard sectors $1, $3, $5, and
$7. Here is a table for translating between hard and soft sectors:
Soft Sector
0
7
E
6
D
5
C
4
B
3
Hard Sector
0
1
2
3
4
5
6
7
8
9
A
2
9
1
8
F
A
B
C
D
E
F
To translate the hard sector number into the actual 4-and-4 encoded
sector number stored in the address field, see Appendix E.
Differences in DOS 3.2 Format
The original DOS 3.2 disk controller cards could not read 2
consecutive zeros reliably. Because of this, there are a number of
differences between DOS 3.3 and 3.2 disks.
The sync bytes written are 9-bit $FF's under DOS 3.2 (8 one bits and
a zero bit). The sync fields are generally longer.
There are fewer possible valid bytes because the restrictions on
consecutive zeros are greater.
The address field begins with D5 AA B5.
The encoding method used in the data field is called "5-and-3
encoding" and stores the 256 data bytes as 410 valid disk bytes.
Since the data fields are longer, only 13 sectors will fit on each
track. The entire disk contains (13 sectors per track * 35 tracks =)
455 sectors.
There is no hard - soft sector translation. The sectors are actually
stored on the disk in this order: $0, $A, $7, $4, $1, $B, $8, $5,
$2, $C, $9, $6, $3.
APPENDIX B: DISK PROTECTION SCHEMES
Protection?
What makes a disk "protected"?
In Appendix A. the format of a normal DOS 3.3 or 3.2 sector was
given. Standard disk copy programs look for this format on every
track of the disk. If the prologs and epilogs can be found in the
right places and the checksums match with the data, then the Disk
Operating System can be "confident" that the data itself is correct.
This helps to produce a very reliable copy.
The simplest protection schemes simply change this format slightly.
Since a normal DOS then can't find the byte patterns it's looking
for, it doesn't know how to make sense of the disk data. It gives up
and prints an enlightening message such as "I/O ERROR". In other
words, any change from a standard disk format, if it was put there
to make copying more difficult, can be considered a "protection
scheme". The sophistication of the changes varies greatly. Many
protected formats bear no resemblance to standard sectors at all.
There are two possible approaches to copy- protection. The first is
to store the program information on the disk in such a way that a
bit copier can't reproduce all of it. When you try to boot the copy,
the program is incomplete and won't run. The second approach is to
store the program in a reasonably normal form, but also put special
bytes or patterns which are difficult to copy somewhere on the disk.
When you boot this, the program loads correctly, but then promptly
begins by checking that the special bytes are still on the disk. If
they are missing or incorrect, then the program "knows" that this is
a copy, and will refuse to run.
Perfection?
Why can't a bit copy program just copy "everything" on the disk?
There are a few reasons for this. The most pervasive one has to do
with the fact that on a circular track, there is no defined
"beginning" or "end". A bit copy program must begin reading at some
arbitrary point around the track, and then make sense of what it
reads. After reading two or three revolutions of the track into a
memory buffer, the bit copy program can find any given byte from the
track two or three times in the buffer. The number of bytes between
these identical images is how many bytes were on the original track.
If all drives spun at exactly the same speed, then the bit copier
could, starting at any byte, write the correct number of track bytes
onto the duplicate disk. These bytes would exactly fill the circular
track on the duplicate disk. The last data byte written would fall
just before the first one on the track. But if the duplicate drive
spun too fast, then the end of the track image would overwrite the
beginning, destroying part of the data. If the drive spun too
slowly, then there would be a gap between the beginning and the end.
This is unacceptable, since the gap or the overlap could end up in
the middle of a data area. Disk drive speed varies too much (even on
a given drive) to copy a track this way.
Most disks are written with first a large sync field, then the data
area. The end of the data area overlaps part of, but not all of, the
sync field as the disk completes a full resolution. (See Appendix
A.) The size of the remaining sync field is determined by how fast
the drive that made the disk was spinning. If a bit copy program can
identify the beginning and ending of the data area, it can also
write a large sync field before the data area. The resulting sync
field may be a slightly different size than on the original, but in
most cases that doesn't matter.
Therefore (take a deep breath!), one of the tasks for a bit copy
program is to identify the start and end of the "useful" data area
on each track. Then when it writes the track, it can let the
"sloppiness" caused by varying drive speeds fall outside of this
data area, where it can hopefully be ignored. Many protection
schemes involve making it difficult for a bit copy program to find
the start and end of the track data.
The first protection schemes involved very simple changes, since
there weren't any programs yet available that could copy these
disks. When bit copy programs that could back up these disks were
developed, more complicated protection schemes were invented. New
copy programs were released to copy the new protection schemes, and
new schemes were created to "beat" the bit copy programs. This cycle
still continues. The following descriptions start off with the
easier changes and progress to some of the state of the art schemes
currently in use.
Changed Address and Data Headers
As mentioned earlier, standard disk copy programs expect to find
normal sectors on the disk, with correct prologs, epilogs,
checksums, etc. These header values can also provide clues to a bit
copy program to help it find the track start and end, since it knows
that a sync field usually precedes every D5 AA 96 address prolog.
Since Apple DOS looks for these bytes when reading a sector,
changing these to new values (e.g. D5 AA 97) cause any, normal copy
program to fail. Prologs. epilogs, track numbers, and checksums have
all been changed in various schemes. This was one of the first and
most simple disk protection schemes developed, but even today most
disks employ this as one of their protection methods.
Changed Sync Bytes
The first bit copy programs didn't look for address prologs at all.
Instead, they looked for the large sync $FF fields and determined
that a track started right after one of these. Soon, many copyprotected disks used both changed address headers and changed sync
fields. One of the most popular changes was to write sync $FE's
rather than $FF's. The bit copiers responded by being able to
recognize a range of values as sync bytes, including both $FE and
$FF.
Some disks instead had large gaps of invalid bytes (bytes with more
than two consecutive zeros), followed by only the minimum number of
sync bytes required by the hardware. Without familiar headers or
large sync fields, the bit copy programs had nothing to use to
reliably determine the start of a track. However, the invalid bytes
couldn't be important data areas, since they can't even be read
reliably, and so were probably part of the track-end gap. With this
knowledge, new bit copy programs were written that included
subroutines to convert invalid bytes to some known value, usually
sync bytes.
About this time, the concept of parameters was introduced to bit
copy programs. It became obvious that no single set of algorithms
would be able to automatically handle all types of copy protection.
The user needed to be able to turn certain routines on or off, and
to set the operating values for others.
Synchronized Tracks
Somebody got clever one rainy day and decided the real way to copyprotect a disk was to change nothing that is visible on the track,
just change the alignment of the information from track to track.
When DOS formats a disk, the tracks are always written with a
certain circular alignment, due to the timing consistency of the
formatting routine. As an example of this alignment, suppose a
program reads sector 0 from track 0. then immediately steps to track
5 (which always takes the same amount of time), then begins looking
for a sector. The first sector to pass under the head will always be
sector $C, because sector $C just happens to lie in the right place
for this to happen.
Most copy programs and formatting programs all produce different
alignments, because they spend varying amounts of time on each track
before stepping to the next track. This usually doesn't hurt any
thing. However, a copy-protected disk can be created with a certain
fixed alignment, then this alignment can be checked by the protected
program whenever the disk is booted. If the alignment differs, then
the program "knows" this is a copy, and not the original disk, so it
refuses to run.
Bit copy programs began including an option to handle synchronized
tracks. They copy not only the data, but whatever track alignment is
on the original disk as well.
Half Tracks
This method appeared about the same time as synchronized tracks. The
Apple disk drive can actually position to 70 different tracks, not
35. Unfortunately, the read/write head used in the drive is too wide
to write complete tracks on every track boundary. It would overwrite
the information stored on adjacent tracks. So DOS actually steps the
head twice for every track on the disk, giving the familiar 35
tracks. But since it is possible to position the head to any of the
70 half-tracks, some disks shift the data and start using tracks on
half-track boundaries. For example, rather than writing information
on tracks 0. 1. 2, 3, etc., then, might use 0, 1.5, 2.5, 3.5, etc.
Any possible pattern can be used, as long as the increment is at
least one whole track.
There is no easy, foolproof way to determine what half-tracks are
used by a protected disk. In general, if you try to read (with the
nybble editor) a track or half-track that was never written to, you
will see large areas of invalid bytes. If data was written to the
half-tracks on either side, you may see a few areas that look like
valid track data, as the wide read head occasionally picks up these
bytes from either side. The HI-RES DISK SCAN option can help you
find the half-tracks containing valid data. (Try using HI-RES DISK
SCAN on a normal DOS disk, setting the track increment to .5 to see
the invalid half-tracks along with the valid tracks.)
Copy ][ Plus can position the drive head over any half-track, or
even quarter-track! To do quarter-tracking, the Bit Copy program
instructs the drive to begin stepping from one half-track to the
next. then it stops the positioning while the read/write head is
still moving. The head is left positioned about halfway between the
two half-tracks.
An Extra Track?
The hardware can (on most drives) write one extra track after the
last track on the disk. This would be track $23. Since a normal copy
program doesn't suspect that an extra track exists, it won't try to
copy it. This is part of the reason bit copy programs such as Copy
][ Plus allow you to specify start and end tracks to copy.
Bit Insertion
Remember that sync bytes are bytes written with extra zero bits on
the end. Groups of sync $FF's are written to ensure that the
hardware will synchronize to the data on the disk. Well, nothing
prevents you from putting an extra bit on the end of other bytes, as
long as the maximum number of consecutive zeros is not exceeded.
Whenever the program must access the disk frequently (for reading
data files or other information), this scheme is easy, since it
doesn't interfere with any DOS routines. This is why so much
business software uses it.
Whenever one of these programs is booted, it finds the spot on the
disk where it knows these special "bit-inserted bytes" should be. It
then uses a carefully timed routine to determine if the extra bits
are there. (See Appendix A for the timing between bits and bytes.)
If not, it knows this is a copy, and refuses to run.
Earlier bit copy programs could not determine which bytes on the
disk were sync (9 or 10 bit) bytes. The timing involved in reading
and storing each byte into memory and checking for sync at the same
time makes this very difficult. The early copy programs instead made
"educated guesses" as to where the sync bytes were. The more recent
versions of Copy ][ Plus use a more sophisticated read routine and
can determine sync with a fairly high degree of reliability. These
bytes appear in the nibble editor as inverse.
Nibble Counting
You can adjust the speed of your Apple disk drives. They normally
run at about 300 rpm (200 milliseconds per revolution), but this can
vary significantly, even on a single drive. As mentioned earlier,
this affects the number of bytes that will fit on a track. Some
software publishers take advantage of this fact. When making a
commercial disk, the duplication program will write a track, then reread it to find out how many bytes (or nibbles - both terms are
used) are on the track. It then writes this count on the disksomewhere. When the disk boots, this count is compared to the actual
number of bytes on the track and if they are equal (or within a
specified tolerance), the program will run. However, even very small
speed variations will affect the number of bytes on a track, so it
is unlikely that your drives will produce the exact same count as
the drive which was used to produce the original disk.
Bit copy programs respond by varying the nibble count somewhat
without adjusting the drive speed. (The method used is explained in
Appendix C.) Note that the nibble count naturally comes closest if
the speed of the duplicate drive closely matches the speed of the
drive that the disk was originally made on. The speed of your
original and duplicate drives do not have to exactly match each
other to do accurate nibble counting.
Long Tracks
Some protected programs are written with a large amount of data on
each track. The drives that make these disks are slowed down
slightly so that the extra data will fit. If you try to copy the
disk with a normal-speed duplicate drive, the end of the long track
will overwrite the beginning, creating an unbootable disk. This is
one possible cause of an error 5 (write verify error) when backing
up a disk with Copy ][ Plus.
When this protection scheme is used, the best solution is to simply
adjust your drive to a slightly slower speed so that the track will
fit on the duplicate disk. Unfortunately, if you leave your drive at
a slower speed, it may be slightly less reliable when accessing
"normal-speed" disks (disks that were made on a drive that spins at
the correct speed). If you have two drives, here is a compromise
suggestion: Set drive 1 to spin at 200 milliseconds per revolution
for greatest reliability Then set 2 to spin at a slower 200.5 to
201.0 milliseconds, which will help back up protected disks while
still maintaining good reliability.
Write-Protect Check
When you use a disk that has a tab over the write-protect notch,
this does two things. The electronics in the drive prevent any
program from writing to the disk, and a "flag" is set which the
program can check to see if the disk is write-protected. Some
commercial disks have no notch, and so are permanently writeprotected.
Some protected programs (that have no notch in the disk) check the
write-protect flag when they are booted. If the flag says "not writeprotected", then the program knows that this is an ordinary notched
disk, and must be a copy rather than the original disk. It will then
hang, or reboot, or ask you to insert the original. (It could also
trash the data on your backup.) If you put a write-protect tab over
the backup before you boot it, then the program cannot use this to
determine that a copy is running.
There is no ready way to determine when this protection scheme is
being used. If you want to be on the safe side, if the original disk
is write-protected, always put a write-protect tab on your duplicate
disk before you boot it. If the original is not write-protected,
don't put a tab on the backup.
"Non-sync Sync"
A few protected programs use a pattern of normal 8-bit byes to
synchronize the hardware to the disk data. This pattern usually has
to be fairly long and consist of the proper bytes in order to
synchronize correctly. If this scheme is used, then 9 and 10 bit
sync bytes are not needed, making it more difficult for bit copy
programs to determine the track start and end.
This covers the main schemes currently in use. It should be noted
that several disks use combinations of the above schemes just to
make things more complicated: radically different sector formats,
with different headers on different tracks, short sync fields or
almost no sync at all, half-tracks, etc. ad infinitum.... In some
cases, the combinations form almost a new protection scheme in
itself. Here is one example:
Spiral Tracks
This method combines synchronized tracks with half-tracks to store
data in an unexpected way. Remember from the discussion of halftracks that the Apple disk read/write head is too wide to write
complete tracks on every half-track boundary. But this doesn't
prevent it from writing a smaller amount of information on each halftrack (just a portion of the circular track), as long as it won't
interfere with the data on adjacent half-tracks. A disk with spiral
tracks is created by writing about 1/4 the normal amount of
information stored on a track, then stepping to the next half-track
and doing the same. This process is repeated until all the
information is written to the diskette. Since each track portion is
short, it never overwrites or interferes with the track portion on
the half-track before or after it. If you try to copy this disk
without synchronizing, the half-track images will overwrite each
other, and the copy will not work. Copying is made even trickier
because the read/write head on the original drive may pick up some
information from the adjacent half-tracks, making it harder to find
the track start and end.
One technique that helps to copy a disk that uses spiral tracks is
to read and write on quarter-tracks, between two half-tracks. The
drive can read the two track portions on either side in one
revolution of the disk.
APPENDIX C: ROUTINES AND PARAMETERS
This appendix describes the methods Copy ][ Plus uses to copy a
disk, and how the various parameters affect the copy process. Each
parameter has both a number and a name. The name provides a quick
way to remember what each parameter does. If a parameter represents
a disk byte value, it can be stored normally (for example, $FF) to
represent a normal 8-bit byte, or with its high bit clear ($7F) to
represent a sync byte. If the byte is part of a byte pattern to
search for in the buffer, a zero value in the parameter means "match
anything for this byte".
Bit copying is more complicated than sector copying, and it is
explained first.
When bit copying, Copy ][ Plus begins with the READ A TRACK routine.
This simply reads bytes from the original drive until it fills the
buffer. Copy ][ Plus uses one of two possible read routines. It
normally uses the routine that checks if each byte is a sync (9 or
10 bit) byte as it reads it. However, if you change parameter 56
(OLD.READ) from 0 to 1, Copy ][ Plus will use the old read routine
which reads everything as nonsync (8 bit) bytes.
Every byte read by the drive has its high bit set. If it is a normal
8 bit byte, Copy ][ Plus stores it in memory as it was read, with
its high bit set. If it is a sync byte, Copy ][ Plus clears the high
bit (subtracts $80 from the number), and stores this new value in
memory. When the track buffer is displayed, all numbers with their
high bit clear are displayed in inverse with the high bit set again.
For example, a sync $FF from the track is stored in memory as a $7F,
and is displayed on the screen as an inverse $FF. This information
is helpful when setting some of parameters discussed below.
If parameter 9 (CLEAN?) has been changed from 0 to 1, then the CLEAN
SYNC FIELDS routine is called next. This routine looks for the areas
between the end of each data field and the beginning of the next
address field, and between the end of each address field and the
beginning of the following data field, and sets all bytes within
these areas to standardized sync (usually sync $FF's; the actual
value is stored in STAND, parameter 7). To find the end of the
address or data field, it usually looks for the epilog bytes DE AA
XX, but these values are from parameters 19, 1A, and 1B
(ADDRESS.END) and can be changed. To find address or data start, it
matches the first two bytes from either ADDRESS.START (parameters E
and F) or DATA.START (parameters 1C and 1D), which usually contain
D5 AA.
If parameter 31 (FIX.INVALID?) is changed from 0 to 1, then Copy ][
Plus next calls the FIX INVALID BYTES routine. This routine scans
the buffer for occurrences of invalid bytes. These are bytes that
the hardware cannot read reliably (those with more than two
consecutive zero bits). It will replace any invalid bytes with
standardized sync bytes (from STAND, parameter 7). These are the
bytes it will convert to standard sync:
81
8B
A2
C5
E3
82
8C
A3
C6
E8
83
8D
B0
C7
F0
84
8E
B1
C8
F1
85
8F
B8
D0
F8
86
90
C0
D1
87
91
C1
D8
88
98
C2
E0
89
A0
C3
E1
8A
A1
C4
E2
In addition, Copy ][ Plus always looks for $80's in the track buffer
and changes them to standard sync, whether or not parameter 31 is
set to 1.
It then calls the STANDARDIZE SYNC routine, if parameter 8 (STANDF)
has been changed from 0 to 1. This routine looks for nonstandard
sync fields and changes them to standard sync. It is good for
cleaning up sync fields that contain a mixture of sync bytes, and a
few other "stray" values.
It looks for fields of at least SYNC.# (parameter 6) bytes that have
been marked as sync by the read routine. The field can contain up to
GLITCH.SIZ (parameter 32) consecutive bytes that are not sync. The
bytes are then all converted to standard sync, the value contained
in parameter 7, STAND. If CHANGE (parameter 33) is 1, the glitch
bytes are also changed; if CHANGE is 0, they're left alone.
The next task of Copy Plus is to find the start and end of the track
data. There are three different methods it can use to determine the
track start. The methods it uses are controlled by parameter 55,
FIND.START. If this is set to 3, Copy ][ Plus will try first by
"header". If this fails, then it will try by "sync". Lastly it will
try by "gap" to find the track start. If parameter 55 is left at 1,
it will first try "sync", then "gap". If set to 2, it will try only
"gap". When it finds the track start, it will display either
"HEADER" or "SYNC" or "GAP" in the center window to show you which
method it used.
The FIND HEADER routine looks for an address header (part of or all
of the address field) to determine the track start. It tries to find
the pattern of bytes from ADDRESS.START up through ADDRESS.END
(parameters E to 1B) in the track buffer. If it can match the first
MATCH bytes (parameter A), then this is the track start. The
ADDRESS.START table contains 3 bytes for the address prolog, and 8
bytes for the encoded volume, track, sector, and checksum.
ADDRESS.END immediately follows and contains the address epilog
bytes. A zero byte in any of these parameters will match any value
from the track buffer. The FIND HEADER routine often requires
several parameter changes before it can find the track start, since
many protected disks use changed headers. If no match is found, this
routine "fails", and the FIND SYNC routine is tried.
The FIND SYNC routine will attempt to find the track start by
looking for the largest group of valid sync bytes in the first part
of the track buffer. The sync field must be at least SYNC.#
(parameter 6) bytes long. It can contain small glitches of non-sync
or invalid bytes. The track start is set to the end of this field.
Since most disks have a large sync field before the track start,
this routine will correctly find the track start most of the time.
If no valid sync fields can be found, this routine "fails", and the
FIND GAP routine is tried.
If the track start is found by header or by sync, Copy ][ Plus then
must determine the end of the track data. It looks for a duplicate
image of the track start later in the buffer, then moves back over
the last sync field or other garbage that may be present. You can
also instead have it set the track end as a fixed number of bytes
after the track start.
Normally, it first skips TRKMIN (parameter 3) pages past the track
start. It then starts looking for at least EMATCH (parameter 50)
bytes that match the track start. This is the repeat image of the
track start later in the buffer. It then backs up over any sync
field or other garbage that may be at the end of the track. The sync
field can contain up to GLITCH.SIZ (parameter 32) consecutive nonsync "glitch" bytes. This point is the track end.
If you want to instead set the track end by cutting the track off a
certain number of bytes from the track start, change parameter 44
(CUT?) from 0 to 1. The number of bytes to cut from (the desired
track length) should be stored as a two-byte number in CUT.HIGH
(parameter 45) and CUT.LOW (parameter 46).
The FIND GAP routine tries to determine the track start and end by
first looking for the largest block of invalid bytes. This is most
useful when only a portion of a track was written to the disk
(rather than a full revolution), and part of the track is "blank". A
blank track reads back as random, usually invalid, data. FIND GAP
looks for the biggest block of "mostly invalid" data, then sets the
track start to the beginning of the valid data that follows it.
If parameter 4F (SDFLTR) is changed from 0 to 1, Copy ][ Plus adds
an extra check as it analyzes the data for track start and end.
SDFLTR stands for Single Density FiLTeR. This check verifies that
the data between track start and track end does not contain more
than 1 consecutive zero in each byte. If it does, Copy ][ Plus
continues to look for another track start and end. This check is
most useful when copying disks that use spiral tracks and contain 4and-4 encoded data; it helps keep spurious data in adjacent halftracks from confusing the Bit Copy program.
If the track data is more than TRKMAX (parameter 2) pages long, it
assumes the analyze routines failed. If Copy ][ Plus cannot find the
track start using any of the methods selected by parameter 55, it rereads and reanalyzes the track up to EREAD (parameter 0) times. If
it still cannot find the track start, then a READ ERROR occurs. An
error number 2 appears in the status display, and Copy ][ Plus
simply grabs a block of data from the buffer that would be about the
correct length for a normal disk, and uses this for track start and
end.
If parameter 34 (BIT.FLAG) has been changed from 0 to 1, then the
BIT INSERT routine is called next. This routine scans through the
track data looking for a pattern of up to 5 bytes. If this pattern
is found, the matching bytes in the buffer can be changed to either
sync or non-sync bytes. This routine can be used when the protected
program is checking that a certain byte on the track is a sync byte.
However, note that in nearly all cases, Copy ][ Plus will correctly
identify all sync bytes automatically, as it reads the track, so the
BIT INSERT routine is not needed often.
The 5 bytes that BIT INSERT tries to match are stored in the
BIT.TABLE, parameters 35 through 39. The pattern matching ignores
the high bits of each byte. The values in the table can have their
high bits either cleared to 0 or set to 1. This indicates whether
the bytes should be written as sync or normal bytes. When a match is
found, the corresponding high bits in the track buffer are also set
or cleared, which will cause the write routine to write them as
normal (8 bit) or sync (9 or 10 bit) bytes. Any zero values in the
BIT.TABLE will match anything.
Copy ][Plus then calls the WRITE TRACK routine to write the track
data in memory to the duplicate disk. It starts writing from a few
bytes before the track start to include the preceding sync field (if
there is one), and continues to the track end. It writes all sync as
either 9 or 10 bit bytes, depending on the value of BITS, parameter
3E. If BITS is set to 1, 9 bit bytes will be written; if set to 2,
10 bit bytes are selected. If the value of parameter 4D, ERASE, is
1, then the entire track is erased to sync $FF's before the track
data is written. If ERASE is changed to 0, or if the track increment
is less than one, then the track is not erased first.
It then immediately calls WRITE VERIFY to verify that the track just
written is correct. This routine simply checks that the track start
was not overwritten by the track end (track too long). If this test
fails, Copy ][ Plus first calls the TRACK CHOPPING routine. This
chops a track that is too long by shortening all the sync fields to
a length specified in KEEP (parameter 3D). The chopped track is
rewritten and verified again. If the verify still fails after EWRITE
(parameter 2) retries, a write verify error (error 5) appears in the
status display. WRITE VERIFY also fails if there is no disk in the
duplicate drive.
If you've answered Yes to the KEEP TRACK LENGTH question, or changed
parameter 4B (DONIB?) from 0 to 1, Copy ][ Plus next calls the
NIBBLE COUNTING routine. This routine computes the number of bytes
(nibbles) on the original disk and tries to maintain that count on
the duplicate disk. It works by converting some of the normal bytes
to 9 or 10 bit bytes if there are too many bytes on the duplicate
disk, or by converting sync bytes to 8 bit bytes if there are not
enough. (This works on the principle that by adding bits to some
bytes, the bytes take up more space on the duplicate track, so fewer
of them are needed to fill the track.) It calculates the number of
bytes to convert based on the current setting of BITS (9 or 10 bit
sync?), and the difference between the length of the original track
and the length of the duplicate track. The difference is compared to
TOLERANCE (parameter 4C) and if it is less than or equal to this
number, the nibble count succeeds. Otherwise, it compares again and
rewrites the duplicate track. It may take several tries before the
nibble count matches. If there is more adjustment to do but no more
bytes which can be changed, a nibble count error (error 6) is
displayed for this track.
If you've answered Yes to the SYNCHRONIZE TRACKS question or changed
parameter D (DOSYNC) from 0 to 1, Copy ][ Plus also maintains
SYNCHRONIZED TRACKS as it copies. This routine makes sure that the
information on the duplicate disk has the same track-to-track
alignment as on the original disk. SYNC.TRACK (parameter C) is the
reference track to synchronize with (usually track 0). SYNC.START
(parameters 22 through 2F) is a table of bytes to match to find the
start of the reference track. It currently contains the address
field bytes for sector 0. SYNC.MATCH (parameter 30) is the number of
bytes in the table to match. If the SYNC.START bytes cannot be found
on the reference track, Copy ][ Plus will spin the disk indefinitely
looking for them. This will only happen if you're trying to
synchronize on a nonbootable disk. Press [RESET] to recover.
If parameter 51 (DYNAM) is changed from 0 to 1, the DYNAMIC HEADER
CHANGE routine is also used. Some disks chance the address header
for each track on the disk. They usually store the new header at the
end of the current track. Using this routine, you can tell the Bit
Copy program where to find the new header and it will dynamically
update the address header table.
The new header is found by adding the offset in parameters 52 and 53
(DYNAM.LOW and DYNAM.HIGH) to the start of the track. Parameter A
(MATCH) is used to determine the length of the header (number of
bytes to fill into the header table). Parameter 54 (FILL.ORDER)
determines whether to fill the header table forwards (0) or
backwards (1).
Sector copying is more straightforward than bit copying. The sectors
from each track are read from the original disk, then formatted and
written onto the duplicate disk. Without any parameter changes,
normal DOS 3.3 and 3.2 disks can be copied reliably. By changing a
few parameters, many protected disks can also be copied.
The parameters used in sector copying are very similar to the custom
patch values that are used in the DOS utilities Sector Editor. A
good knowledge of address and data field formats helps in
understanding these parameters.
When reading, Copy ][ Plus looks for address prologue bytes that
match APRO, parameters 57 through 59. The seed value to use when
calculating the address field checksum is in parameter 5A, ASEED.
Address checksum errors are detected if parameter 5B, ACHKF, is
nonzero. The first two address epilogue bytes are checked against
AEPI (parameters 5C and 5E) if AEPIF (parameter 60) is nonzero.
The three data prologue bytes must match DPRO, parameters 61 through
63. The data check-sum seed value is stored in parameter 64, DSEED.
The data field checksum is tested if DCHKF, parameter 65, is
nonzero. The first two data epilogue bytes must match DEPI
(parameters 66 and 67) if DEPIF (parameter 6B) is nonzero.
If DOSFLG, parameter 77, is zero, then the sector copier will
automatically try to copy using DOS 3.2 format first. If this
fails, then it tries copying using DOS 3.3 format. If DOSFLG is
nonzero, it tries only DOS 3.3 format. Note: If you're copying a DOS
3.3 disk that has its third address prologue byte changed, DOSFLG
must be nonzero.
When writing, the three APRO bytes are used for the address
prologue. The seed value in ASEED is used to determine the address
checksum. If AEPIF is nonzero, then the 4 epilogue bytes from AEPI
(parameters 5C through 5F) are written. If AEPIF is zero, then the
address epilogue bytes read from the original disk are used instead.
The three data prologue bytes are used from DPRO. DSEED is used as a
starting seed value in writing the data field and checksum. If DEPIF
is nonzero, the 5 epilogue bytes from DEPI (parameters 66 through
6A) are used. If DEPIF is zero, then the data epilogue bytes read
from the original disk are used instead.
During writing, if parameter 76, FNYFLG, is nonzero, then 5 "funny"
sync bytes are written before each address field. These bytes help
copy some protected disks, including the older PFS series disks.
Rather than writing the last 5 sync $FF's, the five bytes from FUNNY
(parameters 6C through 70) are written. The numbers of extra zeros
to add to the funny bytes are stored in TIME, parameters 71 through
75.
APPENDIX D: SUMMARY OF PARAMETERS
Here is a summary of all the Bit Copy parameters. The parameter
number is listed first, followed by the original (or "default")
value for the parameter, the parameter name we've given, and a brief
description of what the parameter is for. A few parameter numbers
are blank. These are parameters that were used in earlier versions
of Copy ][ Plus, but are no longer needed.
Parm
Num.
00
Orig
Value
01
Parm Name
Description
EREAD
01
02
EWRITE
02
1A
TRKMAX
03
04
05
06
10
01
TRKMIN
Number of read retries if track can't
be analyzed.
Number of write retries if write verify
falls.
Maximum track, length in pages (for
error checking).
Minimum track length in pages.
07
7F
STAND
08
00
STANDF
09
00
CLEAN?
0A
0B
MATCH
0B
01
DISPLAY
0C
00
SYNC.TRACK
0D
00
DOSYNC
0E
0F
10
11
12
13
14
15
16
17
18
19
1A
1B
1C
1D
1E
1F
20
21
22
23
D5
AA
96
00
00
00
00
AA
AA
00
00
DE
AA
00
D5
AA
AD
DE
AA
00
D5
AA
ADDRESS.START
SYNC.#
Minimum number of sync to constitute a
valid sync field for Standardize Sync
routine.
Standardized sync value to replace
with, for Fix Invalid Nibbles, Clean
Sync Fields, and Standardize Sync.
Use Standardize Sync routine? 1=yes,
0=no.
Use Clean Sync Fields routine? 1=yes,
0=no.
Number of bytes to match with
ADDRESS.START table when finding track
start by header.
01=see track display when copying,
02=enter nibble editor each track,
00=no display.
Track to synchronize to with
Synchronize Tracks routine.
Synchronize tracks? 1=yes, 0=no. This
is also set by SYNCHRONIZE TRACKS
question.
Table of bytes to match with when
finding track start by header. Zero
bytes match anything.
ADDRESS.END
Bytes to match in Clean Sync Fields.
DATA.START
Bytes to match in Clean Sync Fields.
DATA.END
Bytes to match in Clean Sync Fields.
SYNC.START
Bytes to match on reference track in
Synchronize Tracks.
24
25
26
27
28
29
2A
2B
2C
20
2E
2F
30
96
00
00
00
00
AA
AA
00
00
DE
AA
00
0B
SYNC.MATCH
31
00
FIX.INVALID?
32
02
GLITCH.SIZ
33
01
CHANGE
34
35
36
37
38
39
3A
00
DE
AA
6B
00
00
04
BIT.FLAG
BIT.TABLE
3B
3C
3D
Number of bytes on reference track, to
match with SYNC.START table in
Synchronize Tracks routine.
Use Fix Invalid Nibbles routine? 1=yes,
0=no.
Number of consecutive non-sync bytes
that are allowed in a sync field, for
Standardize Sync routine.
In Standardize Sync routine, convert
non-sync bytes to sync also? 1=yes,
0=no.
Use Bit Insert routine? 1=yes, 0=no.
Table of bytes to match with for Bit
Insert routine.
END.GLITCH
Maximum number of consecutive non-sync
bytes that are allowed in the last sync
field before track start.
0C
KEEP
3E
01
BITS
Number of bytes to shorten all sync
fields to, in Track Chop routine.
Number of zero bits to add to all sync
bytes when writing.
3F
40
41
42
43
00
PAGE.OVF
44
00
CUT?
45
18
CUT.HIGH
46
1F
CUT.LOW
47
48
01
PRSLOT
Printer slot number, for printing track
buffer or parameter entry.
49
4A
39
PLINE
4B
00
DONIB?
4C
01
TOLERANCE
4D
01
ERASE
Number of lines per page to print when
printing track buffer.
Do nibble counting? 1=yes, 0=no. This
is also set by KEEP TRACK LENGTH
question.
How closely (number of bytes) nibble
count must match.
Erase entire track to sync $FF's before
Ignore sync fields longer than 256
bytes when looking for track start?
1=yes, 0=no.
Cut track end off a fixed number of
bytes from track start? 1= yes, 0=no.
High byte: Number of bytes to cut from
track start.
Low byte: Number of bytes to cut from
track start.
writing track data?
4E
4F
00
SDFLTR
50
10
EMATCH
51
52
00
07
DYNAM
DYNAM.LOW
53
08
DYNAM.HIGH
54
01
FILL.ORDER
55
01
FIND.START
56
00
OLD.READ
1=yes, 0 =no.
Don't allow track data to contain bytes
with more than 1 consecutive zero?
(Continue analyzing?) 1=yes, 0=no.
Number of bytes to match to find repeat
of track start.
Do Dynamic Header Change? 1=yes, 0=no.
Low byte: number of bytes from track
start to find new header.
High byte: Number of bytes from track
start to find new header.
Fill in header backwards (1) or
forwards (0).
Find track start by (2) just gap, (1)
sync then gap, (3) header then sync
then gap.
Use old Read Track routine that does
not detect sync? 1=yes, 0=no.
Parameters $57 through $78 are used when sector copying a disk.
Parm
Num.
57
58
59
5A
5B
Orig
Value
D5
AA
96
00
FF
Parm Name
Description
APRO
Address prolog bytes to match.
ASEED
ACHKF
5C
5D
5E
5F
60
DE
AA
EB
FF
FF
AEPI
Checksum seed for address field.
Check for address field checksum error?
FF=yes, 00=no.
Granted address epilog bytes. Match
epilog read against first two of these.
61
62
63
64
65
D5
AA
AD
00
FF
DPRO
66
67
68
69
6A
6B
DE
AA
EB
FF
FF
FF
DEPI
6C
6D
6E
6F
70
71
72
73
74
75
93
F3
FC
FF
FF
02
02
01
02
02
FUNNY
AEPIF
DSEED
DCHKF
DEPIF
TIME
Address epilog flag: Check pilogs when
reading? Use anted epilog bytes rather
han read epilog bytes when riting?
FF=yes, 00=no
Data prolog bytes to match.
Check-sum seed for data field.
Check for data field checksum error?
FF=yes, 00=no.
Wanted data epilog bytes. Match epilog
read against first two of these.
Data epilog flag: Check epilogs when
reading? Use wanted epilog bytes rather
than read epilog bytes when writing?
FF=yes, 00=no.
Funny sync bytes to write before
address field.
Number of zero bits to add to each
FUNNY byte when writing.
76
00
FNYFLG
77
00
DOSFLG
78
79
7A
7B
7C
7D
7E
FF
-
RESTORE
Write FUNNY bytes rather than the last
5 sync $FF's before each address field?
FF=yes, 00=no.
Try copying DOS 3.3 only, rather than
trying DOS 3.2 first? FF=yes, 00=no.
(Reserved parameters)
If you access this special parameter
manually, it restores all parameters
back to their original values.
APPENDIX E: NUMBER CONVERSION TABLES
The table below lets you convert between decimal, hexadecimal, and
binary numbers. It also includes the Apple disk 4-and-4 encoded
values for each number. (See Appendix A.)
A thorough tutorial on number systems is beyond the scope of this
manual. Suffice it to say that decimal (base 10), hexadecimal (base
16), and binary (base 2) simply provide different ways of expressing
any number. For example, decimal 11 is exactly the same as hex $0B
and binary 00001011. A simple hex digit is called a "nibble" or
"nybble"; a binary digit is a "bit". Many computer concepts and disk
values can be expressed more readily using hex or binary than with
decimal. That's why Copy ][ Plus uses hexadecimal numbers for some
values.
Dec
0
1
2
3
4
5
6
7
8
9
10
11
12
13
14
15
16
17
18
19
20
21
22
23
24
25
26
27
28
Hex
$00
$01
$02
$03
$04
$05
$06
$07
$08
$09
$0A
$05
$0C
$00
$0E
$0F
$10
$11
$12
$13
$14
$15
$16
$17
$18
$19
$lA
$lB
$lC
Binary
00000000
00000001
00000010
00000011
00000100
00000101
00000110
00000111
00001000
00001001
00001010
00001011
00001100
00001101
00001110
00001111
00010000
00010001
00010010
00010011
00010100
00010101
00010110
00010111
00011000
00011001
00011010
00011011
00011100
4-and-4
AA AA
AA AB
AB AA
AB AB
AA AE
AA AF
AB AE
AB AF
AE AA
AE AB
AF AA
AF AB
AE AE
AE AF
AF AE
AF AF
AA BA
AA BB
AB BA
AB BB
AA BE
AA BF
AB BE
AB BF
AE BA
AE BB
AF BA
AF BB
AE BE
29
30
31
32
33
34
35
36
37
38
39
40
41
42
43
44
45
46
47
48
49
50
51
52
53
54
55
56
57
58
59
60
61
62
63
64
65
66
67
68
69
70
71
72
73
74
75
76
77
78
79
80
81
82
83
84
85
86
87
88
89
90
91
$10
$1E
$1F
$20
$21
$22
$23
$24
$25
$26
$27
$28
$29
$2A
$2B
$2C
$20
$2E
$2F
$30
$31
$32
$33
$34
$35
$36
$37
$38
$39
$3A
$3B
$3C
$30
$3E
$3F
$40
$41
$42
$43
$44
$45
$46
$47
$48
$49
$4A
$4B
$4C
$40
$4E
$4F
$50
$51
$52
$53
$54
$55
$56
$57
$58
$59
$5A
$5B
00011101
00011110
00011111
00100000
00100001
00100010
00100011
00100100
00100101
00100110
00100111
00101000
00101001
00101010
00101011
00101100
00101101
00101110
00101111
00110000
00110001
00110010
00110011
00110100
00110101
00110110
00110111
00111000
00111001
00111010
00111011
00111100
00111101
00111110
00111111
01000000
01000001
01000010
01000011
01000100
01000101
01000110
01000111
01001000
01001001
01001010
01001011
01001100
01001101
01001110
01001111
01010000
01010001
01010010
01010011
01010100
01010101
01010110
01010111
01011000
01011001
01011010
01011011
AE
AF
AF
BA
BA
BB
BB
BA
BA
BB
BB
BE
BE
BF
BF
BE
BE
BF
BF
BA
BA
BB
BB
BA
BA
BB
BB
BE
BE
BF
BF
BE
BE
BF
BF
AA
AA
AB
AB
AA
AA
AB
AB
AE
AE
AF
AF
AE
AE
AF
AF
AA
AA
AB
AB
AA
AA
AB
AB
AE
AE
AF
AF
BF
BE
BF
AA
AB
AA
AB
AE
AF
AE
AF
AA
AB
AA
AB
AE
AF
AE
AF
BA
BB
BA
BB
BE
BF
BE
BF
BA
BB
BA
BB
BE
BF
BE
BF
EA
EB
EA
EB
EE
EF
EE
EF
EA
EB
EA
EB
EE
EF
EE
EF
FA
FB
FA
FB
FE
FF
FE
FF
FA
FB
FA
FB
92
93
94
95
96
97
98
99
100
101
102
103
104
105
106
107
108
109
110
111
112
113
114
115
116
117
118
119
120
121
122
123
124
125
126
127
128
129
130
131
132
133
134
135
136
137
138
139
140
141
142
143
144
145
146
147
148
149
150
151
152
153
154
$5C
$50
$5E
$5F
$60
$61
$62
$63
$64
$65
$66
$67
$68
$69
$6A
$6B
$6C
$6D
$6E
$6F
$6F
$71
$72
$73
$74
$75
$76
$77
$78
$79
$7A
$7B
$7C
$70
$7E
$7F
$80
$81
$82
$83
$84
$85
$86
$87
$88
$89
$8A
$88
s8C
$80
$8E
$8F
$90
$91
$92
$93
$94
$95
$96
$97
$98
$99
$9A
01011100
01011101
01011110
01011111
01100000
01100001
01100010
01100011
01100100
01100101
01100110
01100111
01101000
01101001
01101010
01101011
01101100
01101101
01101110
01101111
01110000
01110001
01110010
01110011
01110100
01110101
01110110
01110111
01111000
01111001
01111010
01111011
01111100
01111101
01111110
01111111
10000000
10000001
10000010
10000011
10000100
10000101
10000110
10000111
10001000
10001001
10001010
10001011
10001100
10001101
10001110
10001111
10010000
10010001
10010010
10010011
10010100
10010101
10010110
10010111
10011000
10011001
10011010
AE
AE
AF
AF
BA
BA
BB
BB
BA
BA
BB
BB
BE
BE
BF
BF
BE
BE
BF
BF
BA
BA
BB
BB
BA
BA
BB
BB
BE
BE
BF
BF
BE
BE
BF
BF
EA
EA
EB
EB
EA
EA
EB
EB
EE
EE
EF
EF
EE
EE
EF
EF
EA
EA
EB
EB
EA
EA
EB
EB
EE
EE
EF
FE
FF
FE
FF
EA
EB
EA
EB
EE
EF
EE
EF
EA
EB
EA
EB
EE
EF
EE
EF
FA
FB
FA
FB
FE
FF
FE
FF
FA
FB
FA
FB
FE
FF
FE
FF
AA
AB
AA
AB
AE
AF
AE
AF
AA
AB
AA
AB
AE
AF
AE
AF
BA
BB
BA
BB
BE
BF
BE
BF
BA
BB
BA
155
156
157
158
159
160
161
162
163
164
165
166
167
168
169
170
171
172
173
174
175
176
177
178
179
180
181
182
183
184
185
186
187
188
189
190
191
192
193
194
195
106
197
198
199
200
201
202
203
204
205
206
207
208
209
210
211
212
213
214
215
216
217
$9B
$9C
$90
$9E
$9F
$AO
$Al
$A2
$A3
$A4
$A5
$A6
$A7
$A8
$A9
$AA
$AB
$AC
$AD
$AE
$AF
$BO
$Bl
$B2
$B3
$B4
$B5
$86
$B7
$88
$B9
$BA
$BB
$BC
$BD
$BE
$BF
$CO
$C1
$C2
$C3
$C4
$C5
$C6
$C7
$C8
$C9
$CA
$CB
$CC
$CD
$CE
$CF
$DO
$Dl
$D2
$D3
$D4
$D5
$D6
$D7
$D8
$D9
10011011
10011100
10011101
10011110
10011111
10100000
10100001
10100010
10100011
10100100
10100101
10100110
10100111
10101000
10101001
10101010
10101011
10101100
10101101
10101110
10101111
10110000
10110001
10110010
10110011
10110100
10110101
10110110
10110111
10111000
10111001
10111010
10111011
10111100
10111101
10111110
10111111
11000000
11000001
11000010
11000011
11000100
11000101
11000110
11000111
11001000
11001001
11001010
11001011
11001100
11001101
11001110
11001111
11010000
11010001
11010010
11010011
11010100
10010101
11010110
11010111
11011000
11011001
EF
EE
EE
EF
EF
FA
FA
FB
FB
FA
FA
FB
FB
FE
FE
FF
FF
FE
FE
FF
FF
FA
FA
FB
FB
FA
FA
FB
FB
FE
FE
FF
FF
FE
FE
FF
FF
EA
EA
EB
EB
EA
EA
EB
EB
EE
EE
EF
EF
EE
EE
EF
EF
EA
EA
EB
EB
EA
EA
EB
EB
EE
EE
BB
BE
BF
BE
BF
AA
AB
AA
AB
AE
AF
AE
AF
AA
AB
AA
AB
AE
AF
AE
AF
BA
BB
BA
BB
BE
BF
BE
BF
BA
BB
BA
BB
BE
BF
BE
BF
EA
EB
EA
EB
EE
EF
EE
EF
EA
EB
EA
EB
EE
EF
EE
EF
FA
FB
FA
FB
FE
FF
FE
FF
FA
FB
218
219
220
221
222
223
224
225
226
227
228
229
230
231
232
233
234
235
236
237
238
239
240
241
242
243
244
245
246
247
248
249
250
251
252
253
254
255
$DA
$DB
$DC
$DD
$DE
$DF
$EO
$El
$E2
$E3
$E4
$E5
$E6
$E7
$E8
$E9
$EA
$EB
$EC
$ED
$EE
$EF
$F0
$F1
$F2
$F3
$F4
$F5
$F6
$F7
$F8
$F9
$FA
$FB
$FC
$FD
$FE
$FF
11011010
11011011
11011100
11011101
11011110
11011111
11100000
11100001
11100010
11100011
11100100
11100101
11100110
11100111
11101000
11101001
11101010
11101011
11101100
11101101
11101110
11101111
11110000
11110001
11110010
11110011
11110100
11110101
11110110
11110111
11111000
11111001
11111010
11111011
11111100
11111101
11111110
11111111
EF
EF
EE
EE
EF
EF
FA
FA
FB
FB
FA
FA
FB
FB
FE
FE
FF
FF
FE
FE
FF
FF
FA
FA
FB
FB
FA
FA
FB
FB
FE
FE
FF
FF
FE
FE
FF
FF
FA
FB
FE
FF
FE
FF
EA
EB
EA
EB
EE
EF
EE
EF
EA
EB
EA
EB
EE
EF
EE
EF
FA
FB
FA
FB
FE
FF
FE
FF
FA
FB
FA
FB
FE
FF
FE
FF
{End of Copy ][ Plus Documentation.}
Scanned, proofread and cleaned up by Thug. If you make any corrections to
this document, add a note below and upload the new document to
ftp://ftp.asimov.net/.
Contributor
Date
Comments
-------------------------------------------------------------------------Thug
5 DEC 1998
Original submission