1
User’s
Manual
4630 and 4830 Bar Code Printers
P/N 063879-002
Intermec Corporation
6001 36th Avenue West
P.O. Box 4280
Everett, WA 98203-9280
U.S. technical and service support: 1-800-755-5505
U.S. media supplies ordering information: 1-800-227-9947
Canadian technical and service support: 1-800-687-7043
Canadian media supplies ordering information: 1-800-267-6936
Outside U.S. and Canada:
Contact your local Intermec service supplier.
The information contained herein is proprietary and is provided solely for the purpose of allowing
customers to operate and/or service Intermec manufactured equipment and is not to be released,
reproduced, or used for any other purpose without written permission of Intermec.
Information and specifications in this manual are subject to change without notice.
1997 by Intermec Corporation
All Rights Reserved
The word Intermec, the Intermec logo, JANUS, IRL, TRAKKER, Antares, Duratherm, Precision
Print, PrintSet, Virtual Wedge, and CrossBar are trademarks of Intermec Corporation.
IBM is a registered trademark of International Business Machines Corporation.
Throughout this addendum, trademarked names may be used. Rather than put a trademark
( or ) symbol in every occurrence of a trademarked name, we state that we are using the names
only in an editorial fashion, and to the benefit of the trademark owner, with no intention of
infringement.
The software contained in the printer and the accompanying materials are copyrighted.
Unauthorized copying of the software, including software that has been modified, merged, or
included with other software, or the written materials is expressly forbidden without the prior
written consent of Intermec. All right, title, and interest in all copies of this software are and shall at
all times remain the sole and exclusive property of Intermec. Customer may be held legally
responsible for any copyright infringement that is caused or encouraged by its failure to abide by
these terms.
Manual Change Record
This page records the changes to this manual, which was originally released as
version 001.
Version
Date
Description of Change
002
5/97
Information has been updated to correspond with
the printer firmware upgrade. The manual has also
been formatted to 8.5 x 11 inches.
Contents
Contents
Before You Begin xv
Warranty Information xv
Safety Summary xv
Warnings, Cautions, and Notes xvi
About This Manual xvii
Other Intermec Manuals xviii
1
Getting Started
Getting to Know Your Printer 1-3
Preparing the Printer for Installation 1-4
Plugging in the Printer 1-5
Opening and Closing the Printer 1-5
Choosing the Print Mode and Media 1-6
Loading Fanfold Media 1-6
Loading Roll-Fed Media 1-7
Loading Thermal Transfer Ribbon 1-8
Printing a Configuration Test Label 1-9
Connecting the Printer to Your System 1-10
Connecting the Printer to a PC Serial Port 1-10
Connecting the Printer to a PC Parallel Port 1-11
Connecting the Printer to a Network 1-11
Connecting the Printer to an AS/400 1-11
Connecting the Printer to a Mainframe 1-12
Cabling in Noisy Electrical Environments 1-12
Configuring the Serial Ports 1-13
Verifying Printer Communications With Your System 1-14
v
4630 and 4830 Bar Code Label Printers User’s Manual
2
Operating and Configuring the Printer
Using the Control Panel 2-3
Reading the Display 2-3
Using the Control Panel Keys 2-4
Understanding the Indicator Lights 2-4
Using the Menu Panel 2-5
About the Printer Menus 2-5
Operator and Install Menus 2-6
Service Menu 2-7
Configuration Menu 2-8
Tips for Using the Control and Menu Panels 2-9
Setting Security Levels 2-9
Setting the Dark Adjust 2-10
Using the X and Y Forms Adjust 2-11
Adjusting the Label Rest Point 2-12
Printing the Buffer Contents 2-13
Adjusting the Media Sensor 2-13
Adjusting the Printer for Different Width Media 2-14
Removing Thermal Transfer Ribbon 2-16
Adding Additional Memory 2-16
Increasing Image Memory 2-17
Using the Media Rewind Hub 2-17
Using the Self-Strip Assembly 2-18
Using the Cutter 2-20
Routing Media Through the Heavy-Duty Cutter 2-20
Routing Media Through the 4630 Standard Cutter 2-20
Enabling the Cutter 2-21
Testing Cutter Operation 2-21
Changing Printer Configuration Settings 2-22
Changing the Label Configuration Settings 2-23
Setting the Media Alert 2-24
vi
Contents
Printing Configuration Test Labels 2-26
Restoring the Printer Default Configuration 2-27
3
Maintaining the Printer
Inspecting the Printer 3-3
Components to Maintain 3-3
Cleaning the Printer 3-4
Cleaning the Printhead 3-4
Cleaning the Drive Roller and the Tear Bar 3-5
Cleaning the Media Path 3-6
Cleaning the Heavy-Duty Cutter Assembly 3-7
Cleaning the 4630 Standard Cutter Assembly 3-8
Cleaning the Printer Cover 3-8
4
Troubleshooting
Troubleshooting Checklist 4-3
Printer Operation Problems 4-4
Print Quality Problems 4-5
Communications Problems 4-6
Error Messages 4-6
Error Codes 4-11
Using the Print Tests 4-12
Printing Data Sent From the Host 4-13
Increasing Available Memory 4-14
Print Quality 4-14
Media Selection 4-14
Print Speed 4-15
Formats 4-15
Dark Adjust 4-15
Printhead Aging 4-15
vii
4630 and 4830 Bar Code Label Printers User’s Manual
5
Designing Labels Using IPL Commands
Using Label Formats 5-3
Storing Label Formats 5-3
Designing and Creating a Label Format 5-3
Defining Label Design Fields 5-8
Bar Code Fields 5-8
Human-Readable Fields 5-9
Downloading User-Defined Fonts 5-9
Lines and Boxes 5-12
Graphics 5-14
Editing Label Formats and Working With Fields 5-15
Editing Existing Fields 5-16
Deleting Fields 5-17
Positioning Fields 5-18
Rotating Fields 5-19
Scaling Fields 5-19
Magnifying Fonts and Character Fields 5-20
Magnifying Bar Code Fields 5-20
Designing Pages 5-21
Creating User-Defined Graphics 5-21
Creating User-Defined Fonts 5-24
Label Format Example 5-27
6
Intermec Printer Language Commands
Command Set Summary 6-3
Listing IPL Commands by Name 6-4
Listing IPL Commands by Command Syntax 6-8
Listing Printer Commands by Function 6-12
Immediate Commands 6-12
Program Mode Commands 6-12
Print Mode Commands 6-16
Immediate Commands 6-19
Abort Print Job 6-19
Error Code, Request 6-19
viii
Contents
Label and Gap Length, Transmit 6-19
Remaining Quantity and Batch Counts, Transmit 6-20
Reset 6-20
Status Dump 6-20
Status Enquiry 6-20
Print Mode Commands 6-21
Alphanumeric Field Separator 6-21
Batch Count, Set 6-22
Clear All Data 6-22
Clear Data From Current Field 6-22
Command Terminator 1 6-22
Command Terminator 2 6-22
Configuration Parameters, Transmit 6-23
Cut 6-23
Data Shift – International Characters 6-23
Field, Select 6-23
Field Decrement, Set 6-24
Field Increment, Set 6-24
First Data Entry Field, Select 6-24
Font, Transmit 6-24
Form Feed 6-25
Format, Select 6-25
Format, Transmit 6-25
Increment/Decrement, Disable 6-25
Memory Usage, Transmit 6-26
Next Data Entry Field, Select 6-26
Numeric Field Separator 6-26
Options Selected, Transmit 6-26
Page, Select 6-27
Page, Transmit 6-27
Print 6-27
Printhead Parameters, Transmit 6-27
Program Mode, Enter 6-27
Program Number, Transmit 6-28
Quantity Count, Set 6-28
Start/Stop Characters, Print 6-28
Test and Service Mode, Enter 6-28
User-Defined Characters, Transmit 6-28
User-Defined Tables, Transmit 6-29
Warm Boot 6-29
Configuration Commands 6-30
Auto-Transmit 1, Enable 6-30
Auto-Transmit 2, Enable 6-30
ix
4630 and 4830 Bar Code Label Printers User’s Manual
Auto-Transmit 3, Enable 6-31
Auto-Transmit 1, 2, and 3, Disable 6-31
Control Panel Access Permission, Set 6-31
Cutter, Enable/Disable 6-31
Dark Adjust, Set 6-32
End-of-Print Skip Distance, Set 6-32
IBM Language Translation, Enable/Disable 6-32
Intercharacter Delay, Set 6-33
Label Rest Point, Adjust 6-33
Label Retract, Enable/Disable 6-33
Label Retract Distance, Set 6-34
Label Stock Type, Select 6-34
Maximum Label Length, Set 6-34
Message Delay, Set 6-34
Online/Offline on Power Up 6-35
Postamble, Set 6-35
Preamble, Set 6-35
Print Speed, Set 6-35
Printer Language, Select 6-36
Self-Strip, Enable/Disable 6-36
Top of Form, Set 6-36
TTR/Direct Thermal Media Grade, Select 6-37
Program Mode Commands 6-37
Bar Code, Select Type 6-38
Code 39 6-39
Code 93 6-39
Interleaved 2 of 5 6-39
Code 2 of 5 6-40
Codabar 6-40
Code 11 6-40
Code 128 6-41
UPC/EAN 6-41
HIBC Code 39 6-42
Code 16K 6-43
Code 49 6-43
POSTNET 6-43
PDF417 6-43
Code One 6-45
Maxicode 6-48
HIBC Code 128 6-50
Bar Code Field, Create/Edit 6-50
Bitmap Cell Height for Graphic or UDF, Define 6-51
Bitmap Cell Width for Graphic or UDF, Define 6-51
Bitmap User-Defined Font, Clear/Create 6-52
x
Contents
Border Around Human-Readable Text, Define 6-52
Box Field, Create/Edit 6-52
Character Origin Offset, Define 6-53
Character Rotation or Bar Code Ratio, Define 6-53
Code 39 Prefix Character, Define 6-53
Command Tables, Load 6-54
Current Edit Session, Save 6-54
Field, Delete 6-54
Field Data, Define Source 6-55
Field Direction, Define 6-55
Field Origin, Define 6-56
Font, Select Type 6-56
Font Character Width, Define 6-56
Format, Create/Edit 6-57
Format Direction in a Page, Define 6-57
Format, Erase 6-57
Format Offset Within a Page, Define 6-57
Format Page Position, Assign 6-58
Format Page Position, Define Data Source 6-58
Format Page Position, Delete 6-58
Graphic, Select Type 6-59
Graphic or UDC, Define 6-59
Height Magnification, Define 6-59
Human-Readable Field, Create/Edit 6-60
Intercharacter Space for UDF, Define 6-60
Interpretive Field, Edit 6-61
Interpretive Field, Enable/Disable 6-61
Length of Line or Box Field, Define 6-61
Line Field, Create/Edit 6-62
Outline Font Description, Download 6-62
Outline User-Defined Font, Download 6-63
Page, Create/Edit 6-63
Page, Delete 6-63
Pitch Size, Set 6-63
Point Size, Set 6-64
Program Mode, Exit 6-64
User-Defined Character, Clear/Create 6-64
User-Defined Character Field, Create/Edit 6-64
User-Defined Font Character, Create 6-65
Width Magnification, Define 6-65
Test and Service Mode Command Descriptions 6-66
xi
4630 and 4830 Bar Code Label Printers User’s Manual
User-Defined Interface Tables 6-67
Print Commands (t = 0) 6-67
Escape Print Commands (t = 1) 6-68
Shift Print Commands (t = 2) 6-69
Status Responses and Auto-Transmit Commands (t = 3) 6-70
Protocol Commands (t = 4) 6-71
Fonts 6-72
Printing 2D Symbologies 6-73
7
Special Procedures
Performing Cloning 7-3
Preparing the Receiver Printer 7-4
Preparing the Sender Printer and Downloading Data 7-4
Performing Selective Transfer 7-5
Preparing the Receiver Printer 7-5
Preparing the Sender Printer 7-5
Sending Formats, Fonts, Pages, and Graphics to the Receiver Printer 7-6
Setting the Maximum Print Speed 7-7
A
Printer Reference
Comparing the 4400 to the 4630 and 4830 A-3
4630 and 4830 Printer Specifications A-4
Communications A-4
Electrical A-4
Environmental A-4
Fonts A-5
Indicators and Keys A-5
Media A-5
Media Dimensions A-6
Options A-7
Physical A-7
Printing A-8
Printer Functional Boundaries A-9
xii
Contents
Bar Code Symbologies A-10
2D Symbologies A-11
2D Stacked Symbologies A-11
2D Matrix Symbologies A-11
International Character Sets A-13
4630/4830 Character Table A-13
Translation Character Table A-14
Extended Character Sets A-14
Code Page 850 Character Table A-19
ASCII Conversion Chart A-20
B
Communications Reference
Communication Protocols B-3
Intermec “Standard” B-3
XON/XOFF B-4
XON/XOFF, No Status B-5
Polling Mode D B-5
Multi-Drop B-5
Host Requirements B-5
Communication Protocol Characters B-6
Communication Boundaries B-7
Communication Interfaces B-7
Printer Serial Ports B-8
Interface Cables and Connectors B-8
Intermec Cables B-8
Cable Schematics B-9
G
I
Glossary
Index
xiii
Before You Begin
Before You Begin
This section introduces you to standard warranty provisions, safety
precautions, warnings and cautions, document formatting conventions, and
sources of additional product information.
Warranty Information
To receive a copy of the standard warranty provision for this product, contact
your local Intermec sales organization. In the U.S. call 1-800- 755-5505, and in
Canada call (800) 688-7043. Otherwise, refer to the Worldwide Sales & Service
list shipped with this manual for the address and telephone number of your
Intermec sales organization.
Safety Summary
Your safety is extremely important. Read and follow all warnings and cautions
in this book before handling and operating Intermec equipment. You can be
seriously injured, and equipment and data can be damaged if you do not
follow the safety warnings and cautions.
Do not repair or adjust alone Do not repair or adjust energized equipment alone
under any circumstances. Someone capable of providing first aid must always
be present for your safety.
First aid Always obtain first aid or medical attention immediately after an
injury. Never neglect an injury, no matter how slight it seems.
Resuscitation Begin resuscitation immediately if someone is injured and stops
breathing. Any delay could result in death. To work on or near high voltage,
you should be familiar with approved industrial first aid methods.
Energized equipment Never work on energized equipment unless authorized
by a responsible authority. Energized electrical equipment is dangerous.
Electrical shock from energized equipment can cause death. If you must
perform authorized emergency work on energized equipment, be sure that you
comply strictly with approved safety regulations.
xv
4630 and 4830 Bar Code Label Printers User’s Manual
Warnings, Cautions, and Notes
The warnings, cautions, and notes in this manual use the following format.
Warning
A warning warns you of an operating procedure, practice, condition, or
statement that must be strictly observed to avoid death or serious injury to
the persons working on the equipment.
Avertissement
Un avertissement vous alerte d’une procédure de fonctionnement, d’une
méthode, d’un état ou d’un rapport qui doit être strictement respecté pour
éviter l’occurrence de mort ou de blessures graves aux personnes manupulant
l’équipement.
Caution
A caution alerts you to an operating procedure, practice, condition, or
statement that must be strictly observed to prevent equipment damage or
destruction, or corruption or loss of data.
Conseil
Une précaution vous avertit d’une procédure de fonctionnement, d’une
méthode, d’un état ou d’un rapport qui doit être strictement respecté pour
empêcher l’endommagement ou la destruction de l’équipement, ou l’altération
ou la perte de données.
Note: Notes are statements that either provide extra information about a topic or
contain special instructions for handling a particular condition or set of circumstances.
xvi
Before You Begin
About This Manual
This manual contains all of the information necessary to install, operate,
configure, design labels, troubleshoot, and maintain your Intermec 4630 or 4830
printer.
Terms and Conventions
The following special terms and conventions occur throughout the manual for
operating procedures and descriptions of the printer.
•
“Printer,” “4630,” or “4830” refer to the 4630 and 4830 bar code label
printers. Unless specifically stated, all information in this manual applies to
both printer models.
•
“Media” is the label stock on which the printer prints labels.
•
“Host” refers to a personal computer or other computer that communicates
with the printer.
•
On line/Off line, Feed/Reload, and Cancel refer to the keys on the printer
control panel.
•
Select, Menu, Enter, Cont, ↑, and ↓ refer to the keys on the printer menu
panel.
•
Messages on the printer display are represented by boxed text:
OFFLINE
SERVICE MENU
•
Downloaded commands appear in the order you enter them into the
printer with the following conventions:
Convention
Description
<>
Angle brackets < > enclose mnemonic representations of ASCII
control characters. For example, <ETX> represents the ASCII
“End of Text” control character.
data
Italic text represents variable data, which you must replace with
a real value. For example, n signifies a variable for which you
must designate a constant value.
[data]
Italic text within brackets represents optional data.
Ctrl
Bold text represents a key on your keypad. For example, Ctrl
represents the Ctrl key and M represents the letter M key.
Ctrl-Z
When two keys are joined with a dash, press them
simultaneously. For example, if you see the command Ctrl-C,
press the two keys at the same time.
E3;F3
Type all characters that appear in the Courier font by pressing an
individual key on the keypad.
xvii
4630 and 4830 Bar Code Label Printers User’s Manual
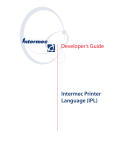
Other Intermec Manuals
The following manuals provide additional information about printing labels
with your bar code printer.
xviii
Manual
Intermec
Part No.
Data Communications Reference Manual
044737
The Bar Code Book by Roger C. Palmer
051241
4630 and 4830 Bar Code Label Printers
Getting Started Guide
063880
1
Getting Started
Getting Started
1
The 4630 and 4830 printers offer many configuration and programming choices, yet
they are easy to operate and understand. These printers are designed to quickly
produce volumes of high quality labels in harsh environments.
Getting to Know Your Printer
You can use the Intermec 4630 and 4830 printers for both direct thermal and
thermal transfer printing applications. The following three illustrations identify
the major components of the Intermec 4630 and 4830 printers.
Front View
Back View
O
1-3
4630 and 4830 Bar Code Label Printers User’s Manual
Internal View
Preparing the Printer for Installation
Before installing and connecting the printer to your data collection system, use
the following guidelines to choose the proper location for the printer.
1-4
•
Position the printer close to an electrical source.
•
Set the printer on a level, sturdy surface.
•
Allow easy access to the power switch and the rear panel.
•
Make sure the printer fan is kept clear of obstructions and debris.
Getting Started
1
Plugging in the Printer
The back of the printer contains the AC power receptacle, the serial
communications ports, the parallel port, and the On/Off (|/O) switch.
To plug in the printer
1. Make sure the On/Off switch is in the off (O) position.
2. Plug the power cord into the receptacle on the back of the printer.
Note: If you are outside the United States and use a 230V power source, contact
your Intermec representative for the appropriate power cord.
3. Plug the other end of the power cord into a grounded wall outlet or surge
protector.
4. Turn the On/Off switch to the on (|) position.
When you turn on the printer, the three indicator lights flash. After the
printer is fully powered, the Power and On line indicator lights are lit and
the display reads:
ONLINE
READY
Opening and Closing the Printer
You need to open the printer every time you load media or perform
maintenance procedures.
To open the printer
•
Grasp the bottom center of the stock door and pull it outward and upward
until you can rest the door on top of the printer.
To close the printer
•
Grasp the stock door and gently pull it down until it rests against the
bottom edge of the printer.
Note: Before closing the stock door, make sure that the printhead is locked down.
1-5
4630 and 4830 Bar Code Label Printers User’s Manual
Choosing the Print Mode and Media
The 4630 and 4830 printers are capable of printing in two modes: direct thermal
(DT) and thermal transfer (TTR).
Direct thermal Heat is directly applied from the thermal printhead to produce
an image on the print media. This is the default print mode for your printer.
Thermal transfer The individual elements of the printhead apply heat to a
ribbon. The “ink” on the ribbon is formulated to melt into the print media to
produce an image.
If you want to print in thermal transfer mode, use the menu panel to access the
Configuration menu and then select Label, Media Type, Thermal Transfer. For
more information on using the menu panel, refer to “Using the Menu Panel” in
Chapter 2.
Note: Do not use direct thermal print media with a thermal transfer ribbon installed.
The print quality will be unacceptable.
Loading Fanfold Media
1. Open the stock door.
2. Raise the printhead latch wing and rotate it counterclockwise one-half turn
to unlock the printhead. Lift the printhead to the raised position.
3. Place the media supply behind or beneath the printer and put a blank
paper core over the media hub.
4. Install the fanfold media guide bracket on the inside back panel of the
printer. The bracket attaches to the upper lip of the fanfold media feed slot.
5. Feed the media through the rear or bottom media loading slot, between the
fanfold media guide bracket and the media hub assembly, under the
bouncer assembly, and in between the upper and lower media guides until
it exits the printhead assembly.
6. Adjust the media edge guide until it just touches the edge of the media.
7. Lower the printhead, engage the printhead latch, and rotate the latch wing
clockwise one-half turn to lock the printhead into position.
Note: You may need to feed several labels through the printer before the media is
properly aligned.
1-6
Getting Started
1
Loading Roll-Fed Media
1. Open the stock door.
2. Raise the printhead latch wing and rotate it counterclockwise one-half turn
to unlock the printhead. Lift the printhead to the raised position.
3. Slide the media roll onto the media hub assembly.
4. Route the media under the bouncer assembly and in between the upper
and lower media guides until it exits the printhead assembly.
5. Adjust the media edge guide until it just touches the edge of the media.
6. Lower the printhead, engage the printhead latch, and rotate the latch wing
clockwise one-half turn to lock the printhead into position.
Note: You may need to feed several labels through the printer before the media is
properly aligned.
1-7
4630 and 4830 Bar Code Label Printers User’s Manual
Loading Roll-Fed Media
Loading Thermal Transfer Ribbon
If you want to print in thermal transfer mode, you must install a thermal
transfer ribbon on the ribbon supply hub and use thermal transfer media.
To load thermal transfer ribbon
1. Open the stock door.
2. Raise the printhead latch wing and rotate it counterclockwise one-half turn
to unlock the printhead. Lift the printhead to the raised position.
3. Remove the J-hook from the ribbon take-up hub by holding the hub and
twisting the J-hook counter-clockwise until it disengages.
4. Determine the “inked” side of the ribbon, making sure that it is down as it
comes off the roll, and then slide the ribbon roll onto the ribbon supply
hub, until it is against the hub flange.
Note: Depending on the type of ribbon you are using, the ribbon may need to feed
from the top or the bottom of the roll. It is important that the “inked” side of the
ribbon does not come in contact with the printhead. You can rub a clean piece of
paper over both sides of the ribbon to determine which side is “inked.”
1-8
Getting Started
1
5. Pull the free end of the ribbon under the printhead carriage, lower the
printhead, and engage the printhead latch. Do not lock the printhead into
position.
6. Pull the ribbon over the ribbon idler rollers, wrap the free end of the ribbon
counterclockwise around the ribbon take-up hub, and slide the J-hook
ribbon clasp into place. Rotate the hub until all slack is removed from the
ribbon (do not use the J-hook to rotate the hub).
7. Rotate the latch wing clockwise one-half turn to lock the printhead into
position and then close the stock door.
Printing a Configuration Test Label
Once media is loaded in the printer, you are ready to print the configuration
test label. Use this label for reference when connecting the printer to your
system and for verifying proper printer operation.
To print the configuration test label
1. Start with the printer display showing OFFLINE READY. You may need to
press On line/Off line to get this display.
2. Press and release the menu panel access door to open the door. From the
menu panel, press Menu and then press ↑ or ↓ until you reach the Service
menu.
3. Press Select and then press ↑ or ↓ until the display shows:
SERVICE MENU
PRINT CONFIG
1-9
4630 and 4830 Bar Code Label Printers User’s Manual
4. Press Select and then press ↑ or ↓ until the display shows:
PRINT CONFIG
USER DEFINED
5. Press Select. The display shows:
USER DEFINED
EXECUTE TEST
6. Press Enter to print the configuration test label.
7. Press Cont to return to the OFFLINE READY display.
Connecting the Printer to Your System
You can connect the printer to a PC, a local area network, an AS/400 (or other
midrange computer), or a mainframe. This section tells you how to connect
your printer to any of these systems.
Connecting the Printer to a PC Serial Port
To connect the printer to your PC serial port, you need a shielded EIA RS-232,
RS-422, or RS-485 electrical interface with a DB 25-pin connector on the printer
end and the appropriate serial port connector on the other end. You can use
one of the following Intermec cables:
•
P/N 048668 (25-pin printer connector to 25-pin serial port connector)
•
P/N 048693 (25-pin printer connector to 9-pin serial port connector)
To connect your printer to a PC serial port
1. Turn off the printer.
2. Plug the 25-pin connector into one of the serial ports on the back panel of
the printer: Main port (A) or Alt port (B).
3. Plug the other end of the cable into a serial port (COM port) on the PC.
4. Make sure the serial port settings for your printer and the PC are the same.
The default configuration settings for the printer serial ports are: 9600 baud,
even parity, 7 data bits, 1 stop bit, and Standard protocol.
1-10
Getting Started
1
Connecting the Printer to a PC Parallel Port
If you are using a parallel port to communicate with the printer, you can
purchase a parallel cable from Intermec (P/N 051211).
To connect your printer to a PC parallel port
1. Turn off the printer.
2. Plug the parallel cable connector into the parallel communications port on
the back panel of the printer.
3. Plug the DB 25-pin cable connector into the 25-socket parallel port on the
PC.
Connecting the Printer to a Network
You can connect the printer to Novell NetWare networks, Token Ring
networks, or TCP/IP networks. To connect the printer to a network, you must
purchase a network interface adapter. Network adapters are listed in
Intermec’s Product Links Catalog. The adapters may connect to either serial or
parallel ports depending on the adapter you select. Refer to your network
documentation for more information.
Connecting the Printer to an AS/400
To connect the printer directly to an AS/400 or midrange system, you need
•
a coax/twinax interface adapter card (P/N 063870).
•
a twinaxial cable equivalent to IBM P/N 7362267 or 7362062.
The maximum cable length for the twinax interface is 5000 feet (1525 meters).
If the coax/twinax interface adapter was not installed in the printer at the
factory, you can have the field installable option (P/N 063870) installed in your
printer. Refer to the manual that comes with the interface adapter for more
information on cabling and communications.
Note: If you are using a midrange computer other than the AS/400, refer to your
system documentation for information on cabling and setting up communications.
1-11
4630 and 4830 Bar Code Label Printers User’s Manual
Connecting the Printer to a Mainframe
To connect the printer directly to an IBM mainframe, you need
•
a coax/twinax interface adapter (P/N 063870).
•
a coaxial cable equivalent to IBM P/N 2577672 or 1833108.
The maximum cable length allowed is 4920 feet (1500 meters). See the IBM
specification Installation and Assembly of Coaxial Cable and Accessories, part
number GA27-2805-4, for further information.
If the coax/twinax interface adapter was not installed in the printer at the
factory, you can have the field installable option (P/N 063870) installed in your
printer. Refer to the manual that comes with the interface adapter for more
information on cabling and communications.
Cabling in Noisy Electrical Environments
The items listed below create noisy electrical environments that can disrupt
data communications between your host computer and the printer:
•
Large power transformers
•
Large electrical motors
•
Arc welders
•
Motor controllers
•
Switch gears
If any of these items are near your printer, you may want to try any of the
following suggestions to reduce the effects of electrical noise. If you need help
eliminating noise, ask your Intermec representative for assistance.
1-12
•
Always use shielded cable. Connect the cable and shield to the metal
backshells on the cable connectors and fasten the connectors to the serial
ports using screws.
•
Install ferrite cable clamps.
•
Connect the printer chassis ground to the building ground. You will find
the chassis ground on the ground pin of the printer power cord.
Getting Started
1
Configuring the Serial Ports
The serial port settings of the printer should match those of your PC or
network controlling device. If the default settings do not match your
configuration needs, you can use the menu panel to access the MAIN PORT or
ALT PORT menus to change them.
The printer serial port settings and the default values (*) are listed below.
Parameter
Settings
Baud Rate
110, 300, 600, 1200, 2400, 4800, 9600*, 19200
Data Bits
7* or 8
Message Length
255*, 512
Parity
Odd, Even*, Mark, Space, Off
Stop Bits
1* or 2
Protocol
Standard*, XON/XOFF, XON/XOFF No Status, Multi-Drop,
Polling Mode D
A faster communications configuration than the printer default is: 19200 baud,
no parity, 8 data bits, 1 stop bit, and XON/XOFF No Status protocol.
Note: You need to configure the printer serial port for 8 data bits if you want to print
Code Page 850 or 8 bit ASCII character sets. Also, use XON/XOFF protocol for
READY/BUSY buffer control.
To configure the printer serial ports
1. From the OFFLINE READY display, press Menu and then press ↑ or ↓
until you reach the Install menu.
2. Press Select and then press ↑ or ↓ until the display shows:
INSTALL MENU
MAIN PORT
or
INSTALL MENU
ALT PORT
3. Press Select and then press ↑ or ↓ to scroll through the available
commands.
4. Press Select when you reach the command you want to change. The current
setting is shown with an asterisk (*).
5. Press ↑ or ↓ to scroll through the available settings for the command and
then press Enter to activate the setting you want.
1-13
4630 and 4830 Bar Code Label Printers User’s Manual
6. Do one of the following:
•
Press Cont to return to the OFFLINE READY display.
•
Press Menu and repeat Steps 3 through 5 to change other serial port
settings.
Note: You must cycle the printer power (turn off the printer, wait five seconds, and
then turn on the printer) to have the changes you made take effect.
Verifying Printer Communications With Your System
Once you have the printer connected to your system, you need to test for
communications with your system.
•
If you have connected the printer to a PC serial port, the easiest way to test
communications is to run PrintSet and then print a test label. You can also
send a character string to the printer from DOS.
•
If you have connected the printer to a PC parallel port, you can send a
character string to the printer from DOS.
•
If you are using a different platform to communicate with your printer,
please refer to your system user’s manual and Chapter 6, “Intermec Printer
Language Commands,” in this manual for information on downloading
commands to the printer.
To verify printer communications using DOS
1. Start with the printer display showing OFFLINE READY. You may need to
press On line/Off line to see this display.
2. Press and release the menu panel access door to open the door. From the
menu panel, press Menu and then press ↑ or ↓ until you reach the Service
menu.
3. Press Select and then press ↑ or ↓ until the display shows:
SERVICE MENU
DATA LINE PRINT
4. Press Select and then press ↑ or ↓ until the display shows:
DATA LINE PRINT
ENABLED
5. Press Enter to enable Data Line Print mode. The printer is ready to print
characters received from the host.
1-14
Getting Started
1
6. Depending on the PC port the printer is connected to, type the following
commands from the DOS prompt and press Enter after each line:
Serial Port
Parallel Port
MODE COM1: 96,E,7,1
COPY CON LPT1
COPY CON COM1
ABCDEF^Z
ABCDEF^Z
where:
MODE COM1:
configures the PC serial port, COM1, for the
communication values you specify. For example,
96,E,7,1 configures the PC serial port for 9600 baud, even
parity, 7 data bits, and one stop bit.
Note: The values you specify must match the values of the
printer serial port.
COPY CON COM1
COPY CON LPT1
copies anything you type after this command to COM1 or
to LPT1.
ABCDEF
random characters typed at the host.
^Z (Ctrl-Z)
stops the COPY CON command and sends the
information to the printer.
The printer prints each character it receives and the hexadecimal value for
that character.
7. Press Cont on the printer menu panel to return to the OFFLINE READY
display. Data Line Print mode is automatically disabled when you exit the
Service menu.
If this test does not work, check to make sure that the communication settings
of the PC serial port match the settings of the printer serial port and that the
printer cable is securely plugged into the serial or parallel port on the PC and
the printer.
1-15
2
Operating and Configuring the Printer
Operating and Configuring the Printer
2
This chapter explains how to use the control and menu panels to operate your printer.
It also contains information on how to change the printer configuration settings and
how you can add options to your printer to enhance printer operation.
Using the Control Panel
You can operate many features of the printer directly from the control panel
instead of through a host computer. The control panel provides direct
communications with the printer for tasks such as advancing media or
canceling the current print job.
Reading the Display
Operating messages These messages appear during normal operation of the
printer. The example below is an operating message that indicates the printer is
online and ready to print labels:
ONLINE
READY
Menu messages When you change printing adjustments, messages appear
indicating the selections that are active and the task you are performing. For
example, when you are adjusting the darkness of your labels, a message
similar to the one shown below appears:
DARK ADJUST
5*
An asterisk (*) appears next to the current setting.
Error messages Error messages indicate a problem with the printer or the data
from the host. The message below indicates the supply of thermal transfer
ribbon is depleted or jammed:
RIBBON FAULT
2-3
4630 and 4830 Bar Code Label Printers User’s Manual
Using the Control Panel Keys
The three control panel keys perform the following functions:
On line/Off line Toggles the printer between
online and offline. When online, the printer prints
any data it receives. When offline, the printer
stops printing and cannot accept data (but can
accept protocol commands) from the host
computer. For most menu panel operations, the
printer must be offline.
Feed/Reload When the printer is offline, you can
use this key to advance the media. Pressing this
key once advances media to the next print point.
Pressing this key twice feeds an entire label through the printer.
Cancel Press this key to delete the current print job after the current label has
finished printing. The printer starts the next print job immediately.
Understanding the Indicator Lights
The control panel has three lights that indicate the current operating status of
the printer.
On line This light indicates the printer is online (it can receive data from the
host computer). When the printer is online, you can only access Operator menu
commands.
Alert This light flashes for conditions that require your attention, such as an
open paper path. A message describing the alert condition also appears on the
control panel display.
Power This light remains on as long as the printer is turned on and is
receiving power.
2-4
Operating and Configuring the Printer
2
Using the Menu Panel
The menu panel is located below the control panel
and behind the menu panel access door. Press and
release the access door to open it.
You use the menu panel keys to change printer
parameters and to setup security levels.
Select Selects menus and features, and returns to
the last adjustment display after you have left the
menus. This key also selects digits when changing
numerical parameters.
Enter Activates a selected option and starts a
selected Test or Service function.
Menu
Cont
Returns to the menu list.
Exits the menus.
4630U-09
↑ and ↓ Scrolls through menus and commands and increases or decreases
command settings.
About the Printer Menus
The printer has four menus. The following table will help you to locate the
menu you want to use, based on the tasks you are performing with the printer.
Menu
Description
User
Operator
Used for making fine adjustments to the
darkness, print alignment, and cutoff
point of your labels. This menu can be
accessed when the printer is online or
offline.
Operators using the printer daily.
Install
Select communication parameters and
security levels and install printer options.
The printer must be offline to access this
menu.
Programmers, systems analysts, or
other personnel who install and set
up the printer
Service
Set and adjust operating features, calibrate
printer sensors, and test current settings.
The printer must be offline to access this
menu.
Technicians or other personnel
qualified to do repair and service.
Configuration
Change the operating parameters and
activate or disable optional features. The
printer must be offline to access this
menu.
Programmers, systems analysts, or
supervisors who program and set up
printer commands and label formats.
2-5
4630 and 4830 Bar Code Label Printers User’s Manual
Operator and Install Menus
Default values are indicated by an asterisk (*).
OPERATOR MENU
INSTALL MENU
2-6
DARK ADJUST
-10 to 10, 0*
X FORMS ADJUST
-30 to 30, 0*
Y FORMS ADJUST
-30 to 30, 0*
LABEL REST POINT
-30 to 30, 0*
MAIN PORT
BAUD RATE
19200
9600*
4800
2400
1200
600
300
110
DATA BITS
7*
8
MESSAGE LENGTH
255*
512
PARITY
ODD
EVEN*
MARK
SPACE
OFF
STOP BITS
1*
2
PROTOCOL
STANDARD*
XON/XOFF
XONXOFF NO STAT
MULTIDROP
POLLING MODE D
COAX/TWINAX
DEVICE ADDRESS
A* to Z, 0 to 5
ALT PORT
Same selections as MAIN PORT.
MAX PRINT SPEED
2.0 to 8.0* INCH/SECOND (51 to 203* mm/SECOND) 4630
2.0 to 5.0* INCH/SECOND (51 to 127* mm/SECOND) 4830
SECURITY
LEVEL
LEVEL
LEVEL
LEVEL
0*
3
2
1
Operating and Configuring the Printer
2
Service Menu
Default values are indicated by an asterisk (*).
SERVICE MENU
SENSOR OUTPUT
GAP
PRINT
DISPLAY
MARK
PRINT
DISPLAY
LABEL TAKEN
PRINT
DISPLAY
PRINT PATH OPEN
PRINTHEAD TEMP
PRINT
DISPLAY
DOTS PASSED
PRINT
DISPLAY
DOTS FAILED
PRINT
DISPLAY
MOTOR TEST
MAIN DRIVE
DISABLED*
ENABLED
MEMORY RESET
COMMAND TABLES
CONFIGURATION
FONTS/GRAPHICS
PAGES/FORMATS
ALL
PRINT PAGE
ALL
0 THRU 9
PAGE QUANTITY
(1-99)
EXECUTE TEST
PRINT FORMATS
ALL
0 THRU 19
FORMAT QUANTITY
(1-99)
EXECUTE TEST
PRINT FONTS
ALL
EXECUTE TEST
41-30, 28, 26,
25, 24, 23, 22,
21, 20, 7, 3, 2,
1, 0
PRINT GRAPHICS
ALL
0 THRU 99
EXECUTE TEST
PRINT CONFIG
USER DEFINED
HARDWARE
EXECUTE TEST
PRINTHEAD
PRINT TEST LABEL PRINT QUALITY
PITCH
EXECUTE TEST
DATA LINE PRINT
ENABLED
DISABLED
CLONING
SENDER
RECEIVER
EXECUTE TEST
SELECTIVE TRANS
SEND ALL
EXECUTE TEST
SEND PAGE
0 to 9
ALL
TO PAGE 1-9
EXECUTE TEST
EXECUTE TEST
SEND FORMAT
0 to 19
ALL
TO FORMAT 1-19
EXECUTE TEST
EXECUTE TEST
SEND FONT
0 to 25
ALL
TO FONT 3-19
EXECUTE TEST
EXECUTE TEST
SEND GRAPHIC
0 to 99
ALL
TO GRAPHIC 0-99
EXECUTE TEST
EXECUTE TEST
2-7
4630 and 4830 Bar Code Label Printers User’s Manual
Configuration Menu
Default values are indicated by an asterisk (*).
CONFIGURATION
MENU
LABEL
BASIC
MEDIA ALERT
2-8
PRINT SPEED
2.0 to
3.5
2.0 to
2.5
8.0 INCH/SECOND (51 to 203 mm/SECOND),
INCH/SECOND* (89 mm/SECOND) 4630
5.0 INCH/SECOND (51 to 127 mm/SECOND),
INCH/SECOND* (64 mm/SECOND) 4830
MAX LABEL LENGTH
1 to 24 INCHES (25 to 610 mm),
5 INCHES* (125mm)
LABEL WIDTH
2.0 to 6.7 INCHES (51 to
6.55 INCHES* (166 mm)
3.0 to 9.0 INCHES (76 to
8.85 INCHES* (225 mm)
LABEL STOCK
CONTINUOUS
LABEL GAP*
LABEL MARK
MEDIA TYPE
THERMAL TRANS
DIRECT THERMAL*
CHARACTER SET
US ASCII*
UK ASCII
GERMAN
FRENCH
NORWAY/DENMARK
SWEDEN/FINLAND
SPANISH
ITALIAN
256 CHARACTERS
CODE PAGE 850
SWITZERLAND
TRANSLATION
DISABLED*
ENABLED
POWER-ON
ONLINE*
OFFLINE
ASCII ZERO
NOT SLASHED*
SLASHED
UNITS
INCHES*
MILLIMETERS
LABEL RETRACT
DISABLED*
ENABLED
SELF-STRIP
DISABLED*
ENABLED
CUTTER
DISABLED*
ENABLED
MEDIA LENGTH
0* to 99999 INCHES (0 to 2539975 mm)
LOW MEDIA WARN
0* to 999 INCHES (0 to 25375 mm)
SET WARNING
DISABLED*
ENABLED
170 mm),
4630
229 mm),
4830
Operating and Configuring the Printer
2
Tips for Using the Control and Menu Panels
•
To stop printing immediately, without losing data, press: On line/Off line.
•
To determine the configuration of the printer, print a configuration test
label.
•
To access the last adjustment that was made using the menu panel, press
Select at the ONLINE READY or the OFFLINE READY display.
•
To access the menu where the last adjustment was made, press Menu at the
ONLINE READY or the OFFLINE READY display.
•
To return to the previous menu, press Menu from within a menu.
•
To go directly to the ONLINE READY display after you finish making an
offline adjustment, press On line/Off line.
Setting Security Levels
To restrict access to certain printer menus, you can set a security level.
Restricting access to printer menus prevents unauthorized tampering with
printer settings and eliminates the number of choices you need to scroll
through when selecting menus and options.
This table shows the restrictions of the different security levels.
Security Setting
Restrictions
Level 0
None.
Level 1
Operator and Configuration menus.
Level 2
Operator menu.
Level 3
All menus.
To set the security level
1. From the OFFLINE READY display, press Menu and then press ↑ or ↓
until you reach the Install menu.
2. Press Select and then press ↑ or ↓ until the display shows:
INSTALL MENU
SECURITY
3. Press Select and then press ↑ or ↓ to access the security level you want.
2-9
4630 and 4830 Bar Code Label Printers User’s Manual
4. Press Enter to activate the security level setting.
5. Press Cont to return to the OFFLINE READY display.
To bypass a security level
1. Turn off the printer.
2. Press and hold the Feed/Reload key and turn on the printer.
The printer security level is set to 0, which allows access to all menus
Setting the Dark Adjust
Print darkness can be adjusted when the printer is online or offline. The dark
adjust setting is set at the factory for common media.
A darkness setting of zero should provide optimal print quality; however, in
order to maintain print quality, you may need to adjust print darkness under
the following conditions:
•
Change in print speed.
•
Change in media type (from direct thermal to thermal transfer and vice
versa).
•
Printhead wear.
•
Using large amounts of media.
To adjust the darkness of your labels
1. From the ONLINE READY display, press Menu to enter the Operator
menu.
2. Press ↑ or ↓ until the display shows:
OPERATOR MENU
DARK ADJUST
3. Press Select. The display shows the current darkness setting.
4. Press ↑ to increase the printing darkness or press ↓ to lighten the printing
on the label. The range is from -10 (lightest) to 10 (darkest).
5. Press Enter to activate the new setting.
6. Press Cont to return to the ONLINE READY display.
7. Print several print quality labels and then scan the bar codes on the labels.
You want to get a very high successful scan percentage (95% or better)
when you scan these labels. You can also use a bar code verifier to
determine if the print quality is acceptable for your application.
2-10
Operating and Configuring the Printer
2
8. If the labels are too dark or too light, repeat this procedure until you get the
results you want.
Note: The human eye generally likes darker print than what is required for a good
scan.
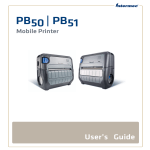
Using the X and Y Forms Adjust
If the print on your labels is not positioned correctly, you can center the printed
image with the X and Y Forms Adjust commands. The X Forms Adjust lets you
adjust the position of the printed image in the direction of media movement
(moves the print further towards the front or back of the label). The Y Forms
Adjust lets you adjust the position of the print in the direction parallel to the
front of the printhead (moves the print towards the sides of the label). You can
use X and Y Forms Adjust commands when the printer is online or offline.
You can adjust the print alignment on your labels without interrupting normal
label production. The following example uses the X Forms Adjust command.
The procedure is performed similarly for the Y Forms Adjust command.
Note: The x-dimension is also affected by the Top-of-Form configuration command.
For more information, see “Top of Form, Set” in Chapter 6.
-Y
+Y
-X
+X
2-11
4630 and 4830 Bar Code Label Printers User’s Manual
To adjust the print alignment
1. From the ONLINE READY display, press Menu to enter the Operator
menu.
2. Press ↑ or ↓ until the display shows:
OPERATOR MENU
X FORMS ADJUST
3. Press Select. The display shows the current X Forms Adjust command
setting.
4. Press ↑ to increase the number and move the print towards the back of the
label. Press ↓ to decrease the number and move the print towards the front
of the label.
Note: The range of the X Forms Adjust command is from -30 (furthest forward on
the label) to +30 (furthest backward on the label). The range for the Y Forms
Adjust command is from -30 (closest to the top of the label) to +30 (closest to the
bottom of the label).
5. Press Enter at the setting you want.
6. Press Cont to return to the ONLINE READY display.
7. Print several labels. If the print is not positioned properly, repeat this
procedure until you get the results you want.
Adjusting the Label Rest Point
The Label Rest Point command sets the point where labels are presented for
cutting or removal from the printer. This command is primarily used with the
self-strip and cutter options. Adjust the label rest point setting, if you are
loosing part of a label each time one is cut or removed from the printer.
To adjust the label rest point
1. From the ONLINE READY display, press Menu to enter the Operator
menu.
2. Press ↑ or ↓ until the display shows:
OPERATOR MENU
LABEL REST POINT
3. Press Select. The display shows the current setting for the Label Rest Point
command.
2-12
Operating and Configuring the Printer
2
4. Press ↑ so that labels move farther forward from the front of the printer.
Press ↓ so that labels do not move as far forward from the front of the
printer.
Note: The range for the label rest point is from -30 to +30 in 5 mil increments.
5. Press Enter at the setting you want.
6. Press Cont to return to the ONLINE READY display.
7. Print several labels. If the labels do not stop at the right point for removal or
cutting, repeat this procedure until you get the results you want.
Printing the Buffer Contents
You can print the data that is stored in the printer buffer when the printer is
offline.
To print the buffer contents
1. Take the printer offline.
2. Press Cont. The printer prints the contents of the buffer.
The printer cannot receive data when it is offline, so the printer can only
print what is in the buffer. When printing stops, the buffer is empty.
Adjusting the Media Sensor
The media sensor performs two functions: it monitors the position of a label
along the media path and it monitors when the label stock must be replaced.
The printer firmware interprets the media sensor input to determine the top of
form position on a label or an out of stock condition with the printer.
The media sensor is adjustable across half of the media path. In general, if the
media sensor adjustment knob is kept in the full counterclockwise position, it
will correctly sense all widths of media. However, if a problem occurs with
sensing the label top of form, try rotating the media sensor adjustment knob
clockwise, one half turn at a time, until the error is eliminated.
2-13
4630 and 4830 Bar Code Label Printers User’s Manual
Adjusting the Media Sensor
Adjusting the Printer for Different Width Media
The printhead has a leveling cam adjustment to ensure even print quality
across the media regardless of the media dimension. The cam adjustment raises
or lowers the right side of the printhead to keep it level across the media.
Your printer is set up at the factory for the following media:
4630
Standard 4 mil thick, 6.55 inch (166 mm) wide print media.
4830
Standard 4 mil thick, 8.85 inch (225 mm) wide print media.
The cam adjustment is designed to compensate for the use of narrower width
stock. When the cam is out of adjustment, print along one side of the label will
drop off suddenly, rather than gradually fading out.
You must pull out on the adjustment knob to turn it. The knob has numbers
that you can use as reference points when adjusting media width; however, the
numbers do not relate to specific media sizes. Turn the knob one or two
numbers at a time until the desired print quality is achieved.
2-14
Operating and Configuring the Printer
2
When changing to media that has a different thickness, it may also be
necessary to reset the cam adjustment bracket.
To reset the cam adjustment bracket
1. Pull out on the adjustment knob and turn it counterclockwise until it stops.
2. Loosen the two screws securing the bracket.
3. Load the new media.
4. Slide the bracket up or down to contact the cam adjustment.
5. Tighten the two screws to secure the bracket.
6. Print a test label. You may need to turn the cam adjustment knob to fine
tune the print quality.
2-15
4630 and 4830 Bar Code Label Printers User’s Manual
Removing Thermal Transfer Ribbon
Generally, ribbons are completely used before they are replaced. To remove a
completely used ribbon, pull the ribbon straight off the take-up hub. However,
if you need to print in direct thermal mode before the thermal transfer ribbon
has been completely used, you must remove the used portion of the ribbon.
To remove partially used thermal transfer ribbon
1. Cut the ribbon between the idler rollers.
2. Turn the ribbon supply hub to rewind the unused ribbon until it is clear of
the printhead. Leave the good ribbon on the supply hub until you need to
use it again.
3. Turn the ribbon take-up hub counterclockwise to roll up the used ribbon,
and then slide the ribbon off the take-up hub.
Adding Additional Memory
The printer can use memory modules to provide extra storage capacity for
fonts and graphics. You can use one or two, 1MB or 4MB modules to expand
printer storage memory up to an additional 8MB. The memory module slots
are accessed from the stock door side of the printer.
You load data into a module by downloading printer commands or by using
printer application software, such as PrintSet.
To install a memory module
1. Turn off the printer and
raise the stock door. The
printer has an upper and a
lower module slot. You
can use one or both of the
slots.
2. With the module cartridge
label facing up, carefully
seat the cartridge firmly
into one of the module
slots. Be careful not to
bend the pins of the
connector. The printer
senses the storage memory
module once it is installed.
2-16
Operating and Configuring the Printer
2
Note: You cannot move storage memory modules from printer to printer without
reloading the module contents.
Increasing Image Memory
The 4630 and 4830 printers come with 1MB of image memory. You can add
4MB or 16MB of image memory to the printer in order to print longer labels.
The following table shows the maximum length of the labels you can print
based on the amount of image memory in your printer.
Image Memory
Maximum Label Length
4630
4830
Standard (1MB)
8 in. (20 cm)
6 in. (15 cm)
5MB
50 in. (127 cm)
35 in. (89 cm)
17MB
200 in. (508 cm)
150 in. (381 cm)
Using the Media Rewind Hub
The media rewind hub is an option that you can purchase with your printer to
spool printed label media. This option is necessary if you need to print large
quantities of labels as a single batch or that you want to use at a later time. The
rewind hub is also necessary if you want to use the self-strip option.
To use the media rewind hub
1. Open the stock door.
2. Load your label media and feed it through the printer until approximately
18 inches (46 cm) of media extend from the front of the printer.
3. Route the media around the rewind bracket and insert it through the media
take-up slot.
4. If necessary, loosen the thumbscrew on the media retainer and remove the
retainer from the media rewind hub.
5. Pull on the rewind hub tension bar in order to slide the core adapters onto
the rewind hub. Adjust the core adapters to the size of your media core and
then use the thumbscrews to tighten them to the hub.
6. Slide an empty media core onto the media rewind hub and wrap the media
around the core by turning the hub counterclockwise several turns.
Note: You may rewind media directly on the rewind hub; however, for best results,
Intermec recommends using a media core.
2-17
4630 and 4830 Bar Code Label Printers User’s Manual
7. Slide the media retainer onto the rewind hub so it’s just touching the media
core and tighten the thumbscrew.
8. Close the stock door.
To remove media or media backing from the rewind hub
1. Open the stock door.
2. Loosen the thumb screw on the media retainer and remove it.
3. Pull the media and core off of the rewind hub.
Note: If you have wound media or media backing directly on the rewind hub, pull
on the rewind hub tension bar. This will release the tension on the media so you
can remove the media from the hub.
Using the Self-Strip Assembly
You can order the printer with the self-strip assembly option or you can
purchase this option separately and have it installed by an Intermec service
technician. You must have the media rewind hub option on your printer in
order to use the self-strip assembly.
The label taken sensor is part of the self-strip assembly and it prevents the
printer from printing a new label until the last printed label has been removed
from the printer.
2-18
Operating and Configuring the Printer
2
To route media through the self-strip assembly
1. Load the printer with die-cut media and feed it through the printer until
approximately 18 inches (46 mm) of media extend from the front of the
printer.
2. Pull open the roller bracket using the two release tabs and then thread the
media over the top of the fixed bracket, under the rollers of the roller
bracket, and into the media take-up slot.
3. Connect the media to the media rewind hub. Refer to “Using the Media
Rewind Hub” earlier in this chapter for more information.
2-19
4630 and 4830 Bar Code Label Printers User’s Manual
Using the Cutter
You can order the heavy-duty cutter option for the 4630 and 4830 printers or
you can purchase the standard cutter option that is only available for the 4630
printer. The heavy-duty cutter is designed to cut adhesive-backed media and
tag media whereas the 4630 standard cutters should only cut media backing.
Routing Media Through the Heavy-Duty Cutter
1. Turn off the printer and then open
the stock door.
2. Load the printer with media and
route the media through the printer
until about 10 inches (25 cm) of
media extent from the front of the
printer.
3. Open the heavy-duty cutter
assembly and feed the media
through the cutter media guides.
4. Close the heavy-duty cutter
assembly.
Routing Media Through the 4630 Standard Cutter
1. Turn off the printer.
2. Turn the cutter latch counterclockwise
to unlock the cutter assembly and pull
it forward.
3. Load the printer with media and route
it through the printer, until about 10
inches (25 cm) of media extent from the
front of the printer.
4. Feed the media through the media slot
on the back of the cutter assembly and
out the front of the cutter assembly.
5. Push the cutter assembly flush against
the printer and rotate the cutter latch
clockwise to lock it into place.
2-20
Operating and Configuring the Printer
2
Enabling the Cutter
1. From the OFFLINE READY display, press Menu and then press ↑ or ↓
until you reach the Configuration menu.
2. Press Select and then press ↑ or ↓ until the display shows:
CONFIGURATION
BASIC
3. Press Select and then press ↑ or ↓ until the display shows:
CONFIGURATION
CUTTER
4. Press Select and then press ↑ or ↓ until the display shows:
CUTTER
ENABLED
5. Press Enter to activate the cutter and then press Cont to return to the
OFFLINE READY display.
Testing Cutter Operation
1. From the OFFLINE READY display, press Menu and then press ↑ or ↓
until you reach the Service menu.
2. Press Select and then press ↑ or ↓ until the display shows:
SERVICE MENU
PRINT TEST LABEL
3. Press Select and then press ↑ or ↓ until the display shows:
SERVICE MENU
PRINT QUALITY
4. Press Select. The display shows:
PRINT QUALITY
EXECUTE TEST
5. Press Enter to print the quality test label.
The cutter cuts the label. After the label is cut, the printer retracts the media for
printing the next label.
Note: You may need to adjust the Label Rest Point setting on the Operator Menu if
you notice that the new label is not printing in the correct location after the previous
label has been cut. The range for the label rest point is from -30 to +30 in 5 mil
increments.
2-21
4630 and 4830 Bar Code Label Printers User’s Manual
Changing Printer Configuration Settings
The factory default configuration of the printer works well in most operating
environments; however, you can easily change these settings to meet your
specific operational needs.
The following table shows the basic configuration settings of the printer. An
asterisk (*) indicates the default values.
Command
Settings
Description
Character Set
US ASCII*, UK ASCII, German,
French, Norway/Denmark,
Sweden/Finland, Spanish, Italian,
256 Characters, Code Page 850,
Switzerland
Select the character set you want to use.
Note: If you want to use Code Page 850 or 256
Characters, you must configure the printer for 8
bits per byte data transmission.
Translation
Enabled, Disabled*
The IBM Translation command allows IBM
compatible characters to replace standard
ASCII characters based on the current
character set.
Power-On
Online*, Offline
Controls if the printer is online or offline when
the printer is turned on.
ASCII Zero
Slashed, Not Slashed*
Controls how zeros are printed: with or
without a slash.
Units
Inches*, Millimeters
Use English or metric printer measurements.
Label Retract
Enabled, Disabled*
The Label Retract command enables the
printer to retract label at the start of print to
prevent skipped labels. Press Feed/Reload
after changing this setting.
Self-Strip
Enabled, Disabled*
An external option that automatically removes
the backing from a label. Press Feed/Reload
after changing this setting.
Cutter
Enabled, Disabled*
An external option that cuts labels from the
media roll after the labels are printed. Press
Feed/Reload after changing this setting.
2-22
Operating and Configuring the Printer
2
To change the printer configuration
1. From the OFFLINE READY display, press Menu and then press ↑ or ↓
until you reach the Configuration menu.
2. Press Select and then press ↑ or ↓ until the display shows:
CONFIGURATION
BASIC
3. Press Select and then press ↑ or ↓ to scroll through the available
commands.
4. Press Select when you reach the command you want. The display shows
the current setting for the command.
5. Press ↑ or ↓ to scroll through the available settings for that command.
6. Press Enter when you see the setting you want. An asterisk (*) appears next
to the new setting, indicating it is active.
7. Press Cont to return to the OFFLINE READY display or, to change other
configuration settings, press Menu and repeat Steps 3 through 6.
Changing the Label Configuration Settings
To obtain the best print quality, you must adapt your printer to print at the
desired print speed on the type of media (label stock) you are using. Your
Intermec representative can recommend media types for your system.
The following table shows the label configuration settings of the printer. An
asterisk (*) indicates the default values.
Command
Settings
Description
Print Speed
2.0, 2.5* (4830), 3.0, 3.5* (4630), 4.0, 4.5,
5.0, 5.5, 6.0, 6.5, 7.0, 7.5, 8.0 in/sec
The rate at which labels are printed.
(51, 64* (4830), 76, 90* (4630), 104, 117,
132, 142, 153, 165, 180, 198,
203 mm/sec)
Note: The 4830 printer has a maximum
print speed of 5 ips (132 mm/sec).
Max Label Length
1 to 24 in (25 mm to 600 mm)— default
is 5 in (125 mm)
The maximum amount of label stock the
printer advances before it checks for a
low stock condition.
Label Stock
Continuous, Label Gap*, Label Mark
The type of label stock you are using.
Press Feed/Reload after changing this
setting.
Media Type
Direct Thermal*, Thermal Transfer
The type of media you are using. Press
Feed/Reload after changing this setting.
2-23
4630 and 4830 Bar Code Label Printers User’s Manual
To change the label configuration settings
1. From the OFFLINE READY display, press Menu and then press ↑ or ↓
until you reach the Configuration menu.
2. Press Select and then press ↑ or ↓ until the display shows:
CONFIGURATION
LABEL
3. Press Select and then press ↑ or ↓to scroll through the available commands.
4. Press Select when you reach the command you want. The display shows
the current setting for the command.
5. Press ↑ or ↓ to scroll through the available settings for that command.
6. Press Enter when you see the setting you want. An asterisk (*) appears next
to the new setting, indicating it is active.
7. Press Cont to return to the OFFLINE READY display or, to change other
configuration settings, press Menu and repeat Steps 3 through 6.
Setting the Media Alert
The Media Alert feature flashes the Alert light to warn you when the media
supply is getting low.
Note: You need to reset the Media Length and the Low Media Warn commands each
time you load a different size roll of media into the printer. If you do not, the printer
may not give you sufficient warning of a low media condition.
To use Media Alert, you must set three control panel commands. An asterisk
(*) indicates the default values.
Command
Settings
Description
Media Length
0* to 99999 inches or
0* to 2539975 mm
The media supply length in inches or millimeters. The
printer uses this value to count backwards (down) to the
low media warning point.
Low Media Warn
0* to 999 inches or
0* to 25375 mm
The minimum amount of media supply. When the
media supply reaches this amount, the alert light is
activated.
Set Warning
Enabled, Disabled*
Enable or disable the Media Alert feature.
2-24
Operating and Configuring the Printer
2
To set the media length
1. From the OFFLINE READY display, press Menu and then press ↑ or ↓
until you reach the Configuration menu.
2. Press Select and then press ↑ or ↓ until the display shows:
CONFIGURATION
MEDIA ALERT
3. Press Select and then press ↑ or ↓ until the display shows:
MEDIA ALERT
MEDIA LENGTH
4. Press Select. The display shows the current setting with a cursor under the
first digit, for example:
MEDIA LENGTH
06000 INCHES*
5. Press ↑ to increase the digit or press ↓ to decrease the digit. Press Select to
move the cursor to the next digit.
Note: Pressing Select at the last digit moves the cursor to the first digit.
6. Press Enter when you have the media length you want.
7. Press Cont to return to the OFFLINE READY display.
To set the low media warning
1. From the OFFLINE READY display, press Menu and then press ↑ or ↓
until you reach the Configuration menu.
2. Press Select and then press ↑ or ↓ until the display shows:
CONFIGURATION
MEDIA ALERT
3. Press Select and then press ↑ or ↓ until the display shows:
MEDIA ALERT
LOW MEDIA WARN
4. Press Select. The display shows the current setting for the Low Media Warn
command with the cursor under the first digit.
5. Press ↑ to increase the digit or press ↓ to decrease the digit. Press Select to
move the cursor to the next digit.
6. Press Enter when you have the value you want.
7. Press Menu and then press ↑ or ↓ until the display shows:
MEDIA ALERT
SET WARNING
2-25
4630 and 4830 Bar Code Label Printers User’s Manual
8. Press Select and then press ↑ or ↓ until the display shows:
SET WARNING
ENABLED
9. Press Enter to enable the Low Media Warn command and then press Cont
to return to the OFFLINE READY display.
Printing Configuration Test Labels
To review the current configuration of the printer, you can print a
Configuration Test Label that shows either the user-defined software or
hardware configuration of your printer.
User-Defined This label lists the current configuration parameters that are set
from the Configuration, Operator, and Install menus, as well as defined pages,
formats, graphics, and fonts. Any printer options that you have installed are
also listed on this label.
Hardware This label lists the amount of memory installed in your printer
(static and dynamic RAM), the width and dot size of the printhead, and the
printhead mileage. The printhead mileage consists of both the amount of media
that has been processed (passed underneath the printhead) and the amount of
media that has been burned (printed).
To print a Configuration Test Label
1. From the OFFLINE READY display, press Menu and then press ↑ or ↓
until you reach the Service menu.
2. Press Select and then press ↑ or ↓ until the display shows:
SERVICE MENU
PRINT CONFIG
3. Press Select and then press ↑ or ↓ to reach the label you want: User-Defined
or Hardware.
4. Press Select and then press Enter to print a Configuration Test Label.
2-26
Operating and Configuring the Printer
2
Restoring the Printer Default Configuration
1. From the OFFLINE READY display, press Menu and then press ↑ or ↓
until you reach the Service menu.
2. Press Select and then press ↑ or ↓ until the display shows:
SERVICE MENU
MEMORY RESET
3. Press Select and then press ↑ or ↓ until the display shows:
MEMORY RESET
CONFIGURATION
4. Press Enter to reset the configuration settings.
Note: After using the Memory Reset command, you must enable any options you want
to use, such as self-strip or the cutter.
The Memory Reset command restores the following factory default settings in
the printer:
Parameter
Setting
Parameter
Setting
ASCII Zero
Not Slashed
Media Length
0
Baud Rate
9600
Media Type
Direct Thermal
Character Set
US ASCII
Message Length
255
Cutter*
Disabled
Parity
Even
Dark Adjust
0
Power-On
Online
Data Bits
7
Print Speed
3.5 ips (4630)
2.5 ips (4830)
Device Address
A
Protocol
Standard
External Options
None
Security
Level 0
Forms Adjust
0
Self-Strip*
Disabled
Internal Options
None
Set Warning
Disabled
Label Rest Point
0
Stop Bits
1
Label Retract
Enabled
Translation
Disabled
Label Stock
Gap
Units
Inches
Low Media Warn
0
X Forms Adjust
0
Max Label Length
5 inches
Y Forms Adjust
0
* Printer option
2-27
3
Maintaining the Printer
Maintaining the Printer
3
Your Intermec printer is designed to withstand harsh environments, but it should be
cleaned on a regular basis to keep it running at full capacity.
Inspecting the Printer
Inspect the printer and the rest of your data collection system on a regular
basis. Your inspections should include the following:
•
Make sure the printer is properly grounded.
•
Inspect the work environment. Large electric motors, welders, and
switching equipment can affect printer performance.
•
Keep the printer away from liquids.
•
Check the network regularly for loose wires or poorly installed connections.
Be sure to replace corroded wires.
Components to Maintain
Clean your printer regularly to maintain the quality of your labels and extend
the life of your printer. To clean the printer effectively and safely, use the
following items:
•
Isopropyl alcohol
•
Cotton swabs
•
Lint-free cloth
•
Compressed air
Printer Component
Maintenance Period
Printhead
Inspect after every roll of media. Clean after every five rolls of media.
Drive roller, tear bar, media
pathway, and edge guides
Clean after every ten rolls of media. If you are using hi-tack adhesive you
must clean after every roll of media. If you are using tag stock or
continuous media, you should clean after every five rolls of media.
Printer cover
Clean as necessary.
Heavy-duty cutter blades
The maintenance period depends on the media you are cutting:
•
Media backing—clean after every 150,000 cuts.
•
Media with adhesive and tag media—clean after every 30,000 cuts.
The cutter uses self-sharpening blades that have a life expectancy of
1,000,000 cuts.
Standard cutter blade
Clean after every 100,000 cuts.
3-3
4630 and 4830 Bar Code Label Printers User’s Manual
Cleaning the Printer
The following procedures tell you how to access the printer components and
how to clean them properly.
Note: Turn off and unplug the printer before cleaning any components.
Cleaning the PrintheadCleaning media debris from the printhead
maintains close contact between the media and printhead, which provides
good print quality. The printhead should be cleaned after every five rolls of
media. If a label jams during printing, clean the printhead immediately after
you remove the label.
Caution
Do not use sharp objects such as knives or screwdrivers to scrape the
printhead clean. Cleaning with sharp objects will damage the printhead.
Clean with a cotton swab, or a clean, lint-free cloth and isopropyl alcohol.
Conseil
N'utilisez pas d'objets pointus tels que couteaux ou tournevis pour nettoyer
la tête d'impression. Nettoyer avec des objets pointus endommagera la tête
d'impression. Nettoyez-la avec de la ouate ou avec un linge propre et libre de
peluches, humecté avec de l'alcool d'isopropyl.
To clean the printhead
1. Open the stock door.
2. Remove the ribbon if you are printing in thermal transfer mode.
3. Unlock the printhead by rotating the printhead latch wing
counterclockwise one-half turn. Lift the printhead to the raised position.
4. Use a cotton swab moistened with isopropyl alcohol to clean the printhead.
Be persistent in order to remove any dirt, adhesive, or debris from the print
surface on the bottom of the printhead.
3-4
Maintaining the Printer
3
5. Wait 5 to 10 seconds for the print surface to dry.
6. Replace the ribbon if you are printing in thermal transfer mode.
7. Lower the printhead, engage the printhead latch, and rotate the printhead
latch wing clockwise one-half turn to lock the printhead.
8. Close the stock door when you are finished cleaning the printer.
Cleaning the Drive Roller and the Tear Bar
Cleaning the drive roller and the tear bar preserves print quality by ensuring
close contact between the media and the printhead.
To clean the drive roller and the tear bar
1. Open the stock door.
2. Raise the printhead latch wing and rotate it counterclockwise one-half turn
to unlock the printhead. Lift the printhead to the raised position.
3. Clean the drive roller with a clean, lint-free cloth moistened with isopropyl
alcohol. Make sure to rotate the roller so that you clean the entire surface of
the roller.
3-5
4630 and 4830 Bar Code Label Printers User’s Manual
Caution
Do not scrape the rubber drive roller. Scraping will gouge the roller and
void any applicable warranty. Gouged rollers must be replaced to
maintain high quality label printing.
Conseil
Ne grattez pas le rouleau caoutchouté. Gratter le rouleau gougera le
caoutchouc et annulera toute garantie applicable. Vous devez remplacer
les rouleaux gougés pour maintenir une haute qualité d'impression
d'étiquettes.
4. Clean the tear bar with a cloth dampened with isopropyl alcohol to remove
all traces of dust, paper, and adhesive.
Warning
Use extreme caution when cleaning the tear bar to avoid cutting yourself.
Avertissement
Lors du nettoyage de la barre coupante, prenez bien soin de ne pas vous
couper.
5. Lower the printhead, engage the printhead latch, and rotate the latch wing
clockwise one-half turn to lock the printhead.
6. Close the stock door when you are finished.
Cleaning the Media Path
You should clean the media path regularly to keep debris off the media surface
and printhead where irregularities can spoil print quality or damage the
printhead. Cleaning the media guides prevents the media from skewing or
improperly tracking as the media travels through the paper path, which can
result in smeared images and print off the side of the label. If a label jams
during printing, clean the media guides immediately after you remove the
label from the printer.
To clean the media guides and bouncer assembly
1. Open the stock door.
2. Clean the upper and lower media guides and the bouncer assembly with a
clean, lint-free cloth moistened with isopropyl alcohol. Be sure to remove
all traces of debris.
3. Close the stock door when you are finished cleaning the printer.
3-6
Maintaining the Printer
3
Cleaning the Heavy-Duty Cutter Assembly
The heavy-duty cutter uses self-sharpening
blades that require a minimal amount of
maintenance and provide a life expectancy
of one million cuts. However, during cutter
operation, the cutter blades collect adhesive
and produce dust and paper particles. The
cutter blades must be cleaned periodically to
ensure proper performance of the cutter
assembly. Use the following guidelines,
based on the media that is cut, to determine
a maintenance schedule for the cutter
assembly:
•
Media backing—clean after every
150,000 cuts.
•
Media with adhesive and tag media—
clean after every 30,000 cuts.
To clean the cutter assembly
1. Open the cutter assembly, disconnect the cutter power cable, and remove
the cutter assembly from the cutter mounting bracket.
2. Remove the Phillips screws from the back of the cutter assembly and then
remove the cover.
3. Use a cotton swab moistened with isopropyl alcohol to clean the cutter
blades of adhesive buildup.
Warning
Use extreme caution when cleaning the cutter to avoid cutting yourself.
Avertissement
Lors du nettoyage de la barre coupante, prenez bien soin de ne pas vous
couper.
4. Use compressed air to remove dust and paper particles from the cutter
mechanism.
5. Replace the cutter cover and secure the cover to the cutter assembly.
6. Install the cutter assembly on the cutter mounting bracket, connect the
cutter power cable, and then close the cutter assembly.
3-7
4630 and 4830 Bar Code Label Printers User’s Manual
Cleaning the 4630 Standard Cutter Assembly
The 4630 standard cutter is designed to cut nonadhesive media that does not exceed a thickness
of 0.0075" (0.190 mm). The cutter requires a
minimal amount of maintenance; however, it
produces dust and paper particles as it operates
and must be cleaned periodically to ensure
proper performance. Clean the cutter of debris
buildup after every 100,000 cuts. The cutter
assembly has a life expectancy of 500,000 cuts.
To clean the cutter assembly
1. Disconnect the cutter power cable from the
bottom of the cutter assembly and then
remove the cutter assembly from the printer.
2. Remove the Phillips screw that secures the upper cover to the cutter
assembly and then remove the upper cover.
3. Use a cotton swab moistened with isopropyl alcohol to clean the cutter
blade of adhesive buildup.
Warning
Use extreme caution when cleaning the cutter to avoid cutting yourself.
Avertissement
Lors du nettoyage de la barre coupante, prenez bien soin de ne pas vous
couper.
4. Use compressed air to remove dust and paper particles from the cutter
mechanism.
5. Replace the upper cutter cover and secure it to the cutter assembly.
6. Install the cutter assembly on the printer and then connect the cutter power
cable to the cutter assembly.
Cleaning the Printer Cover
Clean the printer cover with a general purpose cleaner (soapy water/mild
detergent). Do not use abrasive cleansers or solvents. Be sure to clean the
transparent panel on the stock door so that the media supply inside the printer
is visible when the cover is closed.
3-8
4
Troubleshooting
Troubleshooting
4
This chapter provides information on troubleshooting error messages that may appear
on the printer control panel display, as well as certain problems you may have with
your printer.
Troubleshooting Checklist
Even though your printer is designed to operate reliably under harsh
conditions, you may still encounter error messages at some time. Most of the
errors you encounter can be easily fixed and will not delay operation of the
printer for very long.
If you receive an error message or encounter a functional problem with the
printer, try the following:
•
Check the display for an error message.
•
If there is an error message on the display, find it in the table under “Error
Messages” in this chapter and follow the instructions.
•
If the display does not show an error message, try to locate the symptom in
the tables under “Printer Operation Problems” or “Print Quality Problems”
later in this chapter and follow the instructions.
•
Clean the printer components and check all connections.
If the problem persists, contact:
North America your Intermec Customer Service Representative at
1-800-755-5505.
International your local Intermec representative.
4-3
4630 and 4830 Bar Code Label Printers User's Manual
Printer Operation Problems
If your printer is not operating correctly, try locating the problem in the table
below: {xe "printer:operating problems"}{xe "troubleshooting:printer operation
problems"}
Symptom
Cause
Solution
Labels stop
feeding through
the printer.
Media is sticking to the paper path.
Clear any extraneous material from the paper
path and clean it thoroughly.
Printer is out of media.
Load new media.
Label gap or label mark sensors are
dirty.
Clean label sensors.
Label stock is loaded incorrectly.
Check the paper path.
Label Stock command is not set for
your media.
Use the menu panel to change the label stock
setting to match the media you are using.
AC power cable is damaged or
disconnected.
Make sure the power cable is plugged into
both the printer and an outlet or power strip.
Replace the cable if it is damaged.
Printer main power fuse is burnt
out.
Contact your Intermec representative to have
an Intermec service technician replace the
fuse.
The secondary fuse is burnt out.
Contact your Intermec representative to have
an Intermec service technician replace the
fuse.
Print speed incorrectly set (and is
not recovered when printer quits).
Use the menu panel to change the print speed
settings.
Printer has quit and print speed
was reset.
Use the menu panel to change the print speed
settings.
No power or
power loss.
Printer slows
down.
4-4
Troubleshooting
4
Print Quality Problems
If your labels are not being printed properly, check the following table to locate
the symptom and correct the problem.
Symptom
Cause
Solution
Blotches on labels.
Dirty printhead.
Clean the printhead.
Dirty paper path.
Clean the paper path.
Poor quality label or ribbon stock.
Contact your Intermec representative for
suggestions on proper media or ribbons for
your printing requirements.
Labels are not
stopping at the
right point to be
removed.
Label Rest Point command
incorrectly set.
Adjust the Label Rest Point.
Menu panel does
not access menus.
Security command set to restrict
access to menus.
To bypass security levels, turn off the
printer, press and hold Feed/Reload, and
then turn on the printer
Print is too far
forward or too far
back.
Forms Adjust command incorrectly
set.
Reset Forms Adjust.
Printing is too
light or too dark.
Dark adjust is incorrectly set.
Try changing the Dark Adjust menu panel
setting.
Dirty printhead.
Clean the printhead.
Poor quality label or ribbon stock.
Contact your Intermec representative for
suggestions on proper media or ribbons for
your printing requirements.
4-5
4630 and 4830 Bar Code Label Printers User's Manual
Communications Problems
If your printer is not receiving downloaded data or you cannot reach a certain
menu on the control panel, try the solutions in the following table.
Symptom
Cause
Solution
Printer does not
communicate with
host.
Printer is offline.
Press On line/Off line on the control panel.
Main Port or Auxiliary Port
commands incorrectly set.
Make sure printer port settings and the host
port settings match. You can review the
printer port settings by using the menu
panel, or print a user-defined configuration
test label.
Damaged or incorrect I/O cable.
Check the connections at both ends or
replace the cable. Refer to Chapter 1 and
Appendix B.
Error Messages
Most of the problems the printer may encounter will generate an error message
and cause the Alert light to flash. If this happens, find the message in the table
below and follow the instructions to fix the problem.
Error Message
Problem
Solution
+12 VDC ERROR
Power supply output voltage is not
within the acceptable operating range.
Shut off the printer. Contact your
Intermec service representative.
+24 VDC ERROR
Power supply output voltage is not
within the acceptable operating range.
Shut off the printer. Contact your
Intermec service representative.
80960 RAM ERROR
One of the printer’s microprocessors
cannot access RAM. Printing stops
and the control panel locks up. When
the printer power is cycled, this
message appears.
Cycle the printer power again. If the
message reappears, turn off the printer
and contact your Intermec service
representative.
80960 ROM ERROR
The printer’s microprocessor cannot
access ROM. Printing stops and the
control panel locks up. When the
printer power is cycled, this message
appears.
Cycle the printer power again. If the
message reappears, turn off the printer
and contact your Intermec service
representative.
4-6
Troubleshooting
Error Message
4
Problem
Solution
AC VOLTS LOW
There is not enough voltage reaching
the printer through the AC power
cord.
Test the line voltage. If sufficient
voltage is reaching the printer, then
the problem is internal to the printer
and you should contact your Intermec
service representative. If the printer is
not receiving sufficient voltage,
replace the power cord.
CALLS FAULT
The printer microprocessor has
detected an internal fault.
Contact your Intermec representative.
CHECKSUM ERROR
Portions or all of the static memory
were found to be corrupted and were
reset. Some or all of the fonts, UDCs,
formats, configuration settings, etc.,
may have been lost.
Contact your Intermec representative.
COMMUNICATIONS
ERROR
Printer is not communicating with the
host computer.
Make sure the host is running and all
the connections are intact. Press Cont
to clear the error.
CUTTER FAULT
The Cutter is not operating properly.
Check to see the cutter is properly
maintained and connected. Press
Feed/Reload to clear the error.
CUTTER NOT
CONNECTED
The cutter is enabled from the control
panel but it is not connected.
If you are not using the cutter, disable
the cutter command through the menu
panel. Otherwise, check the
connections between the cutter and
the printer. Press Cont to clear the
error.
The printer microprocessor has
detected an internal fault.
Contact your Intermec representative.
The printhead mechanism has jammed
and the printhead cannot lift between
labels.
Open the printer and press
Feed/Reload. If this does not work,
contact your Intermec representative.
MACHINE FAULT
The printer microprocessor has
detected an internal fault.
Contact your Intermec representative.
MATH FAULT
The printer microprocessor has
detected an internal fault.
Contact your Intermec representative.
The Media Alert command is enabled
and the media supply is low.
Replenish the media supply (refer to
Chapter 1) or disable the Media Alert
command (refer to Chapter 2). Press
Feed/Reload to clear this warning.
FLOAT FAULT
HEAD LIFT FAULT
MEDIA ALERT
4-7
4630 and 4830 Bar Code Label Printers User's Manual
Error Message
Problem
Solution
Portions or all of the static memory
were found to be corrupted and were
reset. Some or all of the fonts, UDCs,
formats, configuration settings, etc.,
may have been lost.
Contact your Intermec representative.
The printer microprocessor has
detected an internal fault.
Contact your Intermec representative.
OVERFLOW ERROR
32
Non-immediate command or data
received with full buffer.
Send message after buffer has cleared.
Press Cont to clear the alert.
OVERFLOW ERROR
37
Not enough room in the printer
memory to print the label format. The
format fits into memory but there is
not enough memory left to print.
Reduce the format complexity by
deleting fields or decreasing the
amount of data. Press Cont to clear the
alert.
OVERFLOW ERROR
42
Not enough room in the printer
memory to store the format.
Delete any formats, fonts, or graphics
that you no longer need. If the format
still does not fit, delete a few fields or
other data from the format. Press Cont
to clear the alert.
MEMORY RESET
OPERATION FAULT
Note: To see how much printer memory is
available, enter <ESC>m at the host.
OVERFLOW ERROR
43
Too many fields in the label format.
Delete some fields, or reduce the
number of characters in the fields.
Press Cont to clear the alert.
OVERFLOW ERROR
53
Not enough room for graphic or userdefined font in the label format.
Delete any formats, fonts, or graphics
that you no longer need. If there is still
not enough room, reduce the size of
the font or graphic. Press Cont to clear
the alert.
PAPER FAULT
You are out of media, there is a jam in
the paper path, or the printer cannot
find a label or index marker in the
expected place.
Open the printer and check the media
path. Make sure the Label Stock and
Media Length parameters are set
correctly (refer to Chapter 2). Press
Feed/Reload to clear the alert.
PAPER PATH OPEN
The printer is open or not properly
closed.
Make sure the printer is closed. Press
Feed/Reload to clear the message.
PARAMETER ERROR
8
Invalid start or stop characters.
Verify start and stop characters in the
label format. Press Cont to clear the
alert.
PARAMETER ERROR
11
Invalid data characters.
Verify data characters in label format.
Press Cont to clear the alert.
4-8
Troubleshooting
4
Error Message
Problem
Solution
PARAMETER ERROR
36
Invalid or undefined format or page
number.
Verify that the page numbers are
between 0 and 9 and the format
numbers are between 0 and 19. Press
Cont to clear the alert.
PARAMETER ERROR
38
Invalid or undefined field number.
Verify the field number in the label
format. Press Cont to clear the alert.
PRINTHEAD COLD
The printhead is too cold to print
properly.
Wait for the printhead to heat up. At
the right temperature printing starts
automatically and the alert clears. If
the printer takes too long to heat up,
contact your Intermec representative.
PRINTHEAD HOT
The printhead is too hot to print.
Wait while the printhead cools. At the
right temperature, printing starts and
the alert clears. If the printer takes too
long to cool, or continues to overheat,
contact your Intermec representative.
PRINTHEAD TEMP
SENSOR FAULT
The temperature sensor for the
printhead is not working or is
disconnected.
The printer will continue to print, but
you cannot clear the alert. Contact
your Intermec representative.
RANGE ERROR 12
Data count has been exceeded.
Reduce the amount of data entered
into this field or increase the field’s
maximum data (up to 200). Press Cont
to clear the alert.
RANGE ERROR 21
Quantity or batch count is out of
range.
Quantity of labels should be between 1
and 9999 and there should be 1 and
9999 batches of labels. Press Cont to
clear the alert.
RANGE ERROR 22
Increment or Decrement quantity is
out of range.
Quantity should be between 1 and
9999. Press Cont to clear the alert.
RANGE ERROR 23
Intercharacter delay or message delay
is out of range.
Delay should be between 0 and 9999.
Press Cont to clear the alert.
RANGE ERROR 52
Invalid font/graphic height, width, or
intercharacter gap.
Font or graphic height and width
should be between 1 and 600.
Intercharacter gap should be between
0 and 199 dots. Press Cont to clear the
alert.
4-9
4630 and 4830 Bar Code Label Printers User's Manual
Error Message
Problem
Solution
If you are using the Cloning or
Selective Transfer commands, the
Receiver printer is not receiving the
information from the Sender.
Make sure the Receiver printer is
turned on and set up correctly for
receiving information from the Sender.
Check all connections between the
Receiver and the Sender printers.
RIBBON FAULT
You are out of thermal transfer ribbon
or it is jammed.
Clear the jam or replenish the ribbon
stock. Press Feed/Reload to clear the
alert.
SELF-STRIP
NOT CONNECTED
The Self-Strip option is not connected.
Make sure the Self-Strip assembly is
connected properly, or disable this
option (refer to Chapter 2). Press
Feed/Reload to clear the alert.
SENDER ERROR
If you are using the Cloning or
Selective Transfer commands, the
Sender printer is not set up properly
to send information to the Receiver.
Check all connections between the
Sender and the Receiver printers.
Make sure the Sender printer is set up
correctly for transmitting information
to the Receiver.
STATE FAULT
The printer microprocessor has
detected an internal fault.
Contact your Intermec representative.
STRUCT FAULT
The printer microprocessor has
detected an internal fault.
Contact your Intermec representative.
SYNTAX ERROR 24
Missing preamble or postamble data.
Delete the setup for preamble or
postamble data, or include the data.
Press Cont to clear the alert.
SYNTAX ERROR 33
Invalid field delimiter. Either a start or
end character is missing or they are
different types.
Check for all pairs of field delimiters
and make sure both are numeric, or
both are alphanumeric. Press Cont to
clear the alert.
SYNTAX ERROR 34
Invalid escape command.
Correct the escape command syntax.
Press Cont to clear the alert.
SYNTAX ERROR 35
Invalid shift command.
Correct the shift command syntax.
Press Cont to clear the alert.
SYNTAX ERROR 44
Semicolon (;) missing after <ESC>P.
If data follows <ESC>P you must
insert a semicolon (;) to separate
commands. Press Cont to clear the
alert.
SYNTAX ERROR 46
Statement does not make sense.
Check the statement syntax. Press
Cont to clear the alert.
RECEIVER ERROR
4-10
Troubleshooting
4
Error Message
Problem
Solution
SYNTAX ERROR 54
Invalid UDC command.
Correct the UDC command syntax.
Press Cont to clear the alert.
TRACE FAULT
The printer microprocessor has
detected an internal fault.
Contact your Intermec representative.
TYPE FAULT
The printer microprocessor has
detected an internal fault.
Contact your Intermec representative.
Error Codes
Most of the problems you may encounter with the 4630 and 4830 printers cause
the printers to send an error code to the host. If this happens, find the error
code in the table and complete the instructions to correct the problem.
Error
Code
Description
00
No error
01
Invalid bar code check character
02
Invalid number of bar code characters (Code UPC/EAN)
04
Bar code check character within numeric field marks
05
Supplemental delimiter within numeric field marks (Code UPC/EAN)
06
Invalid supplemental character count (Code UPC/EAN)
07
More than one supplemental delimiter (Code UPC/EAN)
08
Invalid start/stop characters (Codabar)
11
Invalid bar code data
12
Data count exceeded
13
Data is being entered into a non-data entry field
21
Quantity or batch count out of range
22
Field increment or decrement out of range
23
Intercharacter/message delay out of range
24
Missing preamble or postamble data
25
Invalid format transmission syntax
26
Invalid page transmission syntax
27
Invalid font transmission syntax
28
Invalid UDC transmission syntax
4-11
4630 and 4830 Bar Code Label Printers User's Manual
Error
Code
Description
32
Non-immediate command or data received after buffer is full
33
Invalid field marks
34
Invalid escape command
35
Invalid data shift command
36
Invalid or undefined format number
37
Insufficient room in RAM to print format
38
Invalid or undefined field number
41
Syntax error for Program Commands
42
Insufficient room in RAM to store format
43
Too many fields
46
Undefined statement
52
Invalid UDC or UDF bitmap cell height/width or intercharacter space
53
Insufficient room in RAM to store UDC or UDF
54
Invalid UDC command syntax
Using the Print Tests
The printer software provides several tests you can use to print pages, formats,
fonts, and graphics that are currently stored in printer memory. These tests are
useful when changing label formats so you can review your design options.
4-12
Command
Selections
Print Page
Print 1 to 99 copies of any page number (0 through 9), or print all
pages.
Print Formats
Print 1 to 99 copies of any format number (0 through 19), or print
all formats.
Print Fonts
Print any font number (0 through 25), or print all fonts.
Print Graphics
Print any graphic number (0 through 99), or print all graphics.
Troubleshooting
4
To print test labels of pages, formats, fonts, or graphics
1. From the OFFLINE READY display, press Menu and then press ↑ or ↓
until you reach the Service menu.
2. Press Select and then press ↑ or ↓ until you see the item you want to print,
for example:
SERVICE MENU
PRINT PAGE
3. Press Select and then press ↑ or ↓ until the display shows the number of
the item you want to print.
4. Press Select. The display shows one of the following prompts:
•
If you selected all pages, all formats, or any fonts or graphic, the display
shows an EXECUTE TEST prompt.
•
If you selected a specific page or format, press ↑ or ↓ until you reach the
number of copies you want to print, and then press Select.
5. Press Enter at the EXECUTE TEST prompt to print the test label.
Printing Data Sent From the Host
If you need a hard copy of the data that is sent to the printer from the host, you
can set the printer to Data Line Print. When the printer is in Data Line Print
mode, it prints all incoming data as ASCII characters (including control
characters) with the hexadecimal value underneath each character.
To access Data Line Print mode
1. From the OFFLINE READY display, press Menu and then press ↑ or ↓
until you reach the Service menu.
2. Press Select and then press ↑ or ↓ until the display shows:
SERVICE MENU
DATA LINE PRINT
3. Press Select and then press ↑ or ↓ to enable Data Line Print mode.
4. Press Enter to activate Data Line Print mode.
Exit the Service menu to disable Data Line Print mode.
Note: If you press Feed/Reload while the printer is in Data Line Print mode, the
software version number is transmitted to the host. You can use this feature to perform
a loop-back test at the communications port.
4-13
4630 and 4830 Bar Code Label Printers User's Manual
Increasing Available Memory
If you need to increase the amount of memory available in your printer, you
can purchase extra memory from Intermec. Intermec provides 1MB and 4MB
storage memory modules for holding fonts and graphics and extra image
memory SIMMs in 4MB and 16 MB capacities. You can also use one of the
Memory Reset commands to clear pages, formats, fonts, and graphics from
printer memory. Using any of the Memory Reset commands will destroy any
data that you have previously downloaded to the printer.
To reset printer memory
1. From the OFFLINE READY display, press Menu and then press ↑ or ↓
until you reach the Service menu.
2. Press Select and then press ↑ or ↓ until the display shows:
SERVICE MENU
MEMORY RESET
3. Press Select and then press ↑ or ↓ until you see the item you want.
4. Press Enter to clear fonts/graphics or pages/formats from printer memory.
Print Quality
The 4630 and 4830 printers were designed and configured at the factory to
provide maximum print quality for both direct thermal and thermal transfer
media.
It is important that you select the proper media when printing at higher
speeds. Using good quality media reduces the occurrence of images that fade
or bleed. If you want to print quality labels at higher print speeds, you must
select media with low reaction or release imaging temperatures. Printing at
lower speeds produces the highest quality labels. Please consult your Intermec
representative to decide the proper media for your application.
There are many factors that need to be considered before you can achieve
maximum print quality. These factors are addressed in the following sections.
Media Selection
The choice of media is one of the most important decisions you can make
concerning print quality. The printer supports a wide selection of both direct
thermal and thermal transfer media. To achieve optimum performance in your
application, you must evaluate requirements such as print speed and
environmental conditions.
4-14
Troubleshooting
4
Please consult your Intermec representative to ensure that you select the
proper media for your application.
Print Speed
The print speed you select greatly affects the printed image. Therefore, it is
important to select the proper media when printing at higher speeds. The
highest quality labels are produced at lower speeds. Optimal print quality for
most direct thermal media is achieved at speeds below 3.5 ips.
In order to achieve optimal print quality at speeds greater than 6.0 ips, you
may need to fine-tune the printer controls. At higher print speeds, it is
important to properly set the dark adjust feature.
Formats
Formats can be modified to improve print quality and print speed. At high
speeds, the best quality bar codes are produced when the drag orientation
(perpendicular to paper motion) is used. For more information on formats,
please refer to Chapter 5, “Designing Labels Using IPL Commands.”
Dark Adjust
The dark adjust feature allows tuning of energy levels to optimize print
quality. If you set too high of a darkness level, you may reduce printhead life.
We recommend that you initially leave the dark adjust at zero.
A darkness setting of zero should provide optimal print quality; however, in
order to maintain print quality, you may need to adjust print darkness under
the following conditions:
•
Change in print speed
•
Change in media type (direct thermal to thermal transfer and vice versa)
•
Printhead wear
•
Using large amounts of media
Refer to “Setting the Dark Adjust” in Chapter 2 for more information.
Printhead Aging
Print element wear is common in thermal printers. Over the life of a printhead,
wear can result in a change of resistance in the print elements. The change in
element resistance affects the print quality. If needed, the change in resistance
can be compensated for by using the Dark Adjust command.
4-15
FG 9pt Italic
*1233*
5
Designing Labels Using IPL Commands
FG 9pt Italic
*1233*
FG 9pt Italic
*1233*Designing Labels Using IPL Commands
5
This chapter explains how to design and print your own labels using the Intermec
Printer Language (IPL) command set. It covers the basic elements of label design and
provides examples to guide you in designing your own labels. At first, these printer
commands may seem cryptic, but you can quickly learn to use them once you begin
designing labels.
Using Label Formats
To print a label using the 4630 or 4830 printer, you must first specify a label
format and then send data to fill in the appropriate fields in the format. A label
format defines how the information prints on a label. For example, if you want
to print a number on a label, the label format must indicate the location of the
number, its font and size, and whether the number has a vertical or horizontal
orientation.
Chapter 6, “Intermec Printer Language Commands,” contains a complete
alphabetical listing of all of the Intermec printer commands and their purpose,
syntax, and any other necessary information.
Storing Label Formats
When you define a label, either by downloading printer commands or by using
a label generation program, the printer stores the format in RAM. Once you
store a label format in the printer, you can use it at any time to print labels. You
can also upload the label format to the host computer and use Program mode
to modify one or more of its fields.
Designing and Creating a Label Format
Label formats are combinations of several different fields that determine where
and how different types of data appear in the label design. The fields on a label
may differ in size, location, orientation, and data type. You must define
information that you plan to print on the label as a field in the label format.
Once you define the fields, you can pass data into the fields and print them.
The following tutorial assumes that you are using the IPL command set.
5-3
4630 and 4830 Bar Code Label Printers User’s Manual
To design a basic label format
1. Using a label from your roll of media, sketch an example of a format that
you want to create.
Your format can include any or all of these fields:
•
•
•
•
•
Human-readable (text)
Bar code
Line
Box
User-defined characters (UDCs) or graphics
In this example, you will design a simple label that includes a humanreadable field, a line field, and a bar code field.
2. Determine the placement of each field from the label origin. To determine
the horizontal or X origin of each field, measure the distance from the left
side of the label to the upper left corner of the field.
To determine the vertical or Y origin of each field, measure the distance
from the top of the label to the upper left corner of the field.
When you combine the two numbers, they form the field origin oX,Y.
In the following illustration, the horizontal or X origin of the humanreadable field measures 0.5 inch from the left side of the label and the
vertical or Y origin measures 0.25 inch from the top of the label.
Field origin = X,Y
Direction of label from printer
Y
0.25"
X
0.5"
Code
One
bar code
5-4
FG 9pt Italic
*1233*Designing Labels Using IPL Commands
5
3. Convert the measurements for the human-readable field from inches to
dots. Use this equation:
1 inch (25.4 mm) = 300 dots
1 mm = 16 dots
In this example, the human-readable field origin in dots is:
0.5 inch x 300 dots = 150 dots (X dimension)
0.25 inch x 300 dots = 75 dots (Y dimension)
The origin for the human-readable field is o150,75 (oX,Y).
4. Convert the measurements for the line field and the bar code field to
complete this example.
To create or program the label format
1. Choose a bar code symbology and a human-readable font that suit your
needs.
For this example, you are going to use the proportional outline font and the
Code One symbology. See Chapter 6, “Intermec Printer Language
Commands,” for information on the different symbologies and fonts
available to you.
2. Define the parameters for each type of field in the format.
This Type of Field
Is Represented By
Human-readable (text)
H
Bar code
B
Line
L
Box
W
User-defined characters (UDCs) or graphics
U
See “Listing Printer Commands by Function” in Chapter 6 for a list of the
parameters you can define for each type of field.
5-5
4630 and 4830 Bar Code Label Printers User’s Manual
For example, you need to define the following parameters for a humanreadable field:
Parameter
Value for This Example
field type
H0
field origin
o150,75
font
c28 (proportional outline font)
field direction
f0 (horizontal)
height
h30 (multiplied 30 times)
width
w30 (multiplied 30 times)
field source and number of characters
d0,20
3. Create command strings for each type of field. You must bracket your field
information between the start of text character (<STX>) and the end of text
character (<ETX>).
When you combine the parameters in the previous table into a command
string, it should look like this:
<STX>H0;o150,75;c28;f0;h30;w30;d0,20;<ETX>
4. Combine the command strings you define into one file and add the
following commands bracketed by <STX> and <ETX>:
Command
Description
<ESC>P
Enters Program mode
E4;F4;
Erases what was in format 4 and creates a new format 4
R
Saves the format and exits to Print mode
<ESC>E4
Accesses format 4
<ETB>
Prints the format
5. Create the data lines for the human-readable field and the bar code field.
Do this by completing the following tasks:
a. Type the information that you want to appear in the human-readable
field and the bar code field on two separate lines.
b. Separate the information with a <CR> at the end of the first text string.
The <CR> tells the printer to enter the text into the next field. The first
line will be the text for the human-readable field and so on.
5-6
FG 9pt Italic
*1233*Designing Labels Using IPL Commands
5
c. Preface the data lines with the <CAN> command. It erases all data in
the current format.
Your command strings should look like this:
<CAN>
THIS IS THE SAMPLE LABEL <CR>
SAMPLE
d. Bracket the command strings between <STX> and <ETX>.
6. Combine all of the command strings into one format and it should look like
this:
Command
Definition
<STX><ESC>P<ETX>
Enter Program mode
<STX>E4;F4;<ETX>
Erase format 4, create format 4
<STX>H0;o150,75;f0;c28;h30;w30;d0,30;<ETX>
Edit/create human-readable field 0
<STX>L1;o150,75;f0;l600;w5;<ETX>
Edit/create line field 1
<STX>B2;o300,125;c13,0;h7;<ETX>
Edit/create bar code field 2
<STX>R;<ETX>
Save format and exit to Print mode
<STX><ESC>E4<ETX>
Access format 4
<STX><CAN><ETX>
Erase all data
<STX>THIS IS THE SAMPLE LABEL<CR><ETX>
Data for human-readable field 0
<STX>SAMPLE<ETX>
Data for bar code field 2
<STX><ETB><ETX>
Print
Note: The line breaks in this example are shown for formatting purposes only and do
not necessarily represent carriage returns. Also, the difference between the lowercase
letter “l” and the numeral “1” is not very noticeable in the Courier font. Make sure
that you enter the correct command.
5-7
4630 and 4830 Bar Code Label Printers User’s Manual
This format prints the following label:
THIS IS THE SAMPLE LABEL
Defining Label Design Fields
You define each type of field to hold a certain type of data. You can define:
•
Bar code fields (with or without interpretive fields)
•
Human-readable fields
•
Graphic fields
•
Line fields
•
Box fields
You must define the data you plan to print on your label as a field in the label
format. Each field type gives you options for interpreting your data. The fields
that contain the most options are bar code fields and human-readable fields.
Bar Code Fields
You can print bar codes in any of the symbologies listed below:
5-8
Codabar
Code 49
Interleaved 2 of 5
Code 2 of 5
Code 93
Maxicode
Code 11
Code 128
PDF417
Code 16K
Code One
POSTNET
Code 39
HIBC
UPC/EAN
FG 9pt Italic
*1233*Designing Labels Using IPL Commands
5
Appendix A, “Printer Reference,” contains a full description of each bar code
symbology. You can also refer to Chapter 6, “Intermec Printer Language
Commands,” for a complete list of commands to select the appropriate bar
code symbology.
Human-Readable Fields
You can print human-readable fields in any one of the printer’s internal fonts
or user-defined fonts. Your printer contains several scaleable fonts as well as
numerous resident bitmap fonts in a wide range of sizes and styles.
You can change the size of the font character by using the width and height
magnification or by using the pitch or point-size commands. The fonts
themselves remain unchanged. The font character charts in Appendix A,
“Printer Reference,” illustrate the complete character set for each font.
The printer supports nine different 7-bit international character sets for each
command set mode. The printer also contains two 8-bit character sets for IBM
translation, 256 Characters and Code Page 850.
The internal bitmap fonts of the printer include
•
four standard bitmap fonts measured in dots
•
two bitmap fonts recognized by optical character recognition (OCR)
programs
•
three bitmap fonts measured in point sizes
•
three outline fonts
•
fifteen bitmap monospaced fonts
Downloading User-Defined Fonts
In addition to the fonts permanently resident in your printer, you can also
download user-defined fonts (UDFs) in the form of bitmap (fixed) or outline
(scaleable) fonts.
Bitmap fonts commonly
•
print in multiples of one fixed size.
•
print quickly.
•
are memory intensive when defined as large characters.
5-9
4630 and 4830 Bar Code Label Printers User’s Manual
Outline fonts commonly
•
vary in size. (You can print any size character up to 2 inches.)
•
print smooth characters at any magnification.
•
image smaller font sizes slower than bitmap fonts.
The 4630 and 4830 printers support Bitstream’s Speedo format outline fonts.
For help locating Speedo fonts, contact your Intermec representative.
You can download user-defined fonts (UDFs) to the printer and store them in
the non-volatile memory. Although the printer reserves 16 font ID numbers
(3 to 6, and 8 to 19) for UDFs, memory constraints may limit the number of
fonts you can store.
The easiest way to download fonts to the printer is with the PrintSet printer
installation software. This application is on the disk shipped with your 4630
and 4830 Bar Code Label Printers Getting Started Guide. You can use PrintSet to
select fonts and directly download them to your printer from a PC. If you do
not have your printer connected to a PC, you can use PrintSet to create a .PCF
configuration file that you can save and then download to your printer. You
also have the ability to edit .PCF files using IPL commands.
How you download UDFs depends on the font type. The next sections describe
how to download bitmap fonts and outline fonts.
Downloading Bitmap Fonts
Use PrintSet to select and download bitmap fonts.
Bitmap fonts can use a lot of memory, so you may decide not to download the
entire font to the printer. You can use PrintSet to define a subset of the font
(only the numbers, for example). Then you can download only that subset,
saving storage space on the printer.
The printer requires that bitmap fonts be in six bits per byte format and
PrintSet automatically converts all bitmap fonts into this format. To learn more
about bitmap font formats, see “Creating User-Defined Fonts” later in this
chapter.
Downloading Outline Fonts
Use PrintSet to select and download Bitstream’s Speedo outline fonts to your
printer.
PrintSet automatically converts outline fonts into nibblized data that you can
download to the printer. PrintSet can also convert outline fonts into bitmap
fonts that you can download to the printer. You can then either directly
download the outline font to the printer or save the converted outline font data
to a .PCF file that you can edit and use in other applications.
5-10
FG 9pt Italic
*1233*Designing Labels Using IPL Commands
5
If you need to download an outline font but you cannot use PrintSet, you can
create a program to convert the outline font to a format you can download to
the printer.
When you convert an outline font to a format that you can download to the
printer, you must change the font character data into nibblized data that the
printer can interpret. When you nibblize data, you divide each byte of data into
two bytes. For example, byte 0xab becomes two bytes: 0x41, 0x42.
Here is an example of a nibblized outline font file that includes IPL commands
to send the font file directly to the printer.
Command
Definition
<STX>R<ESC>C<ESC>P<ETX>
Enter Program mode.
<STX>J03,Times,1;<ETX>
Create Speedo font 3 and give it the name Times.
<STX>j0001000000110100000400604c54534
8efe24cd0000002d8000000e04f532f3293e1
900d000003b80000004e56444d58ed68bcf40
000040800001770636d617053c2bcba000142
ac0000029063767420beed8c5300001b78000
006ae6670676d61beec3b0000222800000539
676c79668b49591e0000276400;<ETX>
Speedo data string.
<STX>j00ebf468646d78d956f5ab000113580
000150868656164af3277ec00012860000000
36686865610ef006520001289800000024686
d74788b9237d2000128bc000003706b65726e
fe84fb7b00012c2c000002b86c6f6361a4806
d8c0000011c000001bc6d617870051a043300
012ee4000000206e616d6578ca;<ETX>
Speedo data string.
<STX>j0d2000012f04000006a3706f7374d43
c8176000135a8000001ec707265701cbb23d4
0001379400000b170000003b003b003b003b0
098011201f702fc03ff05120554059605d706
bd07250770079c07c80801089a090c09e10ac
a0b530c060cb90d260e280ee80f300f920ffc
104310b1116612ca13cd154315;<ETX>
Speedo data string.
:
:
:
Several Speedo data strings not shown due to space
constraints.
<STX>j00b3008200b0008725ba0000;<ETX>
Last Speedo data string.
<STX>R<ETX>
Exit Program mode
5-11
4630 and 4830 Bar Code Label Printers User’s Manual
To convert and download an outline font to your printer
1. Nibblize the font data.
Note: Divide the nibblized data into separate lines preceded with a “j” for these
reasons: (1) you need short lines for limited message length protocols and (2) it is
easier to modify using an editor or word processing program.
2. Include IPL commands to instruct the printer what to do with the font data.
For help, see the next example and Chapter 6, “Intermec Printer Language
Commands.”
Lines and Boxes
Use the command set (see Chapter 6, “Intermec Printer Language
Commands”) to define line or box fields on a label. You can use the commands
to determine whether a box or line appears vertically or horizontally and to set
the line length and thickness.
The following example uses vertical and horizontal lines to separate fields on a
label, and uses a box field to make a label border. This format uses bold text to
highlight the lines that contain line or box fields. This label format prints the
label shown on the page following it.
Lines and Boxes Format
<STX><ESC>C1<ETX>
<STX><ESC>P;<ETX>
<STX>E4;F4,Demo 4;<ETX>
<STX>H00;o0,30;f0;h1;w1;c21;r0;b10;d3,
SHIPPING LABEL
<STX>H01;o20,160;f0;h1;w1;c0;r0;b0;d3,BASIS WT. 39-4838;<ETX>
<STX>H02;o20,180;f0;h1;w1;c21;r0;b0;d3,38448379237;<ETX>
<STX>H03;o640,160;f0;h1;w1;c0;r0;b0;d3,GRADE DESCRIPTION;<ETX>
<STX>H04;o600,180;f0;h1;w1;c21;r0;b0;d3,A-PLUS QTY;<ETX>
<STX>H05;o20,300;f0;h1;w1;c0;r0;b0;d3,ROLL WIDTH
536-0333;<ETX>
<STX>H06;o20,310;f0;h1;w1;c21;r0;b0;d3,338438;<ETX>
<STX>H07;o420,300;f0;h1;w1;c0;r0;b0;d3,ROLLS/PKG.;<ETX>
<STX>H08;o450,310;f0;h1;w1;c21;r0;b0;d3,12;<ETX>
<STX>H09;o640,300;f0;h1;w1;c0;r0;b0;d3,ORDER ITEM NUMBER;<ETX>
<STX>H10;o640,310;f0;h1;w1;c21;r0;b0;d3,234-LOFT;<ETX>
<STX>H11;o20,410;f0;h1;w1;c0;r0;b0;d3,CUSTOMER ORDER NUMBER;<ETX>
5-12
;<ETX>
FG 9pt Italic
*1233*Designing Labels Using IPL Commands
5
<STX>H12;o20,420;f0;h1;w1;c21;r0;b0;d3,372181192;<ETX>
<STX>H13;o470,410;f0;h1;w1;c0;r0;b0;d3,LOCATION-PACKAGE NUMBER-GRADE;<ETX>
<STX>H14;o520,420;f0;h1;w1;c21;r0;b0;d3,3839494;<ETX>
<STX>H15;o980,410;f0;h1;w1;c0;r0;b0;d3,WEIGHT;<ETX>
<STX>H16;o980,420;f0;h1;w1;c21;r0;b0;d3,230;<ETX>
<STX>H17;o20,520;f0;h1;w1;c0;r0;b0;d3,LOAD NUMBER OR TRACKING NUMBER;<ETX>
<STX>H18;o20,530;f0;h1;w1;c21;r0;b0;d3,3392-AZ;<ETX>
<STX>H19;o530,520;f0;h1;w1;c0;r0;b0;d3,ROLL NUMBER;<ETX>
<STX>H20;o530,530;f0;h1;w1;c21;r0;b0;d3,37282833;<ETX>
<STX>H21;o940,520;f0;h1;w1;c0;r0;b0;d3,ROLL POSITION;<ETX>
<STX>H22;o940,530;f0;h1;w1;c21;r0;b0;d3,400;<ETX>
<STX>L32;o0,280;f0;l1176;w2;<ETX>
<STX>L33;o560,114;f3;l166;w2;<ETX>
<STX>L34;o0,392;f0;l1176;w2;<ETX>
<STX>L35;o400,280;f3;l112;w2;<ETX>
<STX>L36;o600,280;f3;l112;w2;<ETX>
<STX>L37;o0,504;f0;l1176;w2;<ETX>
<STX>L38;o460,392;f3;l112;w2;<ETX>
<STX>L39;o960,392;f3;l112;w2;<ETX>
<STX>L40;o0,616;f0;l1176;w2;<ETX>
<STX>L41;o510,504;f3;l112;w2;<ETX>
<STX>L42;o930,504;f3;l112;w2;<ETX>
<STX>B51;o20,640;c0,0;f0;h100;w2;r1;i2;d3,INTERMEC;<ETX>
<STX>B52;o560,640;c0,0;f0;h100;w2;r1;i2;d3,372181192;<ETX>
<STX>I51;o20,746;f0;h1;w1;c0;r0;b0;<ETX>
<STX>I52;o560,746;f0;h1;w1;c0;r0;b0;<ETX>
<STX>W53;o0,0;w4;l1180;h780;<ETX>
<STX>R;<ETX>
<STX><ESC>E4<ETX>
<STX><RS>2<ETB><ETX>
5-13
4630 and 4830 Bar Code Label Printers User’s Manual
Lines and Boxes Label
BASIS WT. 39-4838
GRADE DESCRIPTION
38448379237
ROLL WIDTH 536-0333
338438
CUSTOMER ORDER NUMBER
372181192
A - PLUS QTY
ROLLS/PKG.
12
ORDER ITEM NUMBER
234 - LOFT
LOCATION-PACKAGE NUMBER-GRADE
3839494
WEIGHT
230
LOAD NUMBER OR TRACKING NUMBER
ROLL NUMBER
3392-AZ
37282833 400
INTERMEC
ROLL POSITION
372181192
4630U-23
Graphics
You must define a graphic field if you want to print a graphic image on a label.
Before you can use this field, you need to download the graphic to the printer.
Once you download the graphic, you can use it in any format.
Use the PrintSet printer installation software to easily download graphics to the
printer. PrintSet automatically converts the graphic into a six bits per byte
format that your printer can understand.
If you are using third-party label-generation software, convert your graphic file
to a UDC format that the printer can interpret. After you convert the graphic,
download it to the printer with IPL commands or PrintSet.
If you want to design your own graphic, refer to “Creating User-Defined
Graphics” later in this chapter. You must send graphics as six bits per byte
bitmap images. The maximum size that you can define a graphic to be is
3 x 3 inches (900 x 900 dots).
5-14
FG 9pt Italic
*1233*Designing Labels Using IPL Commands
5
Editing Label Formats and Working With Fields
In addition to understanding the different types of printable fields on the
printer, you need to know how to arrange them to define or change the format
of a label. The following sections use examples to describe the commands that
position, size, rotate, and edit label fields. For a complete list of all
programming commands, see Chapter 6, “Intermec Printer Language
Commands.”
Whenever you create a format, the printer automatically creates a humanreadable field zero (H0) along with it. The printer creates the H0 field with all
field parameters set to the default setting. You can only delete field zero after
you create one or more other fields. You cannot delete the last field in a format.
The defaults for the H0 field are:
Command
Definition
o0,0;
Field origin is 0,0.
f0;
Field direction is horizontal with respect to the label motion from
printer.
h2;
Field height magnification is two.
w2;
Field width magnification is two.
c2;
Selects the 10 x 14 standard font.
b0;
Selects no border around human-readable field.
r0;
Selects horizontal orientation of characters.
d0,30;
You enter variable data in Print mode. The maximum number of
characters you can enter into this field is 30.
When creating a new format field, it is not possible to specify field zero as
anything other than human-readable field zero (H0) without creating another
field first. For example, you cannot make field zero a bar code field by doing
the following:
<STX><ESC>P;E1;F1;B0;<ETX>
To make field zero a bar code field, you have to delete human-readable
field 0 and then define bar code field 0. To do this, you must create a temporary
field (L1) before you delete human-readable field zero (H0):
<STX><ESC>P;E1;F1;L1;D0;B0;D1;<ETX>
5-15
4630 and 4830 Bar Code Label Printers User’s Manual
This table describes each command in the string:
Command
Definition
<ESC>P;
Enters Program mode
E1;
Erases format 1
F1;
Creates format 1
L1;
Creates line field (temporary field)
D0;
Deletes field zero
B0;
Creates bar code field zero
D1;
Deletes field 1
When numbering the fields in a format, it is important to remember to give
every field a different number. Never use a field number more than once. You
can have up to 200 fields numbering from 0 to 199. The importance of field
numbering comes into play when you are in Print mode and are entering data
into the label format. At this point, you can only identify the fields by a
number, not by what type of field.
Also keep in mind that you enter data into fields according to their numeric
value if you use a <CR> to separate the data. In other words, the first string of
data you enter goes into the lowest numbered field, the second string of data
you enter goes into the next lowest numbered field, and so on.
Editing Existing Fields
If you make a mistake in a label format, you may not have to download the
entire format again depending on the severity of the mistake. You can change a
specific field in a format by sending a command in Program mode. You can
modify just the incorrect format field(s) instead of having to download the
entire format again.
The printer uses a field pointer to point to the field that you are going to
modify when the printer is in Program mode. The pointer continues to point to
the most recently selected field until you select a different format or field.
5-16
FG 9pt Italic
*1233*Designing Labels Using IPL Commands
5
Use the following format as an example. Assume you have downloaded the
following format to the printer:
Commands
Description
<STX><ESC>P<ETX>
Enters Program mode
<STX>E3;F3;<ETX>
Erases format 3, Create format 3
<STX>H0;o160,200;f0;c0;d0,16;h1;w1;<ETX>
Creates field H0
<STX>H1;o160,240;f0;c0;d0,16;h1;w1;<ETX>
Creates field H1
<STX>H2;o160,300;f0;c2;d0,14;h1;w1;<ETX>
Creates field H2
<STX>H3;o160,380;f0;c2;d0,16;h1;w1;<ETX>
Creates field H3
<STX>B4;o160,0;f0;c0,1;h100;w2;d0,11;i0;p@;<ETX>
Creates field B3
<STX>R;<ETX>
Saves and exits to Print mode
Download the following command string to change field 3 to h2;w2; and
thereby change the height to 2 dots:
<STX><ESC>P;F3;H3;h2;w2;R;<ETX>
The following table describes each command in this string:
Command
Description
<ESC>P
Enters Program mode
F3;
Accesses format number 3 from memory
H3;
Accesses field 3
h2;
Sets the height to 2 dots
w2;
Sets the width to 2 dots
R;
Returns to Print mode
Note: The <STX> and <ETX> commands mark the beginning and end of a message.
The semicolon (;) is the command terminator. All commands in Program mode must
end with this terminator except the last command in a message.
Deleting Fields
It is possible to delete any field from a format except for the last field. You can
use the following command string to delete field 3 from format 4.
<STX><ESC>P;F4;D3;R;<ETX>
5-17
4630 and 4830 Bar Code Label Printers User’s Manual
The following table describes each command in this string:
Command
Description
<ESC>P;
Enters Program mode
F4;
Accesses format 4
D3;
Deletes field 3
R;
Returns to Print mode
Positioning Fields
Using the IPL command language to position fields is the trickiest part of
designing labels. Since you cannot tell exactly how the field looks until it
prints, you may need to make several test prints before you get the field
positioned correctly.
For all types of fields, you determine the print position by defining the
coordinates of the upper left corner of the unrotated field.
The field origin is the upper left corner of an unrotated field. To define the
coordinates of the field origin, you use the origin command (oX,Y) where o is
the command that specifies origin, X is the distance from the left side of the
label, and Y is the distance from the top of the label.
The X and Y coordinates of the field origin are measured in dots. There are
300 dots per inch, or 12 dots per millimeter.
To position a field to print approximately 0.5 inch (13 mm) from the left side
and 1 inch (25 mm) from the top of your label, the origin command is o150,300.
Direction of media from printer
A
Second HR Field
B
*BC FIELD*
C
A = o150,150
B = o150,300
5-18
C = o150,450
D = o600,150
FG 9pt Italic
*1233*Designing Labels Using IPL Commands
5
Rotating Fields
You can rotate any type of printable field in increments of 90 degrees
counterclockwise around the field origin. To position a rotated field, you
should keep in mind that the field origin remains on the corner where it was
before you rotated the field. If you rotate a field 90 degrees counterclockwise,
the origin that was at the upper left corner is now at the lower left corner. Use
the field direction command fn to define the field rotation. See Chapter 6,
“Intermec Printer Language Commands,” for more information.
To rotate a field 90 degrees, you must position the lower left corner of the
rotated field.
•
To rotate a field 180 degrees, you must position the lower right corner of
the rotated field.
•
To rotate a field 270 degrees, you must position the upper right corner of
the rotated field.
ABCDE
•
ABCDE
ABCDE
ABCDE
Scaling Fields
You can determine the size of a field by the font or graphic you use and the
field magnification factors you apply. The human-readable fonts and bar code
symbologies have default sizes, and the user-defined character fields print as
large as you design them (up to the maximum), but you can scale each of these
fields even further by using magnification commands.
5-19
4630 and 4830 Bar Code Label Printers User’s Manual
Magnifying Fonts and Character Fields
The internal fonts in the printer already have sizes associated with them. For
example, the letters in font c0 are 7 dots wide by 9 dots high, with a 1-dot gap
between characters. If you design a field that prints 10 letters in font c0, the
field will be 158 dots wide by 18 dots high.
Note: The default magnification for a field is 2x2.
By applying magnification factors (h for height and w for width) you can
increase a field’s height or width. If you increase the height to 4 (h4) for the
field described above, the field height doubles, and the final field prints 158
dots wide by 36 dots high. If you change the height magnification to h6, the
field height triples, and the field prints 158 dots by 72 dots.
Increasing the width of a text field to 4 (w4) makes each letter in the field twice
as wide. If you did this to the example text field, with field height h2, the final
field would print 318 dots wide by 18 dots high.
Magnifying Bar Code Fields
You can also use height and width command to modify bar code fields, but the
commands do not behave the same as with human-readable fields.
For bar code fields, the height magnification is the actual dot height of the bar
code. If you choose a height magnification of h20, the height of the bar code
field will be 20 dots.
Printing narrow bar codes conserves space on each label as well as media.
However, if you plan to scan bar codes from a distance, you may need to
magnify the bar code widths.
The width magnification factor for bar code fields refers to the width of the
narrowest element of the bar code. The minimum bar code width is 2.5 mil for
drag mode only. When you specify a narrow element width of w3, the width of
the narrowest element in the symbology is 3 dots wide. The spaces and large
element widths grow according to preset ratios for each symbology.
Note: You can only print a bar width of 1 if you are printing in drag mode. If you
select a width of 1 in picket mode, the printer defaults to 2.
The default height for bar code fields is 50 dots, and the default width for
narrow elements is 1 dot. You can magnify bar code fields to print up to 9999
dots high, with a narrow element of up to 999 dots wide, but it requires special
equipment to scan a bar code that wide.
Note: If you are using the POSTNET symbology, follow the rules for magnifying
fonts.
5-20
FG 9pt Italic
*1233*Designing Labels Using IPL Commands
5
Designing Pages
A page is a collection of one or more formats that you combine to print at the
same time. This feature is helpful when you need to print several different
labels for application at once. For example, you may need to attach one type of
label to a product, and a different label to its container. With the page printing
capability, you can print both labels at the same time. Being able to print pages
of several formats at once also allows you to print labels on media rolls that
have different sizes and shapes of labels already precut.
When you group label formats into a page, you assign the formats to positions
designated by the letters a through z. You can print the formats used in pages
independent of each other. The format example at the end of this chapter
shows how to create a page that contains five different formats.
Creating User-Defined Graphics
When you create user-defined graphics (user-defined characters, or UDCs) for
the 4630 or 4830 printer, they need to be in six bits per byte format. To use the
UDC in a format, you must first define a graphic field using the IPL command
Un[,name]. For help using this command (User-Defined Character Field,
Create/Edit), see Chapter 6, “Intermec Printer Language Commands.”
Eight bits (0 through 7) compose every byte, but the printer only uses bits
0 through 5 to map the image. You must always set bit 6 (the seventh bit) to
1 so you can download data to the printer. 7-bit hosts reserve bit 7 (the eighth
bit) for parity and compatibility. Please refer to “Creating User-Defined Fonts”
later in this chapter for an illustrated example of creating a six bits per byte
font.
To download a six bits per byte graphic
1. Draw the graphic on graph paper. For example,
2. Change the graph paper drawing into a pattern of ones (square is filled)
and zeros (square is empty).
5-21
4630 and 4830 Bar Code Label Printers User’s Manual
3. Starting from the top row, divide each vertical column into groups of six
digits. (If the bottom group has less than six digits, add zeros to this group
until it also has six.) The six digits in each group are the six bits that you
download in a byte of data. The top digit of each group is bit 0, the bottom
digit is bit 5.
4. Add a 1 in the bit 6 position, and then add a 0 in the bit 7 position so that
each group now has eight digits. (Eight digits complete the byte.)
5. Starting with the first group of 8 bits in the first column, reverse the order
of each group so that bit 0 is now last and bit 7 is first. Work from the top of
each column to the bottom. Each eight-digit group is now a binary
representation of an ASCII character.
6. Translate each eight-digit group into an ASCII character according to the
full ASCII chart in Appendix A, “Printer Reference.”
7. Download the graphic so that each column is represented by a command
string.
Here is the format for the diamond shape graphic in six bits per byte format
with ASCII characters.
5-22
Command
Definition
<STX><ESC>P<ETX>
Enter Program mode
<STX>G2,diamond;x15;y15;<ETX>
Create UDC bitmap 2 (diamond), 15 rows
by 15 columns
<STX>u0,@B@;<ETX>
Define column 0
<STX>u1,@E@;<ETX>
Define column 1
<STX>u2,`H@;<ETX>
Define column 2
<STX>u3,PP@;<ETX>
Define column 3
<STX>u4,H`@;<ETX>
Define column 4
<STX>u5,D@A;<ETX>
Define column 5
<STX>u6,B@B;<ETX>
Define column 6
<STX>u7,<DEL><DEL>G;<ETX>
Define column 7
<STX>u8,~CB;<ETX>
Define column 8
<STX>u9,|CA;<ETX>
Define column 9
<STX>u10,xc@;<ETX>
Define column 10
<STX>u11,pS@;<ETX>
Define column 11
<STX>u12,`K@;<ETX>
Define column 12
<STX>u13,@G@;<ETX>
Define column 13
<STX>u14,@B@;<ETX>
Define column 14
<STX>R;<ETX>
Save and exit to Print mode
FG 9pt Italic
*1233*Designing Labels Using IPL Commands
5
After downloading the graphic to the printer, download the following format
to see how the graphic prints. A label similar to the one following the format
prints:
Command
Definition
<STX><ESC>P<ETX>
Enter Program mode
<STX>E4;F4<STX>
Create format 4
<STX>U1;o1050,650;c2;w20;h20;<ETX>
Create graphic field 1, origin of
1050,650, use graphic 2, and
magnify it by a factor of 20
<STX>R;<ETX>
Save and exit to Print mode
<STX><ESC>E4<ETX>
Select format 4
<STX><ETB><ETX>
Print
4630U-40
5-23
4630 and 4830 Bar Code Label Printers User’s Manual
Creating User-Defined Font
Each data byte represents six bits in the bitmap. The following example lists the
command and data required to define a font with the two characters “$” (t36)
and “i” (t105).
The maximum size for each font character is 4 x 4 inches (1600 x 1600 dots). It is
possible to define up to 100 characters.
To download a six bits per byte format
1. Draw the character on graph paper.
2. Change the graph paper drawing into a pattern of ones and zeros.
u0
o o o o I
o I I I I
6 digits
6 digits
2 digits
I
I
I
I
I
I I I
I o o
I o o
I o o
I I I
o I I I
o o o o
o o o o
I I o o
I I o o
o I I I
o o o o
I
I
I
I
I
I
I
I
I
I
I
I
I
I
I
I
I
I
I
I
I
I
I
I
I
I
u9
o o o o
I I I o
I
I
I
I
o o I I
o o o o
o o o o
I I I o
I
I
I
o o I
o o I
o o I
I
I
I
I
I
I
I
I
I
I o
I
o o o o
4630U-41
3. Starting with the first column, divide each vertical column into groups of
six digits. (If the bottom group has less than six digits, add zeros to this
group until it also has six.) The six digits in each group are the six bits that
you download in a byte of data. The top digit of each group is bit 0, and the
bottom digit is bit 5.
5-24
FG 9pt Italic
*1233*Designing Labels Using IPL Commands
5
u0 u1 u2 u3 u4 u5 u6 u7 u8 u9
o o o o I I o o o o
o I I I I I I I I o
bit Ø
bit 5
bit 6
bit 7
bit Ø
bit 5
bit 6
bit 7
bit Ø
bit 5
bit 6
bit 7
I
I
I
I
I
I
I
I
I
I
o
o
o
I
o
o
o
I
I
I
I
I
o
o
o
o
o
I
I
I
I
I
I
o
o
o
o
o
o
o
o
I
I
I
I
I
I
I
o
o
o
I
I
I
I
I
I
I
I
I
I
o
o
o
o
o
o
I
I
I
I
I
I
I
I
I
I
I
o
o
o
I
I
o
o
o
I
I
I
I
I
I
I
I
I
I
I
o
o
o
o
o
o
o
o
I
o
o
o
o
o
o
I
I
I
I
I
I
I
I
I
I
I
o
o
o
o
I
I
I
I
o
o
o
o
o
o
o
o
I
I
I
o
o
o
o
o
o
o
o
o
o
o
o
o
o
o
I
o
o
o
I
I
o
o
I
I
I
o
o
o
o
o
o
o
o
o
o
o
o
o
o
o
I
I
o
o
I
I
I
I
I
I
o
o
o
o
o
o
o
I
I
I
I
I
I
I
I
I
I
o
o
o
o
o
o
o
o
o
o
4630U-42
4. Add a 1 in the bit 6 position, and then add a 0 in the bit 7 position so that
each group now has eight digits. Eight digits complete the byte.
5. Starting with the first group of eight bits in the first column (u0), reverse
the order of each group so that bit 0 is now last and bit 7 is first. Work from
the top of each column to the bottom. Each eight-digit group is now a
binary representation of an ASCII character.
Note: In this illustration, each row now represents a column.
u0
u1
u2
u3
u4
u5
u6
u7
u8
u9
o
o
o
o
o
o
o
o
o
o
I
I
I
I
I
I
I
I
I
I
I I I I oo
I I I I I o
ooo I I o
ooo I I o
I I I I I I
I I I I I I
ooo I I o
ooo I I o
oo I I I o
oo I I oo
o
o
o
o
o
o
o
o
o
o
I
I
I
I
I
I
I
I
I
I
I
I
I
I
I
I
I
I
I
I
I ooo I
I oo I I
ooo I I
ooo I I
I I I I I
I I I I I
ooo I I
ooo I I
I I I I I
I I I I o
o
o
o
o
o
o
o
o
o
o
I
I
I
I
I
I
I
I
I
I
oooooo
ooooo I
ooooo I
ooooo I
oooo I I
oooo I I
ooooo I
ooooo I
ooooo I
oooooo
4630U-43
5-25
4630 and 4830 Bar Code Label Printers User’s Manual
6. Translate each eight-digit group into an ASCII character according to the
full ASCII chart in Appendix A, “Printer Reference:”
u0
u1
u2
u3
u4
u5
u6
u7
u8
u9
= |q@
= ~sA
= FcA
= FcA
= <DEL><DEL>C
= <DEL><DEL>C
= FcA
= FcA
= N<DEL>A
= L~@
7. Download the font so that you represent each column with a command
string.
Here are the previously defined characters shown in a six bits per byte format
with ASCII characters.
5-26
Commands
Definitions
<ESC>P;<ETX>
Enters Program mode
<STX>T11,FONT11<ETX>
Create bitmap font 11
<STX>x10;y14;<ETX>
Define cell width (10) and cell height (14)
<STX>t36;Z12;<ETX>
Create ASCII character 36 ($), define character
width as 12
<STX>u0,|q@;<ETX>
Define column 0
<STX>u1,~sA;<ETX>
Define column 1
<STX>u2,FcA;<ETX>
Define column 2
<STX>u3,FcA;<ETX>
Define column 3
<STX>u4,<DEL><DEL>C;<ETX>
Define column 4
<STX>u5,<DEL><DEL>C;<ETX>
Define column 5
<STX>u6,FcA;<ETX>
Define column 6
<STX>u7,FcA;<ETX>
Define column 7
<STX>u8,N<DEL>A;<ETX>
Define column 8
<STX>u9,L~@;<ETX>
Define column 9
<STX>t105;Z4;<ETX>
Create ASCII character 105 (i), define
character width as 4
<STX>u0,L<DEL>C;<ETX>
Define column 0
<STX>u1,L<DEL>C;<ETX>
Define column 1
<STX>R;<ETX>
Save and exit to Print mode
FG 9pt Italic
*1233*Designing Labels Using IPL Commands
5
Label Format Example
The format example on this page is a complex label designed to demonstrate
the different types of data that you can print with your printer. This example
contains human-readable fields, a bar code field, line fields, a box field, and the
diamond graphic field defined earlier in this chapter.
To use the graphic for this example, you can download the six bits per byte
diamond graphic explained in “Creating User-Defined Graphics” earlier in this
chapter.
Complex Label
Label Format
<STX><ESC>C1<ETX>
<STX><ESC>P<ETX>
<STX>E1;F1;<ETX>
<STX>H0;o980,180;f3;c26;h28;w20;d3,Diamond Corp.;<ETX>
<STX>U1;o950,40;c2;h6;w6;f3;<ETX>
<STX>H2;o826,76;f3;c36,4;h1;w1;d3,25cm White Tubing;<ETX>
<STX>H3;o700,40;f3;c25;h8;w8;d3,Part 009140001;<ETX>
<STX>H4;o700,568;f3;c25;h8;w8;d3,Bin 462;<ETX>
<STX>H5;o666,40;f3;c25;h8;w8;d3,Vendor 9578;<ETX>
<STX>H6;o666,568;f3;c25;h8;w8;d3,Date 8.8.95;<ETX>
<STX>W7;o704,36;w8;l110;h750;<ETX>
5-27
4630 and 4830 Bar Code Label Printers User’s Manual
<STX>B8;o616,72;f3;c12,6,1,0;w4;h12;d3,Diamond Corp.*25cm White Tubing*Part
00914001*Bin 462*Inspector GLP*Price #3.10;<ETX>
<STX>E2;F2;<ETX>
<STX>H9;o254,54;f3;c25;h20;w20;d3,#3.10;<ETX>
<STX>E3;F3;<ETX>
<STX>H10;o240,402;f3;c25;h16;w13;d3,Inspected by:;<ETX>
<STX>H11;o166,474;f3;c25;h22;w22;d3,GLP;<ETX>
<STX>E4;F4;<ETX>
<STX>H12;o116,44;f3;c25;h8;w8;f3;d3,Part 009140001;<ETX>
<STX>H13;o78,44;f3;c25;h8;w8;f3;d3,Bin 462;<ETX>
<STX>H14;o42,44;f3;c25;h8;w8;f3;d3,Vendor 9578<ETX>
<STX>E5;F5;<ETX>
<STX>B15;o434,72;f3;c12,6,1,0;w4;h12;d3,Diamond Corp.*25cm White Tubing*Part
00914001*Bin 462*Inspector GLP*Price #3.10;<ETX>
<STX>s1;S1<ETX>
<STX>Ma,1;Mb,2;Mc,3;Md,4;Me,5;<ETX>
<STX>R<ETX>
Label Data
<STX><SI>l4<ESC>G1<ETX>
<STX><ETB><ETX>
Use the <ETX> and <STX> characters to mark the beginnings and ends of the
command strings. The following table explains the other characters. Most of
the printer command lines explained in the following table are those that
contain commands previously not discussed in this chapter. Refer to previous
examples for clarification of the lines that this example does not explain or see
Chapter 6, “Intermec Printer Language Commands,” for a further explanation
of the command language.
Command
Description
<ESC>P
Selects Program mode.
E1;F1;
Erases anything previously stored as format one and accesses the location
for format one.
H0;
Defines field 0 as a human-readable field.
f3;
Rotates field 0 by 270 degrees counterclockwise around the origin.
5-28
FG 9pt Italic
*1233*Designing Labels Using IPL Commands
5
Command
Description
o980,180;
Sets the origin of field 0 at coordinates 980,180.
c26;
Sets the font for field 0 to font 26.
d3,Diamond Corp.;
Sets the data for field 0 to have the constant value: Diamond Corp.
h28;
Sets the height of font 26 to 28 dots.
w20;
Sets the width of font 26 to 20 dots.
U1;
Defines graphic field 1.
o950,40;
Sets the origin for field 1 at 950,40.
c2;
Selects graphic 2 to print in graphic field 1.
h6;
Sets the height of field 1 to 6 dots.
w6;
Sets the width of field 1 to 6 dots.
f3;
Rotates field 1 by 270 degrees counterclockwise around the origin.
W7;
Defines field 7 as a box field.
o704,36;
Sets the origin for box field 7 at 704,36.
w8;
Sets the width of box field 7 to 8 dots.
l110;
Sets the length of box field 7 to 110 dots.
h750;
Sets the height of the box field to 750 dots.
B8;
Defines field 8 as a bar code field.
o616,72;
Sets the origin of field 8 to 616,72.
f3;
Rotates field 8 by 270 degrees counterclockwise around the origin.
c12,6,1,0;
Determines that field 8 prints PDF 417 with 6 columns, 1 level of error
correction, and truncating disabled (the default).
w4;
Sets the width of field 8 to 4 times its actual width.
h12;
Sets the height to 12 times its actual height.
d3, Diamond
Corp.*25cm White
Tubing*Part
00914001*Bin
462*Inspector
GLP*Price #3,10;
Determines the data that prints in bar code field 8.
s1;
Deletes page 1.
S1
Creates page 1.
Ma,1;
Assigns format 1 to position a (first position).
Mb,2;
Assigns format 2 to position b (second position).
Mc,3;
Assigns format 3 to position c (third position).
5-29
4630 and 4830 Bar Code Label Printers User’s Manual
Command
Description
Md,4;;
Assigns format 4 to position d (fourth position).
Me,5;
Assigns format 5 to position e (fifth position).
<SI>l4
Selects French as the printer language.
<ESC>G1
Selects page 1 for printing.
5-30
6
Intermec Printer Language Commands
Intermec Printer Language Commands
6
This chapter provides a detailed description of the commands in the Intermec printer
command set that apply to the 4630 and 4830 printers. All Intermec printers use the
same printer command language. When designing label formats or printing labels,
refer to this chapter for command reference information. If you are using this
command set to design your labels, you may want to refer to Chapter 5 for
information on label design.
Command Set Summary
The Intermec Printer Language (IPL) commands that take effect when
downloaded to the printer depend on which mode the printer is operating in:
Print mode, Program mode, or Test and Service mode. When the printer is in
any of these modes, it responds to the commands specific to that mode only.
As described in the previous chapter, Print mode commands are used to print
labels and download data, configuration commands are used to enable or
disable printer features and options, and Program mode commands are used
for label format design.
Following the command descriptions and accompanying tables are the
functional boundaries of the printer within which you need to define the
boundaries of your labels.
Note: If you are using the parallel interface, you will not receive a response from the
printer for Print mode and Test and Service mode commands that transmit data.
Currently, the parallel interface is a one way (host-to-printer) interface. Refer to the
Appendix for more information.
6-3
4630 and 4830 Bar Code Label Printers User's Manual
Listing IPL Commands by Name
The following table lists a summary of all commands available in the Intermec
printer command set. Each command is described in detail later in this chapter.
Command
Syntax
Abort Print Job
Mode
Page #
<EM>
Immediate
6-19
Alphanumeric Field Separator
<GS>
Print
6-21
Auto-Transmit 1, Enable
<ESC>j
Configuration
6-30
Auto-Transmit 2, Enable
<ESC>d
Configuration
6-30
Auto-Transmit 3, Enable
<ESC>e
Configuration
6-31
Auto-Transmit 1, 2, and 3, Disable
<ESC>k
Configuration
6-31
Bar Code, Select Type
c
0
Program
6-38
Bar Code Field, Create/Edit
B
0
Program
6-50
Batch Count, Set
<US>
1
Print
6-22
Bitmap Cell Height for Graphic or UDF, Define
y
1
Program
6-51
Bitmap Cell Width for Graphic or UDF, Define
x
1 or 10
Program
6-51
Bitmap User-Defined Font, Clear/Create
T
Program
6-52
Border Around Human-Readable Text, Define
b
0
Program
6-52
Box Field, Create/Edit
W
0
Program
6-52
Character Origin Offset, Define
X
0
Program
6-53
Character Rotation or Bar Code Ratio, Define
r
0
Program
6-53
Clear All Data
<CAN>
Print
6-22
Clear Data From Current Field
<DEL>
Print
6-22
Code 39 Prefix Character, Define
p
Program
6-53
Command Tables, Load
C
Program
6-54
Command Terminator 1
<NUL>
Print
6-22
Command Terminator 2
<LF>
Print
6-22
Configuration Parameters, Transmit
<ESC>p
Print
6-23
Control Panel Access Permission, Set
<SI>A
Configuration
6-31
Current Edit Session, Save
N
Program
6-54
Cut
<SO>
Print
6-23
Cutter, Enable/Disable
<SI>c
0
Configuration
6-31
Dark Adjust, Set
<SI>d
0
Configuration
6-32
Data Shift - International Characters
<SUB>
Print
6-23
6-4
Default
0
Intermec Printer Language Commands
6
Command
Syntax
Default
Mode
Page #
End-of-Print Skip Distance, Set
<SI>D
94
Configuration
6-32
Error Code, Request
<BEL>
Immediate
6-19
Field, Delete
D
Program
6-54
Field, Select
<ESC>F
Print
6-23
Field Data, Define Source
d
Program
6-55
Field Decrement, Set
<ESC>D
1
Print
6-24
Field Direction, Define
f
0
Program
6-55
Field Increment, Set
<ESC>I
1
Print
6-24
Field Origin, Define
o
0,0
Program
6-56
First Data Entry Field, Select
<ACK>
Print
6-24
Font, Select Type
c
Program
6-56
Font, Transmit
<ESC>v
Print
6-24
Font Character Width, Define
Z
Program
6-56
Form Feed
<FF>
Print
6-25
Format, Create/Edit
A or F
Program
6-57
Format Direction in a Page, Define
q
Program
6-57
Format, Erase
E
Program
6-57
Format, Select
<ESC>E
Print
6-25
Format, Transmit
<ESC>x
Print
6-25
Format Offset Within a Page, Define
O
0,0
Program
6-57
Format Page Position, Assign
M
a
Program
6-58
Format Page Position, Define Data Source
e
0,a,0
Program
6-58
Format Page Position, Delete
m
a
Program
6-58
Graphic, Select Type
c
0
Program
6-59
Graphic or UDC, Define
u
Program
6-59
Height Magnification, Define
h
50,100,2
Program
6-59
Human-Readable Field, Create/Edit
H
0
Program
6-60
IBM Language Translation, Enable/Disable
<SI>i
0
Configuration
6-32
Increment/Decrement, Disable
<ESC>N
Print
6-25
Intercharacter Delay, Set
<SYN>
0
Configuration
6-33
Intercharacter Space for UDF, Define
z
2
Program
6-60
Interpretive Field, Edit
I
Program
6-61
0
0
cell
0
0
6-5
4630 and 4830 Bar Code Label Printers User's Manual
Command
Syntax
Default
Mode
Page #
Interpretive Field, Enable/Disable
i
0
Program
6-61
Label and Gap Length, Transmit
<ESC>L
Immediate
6-19
Label Path Open Sensor Value, Transmit
L
Test/Service
6-66
Label Rest Point, Adjust
<SI>f
0
Configuration
6-33
Label Retract, Enable/Disable
<SI>R
1
Configuration
6-33
Label Retract Distance, Set
<SI>r
217
Configuration
6-34
Label Stock Type, Select
<SI>T
1
Configuration
6-34
Label Taken Sensor Value, Transmit
T
Test/Service
6-66
Length of Line or Box Field, Define
l
100
Program
6-61
Line Field, Create/Edit
L
0
Program
6-62
Maximum Label Length, Set
<SI>L
1000
Configuration
6-34
Memory Usage, Transmit
<ESC>m
Print
6-26
Message Delay, Set
<ESC><SYN>
Configuration
6-34
Next Data Entry Field, Select
<CR>
Print
6-26
Numeric Field Separator
<FS>
Print
6-26
Online/Offline on Power Up
<SI>O
Configuration
6-35
Options Selected, Transmit
<ESC>O
Print
6-26
Outline Font Description, Download
j
Program
6-62
Outline User-Defined Font, Download
J
Program
6-63
Page, Create/Edit
S
Program
6-63
Page, Delete
s
Program
6-63
Page, Select
<ESC>G
Print
6-27
Page, Transmit
<ESC>y
Print
6-27
Pitch Label, Print
C
Test/Service
6-66
Pitch Size, Set
g
12
Program
6-63
Point Size, Set
k
12
Program
6-64
Postamble, Set
<EOT>
NUL
Configuration
6-35
Preamble, Set
<SOH>
NUL
Configuration
6-35
Print
<ETB>
Print
6-27
Print Speed, Set
<SI>S
Configuration
6-35
Printer Configuration, Reset
D
Test/Service
6-66
Printer Language, Select
<SI>l
Configuration
6-36
6-6
0
0
0
30
0
Intermec Printer Language Commands
Command
Syntax
Printhead Parameters, Transmit
Default
6
Mode
Page #
<ESC>H
Print
6-27
Printhead Temperature Sensor Value, Transmit
P
Test/Service
6-66
Printhead Test Parameters, Set
<SI>U
Configuration
6-27
Program Mode, Enter
<ESC>P
Print
6-27
Program Mode, Exit
R
Program
6-64
Program Number, Transmit
<ESC>M
Print
6-28
Quantity Count, Set
<RS>
Print
6-28
Quality Label, Print
Q
Test/Service
6-66
Reflective Sensor Value, Transmit
M
Test/Service
6-66
Remaining Quantity and Batch Count, Transmit
<ESC>Q
Immediate
6-20
Reset
<DLE>
Immediate
6-20
Self-Strip, Enable/Disable
<SI>t
Configuration
6-36
Start/Stop Characters, Print
<ESC><SP>
Print
6-28
Status Dump
<VT>
Immediate
6-20
Status Enquiry
<ENQ>
Immediate
6-20
Test and Service Mode, Enter
<ESC>T
Print
6-28
Test and Service Mode, Exit
R
Test/Service
6-66
Top of Form, Set
<SI>F
Configuration
6-36
Transmissive Sensor Value, Transmit
G
Test/Service
6-66
TTR/Direct Thermal Media Grade, Select
<SI>g
Configuration
6-37
User-Defined Character, Clear/Create
G
Program
6-64
User-Defined Character Field, Create/Edit
U
0
Program
6-64
User-Defined Characters, Transmit
<ESC>u
0
Print
6-28
User-Defined Font Character, Create
t
Program
6-65
User-Defined Tables, Transmit
<ESC>Z
Print
6-29
Warm Boot
<BS>
Print
6-29
Width Magnification, Define
w
Program
6-65
1
0
0
2
6-7
4630 and 4830 Bar Code Label Printers User's Manual
Listing IPL Commands by Command Syntax
Syntax
Command
A
Format, Create/Edit
B
Bar Code Field, Create/Edit
b
Border Around Human-Readable Text, Define
C
Mode
Page #
Program
6-57
0
Program
6-50
0
Program
6-52
Command Tables, Load
Program
6-54
C
Pitch Label, Print
Test/Service
6-66
c
Bar Code, Select Type
0
Program
6-38
c
Font, Select Type
0
Program
6-56
c
Graphic, Select Type
0
Program
6-59
D
Field, Delete
Program
6-54
D
Printer Configuration, Reset
Test/Service
6-66
d
Field Data, Define Source
Program
6-55
E
Format, Erase
Program
6-57
e
Format Page Position, Define Data Source
Program
6-58
F
Format, Create/Edit
Program
6-57
f
Field Direction, Define
Program
6-55
G
User-Defined Character, Clear/Create
Program
6-64
G
Transmissive Sensor Value, Transmit
Test/Service
6-66
g
Pitch Size, Set
12
Program
6-63
H
Human-Readable Field, Create/Edit
0
Program
6-60
h
Height Magnification, Define
50,100,2
Program
6-59
I
Interpretive Field, Edit
Program
6-61
i
Interpretive Field, Enable/Disable
Program
6-61
J
Outline User-Defined Font, Download
Program
6-63
j
Outline Font Description, Download
Program
6-62
k
Point Size, Set
12
Program
6-64
L
Line Field, Create/Edit
0
Program
6-62
L
Label Path Open Sensor Value, Transmit
Test/Service
6-66
l
Length of Line or Box Field, Define
100
Program
6-61
M
Format Page Position, Assign
a
Program
6-58
M
Reflective Sensor Value, Transmit
Test/Service
6-66
6-8
Default
0,a,0
0
0
Intermec Printer Language Commands
6
Syntax
Command
Default
Mode
Page #
m
Format Page Position, Delete
a
Program
6-58
N
Current Edit Session, Save
Program
6-54
O
Format Offset Within a Page, Define
0,0
Program
6-57
o
Field Origin, Define
0,0
Program
6-56
P
Printhead Temperature Sensor Value, Transmit
Test/Service
6-66
p
Code 39 Prefix Character, Define
Program
6-53
Q
Print Quality Label, Print
Test/Service
6-66
q
Format Direction in a Page, Define
Program
6-57
R
Program Mode, Exit
Program
6-64
R
Test and Service Mode, Exit
Test/Service
6-66
r
Character Rotation or Bar Code Ratio, Define
Program
6-53
S
Page, Create/Edit
Program
6-63
s
Page, Delete
Program
6-63
T
Bitmap User-Defined Font, Clear/Create
Program
6-52
T
Label Taken Sensor Value, Transmit
Test/Service
6-66
t
User-Defined Font Character, Create
Program
6-65
U
User-Defined Character Field, Create/Edit
Program
6-64
u
Graphic or UDC, Define
Program
6-59
W
Box Field, Create/Edit
0
Program
6-52
w
Width Magnification, Define
2
Program
6-65
X
Character Origin Offset, Define
0
Program
6-53
x
Bitmap Cell Width for Graphic or UDF, Define
1 or 10
Program
6-51
y
Bitmap Cell Height for Graphic or UDF, Define
1
Program
6-51
Z
Font Character Width, Define
cell
Program
6-56
z
Intercharacter Space for UDF, Define
2
Program
6-60
<ACK>
First Data Entry Field, Select
Print
6-24
<BEL>
Error Code, Request
Immediate
6-19
<BS>
Warm Boot
Print
6-29
<CAN>
Clear All Data
Print
6-22
<CR>
Next Data Entry Field, Select
Print
6-26
<DEL>
Clear Data From Current Field
Print
6-22
<DLE>
Reset
Immediate
6-20
0
0
0
6-9
4630 and 4830 Bar Code Label Printers User's Manual
Syntax
Command
<EM>
Mode
Page #
Abort Print Job
Immediate
6-19
<ENQ>
Status Enquiry
Immediate
6-20
<EOT>
Postamble, Set
Configuration
6-35
<ESC><SP>
Start/Stop Characters, Print
Print
6-28
<ESC><SYN>
Message Delay, Set
0
Configuration
6-34
<ESC>D
Field Decrement, Set
1
Print
6-24
<ESC>d
Auto-Transmit 2, Enable
Configuration
6-30
<ESC>E
Format, Select
Print
6-25
<ESC>e
Auto-Transmit 3, Enable
Configuration
6-31
<ESC>F
Field, Select
0
Print
6-23
<ESC>G
Page, Select
0
Print
6-27
<ESC>H
Printhead Parameters, Transmit
Print
6-27
<ESC>I
Field Increment, Set
Print
6-24
<ESC>j
Auto-Transmit 1, Enable
Configuration
6-30
<ESC>k
Auto-Transmit 1, 2, and 3, Disable
Configuration
6-31
<ESC>L
Label and Gap Length, Transmit
Immediate
6-19
<ESC>M
Program Number, Transmit
Print
6-28
<ESC>m
Memory Usage, Transmit
Print
6-26
<ESC>N
Increment/Decrement, Disable
Print
6-25
<ESC>O
Options Selected, Transmit
Print
6-26
<ESC>P
Program Mode, Enter
Print
6-27
<ESC>p
Configuration Parameters, Transmit
Print
6-23
<ESC>Q
Remaining Quality and Batch Counts, Transmit
Immediate
6-20
<ESC>T
Test and Service Mode, Enter
Print
6-28
<ESC>u
User-Defined Characters, Transmit
Print
6-28
<ESC>v
Font, Transmit
Print
6-24
<ESC>x
Format, Transmit
Print
6-25
<ESC>y
Page, Transmit
Print
6-27
<ESC>Z
User-Defined Tables, Transmit
Print
6-29
<ETB>
Print
Print
6-27
<FF>
Form Feed
Print
6-25
<FS>
Numeric Field Separator
Print
6-26
6-10
Default
NUL
0
1
0
Intermec Printer Language Commands
Syntax
Command
<GS>
Default
6
Mode
Page #
Alphanumeric Field Separator
Print
6-21
<LF>
Command Terminator 2
Print
6-22
<NUL>
Command Terminator 1
Print
6-22
<RS>
Quantity Count, Set
1
Print
6-28
<SI>A
Control Panel Access Permission, Set
0
Configuration
6-31
<SI>c
Cutter, Enable/Disable
0
Configuration
6-31
<SI>D
End-of-Print Skip Distance, Set
94
Configuration
6-32
<SI>d
Dark Adjust, Set
0
Configuration
6-32
<SI>F
Top of Form, Set
Configuration
6-36
<SI>f
Label Rest Point, Adjust
0
Configuration
6-33
<SI>g
TTR/Direct Thermal Media Grade, Select
0
Configuration
6-37
<SI>i
IBM Language Translation, Enable/Disable
0
Configuration
6-32
<SI>L
Maximum Label Length, Set
1000
Configuration
6-34
<SI>l
Printer Language, Select
0
Configuration
6-36
<SI>O
Online/Offline on Power Up
0
Configuration
6-35
<SI>R
Label Retract, Enable/Disable
1
Configuration
6-33
<SI>r
Label Retract Distance, Set
217
Configuration
6-34
<SI>S
Print Speed, Set
30
Configuration
6-35
<SI>T
Label Stock Type, Select
1
Configuration
6-34
<SI>t
Self-Strip, Enable/Disable
0
Configuration
6-36
<SI>U
Printhead Test Parameters, Set
Configuration
6-27
<SO>
Cut
Print
6-23
<SOH>
Preamble, Set
Configuration
6-35
<SUB>
Data Shift - International Characters
Print
6-23
<SYN>
Intercharacter Delay, Set
0
Configuration
6-33
<US>
Batch Count, Set
1
Print
6-22
<VT>
Status Dump
Immediate
6-20
NUL
6-11
4630 and 4830 Bar Code Label Printers User's Manual
Listing Printer Commands by Function
Immediate Commands
System Commands
Page #
<BEL>
Error Code, Request
6-19
<DLE>
Reset
6-20
<EM>
Abort Print Job
6-19
<ENQ>
Status Enquiry
6-20
<VT>
Status Dump
6-20
Program Mode Commands
Bar Code Field Editing Commands
Page #
c
Bar Code, Select Type
6-38
d
Field Data, Define Source
6-55
f
Field Direction, Define
6-55
h
Height Magnification, Define
6-59
i
Field Interpretive, Enable/Disable
6-61
o
Field Origin, Define
6-56
p
Code 39 Prefix Character, Define
6-53
r
Character Rotation or Bar Code Ratio, Define
6-53
w
Width Magnification, Define
6-65
Bitmap User-Defined Field Editing Commands
6-12
t
User-Defined Font Character, Define
6-65
u
Graphic or UDC, Define
6-59
x
Bitmap Cell Width for Graphic or UDF, Define
6-51
X
Character Origin Offset, Define
6-53
y
Bitmap Cell Height for Graphic or UDF, Define
6-51
Z
Font Character Width, Define
6-56
z
Intercharacter Space or UDF, Define
6-60
Intermec Printer Language Commands
Box Field Editing Commands
6
Page #
f
Field Direction, Define
6-55
h
Height Magnification, Define
6-59
l
Length of Line or Box Field, Define
6-61
o
Field Origin, Define
6-56
w
Width Magnification, Define
6-65
Format Editing Commands
B
Bar Code Field, Create/Edit
6-50
D
Field, Delete
6-54
H
Human-Readable Field, Create/Edit
6-60
I
Interpretive Field, Edit
6-61
L
Line Field, Create/Edit
6-62
U
User-Defined Character Field, Create/Edit
6-64
W
Box Field, Create/Edit
6-52
Human-Readable Field Editing Commands
b
Border Around Human Readable Text, Define
6-52
c
Font Type, Select
6-56
d
Field Data, Define Source
6-55
f
Field Direction, Define
6-55
g
Pitch Size, Set
6-63
h
Height Magnification, Define
6-59
k
Point size, Set
6-64
o
Field Origin, Define
6-56
r
Character Rotation or Bar Code Ratio, Define
6-53
w
Width Magnification, Define
6-65
6-13
4630 and 4830 Bar Code Label Printers User's Manual
Interpretive Field Editing Commands
Page #
b
Border Around Human Readable Text, Define
6-52
c
Font, Select Type
6-56
f
Field Direction, Define
6-55
g
Pitch Size, Set
6-63
h
Height Magnification, Define
6-59
k
Point size, Set
6-64
o
Field Origin, Define
6-56
r
Character Rotation or Bar Code Ratio, Define
6-53
w
Width Magnification, Define
6-65
Line Field Editing Commands
f
Field Direction, Define
6-55
l
Length of Line or Box Field, Define
6-61
o
Field Origin, Define
6-56
w
Width Magnification, Define
6-65
Outline UDF Editing Commands
j
Outline Font Description, Download
6-62
x
Bitmap Cell Width for Graphic or UDF, Define
6-51
y
Bitmap Cell Height for Graphic or UDF, Define
6-51
Page Editing Commands
6-14
e
Format Page Position, Define Data Source
6-58
m
Format Page Position, Delete
6-58
M
Format Page Position, Assign
6-58
O
Format Offset Within a Page, Define
6-57
q
Format Direction in a Page, Define
6-57
Intermec Printer Language Commands
Programming Commands
6
Page #
A
Format, Create/Edit
6-57
E
Format, Erase
6-57
F
Format, Create/Edit
6-57
G
User-Defined Character, Clear/Create
6-64
J
Outline User-Defined Font, Download
6-63
N
Current Edit Session, Save
6-54
R
Program Mode, Exit
6-64
S
Page, Create/Edit
6-63
s
Page, Delete
6-63
T
Bitmap User-Defined Font, Clear/Create
6-52
UDC Editing Commands
u
Graphic or UDC, Define
6-59
x
Bitmap Cell Width for Graphic or UDF, Define
6-51
y
Bitmap Cell Height for Graphic or UDF, Define
6-51
UDC Field Editing Commands
c
Graphic Type, Select
6-59
f
Field Direction, Define
6-55
h
Height Magnification, Define
6-59
o
Field Origin, Define
6-56
w
Width Magnification, Define
6-65
6-15
4630 and 4830 Bar Code Label Printers User's Manual
Print Mode Commands
Configuration Commands
Page #
<SI>A
Control Panel Access Permission, Set
6-31
<SI>c
Cutter, Enable/Disable*
6-31
<SI>D
End-of-Print Skip Distance, Set
6-32
<SI>d
Dark Adjust, Set
6-32
<SI>F
Top of Form, Set
6-36
<SI>f
Label Rest Point, Adjust
6-33
<SI>g
TTR/Direct Thermal Media Grade, Select
6-37
<SI>L
Maximum Label Length, Set*
6-34
<SI>l
Printer Language, Select
6-36
<SI>O
Online/Offline on Power Up*
6-35
<SI>R
Label Retract, Enable/Disable*
6-33
<SI>r
Label Retract Distance, Set
6-34
<SI>S
Print Speed, Set
6-35
<SI>T
Label Stock Type, Select*
6-34
<SI>t
Self-Strip, Enable/Disable*
6-36
D
Reset Memory to Default (Test and Service Command)
6-66
* After enabling these commands, you need to reset the printer or cycle its power.
Print Commands
6-16
Page #
<ACK>
First Data Entry Field, Select
6-24
<CAN>
Clear All Data
6-22
<CR>
Next Data Entry Field, Select
6-26
<DEL>
Clear Data From Current Field
6-22
<ESC><SP>
Start/Stop Characters, Print
6-28
<ESC>D
Field Decrement, Set
6-24
<ESC>E
Format, Select
6-25
<ESC>F
Field, Select
6-23
<ESC>G
Page, Select
6-27
<ESC>I
Field Increment, Set
6-24
<ESC>N
Increment/Decrement, Disable
6-25
Intermec Printer Language Commands
Print Commands
6
Page #
<ESC>P
Program Mode, Enter
6-27
<ESC>T
Test and Service Mode, Enter
6-28
<ETB>
Print
6-27
<FF>
Form Feed
6-25
<FS>
Numeric Field Separator
6-26
<GS>
Alphanumeric Field Separator
6-21
<RS>
Quantity Count, Set
6-28
<SUB>
Data Shift - International Characters
6-23
<US>
Batch Count, Set
6-22
Protocol Modification Commands
<EOT>
Postamble, Set
6-35
<ESC><SYN>
Message Delay, Set
6-34
<ESC>d
Autotransmit 2, Enable
6-30
<ESC>e
Autotransmit 3, Enable
6-31
<ESC>j
Autotransmit 1, Enable
6-30
<ESC>k
Autotransmit 1, 2, and 3, Disable
6-31
<SOH>
Preamble, Set
6-35
<SYN>
Intercharacter Delay, Set
6-33
C
Command Tables, Load
6-54
Test and Service Commands
Page #
D
Reset Memory to Default
6-66
G
Gap Sensor Value, Transmit
6-66
L
Label Path Open Sensor Value, Transmit
6-66
M
Mark Sensor Value, Transmit
6-66
P
Printhead Temperature Sensor Value, Transmit
6-66
Q
Quality Label, Print
6-66
R
Test and Service Mode, Exit
6-66
T
Label Taken Sensor Values, Transmit
6-66
6-17
4630 and 4830 Bar Code Label Printers User's Manual
Transmit Commands
<ESC>H
Printhead Parameters, Transmit
6-27
<ESC>L
Label and Gap Length, Transmit
6-19
<ESC>M
Program Number, Transmit
6-28
<ESC>m
Memory Usage, Transmit
6-26
<ESC>O
Options Selected, Transmit
6-26
<ESC>p
Configuration Parameters, Transmit
6-23
<ESC>Q
Remaining Quality and Batch Counts, Transmit
6-20
<ESC>u
User-Defined Characters, Transmit
6-28
<ESC>v
Font, Transmit
6-24
<ESC>x
Format, Transmit
6-25
<ESC>y
Page, Transmit
6-27
<ESC>Z
User-Defined Tables, Transmit
6-29
<BS>
Warm Boot
6-29
<SI>c
Cutter, Enable/Disable
6-31
<SI>R
Label Retract, Enable/Disable
6-33
<SI>r
Label Retract Distance, Set
6-34
<SO>
Cut
6-23
Cutter Commands
Self-Strip Commands
6-18
<BS>
Warm Boot
6-29
<SI>R
Label Retract, Enable/Disable
6-33
<SI>t
Self-Strip, Enable/Disable
6-36
Immediate Commands
6
Immediate Commands
The following command set is effective in any of the operational modes of the
4630 or 4830 printer. Use the commands in this set to query the printer for
status and print job information. Unlike other commands that the printer stores
in the data buffer and executes in the order received, the printer executes
immediate commands when it receives them, regardless of printer mode.
Abort Print Job
Purpose:
Syntax:
Notes:
Stops batch printing.
<EM>
The printer sets the remaining quantity and batch counts to 1. Other
commands remaining in the buffer will continue to be executed.
Error Code, Request
Purpose:
Syntax:
Notes:
Solicits error codes from the printer.
<BEL>
The most recent error code is sent back in the form of an ASCII number. The
error code represents a command syntax error or a printer RAM usage error. If
no errors have occurred since powering on the printer, the printer sends a zero.
Label and Gap Length, Transmit
Purpose:
Syntax:
Notes:
Transmits the label and gap length as measured by the number of 5 mil
increments.
<ESC>L
Label length refers to the length of the label currently being processed. If the
label is longer than the distance between the label sensor and the printhead, the
printer transmits the length of the previous label.
If continuous stock is selected, the printer transmits the length defined by the
<SI>L command (default is 1000). The gap length is 0.
6-19
4630 and 4830 Bar Code Label Printers User's Manual
Remaining Quantity and Batch Counts, Transmit
Purpose:
Syntax:
Uploads the remaining quantity and batch counts for the current print job.
<ESC>Q
Reset
Purpose:
Syntax:
Notes:
Executes a printer power up reset immediately.
<DLE>
All data and commands in the input buffer are erased.
Status Dump
Purpose:
Syntax:
Causes the printer to upload all current printer status.
<VT>
The printer status is uploaded in the following order (top to bottom, from left):
<GS>
<US>
<US>
<EM>
<DC3>
Buffer already full
Paper path open
Ribbon fault
No label stock
Buffer now full
<BS>
<FS>
<DC1>
<DC1>
<DC1>
Takeup reel full
Label at strip pin
Skipping
Printing
Ready
Status Enquiry
Purpose:
Syntax:
Notes:
Transmits the current printer status to the host.
<ENQ>
If more than one status is true, the printer transmits the status with the highest
priority (top to bottom, from left):
<GS>
<US>
<US>
<EM>
<DC3>
6-20
Buffer already full
Paper path open
Ribbon fault
No label stock
Buffer now full
<BS>
<FS>
<DC1>
<DC1>
<DC1>
Takeup reel full
Label at strip pin
Skipping
Printing
Ready
Print Mode Commands
6
Print Mode Commands
The printer must be in Print mode to
•
pass data to formats.
•
print labels.
•
change the printer configuration.
When you enter data into a format for printing, the printer uses a field pointer
to designate the field in the format where the data should print. If a new format
is chosen, the field pointer automatically points to the lowest numbered data
entry field and will continue to point to that field unless a different field or
format is selected. If a selected field already contains data, it will be overwritten
by the new data. If the pointer is pointing to the same field that just accepted
data, the new data will be concatenated to the previously entered data.
You can send Print mode commands through the methods described in
Chapter 5. The command string to enter Print mode from Program mode or
Test and Service mode is:
<STX>R<ETX>
Note: Each string of commands must be preceded by the start of message character
<STX>, and followed by the end of message character <ETX>. All Print mode
commands are terminated by the next command in the message. The command
separator (<NUL> or <LF>) is optional between commands, but is necessary to
separate commands from data.
The following command descriptions explain the print commands that are
effective when the printer is in Print mode. The commands are listed in
alphabetical order according to the command description.
Alphanumeric Field Separator
Purpose:
Syntax:
Example:
Marks regions of alphanumeric characters to increment or decrement.
<GS>
PART <GS>001<GS>
001
<GS>
the region to be incremented.
marks the region and does not appear on the label.
Alphanumeric characters are 0 to 9 and A to Z. The order of alphanumeric
characters is: 0, 1, 2...7, 8, 9, A, B, C...X, Y, Z, 0, 1, 2...7, 8, 9, A, B, C...
6-21
4630 and 4830 Bar Code Label Printers User's Manual
Notes:
You may have more than one region in a field as long as they do not overlap
and they are incremented or decremented independent of each other.
Increment and decrement regions cannot overlap. If there are any nonalphanumeric characters within this region, they are ignored.
Batch Count, Set
Purpose:
Syntax:
Sets the number of labels to be printed in the next batch.
<US>n
The range for n is from 1 to 9999.
Default:
Notes:
n=1
An error code (21) is generated if n is out of range.
Clear All Data
Purpose:
Syntax:
Notes:
Clears all host-entered data from the current page or format.
<CAN>
If no page is selected, the pointer indicates the first data entry field in the
format after the data is cleared. If a page is selected, the pointer designates the
first data entry field in the first format.
Clear Data From Current Field
Purpose:
Syntax:
Notes:
Deletes data from the current field.
<DEL>
The field pointer continues to designate the current field even after the data is
cleared.
Command Terminator 1
Purpose:
Syntax:
Terminates the current command.
<NUL>
Command Terminator 2
Purpose:
Syntax:
6-22
Terminates the current command.
<LF>
Print Mode Commands
6
Configuration Parameters, Transmit
Purpose:
Syntax:
Notes:
Uploads the current configuration commands from the printer.
<ESC>p
Only the configuration parameters that can be set from the host are received.
Use this command to view, edit, or copy the current configuration command
settings.
Cut
Purpose:
Syntax:
Notes:
Advances the label out to the cutter and cuts the label stock.
<SO>
This command is only executed if the cutter is installed but not enabled.
Data Shift – International Characters
Purpose:
Syntax:
Notes:
Allows command characters to be entered as data.
<SUB>
An error code is generated if no character follows this command.
Field, Select
Purpose:
Syntax:
Selects a data field for entering or working with data.
<ESC>Fn or <ESC>F["name"]
n can range from 0 to 199.
Default:
Notes:
n=0
The parameter for this command may be either the field number or the field
name. It cannot be both. If neither are present, the printer defaults to 0.
If the field number is used, all following data is entered into field n. If the field
name is used, all following data is entered into all fields with that name in the
current format or page. The field name must be bracketed by quotation marks
(" ").
An error code (33) is generated if an invalid field number is entered.
6-23
4630 and 4830 Bar Code Label Printers User's Manual
Field Decrement, Set
Purpose:
Syntax:
Sets the field decrement value for the current field.
<ESC>Dn
The range for n is from 1 to 9999. Field decrement values in data fields are
decremented by n after each print.
Default:
Notes:
n=1
An error code (22) is generated if the decrement value is out of range.
Field Increment, Set
Purpose:
Syntax:
Sets the increment value for the selected field.
<ESC>In
The range for n is from 1 to 9999. Field increment values in data entry fields are
incremented by n after each print.
Default:
Notes:
n=1
An error code is generated if the increment value is out of range.
First Data Entry Field, Select
Purpose:
Syntax:
Notes:
Sets the field pointer to the lowest numbered data entry field in that format.
<ACK>
This command ensures that data will print in the field with the lowest number
if you do not want to specify a data field by its field number.
Font, Transmit
Purpose:
Syntax:
Uploads a font from the printer in the form of commands and data the printer
receives to create the font.
<ESC>vn
n is the font ID number and can range from 0 to 41.
6-24
Print Mode Commands
6
Form Feed
Purpose:
Syntax:
Notes:
Feeds a label out to the next print point.
<FF>
For Self-Strip operation, the printer feeds one blank label to the Self-Strip bar,
skipping an entire label.
For batch operation with die cut label stock, the label moves to the tear bar.
For continuous label stock, the label will move the end-of-print skip distance.
Format, Select
Purpose:
Syntax:
Selects a format for data entry or printing.
<ESC>En
To select an individual format, n is a numeric format ID ranging from 0 to 19.
To select a format within a page, n is an alphabetic format position within the
page ranging from a to z.
Default:
Notes:
n=0
After the format is selected, the field pointer points to the lowest numbered
data entry field. All host entered/variable data will be cleared form this format.
An error code is generated if an invalid format number is entered.
Format, Transmit
Purpose:
Syntax:
Uploads a format from the printer in the form of commands and data the
printer uses to create the format.
<ESC>xn
n is the format ID number and can range from 0 to 19.
Increment/Decrement, Disable
Purpose:
Syntax:
Resets any increment or decrement flags for the current field.
<ESC>N
6-25
4630 and 4830 Bar Code Label Printers User's Manual
Memory Usage, Transmit
Purpose:
Syntax:
Uploads information on RAM usage.
<ESC>m
The amounts are measured in kilobytes.
Notes:
The printer uploads the amount of total storage memory and the amount still
available for formats, fonts, and UDCs in the form: xxx,yyy. For example,
128, 96 indicates that the printer has a total of 128K of static RAM, of which 96K
is still available for use.
Next Data Entry Field, Select
Purpose:
Syntax:
Notes:
Moves the field pointer to the next data entry field.
<CR>
If a page is not selected and the pointer is designating the last field, the field
pointer moves back to the first data entry field in the format.
If a multiformat page is selected and the field pointer is pointing to the last
field in a format, it moves to the first field in the next format.
Numeric Field Separator
Purpose:
Syntax:
Notes:
Specifies which numeric data within a field to increment or decrement.
<FS>
You can have more than one region per field as long as they do not overlap.
The fields are incremented or decremented independent of each other. Any
non-numeric characters within the region are ignored.
Options Selected, Transmit
Purpose:
Syntax:
Uploads the list of selected options.
<ESC>O
Options include:
0 No options selected
1 Cutter
2 Media rewind hub
3 Self-Strip assembly
4 Self-Strip
6-26
Print Mode Commands
6
Page, Select
Purpose:
Syntax:
Selects a page for data entry or printing.
<ESC>Gn
n can range from 0 to 9.
Default:
Notes:
n=0
After the page is selected, the field pointer points to the lowest numbered data
entry field of the lowest position format. All data will be cleared from this
page.
An error code is generated if an invalid field number is entered.
Page, Transmit
Purpose:
Syntax:
Uploads a page from the printer in the form of commands used to create a
format. It also uploads all formats in a page.
<ESC>yn
Default:
n=1
Purpose:
Prints the current page or format with data previously entered.
Print
Syntax:
<ETB>
Printhead Parameters, Transmit
Purpose:
Syntax:
Notes:
Transmits the number and size of dots in the printhead back to the host.
<ESC>H
Example: 1918,3.3
Program Mode, Enter
Purpose:
Syntax:
Notes:
Causes the printer to enter Program mode for the purpose of editing pages,
formats, fonts, or graphics.
<ESC>P
All previously entered data is lost upon execution of this command.
6-27
4630 and 4830 Bar Code Label Printers User's Manual
Program Number, Transmit
Purpose:
Syntax:
Notes:
Example:
Transmits both the program number and the version number.
<ESC>M
This command uploads the program and software version number to the host
as an ASCII alphanumeric character string.
012345ver1.4
Quantity Count, Set
Purpose:
Syntax:
Sets the quantity of label batches to be printed by the next print command.
<RS>n
n can range from 1 to 9999.
Default:
Notes:
n=1
Incrementing and decrementing of data occurs between label batches. An error
code is generated if the quantity is out of range.
Start/Stop Characters, Print
Purpose:
Syntax:
Notes:
Instructs the current Code 39 field to print only the start and stop characters.
<ESC><SP>
The printer clears all previous data from the current field.
Test and Service Mode, Enter
Purpose:
Syntax:
Notes:
Enters Test and Service mode.
<ESC>T
Complete all print jobs before executing this command because any data
entered prior to the command will be erased.
User-Defined Characters, Transmit
Purpose:
Syntax:
Uploads a graphic from the printer in the form of commands and data the
printer receives to create the graphic.
<ESC>un
n is the graphic ID number and can range from 0 to 99.
6-28
Print Mode Commands
6
User-Defined Tables, Transmit
Purpose:
Syntax:
Transmits the commands the printer would receive to download a new
command set.
<ESC>Zt
t is the command table identifier.
t = 0 Print mode commands
t = 1 Escape print commands
t = 2 Shift print commands
t = 3 Status response
t = 4 Protocol characters
Notes:
Use this command to substitute protocol and command characters. Refer to
“Command Tables” later in this chapter for a listing of default values.
Warm Boot
Purpose:
Syntax:
Notes:
Resets the printer with a warm boot.
<BS>
Unlike the <DLE> command, this command does not take effect immediately.
It waits until all previous commands have been executed before it takes effect.
Data sent after this command, or before the printer finishes rebooting, is lost. In
XON/XOFF mode, the printer sends back a <DC2>.
This command is useful when changes in configuration settings require a
printer reset.
6-29
4630 and 4830 Bar Code Label Printers User's Manual
Configuration Commands
Configuration commands, like Print mode commands, are effective when the
printer is in Print mode. Use configuration commands to
•
set parameters for configuration features.
•
enable or disable options.
Configuration commands come into effect when the printer is reset or the
power is cycled. If a printer reset is needed, the warm boot command should
be used. The reset will take place after all previous commands have been
executed. This contrasts with the <DLE> reset command, which executes
immediately after it is received even if other commands are waiting to be
executed. The command string to enter Print mode from Program mode is:
<STX>R<ETX>
Note: Each string of commands must be preceded by the start of message character
<STX>, and followed by the end of message character <ETX>. All configuration
commands are terminated by the next command in the message.
The following command descriptions explain the configuration commands that
are effective when the printer is in Print mode. The command descriptions are
listed in alphabetical order.
Auto-Transmit 1, Enable
Purpose:
Syntax:
Enables auto-transmit level 1.
<ESC>j
Status response codes:
<DC1> Fault cleared
<FS>
Label at strip pin
<BS>
Takeup reel full
<EM>
No label stock
<US>
Ribbon fault
<US>
Label path open
Notes:
The printer automatically transmits the status response codes when necessary.
Auto-Transmit 2, Enable
Purpose:
Syntax:
Notes:
6-30
Enables auto-transmit level 2.
<ESC>d
The printer automatically transmits the status response code <DC1>.
Configuration Commands
6
Auto-Transmit 3, Enable
Purpose:
Syntax:
Enables auto-transmit level 3.
<ESC>e
Status response codes:
<HT>
Imager overrun
<SOH> Printing is done and the buffer is empty
<RS>
Insufficient RAM for printing or storage
Notes:
The printer automatically transmits the status response codes when necessary.
Auto-Transmit 1, 2, and 3, Disable
Purpose:
Syntax:
Disables auto-transmit status.
<ESC>k
Control Panel Access Permission, Set
Purpose:
Syntax:
Sets a security level to restrict access to certain menus depending on the value
of n.
<SI>An
n=0
n=1
n=2
n=3
Default:
Allows access to all menus (operator, configuration, installation, and
test and service).
Allows access to operator and configuration menus only.
Allows access to the operator menu only.
Denies access to all menus.
n=0
Cutter, Enable/Disable
Purpose:
Syntax:
Turns the cutter on or off, if a cutter is installed.
<SI>cn
n=0
n≠0
Default:
Notes:
Disables cutter.
Enables cutter.
n=0
This command becomes effective after a printer reset or power up.
6-31
4630 and 4830 Bar Code Label Printers User's Manual
Dark Adjust, Set
Purpose:
Syntax:
Sets the dark adjust command. This controls the print darkness on the labels.
<SI>dn
n ranges from -10 to 10.
Default:
Notes:
n=0
This command changes the configuration setting.
End-of-Print Skip Distance, Set
Purpose:
Syntax:
Sets the end-of-print skip distance. This distance is a number measured in 5 mil
increments that the label advances after printing. This command works for
continuous label stock and for gap and mark label stock at the end of a batch
print when label retract is enabled.
<SI>Dn
n must be a number from 16 to 9999 in 5 mil increments.
Default:
Notes:
n=0
n = 94
Gap and Mark label stock mode.
Continuous stock mode.
To advance the label out to the tear bar in label stock mode, set n to 90. If you
enter a value for n, it applies to both continuous mode and label stock mode,
regardless of the mode in which the value was entered.
Entering the <SI>D command without setting any parameters returns the
setting to its default value.
IBM Language Translation, Enable/Disable
Purpose:
Syntax:
Turns the IBM language translation feature on or off.
<SI>in
n=0
n=1
Default:
Notes:
6-32
Disable IBM translation.
Enable IBM translation.
n=0
This feature allows IBM compatible characters to replace standard ASCII
characters based on the current printer language. This command overrides the
language translation that is based on the current printer emulation.
Configuration Commands
6
Intercharacter Delay, Set
Purpose:
Syntax:
Sets the intercharacter delay equal to n in milliseconds. The intercharacter
delay is the time delay between characters in a message transmitted by the
printer.
<SYN>n
n must be a number from 0 to 9999, in milliseconds.
Default:
n=0
Label Rest Point, Adjust
Purpose:
Syntax:
Adjusts the point at which labels are presented for removal. Positions the gap
on the tear bar when using form feed. This command is used mostly for SelfStrip and Cutter applications.
<SI>fn
The range for n is from -20 (furthest back) to +20 (furthest forward) in 5 mil
increments.
Default:
n=0
Label Retract, Enable/Disable
Purpose:
Syntax:
Turns the label retract option on or off.
<SI>Rn
n=0
n≠0
Default:
Notes:
Disables label retract.
Enables label retract.
n=1
For die-cut label stock, the printer determines the retract distance
automatically.
For continuous label stock, the printer uses the retract distance set by the Set
Label Retract Distance command. See also Select Label Stock Type command.
This command becomes effective after a printer reset or power up.
6-33
4630 and 4830 Bar Code Label Printers User's Manual
Label Retract Distance, Set
Purpose:
Sets the label retract distance to n in 5 mil increments. This command works
with continuous label stock only. The label retracts to this distance at the start
of a print.
Syntax:
<SI>rn
Default:
n = 217
Label Stock Type, Select
Purpose:
Syntax:
Selects the type of label stock.
<SI>Tn
n=0
n=1
n=2
Default:
Notes:
Continuous label stock
Gap label stock
Mark label stock
n=1
This command becomes effective after a printer reset or power up.
Maximum Label Length, Set
Purpose:
Syntax:
Defines the maximum label length as n in 5 mil increments. This number is
used only for detecting low stock. It is not used to limit the image size of a
format on the label.
<SI>Ln
n must be a number from 200 to 4800 in 5 mil increments.
Default:
Notes:
n = 1000
This command becomes effective after a printer reset or power up.
Message Delay, Set
Purpose:
Syntax:
Sets the message delay to n milliseconds.
<ESC><SYN>n
n must be a number from 0 to 9999 milliseconds.
Default:
6-34
n=0
Configuration Commands
6
Online/Offline on Power Up
Purpose:
Syntax:
Selects the printer to be online or offline when it is turned on.
<SI>On
n=0
n≠0
Default:
Notes:
Printer is online on power up.
Printer is offline on power up.
n=0
This command becomes effective after a printer reset or power up.
Postamble, Set
Purpose:
Syntax:
Sets the postamble character to n.
<EOT>n
n can be any ASCII character. When n = <NUL>, no postamble character is
sent.
Default:
n = <NUL>
Preamble, Set
Purpose:
Syntax:
Sets the preamble character equal to n.
<SOH>n
n can be any ASCII character. When n = <NUL>, no preamble character is sent.
Default:
n = <NUL>
Print Speed, Set
Purpose:
Syntax:
Default:
Sets the print speed in inches per second (ips).
<SI>Sn
4630
n must be from 20 to 80 (2.0 to 8.0 ips) in multiples of 5.
4830
n must be from 20 to 50 (2.0 to 5.0 ips) in multiples of 5.
n = 35, 4630
n = 25, 4830
6-35
4630 and 4830 Bar Code Label Printers User's Manual
Printer Language, Select
Purpose:
Syntax:
Selects the printer language.
<SI>ln
n can be one of the following values:
Default:
Notes:
0 = USA
1 = UK
4 = France
5 = Sweden
8 = 256 Characters
9 = Switzerland
2 = Germany
3 = Denmark
6 = Italy
7 = Spain
10 = Code Page 850
n=0
Only one language is used per print job.
To print 256 Characters or Code Page 850, you must use a parralel interface or
configure the host serial port for 8-bits per byte data transmission.
Self-Strip, Enable/Disable
Purpose:
Syntax:
Turns the Self-Strip option on or off. The Self-Strip option must first be
installed from the control panel.
<SI>tn
n=0
n=1
Default:
Notes:
Disables the Self-Strip option.
Enables the Self-Strip option.
n=0
This command becomes effective after a printer reset or power up.
Top of Form, Set
Purpose:
Syntax:
Sets the top-of-form (left margin) to n which is the distance, in 5 mil
increments, from the label origin to its leading edge.
<SI>Fn
n must be a number from -10 to 4000 in 5 mil increments. The negative values
let you decrease the margin and print closer to the edge of the label.
Default:
6-36
n = 20
Configuration Commands
6
TTR/Direct Thermal Media Grade, Select
Purpose:
Syntax:
Selects the label stock to be used.
<SI>gn
n=0
n=1
Default:
Notes:
Direct thermal stock
Thermal transfer stock
n=0
This command becomes effective after a printer reset or power up.
Program Mode Commands
The Program mode commands are used specifically for label format design and
to download user-defined fonts and graphics. To set the printer to Program
mode, send the following command string:
<STX><ESC>P<ETX>
When creating or editing formats, the printer uses a field pointer to designate
the field that is to be modified when the printer is in Program mode. In order
to download commands in Program mode, you must specify the field to be
changed. If you do not select a field, the pointer will continue to point to the
last selected field until a different format or field is selected.
New formats contain a default human-readable field numbered H0. New pages
do not contain a default format.
Note: Each string of commands must be preceded by the start of message character
<STX>, and followed by the end of message character <ETX>. The semicolon (;) is the
command terminator. All commands in Program mode must end with this terminator
except the last command in a message. Parentheses {( )} and <LF> characters are
ignored by the printer in Program mode.
The following command descriptions explain the commands that are effective
when the printer is in Program mode. The command descriptions are listed in
alphabetical order.
6-37
4630 and 4830 Bar Code Label Printers User's Manual
Bar Code, Select Type
Purpose:
Syntax:
Selects a symbology for a bar code field.
cn[,m1][,m2][,m3]
n can range from 0 to 16.
,m varies depending on the symbology you select.
Default:
Notes:
n=0
Modifiers apply only to bar code symbologies. For more information on bar
code symbologies, please refer to The Bar Code Book by Roger Palmer
(Intermec P/N 051241).
Use the following table to find the correct bar code for your format.
Value
Symbology
Value
Symbology
n=0
Code 39
n=8
HIBC Code 39
n=1
Code 93
n=9
Code 16K
n=2
Interleaved 2 of 5
n = 10
Code 49
n=3
Code 2 of 5
n = 11
POSTNET
n=4
Codabar
n = 12
PDF417
n=5
Code 11
n = 13
Code One
n=6
Code 128
n = 14
Maxicode
n=7
UPC/EAN Codes
n = 16
HIBC Code 128
The following pages contain detailed descriptions of the different symbologies
and the parameters that you can set for each.
6-38
Program Mode Commands
6
Code 39
Syntax:
c0[,m]
The 4630 and 4830 printers support standard Code 39, full ASCII Code 39, and
43 character Code 39.
If you enter <ESC><SPACE> as data, the start and stop characters are printed.
Default:
c0,0
Select Code 39. No check digit.
c0,1
Select Code 39. Printer enters check digit.
c0,2
Select Code 39. Host enters check digit and printer verifies.
c0,3
Select full ASCII Code 39. No check digit.
c0,4
Select full ASCII Code 39. Printer enters check digit.
c0,5
Select full ASCII Code 39. Host enters check digit and printer
verifies.
c0,6
Select 43 character Code 39. No check digit.
c0,7
Select 43 character Code 39. Printer enters check digit.
c0,8
Select 43 character Code 39. Host enters check digit and printer
verifies.
,m = 0
Code 93
Syntax:
c1
Interleaved 2 of 5
Syntax:
c2[,m]
The printer adds a zero to character strings that are odd in length.
Default:
c2,0
Select Interleaved 2 of 5. No check digit.
c2,1
Select Interleaved 2 of 5. Printer enters check digit.
c2,2
Select Interleaved 2 of 5. Printer enters check digit.
,m = 0
6-39
4630 and 4830 Bar Code Label Printers User's Manual
Code 2 of 5
Syntax:
Default:
c3[,m]
c3,0
Select Code 2 of 5. 3-bar start/stop code.
c3,1
Select Code 2 of 5. 2-bar start/stop code.
,m = 0
Codabar
Syntax:
c4[,m]
Valid start/stop characters range from A to D and from a to d. You can define
them as part of the bar code field or you can download them as part of the
print data. Start/stop characters sent down with printer data override the
characters defined by the bar code field.
Default:
c4,0
Select Codabar. Host enters start/stop codes and printer
verifies.
c4,1,x,y
Select Codabar. Printer enters start code x and stop code y. x
and y can range from A to D.
,m = 0
Code 11
Syntax:
Default:
6-40
c5[,m]
c5,0
Select Code 11. Printer enters 2 check digits.
c5,1
Select Code 11. Printer enters 1 check digit.
c5,2
Select Code 11. Host enters 2 check digits and printer verifies.
c5,3
Select Code 11. Host enters 1 check digit and printer verifies.
,m = 0
Program Mode Commands
6
Code 128
Syntax:
c6[,m1][,m2]
UCC-128 serial shipping container code automatically starts in subset C with a
<FNC1>. It is a fixed length version of Code 128 requiring you to enter 19
numeric characters. The printer forces the first two characters to zero.
Default:
c6,0,0
Code 128, keep parentheses and spaces.
c6,0,1
Code 128, ignore parentheses and spaces in the bar code but keep
parentheses and spaces in the interpretive field.
c6,1,0
Select UCC-128 Serial Shipping Container Code.
c6,1,1
Select UCC-128 Serial Shipping Container Code and keep
parentheses and spaces in the interpretive field.
,m1 = 0 (Code 128)
,m2 = 0 (keep parentheses and spaces)
UPC/EAN
Syntax:
c7[,m1][,m2]
c7,0,m2
Select UPC/EAN Codes. Printer enters check digit and flag 1
enable.
c7,1,m2
Select UPC/EAN Codes. Printer enters check digit and flag 1
disabled.
c7,2,m2
Select UPC/EAN Codes. Host enters check digit and printer
verifies flag 1 enabled.
c7,3,m2
Select UPC/EAN Codes. Host enters check digit and printer
verifies. flag 1 disabled.
Use ,m2 to select the following UPC/EAN codes:
Default:
0
variable length
5
UPC Version D1
1
EAN 8
6
UPC Version D2
2
EAN 13
7
UPC Version D3
3
UPC Version A
8
UPC Version D4
4
UPC Version E
9
UPC Version D5
,m1 = 0
,m2 = 0
6-41
4630 and 4830 Bar Code Label Printers User's Manual
Notes:
The variable length option (,m2) selects the UPC/EAN version by the number
of characters in the data field. The number of data characters and check
characters allowed for each version are:
EAN 8
7 data + 1 check character
EAN 13
12 data + 1 check character
UPC version A
11 data + 1 check character
UPC version E
6 data + 1 check character
UPC version D1
13 data + 1 check character
UPC version D2
18 data + 2 check characters
UPC version D3
22 data + 2 check characters
UPC version D4
25 data + 3 check characters
UPC version D5
29 data + 3 check characters
Use " " to delimit the bar code data from the supplemental data. Data to the
right of " " is supplemental data; data to the left is bar code data. You can add
the two- or five-digit supplemental data to any version of the UPC/EAN code.
The flag 1 option only applies to EAN 8, EAN 13, and UPC version A. For EAN
13, enabling the flag 1 option prints the first character of the bar code
interpretive. For EAN 8 and UPC version A, enabling the flag 1 option moves
the first and last character of the bar code interpretive outside of the guard
bars.
HIBC Code 39
Syntax:
c8[,m1][,m2]
The following three modifiers conform to Supplier Standard:
c8,0
Select HIBC Code 39. Primary format.
c8,1
Select HIBC Code 39. Alternate primary format.
c8,2,m2
Select HIBC Code 39. Secondary format. The linkage
character comes from ,m2, which is the field identifier.
The following four modifiers conform to Provider Standard:
Default:
6-42
c8,3
Single format.
c8,4
First data format.
c8,5,m2
Select HIBC Code 39. Second data format. The linkage
character comes from ,m2, which is the field identifier.
c8,6
Select HIBC Code 39. Multiple data format.
,m1 = 0
Program Mode Commands
6
Code 16K
Syntax:
c9
Syntax:
c10
Syntax:
c11
Code 49
POSTNET
Notes:
POSTNET uses the height (h) and width (w) commands in the same way as a
font. Other symbologies use “h” to specify the bar height and “w” to specify
the narrow bar width. POSTNET uses “h” and “w” to magnify the base
character cell. Each character cell is 13 dots high by 22 dots wide. The default
width and height magnification for POSTNET is 2 x 2, resulting in a symbology
sized according to the POSTNET specification.
PDF417
Syntax:
Default:
Notes:
c12[,[m1][,m2][,m3]]
,m1 = 0
Printer selects the number of columns needed to create a symbol
that is as close to square as possible. The range for m1 is 0 to 30.
,m2 = 9
The printer automatically selects the error correction level based on
the amount of data. The range for ,m2 is 0 to 9.
,m3 = 0
Truncating disabled. The values for ,m3 are 0 and 1.
PDF417 is a stacked 2D symbology that provides the ability to scan across rows
of code. Each row consists of start/stop characters, row identifiers, and symbol
characters, which consist of four bars and four spaces each and contain the
actual data. This symbology uses error correction symbol characters appended
at the end to recover loss of data.
Selecting the Number of Columns
Set ,m1 to zero to have the printer select a height magnification that is three
times the width magnification for the symbol. The specifications of PDF417
recommend these magnification values for creating a symbol that you can scan
easily.
6-43
4630 and 4830 Bar Code Label Printers User's Manual
Selecting an Error Correction Level
The level of error correction that works best for your data depends on the
amount of characters in your symbols. If you decide to select your own error
correction level, you need to estimate the number of characters since they are
formed by compressing the raw data you send to the printer. In general, 1.8
alphanumeric characters generate one symbol character. If you are using
numeric data, 2.9 digits generate one data symbol character.
Intermec recommends that you leave the error correction level at the default
setting of 9. This setting lets the printer select a level, between level 2 and level
5, that provides the most efficient error correction of your data. The printer
bases the level selection on the number of symbol characters your data
generates.
The following table shows the m2 values (error correction levels), the
recommended data amount that you should use for each level, and the number
of error correction characters the level generates.
,m2
0
1
2
3
4
5
6
7
8
9
Recommended
Data Amount
*
*
1 - 40
41 - 160
161 - 320
321 - 863
†
†
†
‡
Error Detection
Characters
2
4
8
16
32
64
128
256
512
(error detected, no recovery)
*
You should only use ,m2 values of 0 and 1 if your labels do not have
enough space for more error correction characters. These values are
generally not recommended.
†
The printer reserves ,m2 values of 6, 7, and 8 for special applications where
the symbol is subject to damage and requires a higher level of error
correction.
‡
An ,m2 value of 9 lets the printer set m2 to the recommended value for each
symbol based on the number of characters. An m2 value of 9 is the default
setting.
Setting the Truncate Flag
The truncate flag determines if the symbol is printed in truncated form. A
trucated symbol prints without right row indicators and with only a onemodule wide stop character. To minimize errors and maintain the best reading
performance, Intermec recommends that ,m3 be set to 0.
6-44
Program Mode Commands
6
The approximate data capacity (maximum number of characters allowed) for the three
character sets is: Full ASCII, 1108; Alphanumeric, 1850; Numeric, 2725.
Note: 2D symbols encode data by compressing it in different amounts. Therefore, use
these values as guidelines. The exact data capacity varies with the actual data being
encoded.
Code One
Syntax:
c13[,[,m1][,m2,m3]]
There are 15 versions of Code One. Each version has a different maximum data
length.
Defaults:
Notes:
,m1 = 0
Code One version, variable.
,m2 = 1
First position in the group.
,m3 = 1
Total number of symbols in the group is one symbol.
Selecting a Code One Version
,m1 is the version of Code One you are printing.
c13,0[,m2,m3]
Code One, variable length (autoselects from version
A to version H)
c13,1[,m2,m3]
Version A
c13,2[,m2,m3]
Version B
c13,3[,m2,m3]
Version C
c13,4[,m2,m3]
Version D
c13,5[,m2,m3]
Version E
c13,6[,m2,m3]
Version F
c13,7[,m2,m3]
Version G
c13,8[,m2,m3]
Version H
c13,9[,m2,m3]
Version S10
c13,10[,m2,m3]
Version S20
c13,11[,m2,m3]
Version S30
c13,12[,m2,m3]
Version T16
c13,13[,m2,m3]
Version T32
c13,14[,m2,m3]
Version T48
6-45
4630 and 4830 Bar Code Label Printers User's Manual
It is important that you select the correct version of Code One for the data you
are encoding. If you try to encode data in the wrong version, your symbol may
not print.
If your data lengths vary greatly for different labels, or if you are not sure
which symbology to select, use the default setting. The printer will print the
correct version of Code One (from version A to version H) based on data
length. If you know your data lengths are consistent, or if the printer always
chooses the same version, you should manually select the Code One version to
save printer memory.
When you print Code One symbols, you may notice that part of your symbol
contains no data. This occurs because each version of Code One has a fixed size
and the version that is large enough to accommodate all your data may be
larger than you need. However; be careful about using a smaller size version,
because if it is too small for your data to fit, the symbol will not print.
The following table shows the data lengths that each Code One version
accommodates.
Note: The data lengths in the table are approximations of the maximum amount of data
for each version of Code One. The printer compresses the data before it encodes it,
which shortens the length of the amount you send. This condition should not affect
printing, but if you select the variable length, the printer may select a Code One
version that is smaller than the one listed next to your data length.
6-46
m1 Value
Code One Type
0
1
2
3
4
5
6
7
8
9
10
11
12
13
14
variable*
A
B
C
D
E
F
G
H
S10
S20
S30
T16
T32
T48
Full ASCII
10
19
44
91
182
370
732
1480
†
†
†
10
24
38
Alphanumeric
Numeric
13
27
64
135
271
553
1096
2218
†
†
†
13
34
55
22
44
104
217
435
886
1755
3550
6
12
18
22
55
90
*
Printer selects the correct Code One type based on data length.
†
Encodes only numeric data.
Program Mode Commands
6
Note: For full ASCII and alphanumeric columns, the maximum number of characters
is actually less than those listed for each version of Code One. That number varies
depending upon the number of character type changes (lowercase to uppercase,
numeric to alphanumeric, and so on). The more shifts between these different types, the
less data you can encode.
Grouping Symbols
Use ,m2 (position of the current symbol in the group) and ,m3 (total number of
symbols in the group) to define symbols that are part of a group. For example,
a setting of [,2,5] indicates that the current symbol definition is the second in a
group of five.
Both ,m2 and ,m3 range from 1 to 15, with a default of 1.
Note: If you are using groups of symbols with the ,m2 and ,m3 variables, make sure
,m2 (the position in the group) is never greater than ,m3 (the total number of symbols
in the group).
The printer does not check to ensure that you define all positions of a group.
For example, if you set ,m3 to 5, and you define only three positions, the
printer will print the three positions. However; when you scan these symbols,
the scanner will wait for all five symbols and will not be able to transmit the
data.
Defining Height and Width for Code One
Code One modules must be square. Therefore, when you define a field for
Code One, you only need to enter one value for both the height and width
magnification. If you enter more than one value, the printer uses the last value
for both height and width and ignores all previously entered magnification
values. If you do not enter a value, the printer uses a default value of 3 for both
height and width magnification.
Using Groups of Code One Symbols
You can use groups of Code One symbols to encode data so that you can scan
separate symbols more efficiently. When you scan a group of symbols, the
scanner accumulates the data from all members of the group and transmits the
data as if it came from a single symbol.
6-47
4630 and 4830 Bar Code Label Printers User's Manual
Maxicode
Syntax:
Defaults:
Notes:
c14[,m1][,m2][,m3]
,m1 = 0
Mode 0, Structured Carrier Message.
,m2 = 1
Not supported at this time.
,m3 = 1
Not supported at this time.
When you select Maxicode, you must format your data to conform to five
fields.
Characters
Allowed
Field
Field Description
Default
1
5
ZIP code
None
2
4
ZIP code extension
None
3
3
Service class
999
4
3
Country code
840 (U.S.)
5
84
Message
None
You can format the data with or without inserting delimiters between the fixedlength fields, governed by the number of characters comprising the field. An
example format without delimiters is shown below:
Field
1
2
3
4
5
d3,068107317999840UP TO 84 CHARACTER MESSAGE
4630U-35
Note: Remember, the d3 command defines the data source in Program mode.
Or, you can format data using the carat-delimiting field, as shown in the next
example:
Field
1
2
3
4
5
4630U-36
With this method of delimiting data, fields can be left out (as long as the carats
remain) and the firmware will fill in the default as shown in the following
example. With the carat-delimited format, you must completely fill in all fields,
except the message field.
6-48
Program Mode Commands
Field
1
3
2
6
5
4630U-37
In this example, the country code is left out, with the delimiting carat inserted.
The printer firmware fills in the default value of 840 (USA).
Printing Mode 2 and Mode 3 Compatible Bar Codes
IPL does not currently support Maxicode Modes 2 and 3; however, you can
print a Mode 2 and 3 compatible bar code. The sample data format shown
below prints a Mode 2 and 3 bar code on a printer that supports Maxicode
Mode 2 and 3.
You must restructure the data to print a Mode 2 and 3 compatible bar code on
the 4630 and 4830 printers:
The data fields in the sample format are described below:
Field
Characters
Allowed
Field Description
Default
1
5
ZIP code
None
2
4
ZIP code extension
None
3
3
Service class
999
4
3
Country code
840 (U.S.)
5
9
Header
None
6
75
Message
None
7
1
Data terminator
D
6-49
4630 and 4830 Bar Code Label Printers User's Manual
For your printer to print Mode 2 and 3 compatible symbols, you must
restructure the data:
•
Insert the Mode 2 and 3 header immediately after the country code at the
beginning of the secondary message.
•
Make the fields contiguous and fill in all fields.
•
Swap the order of the country code (field 4) and the service class (field 3).
•
Terminate your data with an uppercase D.
•
No control characters ( S or S) in the primary message.
R
G
HIBC Code 128
Syntax:
c16[,m1][,m2]
The following three modifiers conform to Supplier Standard:
c16,0
Select HIBC Code 128, primary format.
c16,1
Select HIBC Code 128, alternate primary format.
c16,2,m2
Select HIBC Code 128, secondary format. The linkage character
comes from ,m2, which is the field identifier.
The following four modifiers conform to Provider Standard:
Default:
c16,3
Single format.
c16,4
First data format.
c16,5,m2
Select HIBC Code 128. Second data format. The linkage
character comes from ,m2, which is the field identifier.
c16,6
Select HIBC Code 128. Multiple data format.
,m1 = 0
Bar Code Field, Create/Edit
Purpose:
Syntax:
Use this command to edit or create a bar code field n.
Bn[,name]
n values can range between 0 and 199.
,name is an optional field. The field can be up to eight ASCII characters (not
counting the semicolon) and cannot start with a numeric character.
6-50
Program Mode Commands
Default:
Notes:
6
n=0
Parameters for the default field:
Bar code = Code 39
Check digits = disabled
Height magnification = 50
Interpretive = disabled
Data length = 20
Data origin = Print mode
Prefix = none
Ratio= 3 to 1
Field direction = 0°
Field origin = 0,0
Width magnification = 1
Bitmap Cell Height for Graphic or UDF, Define
Purpose:
Syntax:
Defines the height of a graphic or user-defined font.
yn
n can range between 1 and 600. n is the number of rows for a graphic or font
(bitmap).
For outline fonts, n is the height of the base character in number of dots.
Default:
Notes:
n=1
n = 10
Bitmap fonts and graphics
Outline fonts
An error code (52) is generated for an invalid height.
Bitmap Cell Width for Graphic or UDF, Define
Purpose:
Syntax:
Defines the maximum width for a graphic or any character in a font. Each
character has a width within this amount, which should be at least as wide as
the widest character in the font.
xn
n can range between 0 and 599. n is the number of columns for the UDC,
bitmap, or user-defined font.
For outline fonts, n is the width of the base character in number of dots.
Default:
Notes:
n=1
n = 10
Bitmap fonts and graphics
Outline fonts
An error code (52) is generated if the width is invalid.
6-51
4630 and 4830 Bar Code Label Printers User's Manual
Bitmap User-Defined Font, Clear/Create
Purpose:
Syntax:
Use this command to clear or create a user-defined bitmap font set.
Tn[,name]
n is the font ID number and can range from 3 to 6 and 8 to 19.
,name is an optional field. The field can be up to eight ASCII characters (not
counting the semicolon).
Notes:
If font set n has already been defined, all previous characters in the font set are
erased. An existing font cannot be edited, only recreated. To change any
characters, the entire font set must be transmitted.
Border Around Human-Readable Text, Define
Purpose:
Syntax:
Defines a border around a human-readable field.
bn
n values range from 0 to 199.
Default:
Notes:
n=0
No borders (black letters).
When n is greater than 0, the field prints white letters with an n dot size border
surrounding the field.
Box Field, Create/Edit
Purpose:
Syntax:
Use this command to access or create a box field n.
Wn[,name]
n can range between 0 and 199.
,name is an optional field. The field can be up to eight ASCII characters (not
counting the semicolon).
Default:
Notes:
n=0
Parameters for the default field:
Field origin = 0,0
Box length = 100
Field direction = 0°
Box height = 100
Box width = 1
6-52
Program Mode Commands
6
Character Origin Offset, Define
Purpose:
Syntax:
Defines the offset, to the right, of all characters in a font. If each character's
width is defined in columns, with the first column numbered 0, then the origin
of each character is at the column with the same number as n.
Xn
n values can range between 0 and 599. For example, n = 2 shifts the character
origins over two columns to the right.
Default:
Notes:
n=0
For bitmap fonts only.
Character Rotation or Bar Code Ratio, Define
Purpose:
Syntax:
Defines the character rotation for human-readable fields, or the bar code ratio
for a bar code field.
rn
For human-readable fields, n is the rotation:
n=0
Horizontal
n=1
90 degrees counterclockwise.
For bar code fields, n is the ratio of the wide elements to the narrow elements:
n=0
2.5 to 1
n=1
3.0 to 1
n=2
2.0 to 1
Default:
Notes:
n=0
n=1
Human-readable field
Bar code field
If the bar code width is odd and r0 is selected, r1 will be substituted.
Code 39 Prefix Character, Define
Purpose:
Syntax:
Defines the prefix for a Code 39 field only.
p[n1][n2][n3][n4]
n values can range between uppercase A to Z and 0 to 9.
Default:
Notes:
No prefix
The @ character clears all prefixes when entered as n1. Prefix characters do not
appear in the interpretive field.
6-53
4630 and 4830 Bar Code Label Printers User's Manual
Command Tables, Load
Purpose:
Syntax:
Downloads a command table, with t as the command table identifier. This is
followed by the nibblized command entries (c1 - cn) to be loaded into the table.
To change an entry in the table, the entire table must be sent to the printer as a
string of ASCII characters in hexadecimal form. Any entry not redefined
retains its old value. The printer expects two hex digit bytes for every entry in
the table.
Ct, command 1, command 2, ... command n
t can range from 0 to 4. t is the command table identifier.
Data must be nibblized ASCII characters ranging from 0 to 9 and A to F.
Notes:
New commands become effective after the printer is reset or the power is
cycled. Command tables are listed later in this chapter.
Current Edit Session, Save
Purpose:
Syntax:
Saves the current page, format, UDC, or UDF being edited. The printer remains
in Program mode.
N
Field, Delete
Purpose:
Syntax:
Deletes field n from the format.
Dn
n values can range between 0 and 199.
Default:
Notes:
6-54
n=0
The last field in a format cannot be deleted. If the current field is deleted, the
field pointer points to the next field. If you delete a master field, you also delete
all slave fields of that master field.
Program Mode Commands
6
Field Data, Define Source
Purpose:
Syntax:
Defines a data source for the current field and how many characters are in the
field.
dn[,m1][,m2];
n can range from 1 to 3.
,m1 is the number of characters that can be entered into the field and can range
from 1 to 200.
,m2 is an optional positive integer numeric field offset that can range from 0 to
9999.
Default:
n = 0 or 1, ,m1 = 20
n = 0 or 1, ,m1 = 30
Bar code fields
Human-readable fields
n = 2, ,m2 = 0
Notes:
d0[,m1] and d1[,m1];
Optional data is entered in Print mode. m1 is the maximum number of data (up
to 200 characters) that can be entered into this field.
d2,[m1][,m2];
Data is copied to this field from field m1. You must define field m1 before you
can use this command. Only data delimited by numeric field separator (FS), or
alphanumeric field separator (GS), can use the offset. A bar code field cannot
copy data from a human readable field but a human readable field can copy
data from a bar code field.
d3,[m1];
Fixed data m1 is stored as part of the format and is used every time the current
field is printed. The maximum number of characters in a field (including nonprinting characters) is 200. Data entered cannot be changed by print
commands.
Field Direction, Define
Purpose:
Syntax:
Defines the field rotation.
fn
n=0
n=1
n=2
n=3
Default:
Horizontal
Rotated 90 degrees counterclockwise from horizontal.
Rotated 180 degrees counterclockwise from horizontal.
Rotated 270 degrees counterclockwise from horizontal.
n=0
6-55
4630 and 4830 Bar Code Label Printers User's Manual
Field Origin, Define
Purpose:
Syntax:
Defines the origin for a field. The field origin is the upper left corner of the
field. Horizontal n and vertical m locations represent the number of dot
increments from the label's origin. The origin (0,0) is the upper left square on
the label.
on,m
n values can range between 1 and 19999
m values can range between 1 and 19999.
Default:
n=0
m=0
Font, Select Type
Purpose:
Syntax:
Selects a font type for human-readable fields.
cn[,m1]
For human-readable fields, n values can range between 0 and 41.
Default:
Notes:
n=0
Modifiers apply only to bar code symbologies. Fonts and bar codes are listed at
the end of the Program mode command descriptions.
Font Character Width, Define
Purpose:
Syntax:
Defines the amount of space from the origin of one letter to the origin of the
next. If n is too small, characters may overlap.
Zn
n values can range between 0 and 599.
Default:
Notes:
6-56
Character bitmap width, minus the font character offset (Xn) plus the
intercharacter space (zn).
For bitmap characters only.
Program Mode Commands
6
Format, Create/Edit
Purpose:
Syntax:
Use this command to edit or create a format n.
An[,name]
or
Fn[,name]
n is the format ID number. Values can range between 1 and 19.
,name is an optional field. The field can be up to eight ASCII characters (not
counting the semicolon) and cannot start with a numeric character.
Notes:
An error code is generated if the format number is out of range.
Format Direction in a Page, Define
Purpose:
Syntax:
Defines the format directions within a page.
qn
n=0
n=1
n=2
n=3
Default:
Horizontal.
Rotate 90 degrees counterclockwise from horizontal.
Rotate 180 degrees counterclockwise from horizontal.
Rotate 270 degrees counterclockwise from horizontal.
n=0
Format, Erase
Purpose:
Syntax:
Erases format ID number n.
En
n values can range between 1 and 19.
Format Offset Within a Page, Define
Purpose:
Syntax:
Defines the format offsets within a page and creates new origins for fields
within a format by adding the format offsets to the original field offsets. m and
n represent increments of dot sizes.
On,m
n values can range between 1 and 19999.
m values can range between 1 and 19999.
Default:
n=0
m=0
6-57
4630 and 4830 Bar Code Label Printers User's Manual
Format Page Position, Assign
Purpose:
Syntax:
Assigns the format n (format ID) to page position p.
Mp,n
p values can range between a and z.
n values range from 0 to 19.
Default:
Notes:
p=a
A format may be in multiple positions. An error code is generated if the format
ID is out of range.
Format Page Position, Define Data Source
Purpose:
Syntax:
Defines a data source for a format assigned to a page position.
en[,m1][,m2];
e0;
The format receives its data during Print mode.
e1[,m1][,m2];
The format is a slave of another format within this page.
,m1 is the position of the master format within the page.
,m2 is the data offset to apply to the slave format. Only data delimited by
numeric field separator <FS> or alphanumeric field separator <GS> can be
offset.
Default:
Notes:
n=0
m1 = a
m2 = 0
The format ID must be the same for both the master and slave formats.
Format Page Position, Delete
Purpose:
Syntax:
Deletes the format page position p from a page.
mp
p values can range between a and z.
Default:
6-58
p=a
Program Mode Commands
6
Graphic, Select Type
Purpose:
Syntax:
Selects a graphic for graphic fields.
cn
Values for n can range between 0 and 99.
Default:
Notes:
n=0
This command applies to graphic fields only.
Graphic or UDC, Define
Purpose:
Syntax:
Maps one column of bitmap for a graphic or a font character. n is the column to
be mapped.
un,m...m
n values can range between 0 and 599.
Notes:
Each data byte m represents 6 bits of the bitmap. See Chapter 5 for an example.
Height Magnification, Define
Purpose:
Syntax:
Defines box, bar code, or character height magnification. For bar code and box
fields, the height n is defined in number of dot increments.
hn
n values can range between 1 and 250 for human-readable fields and graphics.
For bar code and box fields, the range for n is from 1 to 9999.
Default:
Notes:
n = 50
n = 100
n=2
n=1
Bar code height
Box height
POSTNET and human-readable fields
Graphics
For human-readable fields, graphics, and the POSTNET symbology, n
represents the vertical magnification of the character bitmap.
6-59
4630 and 4830 Bar Code Label Printers User's Manual
Human-Readable Field, Create/Edit
Purpose:
Syntax:
Use this command to edit or create a human-readable field n.
Hn[,name]
n values can range between 0 and 199.
,name is an optional field. The field can be up to eight ASCII characters (not
counting the semicolon) and cannot start with a numeric character.
Default:
Notes:
n=0
If n does not exist, a default human-readable field is created.
Parameters for the default field:
Border = disabled
Character rotation = 0°
Data length = 30
Data origin = Print mode
Field direction = 0°
Field origin = 0,0
Font = 7x9 standard
Height magnification = 2
Pitch = disabled
Point = disabled
Width magnification = 2
Intercharacter Space for UDF, Define
Purpose:
Syntax:
Defines the intercharacter gap length for a user-defined bitmap font in dot
increments.
zn
n values can range between 0 and 199.
Default:
Notes:
6-60
n=2
An error code (52) is generated for invalid lengths.
Program Mode Commands
6
Interpretive Field, Edit
Purpose:
Syntax:
Use this command to edit an interpretive field.
In
n is the ID number of the corresponding bar code field. The range is from 0 to
199.
Notes:
Interpretive fields cannot be created with this command; they can only be
created or deleted with the i command when editing the corresponding bar
code field.
Interpretive Field, Enable/Disable
Purpose:
Syntax:
Determines if the interpretive field of the current bar code field prints.
in
n=0
n=1
n=2
Default:
Notes:
Disables the interpretive field.
Enables the interpretive field with start and stop characters.
Enables the interpretive field without start or stop characters.
n=0
When enabled, the human-readable information in font 0 (7x9 std) is printed
left justified, 2 dots below the bar code field.
Length of Line or Box Field, Define
Purpose:
Syntax:
Defines the length of a line or box by the number of dot increments.
ln
n values can range between 1 and 9999 dots.
Default:
n = 100 dots
6-61
4630 and 4830 Bar Code Label Printers User's Manual
Line Field, Create/Edit
Purpose:
Syntax:
Use this command to access or create a line field n.
Ln[,name]
n values can range between 0 and 199.
,name is an optional field. The field can be up to eight ASCII characters (not
counting the semicolon) and cannot start with a numeric character.
Default:
Notes:
n=0
Parameters for the default field:
Field origin = 0,0
Field direction = 0°
Line length = 100
Line width = 1
Outline Font Description, Download
Purpose:
Syntax:
Notes:
Example:
Use this command to download an outline font description. All characters are
loaded at once; not individually as with bitmap fonts. Since the maximum
message length is 255 characters, the data may have to be split between
successive j commands.
jfont description...
The printer stores all incoming data into the font selected with the Outline User
Defined Font (J) command.
J4, font name;
x30;y30;
jAFB0...4E; (maximum 255 characters)
jB32C...FF; (maximum 255 characters)
The font information must be sent to the printer as a string of ASCII characters
in hexadecimal form. The printer expects two hex digit bytes for every eight-bit
byte of information. Data must be nibblized ASCII hex characters.
6-62
Program Mode Commands
6
Outline User-Defined Font, Download
Purpose:
Syntax:
Selects an outline Bitstream Speedo font to download.
Jn[,name]
n is the font ID number, from 3 to 6 and 8 to 19.
,name is an optional field. The field can be up to eight ASCII characters (not
counting the semicolon) and cannot start with a numeric character.
Notes:
If font n has already been defined, the font is erased and redefined.
Page, Create/Edit
Purpose:
Syntax:
Use this command to edit or create a page.
Sn
n is the numeric page ID and can range between 1 and 9.
Notes:
The default page (page 0) cannot be edited. An error code is generated if a page
number is out of range.
Page, Delete
Purpose:
Syntax:
Use this command to delete a page.
sn
n is the numeric page ID and can range between 1 and 9.
Notes:
The default page (page 0) cannot be deleted.
Pitch Size, Set
Purpose:
Syntax:
This command sets the pitch size, which defines the size of the characters in
human-readable fields. When used, the height and width magnification and
point size commands are ignored.
gn
n values can range between 1 and 50.
Default:
Notes:
n = 12
This command can be used for both bitmap and outline fonts.
6-63
4630 and 4830 Bar Code Label Printers User's Manual
Point Size, Set
Purpose:
Syntax:
This command sets the point size, which defines the size of the characters in
human-readable fields.
kn
n values can range between 4 and 212.
Default:
Notes:
n = 12
This command works most effectively on scalable fonts c25, c26, and c27.
Program Mode, Exit
Purpose:
Syntax:
Instructs the printer to exit Program mode and enter Print mode. Any format
or page currently being edited is saved.
R
User-Defined Character, Clear/Create
Purpose:
Syntax:
This command clears or creates a graphic bit map.
Gn[,name]
n values can range between 0 and 99.
,name is an optional field. The field can be up to eight ASCII characters (not
counting the semicolon) and cannot start with a numeric character.
Notes:
If graphic n has already been defined, it is erased and redefined.
User-Defined Character Field, Create/Edit
Purpose:
Syntax:
Use this command to edit or create a graphic field n.
Un[,name]
n values can range between 1 and 199.
,name is an optional field. The field can be up to eight ASCII characters (not
counting the semicolon) and cannot start with a numeric character.
Default:
6-64
n=0
Program Mode Commands
Notes:
6
Parameters for the default field:
Character rotation = 0°
Field direction = 0°
Field origin = 0,0
Height magnification = 1
Width magnification = 1
UDC = 0
User-Defined Font Character, Create
Purpose:
Syntax:
Specifies which font character is to be defined. n is the decimal representation
of the ASCII character.
tn[,name]
n values can range between 0 and 255.
,name is an optional field. The field can be up to eight ASCII characters (not
counting the semicolon) and cannot start with a numeric character.
Notes:
An error code is generated if the format number is out of range.
Width Magnification, Define
Purpose:
Syntax:
Defines the width magnification of a line, box, bar code, or character. For line,
box, or bar code fields, the width of the narrow element is defined by number
of dot increments n. For human-readable fields, graphics and the POSTNET
symbology, n is the magnification of the character width.
wn
Values for n can range between 1 and 9999 for line, box, and bar code fields.
Human-readable fields, graphics, and POSTNET symbology values can range
between 1 and 250.
Default:
n=1
n=2
Line, box, and bar code fields and graphics.
Human-readable fields and POSTNET.
6-65
4630 and 4830 Bar Code Label Printers User's Manual
Test and Service Mode Command Descriptions
To enter Test and Service mode from Print mode, send <ESC>T from the host
terminal.
Note: All commands in Test and Service mode end with a semicolon (;) except the last
command in a message.
Syntax
Command Name
Description
C;
Pitch Label, Print
Prints the pitch label.
D;
Printer Configuration, Reset
Sets the printer configuration to the factory defaults.
When you exit Test and Service mode after sending this
command, the printer performs a warm boot (it resets).
G;
Transmissive Sensor Value,
Transmit
Transmits the label gap transmissive sensor A/D
output back to the host. Value ranges from 00 to 255.
L;
Label Path Open Sensor Value,
Transmit
Transmits the paper path open switch value back to the
host. A value of 0 indicates the paper path is open and
a value of 1 means it is closed.
M;
Reflective Sensor Value, Transmit
Transmits the label mark reflective sensor A/D output
back to the host. The value ranges from 00 to 255.
P;
Printhead Temperature Sensor
Value, Transmit
Transmits the printhead thermistor A/D output back
to the host. Range of the value is 00 to 255.
Q;
Quality Label, Print
Prints the print quality program and model number
label.
R;
Test and Service mode, Exit
Exits Test and Service mode.
T;
Label Taken Sensor Value,
Transmit
Transmits the label taken sensor A/D output back to
the host. The value can range from 00 to 255.
6-66
Intermec Printer Language Commands
6
User-Defined Interface Tables
These command tables show commands in the order they must be downloaded
when you replace the User-Defined Command/Protocol characters.
Print Commands (t = 0) {xe "Print mode
commands:downloading"}}{xe "downloading:Print mode
commands"}}
The following commands are listed in the order they must be downloaded.
Description
Command
Hex Value
Command Terminator 1
Set Preamble
Set Postamble
Status Enquiry
Select First Data Entry Field
Transmit Error Code
Warm Boot
Command Terminator 2
Status Dump
Form Feed
Select Next Data Entry Field
Cut
Go To Shift Command Table
Reset
Set Intercharacter Delay
Print
Clear All Data
Abort Print Job
Data Shift
Go To Escape Command Table
Numeric Field Separator
Alphanumeric Field Separator
Set Quantity Count
Set Batch Count
Clear Data From Current Field
NUL
SOH
EOT
ENQ
ACK
BEL
BS
LF
VT
FF
CR
SO
SI
DLE
SYN
ETB
CAN
EM
SUB
ESC
FS
GS
RS
US
DEL
00
01
04
05
06
07
08
0A
0B
0C
0D
0E
0F
10
16
17
18
19
1A
1B
1C
1D
1E
1F
7F
6-67
4630 and 4830 Bar Code Label Printers User's Manual
Escape Print Commands (t = 1)
This following commands are listed in the order they must be downloaded.
6-68
Description
Command
Hex Value
Set Message Delay
SYN
16
Enter Start/Stop Character
(space)
20
Set Field Decrement
D
44
Select Format
E
45
Select Field
F
46
Select Page
G
47
Transmit Printhead Parameters
H
48
Set Field Increment
I
49
Transmit Label and Gap Length
L
4C
Transmit Software Version Number
M
4D
Disable Increment/Decrement
N
4E
Transmit Options Selected
O
4F
Enter Program Mode
P
50
Transmit Quantity and Batch Count
Q
51
Enter Test and Service Mode
T
54
Transmit User-Defined Command Tables
Z
5A
Enable Auto-Transmit 2
d
64
Enable Auto-Transmit 3
e
65
Enable Auto-Transmit 1
j
6A
Disable Auto-Transmit 1, 2 and 3
k
6B
Transmit Static RAM Usage
m
60
Transmit Configuration Parameters
p
70
Transmit User-Defined Characters
u
75
Transmit Font
v
76
Transmit Format
x
78
Transmit Page
y
79
Intermec Printer Language Commands
6
Shift Print Commands (t = 2)
The following commands are shown in the order they must be downloaded.
These commands must be preceded by the Go To Shift Command Table
command (default value SI) listed in the table of Print Commands (t = 0).
Description
Command
Hex Value
Set Control Panel Access Permission
A
41
Set End-of-Print Skip Distance
D
44
Set Top-of-Form
F
46
Transmit Printhead Parameters
H
48
Set Number of Image Bands
I
49
Set Maximum Label Length
L
4C
Define Static RAM Size
N
4E
Online or Offline on Power Up
O
4F
Enable or Disable Label Retract
R
52
Set Print Speed
S
53
Select Label Stock Type
T
54
Set Printhead Test Values
U
55
Set Label Width
W
57
Enable or Disable Audible Alarm
a
61
Enable or Disable Cutter
c
63
Set Dark Adjust
d
64
Label Rest Point, Adjust
f
66
Select TTR or Direct Thermal
g
67
Enable or Disable Translation
i
69
Select Printer Language
l
6C
Set Label Retract Distance
r
72
Enable or Disable Self-Strip
t
74
6-69
4630 and 4830 Bar Code Label Printers User's Manual
Status Responses and Auto-Transmit
Commands (t = 3)
The following responses and codes are listed in the order they must be
downloaded.
Status Description
Status Response
Hex Value
Buffer Already Full
GS
1D
Printhead Test Fail
SO
0E
Label Path Open
US
1F
Ribbon Fault
US
1F
No Label Stock
EM
19
Buffer Now Full
DC3
13
Takeup Reel Full
BS
08
Label at Strip Pin, Cutter
Busy/Jammed
FS
1C
Skipping
DC1
11
Printing
DC1
11
Ready
DC1
11
Clear
DC1 -Auto-Transmit 1
11
Label at Strip Pin, Cutter
Busy/Jammed
FS - Auto-Transmit 1
1C
Takeup Reel Full
BS - Auto-Transmit 1
08
No Label Stock
EM - Auto-Transmit 1
19
Ribbon Fault
US - Auto-Transmit 1
1F
Room in Buffer
DC1 - Auto-Transmit 2
11
Imager Overrun
HT - Auto-Transmit 3
09
Print Job Complete and Buffer Empty
SOH - Auto-Transmit 3
01
Insufficient RAM
RS - Auto-Transmit 3
1E
Note: The status responses in the above table are for standard protocol. In XON/XOFF
protocol, most of the status responses are the same; however, instead of DC1, the status
response is DC2, and instead of DC3, the status response is DC4.
6-70
Intermec Printer Language Commands
6
Protocol Commands (t = 4)
The following list contains the protocol codes in the order they must be
downloaded.
Description
Command
Hex Value
SELECT IN
GS
1D
POLL IN
FS
1C
RES IN
EOT
04
REQ IN
ENQ
05
SOM IN
STX
02
EOM IN
ETX
03
AFF IN
ACK
06
NEG IN
NAK
15
DLE IN
DLE
10
XON IN
DC1
11
XOFF IN
DC3
13
SELECT OUT
GS
1D
POLL OUT
FS
1C
RES OUT
EOT
04
REQ OUT
ENQ
05
SOM OUT
STX
02
EOM OUT
ETX
03
AFF OUT
ACK
06
NEG OUT
NAK
15
DLE OUT
DLE
10
XON OUT
DC1
11
XOFF OUT
DC3
13
Proto-Cmd 1
ENQ
05
Proto-Cmd 2
VT
0B
Timeout on EOM ACK
20 (ms)
(Range: 0 - 255)
14
6-71
4630 and 4830 Bar Code Label Printers User's Manual
Fonts
Fonts may be selected using the Font, Select Type (cn) command.
6-72
Font
Selection
Font
Description
c0
7x9 standard
c1
7x11 OCR
c2
10x14 standard
c3-c6
User-defined fonts
c7
5x7 standard
c8-c19
User-defined fonts
c20
8 point standard
c21
12 point standard
c22
20 point standard
c23
OCR A
c24
OCR B size 2
c25
Outline font (monospaced 821 Standard)
c26
Outline font (monospaced 821 Bold)
c27
Outline font (proportional Dutch Roman 801)
c30
6 point bold
c31
8 point bold
c32
10 point standard
c33
10 point bold
c34
12 point bold
c35
16 point standard
c36
16 point bold
c37
20 point bold
c38
24 point standard
c39
24 point bold
c40
30 point bold
c41
36 point bold
Intermec Printer Language Commands
6
Printing 2D Symbologies
When you encode and print 2D symbologies, use the following guidelines:
•
Select a symbol size that can encode all the data being downloaded. If you
select one that is too small, then the symbol will not print. If you do not
know the amount of data you are sending, allow space for the largest
possible amount.
•
In Program mode, the data length is confined to 255 characters. This means
that the d3 command, which is used to define data in Program mode,
cannot be followed by more than 255 characters. To send more than 255
characters, you must send the data in Print mode using the d0 command.
•
To send more than 255 characters in Print mode with the d0 command, you
must separate the data into packets of 255 characters. These packets are
separated by <STX> and <ETX>.
•
The maximum amount of data that can be entered into a field with the d0
command is 3550 characters. However, if you are declaring d0 fields to be
much larger than necessary, you may run out of memory, especially if you
use the maximum value of 3550. To avoid wasting memory, estimate the
largest amount of data you will send and use a value that is close to that
amount.
6-73
7
Special Procedures
Special Procedures
7
This chapter contains instructions for:
•
Copying the entire RAM contents from one printer to another (cloning).
•
Copying selected formats, fonts, graphics, and pages from one printer to another
printer.
Performing Cloning
Cloning is a procedure that copies the RAM contents (configuration data,
formats, formats, pages, and graphics) from one printer (the sender printer) to
another printer (the receiver printer). By programming and configuring just
one printer and then cloning its RAM to other printers, you can configure a
large number of printers in much less time than it takes to program them
individually.
Before you perform the cloning procedure, you must be aware of the following
limits:
•
You can only clone from like printer to like printer. For example, you
cannot clone a 3400 printer to a 4630 or a 4830 printer. You also cannot
clone a 4630 to a 4830 printer and vice versa.
•
The sender and receiver printers must be running the same firmware
version.
•
The sender and receiver printer must have exactly the same amount of
static RAM installed.
•
If you are cloning printer configuration parameters to printers that are used
in a multi-drop environment, be sure to assign each printer a unique device
address when cloning is complete.
If you are not sure of the printer RAM configuration, firmware version, or
setup configuration, print a configuration test label. See Chapter 2 for more
information about printing a configuration test label.
7-3
4630 and 4830 Bar Code Label Printers User’s Manual
Preparing the Receiver Printer
Note: Cloning will erase any data stored in the receiver printer.
1. From the OFFLINE READY display, press Menu and then press ↑ or ↓
until you reach the Service menu.
2. Press Select and then press ↑ or ↓ until the display shows:
SERVICE MENU
CLONING
3. Press Select and then press ↑ or ↓ until the display shows:
CLONING
RECEIVER
4. Press Enter. The print is ready to receive data.
Preparing the Sender Printer and Downloading Data
1. Connect the main serial ports of the sender and the receiver printers with
an RS-232 null modem serial cable (Intermec P/N 049353).
2. From the OFFLINE READY display of the sender printer, press Menu and
then press ↑ or ↓ until you reach the Service menu.
3. Press Select and then press ↑ or ↓ until the display shows:
SERVICE MENU
CLONING
4. Press Select and then press ↑ or ↓ until the display shows:
CLONING
SENDER
5. Press Select. The display shows:
SENDER
EXECUTE TEST
The sender printer is ready to download data to the receiver printer.
6. Press Enter to download the RAM contents to the receiver printer. During
downloading, the display shows:
TRANSFERRING
When the downloading process is complete, the sender printer display
shows:
SENDER
EXECUTE TEST
7-4
Special Procedures
7
The receiver printer display shows:
CLONING
RECEIVER
Cloning is now complete. Disconnect the serial cable from the receiver printer.
To clone another printer
1. Use the menu panel on the new printer to designate it as the receiver
printer.
2. Connect the main serial port of the receiver printer to the serial cable
attached to the sender printer.
3. Press Enter on the sender printer menu panel.
Performing Selective Transfer
If you want to copy select fonts, formats, graphics, or pages from one printer to
another printer, but you do not want to clone the entire RAM contents, you can
use the Selective Transfer command. Use this command to set up different
printers to print the same label formats.
Note: The receiver printer must have enough RAM to accommodate the information
downloaded from the sender printer.
Preparing the Receiver Printer
Configure the receiver printer with the following communication settings:
•
9600 baud
•
7 data bits
•
Even parity
•
1 stop bit
Preparing the Sender Printer
1. Connect the main serial ports of the sender and the receiver printers with
an RS-232 null modem serial cable (Intermec P/N 049353).
2. From the OFFLINE READY display of the sender printer, press Menu and
then press ↑ or ↓ until you reach the Service menu.
7-5
4630 and 4830 Bar Code Label Printers User’s Manual
3. Press Select and the press ↑ or ↓ until the display shows:
SERVICE MENU
SELECTIVE TRANS
4. Press Select.
The sender printer is ready to download data to the receiver printer.
Sending Formats, Fonts, Pages, and Graphics to the
Receiver Printer
You can send pages, formats, fonts, and graphics from the sender printer to the
receiver printer, either all at once or as selected items. Before performing any of
the following procedures, you must have prepared both the sender and
receiver printers.
To download all pages, formats, fonts, and graphics
1. On the sender printer, press ↑ or ↓ until the display shows:
SELECTIVE TRANS
SEND ALL
2. Press Select. The display shows:
SEND ALL
EXECUTE TEST
3. Press Enter to download the data to the receiver printer. During
downloading, the display shows:
TRANSFERRING
4. When the downloading process is complete, the display on the sender
printer shows:
SEND ALL
EXECUTE TEST
5. Disconnect the serial cable from the receiver printer.
7-6
Special Procedures
7
To download specific pages, formats, fonts, or graphics
1. On the sender printer, press ↑ or ↓ until the display shows the item you
want to download, for example:
SELECTIVE TRANS
SEND FORMAT
2. Press Select and then press ↑ or ↓ until you see the number you want to
download, for example:
SEND FORMAT
4
3. Press Select. The display prompts you for a number to assign in the
receiver printer, for example:
TO FORMAT
1
4. Press ↑ or ↓ until you see the number you want and then press Select. In
this example, the display shows:
FORMAT 4 TO 1
EXECUTE TEST
5. Press Enter to download the item. In this example, you are downloading
format 4 from the sender printer to format 1 on the receiver printer.
6. When downloading is complete, the sender printer display shows:
SELECTIVE TRANS
SEND FORMAT
You can download another item to the receiver printer, or disconnect the
receiver printer and download data to a new receiver printer.
Setting the Maximum Print Speed
The 4630 printer can print up to 8 inches per second (ips) and the 4830 printer
can print up to 5 ips. You need to determine the print speed that produces the
highest quality labels for your application. For example, if you decide that your
printer operates best at 4.0 ips or lower, you may want to set the maximum
print speed to 4.0 ips. Setting the maximum print speed enables the printer
operator to print at any speed that does not surpass 4.0 ips.
Note: The Max Print Speed command only limits the print speed range that can be
selected from the menu panel. You can still set any print speed (up to 8 ips for the 4630
or 5 ips for the 4830) from the host by using the <SI>S configuration command.
7-7
4630 and 4830 Bar Code Label Printers User’s Manual
To set the maximum print speed
1. From the OFFLINE READY display press Menu and then press ↑ or ↓ until
you reach the Install menu
2. Press Select and then press ↑ or ↓ until the display shows:
INSTALL MENU
MAX PRINT SPEED
3. Press Select and then press ↑ or ↓ to select the print speed you want:
4630
Ranges from 2.0 ips to 8 ips (51 to 203 mm/second).
4830
Ranges from 2.0 ips to 5 ips (51 to 127 mm/second).
4. Press Enter to activate the new print speed.
5. Press Cont to return to the OFFLINE READY screen.
7-8
A
Printer Reference
Printer Reference
A
Use this appendix to find reference information on 4630 and 4830 printers.
Comparing the 4400 to the 4630 and 4830
Features of the 4400 printer and the 4630 and 4830 printers are compared in the
table below.
Feature
4400
4630
4830
86XX Emulation
Supported
Not Supported
Not Supported
Audible Alarm
Supported
Not Supported
Not Supported
Image Bands
Supported
Not Supported
Not Supported
Image Memory
Standard
Additional
~~
~~
1MB
4MB and 16MB SIMMs
1MB
4MB and 16MB SIMMs
Maximum Label Width
5.12 in. (130 mm)
6.7 in. (170 mm)
9.0 in. (228 mm)
Maximum Print Speed
10 ips (254 mm/s)
8 ips (203 mm/s)
5 ips (127 mm/s)
Maximum Print Width
4.4 in. (112 mm)
6.4 in. (163 mm)
8.5 in. (216 mm)
Media Sensitivity Numbers
Supported
Not Supported
Not Supported
Parallel Port
Supported
Supported
Supported
Print Length,
Standard/Optional
Unlimited
8/98 in. (20/249 cm)
6/98 in. (15/249 cm)
Print Resolution
203 dpi (8
dots/mm)
300 dpi (12 dots/mm)
300 dpi (12 dots/mm)
Printhead Resistance Test
Supported
Not Supported
Not Supported
Serial Ports
1
2
2
Set Printhead Pressure
Supported
Not Supported
Not Supported
Storage Memory
Standard
Additional
39K
256K
128K
(2) 1MB and 4MB flash
cartridges
128K
(2) 1MB and 4MB flash
cartridges
Tests and Service Functions:
Printhead, Ribbon Supply,
and Take-up Motors
Supported
Not Supported
Not Supported
Coax/Twinax
Supported
Supported
Supported
A-3
4630 and 4830 Bar Code Label Printers User’s Manual
4630 and 4830 Printer Specifications
This section lists the specifications and performance parameters for the 4630
and 4830 printers.
Communications
Interface
IEEE RS-232C or RS-422
Baud Rate
110, 300, 600, 1200, 2400, 4800, 9600, or 19,200
Character Set
ANSI ASCII character set
Word Length
Selectable 7-bit or 8-bit data format
Handshaking
XON/XOFF (in receive mode only) and CTS/DTR
Input Buffer
Approximately 7000 bytes.
XOFF is transmitted and DTR goes low when 750 bytes
are available in the buffer.
XON is transmitted and DTR goes high when 750 bytes
remain in the buffer.
Characters are transmitted with no parity from the
printer.
Electrical
Power Source
115/230 VAC, 50/60 Hz, auto ranging, switching
power supply.
Circuit Protection
(2) 8 amp, 250V fuses
Grounding
Unit must be connected to a properly grounded
receptacle.
Environmental
A-4
Operating Temperature
40º F to 100º F (4º C to 38º C)
Storage Temperature
32º F to 120º F (0º C to 49º C)
Humidity
10% to 95% non-condensing
Ventilation
Forced air movement
Dust
Non-conducting, non-corrosive
Printer Reference
A
Fonts
Resident Fonts
21 bitmapped fonts (includes OCR-A and OCR-B) and
three smooth scaleable outline fonts.
Optional Fonts
Proportional and monospaced fonts available.
Font Expansion
All fonts expandable vertically and horizontally; fonts
and graphics can be printed in four directions: 0°, 90°,
180° and 270°.
Indicators and Keys
LCD
2 x 16 characters
Control Panel Lights
Alert, On line, Power
Control Panel Keys
Feed/Reload, On line/Off line, Cancel
Menu Panel Keys
Select, Enter, Menu, Cont, ↑, ↓
Media
Width
4630
2.0" (50.8 mm) to 6.7" (170.2 mm)
4830
3.0" (76.2 mm) to 9.0" (228.6 mm)
Thickness
0.0025" (0.0635 mm) to 0.0100" (0.254 mm)
Type
Roll-fed, die-cut continuous, or fan-fold labels, tags or
tickets.
Supply Roll
8" (203 mm) maximum diameter on 1.5" (38 mm) to
3" (76 mm) cores
Internal Rewind
Accepts full 8" roll of label or label backing. Rewind
spindle accepts standard “core” of 1.5" and 3".
Label Material
Thermal transfer plain-coated papers, vinyl, Mylar,
metalized paper, non-woven fabric, fine woven fabric,
thermal-visible light scannable paper, infrared
scannable paper, thermal ticket/tag stock, thermally
sensitive plastic stock.
Thermal Ribbons
Standard widths: 3.0" (77 mm), 4.1" (104 mm), 5.4"
(137 mm), 6.7" (170 mm), and 8.6" (218 mm) 4830 only.
Media Sensing
Moveable “see-through” for die-cut labels and
reflective for tags with black, carbon-based striping.
A-5
4630 and 4830 Bar Code Label Printers User’s Manual
Media Dimensions
C
J
D
K
F
E
B
4630U-19
4630
Description
in
A Label width
6.70
B Backing width
Max
mm
4830
Min
in
mm
in
170
2.00
51
9.00
6.80
173
2.00
51
C Gap between labels
0.5
13
0.10
D Label length
100
2540
E Backing thickness
0.005
F Label thickness
Max
mm
Min
in
mm
229
3.00
76
9.10
231
3.00
76
2.5
0.5
13
0.10
2.5
0.50
13
100
2540
0.50
13
0.13
0.0023
0.06
0.005
0.13
0.0023
0.06
0.005
0.13
0.0023
0.06
0.005
0.13
0.0023
0.06
G Width of sensor opening
0.5
13
0.20
5
0.5
13
0.20
5
H Distance from edge of media
to edge of sensor
3.25
83
0.20
5
3.25
83
0.20
5
I Reflective sensor mark
length
4.00
102
1.0
25
4.0
102
1.0
102
J Distance between reflective
mark
100
2540
0.25
6.4
100
2540
0.25
6.4
K Reflective sensor mark
width
100
2540
0.10
2.5
100
2540
0.10
2.5
A-6
Printer Reference
A
Options
Coax/Twinax
Interface Card
For coax connections to an IBM 3270-type computer
systems or for twinax connections to IBM midrange
computers and AS/400 hosts.
Cutter with Tray
Maximum media thickness of 0.0075" (0.190 mm)—
4630 only.
Heavy-Duty
Cutter with Tray
For media thicknesses greater than 0.006" (0.152 mm).
Image Memory
Expansion
4MB and 16MB memory expansion for faster image
processing and printing longer, more complex labels.
Media Rewind
Hub
8" (203 mm) maximum outside diameter capacity
Self-Strip Adapter
with Label Taken
Sensor
Removes media backing from labels, one at a time.
Storage Memory
Expansion
1MB and 4MB flash cartridges (maximum 8MB) for
storing fonts and graphics.
Physical
Dimensions
4630 13.5" H x 12.5" W x 18" D
(343 mm x 317.5 mm x 457 mm)
4830 14.2" H x 15.3" W X 18" D
(360 mm x 387 mm x 457 mm)
Weight
4630
55 lbs. (24.8 kg)
4830
64 lbs. (29 kg)
A-7
4630 and 4830 Bar Code Label Printers User’s Manual
Printing
Type
Direct thermal or thermal transfer
Resolution
300 dots per inch (11.8 dots/mm)
Print Speed
4630
2.0" (51 mm) to 8.0" (203.2 mm) per second
4830
2.0" (51 mm) to 5.0" (127 mm) per second
Bar Code Modules
3.3 mil to 110 mil “X” dimension in picket or ladder
orientation
Maximum Print
Width
4630
6.4" (162.6 mm)
4830
8.5" (216 mm)
Maximum Print
Length
4630
10.0" (254 mm) with standard memory
4830
8.0" (203 mm) with standard memory
These values are expandable to 64" (1625.6 mm) with
the optional on board memory expansion module.
A-8
Minimum Print
Length
0.5" (12.7 mm)
White Space Slew
Rate
2.0" (51 mm) per second to 10.0" (254 mm) per second
Maximum Fields
Per Label
200; 10K data per label maximum
Minimum Dot
Size
0.0033" (0.084 mm) square
Label Retract
For use with cutter.
Printer Reference
A
Printer Functional Boundaries
Every printer feature has a functional limit that assumes unlimited common
memory. Since several functions may compete for common memory, the
memory limit may be reached before the functional limit is reached.
For example, even though you have a functional limit of 20 formats, you may
run out of memory before you can store 20 formats if you have downloaded
several large graphics. In cases like this, you may want to restructure your data
or purchase additional printer memory.
Parameter
Functional Limit
Bar Code Height
4 inches
Bar Code Narrow Bar Multiplier
50
Characters in a Field (Including
control characters and delimiters)
200
Characters in a Field Name
8
Field Data Offset
9999
Fields in a Format
200
Font Character Size
4 sq. inches
Formats
20 including default
Formats in a Page
26
Graphic Size
3 sq. inches
Graphics
100
Increment or Decrement Skip
Value
9999
Languages
9 seven-bit character sets;
2 eight-bit character sets
Length or Width of a Line or Box
9999 dots (50 inches)
Pages
10 including default
Quantity or Batch Size
9999
Slaves to a Field
20
User-Defined Fonts
16
A-9
4630 and 4830 Bar Code Label Printers User’s Manual
Bar Code Symbologies
This section lists and describes the available bar code symbologies.
Codabar Originally developed in 1972, Codabar is a numeric symbology most
commonly used in libraries, blood banks, and air parcel express applications.
Code 2 of 5 Code 2 of 5 is a straightforward numeric symbology developed in
the late 1960’s. It has been used for warehouse sorting systems, photofinishing
envelope identification, and for tracking sequentially numbered airline tickets.
All information is contained in the width of the bars; the spaces do not contain
information.
Code 11 Code 11 was developed in early 1977 to satisfy requirements for a
very high density, discrete numeric bar code. The most extensive application of
Code 11 has been for labeling telecommunications equipment.
Code 39 Code 39 is the first alphanumeric symbology ever developed and is
the standard non-retail bar code. It is a discrete, self-checking symbology of
variable length and is used mostly by the automobile and medical industries.
Code 93 Introduced in 1983, Code 93 was specially designed to complement
Code 39. With the correct reading equipment, the two alphanumeric codes may
be interchanged throughout a system without making any changes to software.
Code 128 Code 128 was introduced in 1981 as a very high density,
alphanumeric symbology. It is a variable length, continuous code that employs
multiple element widths.
EAN The European Article Numbering system (abbreviated as EAN) is a
numeric superset of UPC. EAN has both a version that uses 8 digits and a
version that uses 13 digits. The version with 13 digits encodes the same
number of bars as 12 digit UPC Version A, but the 13th digit is encoded into a
parity pattern at the left of the center guard bar.
Interleaved 2 of 5 Interleaved 2 of 5 is a high density, self-checking, continuous
numeric symbology, which has mainly been used in the distribution industry.
Interleaved 2 of 5 actually encodes two digits, one in the bars and one in the
spaces.
POSTNET The Postal Numeric Encoding Technique (POSTNET) uses binary
digits, represented as full bars and half bars, to provide a numeric bar code
symbology that is easily read and decoded by optical reading systems.
POSTNET provides both error detection and correction capabilities.
UPC Universal Product Code (UPC) is a subset of EAN. It is a fixed length,
numeric, continuous symbology employing four element widths. Two common
types of UPC are Version A, which encodes 12 digits, and Version E, which
encodes 6 digits. UPC has been used in the supermarket industry since 1973.
UPC supplemental code is intended for only periodical issue numbers.
A-10
Printer Reference
A
2D Symbologies
2D symbologies provide a more efficient way of encoding data than standard
bar code symbologies. 2D symbologies use two dimensions to hold data
instead of one, allowing much more information to be stored in a smaller
amount of space. Your printer provides the capability for printing both stacked
and matrix 2D symbologies.
2D Stacked Symbologies
2D stacked symbologies (such as PDF 417, Code 16K, and Code 49) consist of
short linear segments stacked on top of each other. In addition to being able to
condense a large amount of information into the stacked format, PDF 417
provides an extensive error detection and correction option. Up to 510
characters can be recovered if they are lost due to an error in scanning or if the
label is damaged.
2D stacked symbologies can be scanned with a laser scanner or imaging device
that features 2D code scanning capability.
Code 16K Introduced in 1988, Code 16K is an alphanumeric symbology
similar to Code 49 in that it employs multiple rows (from 2 to 16). Each row is
fixed length and uses a mirror image of the Code 128 coding patterns.
Code 49 Code 49 is an alphanumeric symbology developed in 1987 as a
means of labeling very small objects. A Code 49 bar code contains from two to
eight adjacent rows, each separated by a one-module separator bar.
PDF417 PDF417 is a stacked 2D symbology that provides the ability to scan
across rows of code. Each row consists of start/stop characters, row identifiers,
and symbol characters (called “codewords”). Each codeword consists of four
bars and four spaces and contain the actual data. In addition to being able to
condense a large amount of information into the stacked format, PDF 417
provides an extensive error detection and correction option. Up to 510
characters can be recovered if they are lost due to an error in scanning or if the
label is damaged. PDF 417 codes can be scanned with a laser scanner or
imaging device that features 2D code scanning capability.
2D Matrix Symbologies
2D matrix symbologies, such as Code One and Maxicode, use both the
horizontal and vertical axes to encode data even more efficiently than stacked
symbologies. 2D matrix codes are created as a matrix of square elements, with
each element being either white or black to encode data in a binary code.
Extensive error detection and correction codes are appended to 2D matrix
symbologies, often automatically.
A-11
4630 and 4830 Bar Code Label Printers User’s Manual
2D matrix symbologies generally cannot be read with a laser scanner. Instead,
they are read by a digital imager that captures the entire symbol at once
instead of scanning each component individually. Since the components of 2D
matrix symbologies are decoded after the image is captured, they permit very
fast data collection.
Code One Code One is a 2D matrix symbology that stores data directly in a
matrix in a checkerboard pattern. This matrix makes Code One especially
useful for applications such as small parts labels that do not provide sufficient
space for linear bar codes. Code One automatically generates error correction
symbol characters that are added to the matrix. In addition to data storage and
error correction symbols, each Code One symbol contains a set of horizontal
lines in the center, called a finder pattern, that helps readers quickly locate and
identify each symbol. Code One symbols also contain vertical reference bars to
help readers locate the relative positions of each data bit.
Code One symbols accommodate varying amounts of data using a different
method than other codes. Other codes adjust their size to fit the data exactly.
Code One symbols are divided into versions, with each version being a specific
size. Each version can accommodate an amount of data from one bit to the
maximum amount that will fit into that version. If more data is present than
the version can accommodate, the printer will not print the symbol.
Maxicode Maxicode is a fixed-size symbology that is made up of offset rows
of hexagonal elements arranged around a bullseye finder pattern. Each
hexagon represents one bit of information and is either black or white
depending on the state of the encoded data bit. United Parcel Service (UPS)
Research and Development developed Maxicode for the specific purpose of
encoding information about a parcel.
This symbology only encodes very specific data that is divided into the
following fields: a 5-digit zip code, a 4-digit zip code extension, a 3-digit
country code, a 3-digit class of service, and a string of uppercase letters,
numbers, or limited punctuation marks.
A-12
A
Printer Reference
International Character Sets
The following tables show which hex codes to download for international
characters not available in the U.S. character set. To use the tables, find the hex
code for the U.S. character that corresponds with the character in your
language.
4630/4830 Character Table
Use this table to find the correct hex codes for the international character sets
listed.
For a selected character set,
enter the hex value for the
US characters at the right to
print the characters below.
#
$
@
[
\
]
^
`
{
|
}
~
23
24
40
5B
5C
5D
5E
60
7B
7C
7D
7E
U.S. ASCII
#
$
@
[
\
]
^
`
{
|
}
~
U.K. ASCII
£
$
@
[
\
]
^
`
{
|
}
¯
Germany
#
$
§
Ä
Ö
Ü
^
`
ä
ö
ü
ß
France
£
$
à
°
ç
§
^
`
é
ù
è
¨
Norway/Denmark
#
$
@
Æ
Ø
Å
^
`
æ
ø
å
¯
Sweden/Finland
#
¤
É
Ä
Ö
Å
Ü
é
ä
ö
å
ü
Spain
£
$
§
¡
Ñ
¿
^
`
°
ñ
ç
~
Italy
£
$
§
°
ç
é
^
ù
à
ò
è
ì
Switzerland
#
$
à
°
ç
é
^
ù
ä
ö
ü
è
A-13
4630 and 4830 Bar Code Label Printers User’s Manual
Translation Character Table
If you are running your printer with Translation enabled, use this table to find
the right hex codes for the international character sets.
For a selected character
set, enter the hex value for
the US characters at the
right to print the characters
below.
!
#
$
@
[
\
]
^
`
{
|
}
~
21
23
24
40
5B
5C
5D
5E
60
7B
7C
7D
7E
U.S. ASCII
|
#
$
@
¢
\
!
¬
`
{
|
}
~
U.K. ASCII
|
#
£
@
$
\
!
¬
`
{
|
}
¯
Germany
!
#
$
§
Ä
Ö
Ü
^
`
ä
ö
ü
ß
France
!
£
$
à
°
ç
§
^
`
é
ù
è
¨
Norway/Denmark
!
Æ
Å
Ø
#
\
¤
^
`
æ
ø
å
ü
Sweden/Finland
!
Ä
Å
Ö
§
É
¤
^
é
ä
ö
å
ü
Spain
|
Ñ
Pt
@
[
\
]
¬
`
{
ñ
}
¨
Italy
!
£
$
§
°
ç
é
^
ù
à
ò
è
ì
Switzerland
!
#
$
à
°
ç
é
^
ù
ä
ö
ü
è
Extended Character Sets
Each internal font in the printer has a different character set associated with it
as shown in the following tables. The hex codes accompany each character.
A-14
Printer Reference
Characters in Fonts:
A
c0 (7 x 9 Standard), c1 (7 x 11 OCR), c2 (10 x 14 Standard), c7 (5 x 7 Standard)
ØØ
Ø1
Ø2
Ø3
Ø4
Ø5
Ø6
Ø7
Ø8
Ø9
ØA
ØB
ØC
ØD
ØE
ØF
1Ø
11
12
13
14
15
16
17
18
19
1A
1B
1C
1D
1E
1F
2Ø
21
22
23
24
25
26
27
28
29
2A
2B
2C
2D
2E
2F
3Ø
31
32
33
34
35
36
37
38
39
3A
3B
3C
3D
3E
3F
4Ø
41
42
43
44
45
46
47
48
49
4A
4B
4C
4D
4E
4F
5Ø
51
52
53
54
55
56
57
58
59
5A
5B
5C
5D
5E
5F
6Ø
61
62
63
64
65
66
67
68
69
6A
6B
6C
6D
6E
6F
7Ø
71
72
73
74
75
76
77
78
79
7A
7B
7C
7D
7E
7F
8Ø
81
82
83
84
85
86
87
88
89
8A
8B
8C
8D
8E
8F
9Ø
91
92
93
94
95
96
97
98
99
9A
9B
9C
9D
9E
9F
AØ
A1
A2
A3
A4
A5
A6
A7
A8
A9
AA
AB
AC
AD
AE
AF
BØ
B1
B2
B3
B4
B5
B6
B7
B8
B9
BA
BB
BC
BD
BE
BF
CØ
C1
C2
C3
C4
C5
C6
C7
C8
C9
CA
CB
CC
CD
CE
CF
DØ
D1
D2
D3
D4
D5
D6
D7
D8
D9
DA
DB
DC
DD
DE
DF
EØ
E1
E2
E3
E4
E5
E6
E7
E8
E9
EA
EB
EC
ED
EE
EF
FØ
F1
F2
F3
F4
F5
F6
F7
F8
F9
FA
FB
FC
FD
FE
FF
A-15
4630 and 4830 Bar Code Label Printers User’s Manual
Characters in Fonts: c20 (8 point); c21 (12 point); c22 (20 point); c25, c26, c28 (outline fonts); c30-c41
(monospace fonts, 6 point to 36 point)
ØØ
Ø1
Ø2
Ø3
Ø4
Ø5
Ø6
Ø7
Ø8
Ø9
ØA
1Ø
11
12
13
14
15
16
17
18
19
1A
ØB
ØC
ØD
ØE
ØE
1B
1C
1D
1E
1F
+
!
" # $
& ?
(
)
,
-
.
/
2Ø
21
22
23
24
25
26
27
28
29
2A
2B
2C
2D
2E
2F
0
1
2
3
4
5
6
7
8
9
:
;
<
=
>
?
3Ø
31
32
33
34
35
36
37
38
39
3A
3B
3C
3D
3E
3F
A
B
C D E
F
G H
I
J
K
L
M N O
41
42
43
46
47
49
4A
4B
4C
4D
\
]
4Ø
44
45
48
*
4E
4F
P
Q R S
T
U V
W X
Y
Z
[
5Ø
51
52
53
54
55
56
57
58
59
5A
5B
5C
5D
5E
5F
‘
a
b
c
d
e
f
g
h
i
j
k
l
m n
o
6C
6D
6E
6F
}
~
_
6Ø
61
62
63
64
65
66
67
68
69
6A
6B
p
q
r
s
t
u
v
w x
y
z
{
7Ø
71
72
73
74
75
76
77
78
79
7A
7B
7C
7D
7E
7F
8Ø
81
82
83
84
85
86
87
88
89
8A
8B
8C
8D
8E
8F
9Ø
91
92
93
94
95
96
97
98
9A
9B
9C
9D
AØ
¡
¢
£
¤
¥
A1
A2
A3
A4
A5
2
3
À
Á ? ?
Ä
CØ
C1
C4
C2
C3
¨
A7
A8
.
99
©
A9
1
a
AA
0
9E
®
9F
-
«
¬
AB
AC
AD
AE
AF
1
2
3
4
¿
BD
BE
BF
-
»
BA
BB
BC
Å Æ Ç È
É Ê
Ë
Ì
Í
Î
Ï
C5
C9
CB
CC
CD
CE
CF
µ ¶
B5
B1
§
1
4
B4
±
BØ
B3
A6
´
°
B2
|
|
B6
C6
B7
C7
B8
C8
B9
CA
D Ñ
Ò Ó Ô Õ Ö ×
Ø Ù Ú Û Ü
Ý
Þ ß
DØ
D1
D2
D8
D8
DA
DB
DD
DE
à
á
EØ
E1
o~
FØ
D3
D4
D5
â
ã
ä
å æ ç
è
é
ê
ë
ì
í
î
ï
E2
E3
E4
E5
E6
E7
E8
E9
EA
EB
EC
ED
EE
EF
ñ
ò
ó
ô
õ
ö
÷
ø
ù
ú
û
ü
ý
Io
ÿ
F1
F2
F3
F4
F5
F6
F7
F8
F9
FA
FB
FC
FD
FE
D6
D7
DC
DF
FF
4630U-31
A-16
Printer Reference
A
Characters in Font c23 (OCR A)
ØØ
Ø1
Ø2
Ø3
Ø4
Ø5
Ø6
Ø7
Ø8
Ø9
ØA
ØB
ØC
ØD
ØE
ØE
1Ø
11
12
13
14
15
16
17
18
19
1A
1B
1C
1D
1E
1F
2Ø
21
22
23
24
25
26
27
28
29
2A
2B
2C
2D
2E
2F
3Ø
31
32
33
34
35
36
37
38
39
3A
3B
3C
3D
3E
3F
4Ø
41
42
43
44
45
46
47
48
49
4A
4B
4C
4D
4E
4F
5Ø
51
52
53
54
55
56
57
58
59
5A
5B
5C
5D
5E
5F
6Ø
61
62
63
64
65
66
67
68
69
6A
6B
6C
6D
6E
6F
7Ø
71
72
73
74
75
76
77
78
79
7A
7B
7C
7D
7E
7F
8Ø
81
82
83
84
85
86
87
88
89
8A
8B
8C
8D
8E
8F
9Ø
91
92
93
94
95
96
97
98
99
9A
9B
9C
9D
9E
9F
AØ
A1
A2
A3
A4
A5
A6
A7
A8
A9
AA
AB
AC
AD
AE
AF
BØ
B1
B2
B3
B4
B5
B6
B7
B8
B9
BA
BB
BC
BD
BE
BF
CØ
C1
C2
C3
C4
C5
C6
C7
C8
C9
CA
CB
CC
CD
CE
CF
DØ
D1
D2
D3
D4
D5
D6
D7
D8
D8
DA
DB
DC
DD
DE
DF
EØ
E1
E2
E3
E4
E5
E6
E7
E8
E9
EA
EB
EC
ED
EE
EF
FØ
F1
F2
F3
F4
F5
F6
F7
F8
F9
FA
FB
FC
FD
FE
FF
A-17
4630 and 4830 Bar Code Label Printers User’s Manual
Characters in Font c24 (OCR B Size 2)
ØØ
Ø1
Ø2
Ø3
Ø4
Ø5
Ø6
Ø7
Ø8
Ø9
ØA
ØB
ØC
ØD
ØE
ØE
1Ø
11
12
13
14
15
16
17
18
19
1A
1B
1C
1D
1E
1F
2Ø
21
22
23
24
25
26
27
28
29
2A
2B
2C
2D
2E
2F
3Ø
31
32
33
34
35
36
37
38
39
3A
3B
3C
3D
3E
3F
4Ø
41
42
43
44
45
46
47
48
49
4A
4B
4C
4D
4E
4F
5Ø
51
52
53
54
55
56
57
58
59
5A
5B
5C
5D
5E
5F
6Ø
61
62
63
64
65
66
67
68
69
6A
6B
6C
6D
6E
6F
7Ø
71
72
73
74
75
76
77
78
79
7A
7B
7C
7D
7E
7F
8Ø
81
82
83
84
85
86
87
88
89
8A
8B
8C
8D
8E
8F
9Ø
91
92
93
94
95
96
97
98
99
9A
9B
9C
9D
9E
9F
AØ
A1
A2
A3
A4
A5
A6
A7
A8
A9
AA
AB
AC
AD
AE
AF
BØ
B1
B2
B3
B4
B5
B6
B7
B8
B9
BA
BB
BC
BD
BE
BF
CØ
C1
C2
C3
C4
C5
C6
C7
C8
C9
CA
CB
CC
CD
CE
CF
DØ
D1
D2
D3
D4
D5
D6
D7
D8
D8
DA
DB
DC
DD
DE
DF
EØ
E1
E2
E3
E4
E5
E6
E7
E8
E9
EA
EB
EC
ED
EE
EF
FØ
F1
F2
F3
F4
F5
F6
F7
F8
F9
FA
FB
FC
FD
FE
FF
4630U-30
A-18
Printer Reference
A
Code Page 850 Character Table
▲
12
!
"
22
07
08
09
0A
0B
0C
0D
0E
¶
§
➝
♠
06
➝
♣
05
➝
➝
11
21
♦
04
➝
▲
10
20
♥
03
➝
13
14
15
16
17
18
19
1A
#
$
%
&
'
(
)
∗
+
,
-
.
23
24
25
26
27
28
29
2A
2B
2C
2D
2E
➝
02
➝
01
1B
1C
0F
➝
00
➝
▲
▼
1D
1E
1F
2F
0
1
2
3
4
5
6
7
8
9
:
;
<
=
>
?
30
31
32
33
34
35
36
37
38
39
3A
3B
3C
3D
3E
3F
@ A B C D E F G H I J
40
41
42
43
44
45
46
47
48
49
P Q R S T U V W X Y
50
`
60
52
53
a b
62
63
51
61
p q
70
71
r
72
Ç ü é
80
81
82
c
55
d e
64
s t
73
74
65
u
75
â ä à
83
É æ Æ ô
92
54
93
84
85
56
57
f
g
66
67
58
59
4A
Z [
5A
h i j
68
69
K L M N O
4B
6A
5B
\
5C
6C
v w
x y
z
{
l
D6
78
7A
7B
7C
77
79
å ç ê ë è
E6
87
88
89
8A
4D
6D
} ˜
7E
7F
ï 8Cî 8Dì 8E
Ä Å
8F
8B
£ Ø × ƒ
97
98
9A
9B
9C
9D
á
í A2
ó ú ñ Ñ
A3
A4
A5
a
o
A6
A7
¿ ® ¬
1/
4
AC
AD
B9
BA
BB
BC
BD
BE
BF
C8
C9
CA
CB
CC
CD
CE
CF
Í D7
Î D8
Ï
D9
DA
DB
DC
DD
DE
B4
Á Â Á
B5
B6
B7
C0
C1
C2
C3
C4
C5
D4
l
D5
-F0
E1
F1
E2
F2
©
C7
D6
E3
E4
E5
E6
3
4
¶
§
F4
F5
F3
A8
¢ ¥ ¬
ã Ã
C6
Ó ß Ô Ò õ Õ µ
E0
AF
B8
B3
D3
AE
AA
B2
D2
9F
A9
B1
D1
i
9E
1/
2
AB
B0
∂ D Ê Ë È
-
7D
F6
D0
5F
6F
95
A1
5E
6E
91
A0
4F
]
5D
90
99
4E
k l m n o
6B
ö ò û ù ÿ Ö Ü ø
94
4C
ρ ρ Ú Û Ù y´
´ Y
E7
E9
..
EA
EB
÷
,
E8
F6
1
3
2
F7
F8
F9
FA
FB
FC
FD
EC
Ì
ED
DF
´
EE
EF
FE
FF
4630U-52
A-19
4630 and 4830 Bar Code Label Printers User’s Manual
ASCII Conversion Chart
FULL ASCII
Binary0
Hex1
Dec2
C393
Char4
Binary
Hex
Dec
C39
Char Control
Character Definitions5
00000000
00000001
00000010
00000011
00
01
02
03
00
01
02
03
%U
$A
$B
$C
NUL
SOH
STX
ETX
01000000
01000001
01000010
01000011
40
41
42
43
64
65
66
67
%V
A
B
C
@
A
B
C
NUL
SOH
STX
ETX
Null, or all zeroes
Start of Heading
Start of Text
End of Text
00000100
00000101
00000110
00000111
00001000
00001001
00001010
00001011
04
05
06
07
08
09
0A
0B
04
05
06
07
08
09
10
11
$D
$E
$F
$G
$H
$I
$J
$K
EOT
ENQ
ACK
BEL
BS
HT
LF
VT
01000100
01000101
01000110
01000111
01001000
01001001
01001010
01001011
44
45
46
47
48
49
4A
4B
68
69
70
71
72
73
74
75
D
E
F
G
H
I
J
K
D
E
F
G
H
I
J
K
EOT
ENQ
ACK
BEL
BS
HT
LF
VT
End of Transmission
Enquiry
Acknowledgement
Bell
Backspace
Horizontal Tab
Line Feed
Vertical Tab
00001100
00001101
00001110
00001111
00010000
00010001
00010010
00010011
0C
0D
0E
0F
10
11
12
13
12
13
14
15
16
17
18
19
$L
$M
$N
$O
$P
$Q
$R
$S
FF
CR
SO
SI
DLE
DC1
DC2
DC3
01001100
01001101
01001110
01001111
01010000
01010001
01010010
01010011
4C
4D
4E
4F
50
51
52
53
76
77
78
79
80
81
82
83
L
M
N
O
P
Q
R
S
L
M
N
O
P
Q
R
S
FF
CR
SO
SI
DLE
DC1
DC2
DC3
Form Feed
Carriage Return
Shift Out
Shift In
Data Link Escape
Device Control 1 (XON)
Device Control 2
Device Control 3 (XOFF)
00010100
00010101
00010110
00010111
00011000
00011001
00011010
00011011
14
15
16
17
18
19
1A
1B
20
21
22
23
24
25
26
27
$T
$U
$V
$W
$X
$Y
$Z
%A
DC4
NAK
SYN
ETB
CAN
EM
SUB
ESC
01010100
01010101
01010110
01010111
01011000
01011001
01011010
01011011
54
55
56
57
58
59
5A
5B
84
85
86
87
88
89
90
91
T
U
V
W
X
Y
Z
%K
T
U
V
W
X
Y
Z
[
DC4
NAK
SYN
ETB
CAN
EM
SUB
ESC
Device Control
Negative Acknowledge
Syncronous Idle
End Transmission Block
Cancel
End of Medium
Substitute
Escape
00011100
00011101
00011110
00011111
00100000
00100001
00100010
00100011
1C
1D
1E
1F
20
21
22
23
28
29
30
31
32
33
34
35
%B
%C
%D
%E
SP
/A
/B
/C
FS
GS
RS
US
SP6
!
"
#
01011100
01011101
01011110
01011111
01100000
01100001
01100010
01100011
5C
5D
5E
5F
60
61
62
63
92
93
94
95
96
97
98
99
%L
%M
%N
%O
%W
+A
+B
+C
\
]
^
_
`
a
b
c
FS
GS
RS
US
SP
DEL
File Separator
Group Separator
Record Separator
Unit Separator
Space
Delete
00100100
00100101
00100110
00100111
00101000
00101001
00101010
00101011
24
25
26
27
28
29
2A
2B
36
37
38
39
40
41
42
43
/D
/E
/F
/G
/H
/I
/J
/K
$
%
&
'
(
)
*
+
01100100
01100101
01100110
01100111
01101000
01101001
01101010
01101011
64
65
66
67
68
69
6A
6B
100
101
102
103
104
105
106
107
+D
+E
+F
+G
+H
+I
+J
+K
d
e
f
g
h
i
j
k
00101100
00101101
00101110
00101111
00110000
00110001
00110010
00110011
2C
2D
2E
2F
30
31
32
33
44
45
46
47
48
49
50
51
/L
/M
/N
/O
/P7
/Q
/R
/S
,
.
/
0
1
2
3
01101100
01101101
01101110
01101111
01110000
01110001
01110010
01110011
6C
6D
6E
6F
70
71
72
73
108
109
110
111
112
113
114
115
+L
+M
+N
+O
+P
+Q
+R
+S
l
m
n
o
p
q
r
s
0
1
2
3
4
5
00110100
00110101
00110110
00110111
00111000
00111001
00111010
00111011
34
35
36
37
38
39
3A
3B
52
53
54
55
56
57
58
59
/T
/U
/V
/W
/X
/Y
/Z
%F
4
5
6
7
8
9
:
;
01110100
01110101
01110110
01110111
01111000
01111001
01111010
01111011
74
75
76
77
78
79
7A
7B
116
117
118
119
120
121
122
123
+T
+U
+V
+W
+X
+Y
+Z
%P
t
u
v
w
x
y
z
{
Bit positions are 76543210
Hexadecimal value
Decimal value
Code 39 character(s)
ASCII character
Hold down Control key
and press key to left
of definition
SP is the SPACE character
The Code 39 characters
/P through /Y may be
interchanged with the
numbers 0 through 9
May be interchanged with
%X or %Y or %Z
is the DELETE character
00111100
00111101
00111110
00111111
3C
3D
3E
3F
60
61
62
63
%G
%H
%I
%J
<
=
>
?
01111100
01111101
01111110
01111111
7C
7D
7E
7F
124
125
126
127
%Q
%R
%S
%T8
|
}
~
Notes
6
7
8
9
9
ASCI7x10
A-20
B
Communications Reference
Communications Reference
B
This chapter provides information on interfaces and protocols for integrating your
printer into a data collection network.
Communication Protocols
The printer supports the flow control and block transfer protocols described in
this section (all are Point-to-Point protocols except Multi-Drop protocol).
Application programs and ROM BIOS determine which protocols your
computer can support. For more detailed information, refer to the Intermec
Data Communications Reference Manual (Intermec P/N 044737).
Intermec “Standard”
Intermec “Standard” protocol is a proprietary block transfer/status response
protocol. Except for single character status commands (<ENQ> and <VT>),
data is transmitted in message blocks beginning with the start of text (<STX>)
character and ending with the end of text (<ETX>) character. Message blocks
can be up to 255 or 512 characters, including the start of text and end of text
characters.
The printer returns its highest priority status when it receives a valid block
(<STX> data <ETX>) or when it receives the status request command <ENQ>.
When the printer receives the status dump command (<VT>), the printer
returns all active status. The printer status response time ranges from 30 ms to
100 ms depending on the complexity of the received message block. In the case
of a transmission error, the printer responds with a <NAK> and discards the
entire message block.
Printer status conditions in descending order of priority, status response
characters, and pin 11/20 states are shown in the following table.
Printer Status
Character
Pin 11/20
Buffer Already Full
GS
Busy
Ribbon Fault
US
Busy
No Label Stock
EM
Busy
Buffer Now Full
DC3
Busy
Printhead Hot
SI
Busy
Offline (Paused)
DC3
Busy
Label at Strip Pin
FS
Ready
Skipping
DC1
Ready
Printing
DC1
Ready
Ready/Online
DC1
Ready
B-3
4630 and 4830 Bar Code Label Printers User’s Manual
Note: Do not confuse the DC1 and DC3 status characters in “Standard” protocol with
the XON/XOFF software flow control characters.
When the printer returns Buffer Now Full (<DC3>) status, the currently
received message block is accepted. At this time, the printer can accept short
messages to allow parsing of immediate commands such as Reset (<DLE>) or
Cancel Batch Printing (<EM>). However, if the printer responds with a <GS>
to any message block, the buffer is already full and the entire message block
has been discarded.
XON/XOFF
When you select the XON/XOFF protocol, software and hardware flow control
are concurrently enabled. Software flow control uses the ASCII characters
<DC1> (XON) and <DC3> (XOFF) to start and stop the flow of data from the
host to the printer. Hardware flow control uses pin 20 on the printer’s serial
port to indicate “Ready” or “Busy” for data flow control. Status responses
conform to the table on the preceding page except that <DC2> is substituted
for <DC1> and <DC4> is substituted for <DC3>.
Pin 20 reports “Ready” and a <DC1> (XON) is transmitted when the printer
finishes reloading at power-up. It reports “Busy” when the printer’s input
buffer fills with 3116 bytes of data. If the host ignores pin 20 and continues to
transmit data, the printer transmits a <DC3> (XOFF) after receiving 15
additional characters. The printer continues to transmit a <DC3> after every
15 characters received if the host continues to transmit data. Data integrity is
not guaranteed if this happens.
Pin 20 becomes “Ready” when the printer has transferred all the data from the
input buffer. If a <DC3> was sent, the printer transmits a <DC1> (XON) and
the host may resume transmission. When the printer is switched to Offline, pin
20 becomes “Busy” and a <DC3> is transmitted. When the printer is switched
to Online (and the input buffer is empty), pin 20 becomes “Ready” and a DC1
is transmitted.
Printer XON/XOFF operation is shown in the following state table:
# of Bytes
Received
Online/
Offline
Pin 20
Transmit
Don’t Care
Offline
Busy
DC3
3116
Online
Busy
3116 + each 15
Online
Busy
DC3
Online
Ready
DC1 (if DC3 was sent)
thereafter
Buffer Empty
Note: Hardware flow control does not work with a multi-drop or modem connection.
B-4
Communications Reference
B
<STX> and <ETX> are optional with XON/XOFF, which lets you use them for
comments or other characters that you want the printer to ignore. If an <ETX>
is downloaded, the printer will ignore all the data between it and the next
<STX>. Once the <STX> is downloaded, the printer starts reading the data
again.
XON/XOFF, No Status
This protocol is identical to XON/XOFF protocol except that status is not
returned after each message received. However, status is still returned for the
status request (<ENQ>) and the status dump (<VT>) commands.
Polling Mode D
Polling Mode D is a block transfer protocol (Intermec proprietary) that
transmits data in blocks of up to 255 characters, including protocol overhead.
The blocks are framed with LRC characters for additional data integrity.
Polling Mode D is normally used for point-to-point networks that connect the
printer to an Intermec port concentrator (RS-232C or RS-422 are acceptable).
This protocol is enabled from the printer.
Multi-Drop
Multi-Drop lets you connect up to 32 devices to an Intermec controller on a
four-wire RS-485 (two twisted pair). This protocol is similar to Polling Mode D
except each device has a unique address (POL and SEL character). You must
use an RS-485, which is automatically enabled when you enable Multi-Drop. Be
sure to specify a unique address for the printer and verify that the baud rate is
between 2,400 and 19,200.
Host Requirements
The 4630 and 4830 printers have the following hardware and software
requirements:
•
The host computer must use the American Standard Code for Information
Exchange (ASCII) for data communications.
•
A serial port must be available on the host (unless I/O options are
installed) if you are connecting it directly to the printer.
•
The host must support at least one of the following data communications
interfaces: EIA RS-232, RS-422, or RS-485.
For information about configuring the host or the controller, refer to the
manual for that device.
B-5
4630 and 4830 Bar Code Label Printers User’s Manual
Communication Protocol Characters
The following table shows the characters available for different protocols. Refer
to the protocol you are using for your system.
Protocol Characters
Standard
XON/XOFF
Polling Mode D
Multi-Drop
Select In
GS
GS
Poll In
FS
FS
Reset In
EOT
EOT
Request for Acknowledgment In
ENQ
ENQ
Start of Message In
STX
STX
STX
STX
End of Message In
ETX
ETX
ETX
ETX
Acknowledgment In
ACK
ACK
Negative Acknowledgment In
NAK
NAK
DLE
DLE
Data Line Escape In
DLE
DLE
XON In
DC1
XOFF In
DC3
Select Out
GS
Poll Out
FS
Reset Out
EOT
EOT
Request for Acknowledgment
Out
ENQ
ENQ
Start of Message Out
STX
STX
End of Message Out
ETX
ETX
Acknowledgment Out
ACK
ACK
NAK
NAK
DLE
DLE
20 (DEC)
20 (DEC)
Negative Acknowledgment Out
NAK
Data Line Escape Out
DLE
DLE
XON Out
DC1
XOFF Out
DC3
Status Enquiry In
ENQ
ENQ
Status Dump In
VT
VT
Timeout on EOM ACK
B-6
Communications Reference
B
Communication Boundaries
The information below applies to all the printer supported protocols.
Parameter
Maximum Capacity
Printer buffer in bytes
2096 (Standard protocol)
3372 (XON/XOFF, READY/BUSY)
Number of bytes in the buffer
when the printer stops
accepting data.
1841 (Standard Protocol)
3116 (XON/XOFF, READY/BUSY)
Number of bytes in the buffer
when the printer resumes
accepting data.
1840 (Standard)
2604 (XON/XOFF, READY/BUSY)
Message block size
255, 512 (Standard, Polling Mode D, Multi-Drop)
Receivable characters after
“Busy”
256
Message delay
9999 ms
Character delay
9999 ms
Device Address number
(Multi-Drop only)
A to Z, 0 to 5
Communication Interfaces
The printer supports serial communications with the following EIA interfaces:
RS-232C, RS-422, RS-485.
RS-232C The RS-232C serial interface is used in all asynchronous point-topoint full- or half-duplex direct data communications or modem control. The
cable connected to the printer must have the pin assignments listed in the
following table to operate properly under RS-232.
RS-422 The RS-422 interface is used in long line point-to-point direct connect
installations. The cable connected to the printer must have the pin assignments
listed in the following table to operate properly under RS-422.
RS-485 The RS-485 serial interface is used for multi-drop installations only.
The cable connected to the printer must have the pin assignments listed in the
following table to operate properly under RS-485.
B-7
4630 and 4830 Bar Code Label Printers User’s Manual
Printer Serial Ports
The serial port connectors are located on the printer’s rear panel. They are
25-pin “D” style subminiature receptacles. The RS-232/422/485 ports are wired
as a data terminal equipment (DTE)
device.
Pin
Description
1
Chassis ground (shield)
2
TXD (RS-232)
3
RXD (RS-232)
4
RTS (4.7kΩ to +5VDC)
5
CTS (input)
7
Signal ground
9
TXD + (RS-422)
10
TXD - (RS-422)
18
RXD + (RS-422)
19
RXD - (RS-422)
20
DTR (output)
25
TXDTXD+
DTR
RXDRXD+
SG
CTS
RTS
RXD
TXD
GND
4630U-18
Unlisted pins are not used.
Interface Cables and Connectors
There are many different cabling options available with the printer. Your choice
of cabling depends on the network configuration, hardware interface, protocol
used, cabling distance, and the electrical and environmental conditions in
which you are operating the printer. For typical installations, Intermec
recommends the following:
B-8
•
Shielded cable, minimum 24 gauge
•
25-pin “D” style subminiature connector with metal backshell
•
Cable shield connected to metal backshell
•
EIA RS-232, RS-422, or RS-485 electrical interface
Communications Reference
B
Intermec Cables
Intermec offers a full line of interface cables. These cables are not included with
the printer and must be ordered separately. Refer to the Intermec Product
Catalog for RS-232 cables or contact your Intermec representative for more
information.
Cable Schematics
The following diagrams show cable schematics for some of the more commonly
used cables.
RS-232 Null Modem Cable for PC with 25-Socket Serial Port
SHIELD
25-PIN (PLUG) D-SUB
METAL BACKSHELL
25-PIN (SOCKET) D-SUB
METAL BACKSHELL
CHASSIS GROUND
1
1
CHASSIS GROUND
TRANSMITTED DATA
2
3
RECEIVED DATA
RECEIVED DATA
3
2
TRANSMITTED DATA
8
CARRIER DETECT
REQUEST TO SEND
4
CLEAR TO SEND
5
DATA SET READY
6
GROUND
7
20
7
6
8
4
DATA TERMINAL READY
CARRIER DETECT
20 DATA TERMINAL READY
5
PC
GROUND
DATA SET READY
CLEAR TO SEND
Printer
Note: The metal backshell is connected directly
to the shield to achieve electrostatic discharge
(ESD) immunity.
4630U-33
B-9
4630 and 4830 Bar Code Label Printers User’s Manual
RS-232 Null Modem Cable for PC with 9-Socket Serial Port
SHIELD
9-PIN (SOCKET) D-SUB
METAL BACKSHELL
25-PIN (PLUG) D-SUB
METAL BACKSHELL
1
CHASSIS GROUND
RECEIVED DATA
2
2
TRANSMITTED DATA
TRANSMITTED DATA
3
3
RECEIVED DATA
8
CARRIER DETECT
CLEAR TO SEND
8
REQUEST TO SEND
7
DATA TERMINAL READY
4
6
DATA SET READY
DATA SET READY
CARRIER DETECT
6
20
5
DATA TERMINAL READY
CLEAR TO SEND
4
REQUEST TO SEND
5
7
GROUND
PC
Printer
GROUND
1
Note: The metal backshell is connected directly
to the shield to achieve electrostatic discharge
(ESD) immunity.
RS-422/RS-485 Multi-Drop Cable
SHIELD
1
Input RxDB
18
Input RxDA
19
1
+
-
13
16
4
Output TxDA
Output TxDB
5
10
9
Printer
+
14
19
Host
4630U-32
B-10
4630U-34
G
Glossary
Glossary
G
ASCII
American Standard Code for Information Interchange. A standard, 7-bit
character code used for computing.
Backing
Silicon release liner on media to which labels are attached until ready for use.
Bar Code
A printed machine-readable code that consists of parallel bars of varied width
and spacing.
BEL
A character that sends an error message.
Character Set
Refers to specific letters, numerals, and symbols that support a particular
language (For example, French, US ASCII).
Cloning
A procedure that copies the RAM contents (configuration, formats, fonts, pages
and graphics) from the memory of one printer to the memory of another.
Configuration
The current settings that determine the operating characteristics of the printer.
Control Panel
A panel on the printer containing the operating keys, liquid crystal display,
and indicator lights.
Cutter
An optional device for the printer that cuts individual labels and drops them
into a tray.
Data File
The collection of data and printer commands that, when sent to the printer, is
merged with a format file to print a label.
Data Line Print
A mode of operation in which the printer prints each command (accompanied
by its ASCII code) that it receives from the host.
G-3
4630 and 4830 Bar Code Label Printers User’s Manual
Density
The amount of information encoded in a given area.
Direct Thermal
A method of thermal printing in which images are printed when heat from the
thermal printhead produces a black mark on the media.
Display
Two-line screen on the control panel that displays messages such as printer
status, menus, commands, and errors.
Drag
A method of bar code printing in which all the bars are printed at once, in
parallel. The bar code appears across the width of the label.
EAN
European Article Numbering. A bar code used widely in Europe.
Field
A graphic element that is the basic unit of a format. The four basic types of
fields are bar code, graphic, line, and text.
Fixed Data Field
Bar code and text fields that never vary from one label to the next; the data in a
fixed field is a permanent part of the format.
Fixed Format
A format in which the data never varies from one label to the next such as a
return address label. A fixed format needs no additional data to print a label.
Font
A character set of a given type size and style. See also Character Set.
Font File
See Soft Font.
Form Feed
A printer control panel button that advances the media.
Format File
The arrangement of fields on a label.
G-4
Glossary
G
Graphic
A bitmap picture downloaded to the printer by the host before printing.
HIBC
Health Industry Bar Code.
Human-Readable
See Text.
Imaging
The process of generating a picture of the label in printer memory.
Increment/Decrement Field
Bar code or text fields the printer automatically changes from one label to the
next. For example, a batch of labels with serial number text or bar code fields,
that change from 001, to 002, to 003, and so on.
Index
To move from the start of the label to the start of print. With continuous media,
to advance the media over the “label gap” to the “edge” of the next label.
Interpretive Field
A text field that describes the data in the associated bar code field.
ISO
International Organization for Standardization. An internationally accepted 7bit character code. (The US version is ASCII.)
IPS
Inches per second. A measurement of print speed that measures the number of
inches of media that is printed each second.
Label
The part of the media on which data is printed.
Label Gap
The space between labels on die-cut label stock.
G-5
4630 and 4830 Bar Code Label Printers User’s Manual
LCD
Liquid crystal display. A display comprised of groups of transparent
anisotropic liquid segments that are sandwiched between two transparent
electrodes. Application of an electric field across a segment changes the
reflectivity of the liquid and it becomes opaque.
Margin
The distance between the edge of a label and where the printing starts on that
label. See also Top-of-Form.
Media
The label stock on which the printer prints labels. Media can be made of plain
paper, polyester, thermally reactive paper, or other materials with adhesive
backing.
Media Rewind Hub
A device that rewinds media and media backing. It is useful for printing
batches of labels and works with the self-strip printer option.
Menu
A list of commands accessible through the Menu Panel on the printer. Menus
contain submenus and selections of printer features.
Mnemonic Code
An acronym or abbreviation for a computer instruction, routine or format. For
example, <STX> represents the start of text.
Multi-Drop
A protocol capable of controlling communications between a single controller
and multiple devices.
Nibblized
A software term that refers to grouping bits into sets of four, called nibbles.
Usually bits are grouped into sets of eight, called bytes.
OCR Font
A font that is recognized by optical character recognition.
Offline
The state in which the printer is not able to carry out two-way communication
with the host.
G-6
Glossary
G
Online
The state in which the printer is able to carry out two-way communication with
the host.
Page
A group of labels that are always printed together. When labels on a page
share the same data, it reduces the number of commands that must be sent to
the printer.
Parallel
A communication scheme in which the bits of a byte are transferred
simultaneously over a multistrand cable.
Parameters
The operating limits of the printer.
Picket
A method of bar code printing in which the bars in the bar code are printed one
at a time, in a series. The bar code appears along the length of the label.
Pitch
(1) The number of characters printed in one horizontal inch determined by the
increment by which the printer platen moves. (2) Rotation of a bar code symbol
about an axis parallel to the direction of the bars.
Point Size
Font height; 72 points equals 1 inch as measured from slightly above the top of
the uppercase letters to slightly below the bottom of the lowercase descenders.
Polling Mode D
A protocol capable of controlling communications between multiple devices
and a single multiport controller.
Print Speed
Measured in inches per second (IPS), the rate at which media travels past the
printhead.
Printhead
The mechanism inside the printer that prints.
G-7
4630 and 4830 Bar Code Label Printers User’s Manual
Printhead Elements
The parts of the printhead that print by placing a mark on the label when
heated. Each element is switched on and off separately in order to react with
the media or thermal transfer ribbon to create a mark on the label.
Printhead Range
The range over which the resistance of the wires that carry energy to the
printhead elements can vary before sending a warning. The wires are tested
with each Printhead Test.
Printhead Test
A test that takes place each time the printer is turned on, or receives a specific
command from the host. This test makes sure the resistance of the wires that
carry energy to the printhead elements are within the acceptable range, which
ensures the temperature of the elements is within the acceptable temperature
range.
Ready
The state in which the printer is able to print; the normal operating state of the
printer.
Ready/Busy Line
Pin 11 of the rear panel connector. Indicates the printer is ready or not ready.
RS-232
Standard for serial binary data interchange. The standard covers the physical,
electrical, and functional characteristics of the interface.
RS-422
Standard for the voltage and impedance levels for serial data transmission on
balanced lines.
RS-485
Standard for allowing multiple devices to share a common set of serial data
communication lines. The signaling is very similar to RS-422. The maximum
number of devices allowed is 32.
Scan
To read a bar code with a device known as a scanner, which converts optical
information into electrical signals.
G-8
Glossary
G
Scannable
A symbol that can be successfully scanned and correctly decoded.
Selective Transfer
A procedure that copies selected formats, fonts, graphics, or pages stored in the
memory of one printer to the memory of another.
Self-Strip
An optional device for the printer that presents each label after it is printed,
with the backing removed so it may be applied immediately.
Sensitivity
The responsiveness of thermal media, or of thermal transfer ribbon, to heat; it
is determined by the time required for a unit measure of heat to affect the
media or ribbon.
Serial
A communication scheme in which the bits of a byte are transferred one at a
time.
Skip
To move the paper at slew speed to the next label.
Soft Font
A file stored in the printer to provide the ability to print text using fonts that
are not resident in the printer.
Standard Protocol
A communications protocol capable of controlling communications between
two devices connected by a single data communication line.
Symbology
A scheme for encoding data as bar code. Code 39, Interleaved 2 of 5, and
Codabar are examples of different symbologies.
Thermal Transfer
A method of printing by which heat from the printhead melts ink from the
ribbon onto media. The ink adheres to the media as it cools.
Top-of-Form
The point at which printing can start on a label. Separated from the edge of the
label by the margin.
G-9
4630 and 4830 Bar Code Label Printers User’s Manual
UPC
Universal Product Code. Bar code used widely in the United States.
User-Defined Characters (UDC)
See Graphic.
User-Defined Fonts (UDF)
See Soft Font.
Variable Data Field
Bar code and text fields that change from one label to the next.
XON/XOFF
A protocol that stops the host from sending data when the printer buffer fills
up and starts it again when the buffer empties.
G-10
I
Index
Index
Numbers, Symbols
2D matrix symbology
Code One, A-12
Maxicode, A-12
printing guidelines, 6-73
2D stacked symbology
Code 16K, A-11
Code 49, A-11
PDF417, A-11
printing guidelines, 6-73
2D symbology, A-11
↑ key, 2-5
↓ key, 2-5
A
Abort Print Job command, 6-19
adjusting print alignment, 2-12
Alert light, 2-4
Alphanumeric Field Separator command, 6-21
AS/400, connecting printer to, 1-11
ASCII conversion chart, A-20
ASCII zero, selecting, 2-22
Auto-Transmit 1, 2, 3, Disable command, 6-31
Auto-Transmit 1, Enable command, 6-30
Auto-Transmit 2, Enable command, 6-30
Auto-Transmit 3, Enable command, 6-31
B
bar code
2D symbologies, A-11
Codabar, A-10
Code 11, A-10
Code 128, A-10
Code 16K, A-11
Code 2 of 5, A-10
Code 39, A-10
Code 49, A-11
Code 93, A-10
Code One, A-12
EAN, A-10
field sizing, 5-20
Interleaved 2 of 5, A-10
Maxicode, A-12
PDF417, A-11
POSTNET, A-10
UPC, A-10
bar code field, 5-8
Bar Code Field Editing commands, 6-12
Bar Code Field, Create/Edit command, 6-50
bar code symbology, A-10
Bar Code, Select Type command, 6-38
Codabar, 6-40
I
Code 11, 6-40
Code 128, 6-41
Code 16K, 6-43
Code 2 of 5, 6-40
Code 39, 6-39
Code 49, 6-43
Code 93, 6-39
Code One, 6-45
HIBC Code 128, 6-50
HIBC Code 39, 6-42
Interleaved 2 of 5, 6-39
Maxicode, 6-48
PDF417, 6-43
POSTNET, 6-43
UPC/EAN, 6-41
Batch Count, Set command, 6-22
Bitmap Cell Height for Graphic or UDF, Define
command, 6-51
Bitmap Cell Width for Graphic or UDF, Define
command, 6-51
bitmap font, 5-9
Bitmap UDF Editing commands, 6-12
Bitmap User-Defined Font, Clear/Create command,
6-52
Border Around Human-Readable Text, Define
command, 6-52
bouncer assembly, cleaning, 3-6
box field
Create/Edit command, 6-52
defining, 5-12
example format, 5-12
Box Field Editing commands, 6-13
buffer, printing contents, 2-13
C
cable schematic
RS-232 null modem, 25 pin - 25 socket connectors,
B-9
RS-232 null modem, 25 pin - 9 socket connectors,
B-10
RS-422/485 multi-drop, B-10
cables, B-9
cabling in noisy electrical environments, 1-12
cam adjustment bracket, resetting, 2-15
Cancel key, 2-4
character fields, 5-9
Character Origin Offset, Define command, 6-53
Character Rotation or Bar Code Ratio, Define command,
6-53
character set
Code Page 850, A-19
international, A-13
selecting, 2-22
I-3
4630 and 4830 Bar Code Label Printers User’s Manual
character table
4630 and 4830, A-13
IBM language translation, A-14
cleaning
bouncer assembly, 3-6
drive roller, 3-5
heavy-duty cutter, 3-7
media guides, 3-6
printer cover, 3-8
printhead, 3-4
standard cutter, 3-8
tear bar, 3-5
Clear Data From Current Field command, 6-22
Clear-All Data command, 6-22
cloning, 7-3
preparing receiver printer, 7-4
preparing sender printer, 7-4
closing printer cover, 1-5
Codabar, 6-40, A-10
Code 11, 6-40, A-10
Code 128, 6-41, A-10
Code 16K, 6-43, A-11
Code 2 of 5, 6-40, A-10
Code 39, 6-39, A-10
Code 39 Prefix Character, Define command, 6-53
Code 49, 6-43, A-11
Code 93, 6-39, A-10
Code One, 6-45, A-12
Code Page 850 character set, A-19
command set
Configuration commands, 6-30
Immediate commands, 6-19
listing by command syntax, 6-8
listing by function, 6-12
listing by name, 6-4
Print mode commands, 6-21
Program mode commands, 6-37
summary, 6-3
Test and Service mode commands, 6-66
command tables, 6-67
Command Tables, Load command, 6-54
Command Terminator 1 command, 6-22
Command Terminator 2 command, 6-22
communication boundaries, B-7
communication protocol characters, downloading, B-6
communications
host requirements, B-5
parallel interface, 6-3
printer serial port, B-8
problems, 4-6
reference information, B-3
RS-232 interface, B-7
RS-422 interface, B-7
RS-485 interface, B-7
specifications, A-4
I-4
verifying, 1-14
configuration
default values, 2-27
hardware test label, 2-26
printing test label, 1-9, 2-26
user-defined test label, 2-26
Configuration commands
Auto-Transmit 1, 2, 3, Disable, 6-31
Auto-Transmit 2, Enable, 6-30
Auto-Transmit 3, Enable, 6-31
Control Panel Access Permission, Set, 6-31
Cutter Enable/Disable, 6-31
Dark Adjust, Set, 6-32
End-of-Print Skip Distance, 6-32
IBM Language Translation, Enable/Disable, 6-32
Intercharacter Delay, Set, 6-33
Label Rest Point, Adjust, 6-33
Label Retract Distance, Set, 6-34
Label Retract, Enable/Disable, 6-33
Label Stock Type, Select, 6-34
Maximum Label Length, Set, 6-34
Message Delay, Set, 6-34
Online/Offline On Power Up, 6-35
Postamble, Set, 6-35
Preamble, Set, 6-35
Print Speed, Set, 6-35
Printer Language, Select, 6-36
Self-Strip, Enable/Disable, 6-36
Top of Form, Set, 6-36
TTR/Direct Thermal Media Grade, Select, 6-37
Configuration menu, 2-8
Configuration Parameters, Transmit command, 6-23
configuring
changing label settings, 2-23
dark adjust, 2-10
printer serial port, 1-13
setting X and Y forms adjust, 2-11
connecting
printer to AS/400, 1-11
printer to mainframe, 1-12
printer to PC parallel port, 1-11
printer to PC serial port, 1-10
Cont key, 2-5
control panel
Alert light, 2-4
Cancel key, 2-4
Feed/Reload key, 2-4
indicator lights, 2-4
On line light, 2-4
On line/Off line key, 2-4
Power light, 2-4
tips for using, 2-9
using, 2-3
Control Panel Access Permission, Set command, 6-31
creating, user-defined graphic, 5-21
Index
Current Edit Session, Save command, 6-54
Cut command, 6-23
cutter
adjusting label position for, 2-12
Configuration menu command, 2-22
Enable/Disable command, 6-31
enabling, 2-21
testing operation, 2-21
using, 2-20
Cutter commands, 6-18
D
dark adjust
optimizing for print quality, 4-15
setting, 2-10
Dark Adjust, Set command, 6-32
data buffer, printing contents, 2-13
Data Shift - International Characters command, 6-23
deleting
fields, 5-17
human-readable field, 5-15
designing
formats, 5-3
page, 5-21
direct thermal media, 1-6
downloading
bitmap font, 5-10
data from sender printer, 7-4
Escape Print commands, 6-68
outline font, 5-10
Protocol commands, 6-71
Shift Print commands, 6-69
drive roller, cleaning, 3-5
E
EAN, A-10
editing, label formats, 5-15
electrical specification, A-4
End-of-Print Skip Distance command, 6-32
Enter key, 2-5
environment, cabling considerations, 1-12
environmental specification, A-4
error code
list of, 4-11
Transmit command, 6-19
Escape Commands, downloading, 6-68
example label format, 5-27
example line and box format, 5-12
extended character sets, A-14
F
fanfold media, loading, 1-6
Feed/Reload key, 2-4
I
field
bar code, 5-8
box, 5-12
character, 5-9
defining for label format, 5-8
Delete command, 6-54
deleting, 5-17
determining print position, 5-18
editing, 5-15
human-readable, 5-9, 5-15
line, 5-12
magnifying fonts and characters, 5-20
origin, 5-18
rotating, 5-19
scaling, 5-19
Select command, 6-23
size, 5-19
sizing bar codes, 5-20
Field Data, Define Source command, 6-55
Field Decrement, Set command, 6-24
Field Direction, Define command, 6-55
field height, change magnification, 5-20
Field Increment, Set command, 6-24
Field Origin, Define command, 6-56
field width, change magnification, 5-20
First Data Entry Field, Select command, 6-24
font
bitmap, 5-9
deciding which to use, 5-9
downloading, 5-10
downloading with PrintSet, 5-10
extended character sets, A-14
field size, 5-19
in human-readable field, 5-9
list of, 6-72
magnifying in field, 5-20
resident in printer, 5-9
Select Type command, 6-56
specifications, A-5
Speedo, 5-9
test printing, 4-12
Transmit command, 6-24
user-defined, 5-9
Font Character Width, Define command, 6-56
form feed command, 6-25
format
basic design example, 5-7
Create/Edit command, 6-57
creating with IPL, 5-5
deleting fields, 5-17
designing, 5-3
designing for print quality, 4-15
designing pages, 5-21
editing, 5-15
Erase command, 6-57
I-5
4630 and 4830 Bar Code Label Printers User’s Manual
format (continued)
example, 5-27
example line and box fields, 5-12
label design field, 5-8
positioning fields, 5-18
rotating fields, 5-19
Select command, 6-25
six bits per byte graphic, 5-21
storing, 5-3
test printing, 4-12
Transmit command, 6-25
using, 5-3
Format Direction in a page, Define command, 6-57
Format Editing commands, 6-13
Format Offset Within a Page, Define command, 6-57
Format Page Position, Assign command, 6-58
Format Page Position, Define Data Source command,
6-58
Format Page Position, Delete command, 6-58
G
graphic
creating, 5-21
Define command, 6-59
Select Type command, 6-59
six bits per byte format, 5-21
test printing, 4-12
H
hardware configuration label, 2-26
heavy-duty cutter
cleaning, 3-7
enabling, 2-21
routing media, 2-20
testing operation, 2-21
Height Magnification, Define command, 6-59
HIBC Code 128, 6-50
HIBC Code 39, 6-42
host
communications requirements, B-5
printing data from, 4-13
human-readable field, 5-9, 5-15
Create/Edit command, 6-60
deleting, 5-15
Human-Readable Field Editing commands, 6-13
I
IBM language translation
character table, A-14
Configuration menu command, 2-22
Enable/Disable command, 6-32
image memory, adding, 2-17
I-6
Immediate commands
Abort Print Job, 6-19
Error Code, Transmit, 6-19
Label and Gap Length, Transmit, 6-19
Quantity and Batch Counts, Transmit, 6-20
Reset, 6-20
Status Dump, 6-20
Status Enquiry, 6-20
System commands, 6-12
Increment/Decrement command, 6-25
indicator light
Alert, 2-4
On line, 2-4
Power, 2-4
Install menu, 2-6
installation
configuring printer serial ports, 1-13
preparing the printer, 1-4
installing ribbon, 1-8
Intercharacter Delay, Set command, 6-33
Intercharacter Space for UDF, Define command, 6-60
Interleaved 2 of 5, 6-39, A-10
international character sets, A-13
interpretive Field Editing commands, 6-14
interpretive field
Edit command, 6-61
Enable/Disable command, 6-61
IPL commands
Abort Print Job, 6-19
Alphanumeric Field Separator, 6-21
Auto-Transmit 1, 2, 3, Disable, 6-31
Auto-Transmit 1, Enable, 6-30
Auto-Transmit 2, Enable, 6-30
Auto-Transmit 3, Enable, 6-31
Bar Code Field, Create/Edit, 6-50
Bar Code, Select Type, 6-38
Batch Count, Set, 6-22
Bitmap Cell Height for Graphic or UDF, Define,
6-51
Bitmap Cell Width for Graphic or UDF, Define, 6-51
Bitmap User-Defined Font, Clear/Create, 6-52
Border Around Human-Readable Text, Define, 6-52
Box Field, Create/Edit, 6-52
Character Origin Offset, Define, 6-53
Character Rotation or Bar Code Ratio, Define, 6-53
Clear Data From Current Field, 6-22
Clear-All Data, 6-22
Code 39 Prefix Character, Define, 6-53
Command Tables, Load, 6-54
Command Terminator 1, 6-22
Command Terminator 2, 6-22
Configuration, 6-30
Configuration Parameters, Transmit, 6-23
Control Panel Access Permission, Set, 6-31
Current Edit Session, Save, 6-54
Index
IPL commands (continued)
Cut, 6-23
Cutter Enable/Disable, 6-31
Dark Adjust, Set, 6-32
End-of-Print Skip Distance, 6-32
Error Code Transmit, 6-19
Field Data, Define Source, 6-55
Field Decrement, Set, 6-24
Field Direction, Define, 6-55
Field Increment, Set, 6-24
Field Origin, Define, 6-56
Field Select, 6-23
Field, Delete, 6-54
First Data Entry Field, Select, 6-24
Font Character Width, Define, 6-56
Font, Select Type, 6-56
Font, Transmit, 6-24
Form Feed, 6-25
Format Direction in a Page, Define, 6-57
Format Offset Within a Page, Define, 6-57
Format Page Position, Assign, 6-58
Format Page Position, Define Data Source
Command, 6-58
Format Page Position, Delete, 6-58
Format Select, 6-25
Format, Create/Edit, 6-57
Format, Erase, 6-57
Format, Transmit, 6-25
Graphic or UDC, Define, 6-59
Graphic, Select Type, 6-59
Height Magnification, Define, 6-59
Human-Readable Field, Create/Edit, 6-60
IBM Language Translation, Enable/Disable, 6-32
Immediate, 6-19
Increment/Decrement, 6-25
Intercharacter Delay, Set, 6-33
Intercharacter Space for UDF, Define, 6-60
Interpretive Field, Edit, 6-61
Interpretive Field, Enable/Disable, 6-61
Label and Gap Length, Transmit, 6-19
Label Rest Point, Adjust, 6-33
Label Retract Distance, Set, 6-34
Label Retract, Enable/Disable, 6-33
Label Stock Type, Select, 6-34
Length of Line or Box Field, Define, 6-61
Line Field, Create/Edit, 6-62
Listing By Command Syntax, 6-8
Listing By Function, 6-12
Listing By Name, 6-4
Maximum Label Length, Set, 6-34
Memory Usage, 6-26
Message Delay, Set, 6-34
Next Data Entry Field, Select, 6-26
I
Numeric Field Separator, 6-26
Online/Offline On Power Up, 6-35
Options Selected, Transmit, 6-26
Outline Font Description, Download, 6-62
Outline User Defined Font, Download, 6-63
Page, Create/Edit, 6-63
Page, Delete, 6-63
Page, Select, 6-27
Page, Transmit, 6-27
Pitch Size, Set, 6-63
Point Size, Set, 6-64
Postamble, Set, 6-35
Preamble, Set, 6-35
Print, 6-27
Print mode, 6-21
Print Speed, Set, 6-35
Printer Language, Select, 6-36
Printhead Parameters, Transmit, 6-27
Program Mode, 6-37
Program Mode, Enter, 6-27
Program Mode, Exit, 6-64
Program Number, Transmit, 6-28
Quantity Count, Set, 6-28
Remaining Quantity and Batch Counts, Transmit,
6-20
Reset, 6-20
Self-Strip, Enable/Disable, 6-36
Start/Stop Characters, Print, 6-28
Status Dump, 6-20
Status Enquiry, 6-20
Test and Service mode, 6-66
Test and Service Mode, Enter, 6-28
Top of Form, Set, 6-36
TTR/Direct Thermal Media Grade, Select, 6-37
User-Defined Character Field, Create/Edit, 6-64
User-Defined Character, Clear/Create, 6-64
User-Defined Characters, Transmit, 6-28
User-Defined Font Character, Create, 6-65
User-Defined Tables, Transmit, 6-29
Warm Boot, 6-29
Width Magnification, Define, 6-65
K
key
↑, 2-5
↓, 2-5
Cancel, 2-4
Cont, 2-5
Enter, 2-5
Feed/Reload, 2-4
Menu, 2-5
On line/Off line, 2-4
Select, 2-5
I-7
4630 and 4830 Bar Code Label Printers User’s Manual
L
label
editing, 5-15
positioning for tear bar or cutter, 2-12
printing printer configuration, 1-9
label and gap length, transmit, 6-19
label configuration, changing settings, 2-23
label design field, 5-8
label format
basic design example, 5-7
deleting fields, 5-17
designing, 5-3
designing pages, 5-21
editing, 5-15
example, 5-27
field types, 5-8
positioning fields, 5-18
programming with IPL, 5-5
rotating fields, 5-19
storing, 5-3
using, 5-3
label rest point, 2-12
Label Rest Point, Adjust Command, 6-33
label retract
Configuration menu command, 2-22
Enable/Disable command, 6-33
Label Retract Distance, Set command, 6-34
Label Stock Type, Select command, 6-34
label stock, selecting, 2-23
label taken sensor and self-strip option, 2-18
Label Taken Sensor Value, Transmit command, 6-66
Length of Line or Box Field, Define command, 6-61
line field
defining, 5-12
example format, 5-12
Line Field Editing commands, 6-14
Line Field, Create/Edit command, 6-62
loading
fanfold media, 1-6
roll-fed media, 1-7
thermal transfer ribbon, 1-8
low media warning, setting, 2-24, 2-25
M
mainframe, connecting printer to, 1-12
maintenance
bouncer assembly, 3-6
cleaning printer, 3-4
drive roller, 3-5
heavy-duty cutter, 3-7
media path, 3-6
printer components, 3-3
printer inspection, 3-3
I-8
printhead, 3-4
standard cutter, 3-8
tear bar, 3-5
max label length, setting, 2-23
Maxicode, 6-48, A-12
Maximum Label Length, Set command, 6-34
maximum print speed, setting, 7-7
media
dimensions, A-6
direct thermal, 1-6
loading fanfold, 1-6
loading roll-fed, 1-7
printer adjustments, 2-14
removing from rewind hub, 2-18
removing thermal transfer ribbon, 2-16
selecting for print quality, 4-14
thermal transfer, 1-6
media alert
set warning, 2-24
setting low media warning, 2-25
setting media length, 2-25
media dimensions, A-6
media guides, cleaning, 3-6
media length, setting, 2-24, 2-25
media rewind hub
removing media backing from, 2-18
using, 2-17
media sensor, adjusting, 2-13
media specification, A-5
media type, selecting, 2-23
memory
adding image memory, 2-17
adding storage memory, 2-16
resetting printer, 4-14
Memory Usage command, 6-26
menu
Configuration, 2-8
Install, 2-6
Operator, 2-6
Service, 2-7
setting security levels, 2-9
using, 2-5
Menu key, 2-5
menu panel
↑ key, 2-5
↓ key, 2-5
Cont key, 2-5
Enter key, 2-5
Menu key, 2-5
printer menus, 2-5
Select key, 2-5
tips for using, 2-9
using, 2-5
Message Delay, Set command, 6-34
Multi-Drop protocol, B-5
Index
N
network
connecting printer to AS/400, 1-11
connecting printer to mainframe, 1-12
Next Data Entry Field, Select command, 6-26
nibblizing an outline font, 5-12
Numeric Field Separator command, 6-26
O
offline after power-on, 2-22
On line light, 2-4
On line/Off line key, 2-4
online after power-on, 2-22
Online/Offline On Power Up command, 6-35
opening printer cover, 1-5
Operator menu, 2-6
Options Selected, Transmit command, 6-26
origin, field position, 5-18
outline font, 5-10
converting to download, 5-11
example format for downloading, 5-11
how to nibblize format, 5-12
Outline Font Description, Download command, 6-62
Outline UDF Editing commands, 6-14
Outline User Defined Font, Download command, 6-63
P
page
Create/Edit command, 6-63
Delete command, 6-63
designing, 5-21
Select command, 6-27
test printing, 4-12
Transmit command, 6-27
Page Editing commands, 6-14
Paper Path Open Sensor Value, Transmit command,
6-66
parallel interface, printer response to host, 6-3
parallel port, connecting printer to, 1-11
PC
connecting printer to parallel port, 1-11
connecting printer to serial port, 1-10
PDF417, 6-43, A-11
Pitch Label, Print command, 6-66
Pitch Size, Set command, 6-63
Point Size, Set command, 6-64
Polling Mode D protocol, B-5
positioning fields, 5-18
Postamble, Set command, 6-35
POSTNET, 6-43, A-10
Power light, 2-4
power source, connecting the printer to, 1-5
Power-On mode, selecting, 2-22
I
preamble, set command, 6-35
print alignment, adjusting, 2-12
Print command, 6-27
Print commands, 6-16
print mode
direct thermal, 1-6
thermal transfer, 1-6
Print mode commands
Alphanumeric Field Separator, 6-21
Batch Count, Set, 6-22
Clear Data From Current Field, 6-22
Clear-All Data, 6-22
Command Terminator 1, 6-22
Command Terminator 2, 6-22
Configuration commands, 6-16
Configuration Parameters, Transmit, 6-23
Cut, 6-23
Cutter commands, 6-18
Data Shift - International Characters, 6-23
Field Decrement, Set, 6-24
Field Increment, Set, 6-24
Field, Select, 6-23
First Data Entry Field, Select, 6-24
Font, Transmit, 6-24
Form Feed, 6-25
Format Select, 6-25
Format, Transmit, 6-25
Increment/Decrement, 6-25
Listing By Function, 6-16
Memory Usage, 6-26
Next Data Entry Field, Select, 6-26
Numeric Field Separator, 6-26
Options Selected, Transmit, 6-26
Page, Select, 6-27
Page, Transmit, 6-27
Print, 6-27
Print commands, 6-16
Printhead Parameters, Transmit, 6-27
program mode, enter, 6-27
Program Number, Transmit, 6-28
Protocol Modification commands, 6-17
Quantity Count, Set, 6-28
Self-Strip commands, 6-18
Start/Stop Characters, Print, 6-28
Test and Service commands, 6-17
Test and Service Mode, Enter, 6-28
Transmit commands, 6-18
User-Defined Characters, Transmit, 6-28
User-Defined Tables, Transmit, 6-29
Warm Boot, 6-29
print quality
adjusting label format, 4-15
adjusting print speed, 4-15
getting best, 4-14
printhead age, 4-15
I-9
4630 and 4830 Bar Code Label Printers User’s Manual
print quality (continued)
selecting media, 4-14
setting dark adjust feature, 4-15
troubleshooting, 4-5
print speed
adjusting for print quality, 4-15
maximum setting, 7-7
Set command, 6-35
setting, 2-23
print tests, 4-12
printer
↑ key, 2-5
↓ key, 2-5
adjusting for different width media, 2-14
Alert light, 2-4
back view, 1-3
Cancel key, 2-4
character table, A-13
cleaning, 3-4
cloning, 7-3
closing cover, 1-5
communications problems, 4-6
communications reference, B-3
connecting to AC power, 1-5
connecting to AS/400, 1-11
connecting to mainframe, 1-12
connecting to PC parallel port, 1-11
connecting to PC serial port, 1-10
Cont key, 2-5
emptying buffer, 2-13
Enter key, 2-5
error codes, 4-11
extended character sets, A-14
Feed/Reload key, 2-4
front view, 1-3
getting maximum print quality, 4-14
increasing available memory, 4-14
internal view, 1-4
international character sets, A-13
loading fanfold media, 1-6
loading roll-fed media, 1-7
loading thermal transfer ribbon, 1-8
maintenance, 3-3
media sensor adjustment, 2-13
Menu key, 2-5
On line light, 2-4
On line/Off line key, 2-4
opening cover, 1-5
options, A-7
Power light, 2-4
preparing for installation, 1-4
print quality problems, 4-5
print tests, 4-12
removing ribbon, 2-16
resetting cam adjustment bracket, 2-15
I-10
resetting memory, 4-14
Select key, 2-5
selecting measurement units, 2-22
serial port, B-8
serial port configuration, 1-13
setting low media warning, 2-25
setting maximum print speed, 7-7
specifications, A-4
troubleshooting checklist, 4-3
using control panel keys, 2-4
using the menu panel, 2-5
verifying communications, 1-14
printer cables, B-9
printer commands
Configuration, 6-30
Immediate, 6-19
listing by command syntax, 6-8
listing by function, 6-12
listing by name, 6-4
Print mode, 6-21
Program mode, 6-37
Test and Service, 6-66
printer configuration
default values, 2-27
Reset command, 6-66
printer cover, cleaning, 3-8
printer dimensions, A-7
printer display
error messages, 2-3
menu messages, 2-3
operating messages, 2-3
reading, 2-3
Printer Language, Select command, 6-36
printer menus, 2-5
printer option
cutter, 2-20
image memory, 2-17
media rewind hub, 2-17
self-strip, 2-18
storage memory, 2-16
printhead
cleaning, 3-4
print quality and age, 4-15
Printhead Parameters, Transmit command, 6-27
Printhead Temperature Sensor Value, Transmit
command, 6-66
printing
adjusting label rest point, 2-12
configuration test label, 1-9, 2-26
host data, 4-13
media, 1-6
mode, 1-6
setting the dark adjust, 2-10
using X and Y forms adjust, 2-11
printing specifications, A-8
Index
PrintSet, download fonts, 5-10
Program mode commands
Bar Code Field Editing commands, 6-12
Bar Code Field, Create/Edit, 6-50
Bar Code, Select Type, 6-38
Bitmap Cell Height for Graphic or UDF, Define, 6-51
Bitmap Cell Width for Graphic or UDF, Define, 6-51
Bitmap UDF Editing commands, 6-12
Bitmap User-Defined Font, Clear/Create, 6-52
Border Around Human-Readable Text, Define, 6-52
Box Field Editing commands, 6-13
Box Field, Create/Edit, 6-52
Character Origin Offset, Define, 6-53
Character Rotation or Bar Code Ratio, Define, 6-53
Code 39 Prefix Character, Define, 6-53
Command Tables, Load, 6-54
Current Edit Session, Save, 6-54
Field Data, Define Source, 6-55
Field Direction, Define, 6-55
Field Origin, Define, 6-56
Field, Delete, 6-54
Font Character Width, Define, 6-56
Font, Select Type, 6-56
Format Direction in a Page, Define, 6-57
Format Editing commands, 6-13
Format Offset Within a Page, Define, 6-57
Format Page Position, Assign, 6-58
Format Page Position, Define Data Source command,
6-58
Format Page Position, Delete, 6-58
Format, Create/Edit, 6-57
Format, Erase, 6-57
Graphic or UDC, Define, 6-59
Graphic, Select Type, 6-59
Height Magnification, Define, 6-59
Human-Readable Field Editing commands, 6-13
Human-Readable Field, Create/Edit, 6-60
Intercharacter Space for UDF, Define, 6-60
Interpretive Field Editing commands, 6-14
Interpretive Field, Edit, 6-61
Interpretive Field, ENABLE/Disable, 6-61
Length of Line or Box Field, Define, 6-61
Line Field Editing commands, 6-14
Line Field, Create/Edit, 6-62
listing by function, 6-12
Outline Font Description, Download, 6-62
Outline UDF Editing commands, 6-14
Outline User Defined Font, Download, 6-63
Page Editing commands, 6-14
Page, Create/Edit, 6-63
Page, Delete, 6-63
Pitch Size, Set, 6-63
Point Size, Set, 6-64
Program Mode, Exit, 6-64
Programming commands, 6-15
I
Select Codabar, 6-40
Select Code 11, 6-40
Select Code 128, 6-41
Select Code 16K, 6-43
Select Code 2 of 5, 6-40
Select Code 39, 6-39
Select Code 49, 6-43
Select Code 93, 6-39
Select Code One, 6-45
Select HIBC Code 128, 6-50
Select HIBC Code 39, 6-42
Select Interleaved 2 of 5, 6-39
Select Maxicode, 6-48
Select PDF417, 6-43
Select POSTNET, 6-43
Select UPC/EAN, 6-41
UDC Editing commands, 6-15
UDC Field Editing commands, 6-15
User-Defined Character Field, Create/Edit, 6-64
User-Defined Character, Clear/Create, 6-64
User-Defined Font Character, Create, 6-65
Width Magnification, Define, 6-65
Program Mode, Enter command, 6-27
Program Mode, Exit command, 6-64
Program Number, Transmit command, 6-28
Programming commands, 6-15
programming label format with IPL, 5-5
protocol
communication boundaries, B-7
communication characters, B-6
downloading commands, 6-71
Intermec standard, B-3
Multi-Drop, B-5
Polling Mode D, B-5
XON/XOFF, B-4
XON/XOFF, No Status, B-5
Protocol Modification commands, 6-17
Q
Quality Label, Print command, 6-66
Quantity and Batch Counts, Transmit command, 6-20
Quantity Count, Set command, 6-28
R
receiver printer
preparing for cloning, 7-4
preparing for selective transfer, 7-5
Reflective Sensor Value, Transmit command, 6-66
Reset command, 6-20
resetting printer memory, 4-14
ribbon
loading, 1-8
removing, 2-16
roll-fed media, loading, 1-7
I-11
4630 and 4830 Bar Code Label Printers User’s Manual
rotating fields, 5-19
RS-232 serial interface, B-7
RS-422 serial interface, B-7
RS-485 serial interface, B-7
S
schematic
RS-232 null modem cable, 25 pin - 25 socket
connectors, B-9
RS-232 null modem cable, 25 pin - 9 socket
connectors, B-10
RS-422/485 multi-drop cable, B-10
security level, setting, 2-9
Select key, 2-5
selective transfer
preparing receiver printer, 7-5
preparing sender printer, 7-5
self-strip
Configuration menu command, 2-22
Enable/Disable command, 6-36
label rest point, 2-12
using, 2-18
Self-Strip commands, 6-18
sender printer
downloading data, 7-4
preparing for cloning, 7-4
preparing for selective transfer, 7-5
serial port, B-8
configuring, 1-13
connecting printer to, 1-10
Service menu, 2-7
Shift Print commands, 6-69
sizing fields, 5-19
specification
communications, A-4
electrical, A-4
fonts, A-5
media, A-5
media dimensions, A-6
printer dimensions, A-7
printer environment, A-4
printer options, A-7
printing, A-8
Speedo font
example format for downloading, 5-11
how to nibblize format, 5-12
standard cutter
cleaning, 3-8
enabling, 2-21
routing media, 2-20
testing operation, 2-21
Standard protocol, B-3
Start/Stop Characters, Print command, 6-28
Status Dump command, 6-20
I-12
Status Enquiry command, 6-20
storage memory, adding, 2-16
storing label formats, 5-3
symbology, 5-8, A-10
Codabar, A-10
Code 11, A-10
Code 128, A-10
Code 16K, A-11
Code 2 of 5, A-10
Code 39, A-10
Code 49, A-11
Code 93, A-10
EAN, A-10
in bar code field, 5-8
Interleaved 2 of 5, A-10
Maxicode, A-12
PDF417, A-11
POSTNET, A-10
UPC, A-10
System commands, 6-12
system, verifying printer communications, 1-14
T
tables, downloading user-defined commands, 6-67
tear bar
adjusting label position for, 2-12
cleaning, 3-5
Test and Service commands, 6-17, 6-66
Test and Service Mode, Enter command, 6-28
Test and Service Mode, Exit command, 6-66
thermal transfer media, 1-6
thermal transfer ribbon
loading, 1-8
removing, 2-16
Top of Form, Set command, 6-36
translation character table, A-14
Transmissive Sensor Value, Transmit command, 6-66
Transmit commands, 6-18
troubleshooting
checklist, 4-3
error codes, 4-11
print quality problems, 4-5
printer communications problems, 4-6
TTR/Direct Thermal Media Grade, Select command,
6-37
U
UDC Editing commands, 6-15
UDC Field Editing commands, 6-15
UPC, A-10
UPC/EAN, 6-41
User-Defined Character Field, Create/Edit Command,
6-64
User-Defined Character, Clear/Create command, 6-64
Index
User-Defined Characters, Transmit command, 6-28
user-defined command tables, 6-67
user-defined configuration test label, 2-26
User-Defined Font Character, Create command, 6-65
user-defined graphic, creating, 5-21
User-Defined Tables, Transmit command, 6-29
X
W
Y forms adjust, using, 2-11
I
X forms adjust, using, 2-11
XON/XOFF protocol, B-4
XON/XOFF, No Status protocol, B-5
Y
Warm Boot command, 6-29
Width Magnification, Defined command, 6-65
I-13