1
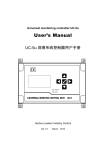
Universal Control Unit UC-2C
UC-2C 通用润滑系统控制器
User’s Manual
用户操作指导手册
Suzhou Leetern Industry Control Department
March 2011
Universal Control Unit UC-2C is designed for controlling and monitoring of
centralized Lubrication system. It is suitable for injection lubrication control for
machinery and equipment like conveyor belt and escalator etc. UC-2C stores
configuration data and parameters in EEPROM, which made UC-2C can store
data safely for long period without backup power supply.
The control unit uses LED monitor and LED signal lights to show information. It
is easy for operation.
Factory settings on UC-2C:
Pause mode:
Timer
Pause time:
1 min
LUBE mode:
Counter
LUBE pulse:
10 pulses
Current on time:
0.2s
Pitch adjustment:
1:1
Monitoring:
Level monitoring
Without our written permission, any forms of translation, excerpt, copy,
print and reproduce of this USER MANUAL and its content is prohibited.
We reserve all rights to this USER MANUAL. We reserve the right to
revise it without prior notice.
Manufacturer:Suzhou Leetern Industry Control Department
Address: Rm.102, Building 8, No. 22, Xiao Shi Jia Nong, Suzhou, China
Technical Support Fax: +86-512-68661838
Technical Support Email Box: [email protected]
Website: http://www.leetern.com
Contents
Safety Warning!
1.
Installation
1.1 Installation dimensions
1.2 Electrical connection
2.
Display and control panel
2.1 LED monitor
2.2 LED signal lights
2.3 Keys
2.4 Fault Signal Relay SR
3.
Operation guide and programming
3.1
3.2
3.3
3.4
Operating instruction
Set PAUSE parameters
Set LUBE parameters
Set pitch parameters
4.
Operation modes
4.1 Timer mode
4.2 Counter mode
4.3 Pitch adjustment
4.4 System monitoring
4.5 Power-down protection function
5.
Faults
5.1
5.2
5.3
Oil level monitoring
Fault display
Fault message clearance
6.
Technical Data
Safety Warning!
Universal Control Unit UC-2C is designed and manufactured not only in
conformity with the generally engineering standards, industrial safety
and accident prevention regulations, but also in accordance with some
relevant generally industrial technical acceptance standards.
Although this unit complies with relevant safety technical requirements,
the use of the unit may still entail dangers leading to personal injury of
the user or third parties or damage to property. Therefore, the unit must
be used when it is in perfect technical condition. And the operation must
strictly comply with operation manual. Errors that may affect safety must
be rectified immediately.
The unit is designed for controlling and monitoring centralized
lubrication systems. The user himself shall be liable for any damage
caused by improper use.
Potential electrical dangers
This unit must be connected to the power supply only by trained
qualified personnel in accordance with the local electric technical
regulations. Improper connection may lead to serious personal injury.
UC-2C is suitable for conveyor, escalator and lubrication station, to
control lubrication system that driven by single-phase AC power or
similar electrical system. When it is used for any other purposes, all
safety regulations should be complied with.
Note: The area that is circled by white heavy line on PCB is
high voltage dangerous area. It is prohibited to touch directly
with hand or with tools to avoid the danger of electric shock.
Qualified personnel
Qualified person means person trained, assigned and instructed by the
operator of the equipment concerned. They are familiar with relevant
safety rules or regulations and have certain knowledge and skills of
safety. They are entitled to carry out the activities required in a given
case and will be able to recognize and avoid possibly existing dangers.
1. Installation
Universal Control Unit UC-2C is not designed to work in open-air. It has to be
installed in the room or in switch box to protect it from environmental
influences.
Control panel component is designed with O ring seal groove. With O ring
sealant and proper mounting hole, it can reach very high protection level.
If the control unit is installed at an inaccessible position, it is advisable to install
additional pilot lights in operation room so that the operation situation of the
system can be remote monitored.
UC-2C must be installed after Class II over-voltage electrical equipment, which
supplies over-voltage protection. It is prohibited to install UC-2C directly to a
bus bar or a trunk line.
1.1
Installation dimension
PANEL CUT-OUT diagram
Outline dimension of control board
1.2 Electrical connection
J0 - GND
GND (PE)
J1 - LL
Level switch
J2 - MK
Signal input
J3 - V+
DC +24V Power output (Max 50mA)
J4 - SR
Status relay output
J5 - PUMP_A
Pump output_A (Max 3A)
J6 - PUMP_B
Pump output_B
J7 - AC_N
Neutral wire (90~250V 45-65Hz)
J8 - AC_L
Live wire
J9 - PANEL
To operation panel
J10 - TEST
Interface for test
Electrical connection diagram
Note:
When UC-2C is in use, be sure the system voltage is within voltage limit range.
Power voltage fluctuation should be in the scope of 90V~250V. Lower or higher
than the voltage limit for long time will permanently damage the control unit.
If controller is installed on a metal baseboard, an 8mm (at least) net
safety space between the metal baseboard and control board should be
guaranteed to avoid the danger of electric shock.
2. Display and control panel
Film panel protects UC-2C from
humidity and dust.
Please use soft cloth with warm
water or neutral detergent to
clean the film panel. Organic
solvent is prohibited.
To avoid damage to the panel, do
not use sharp tools/ object to
touch it.
Please do not peel off the
protection film before its final
installation.
2.1
LED monitor
LED monitor displays operating status and
parameters.
2.2
LED signal lights
PAUSE:Pause indicator light.
LED "PAUSE" is on: Power is supplied to pump and control unit. System
is in PAUSE phase.
In programming, Light PAUSE on means the current programmed
parameters relate to PAUSE.
"Light on" mentioned in this manual means the indicator light is a steady
light. "Light flashes" means indicator light flashes by a frequency of 0.5s
on and 0.5s off.
LUBE:Lubricating signal light
LED "LUBE" on: Power is supplied to pump and UC-2C. System is now in
lubrication status.
In programming, Light LUBE on means the current programmed
parameter relates to LUBE.
TIMER:TIMER mode indicator light
LED light "TIMER" on: the current phase is now in TIMER control mode.
In programming, Light TIMER flashes means the control mode can be
changed.
COUNTER:COUNTER mode indicator light
LED "COUNTER" on: System is now in COUNTER control mode.
In programming mode, Light COUTER flash means the control mode can
be changed.
FAULT:Fault indicator light
LED "FAULT" flash means fault occurs in the lubrication system.
2.3
Keys
UP KEY
With key
, to increase the displayed value at cursor position by 1 in
programming state. If the digit is already 9, then it will return to 0.
LEFT KEY
To move left the cursor position when input parameters in programming
status. If the cursor is already at the leftmost bit, then press this key, the
cursor will return to the rightmost position.
SET KEY
Activate programming mode. Confirm options or parameters.
When system is in FAULT state, briefly press this key to exit error state
after troubleshooting.
NOTE: Programming operation can only be carried out when the system
at normal condition. If the system is in FAULT state, then troubleshooting
needs to be done first.
2.4 Fault relay SR
Fault relay SR is used to indicate the fault status of the controller.
If controller detects error, SR will close and output AC power, to indicate that
the lubrication system is now in abnormal condition.
*
In programming mode, if no key operations for more than 2 minute,
LED turns off automatically and quit current operation.
3. Operation guide and programming
Controller shows operational parameters and states via LED monitor and
LED pilot lights. User may change the preset parameters with keys (buttons)
on control panel.
If PAUSE is set as TIMER mode, the measurement unit of the figure on LED
monitor is hour. If PAUSE is set as COUNTER mode, the figure on LED
monitor is impulses number. Value for LUBE is fixed as counting times.
3.1
Display operation
LED pilot lights indicate current operation
status and control mode. LED monitor
displays the remaining value of the
current status.
Example : System is now in PAUSE
phase, Timer mode, and remaining value
is 6.2 h.
If PAUSE is set as counter mode, LED
displays operation data into 2 segments.
It first shows the 3 high-order digits of the
value.
Example:H123,means the high-order
digits of the value is 123.
About 1s later,LED monitor then displays
3 low-order digits of the value.
Example:L456, means the 3 low-order
digits is 456
Compose the two digital segments to get
the PAUSE value 123456.
If system is in LUBE phase, the condition
of control panel will be shown like the
right figure.
This figure shows the remaining LUBE
value is 8 impulses. And LUBE mode is
fixed in COUNTER mode.
Please refer to chapter 5 for detailed "Error status display and instruction"
3.2
PAUSE setting
1. Press
longer than 2 seconds,
LED monitor shows "PAU"
2. Press key
, the light PAUSE on,
meanwhile, light TIMER or COUNTER
flash to show preset control mode for
PAUSE.
Example:Light COUNTER flash means
PAUSE is in COUNTER control mode.
3. Use key
to change PAUSE control mode, then the relative light TIMER or
COUNTER will flash accordingly.
Example: Change PAUSE control mode
to TIMER mode.
4. Press
to confirm the new control
mode, If control mode is TIMER, then
LED shows time.
Example:0.1h (factory setting)
If control mode is COUNTER, then skip to
step 8.
5. User may use keys
PAUSE value.
Example:
change to 72h.
to change
6. Press key
to confirm the new
programmed parameters. LED displays
‘End.’ means setting for PAUSE finish.
7. Press key
to exit setting operation
and goes back to operation status display
mode. Programmed parameters are
saved permanently till next change via
programming.
8. If PAUSE mode is counter, LED
monitor will display the 3 high-order digits
of the value.
Example:H000
9. Use key
to change the value.
Example:Change to H123
10. Press key
to confirm the change
of the 3 high-order digits, then LED
monitor displays 3 low-order digits.
Example:L001
11. Use key
to modify the 3
low-order digits of the PAUSE counter
value.
Example:Change to L456
Compose the 2 digital segments, there
comes the value 123456.
12. Press key
to confirm the new
parameters. LED monitor displays 'End.',
this means the setting for PAUSE is
finish.
13. Press key
to exit setting operation and goes back to operation status
display mode. Programmed parameters
are saved permanently till next change.
When operation goes to step 6 or step 12, LED monitor displays 'End.',
press key
to select other item and continue setting operation. Or
press
to end the setting operation.
3.3
LUBE setting
1. Press
longer than 2 seconds,
LED monitor shows "PAU"
2. Press key
displays 'LUb'.
until LED monitor
3. Press key
, light LUBE and
COUNTER on the panel on, LED monitor
displays preset LUBE parameters.
Example:0010(factory setting)
4. Use keys
control parameters .
Example:
to change LUBE
change to 25.
5. Press key
to confirm the new
setting, LED monitor then displays 'End.',
which means LUBE setting is finish.
6. Press key
to end the setting
operation and get back to display mode.
The newly set parameters will be saved
permanently until next change.
LUBE value is not allowed to set as 0(zero), if LUBE value is set as 0,
press key
, controller will not accept the new setting.
3.4
Pitch ratio setting
1. Press key
longer than 2 seconds,
LED monitor shows "PAU"
2. Press key
displays 'JUP'.
until LED monitor
3. Press key
, LED monitor displays
current pitch ratio control value.
Example:0001(factory setting)
4. Use keys
to modify the pitch
ratio control value.
Example:Change to 0002.
5. Press key
to confirm the new
setting, LED monitor then displays 'End.',
which means the setting is finish.
6. Press key
to end the setting
operation and get back to display mode.
The newly set parameters will be saved
permanently until next change via setting.
Pitch value setting range is 1-99. Controller does not accept and store
any values that beyond this range.
4.
Operating modes
In order to meet different needs in different lubrication control applications,
controller UC-2C supports multiple operating modes.
4.1 Timer operating mode
Set "TIMER" mode for PAUSE. After controller carry out the programmed
PAUSE time, it begins to detect sensor impulses and carries out LUBE task
based on the programmed LUBE impulses. When the programmed LUBE
impulse number is reached, UC-2C goes to PAUSE timing process again and
performs the cycle control of "PAUSE – LUBE – PAUSE".
4.2 Counter operating mode
If PAUSE is set as COUNTER mode, after controller carry out the programmed
impulses numbers, it begins to detect sensor impulses and carries out LUBE
task based on the programmed LUBE impulses. When the programmed LUBE
impulse number is reached, UC-2C goes to PAUSE counting process again
and performs the cycle control of "PAUSE – LUBE – PAUSE ".
COUNTER mode is the only operation mode for LUBE.
4.3
Pitch adjustment
Oil projection action performs by tracking sensor-signal impulses. If the
impulses are too dense, and pump is required to project oil by tracking each
impulse, this would lead to the pump cannot track signals successfully. This
result in the oil projection cannot be performed properly. Typical phenomenon
is pump stay electrifying status and will not release.
User can eliminate this phenomenon by proper pitch jump setting. After setting
pitch jump value, UC-2C performs oil projection and lubrication movement
once every N pitches as show in figure above.
4.4 Power-off protection function
The control unit UC-2C has power-off protection function. When power is cut
off, it automatically stores operating status and remaining values at the point of
power-off. When power is supplied again, UC-2C will continue carrying out
operation from the phase that it stopped.
UC-2C stores operating status and values in EEPROM. The data can reliable
be stored for at least 10 years.
In order to guarantee the operational data is saved properly, the interval
between power down and next power on should NOT LESS than 3
seconds. Otherwise, controller may not initiate properly.
5.
Faults
When control unit detects faults, light "FAULT" on the panel will be flashing
quickly. Meanwhile, the fault indicator relay closes and outputs AC power to
remind user the lubrication system is in fault condition. Control unit stops
normal operation and waiting for user to handle the faults. User may check the
detailed fault reason on LED monitor.
5.1 Level monitoring
Controller can monitor the level situation of the reservoir via level switch. When
level is lower than a certain level, level switch will open. Once the controller
detects the level switch opens, it gives alarm immediately and all LUBE
channels stop at the same time.
Level monitoring function is activated all the time. It cannot be deactivated via
setting. If user DOES NOT need this level monitoring function, they can short
circuit terminal J1 and J3 on the control board.
5.2 Faults display
Whenever controller detects fault, LED monitor will display corresponding error
code and meanwhile light FAULT on the panel flashes. The contact of the fault
relay inside controller will close, and transfer the fault signal to control room or
other connected control system.
When fault occurs, the information displayed on LED monitor may be as follow
figures:
Left figure 'LOL' means Low Oil Level fault occurs.
Right figure ‘ESS’ means error occurs in the system. In this condition, please
cut the power to the controller for 1 minute, if the error still exists when electrify
it again, please contact manufacturer.
5.3 Clear fault messages
After the error being handled, briefly press key
on the panel to clear
the error message, exit fault state and gets back to normal lubrication circle.
If the reason that causes the error still exists, this operation does not work.
6. Technical specification
Operation voltage -----------
90V~250V, 45~65Hz
Max. output ------------------
>3A
Pump current on time ------
0.2s
LUBE counting times -------
1~9999
PAUSE time ------------------
0~999.9 h
PAUSE counting times------
0~999 999
Pitch ratio ----------------------
1:1~99:1
External input signal --------
10V ~30V DC, input equivalent resistance of 10k
Fault relay output ------------
250V AC,5A Max,N.O.
Operation temperature -----
-30℃~+70℃