1
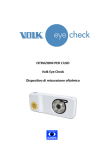
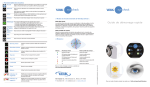
INSTRUCTIONS FOR USE Volk® Eye Check Ophthalmic Measurement Device Shipping Contents Item: Part Number: Volk Eye Check USB Cord Power Adaptors 18343-US 18338 18339-US Stylus Protective Case Protective Pouch Quick Start Guide* Registration Card 18349 18345 18346 ML-1016 IM-081 Description: Ophthalmic measurement device For charging and data transmission For charging Volk Eye Check in a wall outlet (Formats Supplied: USA) For precise interaction with touch screen Case for Volk Eye Check Microfiber Pouch for Volk Eye Check Abbreviated instructions Please fill out and return to Volk Optical * NOTE: Instructions for Use (IFU) available at: http://volk.com/eyecheck/literature/ Preparation for First Use 1. 2. 3. 4. 5. 6. Remove Volk Eye Check from the package and check that all parts present are undamaged. Sterilization or calibration prior to first use is not required. Connect Volk Eye Check to the mains using the USB cord and the appropriate power adaptor. The battery will start to charge. Safely place Volk Eye Check on a flat surface. Charge battery for at least 3 hours before the first use. IM-078 Rev. C Page 2 of 31 1 Table of Contents Shipping Contents ................................................................................................................................... 2 Preparation for First Use ......................................................................................................................... 2 Intended Use ........................................................................................................................................... 4 Indications for Use .................................................................................................................................. 4 Recommendations Prior to Use .............................................................................................................. 4 Contraindications for Use ....................................................................................................................... 4 Warnings ................................................................................................................................................. 4 Cautions .................................................................................................................................................. 4 Important Symbols.................................................................................................................................. 5 Device Display & Interface ...................................................................................................................... 6 Features & Controls ................................................................................................................................ 6 Soft Buttons ............................................................................................................................................ 7 Environment & Photo-Taking Indicators ................................................................................................ 8 Preparation ............................................................................................................................................. 8 Initial Settings.......................................................................................................................................... 9 Device Settings ........................................................................................................................................ 9 Application Settings .............................................................................................................................. 10 Basic Use – Start Up, Shut Down, and Capturing an Image .................................................................. 12 Capturing a Patient Session .................................................................................................................. 12 Measurements Provided by Volk Eye Check ........................................................................................ 14 Reviewing Patient Measurement Data ................................................................................................. 16 WiFi Upload ........................................................................................................................................... 16 Data Transfer via PC Connection .......................................................................................................... 17 Pre-loading Patient details .................................................................................................................... 18 Adding a Patient Database .................................................................................................................... 18 Starting a new session for a patient already in the database .............................................................. 20 Freestyle Mode ..................................................................................................................................... 20 How to update Volk Eye Check Software ............................................................................................. 22 System Messages .................................................................................................................................. 23 Cleaning Instructions ............................................................................................................................ 24 Device Maintenance and Servicing ....................................................................................................... 24 Calibration ............................................................................................................................................. 25 EN 62479 ............................................................................................................................................... 25 Technical Description ............................................................................................................................ 26 Environmental Conditions for Use, Storage and Transportation ......................................................... 27 Serial numbering ................................................................................................................................... 27 Intellectual Property Rights Information .............................................................................................. 28 Disposing of Volk Eye check .................................................................................................................. 28 Contact for Product Support ................................................................................................................. 28 Warranty ............................................................................................................................................... 28 Appendix A – FCC Statement ................................................................................................................ 29 Appendix B – Replacing the AAA Batteries ........................................................................................... 30 IM-078 Rev. C Page 3 of 31 1 Intended Use Volk Eye Check is standalone ophthalmic software, loaded on a mobile electronic platform that is intended to measure ophthalmic characteristics and to aid in the diagnosis of ophthalmic abnormalities. Indications for Use To be used by Ophthalmologists, Optometrists, and other trained health care professionals. Clinical support staff can also use Volk Eye Check. Recommendations Prior to Use It is highly recommended that all persons, eye care specialists and healthcare professionals or clinical support staff, thoroughly review this document prior to patient usage. Interpretation of the measurement data generated is advised for eye care specialists and healthcare professionals only. There are no special facilities or qualifications required relating to the device. Contraindications for Use Some patients may experience momentary discomfort when exposed to flash photography. Use of Volk Eye Check on patients with photosensitive epilepsy is at the discretion and professional judgement of the healthcare professional. Warnings There are no medicinal substances or biological materials incorporated within this device. No personal protective equipment is required to be worn by the user or the patient when using this device. Cautions Use only accessories and Li-ion batteries provided by Volk Optical with this product. Any good-quality Alkaline AAA batteries may be used in the Fixation Target. No modification of this equipment is allowed. No files may be copied to/from the device except as described later in this document. IM-078 Rev. C Page 4 of 31 1 Important Symbols Symbol Description The CE mark on this product indicates it has been tested and conforms to the provisions noted within the 93/42 EEC Medical Device Directives. The CE mark with notified body identification number indicates a Class I (measuring) product. The FCC Declaration of Conformity, or the FCC label, or the FCC mark, is a certification mark employed on electronic products manufactured or sold in the United States which certifies that the electromagnetic interference from the device is under limits approved by the Federal Communications Commission. Do not dispose of Volk Eye Check or Volk Eye Check’s battery (LithiumIon) as unsorted municipal waste. Recycle Volk Eye Check’s Lithium-Ion battery. Li-ion Read accompanying user documentation. Indicates that important operating instructions are included in this User Manual. Failure to follow these instructions could place the patient or operator at risk. IM-078 Rev. C Page 5 of 31 1 Device Display & Interface Features & Controls Number 1 Name Display Screen Home screen for the Volk Eye Check application 4 POWER Turns the device on and off with a long press SHUTTER Locks the focus and exposure (half press) and takes photo (full press) FIXATION TARGET Activates the fixation target’s flashing LEDs 5 BACK Returns to previous screen 6 HOME Returns to home screen 2 3 7 IM-078 Rev. C Purpose - MICRO USB CONNECTOR For charging and data transfer Page 6 of 31 1 Soft Buttons These controls will be found on the interactive touch screen and will change depending on mode: Icon Purpose Home: Displays the regulatory labels when in the Patient Details screen Returns to Patient Details screen when in any other screen Start: Short press: Initiates a new session and enters capture mode Long press: Choose - normal or freestyle session or save patient details Attract: Plays random MP3 when in picture capture mode Note: Audio needs to be enabled in Application Settings for icon to be visible Review: Initiates patient data review mode from home or capture screen Upload: Indicates the upload status of the current session – Red – not uploaded Amber – upload in progress Green – upload complete Application Settings: Opens the Eye Check settings screen where upload, reporting and audio features can be configured. Session Report: When pressed will generate and save a report file for the current session. Note: This control is only visible if the report file does not exist. Help: Long press to activate help dialog. Back: Go back to the previous screen IM-078 Rev. C Page 7 of 31 1 Environment & Photo-Taking Indicators These indicators are displayed on the interactive touch screen while taking pictures: Indicator Purpose Good photos: Indicates number of valid photos in current session Poor photos: Indicates number of poor photos in current session Correct distance: Optimal patient-practitioner distance Distance too far: Face too small, move closer to patient Distance too close: Too close to patient, move back Brightness level: Optimum level is between 70-80 Zoom: Pre-set zoom level Battery: Indicated percentage left of battery life Preparation Volk Eye Check can be charged by connecting the supplied USB cable to either a PC (Personal Computer) or the appropriate mains power adaptor. When not using Volk Eye Check, it is recommended that the device is completely shut down. The device will not function if the remaining battery power falls below a 15%. IM-078 Rev. C Page 8 of 31 1 Initial Settings Power the device on with a long press on the power button. After completing a short self-test, the Volk Eye Check Home Screen will appear. Home Screen Device Settings From the Home Screen touch the Device Settings icon. This will display a menu of items relating to the Volk Eye Check hardware as shown below. Scroll the screen to locate the wireless and date/time settings. IM-078 Rev. C Page 9 of 31 1 Device Settings Menu Enable WiFi functionality: 1. 2. 3. 4. 5. Select wireless & networks from the device settings menu. In the next screen, check the WiFi box to turn on WiFi. Select WiFi Settings. Scroll down to select your preferred wireless network. Input the password - if required - and then choose connect. Press the physical back button to return to the Device Settings Menu. Set the Date, Time and Time Zone: 1. 2. 3. 4. 5. 6. 7. Select Date & Time from the Device Settings Menu. In the following screen, ensure Automatic is un-checked. Touch set date. Spin the wheels to the correct date then touch set. Choose select time zone and scroll the list up or down to select your location. Touch set time, spin the wheels to the correct time and touch set. Set the 24-hour check box. Touch select date format to select the desired date format. Press the physical back button to return to the Device Settings Menu. From the Device Settings Menu press the physical back button to return to the Home Screen. Application Settings From the Home Screen, touch the Eye Check icon to start the Eye Check application. The first screen to be displayed is Patient Details. IM-078 Rev. C Page 10 of 31 1 Patient Details Screen Touch the gear-wheel icon on the right side of the screen to access the Application Settings. Application Settings Screen Setting Purpose Upload Set if you wish to upload patient data automatically on completion of a patient session Email address Enter the address where the PDF report should be sent. Note: “Upload” must be set for the email PDF to be enabled. Report Set if you wish to generate a data report at the end of a patient session. If you do not check this option, no report for reference will be generated on the device at the end of each patient session. Include picture Set if you wish to include the patient photo on session reports. Note – this setting applies to both local and uploaded report content. Please be aware of HIPAA regulations within your clinical setting for this feature. Prefix A prefix can be added to all patient IDs. Sound Set to ON if you wish to activate the audio attract feature. This helps to attract the attention of younger patients. Show warning dialogs Unset if you wish to disable the warning dialogs that may pop up during a photo taking session. It is highly recommended that this option remains set in order to direct the user during the photo taking process for maximum efficiency. Generally, both Device Settings and Applications Settings only require attention once during initial setup. However, they can be changed at any time if desired. When finished, touch the back button to return to the Patient Details screen, then again to return to the Home Screen. IM-078 Rev. C Page 11 of 31 1 Basic Use – Start Up, Shut Down, and Capturing an Image An image is captured using the dual-action shutter button. At the first detent (half press) the camera will focus on the subject and lock-in its exposure settings. Pressing the shutter further, to its second detent (full press), the image is captured and analyzed. Don’t wait too long between half-press and full-press because of camera-shake and subject movement. The device may be powered off or put to sleep by returning to the Home Screen and touching the power / sleep soft key. Choose either shut down or sleep. The device may also be placed into sleep mode by a short press on the power button. To wake the device from sleep mode, short-press the power button or the back button. If a device is left in sleep/standby overnight, it will power itself down at approximately 2:00am. Capturing a Patient Session Follow the steps below to successfully complete a patient session. 1. Select the Eye Check icon from the Home Screen. 2. Enter the patient data correctly: Patient ID, date of birth, gender and IPD (if known). Touch the start icon to start a patient session. NOTE: The use of IPD is recommended in order to facilitate an easier photo taking session, particularly in sub-optimal conditions. The IPD can be input in one of two ways, as the full IPD or as right and left PD respectively, both to the nearest 0.5mm. IPD Input Screen 3. The lens will extend and automatically be set to the correct zoom setting. There is a short lag as this takes place and the device prepares the new session. IM-078 Rev. C Page 12 of 31 1 NOTE: When capture mode is initiated, the camera focus motor makes a sound. This sound is normal and is not a sign of any damage or problem. 4. The attract icon on the left hand side will only appear if the sound feature has been enabled in application settings. Press this icon to hear the sound as required. 5. The optimum light level is between 70-80 for light skinned patients and around 60 for darker skinned patients. A patient - practitioner distance of 50-60cm is required. Check the brightness level and distance on the panel to the right side of the screen. 6. Ensure that the patient is sitting comfortably in front of a neutral background. The practitioner should be at eye level with the subject. Avoid large windows, mirrors and strong reflections. 7. Hold the camera comfortably but firmly with two hands to avoid shaking. Use the index finger of the left hand to activate the fixation target button. This is located on the top left side of the device. The fixation LEDs will be activated all the time this button is pressed. The patient is required to look at this target throughout the photo capture session. 8. Frame the subject’s face, aiming for 2/3 of the face to appear on the screen from forehead to mouth. Half-press the shutter button to achieve correct focus. The white focus squares will turn green if this is the case. Fully press the shutter button to take a photo. Do not linger after focus is achieved. NOTE: All parameters – distance, brightness and focus lock - must be green to validate a picture. If the focus squares are red, completely release the shutter button and half press again. Repeat until correct focus achieved. 9. 2 to 4 green check photos are required to complete a session and report the measurements. The lens may automatically recalibrate after 4 photos. If a photo is invalid, please adjust your position, the patient’s position or the surroundings to account for the factor that is not optimum. See “System Message” for error messages and what to do. Please do read these messages and follow their instructions. IM-078 Rev. C Page 13 of 31 1 10. Once a session analysis has been completed, the measurements report will be displayed on screen. Scroll up and down to review all data. 11. Touch the review icon to view thumbnails of the pictures for that session. Touch back to return to the results screen. The upload icon on the right side will indicate the session upload status. See WiFi Upload section. Measurements Provided by Volk Eye Check Eye Check Scrollable Measurements Screen The table below lists all of the ocular measurements provided in the Volk Eye Check session analysis: Measurement Abbreviation Definition Right pupil size ----------- Diameter of the right pupil Left pupil size ----------- Diameter of the left pupil Difference in pupil size Diff. pupil size Difference between right and left pupil sizes (No) Deviation ----------- Inter-pupillary distance IPD Right horizontal visible iris diameter Right HVID Maximum horizontal white-to-white measurement of the right iris Left horizontal visible iris diameter Left HVID Maximum horizontal white-to-white measurement of the left iris Horizontal visible iris diameter difference HVID difference Difference in right and left visible iris horizontal distances Difference in palpebral aperture Diff. palpebral aperture Difference between the right and left palpebral apertures IM-078 Rev. C Strabismus deviation in prism diopters if detected. Reports “no manifest deviation” if no misalignment is detected Distance between the centers of the right and left corneas in primary gaze. Distance IPD is given. If IPD was input by the user then this will be indicated on the report. Page 14 of 31 1 Measurement Abbreviation Definition Upper margin reflex distance right MRD R top Measurement from the purkinje image to the margin of the right upper eyelid Lower margin reflex distance right MRD R bottom Measurement from the purkinje image to the right lower eyelid margin Upper margin reflex distance left MRD L top Measurement from the purkinje image to the margin of the left upper eyelid Lower margin reflex distance left MRD L bottom Measurement from the purkinje image to the left lower eyelid margin Right pupil eccentricity (nasal or temporal) Right pupil nasal ecc. or Right pupil temporal ecc. Centre of the right pupil relative to the center of the right iris in the horizontal axis. Negative measurement indicates temporally located Right pupil eccentricity vertical Right pupil vertical ecc. Centre of the right pupil relative to the center of the right iris in the vertical axis. Negative measurement indicates inferiorly located Left pupil eccentricity (nasal or temporal) Left pupil eccentricity vertical IM-078 Rev. C Left pupil nasal ecc or Left pupil temporal ecc Left pupil vertical ecc. Centre of the left pupil relative to the center of the left iris in the horizontal axis. Negative measurement indicates temporally located Centre of the left pupil relative to the center of the left iris in the vertical axis. Negative measurement indicates inferiorly located Page 15 of 31 1 Reviewing Patient Measurement Data Launch Volk Eye Check by touching the Eye Check icon on the Home Screen. Open the patient database using the review icon on the left side. The database is organized in numerical/alphabetical patient ID order. Scroll though the database to locate the desired patient. Select the patient, then select the required session (if there’s more than one). The measurement data for the chosen session will be displayed. Scroll through as required. To regenerate the local report file, touch the report icon. Note: the report icon will be visible only if the report for this session is not already present on the device. The high-resolution images taken by the device are required only for the analysis stages of each Volk Eye Check session, in order to produce the measurement data. These images are not stored on the device and will not be available to the practitioner. WiFi Upload If the settings described in the Initial Settings section have been configured correctly then, on the successful completion of each session, a PDF document containing the results will automatically be emailed to the address specified in the, WiFi connectivity permitting. To check if the upload has been successful, Launch Volk Eye Check using the Eye Check icon on the Home Screen. Open the patient database using the review icon on the left side. The database is organized in numerical/alphabetical patient ID order. Scroll though the database until the desired patient is located. Select the patient and the session if there is more than one. This upload icon will appear green if the upload has been successful. If the upload is in progress, the icon will be amber. If the upload had not been successful, the icon will be red. To manually initiate an upload (or to get the PDF re-sent), touch the red icon. 2x Sessions – One uploaded the other not Please be aware that a successful session upload and subsequent receipt of the PDF email is dependent on entering the correct email address in the application settings and properly setting the WiFi connection in the device settings. If the upload fails please check all the settings and ensure the device is within the coverage of the specified WiFi service. IM-078 Rev. C Page 16 of 31 1 Data Transfer via PC Connection 1. Connect the Volk Eye Check device to a personal computer using the supplied USB cable. 2. Once the connection is complete, return to the device and click device settings. 3. From the device settings menu, drag down from the top of the screen to open Connectivity menu. Swipe down to access USB connection control 4. Touch USB Connected – Select to copy files to/from your computer. 5. Touch Turn on USB Storage. Select OK when USB advice message appears. 6. Touch Turn on USB Storage. Select OK when USB advice message appears. 7. On your computer, locate the device in Finder (Mac) or Windows Explorer (Windows). Click on the device to open the root folder. IM-078 Rev. C Page 17 of 31 1 8. Open the folder IRISSReports and begin managing the patient records. You can: a. Copy reports to a local drive b. Print via PC printer c. Delete reports from the device d. Rename files Pre-loading Patient details To pre-load and save patient details to the Eye Check database prior to use, follow the instructions below: 1. Enter the patient ID screen via the Eye Check icon on the Home Screen. 2. Input all patient details correctly as required, including date of birth and gender. 3. Long press the start icon. An options menu will appear giving the following options: Analyze Freestyle Save details Cancel Select Save Details. These details have now been saved for later use. 4. Continue to input as many patient entries as required. 5. To access the preloaded patient details when starting a new patient session long press the empty Patient Ref field in the patient ID screen. The preloaded patient entries will appear here. 6. Scroll down and select the correct patient. Once selected the patient information will automatically populate the necessary data fields. 7. Touch the start icon to start a session for the selected patient, following the instructions as per the Capturing a Patient Session section of this instruction manual. Adding a Patient Database To use this pre-load patient database feature, Microsoft Excel (or similar) is required to create a data list of the patient details to be saved to the device database. 1. Create a spreadsheet with the following data column headings in bold, PatientID, DoB (date of birth), Gender, Name. Input all of required information to complete the spreadsheet database. Note: The Name column is not mandatory and is not retained by the Eye Check database. It is useful for validation of patient identity by the practitioner. 2. Save this spreadsheet in a remembered file location using a designated file name and save it as a .csv format (comma separated value file). 3. Use steps 1-6 in the section Data transfer via PC connection to successfully connect the device to a PC. 4. Once in the root folder, copy the .csv file created here. IM-078 Rev. C Page 18 of 31 1 5. On the device, select turn off USB storage to turn off this functionality. Safely eject the device from the physical PC connection. 6. Return to the Eye Check Home Screen; select the Eye Check icon to start a session. 7. Long press the PatientID field, this will display the contents of the uploaded .csv file. Scroll through the database to select the required patient. Once selected the user will be returned to the patient details screen with the other data fields now populated from the chosen record. Selecting a patient from an uploaded file Note: If there is more than one valid .csv file loaded onto the device, the user is required to select the correct database to be used. Choosing a patient database file 8. Select the start icon to start the patient session. Use as directed in the section Capturing a patient session steps 3-11. IM-078 Rev. C Page 19 of 31 1 Starting a new session for a patient already in the database Access the patient database by launching Volk Eye Check using the Eye Check icon on the Home Screen. Select patient database using the review icon on the left hand-side. The database is organized in numerical/alphabetical patient ID order. Scroll though the database to locate the desired patient. Long press on the patient entry will activate a menu with the following options: Export Delete New session Cancel Select new session. This will populate the patient details screen with the details of the chosen patient. Now touch the start icon and use as directed in the “Capturing a Patient Session” section. Options for existing patient details Freestyle Mode Follow the steps below to successfully complete a free style mode patient session. 1. Select the Eye Check icon from the Home Screen. 2. Enter the patient data correctly: Patient ID, date of birth and gender. Long press the start icon and select Freestyle to start a free style mode patient session. IM-078 Rev. C Page 20 of 31 1 Options from long press on the start control 3. The lens will extend and automatically be set to the correct zoom setting. There is a short lag as the lens extends out and the device prepares the new session. 4. Hold the camera comfortably but firmly with two hands to avoid shaking. Frame the area of interest on the subject’s face. Half-press the shutter button to achieve correct focus. The white focus squares will appear green if this is the case. Fully press the shutter button to take a photo. Do not linger after focus is achieved. 5. The photograph will be saved in the database. Continue to take as many freestyle photographs as required. Once the practitioner has completed a session, press the physical back button to return to the patient entry page. 6. Select the review icon to access the database. Scroll down to select correct patient. Select the correct session (if there is more than one) and select review icon on the left hand side to review thumbnails of the photographs taken. Note: There will be no analysis or data measurements on the first screen when reviewing data. This will present as a black screen until the review icon is selected to view thumbnails. Freestyle sessions are not uploaded and reports are not generated. Data and pictures may be copied from the internal memory after exporting the session. IM-078 Rev. C Page 21 of 31 1 How to update Volk Eye Check Software To update your Volk Eye Check to the latest software (when available) follow the steps below: 1. Refer to the section titled Data Transfer via PC connection and connect the Volk Eye Check to the PC using the steps 1-6. 2. Download the new version of the software from your e-mail account to a remembered location on your PC. 3. Go to the saved location of the software, right click the icon/data field to select the copy option. 4. Return to locate the device in Finder (Mac) or Windows Explorer (Windows). Click on the device to open the root folder. Select the IRISSApps folder. Right click within this folder to select the paste option to paste the new software package to the device. 5. On the device, select turn off USB storage to turn off this functionality. Safely eject the device from the physical PC connection. 6. Press the physical back key to return to the Eye Check Home Screen. A message will automatically be generated on detection of the new software. Software update found, do you want to install? Touch yes. This will automatically initiate the installation of the latest version of the Eye Check software. Follow the prompts to accept the replacement of the current version and to proceed with the installation. Touch the done control on the final screen and the update is completed. 7. To verify that the new software update has been correctly installed, touch the home icon when in the Home Screen. This will display the details of the software currently running on the device. Crossreference these details with the details of the software update that was received. 8. At this point you can continue to use the device as directed. IM-078 Rev. C Page 22 of 31 1 System Messages The Volk Eye Check device will display messages for many reasons. The messages usually include an explanation and details of possible corrective actions. List of messages displayed by the Volk Eye Check application: Error message: Patient details field label Future dates are not allowed Zoom on face Include both eyes Analysis in progress – another picture required. Picture not quite in focus Face may be tilted Picture not valid Subject too bright or too far away. Too close, move away. Too far away, move closer. What to do: A capture session will not be possible unless all fields are filled in on the patient information page. Ensure correct date of birth and gender are input. Check correct date of birth has been input. Correct zoom setting already pre-set (Z5). Move to correct distance (50-65cm) from patient to take photo and include both eyes. Valid photo achieved. Eye Check requires another valid photo to complete analysis. Continue to take valid photos until session completed Lift finger from dual action shutter button. Re-frame patient. Half press shutter button to achieve green focus lock. Repeat half press process if red focus lock appears to achieve a green focus lock. Readjust patient head position until straight in primary position Retake photo, ensuring correct distance, good lighting level and green focus lock Either reduce lighting or move closer to patient. Move further away from patient and retake photo. More closer toward patient and retake photo. Subject not looking at target Retake photo and encourage patient to focus on fixation target. Zoom setting not valid Incorrect zoom setting. Exit current session and restart session. Room too bright Light level too low Eyes closed or unwanted reflections Battery too low The memory card is full. Clear Database. No WiFi or SIM connection. Please try later. Warning! This will delete all data. Sending data may breach the Personal Data Directive. Including a picture may breach the Personal Data Directive. Reduce room illumination. Increase ambient illumination to the recommended levels as outlined on page 13. Encourage patient to keep eyes open or relocate patient to an area free from mirrors, large windows and extra reflections. Return Eye Check to charger and fully charge. Return to Eye Check settings via the settings icon on the patient ID input page. If you wish to clear database, touch clear database. This is an irreversible process. If you do not wish to delete database and require more storage space contact Volk Optical. Check WiFi settings are correct (section 7.2) and WiFi set up within clinical environment are correct. If you wish to delete data, click delete. This is an irreversible process. To go back, click cancel, the data will not be deleted. Check clinical setting procedures for Personal Data Directive. If this complies, touch yes. If this does not comply, touch no. The data will not be sent via WiFi upload feature. Check clinical setting procedures for Personal Data Directive. If this complies, touch yes. If this does not comply, touch no. The report will not contain the patient picture. Messages from the Eye Check hardware: Error message: Eye Check has stopped unexpectedly. IM-078 Rev. C What to do: Choose the Force Close option. This will reset the application and return to Eye Check Home Screen. Page 23 of 31 1 Cleaning Instructions Volk Eye Check is a precision instrument that should be handled with care. Please note the following cleaning instructions: Shut down the device before cleaning, except when cleaning the camera’s lens element. Clean the housing and display with a soft, lint-free cloth moistened with alcohol. Avoid touching electrical connectors, etc. The lens may be cleaned with a clean cloth or moist lens tissue such as Volk’s Precision Optical Lens Cleaner®. CAUTION: Do not allow Volk Eye Check to become wet. Do not irrigate with liquids. CAUTION: Volk Eye Check is not intended to be disinfected or sterilized. Device Maintenance and Servicing Volk Eye Check contains a Lithium-ion (Li-ion) battery that operates the camera. The service life of the battery is approximately 2 years, depending on usage. The battery should only be replaced by the Volk Optical or a Volk Optical certified service facility when the battery is approaching the end of its service life, or when it ceases electrical functionality. Cease using and return for service if any of the following occur: The device does not power up. The battery does not retain its charge. The application no longer behaves as expected. The device no longer operates as expected. The case is cracked or broken. Volk Eye Check contains two AAA Alkaline batteries that operate the fixation target’s LEDs. Do not recharge the alkaline batteries. Both alkaline batteries should be replaced at the same time when required. It is advised that the batteries should be removed from the device if it is to be stored for an extended period of time. See Appendix B for instructions on replacement of the AAA batteries. All servicing and repairs, other than replacing the AAA batteries, must be carried out by Volk Optical or a Volk Optical certified service facilities and service personnel. CAUTION: If there is damage to the device’s display, buttons, or surfaces, or other visual defects, please contact Volk Optical or a Volk Optical certified service facility. IM-078 Rev. C Page 24 of 31 1 Calibration Volk Eye Check is factory calibrated during the manufacture of the camera. This calibration process will last the lifetime of the product. No further calibration by the user is required. EN 62479 Volk Eye Check has been tested to EN 62479 RF (Assessment of the compliance of low power electronic and electrical equipment with the basic restrictions related to human exposure to electromagnetic fields) and has been found to be safe. The manufacturer does not foresee any precautions or measures that are required to be undertaken with regard to risk of interference or external/environmental influences. IM-078 Rev. C Page 25 of 31 1 Technical Description Volk Eye Check Ophthalmic measurements Measurement accuracy Operating subject distance Average pictures per session Average session time HIPAA Compliant Image Resolution Touchscreen Lens Exposure Subject Illumination Fixation target Storage Connectivity Dimensions Weight (With batteries) Batteries Left and right pupil size Pupil size difference Deviation Inter-pupillary distance (IPD) Left and right horizontal visible iris diameter (HVID) HVID difference Palpebral aperture difference Left and right, top and bottom MRD Left and right, vertical and horizontal pupil eccentricity ± 5% (Based on the results of clinical trials – see page 16) 500mm to 650mm 3 30-45sec Yes 16Mp – 4608x3440 pixels TFT-LCD, 3.2”, 400x800 pixels, 16M colors f/3.1 – f/5.6, Autofocus Auto Exposure, Auto White Balance, Auto ISO Xenon Flash, GN3.1, Auto intensity, 100µS duration 11x Visible Light LEDs flashing at approx. 6Hz 8GB microSD Card USB-2 (microUSB) WiFi 802.11 b/g/n Bluetooth v2.1 +EDR Width – 162.75mm Height – 63.5mm Depth – 27.25mm (lens retracted) Depth – 37.25mm (lens extended) 242g 1x Rechargeable, Li-ion, 3.7v, 1020mAh 2x AAA Alkaline NOTE: If you need a replacement Lithium-Ion battery or power adapter, please contact Volk Optical or your local retailer/distributor. IM-078 Rev. C Page 26 of 31 1 Environmental Conditions for Use, Storage and Transportation IP Code: IPX0 (Equipment not protected against the ingress of water) The Volk Eye Check is intended to be used in a controlled-lighting environment. There is no need for special storage of the device. No specialized handling conditions required. Usage: Temperature, use: + 10 C to 35 C Relative humidity, use: 10 % to 80 % Atmospheric pressure: 800 hPa to 1060 hPa Please note also EMC information given in Annex A. Storage Temperature, storage - 10 C to 40 C Relative humidity, storage: 10 % to 95 % Atmospheric pressure: 500 hPa to 1060 hPa Serial numbering Volk Eye Check is a serialized product. A label indicating the serial number is attached to the base of the device. First screen of the regulatory label sequence The software version and the serial number are both displayed on the device’s display during start up and are accessible via the user interface. IM-078 Rev. C Page 27 of 31 1 Intellectual Property Rights Information Copyright © IRISS Medical Technologies Ltd Disposing of Volk Eye check Do not dispose Volk Eye Check as unsorted municipal waste. Prepare Volk Eye Check for reuse or separate collection as specified by Directive 2002/96/EC of the European Parliament and Council of the European Union on Waste Electronic and Electrical Equipment (WEEE). If this product is contaminated, this directive does not apply. For more specific information, please contact IRISS Medical Technologies or your local retailer/distributor. Contact for Product Support If you wish to contact Volk for product support: Direct: 440-942-6161 Toll free in the United States: 1-800-345-8655 Fax: 440-942-2257 e-mail: [email protected] or [email protected] Warranty Volk Optical provides a 1 year warranty for the parts and labor. Warranty for the Lithium-Ion battery is 6 months. Submitting claim: Any claim under this warranty must be submitted in writing before the end of warranty period to Volk Optical. The claim must include a written description of any failure(s) experienced with the device. Warranty does not cover: Products that have been subjected to abuse, accident, alternation, modification, tampering, misuse, faulty installation, lack of reasonable care, repair or service in any way that is not contemplated in the documentation of the product, or if the model or serial number has been altered, tampered with, defaced or removed. Warranty does not cover damage caused by dropping the device or damage caused by normal wearing. Any issue related to the stickers attached to the device coming off are not covered by warranty. Repair or service done by non Volk Optical certified service facility is not covered by warranty. For customer support, contact: [email protected] IM-078 Rev. C Page 28 of 31 1 Appendix A – FCC Statement Electromagnetic compatibility information US notice Wireless LAN frequency range 2412 MHz ~ 2462 MHz Federal Communication Commission Interference Statement This device complies with Part 15 of the FCC Rules. Operation is subject to the following two conditions: (1) This device may not cause harmful interference, and (2) this device must accept any interference received, including interference that may cause undesired operation. This equipment has been tested and found to comply with the limits for a Class B digital device, pursuant to Part 15 of the FCC Rules. These limits are designed to provide reasonable protection against harmful interference in a residential installation. This equipment generates, uses and can radiate radio frequency energy and, if not installed and used in accordance with the instructions, may cause harmful interference to radio communications. However, there is no guarantee that interference will not occur in a particular installation. If this equipment does cause harmful interference to radio or television reception, which can be determined by turning the equipment off and on, the user is encouraged to try to correct the interference by one of the following measures: Reorient or relocate the receiving antenna. Increase the separation between the equipment and receiver. Connect the equipment into an outlet on a circuit different from that to which the receiver is connected. Consult the dealer or an experienced radio/TV technician for help. FCC Caution Any changes or modifications not expressly approved by the party responsible for compliance could void the user's authority to operate this equipment. This transmitter must not be co-located or operating in conjunction with any other antenna or transmitter. Radiation Exposure Statement This device meets the government’s requirements for exposure to radio waves. This device is designed and manufactured not to exceed the emission limits for exposure to radio frequency (RF) energy set by the Federal Communications Commission of the U.S. Government. The exposure standard for wireless device employs a unit of measurement known as the Specific Absorption Rate, or SAR. The SAR limit set by the FCC is 1.6W/kg. *Tests for SAR are conducted using standard operating positions accepted by the FCC with the device transmitting at its highest certified power level in all tested frequency bands. The highest SAR value for the device as reported to the FCC is 1.492 W/kg when placed next to the body. IM-078 Rev. C Page 29 of 31 1 Appendix B – Replacing the AAA Batteries Two AAA batteries are included within the device to operate the flashing LED on the front of the camera. The user can follow the instructions below to replace the batteries. Alternatively, Volk Optical, and/or Volk Optical’s retailers will provide battery replacement service. Replacing the Fixation Target batteries: 1. Open the battery compartment cover by removing four screws at the back. Put the screws somewhere safe so they don’t get lost 2. Gently pry the back cover away from the front of the Eye Check device, starting at the groove on the right-hand end of the case. 3. Insert 2 fresh AAA Alkaline batteries, after first making note of the proper orientation. Please dispose properly of the old batteries 4. Replace the back cover by snapping it in to position all around the edges. Finish by replacing the four screws saved from step 1. IM-078 Rev. C Page 30 of 31 1 Volk Optical Inc. 7893 Enterprise Drive Mentor, Ohio 44060 USA Phone: 440-942-6161 Toll free within the United States: 1-800-345-8655 Fax: 440-942-2257 Email: [email protected] Website: www.volk.com Copyright © 2014 Volk Optical Inc. Part No. IM-078 Effective: August 22, 2014 Revision: C Instructions for Use (IFU) available at: IM-078 Rev. C http://volk.com/eyecheck/literature/ Page 31 of 31 1