1
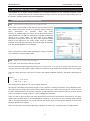
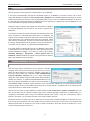
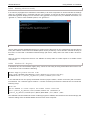
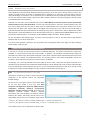
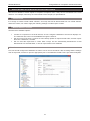
AIDA64 Business Setup guide v 1.0 13. 01. 2014. AIDA64 product family is developed by FinalWire Ltd. Copyright © 1995 - 2014 FinalWire Kft. This document was created by ABSEIRA Ltd. All rights reserved. Copyright © 2010 - 2014 ABSEIRA Kft. The names of actual companies and products mentioned herein may be the trademarks of their respective owners. AIDA64 Business Contents CONTENTS 1 Introduction ....................................................................................................................................... 3 1.1 Minimum system requirements ...................................................................................................... 3 1.2 Entering the registration key .......................................................................................................... 3 1.3 Preparations for evaluating AIDA64 ............................................................................................... 4 2 Using AIDA64 on a network ............................................................................................................. 5 2.1 Copying AIDA64 to a network share .............................................................................................. 5 2.1.1 Using Windows Server and Active Directory ............................................................................ 5 2.1.2 Using a Linux server and Samba 4 ........................................................................................... 5 2.2 Storing reports ................................................................................................................................ 6 2.3 Running AIDA64 on the clients ...................................................................................................... 6 2.3.1 Creating a logon script .............................................................................................................. 6 2.3.2 Scheduled task.......................................................................................................................... 7 2.4 Adding exceptions to Windows Firewall ......................................................................................... 8 2.4.1 In a domain environment, using GPO ....................................................................................... 8 2.4.2 On each computer one by one .................................................................................................. 9 3 Using AIDA64 on computers outside the domain .......................................................................10 3.1 Installation ....................................................................................................................................10 3.2 Making reports: options ................................................................................................................10 3.2.1 Database .................................................................................................................................10 3.2.2 FTP .........................................................................................................................................11 3.2.3 E-mail ......................................................................................................................................14 4 Command-line options ...................................................................................................................15 4.1 Report ...........................................................................................................................................15 4.2 Remote report ..............................................................................................................................17 4.3 Report conversion ........................................................................................................................18 4.4 Report profile ................................................................................................................................18 4.5 Report format ...............................................................................................................................18 4.6 Remote connection ......................................................................................................................19 4.7 Language .....................................................................................................................................19 4.8 Troubleshooting ...........................................................................................................................19 4.9 Miscellaneous...............................................................................................................................20 1 AIDA64 Business 4.10 Contents Variables ......................................................................................................................................20 5 Command-line examples ................................................................................................................21 6 Hints and tips ...................................................................................................................................22 7 Contact .............................................................................................................................................24 2 AIDA64 Business Introduction 1 INTRODUCTION AIDA64 Business is an IT asset management and remote monitoring tool for Windows. With the application, you can collect a very detailed hardware and software inventory from Windows client computers on your company network, and monitor changes in both hardware and software. It allows you to monitor and manage your Windows PCs remotely, and it also offers hardware diagnostics and benchmarking functionality. It is not necessary to install AIDA64 Business on each client separately, as the application can be run from a central shared folder. If you want to evaluate the product, you will need a free test license, which can be requested here. A detailed description of the functions AIDA64 Business offers is available in the AIDA64 Business User Manual, downloadable from our website. 1.1 MINIMUM SYSTEM REQUIREMENTS Operating systems: Windows 95 / 98 / Me Windows NT4 / 2000 Windows XP Windows PE Windows Server 2003 Windows Vista Windows Server 2008 Windows 7 Windows Server 2008 R2 Windows 8 Windows 8.1 Windows Server 2012 Windows Server 2012 R2 Processor: Intel Pentium or newer Memory: 32 MB or more (or 128 MB or more for running the benchmarks) Available hard drive space: 40 MB AIDA64 is completely vendor-independent and is compatible with all PCs running 32-bit and 64-bit Microsoft Windows operating systems. As far as the available functions are concerned, it is irrelevant if we run AIDA64 on a server or client operating system. 1.2 ENTERING THE REGISTRATION KEY When launching AIDA64 Business for the first time, we must enter the product key which was provided in the product registration email after purchase. The software can be activated without an internet connection. During the validity of the license, the software can be used with full functionality; and the user is entitled to free updates and support. Moreover, AIDA64 automatically searches for and activates the latest updates. 3 AIDA64 Business Introduction 1.3 PREPARATIONS FOR EVALUATING AIDA64 To test the software, we suggest you perform the following steps: 1. Request a free, 30-day test license. 2. Download the AIDA64 Business ZIP package from the link provided in the email. 3. Unzip the package to a shared folder to which all the clients have access. 4. Choose the format in which you would like to store the reports collected from the networked computers: 4.1. separate files (i.e.\\Server_IP_address\Share\AIDA64\reports\$DATE\$HOSTNAME) 4.1.1.Simple text file (txt) 4.1.2.HTML file 4.1.3.MHTML file 4.1.4.XML file 4.1.5.CSV file (which can be imported subsequently to a database) 4.1.6.MIF file 4.1.7.INI file 4.2. database 4.2.1.Borland InterBase / Firebird (MSDASQL) 4.2.2.MS Access 97 (MS.Jet.OLEDB.4.0) 4.2.3.MS Access 2000/XP/2003 (MS.Jet.OLEDB.4.0) 4.2.4.MS SQL Server (SQLOLEDB) 4.2.5.MySQL (MSDASQL) 4.2.6.ODBC (MSDASQL) – any database with an ODBC driver 4.2.7.Oracle (MSDAORA) 4.2.8.PostgreSQL (MSDASQL) 4.2.9.Sybase (SybaseASEOLEDBProvider) 5. Select the way you want to run AIDA64 Business on the network 5.1. In a domain environment – using a logon script (recommended) 5.2. In a domain environment – as a scheduled task (when Group Policy service is not available on the domain controller) 5.3. On a portable computer connecting from outside the company network 4 AIDA64 Business Using AIDA64 on a network 2 USING AIDA64 ON A NETWORK The simplest way to deploy AIDA64 Business on a computer network is to use a domain controller. In this case, running AIDA64 Business has to be included in the logon script for each client so that as they log on to the domain, AIDA64 Business will start automatically. 2.1 COPYING AIDA64 TO A NETWORK SHARE 2.1.1 USING WINDOWS SERVER AND ACTIVE DIRECTORY First, create a shared folder on the network, which all clients access with “Read” permissions as well as exclusively “Read & Execute” NTFS permissions. For example, name this folder \\Server_IP_address\share. Of course, we can also use the server name instead of the IP address of the server. If we want to store the reports in the “share” folder, we also need to set “Modify” permission on this folder, but we can also create separate shared folders for the reports. In the “share” folder, create an “aida64” subfolder and copy the contents of the ZIP package downloaded from the AIDA64 website in this subfolder. Note: If we share the share folder appending a $ sign to its name (e.g. “share$”) it will be a hidden share. 2.1.2 USING A LINUX SERVER AND SAMBA 4 In this case, Linux acts as the domain controller. We can download AIDA64 Business directly to our Linux server, or to any of our clients, from where we can copy it to the server using SSH. Create a folder for AIDA64, then decompress the AIDA64 files into this folder. Then we need to open smb.conf, which is found in the Samba installation directory, and add the following lines to it: [share] path = /srv/share read only = yes After saving the modified file, we have to restart Samba 4. We will use a Windows client already logged in on the domain to modify permissions. On the Windows client, we need to open an empty mmc console, then in the File menu click “Add or remove snap-ins”. There we have to select “Shared folders” and “Another computer”, in which field we have to type the name of our Linux server (not the IP address!). Finally, under the “View” heading select “Shares”. Then we need to open “Shares” and grant “Read and execute” NTFS permissions to all clients in our newly created share (called “share”). We should apply the settings. If we receive an error message when clicking “OK” in the properties window, we may as well exit clicking the “Cancel” button as the settings on the security tab have already been applied. Note: If we share the share folder appending a $ sign to its name (e.g. “share$”) it will be a hidden share. 5 AIDA64 Business Using AIDA64 on a network 2.2 STORING REPORTS We can choose to store reports in individual files or in a database. If we want to automatically manage the generated reports in a database, we need to select one of the 9 supported database formats from File | Preferences | Database in the AIDA64 Business running from central storage and provide the location of the corresponding data source. If we use a different database not found in the Provider drop-down list but with an ODBC driver at our disposal, it is possible to use that database, too. It is recommended to regularly backup the database. Database-specific options and settings are discussed in detail in the AIDA64 Business user manual, in the section “Preferences / Database”. If we decide to store the reports collected at scheduled times from client computers in individual files rather than in a database, we should create a folder to which all clients have access with “Write” NTFS permission only. (Should clients also have inherited “Read and execute” permissions, we have to revoke these!) Running on the clients, AIDA64 Business will be able to copy the reports here. The folder can be: \\Server_IP_address\share\aida64reports. If we later decide to manage the reports in a database, rather than in individual files, we can easily import our CSV report files into the AIDA64 Database manager. To do this, we need to go to File | Database Manager | Operations | Insert Report Files to Database | Files and select the saved CSV report files we want to add to the database, then click Open. 2.3 RUNNING AIDA64 ON THE CLIENTS 2.3.1 CREATING A LOGON SCRIPT Run the group policy management on the domain controller, navigate to the Group Policy Object group where you need to add a new GPO. Name it, for example, „AIDA64”. Right-click on this entry, choose Edit, then navigate to User Configuration| Policies| Windows settings then in the Logon Properties dialog box select Add a Script and add the full network path for aida64.exe (\\Server_IP_address\share\aida64\aida64.exe) as well as the Script Parameters you want to use (for example. /R /DATABASE /AUDIT /ACCEPT /SAFE /SILENT). This ensures that AIDA64 will run automatically and start creating reports on the client machines when they log on to the network. It will also wait for incoming remote connections and can send alerts in real time. We can set how often we want AIDA64 to create reports in File | Preferences | Report | Schedule. We can also choose if we want to create an /AUDIT report, which contains all pages required for a network audit, or a completely customized report using the /CUSTOM <profile path> option. Using the command-line option /DELAY <seconds>, we can delay the start of the report creation process. Important! We have to make sure not to create two (or more) scripts containing aida64.exe otherwise only the first one will be executed as only one aida64.exe can reside in the memory. If we want to run AIDA64 with different parameters on certain PCs, we need to create a new GPO, which we can link to another OU, or we can grant another group access to it. 6 AIDA64 Business 2.3.1.1 Using AIDA64 on a network Running AIDA64 instantly If we want to propagate the modifications immediately to all client computers we should activate the settings using the “gpupdate /force” command and then use “gpresult” to check if all clients received the GPO. The information “gpresult” displays can be saved to a file (“gpresult /X C:\report.xml”). For detailed information, use “gpresult /V”, and for other available options, use “gpresult /?”. 2.3.2 SCHEDULED TASK We can easily activate AIDA64 Business in our system even if the server on our network does not have Group Policy but a domain environment is available (which can be provided by a Linux domain controller as well). In this case, we will need a centralized shared storage (file server, NAS) where we need to add a share for AIDA64. Next, we need to configure all clients to run AIDA64 on startup either to create reports or to enable remote connections. 2.3.2.1 Windows XP – Registry In Windows XP, we need to add a registry entry, which we can easily do using a REG file that we have to run on the client. It has to include the following: Windows Registry Editor Version 5.00 [HKEY_LOCAL_MACHINE\SOFTWARE\Microsoft\Windows\CurrentVersion\Run] "AIDA64Startup"="\\Server_IP_address\\share\\aida64\\start.bat" In the start.bat file we can specify the desired functions (report creation, remote connection) with commandline switches. For combined (report creation + remote connection) functions the start.bat has to include the following script: @echo off rem Run AIDA64 to create reports and enable remote connection start \\Server_IP_address\share\aida64\aida64.exe /ACCEPTBG /R \\Server_IP_address\aida64report\$DATE\$HOSTNAME /CSV /AUDIT /SAFE Now AIDA64 has been added to the list of startup programs. AIDA64, launched from the central storage, will read the settings from the default aida64.ini file for each client computer. 7 AIDA64 Business 2.3.2.2 Using AIDA64 on a network Windows Vista and newer Using Windows Vista and newer Windows operating systems, we do not need to add an autorun entry in the registry, instead we have to create a scheduled task for AIDA64 to run when the computer starts. This has many advantages, for instance, it is not necessary to run AIDA64 at the very beginning of the startup process, we can use a few seconds of delay, and we can define various criteria for running the program. We can create a scheduled task in several ways. Manually, we can add a new scheduled task from the Start Menu| Control Panel| All Control Panel Items| Administrative Tools| Task Scheduler. In the menu in the left column, select the Task Scheduler entry, and then click Create Task. Give the task a name (such as “Start AIDA64 when the system starts”), then on the Startup tab, click New. Here, select Login as the trigger event, then Every user, and set a 10 second delay so that launching AIDA64 will not add time to the startup process. On the Actions tab, click the New button, select Start program, select the aida64.exe in the shared folder (\\Server_IP_address\share\aida64\aida64.exe), and provide the required options, for example: /R /DATABASE /AUDIT /ACCEPT /SAFE /SILENT. On the Conditions and Settings page, we need to set the options in such a way that ensures that AIDA64 Business will run on clients at all times. If we have more portable computers, we can perform the configuration faster if we apply the above settings automatically, using a script. 2.4 ADDING EXCEPTIONS TO WINDOWS FIREWALL If we want to use the remote access functions of AIDA64 Business, we need to ensure that we allow the software to communicate through the local firewalls. In practice, two Windows Firewall popups asking for permission to pass through the firewall will appear on the client computers when AIDA64 launches for the first time, which may confuse non-professional users. For security reasons, most users will probably choose “Do not allow”, which will block the remote access functions of AIDA64. Accordingly, it is not recommended to let users make the choice here, if they have the rights to perform such operations at all. Educating users about this firewall settings can be difficult and costly, and we would also like to avoid visiting each client computer one by one, so the most practical solution is to set up our server so that it deploys the proper firewall settings on every computer in the domain as they log on. 2.4.1 IN A DOMAIN ENVIRONMENT, USING GPO We need to configure our server in such a way that all computers in the domain receive the necessary firewall settings On the server, in the quick menu of an existing GPO (or we can also create a new one) click Edit| Computer Configuration| Policies| Administrative Templates| Network| Network Connections| Windows firewall| Domain profile and search for Windows Firewall: Define inbound program exceptions, then click Enabled. Click Show, add the following two paths, and finally, link the GPO to the organization unit in which our computers are grouped: \\Server_IP_address\Share\aida64\aida64.exe:*:enabled:aida64.exe \\Server_IP_address\Share\aida64\aida_rcs.dll:*:enabled:aida_rcs.dll This solution works only on Windows XP SP2 or later. 8 AIDA64 Business 2.4.2 Using AIDA64 on a network ON EACH COMPUTER ONE BY ONE If we have configured each client manually to run AIDA64, as a final step, we need to allow the software to pass through the firewall. Manually, we can do this by clicking “allow” on the two popup notifications that Windows firewall displays when the program is launched for the first time on each client. But the process can be easily automated by running the BAT script file below, which will add the required exceptions to Windows firewall. netsh firewall add allowedprogram \\Szerver_IP_címe\share\aida64\aida64.exe aida64.exe enable netsh firewall add allowedprogram \\Szerver_IP_címe\share\aida64\aida_rcs.dll aida_rcs.dll enable 9 AIDA64 Business Using AIDA64 on computers outside the domain 3 USING AIDA64 ON COMPUTERS OUTSIDE THE DOMAIN We can use AIDA64 to create reports of corporate computers even if they are not connected to the local network – for example, when they are used outside of the company for presentations. 3.1 INSTALLATION It is enough to create a folder called “AIDA64”, and unzip the ZIP file downloaded from our official website. When this is done, we need to apply the following settings to enable report creation. 3.2 MAKING REPORTS: OPTIONS We have three available options: 3.2.1 Just like on computers on the local network, we can configure a database to be used on laptops, too. The machines will connect to the database through the internet. We can use an FTP server, to which we can instantly upload our reports saved to file, and then import them into a database, if needed. We can send the report files in e-mail. With a script, we can automatically download the e-mail attachments to a selected folder, or we can import them into a database. DATABASE First, we should configure the database we want to use on the local network. After checking that the settings work as expected, we have to open the appropriate port on the hardware firewall. This is port 3306 for MySQL. 10 AIDA64 Business 3.2.2 Using AIDA64 on computers outside the domain FTP After setting up the FTP server, we need to create a user. It is the “Home” directory of this user, for example: “D:\FTP\Reports”, into which AIDA64 will upload the reports. We need to grant “Write” and “+ Subdirs” permissions to the user. We have to open the port we use – in this case port 21 – on the hardware firewall as well as on the local firewall, if required, so that our portable computers can connect to the FTP server from outside the network. 3.2.2.1 FTP settings in AIDA64 To configure FTP, we need to navigate to File | Preferences | Report | FTP. We have to type our public IP address in the “Server” field, specify the FTP port we use, then provide the user name and password of the user we have created for the purpose. We should create a new folder within the “Home” directory – for example, “CSV files” –, and add that as the FTP folder here. If required, we can use passive mode. By clicking the “Test” button, we can check if our settings work as expected. 11 AIDA64 Business 3.2.2.2 Using AIDA64 on computers outside the domain Running AIDA64 To make AIDA64 send reports automatically to the FTP server we need to use the /FTPUPLOAD [file name] command-line option. We can run the command as a scheduled task so that the software generates a report each time the user logs in, or just once a day. Open Task Scheduler, then locate Actions | Create task. On the Trigger tab, click “New” and create a new trigger. In the Program/Script field on the New action tab, we need to browse to the AIDA64 executable found in the local drive, and add the required command-line options. For example: “C:\AIDA64Business\aida64.exe /FTPUPLOAD $DATE_$HOSTNAME /CSV /AUDIT”. 12 AIDA64 Business Using AIDA64 on computers outside the domain Finally, check the “Run with highest privileges” checkbox. After we have created the new task, a report will be created each time the computer starts. In order to avoid creating a large and unnecessary number of reports, we have to configure scheduling in AIDA64. We have to make sure that the “recur” settings in Task Scheduler are in line with our AIDA64 settings. The reports created this way can be automatically imported into a database, if needed. Note: When running AIDA64 with such parameters, we cannot use /ACCEPT. 13 AIDA64 Business 3.2.3 Using AIDA64 on computers outside the domain E-MAIL If we choose to send the reports in e-mail, we need to run AIDA64 using the command-line option /E. When no address is specified in the command-line, the report is sent to the “To:” address provided on the e-mail settings page, which is available in Preferences | E-mail. Reports are automatically compressed if compression is enabled in Preferences | Report. If we use this option on several computers, creating a dedicated e-mail account is recommended. For example, we can run AIDA64 with the following command: aida64.exe /E [email protected] /CSV /AUDIT /SILENT /SAFE In this case, AIDA64 will instantly send the generated report to the specified e-mail address. This is how the e-mail message the software sends looks like: By clicking the download button, we can save the reports into a folder of our choice, from where they can be imported automatically into a database. 14 AIDA64 Business Command-line options 4 COMMAND-LINE OPTIONS AIDA64 Business offers several command-line options with which we can customize network audit, automated report creation, remote connections and some security features. Precautions: 1. Only one of the following options can be used in a single command-line: /R, /E, /FTPUPLOAD, /RMTREPORT. Using more of these options simultaneously could cause unexpected issues. 2. Only one of the following options can be used in a single command-line: /RMTREPORT, /ACCEPT, /ACCEPTBG, /ACCEPTMIN. Using more of these options simultaneously could cause unexpected issues. 3. Only one of the following options can be used in a single command-line: /ALL, /SUM, /HW, /SW, /BENCH, /AUDIT, /CUSTOM. Using more of these options simultaneously could cause unexpected issues. 4. Only one of the following options can be used in a single command-line: /TEXT, /HTML, /MHTML, /XML, /CSV, /MIF, /INI, /DATABASE. Using more of these options simultaneously could cause unexpected issues. 5. From Version 2.20, it is possible to use Report and Remote Connection options simultaneously in a single command-line. In such cases, the report creation process will be launched first, and after it is finished AIDA64 stays in the background waiting for incoming remote connections. 4.1 REPORT /R [reportfile] – this option can be used to create a report and save it to file When no file name is specified, the report will be written to the file specified in Preferences / Report / Report File. It is recommended to specify a full path name for the report file in the command-line. For a network audit, we should use UNC paths in folder names instead of using a mapped network drive. Reports are automatically compressed if this option is enabled in Preferences / Report. In the report file names we can use control strings. Example: AIDA64 /R \\server\share\folder\$HOSTNAME /CSV /AUDIT /SILENT /SAFE 15 AIDA64 Business Command-line options 16 AIDA64 Business Command-line options /E [address] – this option can be used to create a report and send it in e-mail When no address is specified the report is sent to the “To:” address configured in Preferences / Report / E-mail. Reports are automatically compressed if this option is enabled in Preferences / Report. Example: AIDA64 /E [email protected] /CSV /AUDIT /SILENT /SAFE /SUBJ <subject> – this option can be used with /E to specify the subject of the e-mail to be sent In the subject we can use control strings. Example: AIDA64 /E [email protected] /SUBJ "Report of $HOSTNAME" /CSV /AUDIT /SILENT /SAFE /FTPUPLOAD [reportfile] – this option can be used to create a report and upload it to a FTP server When no file name is specified the report will use the file name configured in Preferences / Report / Report File. Reports are automatically compressed if this option is enabled in Preferences / Report. The FTP connection has to be configured in Preferences / Report / FTP. Example: AIDA64 /FTPUPLOAD $HOSTNAME /CSV /AUDIT /SILENT /SAFE 4.2 REMOTE REPORT /RMTREPORT [reportfile] – this option can be used to create report files of remote computers and save them to files When no file name is specified the report will be saved to the file configured in Preferences / Report / Report File. It is recommended to specify the file name with a full path name in the command-line. Reports are automatically compressed if this option is enabled in Preferences / Report. When more than one computer is to be interrogated, it is imperative to use at least one special file control string in the file name to avoid the reports overwriting each other! This option must be used with the /RMTHOSTS option explained below. On the remote computers, one AIDA64 instance has to be running in the background and accepting incoming connections automatically (using either /ACCEPT or /ACCEPTBG command-line options). Example: AIDA64 /RMTREPORT pc1name,pc2name,pc3name /CSV /AUDIT c:\remotereports\$HOSTNAME /RMTHOSTS /RMTHOSTS – this option can be used to specify the list of remote computers of which /RMTREPORT creates reports This option can be used in two different ways: /RMTHOSTS <host1,host2,...> The names of remote computers are separated by commas. Do not use spaces between the computer names! Example: AIDA64 /RMTREPORT pc1name,pc2name,pc3name /CSV /AUDIT c:\remotereports\$HOSTNAME /RMTHOSTS /RMTHOSTS <@listfile> The names of remote computers are located in an existing text file, in which each computers name has to be listed in a separate line. Example: AIDA64 /RMTREPORT @c:\aida64\remotepclist.txt /CSV /AUDIT c:\remotereports\$HOSTNAME 17 /RMTHOSTS AIDA64 Business Command-line options 4.3 REPORT CONVERSION /CSV2HTM [input file] [output file] - This option converts a CSV report file to a HTML report file. /CSV2SQL [folder] – This option inserts the contents of a folder containing CSV report files to a SQL database. 4.4 REPORT PROFILE /ALL – the reports created will include all pages from the page menu. /SUM – the reports created will include only the Computer / Summary page /HW – the reports created will include only the pages listing hardware-related information /SW – the reports created will include only the pages listing software-related information /BENCH – the reports created will include the benchmark pages only. /AUDIT – the reports created will include only the pages required by AIDA64 Audit Manager to compile a network audit and show audit statistics. /CUSTOM [\\Server_IP_address\AIDA64\profile.rpf] – this option loads a customized report profile 4.5 REPORT FORMAT /TEXT – reports will be created in plain text format Plain text reports are usually not suitable for network audits. /HTML – reports will be created in HTML (HyperText Markup Language) format HTML report layout can be customized in Preferences / Report / Report Look. Although HTML reports are ideal if we want to print reports, they cannot be used in AIDA64 Audit Manager and Change Manager. /MHTML – reports will be created in MHTML format (with HTML images) MHTML reports are basically HTML reports with small icons included. MHTML report layout can be customized in Preferences / Report / Report Look. Although MHTML reports are ideal if we want to print reports, they cannot be used in AIDA64 Audit Manager and Change Manager. /XML – reports will be created in XML (Extensible Markup Language) format XML reports can be processed by 3rd party solutions, but they cannot be used in AIDA64 Audit Manager and Change Manager. /CSV – reports will be created in CSV (Comma Separated Values) format CSV reports can be used in AIDA64 Audit Manager and Change Manager, or can be processed by any other 3rd party solutions. The default column separator character for CSV reports (comma) cannot be changed. /MIF – reports will be created in MIF format MIF reports can be used for MS SMS integration. MIF reports always include the same static information block, regardless of the specified report profile. /INI – reports will be created in INI format INI reports can be used by scripting languages, but they cannot be used in AIDA64 Audit Manager and Change Manager. /DATABASE – reports will be inserted to a SQL database SQL connection parameters can be configured in Preferences / Database. 18 AIDA64 Business Command-line options 4.6 REMOTE CONNECTION /ACCEPT – This option enables incoming connections. /ACCEPTBG – Using this option, AIDA64 will be launched in the background and wait for incoming remote connections. The user on the client machine cannot use or close AIDA64. /ACCEPTMIN – Using this option, AIDA64 will be launched in the background and wait for incoming remote connections. The user on the client can use and close AIDA64. 4.7 LANGUAGE /LANGxx – where “xx” should be replaced with a 2-letter language code. The following languages are currently supported: AA = Arabic AL = Albanian BG = Bulgarian BS = Bosnian BY = Belarusian CA = Catalan CN = Chinese (Simplified) CZ = Czech DE = German DK = Danish EN = English ES = Spanish FI = Finnish FR = French HR = Croatian HU = Hungarian ID = Indonesian IT = Italian JP = Japanese KR = Korean LT = Lithuanian LV = Latvian MK = Macedonian NL = Dutch NO = Norwegian PL = Polish PT = Portuguese RO = Romanian RU = Russian SE = Swedish SI = Slovenian SK = Slovak SR = Serbian TR = Turkish TW = Chinese (Traditional) UA = Ukrainian 4.8 TROUBLESHOOTING /SAFE – This option activates safe mode, in which low-level PCI, SMBus and sensor scanning are disabled. For network audits, it is recommended to use this option to make sure AIDA64 does not cause system stability issues. /SAFEST – This option activates the safest mode in which kernel drivers are not loaded either. /NT4ZIPFIX – Using this option, an Iomega Zip drive related issue can be avoided on Windows NT 4.0 systems. 19 AIDA64 Business Command-line options 4.9 MISCELLANEOUS /SILENT – This option can be used to hide the AIDA64 icon on the System Tray (also known as Notification Area) and the bubble notifications. /SHOWED – Using this option displays a dialog box before the report is sent in e-mail. This can be useful in help desk scenarios as the dialog box lets the user enter special comments about his/her issue. This option must be used with the /E command-line option. /SHOWP – Using this option, the report creation progress can be tracked on screen, but no user intervention is allowed (can be used with the options /R, /E or /FTPUPLOAD). /SHOWPCANCEL – Using this option, the report creation progress can be tracked, and user intervention is allowed (can be used with the options /R, /E or /FTPUPLOAD). /SHOWS – Using this option, the startup process of AIDA64 can be tracked on screen. /NOICONS – AIDA64 will not display icons on its user interface. This option can be used to save network bandwidth. /INIFILE <\\Server_IP_address\AIDA64\aida64.ini> – This option can be used to tell AIDA64 where to load the settings from. /DELAY [seconds] – This option can be used to delay the startup of AIDA64 so that other programs can load faster. /IDLE – This option sets AIDA64 application process to idle (lowest) priority. /NOLICENSE – This option can be used to disable and hide all software license related information, including the Software / Licenses page. 4.10 VARIABLES With variables, we can use dynamic path and file names in command-line switches. $HOSTNAME – Inserts host name $USERNAME – Inserts current user name $DOMAIN – Inserts current logon domain $IPADDR – Inserts primary network adapter IP address (aaa-bbb-ccc-ddd) $MACADDQ – Inserts primary network adapter MAC address (AABBCCDDEEFF) $MACADDR – Inserts primary network adapter MAC address separated by hyphens (AA-BB-CC-DD-EE-FF) $UUIDMAC – Inserts DMI System UUID. When this is not available, it inserts MAC address (00000000-00000000-0000AABB-CCDDEEFF) $MONTH – Inserts current month (MM) $DATE – Inserts current date (YYYY-MM-DD) $TIME – Inserts current time (HH-MM-SS) The default environment variables of Windows can also be used: these are listed in AIDA64 on the Config / Environment page. If we want to use these we need to enclose them in percent signs, for example: %LOGONSERVER%. 20 AIDA64 Business Command-line examples 5 COMMAND-LINE EXAMPLES Creating a CSV report in safe mode /R \\Server_IP_address\Share\aida64reports\$DATE\$HOSTNAME /CSV /AUDIT /SAFE Creating a SQL report in safe mode /R /DATABASE /AUDIT /SAFE Running AIDA64 in the background with remote access enabled /ACCEPTBG /SILENT Running AIDA64 in the background to create a CSV report and enable remote access, in safe mode /ACCEPTBG /R \\Server_IP_address\Share\aida64reports\$DATE\$HOSTNAME /CSV /AUDIT /SAFE /SILENT Running AIDA64 in the background to create a SQL report and enable remote access, in safe mode /ACCEPTBG /R /DATABASE /AUDIT /SAFE /SILENT 21 AIDA64 Business Hints and tips 6 HINTS AND TIPS 1. Issue: Many users complain about significantly longer boot-times after activating AIDA64. Solution: AIDA64 Business starts as a scheduled task in Windows Vista or newer Windows editions. We can set a 10 second delay after system startup so the user can start using their systems and AIDA64 will activate later in the background. We can also set a delay in a domain environment. We can also delay the start of the report creation process with the /DELAY command-line switch. 2. Issue: Reports are not generated or, to the annoyance of users, a UAC (User Account Control) notification pops up every time the system starts. Solution: If reports are not generated, or AIDA64 hangs up while saving reports or asks for elevated privileges, check if users have the appropriate read or write permissions for the AIDA64 files and folders stored on the central storage. If permissions seem all right and you still experience issues, delete the “aida64e.exe.manifest” file from the AIDA64 Business folder. 3. Issue: On some clients, AIDA64 hangs up while creating reports. Solution: Using the /SAFE command line option, we can disable critical low-level tests (low-level PCI, SMBus and sensor monitoring), which should resolve the issue in most cases. If the problem still persists use the /SAFEST option to also prevent kernel drivers from loading. 4. Issue: Clients fail to save the reports to the specified location. Solution: We need to double-check the write permissions. Special characters (such as space, accented letters) used in the folder names are also known to have occasionally caused issues. Rename the folders ensuring that not even the full path names contain a folder name with spaces. 5. Issue: When the system starts, AIDA64 launches normally from the AIDA64.bat file on the clients but the black command line window remains open and needs to be closed manually. Solution: Use the built-in Start.exe application launcher utility in Windows. Add „start” to the beginning of the command line so that the window closes automatically immediately after entering the command (on faster PCs this will be almost unnoticeable). 6. Issue: We create more reports per day but only the first is saved to the shared storage in the folder, the name of which contains the date and computer name. Solution: Since client computers have write-only permissions, they cannot first read and then write to the existing folder. After the second attempt, the saving process will terminate with an error message. This problem can be resolved if we give modify permissions for the shared folder to the clients. 7. Issue: Share folder permissions work as required but users can see the content of the shared folders. Solution: Instead of \\Server_IP_address\Share\aidareports use \\Server_IP_address\ Share$\aidareports (and the other AIDA64 folders) as the folder name for the shared folders. This way the AIDA64 Business folders will be hidden, shared network folders. 8. Issue: If I run the Windows XP specific batch file that adds the firewall exception on Windows Vista or later, I receive a warning message. Solution: Even though “netsh firewall” is an outdated command, newer Windows versions, including Windows 8, provide backward compatibility and can run the command without problems. The message is only to notify the user that there are more up-to-date solutions available. 22 AIDA64 Business 9. Hints and tips Issue: After we have finished installation and configuration, the group policy is not refreshed on some client machines. Solution: By default, group policy is updated every 90 minutes, with a random offset of 0 to 30 minutes. You can either wait for the client computers to get updated automatically or run the “gpupdate /force” command to force instant group policy refresh. The /force option ignores processing optimizations and reapplies all policy settings. Another option is to modify the update rate from 0 to 64,800 minutes (45 days) in Group Policy. You can do this by running gpedit.msc, then search for Computer Configuration| Administrative Templates| System| Group Policy, and double-click “Group Policy refresh interval for computers” to specify a custom update rate. And there is a third option: if we create a Group Policy before (even just a day before) deployment using the “gpupdate /force” command, this will update the group policy automatically on every computer when they start. This way it is enough to log out and then log in again to run AIDA64. After a while, we can delete this GPO. 23 AIDA64 Business Contact 7 CONTACT ABSEIRA Kft. Erzsébet tér 2. 1051 Budapest Hungary Registration number: 01-09-947083 VAT identification number: 22971074-2-41 E-mail: [email protected] Business hours: from Monday to Friday between 8.00 and 16.00 CET. ABSEIRA Ltd. is the international distributor of the AIDA64 product family. v 1.0 – First edition 24