1
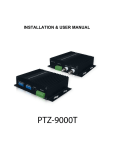
INSTALLATION & USER MANUAL Tracking Box for PTZ Camera Thank You for choosing our tracking box for PTZ Camera! When you open the box: ; Check that the packing and the contents are not visibly damaged. Contact the retailer immediately if any parts are either missing or damaged. ; Make sure if the contents are all included as per the packing list. ; Do not attempt to use the device with missing or damaged parts. Send the product back in its original packing if it is damaged. The information contained in the document is subject to change without notice. i/i Table of Contents 1. Safety Notes --- Important!!! .....................................................................................1 2. About The Product.....................................................................................................1 2.1. 2.2. 2.3. 3. Features....................................................................................................................1 Functions ..................................................................................................................1 Technical Parameters...............................................................................................2 Operation Guide .........................................................................................................2 3.1. Diagram And Dip Switch Setting ..............................................................................2 3.2. Operation At Power Up.............................................................................................8 3.3. How To Use Our Control Keyboard..........................................................................9 3.3.1. Control Keypad Command Syntax.....................................................................9 3.3.2. Keys “Open” And “Close” ...................................................................................9 3.3.3. Preset Positions Programming And Recalling .................................................10 3.4. Function Program Menu .........................................................................................10 3.4.1. Tracking Setting Menu .....................................................................................11 3.4.2. Cruise ...............................................................................................................13 3.4.3. Alarms ..............................................................................................................13 3.5. Special Control Panel Commands..........................................................................14 4. Trouble Shooting ........................................................................ 错误!未定义书签。 ii / iii 1. SAFETY NOTES --- IMPORTANT!!! The following important notes must be followed carefully to run the device and respective accessories in total safety. Use the instructions correctly and fully Read all safety rules and instructions carefully before operation. Follow the instructions in the instruction manual. Pay attention to all warnings on the camera and in the instruction manual. Keep the safety notes and instructions for use for future reference. Attachments & Accessories Do not use attachments other than those recommended in the instruction manual because this could cause risks to the device. Only use the recommended accessories for the camera for installation and operation. Protect the video system Keep it away from rain and humidity to prevent the risk of fire and electrocution. Do not introduce solids or liquids inside the device to prevent the risk of fire and electrocution. If this should accidentally occur, disconnect the device from the mains and have it inspected by qualified personnel. Maintenance & Repairs Always contact a qualified service technician to repair the device. Unauthorized opening or removing the lids may cause fire and electrocution risk and other dangers. Disconnect all electrical parts from the mains before cleaning. After any servicing intervention or repair to the device, ask the technician to run a safety check to ensure that everything is working safely. 2. ABOUT THE PRODUCT The tracking box is a new and cost-effective tracking solution for high speed PTZ cameras. It enables object tracking functions on normal speed domes. 2.1. FEATURES ; Highly compatible with normal high speed PTZ cameras, with no affect on the existing functions of the cameras; ; Independent OSD menu; ; Cost effective solution with no other update cost on the cameras; ; Up to 4 alarm inputs and 2 alarm outputs; ; Compact design and easy operation; ; Auto search and track on moving object, with adjustable precision and tracking state; ; Auto return to home position/preset and keep tracking after some programmable interval when object is out of adjustable area; ; Auto activation on power up/reset or as per schedule: after power-up or reset, or as scheduled, zone scan, random scan, auto cruise, pattern scan and tracking; ; Hi-precision motor providing stable and precise performance; ; P/T speed adjustable as per zoom times; ; Manual-controlled scan area adjustable; ; Auto/Manual start of heating device. 2.2. FUNCTIONS Object Tracking 1/1 In auto tracking mode, a PTZ camera can tracking a moving object in the target area with auto pan, tilt and zoom which realizes smart unattended surveillance. The device can enable a normal PTZ camera to track a moving object. Alarm and Track The device receives alarm signals and as a result, it enables the connected PTZ camera to track a moving object. Tracking During Cruise When the camera is cruising among saved presets, it will detect and follow the moving object automatically when it stops at a specific preset; while after the moving object gets lost for pre-defined interval, the camera will go back to its previously stopped preset and cruise to next preset again. Park Action When the camera is kept idle for a set interval, it will be regarded as “Park”; there are many actions selectable that you want the camera to operate when in “Park”, such as Cruise, Tracking and etc. 2.3. TECHNICAL PARAMETERS Interface RS485 (one to controller, the other to PTZ camera) Baud Rate 2400bps, 4800bps, 9600bps Menu OSD Spectra Address 0~255 Protocols Pelco D/P Power 9~12VDC Table 1: Technical Parameters 3. The specifications are subject to change without notice. OPERATION GUIDE This section contains detailed instructions for installation and operation of the device. These instructions assume that the user has a good knowledge of installation techniques and is capable of adopting safe installation methods. 3.1. DIAGRAM AND DIP SWITCH SETTING Please ensure the power supply is within the named range of the device. Connect the power, alarm and video. Pic. 1 Power, Alarm, Video Make sure the DIP switches of protocol, baud rate, address on the device are the same as those of the PTZ camera connected. 2/2 Pic. 2 Protocol, Address and RS485 Please refer to the following tables to set baud rate, and communication protocol type and camera address. POS Protocol POS Baud Rate 1 2 3 4 DESCRIPTION OFF OFF OFF OFF PELCO-P ON OFF OFF OFF PELCO-D DESCRIPTION 5 6 7 8 2400 ON OFF OFF OFF 4800 OFF ON OFF OFF 9600 OFF OFF OFF OFF Table 2: Switch Setting of Protocol and Baud Rate Address 0 1 OFF 2 OFF 3 OFF 4 OFF 5 OFF 6 OFF 7 OFF 8 OFF 1 ON OFF OFF OFF OFF OFF OFF OFF 2 OFF ON OFF OFF OFF OFF OFF OFF 3 ON ON OFF OFF OFF OFF OFF OFF 4 OFF OFF ON OFF OFF OFF OFF OFF 5 ON OFF ON OFF OFF OFF OFF OFF 6 OFF ON ON OFF OFF OFF OFF OFF 7 ON ON ON OFF OFF OFF OFF OFF 8 OFF OFF OFF ON OFF OFF OFF OFF 9 ON OFF OFF ON OFF OFF OFF OFF 10 OFF ON OFF ON OFF OFF OFF OFF 11 ON ON OFF ON OFF OFF OFF OFF 12 OFF OFF ON ON OFF OFF OFF OFF 13 ON OFF ON ON OFF OFF OFF OFF 14 OFF ON ON ON OFF OFF OFF OFF 15 ON ON ON ON OFF OFF OFF OFF 16 OFF OFF OFF OFF ON OFF OFF OFF 17 ON OFF OFF OFF ON OFF OFF OFF 18 OFF ON OFF OFF ON OFF OFF OFF 19 ON ON OFF OFF ON OFF OFF OFF 20 OFF OFF ON OFF ON OFF OFF OFF 21 ON OFF ON OFF ON OFF OFF OFF 22 OFF ON ON OFF ON OFF OFF OFF 23 ON ON ON OFF ON OFF OFF OFF 24 OFF OFF OFF ON ON OFF OFF OFF 25 ON OFF OFF ON ON OFF OFF OFF 26 OFF ON OFF ON ON OFF OFF OFF 27 ON ON OFF ON ON OFF OFF OFF 3/3 28 29 OFF ON OFF OFF ON ON ON ON ON ON OFF OFF OFF OFF OFF OFF 30 OFF ON ON ON ON OFF OFF OFF 31 ON ON ON ON ON OFF OFF OFF 32 OFF OFF OFF OFF OFF ON OFF OFF 33 ON OFF OFF OFF OFF ON OFF OFF 34 OFF ON OFF OFF OFF ON OFF OFF 35 ON ON OFF OFF OFF ON OFF OFF 36 OFF OFF ON OFF OFF ON OFF OFF 37 ON OFF ON OFF OFF ON OFF OFF 38 OFF ON ON OFF OFF ON OFF OFF 39 ON ON ON OFF OFF ON OFF OFF 40 OFF OFF OFF ON OFF ON OFF OFF 41 ON OFF OFF ON OFF ON OFF OFF 42 OFF ON OFF ON OFF ON OFF OFF 43 ON ON OFF ON OFF ON OFF OFF 44 OFF OFF ON ON OFF ON OFF OFF 45 ON OFF ON ON OFF ON OFF OFF 46 OFF ON ON ON OFF ON OFF OFF 47 ON ON ON ON OFF ON OFF OFF 48 OFF OFF OFF OFF ON ON OFF OFF 49 ON OFF OFF OFF ON ON OFF OFF 50 OFF ON OFF OFF ON ON OFF OFF 51 ON ON OFF OFF ON ON OFF OFF 52 OFF OFF ON OFF ON ON OFF OFF 53 ON OFF ON OFF ON ON OFF OFF 54 OFF ON ON OFF ON ON OFF OFF 55 ON ON ON OFF ON ON OFF OFF 56 OFF OFF OFF ON ON ON OFF OFF 57 ON OFF OFF ON ON ON OFF OFF 58 OFF ON OFF ON ON ON OFF OFF 59 ON ON OFF ON ON ON OFF OFF 60 OFF OFF ON ON ON ON OFF OFF 61 ON OFF ON ON ON ON OFF OFF 62 OFF ON ON ON ON ON OFF OFF 63 ON ON ON ON ON ON OFF OFF 64 OFF OFF OFF OFF OFF OFF ON OFF 65 ON OFF OFF OFF OFF OFF ON OFF 66 OFF ON OFF OFF OFF OFF ON OFF 67 ON ON OFF OFF OFF OFF ON OFF 68 OFF OFF ON OFF OFF OFF ON OFF 69 ON OFF ON OFF OFF OFF ON OFF 70 OFF ON ON OFF OFF OFF ON OFF 71 ON ON ON OFF OFF OFF ON OFF 72 OFF OFF OFF ON OFF OFF ON OFF 73 ON OFF OFF ON OFF OFF ON OFF 74 OFF ON OFF ON OFF OFF ON OFF 4/4 75 76 ON OFF ON OFF OFF ON ON ON OFF OFF OFF OFF ON ON OFF OFF 77 ON OFF ON ON OFF OFF ON OFF 78 OFF ON ON ON OFF OFF ON OFF 79 ON ON ON ON OFF OFF ON OFF 80 OFF OFF OFF OFF ON OFF ON OFF 81 ON OFF OFF OFF ON OFF ON OFF 82 OFF ON OFF OFF ON OFF ON OFF 83 ON ON OFF OFF ON OFF ON OFF 84 OFF OFF ON OFF ON OFF ON OFF 85 ON OFF ON OFF ON OFF ON OFF 86 OFF ON ON OFF ON OFF ON OFF 87 ON ON ON OFF ON OFF ON OFF 88 OFF OFF OFF ON ON OFF ON OFF 89 ON OFF OFF ON ON OFF ON OFF 90 OFF ON OFF ON ON OFF ON OFF 91 ON ON OFF ON ON OFF ON OFF 92 OFF OFF ON ON ON OFF ON OFF 93 ON OFF ON ON ON OFF ON OFF 94 OFF ON ON ON ON OFF ON OFF 95 ON ON ON ON ON OFF ON OFF 96 OFF OFF OFF OFF OFF ON ON OFF 97 ON OFF OFF OFF OFF ON ON OFF 98 OFF ON OFF OFF OFF ON ON OFF 99 ON ON OFF OFF OFF ON ON OFF 100 OFF OFF ON OFF OFF ON ON OFF 101 ON OFF ON OFF OFF ON ON OFF 102 OFF ON ON OFF OFF ON ON OFF 103 ON ON ON OFF OFF ON ON OFF 104 OFF OFF OFF ON OFF ON ON OFF 105 ON OFF OFF ON OFF ON ON OFF 106 OFF ON OFF ON OFF ON ON OFF 107 ON ON OFF ON OFF ON ON OFF 108 OFF OFF ON ON OFF ON ON OFF 109 ON OFF ON ON OFF ON ON OFF 110 OFF ON ON ON OFF ON ON OFF 111 ON ON ON ON OFF ON ON OFF 112 OFF OFF OFF OFF ON ON ON OFF 113 ON OFF OFF OFF ON ON ON OFF 114 OFF ON OFF OFF ON ON ON OFF 115 ON ON OFF OFF ON ON ON OFF 116 OFF OFF ON OFF ON ON ON OFF 117 ON OFF ON OFF ON ON ON OFF 118 OFF ON ON OFF ON ON ON OFF 119 ON ON ON OFF ON ON ON OFF 120 OFF OFF OFF ON ON ON ON OFF 121 ON OFF OFF ON ON ON ON OFF 5/5 122 123 OFF ON ON ON OFF OFF ON ON ON ON ON ON ON ON OFF OFF 124 OFF OFF ON ON ON ON ON OFF 125 ON OFF ON ON ON ON ON OFF 126 OFF ON ON ON ON ON ON OFF 127 ON ON ON ON ON ON ON OFF 128 OFF OFF OFF OFF OFF OFF OFF ON 129 ON OFF OFF OFF OFF OFF OFF ON 130 OFF ON OFF OFF OFF OFF OFF ON 131 ON ON OFF OFF OFF OFF OFF ON 132 OFF OFF ON OFF OFF OFF OFF ON 133 ON OFF ON OFF OFF OFF OFF ON 134 OFF ON ON OFF OFF OFF OFF ON 135 ON ON ON OFF OFF OFF OFF ON 136 OFF OFF OFF ON OFF OFF OFF ON 137 ON OFF OFF ON OFF OFF OFF ON 138 OFF ON OFF ON OFF OFF OFF ON 139 ON ON OFF ON OFF OFF OFF ON 140 OFF OFF ON ON OFF OFF OFF ON 141 ON OFF ON ON OFF OFF OFF ON 142 OFF ON ON ON OFF OFF OFF ON 143 ON ON ON ON OFF OFF OFF ON 144 OFF OFF OFF OFF ON OFF OFF ON 145 ON OFF OFF OFF ON OFF OFF ON 146 OFF ON OFF OFF ON OFF OFF ON 147 ON ON OFF OFF ON OFF OFF ON 148 OFF OFF ON OFF ON OFF OFF ON 149 ON OFF ON OFF ON OFF OFF ON 150 OFF ON ON OFF ON OFF OFF ON 151 ON ON ON OFF ON OFF OFF ON 152 OFF OFF OFF ON ON OFF OFF ON 153 ON OFF OFF ON ON OFF OFF ON 154 OFF ON OFF ON ON OFF OFF ON 155 ON ON OFF ON ON OFF OFF ON 156 OFF OFF ON ON ON OFF OFF ON 157 ON OFF ON ON ON OFF OFF ON 158 OFF ON ON ON ON OFF OFF ON 159 ON ON ON ON ON OFF OFF ON 160 OFF OFF OFF OFF OFF ON OFF ON 161 ON OFF OFF OFF OFF ON OFF ON 162 OFF ON OFF OFF OFF ON OFF ON 163 ON ON OFF OFF OFF ON OFF ON 164 OFF OFF ON OFF OFF ON OFF ON 165 ON OFF ON OFF OFF ON OFF ON 166 OFF ON ON OFF OFF ON OFF ON 167 ON ON ON OFF OFF ON OFF ON 168 OFF OFF OFF ON OFF ON OFF ON 6/6 169 170 ON OFF OFF ON OFF OFF ON ON OFF OFF ON ON OFF OFF ON ON 171 ON ON OFF ON OFF ON OFF ON 172 OFF OFF ON ON OFF ON OFF ON 173 ON OFF ON ON OFF ON OFF ON 174 OFF ON ON ON OFF ON OFF ON 175 ON ON ON ON OFF ON OFF ON 176 OFF OFF OFF OFF ON ON OFF ON 177 ON OFF OFF OFF ON ON OFF ON 178 OFF ON OFF OFF ON ON OFF ON 179 ON ON OFF OFF ON ON OFF ON 180 OFF OFF ON OFF ON ON OFF ON 181 ON OFF ON OFF ON ON OFF ON 182 OFF ON ON OFF ON ON OFF ON 183 ON ON ON OFF ON ON OFF ON 184 OFF OFF OFF ON ON ON OFF ON 185 ON OFF OFF ON ON ON OFF ON 186 OFF ON OFF ON ON ON OFF ON 187 ON ON OFF ON ON ON OFF ON 188 OFF OFF ON ON ON ON OFF ON 189 ON OFF ON ON ON ON OFF ON 190 OFF ON ON ON ON ON OFF ON 191 ON ON ON ON ON ON OFF ON 192 OFF OFF OFF OFF OFF OFF ON ON 193 ON OFF OFF OFF OFF OFF ON ON 194 OFF ON OFF OFF OFF OFF ON ON 195 ON ON OFF OFF OFF OFF ON ON 196 OFF OFF ON OFF OFF OFF ON ON 197 ON OFF ON OFF OFF OFF ON ON 198 OFF ON ON OFF OFF OFF ON ON 199 ON ON ON OFF OFF OFF ON ON 200 OFF OFF OFF ON OFF OFF ON ON 201 ON OFF OFF ON OFF OFF ON ON 202 OFF ON OFF ON OFF OFF ON ON 203 ON ON OFF ON OFF OFF ON ON 204 OFF OFF ON ON OFF OFF ON ON 205 ON OFF ON ON OFF OFF ON ON 206 OFF ON ON ON OFF OFF ON ON 207 ON ON ON ON OFF OFF ON ON 208 OFF OFF OFF OFF ON OFF ON ON 209 ON OFF OFF OFF ON OFF ON ON 210 OFF ON OFF OFF ON OFF ON ON 211 ON ON OFF OFF ON OFF ON ON 212 OFF OFF ON OFF ON OFF ON ON 213 ON OFF ON OFF ON OFF ON ON 214 OFF ON ON OFF ON OFF ON ON 215 ON ON ON OFF ON OFF ON ON 7/7 216 217 OFF ON OFF OFF OFF OFF ON ON ON ON OFF OFF ON ON ON ON 218 OFF ON OFF ON ON OFF ON ON 219 ON ON OFF ON ON OFF ON ON 220 OFF OFF ON ON ON OFF ON ON 221 ON OFF ON ON ON OFF ON ON 222 OFF ON ON ON ON OFF ON ON 223 ON ON ON ON ON OFF ON ON 224 OFF OFF OFF OFF OFF ON ON ON 225 ON OFF OFF OFF OFF ON ON ON 226 OFF ON OFF OFF OFF ON ON ON 227 ON ON OFF OFF OFF ON ON ON 228 OFF OFF ON OFF OFF ON ON ON 229 ON OFF ON OFF OFF ON ON ON 230 OFF ON ON OFF OFF ON ON ON 231 ON ON ON OFF OFF ON ON ON 232 OFF OFF OFF ON OFF ON ON ON 233 ON OFF OFF ON OFF ON ON ON 234 OFF ON OFF ON OFF ON ON ON 235 ON ON OFF ON OFF ON ON ON 236 OFF OFF ON ON OFF ON ON ON 237 ON OFF ON ON OFF ON ON ON 238 OFF ON ON ON OFF ON ON ON 239 ON ON ON ON OFF ON ON ON 240 OFF OFF OFF OFF ON ON ON ON 241 ON OFF OFF OFF ON ON ON ON 242 OFF ON OFF OFF ON ON ON ON 243 ON ON OFF OFF ON ON ON ON 244 OFF OFF ON OFF ON ON ON ON 245 ON OFF ON OFF ON ON ON ON 246 OFF ON ON OFF ON ON ON ON 247 ON ON ON OFF ON ON ON ON 248 OFF OFF OFF ON ON ON ON ON 249 ON OFF OFF ON ON ON ON ON 250 OFF ON OFF ON ON ON ON ON 251 ON ON OFF ON ON ON ON ON 252 OFF OFF ON ON ON ON ON ON 253 ON OFF ON ON ON ON ON ON 254 OFF ON ON ON ON ON ON ON 255 ON ON ON ON ON ON ON ON Table 3: Address Setting 3.2. OPERATION AT POWER UP The device employs the default settings the first time it is switched on. Changes to the settings will be permanently stored and will be made available the next time it is switched on. You can return to the default settings by means of the appropriate menu option at any time. The device will work as follows when it is switched on. 8/8 The device will run a calibration procedure and a message showing the following information will appear on the video output OSD (On Screen Display): protocol, communication parameters, and camera address and software version. Check that the data are suitable for operation. Otherwise, refer to the section in this document that shows how to install the device correctly. PROTOCOL: PELCO-D COM: 9600, N, 8, 1 ADDR: 01 SOFTWARE VERSION 3.3. V4.2 HOW TO USE OUR CONTROL KEYBOARD The camera is ready to receive commands from our control keyboard (see figure below) after connecting. 3.3.1. CONTROL KEYPAD COMMAND SYNTAX Controls can use the joystick, single keys or key combinations. The key command syntax is shown below. Key command syntax The syntax used in this manual for controls using keys consists of various elements (words and three digit numbers). Each command is always in braces and each element is separated by commas. Each word or decimal digit used in the syntax is identified by a corresponding key on our control panel. Words can be enclosed in round brackets, square brackets or no brackets. Three digit decimals are never enclosed in brackets. The following words only can be used: PRESET, CALL, ESC, OPEN, CLOSE, NEAR, FAR, ZOOM OUT, ZOOM IN, CAM, MON, SCAN, ENTER. The decimal digits are: 0, 1, 2, 3, 4, 5, 6, 7, 8, and 9. Some application examples of controls are shown in details below. Using the joystick A command can also be given simply by moving the joystick because this generates actions on the camera or OSD (On Screen Display) menu. Using a single key Pressing a single key can cause camera/device action. For example, the following command will zoom out of the frame. Underling indicates the key is in use. ZOOM OUT Key combinations Pressing a key combination in rapid sequence extents the command set. For example, the following command (select camera address 1) is performed by pressing the following keys: CAM + 1 + ENTER 3.3.2. KEYS “OPEN” AND “CLOSE” OPEN: To confirm a selection of a menu entry. 9/9 CLOSE: To cancel a selection of a menu entry. 3.3.3. PRESET POSITIONS PROGRAMMING AND RECALLING The camera can store up to 256 panning, tilting and zooming configurations (called preset positions) which can be recalled at any time. The manual focusing and IRIS opening settings cannot be stored. When storing presets, it is important to remember that some are reserved and cannot be either stored or used for positioning the camera. The following examples show how to program the free Presets and recall them. Example: programming preset number 32 1) 2) Position the camera in a certain pan, tilt and zoom configuration. Enter the command PRESET + 32 + ENTER. From this moment onwards, simply enter the command CALL + 32 + ENTER to move the camera to the preset position. 3.4. FUNCTION PROGRAM MENU Use the following control panel command to access the function programming menu. PRESET + 50 + ENTER At this point, if no password is required for access, the following first level menu will appear on the screen: MAIN MENU TRACKING SETTING CRUISE SETTING ALARMS PARK TIME 15S PARK ACTION NONE RESTORE FACTORY DEFAULT EXIT Screen 1: Main Menu Simply move the joystick vertically to scroll the menu and point the cursor to the menu item to be selected: at the point, press OPEN to access the selected second level. Simply press BACK and use OPEN to go back to the previous level menu. To completely exit a menu on any level, simply select EXIT and use the OPEN command. Option Value Explanation TRACKING SETTING Product information menu (refer to Section 3.4.1). CRUISE SETTING Display menu (refer to Section 3.4.2). ALARMS Main programming menu (refer to Section 3.4.3). PARK TIME 1~12HOURS PARK ACTION NONE PRESET1 With this function, the device will resume the function defined in PARK ACTION by specifying a value (in 1s, 1m, 1h steps) following a stop or interruption of the performed function and after the programmed time. No action is performed at the end of the park time The camera performs pattern 1 at the end of park time 10 / 10 The camera performs pattern 1 at the end of park time The camera performs pattern 1 at the end of park time The camera performs pattern 1 at the end of park time The camera performs a cruise (preset sequence) at the end of the park time The camera simply resumes the operation it was performing before being interrupted at the end of the park time The camera performs a tracking operation at the end of the park time The camera performs a cruise with tracking function enabled at the end of the park time PRESET2 PRESET3 PRESET4 CRUISE REPEAT LAST TRACKING CRUIS1 RESTORE TO FACTORY DEFAULT Restore all settings to factory default Table 4 3.4.1. TRACKING SETTING MENU In the first level menu, select TRACKING SETTING to set the tracking function. TRACKING SETTING AUTO ZOOM SIZE SENS GRAY SENS LOST ACT TRACKING TIME(M) WAIT TIME(S) TRACKING SPEED DEFAULT SETTING BACK EXIT ON MEDIUM MEDIUM TO HOME &TRA AUTO 15 AUTO Screen 2: Tracking Setting Option Value Explanation AUTO ZOOM ON/OFF SIZE SENS LARGE/MEDIUM/SMALL GRAY SENS HIGH/MEDIUM/LOW TO HOME TRACKING LOST ACT KEEP TRACKING STOP TRACKING TRACKING TIME (M) This option determines if the tracking function is with auto zoom on or off. This option defines the total dimensions of the object to be tracked. The parameters are LARGE/MEDIUM/SMALL. A object larger than one fourth of the screen is LARGE. An object smaller than one eighth of the screen is SMALL. This option determines the auto tracking sensitivity. The sensitivity measures the grey scale variations of a certain point in the frame in the unit of time. This option is used to establish the action to be performed if the camera looses the tracked object: the TO HOME TRACKING option repositions the camera in the original position (i.e. the position the camera goes to after power up) and tracking is enabled from this position. The KEEP TRACKING option keeps the camera in the position reached and the tracking function is kept on waiting for an object to be intercepted again. The STOP TRACKING option leaves the camera in the position reached and deactivates the tracking function. The duration of tracking function. The tracking 5 ~ 40 11 / 11 will be disabled after the period. This option allows setting the max. tracking duration, in minutes, during which the camera automatically tracks moving objects. WAIT TIME TRACKING SPEED Once the tracking time has expired, the camera executes the action set in the option "LOST ACT", independently of the movement in the scene. AUTO,1~15 (MINUTES) If the value "AUTO" is set, there is no time limitation on the tracking action and, in case of no movement in the scene at all, the camera executes the option "WAIT TIME". This option establishes the camera movement speed. If AUTO is selected, the camera is automatically “adapted” to the motion of the target. The MANUAL options allow selecting the expected speed of the object to be tracked (1 slow, 5 fast). AUTO, 1 ~ 5 Change all the tracking settings to default. DEFAULT SETTING Table 5 Advice for Correct Auto Tracking Use General warnings ; The tracking function should mainly be used in indoor environments. Outdoor use is highly problematic: the variety of objects (leafs, flags, litter, etc.) moved by the wind makes use unreliable. ; Provide the best lighting possible in the detection zone: in poor lighting conditions, the inevitable presence of noise on the image makes grayscale variations extremely critical. In poor lighting conditions, the camera may easily loose the tracked object. ; If IR illuminators are use, remember that: The camera must be programmed to operate in B/W only because the Slow Shutter will make tracking unreliable in color mode The lighting entirely covers the frame where motion is tracked, possibly by restricting the range of action of the camera in tracking mode. ; Avoid background objects in the frame which could trick the motion detector, such as for example Venetian blinds, gates, doors with grid and objects with very marked, contrasting contours. A chequerboard background is certainly the worst condition for satisfactory operation. ; Do not use the auto tracking function if the object to be tracked and/or monitored moves too fast. Recommended control parameters SIZE SENS: select SMALL particularly in poor lighting conditions to improve performance. GRAY SENS: most false alarms are caused by the tracking of unexpected objects. For this reason, it is preferable to select low sensitivity. WAIT TIME: particularly, in the case of poor lighting conditions or frames with interference, it is preferable to set the lowest possible time to prevent the camera from constantly tracking unexpected objects (e.g. “video noise” in the frame). TRACKING SPEED: the AUTO setting should always be preferred, unless the object to be tracked does not always move at low, constant speed. 12 / 11 3.4.2. CRUISE The CRUISE menu is used to display and change the cruise settings. CRUISE DWELL TIME (SECS) 8 PRESET LIST 1 1 ON 0 OFF 1234567890 PRETST 0000000000(1-10) WAIT BEFORE TRA(SEC) BACK EXIT 4 Screen 3: Cruise Option Value DWELL TIME <SECS> 5 ~ 250 PRESET LIST 1~3 WAIT BEFORE TRA(SEC) 3~6 Explanation Duration (in seconds) of the dwelling time on each presetting. The team number of presets. 1 means the first 10 presets (preset 1 ~ 10); 2 means the second 10 presets (preset 11~20); 3 means the second 10 presets (preset 11~20). The wait time (Seconds) after a preset localization ends and before tracking function starts. This will prevent the camera from fault tracking during a preset localization. Table 6 3.4.3. ALARMS The ALARMS menu is to display and change the alarm settings. ALARMS SEQUENC ALARM 1 ALARM 2 ALARM 3 ALARM 4 BACK EXIT (SECS) ACT ACT ACT ACT 1 NONE NONE NONE NONE Screen 4: Alarms Option Value Explanation SEQUENCE (SECS) 1 ~ 250 Duration time (in seconds) of the action related to each alarm when several alarms occur at the same time. ALARM ACT (FOR ALARM 1 ~ 4) NONE No action occurs during the alarm. PRESET 1 (~4) The camera goes to the selected preset. CRUISE TRACKING CRUISE 1 The camera performs a cruise after the alarm. The camera performs a tracking operation after the alarm. The camera performs a cruise with tracking function enabled after the alarm. Table 7 13 / 13 3.5. If an alarm is triggered during any automatic operation of the camera (Pattern, Auto Tracking, etc.), the operation in progress is stopped and the camera executes the action that has been set in the ALARM ACTION menu: ; In the event of "TRACKING" action, the camera executes the tracking function. Once the tracking action has finished, the camera executes the action set in the option PARK TIME ACTION or the LOST ACT in TRACKING SETTING MENU. ; In the event of "PATTERN, AUTO SCAN, RANDOM SCAN, FRAME SCAN, CRUISE" actions, the action is executed by the camera permanently and can only be stopped by one of the following actions: any command sent by the operator, the use of the joystick, any alarm event. SPECIAL CONTROL PANEL COMMANDS The device can be programmed and operated using various quick control panel commands. Control panel command Function PRESET + 50 + ENTER Access main menu PRESET + 51 + ENTER Start tracking function for a PTZ camera PRESET + 52 + ENTER Start cruise PRESET + 53 + ENTER Start tracking function during cruise Set the font display in PAL. Need to reboot for activation. Set the font display in NTSC. Need to reboot for activation. Table 8 PRESET + 222 + ENTER PRESET + 223 + ENTER 14 / 14