1
Notification
Dear Users,
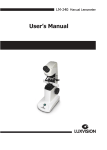
Thank you for your purchase of LM 200 Lensmeter. Please take time to read our
user’s manual carefully before use.
This guarantees you to make full use of this unit and prolongs the operation life of
this unit.
Precautions
If you have detected abnormal heat, smoke, noise or smell, immediately stop using
the product.
In the event of an abnormality, turn off the power and disconnect the power plug from
the power socket. Continuing to use the product may result in electric shock or fire.
Observe the instructions given below regarding the power cable:
•
•
•
•
•
•
Be sure to use the supplied or specified power cable.
Do not modify, forcibly bend, kink or pull the power cable.
When disconnecting the power cable from the AC outlet, be sure to hold the cable
by the plug.
Pulling the cable may cause wire breakage or shot circuit, resulting in fire or
electric shock.
Do not connect or disconnect the plug of the power cable to/from the AC outlet
using wet hands.
Doing so may result in electric shock.
Do not touch the product with wet hands while the power cable is connected
to the AC outlet.
Doing so may result in electric shock.
If the product will not be used for a long period, disconnect the power cable from
the power source. Leaving the cable connected to the power socket for a prolonged
period will consume electricity and may result in heating.
Content
1.
Function Introduction .....................................................................................4
2.
Working Principle Device ................................................................................4
3.
Functions ......................................................................................................5
4.
Operation ....................................................................................................11
5.
Maintenance ................................................................................................16
6.
Common Trouble Shooting ...........................................................................17
7.
Specifications ..............................................................................................18
1. Function Introduction
This lens meter is divided into 2 models, standard model and strengthened model
with prism compensator.
This product is applicable to measurement testing departments, spectacles
manufacturers, retail dealers of spectacles, hospital’s department of ophthalmology
and optical element factories for conducting measurement of spherical lens diopter,
cylindrical lens diopter, cyIindrical lens axis of astigmatism, prism diopter, prism basal
angle and cornea contact lens diopter.
In the following description, all chapters or content attached with “*” in the front are
special for strengthened model device with prism compensator.
2. Working Principle Device
Fig. 1 Diagram of Optical Principle
1. Light source
4. Measuring object lens
7. Objective lens
10.Reading division board
13.Right angle prism
2. Color filter
3. Marker reticule
5. Diaphragm
6. Prism compensation device
8. Eyepiece reticule 9. Eyepiece
11.Reflect lens
12.Front lens
14.Black lens
4
This instrument consists of two coaxial optical systems. Light sent out from light
source 1(ligting bulb) passes through color filter 2 to lighten marker reticule 3.
Through measuring objective lens 4 and objective lens 7, marker reticule 3 forms
its image in eyepiece 8. Meanwhile, the optical reading reticule 10 forms its image
on eyepiece 8 through front lens 12 and back lens 14. At this time, human eyes are
able to clearly observe the images of reticule 3 eyepiece 8 and reading reticule 10.
During the operation, place lens at position of diaphragm 5 (Objective lens bearing
seat), turn and axially move marker reticule 3 so that it is imaged clearly. Then the scale
interval shown on the reading division board 10 is just the numerical value of diopter.
3. Functions
3.1
Eyepiece (Fig. 2)
Eyepiece section is equipped with a spiral focusing unit whose range of focusing
is ±5D so as to suit different eyesights of people.
Fig. 2
3.2
Eyepiece reticule and marker reticule (Fig.3, Fig.4)
Reticule in the field of view of eyepiece is shown as Fig, 3. On the reticule is
divided with measuring scale and dividing disc of prism degree. Integer degree
of prism is directly read on the measuring scale and decimal one estimated
according to the degree on the measuring scale. The dividing disc is ruled with
an interval of 5°. The marker reticule is shown as Fig. 4, 3 long green lines are
in the horizontal position.
5
Fig. 3
3.3
Fig. 4
Reading division board (Fig. 5)
In eyepiece 9’s field of vision, the reading window is in the lower part of eyepiece
reticule 8. The range of reading reticule is ± 25D. The graduation between 0 and
± 5D are at an interval of 0.125D; those between ± 5D and ± 25D arc at interval
of 0.25D.
Fig. 5
*3.4 Prism compensation device (Fig. 6)
MODEL LM 200 P
The prism compensation device is needed when measuring lens diopter above
5 ∆. There are two lines of graduations on the prism compensation device.
The upper line is angle between 0° and 180° at 5° intervals. The lower line is the
prism diopter in the range of 15 ~ 0 ~ 15∆ at 1∆ interval.
6
Fig. 6
3.5
Lens pressing unit (Fig. 7)
In the unit, 3 plastic pressing feet with springs are used to press lens so that
surface of lens with any shape can be pressed stably and no lens surface will
be bruised. When it is operated, lift the lens pressing bracket so that the lens
pressing unit lowers to press the lens. After using, raise the lens pressing unit
and then the lens pressing unit is hung.
Fig. 7
3.6
Lens pushing unit (Fig. 8)
The unit is used to fix the position of lens. During operation, turn backwards the
lens pushing handle and then the lens pushing board is pushed out forwardly.
After use, turn forwards the lens pushing handle to withdraw the lens pushing
board. During measurement, first press the lens with the lens pressing unit and
slightly move the lens so that it aims right at center, then fix it with the lens
pushing unit.
7
Fig. 8
3.7
Printing unit (Fig. 9)
The unit has 3 identical point-making pens connected in line, the pen in the
middle is used to set center of lens and the connected line of printing points
made by these 3 pens are used to demarcate angle of axis of astigmatism and
base angle of prism lens. When printing is needed, turn holder of point-making
pens and apply ink to the front ends (a small convex) of 3 pens, then it is very
convenient for people to print the ink on the lens swiftly.
Fig. 9
3.8
Objective lens bearing seat (Fig. 10)
It is a white nylon part which is able to stably support surface of any shape of
lens without bruising lens surface. Objective lens is shown below, and there
are 3 lock screws nearby.
8
Fig. 10
3.9
Diopter measuring handwheel (Fig.11)
There is a diopter measuring handwheel at either side of this instrument. They
can be rotated smoothly and steadilty. During the measurement, rotate one
handwheel to adjust the focus till you clearly see the indication of the lens diopter
through the reading window.
Fig.11
3.10 Astigmatism axis measuring hand wheel (Fig.12)
It is used to measure and fix angle of astigmatism axis of cylindrical lens and
base angle of prism lens.
9
Fig. 12
3.11 Illuminating bulb chamber (Fig.13)
Open the lower cover of the device, one can easily and quickly change the bulb.
Fig.11
3.12 Instrument’s inclination regulating handle (Fig.14)
It allows user to freely regulate inclination of instrument so that he (she) is able
to work at a comfortable posture. After screwing out the handle, the user can
incline the device to a required angle according to the state of working table,
and then lock the handle.
10
Fig.12
4. Operation
4.1
Preparation before Measurement
4.1.1 Place the instrument on the working table and adjust inclination of the instrument
so that user is able to make a measurement comfortably.
4.1.2 Connect with the mains.
4.1.3 Regulation of eyepiece’s visibility. Before measurement, visibility of eyepiece
shall be regulated in order to get accurate and reliable results of measurements.
Method: While observing black cross dividing line of eyepiece reticule 8 in the
view field of eyepiece.rotate eyepiece cover in one way (one-way rotation can
remove influence due to regulation effect of eyes) until the black cross line gets
clearest.
4.1.4 Regulation of zero position of instrument. Rotate diopter measuring hand wheel
to regulate scale interval to zero position and observe green dividing line of
marker reticule 3 in the view field of eyepiece. At this time the green dividing
line is clearest.
4.2
Points for Attention in Operation
4.2.1 A measurand person who has relatively deep diopter or astigmatism of eyes
shall wear glasses to correct defects of vision. Only after that, can measurement
be carried out.
4.2.2 Among the green dividing lines, 2 longer ones are spherical marking lines and
3 longer ones are cylindrical marking lines.
4.2.3 To achieve the most accurate measuring results it would be best if one rotate
the diopter measuring handwheel in one way. The direction of rotation is
-25D ~ + 25D.
11
4.3
Placement of Lens
4.3.1 Lens should be placed on the objective lens bearing seal with concave facing
downwards.The upper edge of lens assembled on the lens frame (i.e beam
edge of lens frame) should be leaned against the lens pushing borad.
4.3.2 Lightly release the lens pressing unit so that the pressing feet press the lens slightly,
4.3.3 Regulation of lens center. Observe it through eyepiece and rotale diopter
measuring handwheel to make green dividing line of marker reticule 3 clearest.
At the same time, move the lens so that the green dividing line of marker
reticule 3 and center of black cross dividing line of eyepiece reticule 8 coincide.
4.4
Measurement of Spherical Lens
Rotate diopter measuring handwheel so that green dividing line of marker
reticule 3 becomes clearest.Then scale interval on the reading window is the
spherical diopter of the iaid lens.
4.5
Measurement of Sphero-Cylindrical Lens
Sphero-Cylindrical Lens means astigmatic lens.Normally its outer surface is
spherical and inner surface is cylindrical or drum-typed (e.i internal astigmatism).
Each section of the internal surface has different refractive power, in which 2 mutually
vertical sections have weakest refractive power and strongest refractive power.
When this instrument is used to measure such kind of lens, 2 long green lines
and 3 long green lines of marker reticule 3 will not get clear simultaneously.
Measurement is made in 3 steps:
The first step: Rotate diopier measuring handwheel so that the torus (composed
of 12 small green dots) is imaged into clear looped short cylindrical lines.
Then rotate astigmatic axis measuring handwheel again, so that spherical
marking line (2 long green ones) and torus short lines are in the same direction.
At the same time conduct fine tuning of the diopter measuring handwheel to
make 2 long lines clearest. Now write down a reading value of diopter.
The second step: Rotate diopter measuring handwheel again so that cylindrical
marking lines (3 long green ones) are focused to be clearest and in the same
direction of the torus short lines. Now write down again a reading value of
diopier, and also note down the reading value of the lens´ angle of astigmatism
axis on the astigmatism axis measuring handwheel (which can be also read
off according lo eyepiece reticule 8).
The third step: Calculation of the degree of astigmatism. Subtracting reading values
of the diopter of above-stated 2 times is just the astigmatism dergee of the said lens.
12
Diopter of a sphero-cylindrial lens may be written in various forms, where spherical
diopter may be expressed as low luminosity or high luminosity and cylindrial diopter
(i.e astigmatic degree) expressed as a positive or negative number.This can be done
simply by way of luminosity transformation. In this operation instruction, spherical
diopter is assumed to be low luminosity. The procedures of measurement
are shown as follows:
A. Calculation of spherical diopter.
Focus spherical marking lines (2 long green ones) cleraly. Please note that
there will be 2 reading numbers. Rotate diopter measuring handwheel and,
at the same time rotate astigmatism axis measuring handwheel, focus spherical
marking lines (2 long green ones) clearly and write down a reading value of
diopter. Then rotate astigmatism axis measuring handwheel by 90° focus
spherical marking lines (2 long green ones) clearly again and note down a
new diopter reading value. Compare reading values of 2 times and take a
reading value with smaller absolute value (i.e low luminosity) as the spherical
diopter of the said lens.
B. After fixing spherical diopter, rotate diopter measuring handwheel again to
focus cylindrical marking lines (3 long green ones) clearly. Write down the
diopter reading value (high luminosity) at this moment.
C. Difference of the readings in 2 times is the astigmatism degree of the said
lens and its axis direction is directly read off according to astigmatism axis
measuring handwheel.
Example 1: Calculation of + 1DS-3.5DC X 30°
The first step: Rotate diopter measuring handwheel and at the same time, rotate
astigmatism axis measuring handwheel to focus spherical marking lines clearly.
Now the measured data are: diopter +1D, axis angle 30°. Then rotate astigmatism
axis measuring handwheet by 90° to focus spherical marking lines clearly.
Now the measured data are: diopter -2.5D, axis angle 120°. Take +1D as
spherical diopter.
The second step: Rotate diopter measuring handwheel and, at the same
time rotate astigmatism axis measuring handwheel to focus spherical marking
lines clearly once more. Now the reading on the reading window is +1D, which
is the reading at the first lime. Then rotate the diopter measuring hand wheel
to focus cylindrical marking lines clearly. At this tirne, the reading on the reading
window is -2,5D, which is the reading at the second time.
The third step: (-2.5D)-(+1D) =-3,5D, i.e astigmatism degree is -3,5D and
axis direction is directly read off according to astigmatism axis measuring
13
handwheel, which is 30°, as shown in Fig.15 and Fig.16.
Fig. 15 Image at +1D
Fig. 16 Image at -2.5D
Illustration: +1DS-3.5DC X 30° can be converted into -2.5DS+ 3.5DCX120°, and
can be also measured using this instrument, which will not be described here again.
4.6
Calculation of Prism Lens
4.6.1 Measurement of diopter below 5∆
Place prism lens on the objective lens bearing seat and aim its optical center at
center of objective lens bearing seat (i.e optical axis). Rotate diopter measuring
handwheel to focus lines of marker reticule 3 clearly, the marking linescan be
seen to deviate from center of eyepiece reticule 8. The deviating direction is the
base direction of prism eyeglass. Rotate astigmatism axis measuring handwheel
so that the middle one of 3 long green marking lines passes through the center
of eyepiece reticule 8, thus value of base angle of prism lens can be read off
according to astigmatism axis measuring hand wheel. Prism diopter can be
estimated according to the reading on eyepiece reticlue 8, as shown in Fig.17.
Fig. 17
In the figure: Diopter of prism lens is estimated as 2∆ and dividing line image
of marker reticule 3 deviates by 30° to upper right side. Measured data of the
said prism lens include prismdiopter 2∆ and base angle 30°.
14
*4.6.2 Measurement of diopter above 5∆
The prism compensation device is needed when measuring lens diopter above 5∆.
Rotate the diopter measuring handwheel and turn the angle to adjust the devision line
on marker reticule 3 to the proper position. Then you get two reading from eyepiece
reticule 8 and the prism compensation device. The sum of the two numbers is the prism
diopter of the lens, the base angle can be read from the prism compensation device.
4.7
Demarcation of Lens
4.7.1 Determination of the optical center of 2 assembled lens
Place the glasses on the instrument. First choose any one of glasses and rotate
diopter measuring handwheel to make it in focus, at the same time, lightly move
glasses frame so that the focused-image is at the center of optical axis and
make a center printing mark on the lens by the use of printer. Then repeat the
operation to print a mark on another lens. Now simply measure the distance
between center printing marks of these 2 lens by the use of slide calliper.
4.7.2 Demarcation of spherical lens
A. Rotate diopter measuring handwheel to focus lines of marker reticule 3 clearly.
B. Lightly move the lens to find the right optical center.
C. Make 3-point printing marks by the use of printer.
4.7.3 Demarcation of the axis of sphero-cylindrical lens
A. Rotate astigmatism axis measuring handwheel to a required angle.
B. Rotate diopter measuring handwheel and, at the same time, turn lens to
focus cylindrical marking lines clearly.
C. Lightly move the lens to find the right optical center.
D. Make 3-point printing marks by the use of printer.
4.7.4. Demarcation of the base of prism lens
A. Rotate astigmatism axis measuring handwheel to a required angle.
B. Rotate diopter measuring handwheel to focus lines of marker reticule 3 clearly.
C. Lightly turn prism lens so that the middle one of 3 long green marking lines
passes through center of the eyepiece reticule 8.
15
D. Make printing point marks by the use of printer.
5. Maintenance
5.1
Factory-adjusted control of the instrument has been carried out, please do not
dismantle it at will so as not to influence its indicating precision.
5.2
The instrument should be used in a dry and air-circulated indoor place in order
to prevent the optical components from damping and wildewing.
5.3
After using it, clean the instrument and cover lens with dust shield.
5.4
Prevent the instrument from severe vibration or impact in order to aviod damage
and looseness of parts and components and guarantee the measuring precision.
5.5
When you change the bulb do not do it until the bulb is cool to avoid burning your hand.
5.6
Always keep the instrument clean. Touching surface of optical parts is strictly
prohibited. Dust and stain on it shall be cleaned with absorbent cotton dipped
with mixture solution of ethanol and ether.
16
6. Common Trouble Shooting
Serial
No.
1
2
Trouble
Reason
Solution
Bulb can not be
lighted
Mains are not connected
Connect with mains
Change the bulb
Bulb is out of order
Degree of the measurand
person’s myopic eye is
too deep or he (she) has
astigrmatism
3
4
Eyepiece reticule
can not be seen
when adjusting the
eyepiece readings
Green marking
image can not be
seen
Green marking
image can nol be
seen clearly
5
Deviation of the
center of green
marking image
Loosening of lock screw
6
Translocation of
printing unit
Loosening of limit screw
Regulate limit screw
and lock it
Loosening of connecting
screws
Regulate connecting
screws and lock them
Bulb can not be lighted
Wear glasses
Same as No. 1
Dust shield is not taken off Take off the dust shield
Dust occurs on optical
lens
Clean it using absorbent cotton dipped
with cleaning solution
Take off objective lens
protection shield and
regulate 3 screws and
lock them
17
7. Specifications
Ranges of diopter measurement
0 ~ +25D
Minimum scale value
0.125D at 0 ~ ± 25D
0.25D at ± 5D ~ ± 25D
Astigmatism axis of cylindric lens
0 ~ 180°
Minimum scale value
1°
Prism diopter standard model
0 ~ 5∆
Minimum scale value
1∆
*Strengthened model
0 ~ 20∆
*Minimum scale value
1∆
Prism base angle
0 ~180°
Minimum scale value
1°
Regulation of ocular visibility
±5D
Size of lens
ø16mm ~ ø18mm
Overall dimensions of device
275mm X 130mm X 455mm
Weight standard model
5.6kg
*Strengthend model
5.7kg
Lighting lamp
220V / 110V 15W
18
LUXVISION is not responsible or liable for indirect, special or consequential damages arising out of or in
connection with the use or performance of the product or damages with respect to any economic loss,
loss of property, loss of revenues or profits, loss of enjoyment or use, costs of removal or installation or
other consequential damages of whatsoever nature. Some states do not allow the exclusion or limitation
of incidental or consequential damages. Accordingly, the above limitation may not apply to you.
Every effort has been made to ensure the accuracy of this manual. However, LUXVISION, makes no
warranties with respect to the documentation and disclaims any implied warranties of merchantability
and fitness for a particular purpose. LUXVISION, Inc. shall not be liable for any errors or for incidental or
consequential damages in connection with the furnishing, performance, or use of this manual or the examples
herein. The information in this document is subject to change without notice.
19