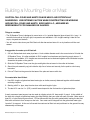
1
Control Box
8.
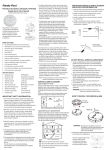
Attach the Control Box to the Mounting Pole with the U-Bolts.
9.
Feed the Speaker Cables through the Cable Strain Relief at the
Control Box Connector
to Voltage Regulator
bottom of the Control Box. (Figure 6)
10. Attach the Speaker Cables from the 20-Speaker Tower to the
screws marked “SPEAKER” on the faceplate of the control panel.
Cable Strain
Relief
11. Locate the Control Box Connector Cable (the grey 2 lead cables) and
feed one end through the Cable Strain Relief.
12. Connect the RED wire to the screw marked “+” and the BLACK wire to the screw
marked “-” under “12V BATTERY” on the faceplate of the control panel.
13. MAKE SURE THE POWER SWITCH IS TURNED OFF BEFORE ATTACHING
BATTERY CABLES TO BATTERY.
14. Connect the other end of the RED wire to the “+” terminal on the 12-volt Deep
Cycle battery (not included). Connect the BLACK wire to the “-” terminal on the
battery.
Tapered Cinch
Nut
Speaker Cables
Figure 6
15. Hand tighten the Tapered Cinch Nut on the bottom of the Cable Strain Relief to
insects and moisture out.
help keep
Solar Panel Connections
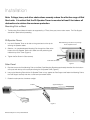
16. Cut the black zip-ties securing the RED and BLACK wires on the underside of the solar panel. (Figure 7)
17. Connect the RED wire to the “+” terminal on the 12-volt battery and connect the BLACK wire to the “-” terminal on the battery.
NOTE: If you are using a “Sealed Gel” 12-volt battery (instead of a Lead Acid battery) you will need to cut the indicated small
BLUE wire on the attached voltage regulator. This prevents Sealed Gel batteries from being overcharged.
Failure to cut this wire can result in permanent battery damage. (Figure 8)
Figure 7
Solar Controller
Cut Blue wire for
“Sealed Gel” batteries
RED and BLACK wires
connect to BATTERY
Figure 8
CAUTION: Your Bird Gard Super Pro Amp
is capable of producing sounds up to 125 decibels.
Hearing protection must be worn anytime the unit is on!
Bird Gard Super Pro Amp Users Manual
9