1
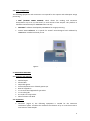
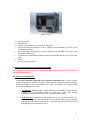
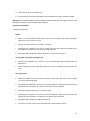
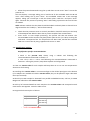
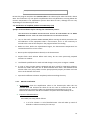
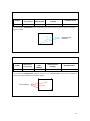
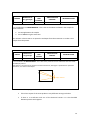
CLART HUMAN PAPILLOMAVIRUS 2 GENOTYPING OF HUMAN PAPILLOMAVIRUS VIA GENOMIC IDENTIFICATION for IN VITRO DIAGNOSIS CLART HUMAN PAPILLOMAVIRUS 2 CLART® HUMAN PAPILLOMAVIRUS 2 or CLART® HPV2 is under protection of 2 patent families corresponding to International PCT Patent Applications WO2007017699 and WO2011116797, which comprise national and regional members in different territories, including granted patents in Spain, Germany, Denmark, France, Italy, Sweden, Russia, Mexico, China and Israel, and patent applications under prosecution in Brazil and Canada. CLART®, CLART-Strip®, CAR®, SAICLART® and AUTOCLART® are registered Trademarks of GENOMICA. GENOMICA, S.A.U. Parque Empresarial Alvento, Edificio B Calle Vía de los Poblados, 1 – 1ª planta 28033 Madrid, Spain www.genomica.com Version 13 June 2015 CONTENTS: 1. GLOSSARY OF TERMS 2. DESCRIPTION 3. KIT COMPONENTS AND CONSERVATION 3.1. Extraction, purification and amplification reagents 3.2. Visualization reagents 3.3. Other components 4. ADDITIONAL MATERIAL 4.1. Reagents and material 4.2. Equipment 5. HANDLING PROCEEDINGS AND RECOMMENDATIONS 5.1. General recommendations 5.2. Visualization precautions 6. TAKING SAMPLES 6.1. Swabs 6.2. Cell suspensions 6.3. Formol, ethanol and paraffin wax-embedded samples 7. WORKING PROTOCOL 7.1. HPV DNA extraction 7.1.1. Manual extraction 7.1.2. Automatic extraction 7.2. Amplification reaction 7.3. Visualization of amplified product on CLART-Strip® (CS) 7.3.1. Manual visualization 7.3.2. autoclart® visualization 8. RESULTS READING 9. RESULTS INTERPRETATION 10. TECHNICAL AND WORKING SPECIFICATIONS 11. REFERENCES 12. TABLES 1. GLOSSARY OF TERMS Please, check handling instructions Expiry date In vitro diagnostic device Batch 25ºC Store at room temperature 20ºC 8ºC Store between 4 ºC and 8 ºC 4ºC -18ºC Store between –30 ºC and –18 ºC - 30ºC 4 2. DESCRIPTION OF PROTOCOL Based on the amplification of specific fragments of the viral genome and their hybridization with specific probes for each HPV type, the CLART Human Papillomavirus 2 Kit is able to detect infections and coinfections of up to 35 HPV genotypes in only one tube. This approach presents a number of advantages: Its high sensitivity allows detection of minimal quantities of viral DNA. Its high specificity allows detection of specific HPV genotypes by recognising a highly conserved sequence of the viral genome. The test can be easily performed in hospital laboratories. Its speed; results will be available within 8 hours. CLART Human Papillomavirus 2 Kit detects 35 different HPV subtypes (6, 11, 16, 18, 26, 31, 33, 35, 39, 40, 42, 43, 44, 45, 51, 52, 53, 54, 56, 58, 59, 61, 62, 66, 68, 70, 71, 72, 73, 81, 82, 83, 84, 85 and 89) of the most clinically relevant HPV types in a wide range of samples (swabs, cell suspensions, tissues fixed in formol or paraffin wax). Detection of the different HPV genotypes is achieved by PCR amplification of a 450 bp fragment within the highly conserved L1 region of the virus. This highly conserved sequence presents slight variations among each individual HPV type that allows its genomic identification by recognition of the viral DNA by specific probes. This slight variation guarantees the detection specificity. The detection of the product amplified by PCR is carried out by means of a low-density microarray platform: CLART® (Clinical Arrays Technology). The platform is based on a very simple principle, but at the same time cost effective. It consists of a microarray printed at the bottom of a microtiter plate, which simplifies the entire hybridization and visualization process when compared to classic microarray systems. Figure 1 displays a CLART-Strip® or CS of 8 wells. Figure 1. CLART-Strip® (CS) platform in the form of an 8-well strip. CLART Human Papillomavirus 2 detection system is based on the precipitation of an insoluble product in those microarray areas in which hybridization of amplified products with specific probes takes place. During PCR, amplified products are labelled with biotin. After amplification, these products are hybridized with their respective specific complementary 5 probes that are immobilised in specific and well-known microarray areas. Afterwards they are incubated with a streptavidine-peroxidase conjugate. The conjugate is bound through streptavidine with the biotin present in the amplified products (which are bound to their specific probes) and the peroxidase activity prompts the appearance of a non-soluble product in the presence of the o-dianisidine substrate, which precipitates on the microarray areas where hybridization occurs (Figure 2). Labelled products Probes on the array Biotin Hybridization Incubation with conjugate Conjugate Specific precipitation Development reaction Figure 2: Diagram of the visualization method. Probes, immobilized on the surface, capture 3. KIT COMPONENTS AND CONSERVATION their complementary biotin-labelled amplified products. With the help of biotin, they bind to the conjugate, in this case streptavidine-HRP (HorseRadish Peroxidase). The o-dianisidine substrate, by the action of the HRP, produces a precipitate on the area where hybridization occurs. 6 CLART Human Papillomavirus 2 Kit contains sufficient reagents for the extraction and analysis of DNA from 48 or 96 clinical samples. These reagents are provided in two different boxes, depending on the temperature at which they should be kept. All the reagents provided are stable under the appropriate conditions until the indicated expiration date. 3.1. Extraction, purification and amplification reagents. The CLART Human Papillomavirus 2 Extraction and Purification Kit is delivered to users at 4ºC or room temperature. Components: Purification columns adapted to 2 ml tubes 2 ml Collection Tubes Buffer T1 Buffer B1 Buffer B2 Buffer B5 Buffer BW Buffer BE Label for Buffer B3 Proteinase K, lyophilized (keep at 4ºC when resuspended) Buffer BP Amplification tubes are sent at -20 ºC: Amplification tubes contain 45 µl of reaction mix. They are sent ready to use and must be stored at -20ºC. Only the required number should be thawed on ice at any given time while the remainders should be kept at –20ºC. Note: the kit includes an adhesive temperature indicator strip. If a red colour appears in the viewing window of this temperature indicator strip, the cold chain may have been broken and the kit should not be used. 3.2. Visualization reagents. The visualization kit is shipped and should be stored at 4ºC. WARNING: Once received, the CLART-Strip® (CS) should be stored at room temperature. CLART-Strip® (CS) strips (including all specific probes). They are provided in a sealed thermal envelope. Store it closed at room temperature (25oC max.), protected from direct light. SH (Hybridization Solution). Store at 4ºC. DC (Conjugate Diluent). Store at 4ºC. CJ (Conjugate). Store at 4ºC. Centrifuge once before use. RE (Development Solution). Store at 4ºC and protected from light. TL (Wash Buffer). Store at 4ºC. Adaptor and lid for 8-well strips. 7 3.3. Other components. The following equipment and accessories are required for the capture and subsequent image processing: CAR® (CLINICAL ARRAY READER): which allows the reading and automatic interpretation up to 12 CS, that means, a total amount of 96 samples. This platform is manufactured exclusively for GENOMICA kits use only. SAICLART®: software developed by GENOMICA for image processing. CLART® HPV2 Software: It is specific for CLART® HPV2 designed and validated by GENOMICA. Installed and ready to use. Figure 3. CAR® (CLINICAL ARRAY READER) 4. ADDITIONAL MATERIAL 4.1. Reagents and material. Distilled water Ethanol 96% Disposable gloves Positive displacement or filtered pipette tips Bowl of chipped ice 1.5 mL autoclaved Eppendorf type tubes. 1.5 mL tube grids. 0.5 mL/0.2 mL tube holder. Saline solution 0.9% NaCl 4.2. Equipment. autoclart® (Figure 4) The following equipment is needed for the automatic visualization phase. It enables the automatic visualization of up to 12 CS that means a total amount of 96 samples. 8 Figure 4. autoclart® Microcentrifuge. Thermocycler. Laminar flow chamber for the extraction laboratory. Three adjustable micropipettes (1-20 µl, 20-200 µl and 200-1000 µl) for use in the extraction laboratory. Three adjustable micropipettes (1-20 µl, 20-200 µl and 200-1000 µl) for use in the visualisation laboratory. Thermoblock compatible with 96-well plates and adjustable shaking at 25°C, 30°C and 65°C. Vortex Vacuum system (desirable) 5. HANDLING PROCEEDINGS AND RECOMMENDATIONS Very important: Read this section carefully before beginning any work in order to prevent potential contamination. 5.1. General recommendations. 1. This assay should be performed in two physically separated areas, in order to avoid sample contamination with the previously amplified product. Separate working materials should be available in each area (pipettes, tips, tubes, grids, gloves, etc.) which should never be used outside these areas. 1. Pre-PCR area: DNA extraction, sample preparation and addition of the extracted material to the amplification tubes are performed in this area. Sample manipulation must be carried out within a biosafety cabinet (BSC). 2. Post-PCR area: Amplification and visualization of the amplified product are carried out in this area. The material of this area should never come into contact with the material of the extraction area. Avoid entering the pre-PCR area after having worked in the visualization area. 9 2. Always use gloves. It is recommended to change gloves quite frequently, and it is mandatory to change gloves before start working in each of the aforementioned areas. New gloves must always be used when DNA is added to the amplification tubes. 3. Clean working areas (laboratory cabinets, hoods, grids, pipettes) thoroughly with a 10% diluted bleach solution after every sample batch processing; it is mandatory to disinfect all working areas in case of contamination. For thermocyclers and thermomixers, it is advised to clean them before and after used, in these same conditions. 4. Always use filter tips and positive displacement pipettes to avoid contamination due to micropipettes. Different sets of pipettes should be used in each area. 5. Use disposable and autoclaved laboratory material. 6. Never mix reagents from two different vials, even if they belong to the same lot. 7. Close reagent tubes immediately after use in order to avoid contamination. 8. Discard the micropipette tip after pipetting. 9. GENOMICA is not responsible for the results obtained with the kit if other samples different to the ones indicated are used. 5.2. Precautions for the extraction and addition of extracted material to the amplification tube 1. Always wear gloves 2. Clean working surfaces of cabinets with a 10% diluted bleach solution. 3. Turn on the laminar flow and UV light at least 20 minutes before extraction. Turn off the UV light when it is working inside the cabinet. 4. The preparation of the samples before extraction must be made inside the cabinet. 5.3 Precautions for visualization 1. Avoid the pipette tip or the vacuum system touching the bottom of the well, since this could damage the probes printed at the well’s bottom. 2. It is recommended to add all solutions to the wall of the CS well; never directly at the bottom. 3. It is convenient not to add the SH solution (hybridization solution) until the denatured products of PCR are ready. 4. The array must not remain dry. 5. Following incubation with the CJ solution, it is very important to wash the microarray thoroughly in order to avoid any residues that could react with the RE solution, resulting in a non-specific precipitation that could lead to false interpretations of the result. 10 6. Avoid foaming when adding any reagent. 7. When visualizing the image in the reader, ensure that position markers appear and that there are no bubbles, fibers or spots interfering with the reading. Otherwise, clean the outer face of the well with a cloth and alcohol. 6. TAKING SAMPLES 6.1. Swabs. Samples should be taken with a clean, dry, cotton or alginate swab large enough to obtain a good sized sample. Do not use devices that could cause any bleeding, as blood may interfere with the assay. Place the swab in its tube, which should not contain any kind of preservation medium. Maintain the swab at 4ºC if it is to be processed within seven days, or at –20ºC if processing is to occur later. 6.2. Cell suspensions. Cervicovaginal cytology tests (membrane-filtered monolayers [ThinPrep®, Cytyc]) are refered in this section. After taking the sample with a brush or spatula, resuspend the sample in a vial containing the transport medium by agitating the sampling device. Dispose of the sampling device and keep the sample at 4ºC until use. 6.3. Formalin, ethanol and paraffin wax-embedded samples. Fix the samples in buffered formalin for the shortest time possible (never more than 24 h). The use of non-buffered formalin or fixation for longer than 24 h could cause sample DNA degradation. Before cutting the sample, it is important to carefully clean the blade with xylene before and after cutting. This will help to avoid any cross contamination of the cut samples. Remove any excess wax from the sample with another blade. Use a microtome to make four or five 5 µm sections and store them in a 1.5 ml sterile tube. 7. WORKING PROTOCOL 7.1.1. Manual extraction of HPV DNA. PREPARATION PROCEDURES 1. Buffer B3 preparation: Transfer Buffer B1 (containing 12 ml) into Buffer B2 (containing 3 ml) and mix it thoroughly by pipetting up and down. The resulting Buffer B3 is stable for 5 months when stored in the dark at room temperature. 2. Dissolve lyophilised Proteinase K in BP before using in order to reach a stock concentration of 20 mg/ml. The volume of PB should be used, is indicated on the bottle of proteinase K . Store it at 4ºC 3. Buffer B5 preparation: Add 28 ml of 96-100% ethanol to the Buffer B5 bottle before use. 11 4. Heat solution BE to 70°C before use. 5. All centrifuging should be performed at room temperature unless otherwise stated. Warning: Solutions B3 and BW contain guanidine hydrochloride. The use of gloves, glasses and laboratory clothing is recommended when handling. Extraction of HPV DNA 1. Sample preparation Swabs: Add 1.5 ml saline buffer (0.9% NaCl) to the tube containing the swab and agitate vigorously with a vortex for 1 min. Decant the supernatant into a sterile 1.5 ml tube. Centrifuge the samples for 10 min at 12,000 rpm and then remove all liquid with a micropipette. Be careful not to remove the precipitate. Resuspend the precipitate in 180 µl solution T1, and proceed to step 2. Tissues fixed in formalin or paraffin wax: Introduce the samples into a sterile 1.5 ml microcentrifuge tube and add 180 µl of Solution T1. After mashing the tissue using the pipette tip, vortex it all vigorously to facilitate cell lysis. Cell suspensions: Shake the sample (invert the sample container a few times) and take 1 ml to a sterile 1.5 ml microcentrifuge tube. Centrifuge the samples for 10 min in a microcentrifuge at 12,000 rpm and remove the liquid with a micropipette. Be careful not to remove the precipitate. Resuspend the precipitate with 1 ml sterile water. Centrifuge the samples for 10 min in a microcentrifuge at 12,000 rpm and remove the liquid with a micropipette. Be careful not to remove the precipitate. Resuspend the precipitate in 180 µl Solution T1. Transfer to a sterile 1.5 ml microcentrifuge tube, and proceed to step 2. 12 SAMPLES WILL FOLLOW THE SAME TREATMENT FROM NOW ON 2. Add 25 µl of proteinase K solution and incubate the samples at 56°C for 1-3 h (overnight in case of paraffin embedded tissues) in a water bath or Thermoblock (with agitation) until the sample is completely lysed. Vortexing samples every 15 minutes for a few seconds will accelerate lysis. 180 l T1 + 25 l proteinase K o 1-3 h, 56 C 3. After lysis, add 200 µl of solution B3 to each sample. Mix the samples thoroughly by vortexing them and incubate them at 70°C for 10 min. Add Add 200200 l B3l B3 70°C, 10 min. 70°C, 10 min. 4. Add 210 µl of 96% ethanol to each sample and vortex them immediately. Note: Do not discard any white precipitate that might form after adding the ethanol. Along with the rest of the solution, this precipitate should be added to the purifying column in the next step. 5. After preparing a purifying column for each sample, add the samples and centrifuge them for 1 min at 12,000 rpm. Make sure that all the solution has completely overpassed the membrane and discard the filtered solution and the 2 ml collection tube. 6. Add 500 µl of Solution BW to the column and centrifuge at 12,000 rpm for 1 min. Dispose the filtered solution and the 2 ml collection tube. 7. Add 600 µl of Solution B5 to the column and centrifuge at 12,000 rpm for 1 min. Dispose the filtered solution. Add the sample 1 min, 12,000 rpm Add 500 l B5 1 min, 12,000 rpm Add 600 l B5 1 min, 12,000 rpm 8. Centrifuge once more at 12,000 rpm for 1 min in order to eliminate any remaining Solution B5. 1 min 12,000 rpm 13 Note: Any residual ethanol from Solution B5 might inhibit the required enzymatic reactions; it must therefore be completely eliminated by centrifugation. 9. Place the column in a clean 1.5 ml microcentrifuge tube. Incubate the DNA column with 100 µl of Solution BE (pre-heated at 70oC) for 1 min and then centrifuge at 12,000 rpm for 1 min. Add 100 l BE 1 min 1min, 12,000 rpm 10. Recover the filtrate (approximately 100 µl) in the microcentrifuge tube and take 5 µl for the amplification reaction. Store the rest at –20°C. 7.1.2. Automatic extraction of HPV DNA 7.1.2.1. NucliSENSTM Biomérieux easyMAG device The following protocol is recommended: 1. Preparation of samples for the internal lysis (performed inside the device) Swabs: Add 1.5 ml of saline serum (0.9% sodium chloride) to the tube that contains the swab and vortex vigorously for 1 minute. Pour the supernatant into a sterile 1.5 ml tube. Transfer 1 ml into a well of the tray (each tray contains eight wells). Transportation medium (volume less than 3 ml): Shake the sample by inverting the vial several times and transfer 0.5 ml into one well of the tray. Cell suspensions (volume less than 3 ml): Shake the sample by inverting several times the vial and transfer 1 ml into one well of the tray. 2. Internal lysis and DNA extraction: follow the user’s protocol. It is necessary to set the elution volume in the program to 110 µl. 3. Once the extraction is finished transfer 110 µl of eluted DNA into a 1.5 ml Eppendorf type tube. Use 5 µl for the amplification reaction and store the rest at -20ºC. 14 7.1.2.2. Qiagen BioSprint 96 device. The following protocol is recommended: BUFFER PREPARATION Make sure the buffers are prepared before starting the extraction process. 1. Before using, reconstitute the lyophilized protease by adding 4.4 ml of the buffer indicated in the label. Once reconstituted, keep at 4ºC for up to 2 months. 2. Preparing Buffer AW1 Volume concentrated AW1 Volume of 96% ethanol to be (ml) added 19 25 27 35 98 130 Note: keep at RT. Before using, shake the bottle five times. Final Volume (ml) 44 62 228 3. Preparing Buffer AW2 Volume concentrated AW2 Volume of 96% ethanol to be (ml) added 17 40 68 160 Note: keep at RT. Before using, shake the bottle five times. Final Volume (ml) 57 228 4. Preparing 0.0002% Tween 20 RNAase free H2O Tween 20 Note: Keep the mixture at 4ºC. 30 ml 6 µl 250 ml 50 µl SAMPLE PREPARATION 1. Caution! Set the thermomixer at 70ºC to be ready for the protease lysis. Swabs: Cut the swab and introduce it into a 1.5 ml tube. Add: - 400 µl of ATL buffer - 20 µl of Protease Cell suspensions (volume less than 3 ml):: Liquid cytology: vortex and add to the (S-Block) plate: 15 -200 µl of sample -20 µl of Protease 2. Incubate in the Thermomixer at 70ºC for 10 minutes. If the incubation is performed in a plate, cover it with a transparent film and a pre-heated lid at 70ºC in order to avoid condensation of the sample which could lead to contamination. 3. Master-mix preparation. Pipetting errors can be reduced by preparing one extra tube per each group of 10. Add the following volumes: Components AL Buffer Isopropanol MagAttract Suspension G Volume per sample (µl) 200 200 20 4. Dispense the solutions into the plates. It is necessary to use 6 S-Block and 2 Microplate MP. The table 1 shows the slot of each plate in the device and the volumes that must be added into the plates: Slot in the device 8 Plate Micro-plate MP 7 Micro-plate MP 6 S-Block 5 4 3 2 1 S-Block S-Block S-Block S-Block S-Block To add Place the support with the protective cover Buffer AE (Elution Buffer) RNAase free H2O + Tween 20 Buffer AW2(2) Buffer AW2(1) Buffer AW1(2) Buffer AW1(1) Lysed samples + Master-mix (*) Volume per well (µl) -----100 or 200 500 500 500 500 500 200 + 420 (*) When using swabs, spin the samples before adding the lysates. First add 200 µl of the lysed sample and then, 420 µl of the master-mix into the well. If the lysis has been performed in the plates, add 420 µl of master-mix directly into the well containing the lysed sample. Always mix sample and master-mix by pipetting up and down several times. 5. Extraction. Once the plates are prepared, switch on the BioSprint 96 at the power switch. Open the front door of the protective cover. 16 Select the protocol DNA Swab using the up and down arrows. Press “Start” to start the protocol run. The LCD displays a message asking you to load slot 8 of the worktable with the 96-rod cover. After loading slot 8, press “Start”. The worktable rotates and a new message appears, asking you to load spot 7 with the elution plate. Load slot 7 and press “Start” again. Continue this process of pressing “Start” and loading a particular slot until all slots are loaded. Table 1 shows in which slots the plates should be loaded. Load each plate so that well A1 is aligned with the slot’s label (i.e., well A1 faces inward). Check that the protective cover is correctly installed: it should fit exactly into the body of the BioSprint 96. Slide the door shut to protect samples from contamination. Press “Start” to start sample processing. The process will take 20 minutes. The extracted DNA can be stored in the plate (elution plate in slot 7) at -20ºC, covering the wells with a transparent film. If a full plate has not been used, transfer the extracted DNA into a 1.5 ml tube by using a pipette and store it at -20ºC. 7.2. Amplification reaction. Amplification-specific recommendations: Work in the pre-PCR area, always using a cabinet and following the recommendations mentioned in section 5.1. DNA always adds in cabinet and following the recommendations mentioned in section 5.1. During the process, keep tubes separate and refrigerated. 1. Thaw one reaction tube for each sample and keep them on ice. Do not use temperatures above 37ºC for thawing. 2. Centrifuge the reaction tubes in a microcentrifuge so that all the liquid goes to the bottom (if no adapters are available to hold the reaction tubes, they can be placed in larger tubes with their caps removed). 3. Should your DNA sample be obtained from paraffin embedded tissues; add 1.5 µl 25mM Magnesium Chloride to the reaction tubes. 4. Add 5 µl of extracted DNA from each sample to the reaction tubes and resuspend several times with a micropipette. Leave the tubes on ice. 5. Program the thermocycler as follows: - 1 cycle 95ºC 5 min 40 cycles 94ºC 30 seg 55ºC 60 seg 72ºC 90 seg 1 cycle 72ºC 8 min For 0.2 ml reaction tubes: 17 4ºC (maintained) until tube collection (optional) 6. Start the program and place the reaction tubes in the Thermocycler when the block is above 90ºC. This minimises any non-specific amplifications due to hybridization occuring below the reaction temperature. The amplification process lasts about 4 hours, although this can vary depending on the Thermocycler used. 7.3. Visualization of amplified products on CLART-Strip® (CS) Specific recommendations before starting the visualization process: THE PROTOCOL DESCRIBED BELOW SHOULD ALWAYS BE PERFORMED IN THE POSTPCR AREA. DO NOT TAKE THE AMPLIFIED PRODUCT IN THE PRE-PCR AREA. 1. Turn on the CAR® (CLINICAL ARRAY READER) before starting the whole procedure. The self-calibration of the equipment takes a few minutes, and it is also necessary to introduce the name of the samples in the program before the reading. 2. Make sure that, before the hybridization begins, the thermomixer temperature has reached the 65ºC for at least 1 hour. 3. Warm up the SH (hybridization solution) in the thermomixer. 4. Prepare fresh wash solution before each assay; do not reuse previously prepared solutions or residues. 5. Use filtered tips different for each well and change it every time a reagent is added. 6. In case of using vacuum pumps equipped with 8-tip comb for aspirating solutions, discard the combs after each use or decontaminate them with a 10% diluted bleach solution after every assay. Make sure the pump aspirates properly and does not leave traces at the bottom of the well. 7. Aspirate the different solutions completely without touching the array. 7.3.1. Manual visualization 1. Denaturation: Place the amplification tubes in the thermocycler when this has reached 95ºC and incubate the tubes for 10 min. Not to exceed 10 min time of denaturation to prevent the tubes are opened and contamination may occur. Remove the tubes from the 95ºC incubation and place them immediately on ice. 2. Prepare TL diluted Solution: For 8 wells (one strip) add as follows: 1 ml of TL solution + 9 ml of distilled water. This will make up 10 ml of diluted TL solution necessary for one strip. 18 3. Pre-washing of CS: Before starting the assay, it is necessary to pre-wash the CS by adding 200 µl of TL diluted solution per well. After addition, mix the TL diluted solution 10 to 15 times with the pipette avoiding touching the surface of the array. Aspirate the TL diluted solution with the pump, making sure that the well remains completely clean with no remaining liquid. Add the buffer straight away as follows: 4. Hybridization: Hybridization solution (SH) must be heated at 50ºC in order to dissolve crystallized salts. Add 100 µl of SH buffer (avoiding foam formation) + 5 µl of denatured product to each well. Mix well with the pipette avoiding touching the array and incubate the strip, covered with the transparent plastic lid in the thermomixer for 1 hour at 65 oC, shaking at 550 rpm. After one hour, take the CS out and remove the SH buffer with the pump. (Set the Thermomixer at 30oC and shaking at 550 rpm for step 6. Remove the lid to speed up the cooling). 5. Double washing: use different tips for each well in both washes. Add 200 µl of diluted TL buffer and mix 10 to 15 times with the pipette. Remove the TL diluted solution with the pump. Repeat this wash once and leave the CS with 200 µl of TL buffer until the Thermomixer has reached 30oC. 6. Blocking and adding conjugate: Prepare the diluted CJ solution 15 minutes before hybridization time is over and keep it on ice until its use. It is recommended to spin the CJ buffer for 10 seconds before using. Prepare the diluted CJ buffer: For one strip (8 wells) add as follows: 1 ml of DC buffer 7.5 µl of CJ buffer Vortex the diluted CJ solution briefly before use. Remove the diluted TL buffer without drying out the array and add 100 µl of diluted CJ buffer to each well. Incubate in the Thermomixer at 30oC, 550 rpm, for 15 minutes exactly. After this incubation, take the strip and remove the diluted CJ buffer immediately with the pump (see figure 4). (Set the Thermomixer at 25oC and no shaking for step 8. Remove the lid to speed up the cooling). 7. Triple Washing: Add straight away 200 µl of TL diluted solution per well. Mix well 10 to 15 times with the pipette and remove the diluted TL buffer with the pump without drying out the array. Repeat this wash twice and leave the CS with 200 µl of TL buffer at RT for 5-10 minutes or until the Thermomixer has reached 25oC. It is very important that the diluted CJ buffer is completely washed off. Any remaining buffer could react with the RE buffer producing an unspecific signal. 8. Developing with RE buffer: Remove the diluted TL buffer without drying out the array and add 100 µl of RE buffer per well. Incubate in the Thermomixer at 25oC for 10 minutes without agitation. 19 Attention! It is very important to use the Thermomixer without agitation in this step. 9. After 10 minutes, remove the RE buffer with the pump. The array must be dry at this time. 10. CAR® (CLINICAL ARRAY READER): place the plate normally on the tray and the CAR® will take and analyse the arrays automatically. 7.3.2. autoclart® visualization 1. Denaturation: Place the amplification tubes in the thermocycler when this has reached 95ºC and incubate the tubes for 10 min. Not to exceed 10 min time of denaturation to prevent the tubes are opened and contamination may occur.Remove the tubes from the 95ºC incubation and place them immediately on ice. 2. Switch on the autoclart® unit and follow the instructions described on the screen : 3. Closet the door and press the knob. 4. Select Run at the main menu. 5. Select the assay HPV test among those listed. 6. Select the well of the strip where run should start: A1 or E1 in case the first 4 wells have been already processed. 7. Select the amount of samples to be processed. With autoclart® user can process from 4 up to 96 samples per run. In any case, samples should be multiples of four. 8. Confirm that number of samples and start up well (A1 or E1) are correct. 9. Place the tips rack (full) on its position. 10. Check that both, tip waste and liquid waste containers are empty. 11. Fill the bottle with 250 ml distilled water. 12. Add each reagent to its specific container. autoclart® calculates the specific volumes required according to the amount of samples indicated: - TL (Washing buffer). Volume showed in the display indicates the diluted washing buffer required. In order to prepare the diluted washing buffer please dilute the TL reagent provided 1:10 into distilled water. - SH (Hybridization solution). It is provided ready to use. Add the specified volume in the container once tempered. - CJ (Conjugate). It’s recommended to shortly spin the CJ before use. Display shows final volume of diluted CJ, meaning that each mL indicated on the display should be prepared as follows: 1 ml of DC (Conjugate Diluent) and 5 µl CJ reagent. Vortex the diluted solution in order to mix it properly up. 20 - RE (Developer). Add the RE volume indicated on the display. 13. Close the door and press the knob. The device will start priming the system and cleaning the tips with water. Then it will perform the pre-washes of the CS and adding the hybridization solution. Once finished these steps, the device will beep as a signal for pipetting the samples on their specific CS. autoclart® will automatically stop beeping as soon the user opens the door. 14. For adding the samples on the CSs, please remove the plate carefully from autoclart® unit and add 5ul of the denatured product respectively to each well. Mix it up carefully in order not to touch the array and place the microplate again on the autoclart®. Press the knob again to continue the visualization process. 15. Once finished the visualization process, the autoclart® unit will beep again indicating the end of the run. Please remove the microplate carefully and proceed with the reading step on the CAR®. 16. CAR® (CLINICAL ARRAY READER): place the plate normally on the tray and the CAR® will take and analyse the arrays automatically. 8.RESULTS READING The processing of the obtained data in each analysis is completely automatic. The reading/analysis equipment will provide a report with the results. On the screen, a table with three columns will appear. The left column shows the HPV genotypes that can be detected, the central column will give either a positive or negative result for each genotype, and the right column will show if the amplification and DNA controls are fulfilled. 9. RESULTS INTERPRETATION One of the main drawbacks of genomic amplification is the utilization of poor quality DNA samples (too short DNA, degradation of the DNA, or loss of DNA during extraction) or the presence of DNA polymerase inhibitors (e.g., hemoglobin, remains of paraffin wax, salts etc.) in the samples to be analyzed, thus interfering with the genomic amplification and resulting in false negatives. However, the CLART Human Papillomavirus 2 eliminates false negatives using internal controls within the same tube where the sample is analyzed, and that are amplified at the same time as the viral DNA. Every reaction (amplification) tube of the kit contains the following primers: A pair of primers that amplify a fragment of the human gene CFTR (genomic DNA or DNA from the patient). It is used as genomic DNA control. A pair of primers that amplify a modified plasmid that is included in the tube and which is used as a amplification reaction control. HPV primers. The reaction tube has been designed in order to favour the amplification of the HPV against 21 the other two controls. Among these two controls, the genomic DNA will amplify preferentially compared to the amplification reaction control. The reason for this design is: Genomic DNA control would only be essential for confirming a negative result, since it reports that DNA from the patient was present in the sample even if no HPVs were found. PCR control would only be essential if no amplification in the tube is found, because it will help to distinguish between an inhibited PCR and a sample where no DNA has been found. However, when HPVs are present in the sample, there is always a preference to amplify genotypes instead of amplifying the controls. Hence, under certain conditions (i.e. high copy numbers of a particular HPV genotype or several HPV genotypes present in one sample) internal controls may not appear (NO SIGNAL). Taking in mind these observations, we can consider the following result interpretations: 22 SAMPLE POSITIVE for any genotype GENOMIC DNA CONTROL AMPLIFICATION CONTROL INTERPRETATION √ √ √ POSITIVE It is considered as a VALID RESULT. GENOMIC DNA CONTROL PCR CONTROL HPV GENOTYPE SAMPLE POSITIVE for any genotype GENOMIC DNA CONTROL AMPLIFICATION CONTROL INTERPRETATION √ √ NO SIGNAL POSITIVE It is considered as a VALID RESULT, even if the amplification control reports NO SIGNAL. This is due to the competition during the amplification between the three types of DNA . GENOMIC DNA CONTROL HPV GENOTYPE 23 SAMPLE POSITIVE for any genotype GENOMIC DNA CONTROL AMPLIFICATION CONTROL INTERPRETATION √ NO SIGNAL NO SIGNAL POSITIVE It is considered as a VALID RESULT, even if the two controls appear as NO SIGNAL. This is due to a high number of copies of one virus genotype or high number of HPVvirus present in the sample. HPV GENOTYPE SAMPLE NEGATIVE for any genotype GENOMIC DNA CONTROL AMPLIFICATION CONTROL INTERPRETATION √ √ √ NEGATIVE It is considered as a VALID RESULT. PCR CONTROL GENOMIC DNA CONTROL 24 SAMPLE NEGATIVE for any genotype GENOMIC DNA CONTROL AMPLIFICATION CONTROL INTERPRETATION √ √ NO SIGNAL NEGATIVE It is considered as VALID RESULT, even if the PCR control does not appear, due to a high concentration of genomic DNA. GENOMIC DNA CONTROL BLANK NEGATIVE for any genotype GENOMIC DNA CONTROL AMPLIFICATION CONTROL INTERPRETATION H2O √ NO SIGNAL √ NEGATIVE It is considered as VALID RESULT, because in this case it is a BLANK SAMPLE and there is no DNA to be amplified Only PCR CONTROL is expected to appear. PCR CONTROL 25 SAMPLE NEGATIVE for any genotype GENOMIC DNA CONTROL AMPLIFICATION CONTROL INTERPRETATION √ NO SIGNAL √ NO DNA It is considered as an INVALID RESULT. This is due to the absence of DNA in the sample for several reasons: 1. not enough DNA in the sample 2. loss of DNA during the extraction The solution in these cases is to repeat the technique from the extraction or to take a new sample from the patient. SAMPLE NEGATIVE for any genotype √ GENOMIC DNA CONTROL NO SIGNAL AMPLIFICATION CONTROL INTERPRETATION NO SIGNAL PCR INHIBITED It is considered as an INVALID RESULT. This is due to the presence of some substances that can inhibit the DNA polymerase. The solution is to check for the presence of these substances, although it is preferable to repeat the extraction, or to take a new sample. Align markers An uncertain result may appear due to one of these possibilities: If the three copies of the same probe are very different among each other. If there is a co-infection and one of the detected viruses is in the threshold between positive and negative. 26 10. TECHNICAL AND WORKING SPECIFICATIONS KNOWN SOURCES OF INTERFERENCE Certain substances can interfere with the CLART Human Papillomavirus 2 kit. These are mainly substances that inhibit DNA polymerase, and therefore the amplification reaction. For example: 1. Hemoglobin or paraffin. DNA extracted from cervicovaginal swabs may contain small amounts of hemoglobin, while DNA extracted from samples in paraffin wax may be contaminated with this medium. Although our Extraction-Purification kit minimises these effects there is still potential for interference. 2. Acetic acid and iodine. If a sample for analysis is taken after a colposcopy, contamination of the sample with acetic acid or iodine is possible. Since both compounds can inhibit PCR, we strongly recommend taking the samples before performing any procedure containing these compounds. 3. Use of inadequate samples. The use of any sample types other than those indicated in this manual, or the incorrect taking of samples, could lead to non-conclusive results. For example, if a sampling swab is placed in an alternative medium, PCR might be inhibited, or if samples are left in formalin for too long, the DNA may degrade. 4. Residual proteinase K activity. During DNA extraction, the proteinase K has to be inhibited by incubation at 70ºC for 10 min. This leads to its complete inactivation. If this step is omitted, or the conditions not adhered to, some proteinase K could be left over and degrade the DNA polymerase needed for the PCR, thus inhibiting the reaction. 5. Inadequate conservation of samples. If the samples are held under conditions that lead to the degradation of their DNA, the results may be unreliable. TECHNICAL SPECIFICATIONS 1. Analytical parameters: Analytical sensitivity. The analytical sensitivity was determined by specific amplification of the different HPV genotypes cloned in recombinant plasmids. Sensitivity of HPV types 16 and 18 were also determined from samples from the 2010 WHO HPV LabNet Proficiency Study of HPV DNA Typing. 2 HPV GENOTYPE 10 copies 6 11 16 18 26 31 33 35 100% 100% 100% 100% 100% 100% 50 copies* 100% 100% 10 copies 40% 60% 80% 80% 80% 80% 100% 27 39 45 51 52 53 56 58 59 66 68 82 100% 60% 80% 80% 80% 100% 100% 80% 100% 80% 100% 100% 100% 100% 100% 100% 100% N=95 * Data expressed in genome equivalents. Table 1. Analytical sensitivity of CLART® HPV 2 kit Due to the clinical significance of HPV types 16 & 18, we have included the sensitivity data from these types from the 2010 WHO HPV LabNet Proficiency Study of HPV DNA Typing in order to compare HPV DNA detection and typing methodologies for the evaluation of HPV vaccines and in effective implementation and monitoring of HPV vaccination programs. A data set was considered proficient when it was detecting at least 50 international units (genome equivalents) of HPV 16 and HPV 18, fact achieved within CLART® Human Papillomavirus 2. Analytical specificity. The analytical specificity was 100%. CLART® Human Papillomavirus 2 kit detects no other pathogens that might be found in cervicovaginal samples, such as herpesvirus. 2. Diagnostic parameters. In order to determine the diagnostic parameters of the kit CLART® Human Papillomavirus 2, comparative studies against the previous version of the kit were performed. This comparison was performed in collaboration with two Spanish hospitals and a Portuguese one. Microbiology Service of the University Hospital Germans Trías i Pujol of Badalona. Virology Unit of University Hospital Virgen de la Arrixaca, Murcia. Infection Diseases Department of the National Health Institute Ricardo Jorge, I. P. Lisboa (Portugal). A total amount of 386 samples were performed, including 9 swabs, 25 paraffin embedded tissues and 364 LBC. The following table illustrates the diagnostic sensitivity and specificity data for HPV types detected in the kit CLART® Human Papillomavirus 2: HPV type 6 11 16 18 26 31 Sensitivity 97,37 100,00 100,00 100,00 100,00 100,00 Specificity 100,00 100,00 99,69 100,00 100,00 100,00 HPV type 56 58 59 61 62 66 Sensitivity 100,00 97,44 100,00 100,00 100,00 100,00 Specificity 100,00 100,00 99,73 100,00 99,46 100,00 28 33 35 39 42 43 44 45 51 52 53 54 97,14 100,00 88,89 100,00 100,00 100,00 92,86 100,00 96,15 95,83 100,00 99,72 99,74 100,00 99,46 99,50 100,00 99,74 100,00 100,00 100,00 100,00 68 70 71 72 73 81 82 83 84 85 97,44 94,44 100,00 100,00 100,00 100,00 94,74 100,00 100,00 100,00 98,33 100,00 100,00 100,00 99,74 100,00 99,47 100,00 100,00 100,00 Table 2. Diagnostic parameters of CLART® HPV 2. 29 11. REFERENCES Verdasca, N., A. Coelho, F. Ribeira, A. Pista.: “Detection of VPH ADN from cervical samples in a group of portuguese women: comparison of two VPH genotyping assays”. 23rd International papillomavirus conference and clinical workshop. September 2006. Praga. Mejlhede N., Bonde J., Fomsgaard A.:”High frequency of multiple HPV types in cervical specimens from Danish women”. APMIS 117:108-114, September 2008. Fagan, E.J., Moore C., Jenkins C., Rossouw A., Cubie H.A, James V.: “External quality assessment for molecular detection of human papillomaviruses”. Journal of Clinical Virology 48: 251-254, May 2010. Pista, A., Freire de Oliveira C., Lopes C., and Cunha M. J., on behalf of the CLEOPATRE Portugal Study Group: “Prevalence of Human Papillomavirus Infection in Women in Portugal - The CLEOPATRE Portugal Study”. Int J Gynecol Cancer 2011;21: 1150Y1158 Kaspersen MD., Larsen PB., Ingerslev HJ., Fedder J., Petersen GB., Bonde J., Höllsberg P.: “Identification of Multiple HPV Types on Spermatozoa from Human Sperm Donors”. PLOSONE, Vol. 6, Issue 3, March 2011. Casalnego JS., Benchaib M., Le Bail Carval K., Piaton E., Mathevet P., Mekki Y. : “Human papillomavirus genotype distribution among French women with and without cervical abnormalities”. International Journal of Gynecology and Obstetrics. Vol 114 Issue 2: 116-119. August 2011. Rebolj M., Lynge E., Bonde J.:”Human papillomavirus testing and genotyping in cervical screening”. Expert Review Anticancer Ther. 11(7), 1023-1031 (2011). Chranioti A., Spathis A., Aga E., Merustoudis C. Pappas A., Panayiotides I. and Karakitsos P. “Comparison of two commercially available methods for HPV Genotyping: CLART HPV2 and Linear Arrays HPV Genotyping Test”. Analytical and Quantitative Cytopathology and Histopathology. Volume 34, number 5, October 2012. Garbugliaa A. R., Piselli P., Lapaa D., Sias C., Del Nonnoc F., Baiocchinic A., Cimagliab C., Agrestab A. and Capobianchia M. R. “Frequency and multiplicity of human papillomavirus infection in HIV-1 positive women in Italy”. Journal of Clinical Virology. JCV-2429 (2012). Goldman B., Rebolj M., Rygaard C., Preisler S., Ejegod DM, Lyngea E., and Jesper Bonde. “Patterns of cervical coinfection with multiple human papilloma virus types in a screening population in Denmark”. Vaccine 2013 Mar 15;31 (12): 1604-9. Pista, A., Freire de Oliveira C., Lopes C., and Cunha M. J., on behalf of the CLEOPATRE Portugal Study Group. “Human Papillomavirus Type Distribution in Cervical Intraepithelial Neoplasia Grade 2/3 and Cervical Cancer in Portugal A CLEOPATRE II Study”. International Journal of Gynecological Cancer & Volume 23, Number 3, March 2013 Bonde J., Rebolj M., Ejegod DM., Preisler S., Lynge E., Rygaard C.: “HPV prevalence and genotype distribution in a population-based split-sample study of well-screened women using CLART® HPV2 Human Papillomavirus genotype microarray system”. BMC Infectious Diseases 2014, 14:413. 30 Smelov V., Elfström KM., Johansson A LV., Ecklund C., Naucler P., Arnheim-Dahlström L., Dillner J.: “Long-term HPV type-specific risks of high-grade cervical intraepithelial lesions: A 14-year follow-up of a randomized primary HPV screening trial”. Int. J. Cancer: 136, 1171–1180 (2015). Ejegod DM., Rebolj M., Bonde J.: “Comparison of analytical and clinical performance of CLART HPV2 genotyping assay to Linear Array and Hybrid Capture 2: a split-sample study”. DOI 10.1186/s12885-015-1223-z 31 12. TABLE Oncogenic risk of the HPV types detectable with CLART® HPV2. TYPE ONCOGENIC RISK * TYPE ONCOGENIC RISK * PVH 6 Low Risk PVH 56 Hight Risk PVH 11 Low Risk PVH 58 Hight Risk PVH 16 Hight Risk PVH 59 Hight Risk PVH 18 Hight Risk PVH 61 Low Risk PVH 26 Problable Hight Risk PVH 31 Hight Risk PVH 62 Low Risk PVH 66 Hight Risk PVH 33 Hight Risk PVH 35 Hight Risk PVH 68 Hight Risk PVH 39 Hight Risk PVH 71 Low Risk PVH 40 Low Risk PVH 72 Low Risk PVH 42 Low Risk PVH 43 Low Risk PVH 73 Probable Hight Risk PVH 81 Low Risk PVH 44 Low Risk PVH 82 Probable Hight Risk PVH 45 Hight Risk PVH 83 Low Risk PVH 51 Hight Risk PVH 84 Low Risk PVH 52 Hight Risk PVH 85 Low Risk PVH 53 Probable Hight Risk PVH 89 Low Risk PVH 70 Low Risk PVH 54 Low Risk *According to: Bouvar d V, Baan R, Straif K, Grosse Y, Secretan B, El Ghissassi F et al. A review of human carcinogens -Part B: biological agents. Lancet Oncol 2009:10( 4):321 322 32