1
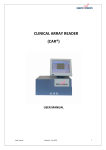
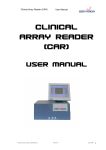
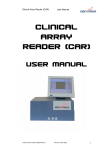
CLART® ENTHERPEX
DETECTION AND TYPING OF
HERPES AND HUMAN ENTEROVIRUS
VIA
GENOMIC IDENTIFICATION
FOR IN VITRO DIAGNOSIS
-1-
CLART® ENTHERPEX
CLART® ENTHERPEX is under protection of patent family corresponding to International PCT Patent
Application WO2009122201, which comprises national and regional members in different
territories, including granted patents in Europe, Mexico and Russia, and patent applications under
prosecution in Brazil and Canada.
CLART®, CLART-Strip®, CAR®, SAICLART®, AUTOCLART® and ENTHERPEX® are registered
Trademarks of GENOMICA.
ONLY CMV DIAGNOSTIC HAS BEEN ASSENTED BY THE NB 0318.
GENOMICA, S.A.U.
Parque Empresarial Alvento, Edificio B
Calle Vía de los Poblados, 1 – 1ª planta
28033 Madrid, Spain
Telf: +34 91 674 89 90,
Fax: +34 91 674 89 91
www.genomica.com
Version 5
July 2015
-2-
TABLE OF CONTENTS:
1. KEY TO SYMBOLS
2. INTRODUCTION
3. DESCRIPTION OF THE CLART® ENTHERPEX KIT
4. KIT COMPONENTS AND STORAGE
4.1. Extraction-purification reagents
4.2. Amplification reagents
4.3. Visualization reagents
4.4. Other components
5. MATERIALS REQUIRED AND NOT PROVIDED
5.1. Reagents and materials
5.2. Equipment
6. RECOMMENDATIONS AND HANDLING PROCEDURES
6.1. General recommendations
6.2. Precautions for visualization
7. SAMPLING
7.1. Swabs
7.2. Serum, plasma
7.3. Cerebrospinal fluid
7.3. Paraffin-embedded tissue fixed in formaldehyde or ethanol
8. WORKING PROTOCOL
8.1. DNA/RNA extraction from various samples
8.1.1. Swabs
8.1.2. Serum, plasma
8.1.3. Cerebrospinal fluid
8.1.4. Paraffin-embedded tissue fixed in formaldehyde or ethanol
8.2. Automatic extraction:
- Swabs
- Serum/plasma/cerebrospinal fluid
- Whole blood
8.3. Amplification reaction
8.4. Amplified product visualization in CLART-Strip® (CS)
8.4.1 Manual visualization
8.4.2. autoclart® visualization
9. RESULTS READING
10. RESULTS INTERPRETATION
11. TECHNICAL AND OPERATIONAL SPECIFICATIONS
12. BIBLIOGRAPHY
-3-
1. GLOSSARY OF TERMS
Please, check handling instructions
Expiry date
In vitro diagnostic device
Batch
25ºC
Store at room temperature
20ºC
8ºC
Store between 4 ºC and 8 ºC
4ºC
-18ºC
Store between –30 ºC and –18 ºC
- 30ºC
-4-
2. DESCRIPTION OF PROTOCOL
CLART® ENTHERPEX detects the presence of all 8 human herpes in clinical samples (swabs, serum,
plasma, cerebrospinal fluid and biopsies): HSV-1, HSV-2, VZV, CMV, EBV, HHV-6, HHV-7 and HHV8. It also detects the three most relevant human Enteroviruses from a clinical point of view:
Poliovirus, Echovirus and Coxsackievirus.
Detection is carried out via amplification of a fragment located between 106-328 bp, the
sequence of which is highly conserved although it is sufficiently specific for each virus type. This
way, detection specificity is guaranteed.
The detection of the amplified product via RT-PCR is performed thanks to the use of a new
technology platform based on low-density micro-arrays: CLART® (Clinical Arrays Technology). The
platform is based on a very simple, efficient and user friendly principle, consisting in including a
micro-array at the bottom of a 2 mL tube (Array Tube-AT) or in an 8-well Strip (CLART-Strip® / CS)
(Figure 1) Compared to classic micro-array systems, it considerably simplifies the hybridization and
visualization processes.
The detection of the product amplified by PCR is carried out by means of a low-density microarray
platform: CLART® (Clinical Arrays Technology). The platform is based on a very simple principle,
but at the same time cost effective. It consists on a microarray printed at the bottom of a
microtiter plate well (CLART-Strip® -CS) (Figure 1), which simplifies the entire hybridization and
visualization process when compared to classic microarray systems.
Figure 1. CLART-Strip® (CS) platform in the form of an 8-well strip.
This type of technology allows the simultaneous detection of multiple molecular markers of
diagnostic utility and of the controls needed to guarantee the reliability of the obtained results
The CLART® ENTHERPEX detection system is based on the precipitation of an insoluble product at
those dots with specific probes of the micro-array where the amplified products hybridize. During
RT-PCR, amplified products are labeled with biotin. Following amplification, they hybridize with
their respective specific probes that are immobilized in concrete and known sites of the microarray. After hybridization they are incubated with a streptavidin-peroxidase conjugate. The
-5-
conjugate binds via streptavidin with the biotin present in the amplified products (which are also
bound to their specific probes). In presence of o-Dianisidine, the peroxidase activity of the
conjugate catalyzes the precipitation of an insoluble product at the hybridization sites of the
micro-array (Figure 2).
Figure 2: Diagram of the visualization method. Probes, immobilized on the surface, capture their
complementary biotin-labelled amplified products. With the help of biotin, they bind to the conjugate, in
this case streptavidine-HRP (HorseRadish Peroxidase). The o-dianisidine substrate, by the action of the
HRP, produces a precipitate on the area where hybridization occurs.
-6-
The sensitivity of CLART® ENTHERPEX, combining the genomic amplification and the visualization
in the micro-array is so high that it is not necessary to perform double amplifications (nested-PCR),
thus avoiding any contamination risks.
One of the main drawbacks of the detection by genomic amplification is reporting false negatives.
This may occur because of the presence of enzyme mixture (RT and DNA polymerase) inhibitors
like hemoglobin, salts (etc.) in those samples where virus detection is going to be performed
The CLART® ENTHERPEX kit avoids reporting false negatives thanks to the presence of an internal
control that verifies the amplification reaction efficiency in the amplification tubes.
An incorrect performance during the DNA/RNA extraction procedure may lead to false negative
results. Especial attention at this step is highly recommended.
A negative control should also be included in order to check contamination during the extraction,
amplification and visualization processes; which would report false positive results.
4. KIT COMPONENTS AND STORAGE
The CLART® ENTHERPEX kit contains extraction and analysis reagents for 24 to 48 DNA/RNA
clinical samples. Reagents included in the kit have been grouped in different packages, depending
on the storing temperature. When storage recommendations are observed, all reagents remain
stable until the kit expiration date.
4.1. Extraction reagents
The extraction-purification CLART® ENTHERPEX kit is shipped at -20ºC and it should be stored at
this temperature until it is used.
It contains the following materials:
•
•
•
•
•
•
SEML (extraction solution). Once thawed, it should be stored at 4ºC and used within 8
days.
SD (Dilution solution). Store at -20ºC or 4ºC.
IP (Isopropanol). Store at -20ºC.
DE (Ethanol 70%). Store at -20ºC.
DB (Digestion solution 5X). Once thawed, store at 4ºC.
PK (Proteinase K 10X). Once thawed, it should be kept on ice and stored at 4ºC. Once
thaw, PK must be used within a month
4.2. Amplification reagents
They are shipped and stored at -20ºC.
•
Amplification tubes
-7-
Two types of amplification tubes are shipped:
•
Colorless tube (multiplex-RT-PCR 1) for the amplification of HSV-1, HSV-2 and
VZV. They contain 45 µL of reaction mixture. Mix 1
•
Green tube (multiplex-RT-PCR 2) for the amplification of CMV, EBV, HHV-6,
HHV-7, HHV-8 and Enterovirus (Echovirus, Poliovirus and Coxsackivirus). They
contain 43 µL of reaction mixture. Mix 2
WARNING! Green amplification tube requires the addition of 2 µL of enzyme mixture
before the introduction of the extracted genetic material. Colorless tubes already
contain enzymatic mix.
•
Enzyme mixture: this is a mixture of RT (retrotranscriptase) enzymes and DNA
polymerase. Ready to use. Store at -20ºC.
NOTE: The kit package includes a self-adhesive and irreversible temperature indicator; the
appearance of a reddish color on the visualization window indicates that, at a certain
moment, products have exceeded storage temperature of -20oC and they should not be
used.
4.3. Visualization reagents
The visualization kit is shipped and should be stored at 4ºC.
WARNING: Once received, the CLART-Strip® (CS) should be stored at room temperature.
•
•
•
•
•
•
CLART-Strip® (CS) strips (including all specific probes). They are provided in a sealed
thermal envelope. Store it closed at room temperature (25oC max.), protected from
direct light.
SH (Hybridization Solution). Store at 4ºC.
DC (Conjugate Diluent). Store at 4ºC.
CJ (Conjugate). Store at 4ºC. Centrifuge once before use.
RE (Development Solution). Store at 4º C.
TL (Washing Buffer). Store at 4ºC.
WARNING! Upon receipt, the kit, micro-arrays solution should be stored at room
temperature.
4.4. Other components
The following equipment and accessories are required for the capture and subsequent image
processing:
-8-
•
CAR® (CLINICAL ARRAY READER): which allows the reading and automatic interpretation
up to 12 CS, that means, a total amount of 96 samples. This platform is manufactured
exclusively for GENOMICA kits use only.
SAICLART®: software developed by GENOMICA for image processing.
CLART® ENTHERPEX Software: It is specific for CLART® ENTHERPEX designed and validated
by GENOMICA. Installed and ready to use.
•
•
Figure 3. CAR (CLINICAL ARRAY READER)
5. MATERIALS REQUIRED BUT NOT PROVIDED
Below there can be found a list of all materials required but not provided.
5.1. Reagents and materials
•
Distilled water.
•
Saline solution.
•
Disposable gloves.
•
Filter tips or positive displacement pipettes.
•
Crushed ice container.
•
1.5 mL autoclaved Eppendorf tubes.
-9-
•
1.5 mL tube grids.
•
0.5 mL/0.2 mL tube holder.
5.2. Equipment
•
autoclart® (Figure 4) The following equipment is needed for the automatic visualization
phase. It enables the automatic visualization of up to 12 CS that means a total amount
of 96 samples.
Figure 4. autoclart®
•
Microcentrifuge.
•
Thermocycler.
•
Laminar flow cabinet for the extraction laboratory.
•
Three adjustable micropipettes ranging from 1-20 µL, 20-200 µL, and 200-1000 µL for
the extraction laboratory.
•
One adjustable micropipette ranging from 1-20 µL, to add the enzyme mixture to the
colored amplification tube and to add the genetic material to the amplification tubes.
•
Three adjustable micropipettes ranging from 1-20 µL, 20-200 µL, and 200-1000 µL for
the visualization laboratory.
•
Heating block with agitation, adjustable at 25ºC, 30ºC, 50ºC and 53ºC. Compatible with
Eppendorf tubes and with 8 well strips.
•
Vortex.
•
Vacuum system (optional).
- 10 -
6. RECOMMENDATIONS AND HANDLING PROCEDURES
Very important in order to avoid contamination! Please, read carefully before initiating the
assay.
6.1. General recommendations
1. This assay should be performed in two physically separated areas, in order to avoid sample
contamination with the previously amplified product. Separate working materials should be
available in each area (pipettes, tips, tubes, grids, gloves, etc.) which should never be used outside
these areas.
1. Pre-PCR area: In this area, the extraction of DNA/RNA is performed, enzyme
mixture is added to the amplification tubes and DNA/ARN is added to the
amplification tubes. Working in a laminar flow hood is recommended.
2. Post-PCR area: Amplification and visualization of the amplified product are carried
out in this area. The material of this area should never come into contact with the
material of the extraction area. Avoid going to the pre-PCR area after having
worked in the visualization area.
2. Always use gloves. It is recommended to change gloves quite frequently while it is mandatory
to change them prior to start working in each of the above-mentioned areas. New gloves should
be used for the preparation of the amplification tubes and every time DNA/RNA is added to them.
3. Clean working areas (laboratory benches, hoods, grids, pipettes and Thermocycler) thoroughly
with 10 % diluted bleach following every sample batch processing; it is mandatory to disinfect all
working areas in case of contamination. Use new filter paper every time to start working. It is
recommended to clean the Thermocycler and heating block with 10% diluted bleach.
4. Always use filter tips or positive displacement pipettes to avoid contamination due to
micropipettes. A set of pipettes should be used in each area.
5. Use disposable and autoclaved laboratory material.
6. Never mix reagents from two different tubes even though they belong to the same lot.
7. Close reagent tubes immediately after use in order to avoid contamination.
8. Discard the micropipette tip after pipetting.
9. GENOMICA shall not be liable for results obtained using this kit, in case other samples than
those indicated in the manual are used or other DNA/RNA extraction protocols than the one
indicated herein are followed.
- 11 -
6.2. Precautions for visualization
1. Avoid the pipette tip or the vacuum system touching the bottom of the well, since this could
damage the probes printed at the well’s bottom.
2. It is recommended to add all solutions to the wall of the CS well; never directly at the bottom.
3. It is convenient not to add the SH solution (hybridization solution) until the denatured products
of PCR are ready.
4. The array must not remain dry.
5. Following incubation with the CJ solution, it is very important to wash the microarray
thoroughly in order to avoid any residues that could react with the RE solution, resulting in a
non-specific precipitation that could lead to false interpretations of the result.
6. Avoid foaming when adding any reagent.
7. When visualizing the image in the reader, ensure that position markers appear and that there
are no bubbles, fibers or spots interfering with the reading. Otherwise, clean the outer face of
the well with a cloth and alcohol.
7. SAMPLING
7.1. Swabs
Take the sample with a dry and clean cotton or alginate swab, preferably an urethral type one
(even for the vaginal swabs). Never use mechanisms that could cause bleeding injuries.
Reintroduce the swab in its tube without using any kind of medium. Store the sample at 4ºC if it is
going to be processed within 7 days or at -20º C if it is going to be processed later than 7 days.
7.2. Serum or plasma
Blood samples with plasma will be extracted and should be collected in tubes containing citrate or
EDTA as anticoagulant, never heparin.
In order to extract serum, allow the blood sample to coagulate for 30 min and then centrifuge at
1500 rpm for 20 min.
In some cases, following sampling of this type, it is possible to isolate cellular fraction and proceed
to DNA/RNA extraction from it.
If the sample is going to be processed within 12 hours, it should be stored at 4º C. If the analysis is
going to be performed later than that, the sample should be stored aliquoted at -70º C and
thawed just before it is processed. It is important to avoid repeated freeze-thawing cycles.
- 12 -
7.3. Cerebrospinal fluid
If the sample is going to be processed within 12 hours, it should be stored at 4º C. If the analysis is
going to be performed later than that, the sample should be stored aliquoted at -70º C and
thawed just before it is processed. It is important to avoid repeated freeze-thawing cycles.
7.4. Paraffin-embedded biopsies fixed in formaldehyde or ethanol
Fixing samples in buffered formaldehyde for the shortest time possible (never more than 24
hours) avoids DNA/RNA degradation. Using non buffered formaldehyde or a fixation longer than
24 hours could lead to a false negative result.
It is important to carefully clean the blade with xylene or to use disposable blades, before cutting
and after having cut the sample, to avoid transferring residues from a previously cut sample. Use
the microtome to slice
2-3 5 µm sections and place them in a clean 1.5 mL tube.
8. WORKING PROTOCOL
8.1 Manual DNA/RNA extraction from various samples
With independence of the extraction method (manual or automatic), a minimal RNA amount of
5-10 ng/µl is recommended in order to optimize the results.
Specific recommendations before initiating extraction:
•
•
•
•
•
Work in the pre-PCR extraction area, always using a hood and following the
recommendations mentioned in section 6.1.
Before starting and at the end, the hood area should be carefully cleaned with 10% diluted
bleach.
Clean pipettes before and after every use with 10% diluted bleach.
Keep samples on ice.
Use Eppendorf type 1.5 mL clean tubes. Keep them as apart as possible in the grids during
the extraction in order to avoid contamination.
DNA/RNA extraction
8.1.1. Swabs
At the end of each series of samples include a negative control, consisted of 1.5 mL of saline
solution, and process like the rest of the samples.
1. Add 1.5 mL of saline solution (0.9% sodium chloride) to the tube containing the swab and
vortex for 1 min.
- 13 -
2. Decant the supernatant in an autoclaved 1.5 mL Eppendorf tube and centrifuge in the
microcentrifuge at maximum speed for 10 minutes.
3. Remove the supernatant using the pipette very carefully avoiding sweeping along the cell
precipitate.
4. Defrost a tube of BD 5X (Digestion Solution 5X), a tube of PK 10X (Proteinase K 10X), and a tube
of SD (Dilution Solution). Proteinase K should be maintained on ice while it is being used, and
then it should be stored at 4ºC, being stable just for 7 days; once thawed, do not ever freeze
again. Prepare the digestion mixture, mixing the following amounts for each sample to be
processed:
70 x (tubes no. + 1) = __ µL of SD (Dilution Solution).
20 x (tubes no. + 1) = __ µL of BD5X (Digestion Solution 5X).
10 x (tubes no. + 1) = __ µL of PK 10X (Proteinase K 10X).
5. Add 100 µL of digestion mixture to every sample. Gently resuspend the cell precipitate using a
micropipette.
6. Incubate at 55-60ºC for 2 hours.
7. Boil for 10 minutes to deactivate Proteinase K. If the tube closure is not firm enough, it is
recommended to perforate the cups with a needle in order to prevent their opening during
incubation at 100ºC. Avoid the bath water to enter in the tube by such openings. Do not close
the bath cap.
8. Centrifuge in a microcentrifuge at high speed for 10 minutes. Pass immediately the supernatant
to a clean tube and draw a 5 µL aliquot to perform the amplification reaction. Store the rest at 20ºC.
8.1.2. Serum or plasma
It is necessary to process a sample consisted of 100 µL saline solution which will serve as a
negative control of the amplification and visualization reaction.
1. Thaw and keep the sample on ice.
2. Place 100 µL of clinical sample in a 1.5 mL Eppendorf type tube.
3. Add 400 µL of SEML (liquid sample extraction solution). Wait until the solution thaws and turns
clear before using it. Mix by inverting the tubes several times and incubate for 15 min at room
temperature.
4. Add 500 µL of Isopropanol (stored at -20ºCand kept on ice until it is used). Mix by inverting the
tubes several times and centrifuge, preferably at 4ºC, at 13000 rpm for 20 min.
- 14 -
5. Remove supernatant using a micropipette. A 1000 µL micropipette can be used to remove the
supernatant, as long as a smaller micropipette is used at the end, for example a 20 µL one, for
removing the residues at the bottom of the tube without removing the precipitate accidentally.
6. Add 500 µL of 70% Ethanol (stored at -20ºCand kept on ice until it is used). Agitate gently to
clean the precipitate at the bottom and centrifuge for 15 minutes at 13000 rpm.
7. Remove the supernatant carefully as indicated in step 5. Dry the opened tubes under the hood
for 15 or 20 minutes. Prior to resuspend the sample, confirm that there are no ethanol residues
left, that could inhibit the PCR.
8. Resuspend in 25 μL of Dilution Solution (DS). Extracted DNA/RNA could be used directly for
analysis Keep it on ice until it is added into the amplification tubes or store it at -20º C.
8.1.3. Cerebrospinal fluid
It is necessary to process a sample consisted of 50 µL saline solution which will serve as a negative
control of the amplification and visualization reaction.
1. Thaw samples on ice.
2. Place 50 µL of clinical sample in a 1.5 mL Eppendorf type tube.
3. Add 200 µL of SEML (Liquid Sample Extraction Solution). Wait until the solution thaws and turns
clear before using it. Mix by inverting the tubes several times and incubate for 15 min at room
temperature.
4. Add 250 µL of Isopropanol (stored at -20ºC and kept on ice until its use). Mix by inverting the
tubes several times and centrifuge, preferably at 4ºCand 13000 rpm for 20 min.
5. Remove supernatant using a micropipette. A 1000 µL micropipette can be used to remove the
supernatant, as long as a smaller micropipette is used at the end, for example a 20 µL one, for
removing the residues at the bottom of the tube without removing the precipitate by mistake.
6. Add 500 µL of Ethanol at 70% (stored at -20ºCand kept on ice until its use). Agitate gently to
clean the precipitate at the bottom and centrifuge for 15 minutes at 13000 rpm.
7. Remove the supernatant carefully as indicated in step 5. Dry in the hood for 15 or 20 minutes
until there are no ethanol residues left. Prior to resuspend the sample, confirm that there are
no ethanol residues left.
8. Resuspend in 25 μL of Dilution solution. Extracted DNA/RNA could be used directly for analysis
Keep it on ice until it is added into the amplification tubes or store it at -20º C.
8.1.4. Paraffin-embedded biopsies fixed in formaldehyde or ethanol
- 15 -
1.a. Paraffin-embedded: Use the microtome to slice two 5 µm sections and place them in an
autoclaved 1.5 mL Eppendorf type tube. It is important to carefully clean the blade with xylene,
before cutting and after having cut the sample, to avoid transferring residues from a previously
cut sample.
1.b. Fixed in formaldehyde or ethanol: Cut/crush a 2-3 mL sample fragment with a clean blade on
a clean slide and introduce it in a 1.5 mL Eppendorf type clean tube. Crush the tissue with the
pipette tip, and mix it on the vortex to facilitate lysis.
2. Defrost a tube of DB 5X (Digestion Solution 5X), a tube of PK 10X (Proteinase K 10X) and a tube
of SD (Dilution Solution) at room temperature. Proteinase K should be maintained on ice while
it is being used, and then it should be stored at 4ºC; once thawed, do not ever freeze it again.
Prepare the digestion mixture, mixing the following volumes per sample to be processed:
70 x (tubes no. + 1) = __ µL of SD (Dilution Solution).
20 x (tubes no. + 1) = __ µL of DB 5X (Digestion Solution 5X).
10 x (tubes no. + 1) = __ µL of PK 10X (Proteinase K 10X).
Add 100 µL of digestion mixture to every sample. Push the cut section with the micropipette tip
to completely cover it with digestion mixture.
Add 100 µL of mixture to an empty 1.5 mL tube, which will be processed as a negative
extraction and visualization control.
3. Incubate in a heating block or in a bath at 56ºC for 3 hours.
4. Boil for 10 minutes to deactivate Proteinase K. If the tube closure is not firm enough, it is
recommended to perforate the cups with a needle in order to prevent their opening during
incubation at 100ºC.
5. Centrifuge immediately in a microcentrifuge for 10 minutes. Collect the supernatant in a clean
1.5 mL tube, going through the upper layer of the solidified paraffin with a micropipette. The
extracted DNA can be analyzed either directly or it can be stored at –20ºC.
8.2. Automatic extraction
Please, follow the instructions provided by the manufacturer.
8.3. Amplification reaction
8.3.1 Amplification-specific recommendations:
•
Work in the Pre-PCR area, always working under a laminar flow hood and following the
recommendations mentioned in section 6.1.
- 16 -
•
Be careful when adding the enzyme mixture to the PCR tubes, since it contains a high
percentage of glycerol. If the pipette tip is introduced too deeply, the mixture adheres to the
tip walls causing, on the one hand, the addition to the reaction tube of a larger amount of
mixture than the necessary and, on the other hand, some loss of enzyme mixture volume. This
could result in an insufficient quantity of enzyme mixture for the rest of the amplification
tubes of the kit.
1. Add the DNA/RNA in the Pre-PCR area, always under the hood and following the
recommendations mentioned in section 6.1. During the process, keep tubes
closed, separate and on ice.
8.3.2 Amplification reaction protocol:
1. For each sample to be processed, thaw two amplification tubes (a colorless and a green
one) on ice. Do not use temperatures above 37ºC for thawing.
2. Centrifuge in the microcentrifuge for a few seconds, until all liquid accumulates at the
bottom of the tube. In case there are no microcentrifuge adaptors available, larger
tubes can be used instead, after having cut their cap off.
3. Add 2 µL enzyme mixture into the colored amplification tube (Mix 2). Keep enzyme
mixture on ice during handling.
4. Add 5 µL of the extracted RNA/DNA to each one of the reaction tubes and resuspend
several times with the micropipette. Extracted RNA/DNA has to have a minimal
concentration of 3 ng/ µl. Keep the tubes on ice.
5. Program the following temperature cycles in the Thermocycler for both types of
multiplex PCR:
1 cycle
45ºC 45 min
95ºC 15 min
45 cycles
95ºC 30 sec
56ºC 1:30 min
72ºC 1 min
1 cycle
72ºC 10 min
4ºC continuously until tube collection (optional)
6. Start the program and place the reaction tubes in the Thermocycler. The amplification
lasts around 5 hours, although this could slightly vary depending on the system used.
8.4. Visualization of amplified products on CLART-Strip® (CS)
Specific recommendations before starting the visualization process:
- 17 -
THE PROTOCOL DESCRIBED BELOW SHOULD BE FOLLOWED IN THE POST-PCR AREA. NEVER TAKE
THE AMPLIFIED PRODUCT TO THE PRE-PCR AREA.
1. At the beginning of the assay:
• Switch on the CAR® (CLINICAL ARRAY READER) in order to allow auto-calibration of the
device.
• Input the sample IDs. It is important to have the equipment ready to read the samples at
the end of the assay to avoid a time overexposure of the samples.
2. One hour before starting the hybridization process, switch on the Thermomixer at 59ºC.
3. Allow the SH (Hybridization Solution) to reach room temperature.
4. PREPARE THE WASHING SOLUTION BEFORE EACH ASSAY. DO NOT USE PREVIOUS
SOLUTIONS OR ANY REMAININGS FROM PREVIOUS ASSAYS.
5. Before starting the denaturing program, wash the Thermocycler with bleach diluted to
10%. During the denaturing process, place the amplification tubes separated from each
other into the Thermocycler. Do not keep on denaturing more than 10 minutes.
6. It is not necessary to use filter tips during the visualization process, only when adding
amplified products to every well. A different tip for each sample and for each reagent
must be used. This precaution must also be undertaken for the TL buffer.
7. The 8-tip combs used with the aspiration pumps must be discarded after use or
decontaminated with 10% bleach solution after each assay. Make sure that the vacuum
pump works properly and do not let remaining liquid in the wells.
8. All the buffers must be thoroughly aspirated from the wells without touching the bottom.
9. Introduce IMMEDIATELY the strips in the Thermomixer after adding the amplification
products especially if many strips are being assayed simultaneously.
10. If many strips are going to be assayed it is recommended to add all the reagents with a
multichannel pipette and separated reservoirs except for the amplification products, that
should be added with a single added micropipette. After performing each assay the
reservoirs have to be cleaned with bleach 10% in the case they are not disposable.
- 18 -
8.4.1. Manual Visualization
1. Denaturing: use the Thermocycler to denature the samples.
Adjust the program for 15 minutes at 95ºC. Place the amplified products into the
Thermocycler and incubate 10 minutes at 95ºC. After 10 minutes, take off the tubes from
the Thermocycler (still at 95oC) and place them straight away on ice. NOT TO EXCEED 10
MIN TIME OF DENATURATION.
2. Prepare TL diluted Solution:
For 8 wells (one strip) add as follows:
•
1 ml of TL solution + 9 ml of distilled water. This will make up 10 ml of diluted
TL solution necessary for one strip.
3. Pre-washing of CS: Before starting the assay, it is necessary to pre-wash the CS by adding
200 µl of TL diluted solution per well. After addition, mix the TL diluted solution 10 to 15
times with the pipette avoiding touching the surface of the array. It is recommended to
carry out this wash while the amplificated product are being denatured and keep the
wash solution in the strip until the denatured product are going to be added. Take off
the TL diluted solution with the vacuum pump
The array should not contain washing solution residues. Under no circumstances, should
array be allowed to dry out for a long period of time.
4. Hybridization: Hybridization solution (SH) must be heated at room temperature in order
to dissolve crystallized salts. Add 100 µl of SH buffer (avoiding foam formation) + 5 µl of
denatured product to each well. Mix well with the pipette avoiding touching the array .
In order to avoid the contaminations ,It is recommended to fill up each strip separately
When the sample addition in each strip is finished , the strip should be placed in the
thermomixer immediately in order to avoid the renaturation of amplicons by being at
the room temperature. Incubate the strip, covered with a transparent plastic lid in the
Thermomixer for 1 hour at 59oC, shaking at 550 rpm.
After one hour, take out the CS of the Thermomixer and remove the SH buffer with the
vacuum pump. The array should not contain solution residues. Under no circumstances,
should array be allowed to dry out for a long period of time. Add the following solution
immediately ( Set the Thermomixer at 30oC and shaking at 550 rpm for step 6. Remove
the lid to speed up cooling).
5. Double washing: Use different tips for each well in both washes. Add 200 µl of diluted TL
buffer and mix 10 to 15 times with the pipette. Remove the TL diluted solution with the
vacuum pump. Repeat this wash once using different tips for each well and leave the CS
with 200 µl of TL buffer until the Thermomixer has reached 30oC.
- 19 -
6. Blocking and adding conjugate: It is recommended to spin the Cj solution during 10
seconds before using. Then Prepare the diluted CJ buffer: For one strip (8 wells) add
volumes as follows:
•
•
1 ml of DC buffer
7.5 µl of CJ buffer
Remove the diluted TL buffer, The array should not contain solution residues and add
100 µl of diluted CJ buffer to each well. Incubate in the Thermomixer at 30oC, 550 rpm
for 15 minutes exactly.
After this incubation, take out the strip and remove the diluted CJ buffer immediately
with the vacuum pump (Set the Thermomixer at 25oC and no shaking for step 8. Remove
the lid to speed up cooling).
7. Triple Washing: Add straight away 200 µl of TL diluted solution per well. Mix 10 to 15
times with the pipette and remove the diluted TL buffer with the vacuum pump without
drying out the array. Repeat this wash twice and leave the CS with 200 µl of TL buffer at
RT for 5-10 minutes or until the Thermomixer has reached 25oC.
It is very important that the diluted CJ buffer is completely washed off. Any remaining
buffer could react with the RE buffer producing an unspecific signal.
8. Developing with RE buffer: remove the diluted TL buffer without drying out the array
and add 100 µl of RE buffer per well. Incubate in the Thermomixer at 25oC for 10
minutes without agitation.
Attention! It is very important to use the Thermomixer without agitation in this step.
9. After 10 minutes, remove the RE buffer with the vacuum pump. The array must be dry
at this time.
10. CAR® (CLINICAL ARRAY READER): place the plate normally on the tray and the CAR® will
handle and analyse the arrays automatically.
8.4.2. autoclart® visualization
1. Denaturation:
Place the amplification tubes in the thermocycler when this has reached 95ºC and incubate the
tubes for 10 min. Adjust the program for 15 minutes at 95ºC. . After 10 minutes, take off the tubes
from the Thermocycler and place them immediately on ice. Not to exceed 10 min time of
denaturation.
2. Switch on the autoclart® unit and follow the instructions described on the screen:
- 20 -
1. Closet the door and press the knob.
2. Select Run at the main menu.
3. Select the assay ENTHERPEX test among those listed.
4. Select the well of the strip where run should start: A1, or E1 in case the first 4 wells have
been already processed.
5. Select the amount of samples to be processed.
With autoclart® user can process from 4 up to 96 samples per run, in any case, samples
should be multiples of four.
6. Confirm that number of samples and start up well (A1 or E1) are correct.
7. Place the tips rack (full) on its position.
8. Check that both, tip waste and liquid waste containers are empty.
9. Fill the bottle with 250 ml distilled water.
10.Add each reagent to its specific container. autoclart® calculates the specific volumes
required according to the amount of samples indicated:
- TL (Washing buffer). Volume showed in the display indicates the diluted washing buffer
required. In order to prepare the diluted washing buffer please dilute the TL reagent
provided 1:10 into distilled water.
- SH (Hybridization solution). It is provided ready to use. Add the specified volume in the
container once tempered.
- CJ (Conjugate). It’s recommended to shortly spin the CJ before use. Display shows final
volume of diluted CJ, meaning that each ml indicated on the display should be prepared as
follows: 1 ml of DC (Conjugate Diluent) and 5 µl CJ reagent. Vortex the diluted solution in
order to mix it properly up.
WARNING: be especially careful on the conjugate dilution preparation : 5ul conjugated +
1000 ul Conjugate Diluent per strip. An increase in the conjugate concentration can lead
to false positives.
- RE (Developer). Add the RE volume indicated on the display.
11. Close the door and press the knob.
The device will start priming the system and cleaning the tips with water. Then it will perform the
pre-washes of the CS and adding the hybridization solution. Once finished these steps, the device
will beep as a signal for pipetting the samples on their specific CS. autoclart® will automatically
stop beeping as soon the user opens the door.
- 21 -
12. For adding the samples on the CSs, please remove the plate carefully from autoclart® unit and
add 5 µl of each denatured amplification tube (colorless and green one) to the CLART-Strip®.
Resuspend several times to mix with the SH Solution, without touching the array. Place the
microplate again on the autoclart®. Press the knob again to continue the visualization process.
13. Once finished the visualization process, the autoclart® unit will beep again indicating the end
of the run. Please remove the microplate carefully and proceed with the reading step on the CAR®.
WARNING: Once the automatic visualization phase is finished , it is important to read
the results immediately in the CAR®, otherwise, false negatives may appear due to the
loss of the sign .
14. CAR® (CLINICAL ARRAY READER): place the plate normally on the tray and the CAR® will take
and analyse the arrays automatically.
9. RESULTS READING
Data processing obtained from each analysis is carried out automatically. The reading and analysis
system will present a report indicating the results.
The system monitor displays a three-column table. The left column shows the characterized virus
in the micro-array. The central column shows a positive or negative result for each virus, while the
right one shows the validity determined by the amplification control.
10. RESULTS INTERPRETATION
One of the main detection drawbacks by genomic amplification is reporting false negatives, which
are mainly due to the presence of DNA polymerase inhibitors in those samples where virus
detection is going to be performed (hemoglobin, paraffin residues, salts, etc.). The CLART®
ENTHERPEX kits eliminate such false negatives due to the presence of an internal amplification
control in both reaction tubes where the sample is analyzed.
Every amplification tube contains the following oligonucleotides:
•
•
Specific oligonucleotides to amplify a modified plasmid included in the amplification tube
which is used as amplification control of the RT-PCR reaction.
Specific oligonucleotides for Herpes virus and Enterovirus.
The RT-PCR tube has been designed to prioritize the amplification of the viruses rather than the
amplification control. This way, under certain conditions (for example, when there is a high
number of viral copies or when the sample presents co-infections with different viruses at the
same time) some controls may not amplify and the following reading may report: PASSED.
Bearing in mind these observations, we can consider the following interpretations for reading
results:
- 22 -
1. Positive samples:
1.1. With positive amplification control
Virus
Species
Result
Positive
Control
Internal Control
Control
Passed
Signal
> 0.150
Result
Passed
CS
VIRUS
ALIGNMENT MARKERS
AMPLIFICATION CONTROL
This is considered a VALID RESULT. It can be assumed as a true positive result.
1.2. With negative amplification control
Virus
Species
Control
Internal Control
Result
Positive
Control
Passed
Signal
< 0.150
Result
No signal
CS
ALIGNMENT
MARKERS
VIRUS
This is considered a VALID RESULT, even if the amplification control shows NO SIGNAL.
This is due to the virus competition effect. It can be assumed as true positive result.
- 23 -
2. Negative samples
Virus
Species
Result
Negative
Control
Internal Control
Control
Passed
Signal
> 0.150
Result
Passed
CS
ALIGNMENT
MARKERS
AMPLIFICATION CONTROL
This is considered a VALID RESULT. In this case it can be assumed as a true negative result.
2. Inadequate, inhibited samples
Virus
Species
Result
Negative
Control
Internal Control
Signal
> 0.150
Control
Inhibited PCR
Result
No signal
CS
ALIGNMENT
MARKERS
This is considered as INVALID RESULT. This is due to the fact that certain substances can inhibit
the PCR reaction through blocking the DNA polymerase enzyme activity.
- 24 -
The remedy is to ensure that there are no substances of this type in the sample or in the genetic
material extract. It is recommended to repeat the extraction or, if possible, to ask the physician for
a new patient`s sample.
There are two possibilities that lead to an uncertain result:
•
In those cases where the three copies of a probe are very different from each other.
•
In co-infections of more than 5 viruses.
11. TECHNICAL AND OPERATIONAL SPECIFICATIONS
Control of known interferences:
There are substances that might interfere in the functioning when using the CLART® ENTHERPEX
kit. There are mainly substances inhibiting enzyme mix and, thus, they could inhibit the
amplification reaction. The most common interferences are the following:
1
Presence of hemoglobin or paraffin following DNA/RNA extraction. Both the DNA extracted
from whole blood or other blood products, as well as the one obtained from paraffinembedded tissue samples, might contain hemoglobin and paraffin residues, respectively. You
can avoid this problem by purifying DNA/RNA after extraction.
2
Isopropanol residues in DNA/RNA. During the DNA/RNA extraction process from serum,
plasma and CSF samples, DNA/RNA has to be precipitated with isopropanol. If the precipitate
is not allowed to dry correctly, the presence of isopropanol in the sample can inhibit the
amplification reaction.
3
Use of inadequate samples. The analysis of any kind of clinical samples other than those
specified in the manual of the CLART® ENTHERPEX kits, as well as incorrect sampling, can
produce an inconclusive or invalid analysis result due to the lack of amplification as a
consequence of an inhibited reaction. For example, if the swab has been included in any kind
of preservation media this might result to PCR inhibition. If the time for fixing a tissue in
formalin is excessive, DNA degradation might occur.
4
Proteinase K residual activity. Proteinase K should be inactivated during the DNA/RNA
extraction process for swab samples and biopsies by incubation at 100ºC for 10 minutes.
Under these conditions, inactivation is complete. If this step is omitted, or conditions are not
met exactly as specified, there could be proteinase K residual activity that could cause DNA
polymerase degradation thus leading to PCR inhibition.
5
Inadequate storage of samples can influence the result of the analysis, if samples are subject
to conditions that can result in the degradation of their DNA/RNA.
Technical specifications:
1. Processing parameters:
- 25 -
Analytical sensitivity. Analytical sensitivity of the virus types presented in Table 1 was
determined via amplification of a series of DNA dilutions of recombinant plasmids for
every one of the viruses detected with the kit. Each one of them contains the inserted
amplified product (including the complementary part of the detection-specific probe). The
visualization step was performed in all CLART® platforms, AT but also AS and CS, obtaining
same results which are summarized in the following table.
VIRUS
Recombinant
copies Nr.
reaction.
VZV
HHV-7
HSV-1
HSV-2
CMV
EBV
HHV-6
HHV-8
Coxsackivirus
Echovirus
Poliovirus
plasmid
per PCR
10
100
1000
Table 1: Relation of the recombinant plasmid copy numbers
(specified by virus type) necessary for obtaining 100%
sensitivity detecting each one of the viruses.
•
Analytical specificity. Specificity assays were performed with recombinant plasmids and
visualized in AT and CS. The results are summarized in Table 2.
VIRUS
HSV-1
VZV
CMV
HHV-6
HHV-7
HHV-8
HSV-2
EBV
Enterovirus
Analytical specificity
100%
99.4%
92.2%
Table 2: Analytical sensitivity by virus type
- 26 -
2. Diagnostic utility parameters
To determine the diagnostic parameters of the kit, a head-to-head evaluation of the two
techniques was performed comparing the CLART® ENTHERPEX kit to the following techniques:
-
Herplex®: for the HSV-1, HSV-2, VZV, CMV, EBV and HHV-6 viruses
Quantitative PCR: in some cases, for CMV and EBV
Real-time PCR: for Enterovirus
Self-developed PCR and in-gel detection: for HHV-7 and HHV-8 viruses.
Immunohistochemistry for HHV-8.
CLART® ENTHERPEX kit has been validated in collaboration with University Hospital Marqués of
Valdecilla (Santander), University Hospital Lozano Blesa (Zaragoza) and University Hospital La Paz
(Madrid). The total amount of analyzed samples is 173, which include 30 swabs, 56 serum/plasma
samples, 19 CSF and 68 biopsies.
Analysis results of the studied samples are summarized in the table below:
VIRUS
HSV-1
Swabs
Serum/Plasma
CSF
Biopsy
Total
HSV-2
Swabs
Serum/Plasma
CSF
Biopsy
Total
VZV
Swabs
Serum/Plasma
CSF
Biopsy
Total
CMV
Swabs
Serum/Plasma
CSF
Biopsy
Total
EBV
Positive
Samples
Negative
Samples
Total
Sensitivity (%)
Specificity (%)
16
4
7
8
35
14
52
12
60
138
30
56
19
68
173
100
75
57.1
87.5
100
100
100
100
4
0
0
4
8
26
56
19
64
165
30
56
19
68
173
75
--100
100
--100
3
1
2
4
10
27
55
17
64
163
30
56
19
68
173
100
100
100
100
100
100
94.1
95.3
2
47
8
41
98
28
9
11
27
75
30
56
19
68
173
50
87.2
62.5
95.1
100
100
100
100
- 27 -
Swabs
Serum/Plasma
CSF
Biopsy
Total
HHV-6
Swabs
Serum/Plasma
CSF
Biopsy
Total
HHV-7
Swabs
Serum/Plasma
CSF
Biopsy
Total
HHV-8
Swabs
Serum/Plasma
CSF
Biopsy
Total
ENTEROVIRUS
Swabs
Serum/Plasma
CSF
Biopsy
Total
6
2
2
38
48
24
54
17
30
125
30
56
19
68
173
100
100
100
94.7
100
98.1
94.1
93.3
9
0
3
23
35
47
30
16
45
138
56
30
19
68
173
77.8
-33.3
91.3
100
-100
100
3
2
1
11
17
27
54
18
57
156
30
56
19
68
173
100
100
100
100
100
100
100
100
0
0
3
2
5
30
19
53
66
168
30
19
56
68
173
--100
100
--100
100
0
0
0
10
10
56
68
30
9
163
56
68
30
19
173
---80
---100
Table 3: Diagnostic parameters using CLART® ENTHERPEX technique.
126 amplification samples were used to validate the new CLART-Strip® platform. These samples
were tested comparatively between CLART-Strip® platform and the Array Strip (AS) platform,
suited to be replaced. The Array Strip (AS) platform was validated previously with the Array Tubes
(AT) platform. The following viral types were used for the validation as showed below:
N = 120
Number of analyzed samples
HSV1
HSV2
VZV
CMV
EBV
HHV6
24
36
24
30
28
24
- 28 -
AS results
Version 8.0
24
36
24
30
28
24
CS results
Version 8sc.0
24
36
24
30
28
24
HHV7
HHV8
ENTEROVIRUS
NEGATIVES
24
24
24
31
31
31
24
24
24
6
6
6
TABLE 4. ANALYZED SAMPLES FOR AS/CS COMPARATIVE STUDY.
Concordances between platforms are 100%, which do not really modify the previously described
diagnostic parameters.
12. BIBLIOGRAPHY
1.Tsan-Chi Chen, Guang-Wu Chen, Chao Agnes Hsiung, Jyh-Yuan Yang, Shin-Ru Shih, Yiu-Kay Lai,
Jyh-Lyh Juang: “Combining Multiplex Reverse Transcription-PCR and a Diagnostic Microarray to
Detect and Differentiate Enterovirus 71 and Coxsackievirus A16”. Journal of Clinical Microbiology.
44(6), 2212-2219 (2006).
2. Boriskin YS, Rice PS, Stabler RA, Hinds J, Al-Ghusein H, Vass K, Butcher PD.: “DNA microarrays for
virus detection in cases of central nervous system infection” . Journal of Clinical Microbiology.
42(12), 5811-5818 (2004).
3. Jaaskelainen AJ, Piiparinen H, Lappalainen M, Koskiniemi M, Vaheri A.: “Multiplex-PCR and
oligonucleotide microarray for detection of eight different herpesviruses from clinical specimens”.
Journal of Clinical Virology, 37(2), 83-90 (2006)
4. Coiras MT, Aguilar JC, García ML, Casas I, Pérez-Breña P.: “Simultaneous detection of fourteen
respiratory viruses in clinical specimens by two multiplex reverse transcription nested-PCR assays”.
Journal Medical Virology , 72(3), 484-495 (2004).
5. Zheng ZB, Wu YD, Yu XL, Shang SQ.: “DNA microarray technology for simultaneous detection
and species identification of seven human herpes viruses”. Journal Medical Virology, 80(6), 10421050 (2008).
6. Hudnall SD, Chen T, Allison P, Tyring SK, Heath A.: “Herpesvirus prevalence and viral load in
healthy blood donors by quantitative real-time polymerase chain reaction. Transfusion, Apr 15
(2208).
7. Afenjar A, Rodriguez D, Rozenberg F, Dorison N, Guët A, Mignot C, Doummar D, Billette de
Villemeur T, Ponsot G.: “Human herpes virus type 6, etiology of an acute encephalitis in childhood:
case report”. Arch Pediatric, 14(5), 472-475 (2007).
8. Zambrano Y, Chiarello A, Soca A, Villalobos I, Marreno M, Soler M, Laferte J, Alvarez M.”Use of
polymerase chain reaction for the diagnosis of central nervous system infections”. Invest Clin.,
47(4),337-347 (2206).
9. Huang C, Morse D, Slater B, Anand M, Tobin E, Smith P, Dupuis M, Hull R, Ferrera R, Rosen B,
Grady L. ”Multiple-year experience in the diagnosis of viral central nervous system infections with
a panel of polymerase chain reaction assays for detection of 11 viruses.”. Clin Infect Dis., 39(5),
- 29 -
630-635 (2004).
10. Casas I, Pozo F, Trallero G, Echevarría JM, Tenorio A. “Viral diagnosis of neurological infection
by RT multiplex PCR: a search for entero- and herpesviruses in a prospective study”. Journal
Medical Virology 57(2), 145-151 (1999).
11. Kanerva M, Jääskeläinen AJ, Suvela M, Piiparinen H, Vaheri A, Pitkäranta A. “Human
herpesvirus-6 and -7 DNA in cerebrospinal fluid of facial palsy patients”. Acta Otolaryngol. 128(4),
460-464 (2008).
12. Ginanneschi F, Donati D, Moschettini D, Dominici F, Cermelli C, Rossi A.
“Encephaloradiculomyelitis associated to HHV-7 and CMV co-infection in immunocompetent
host”. Clin. Neurol. Neurosurg., 109(3), 272-276 (2007).
13. Calvario A, Bozzi A, Scarasciulli M, Ventola C, Seccia R, Stomati D, Brancasi B.: “Herpes
Consensus PCR test: a useful diagnostic approach to the screening of viral diseases of the central
nervous system”. Journal Clinic Virology, 25(suppl.), S71-S78 (2002).
14. Deback C, Agbalika F, Scieux C, Marcelin AG, Gautheret-Dejean A, Cherot J, Hermet L, Roger O,
Agut H.: “Detection of human herpesviruses HHV-6, HHV-7 and HHV-8 in whole blood by real-time
PCR using the new CMV, HHV-6, 7, 8 R-genetrade mark kit”. Journal Virology Methods, 149(2),
285-291 (2008).
15. Hubacek P, Sedlacek P, Keslova P, Formankova R, Stary J, Kulich M, Cinek O.: “Incidence of
HHV7 in donors and recipients of allogeneic hematopoietic stem cell transplantation”. Pediatric
Blood Cancer. 50(4), 935 (2008).
16. Holden SR, Vas AL.: “Severe encephalitis in a haematopoietic stem cell transplant recipient
caused by reactivation of human herpesvirus 6 and 7”. Journal Clinic Virology, 40(3), 245-247
(2007).
17. Berger C, Hug M, Gysin C, Molinari L, Frei M, Bossart W, Nadal D.: “Distribution patterns of
beta- and gamma-herpesviruses within Waldeyer's ring organs”. Journal Med. Virology, 79(8),
1147-1152 (2007).
18. Chen T, Hudnall SD.: “Anatomical mapping of human herpesvirus reservoirs of infection”. Mod.
Pathol.,19(5), 726-737 (2006).
19. Mendoza LP, Bronzoni RV, Takayanagui OM, Aquino VH, Figueiredo LT:: “Viral infections of the
central nervous system in Brazil”. Journal Infect., 54(6), 589-596 (2007).
20. Kaneko H, Kawana T, Ishioka K, Ohno S, Aoki K, Suzutani T. “Evaluation of mixed infection cases
with both herpes simplex virus types 1 and 2”. Journal Med. Virology, 80(5), 883-7 (2008).
- 30 -
21. Ulrich C, Hackethal M, meyer T, Geusau A, Nindl I, Ulrich M, Forschner T, Sterry W, Stockfleth
E.: “Skin infections in organ transplant recipients”. Journal Dtsch Dermatol Ges., 6(2), 98-105,
(2008).
22. Anne de Pagter PJ, Schuurman R, Visscher H, de Vos M, Bierings M, van Loon AM, Uiterwaal CS,
van Baarle D, Sanders EA, Boelens J.: “Human herpes virus 6 plasma DNA positivity after
hematopoietic stem cell transplantation in children: an important risk factor for clinical outcome”.
Biol. Blood Marrow Transplant, 14(7), 831-839 (2008).
23. Kim DH, Messner H, Minden M, Gupta V, Kuruvilla J, Wright J, Lipton J.: “Factors influencing
varicella zoster virus infection after allogeneic peripheral blood stem cell transplantation: lowdose acyclovir prophylaxis and pre-transplant diagnosis of lymphoproliferative disorders”. Transpl.
Infect Dis., 10(2), 90-98 (2008).
24. Dolcetti R.: “B lymphocytes and Epstein-Barr virus: the lesson of post-transplant
lymphoproliferative disorders”. Autoimmun Rev., 7(2):96-101 (2007).
25. Sugita S, Shimizu N, Watanabe K, Mizukami M, Morio T, Sugamoto Y, Mochizuki M.: “Use of
multiplex PCR and real-time PCR to detect human herpes virus genome in ocular fluids of patients
with uveitis”. Br. J. Ophthalmol., 11 (2008)
26. Karatas H, Gurer G, Pinar A, Soylemezoglu F, Tezel GG, Hascelik G, Akalan N, Tuncer S, Ciger A,
Saygi S.: “Investigation of HSV-1, HSV-2, CMV, HHV-6 and HHV-8 DNA by real-time PCR in surgical
resection materials of epilepsy patients with mesial temporal lobe sclerosis”. J. Neurol Sci., 164(12); 151-6 (2008).
27. Dierssen U, Rehren F, Henke-Gendo C, Harste G, Heim A.: “Rapid routine detection of
enterovirus RNA in cerebrospinal fluid by a one-step real-time RT-PCR assay”. Journal Clin.
Virology, 42(1): 58-64 (2008).
28. Read SJ, Mitchell JL, Fink CG.: “LightCycler multiplex PCR for the laboratory diagnosis of
common viral infections of the central nervous system”. Journal Clin. Microbiology, 39(9): 30563059 (2001).
- 31 -