Download R-Flex Knee CPM Owner`s Manual
Transcript
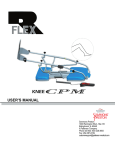
KNEE
USER’S MANUAL
Sammons Preston
W68 N158 Evergreen Blvd.
Cedarburg, WI 53012
A Patterson Company
Phone toll-free: 800-228-3693
Fax: 262-387-8749
[email protected]
TABLE OF CONTENTS
General Information..…………………..................................................................................................................1
Safety Information...............................................................................................................................................2-5
Precautionary Instructions......................................................................................................................2-4
Product Description....................................................................................................................................5
Indications & Contraindications.................................................................................................................5
Specifications.......................................................................................................................................................6-7
R-FLEX CPM Unit..................................................................................................................................6-7
Nomenclature...........................................................................................................................................................8
R-FLEX CPM Unit…………......................................................................................................................8
Unpacking...............................................................................................................................................................9
Set Up Instructions..........................................................................................................................................10-12
R-FLEX CPM Unit Set Up..................................................................................................................10-11
Set Up for Pediatrics or Short Leg….......................................................................................................12
Hand Controller Operation.............................................................................................................................13-15
Cleaning and Maintenance...................................................................................................................................16
Warranty…………...............................................................................................................................................17
GENERAL INFORMATION
Thank you for purchasing the Sammons Preston R-FLEX Continuous Passive Motion (CPM) unit.
This manual contains general safety, operating, maintenance and care instructions for the R-Flex CPM unit.
The information contained in this manual was current and up to date at the time of publication. Sammons Preston reserves the right to make periodic changes and improvements to our equipment and documentation without
any obligation on the part of Sammons Preston.
Read, understand, and follow the information contained in this manual. Observe all applicable precautionary
measures for treatment.
1
SAFETY INFORMATION
Precautionary Instructions
Cautions, Warnings and Hazards impacting the use of the R-Flex CPM machine are indicated by
specific symbols. Understand these symbols and their definitions before operating this equipment.
The definition of these symbols are as follows:
=CAUTION- Indicates possible safety issues that could have the potential to cause minor to moderate
injury or damage to equipment.
=WARNING- Indicates possible safety issues that could possibly cause serious injury or damage to
equipment.
=DANGER- Indicates possible safety issues that are immediately hazardous and could cause death or
serious injury.
=EXPLOSION HAZARD- Indicates possible safety issues if this equipment is used in the presence of flammable anesthetics.
IMPORTANT SAFEGUARDS
When using electrical products, especially when children are present, basic safety precautions should always be
followed, including the following:
DANGER: TO REDUCE THE RISK OF ELECTROCUTION:
Always unplug this product immediately after using.
Do not use while bathing.
Do not place or store product where it can fall or be pulled into a tub or sink.
Do not place in or drop into water or other liquid.
Do not reach for a product that has fallen into water. Unplug immediately.
WARNING: TO REDUCE THE RISK OF BURNS, ELECTROCUTION, FIRE, OR INJURY:
Use indoors only.
A product should never be left unattended when plugged in.
Close supervision is necessary when this product is used by, on, or near children or invalids.
Use this product only for its intended use as described in this manual. Do not use attachments not
recommended by the manufacturer.
Never operate this product if it has a damaged cord or plug. If it is not working properly, has
been dropped or damaged, or dropped into water, return it to a service center for examination and
repair.
Keep the cord away from heated surfaces.
Never use while sleeping or drowsy.
Never drop or insert any object into any opening.
Do not use outdoors or operate where aerosol (spray) products are being used or where oxygen is
being administered.
Connect this product to a properly grounded outlet only. See grounding instructions.
2
CPM UNIT THERAPY
CAUTION: This equipment may cause electromagnetic or other interference between other devices. If this occurs, move the device away from the affected equipment.
Work in a range of motion as instructed by your healthcare practitioner.
If you experience increased pain, swelling, or any adverse reactions while using this product, immediately consult your health care practitioner.
Set up and use of this equipment should be in a low traffic location and away from children and
pets.
WARNING: Make sure the hand control is accessible to the operator before starting this equipment. The STOP/
START button on the hand control is the only way of stopping the motion for disabled patients or
children using the unit.
The physician defines the protocol and ensures that it is correctly implemented.
CAUTION: It is important to install and use this equipment in accordance with the instructions, to prevent
harmful interference to other devices in the vicinity. If this equipment does cause harmful interference to other devices, which can be determined by turning the equipment off and on, the user is
encouraged to try to correct the interference by one or more of the following measures:
• Reorient or relocate the other device(s).
• Increase the separation between the equipment.
• Connect this equipment into an outlet on a circuit different from that to which the other device(s)
are connected.
• Consult the manufacturer or field service technician for help.
EXPLOSION HAZARD
R-FLEX CPM NOT SUITABLE FOR USE IN THE PRESENCE OF A FLAMMABLE
ANAESTHETIC MIXTURE WITH AIR, OXYGEN OR NITROUS OXIDE
3
CPM UNIT THERAPY
The CPM should not be used adjacent to or stacked with other equipment. If adjacent or stacked use is necessary, it is the responsibility of the provider to verify correct operation in the configuration that it will be used.
WARNING
Use of accessories or replacement parts other than those specified by the manufacturer may result in increased
emissions or decreased immunity of the equipment.
4
CPM UNIT THERAPY
Product Description
The R-FLEX is an anatomically aligned CPM enabling the knee to travel from full extension to full flexion
(-10 deg to 120 deg) at user selectable speeds of 55 to 140 degrees per minute.
Indications, Clinical Benefits & Contraindications
Indications
• Knee replacement surgery
• Fractures (patellar, tibia plateau, femoral, etc.)
• Arthrolysis
• Hip surgery, including hip replacement, hip pinning, osteotomy, etc.
• Ligament repairs
• Arthroscopic surgery (meniscetomies, patellectomies, etc.)
• Burns, joints sepsis.
Clinical Benefits
• Breaks the cycle of trauma, inflammation and the loss of range of motion
• Prevents joint stiffness
• Speeds the recovery of post-operative range of motion
• Maintains the quality of the joint surface
• Reduces pains and edema
• Promotes joint cartilage healing
• Reduces hospitalization time
• Reduces the need for pain medication
• Provides immediate post-operative continuous passive motion
• Digital ROM readout on the patient hand control for positive reinforcement
• Maintains desired positions for stretching and muscular rest
Contraindications
• Bone Cancer
• Warped joint surfaces
• Spastic paralyses
• Unstable fractures
• Uncontrolled infection
• Acute inflammatory conditions such as acute arthritis
• Destructive bone or joint diseases
Patients taller than 6’7” or shorter than 4’7” should not use this device.
Discontinue treatment immediately if signs of hyperthermia, irritation, swelling, bleeding, or increased or
persistent pain are observed.
5
CPM UNIT SPECIFICATIONS
Table 1. Physical and Electrical Specifications
Size Setup for Use:
Length
Width
Height
Weight:
Without accessories
With accessories
Fully packaged
Electrical Specifications:
Input
Fuse
29.6”
14.2”
30.4”
27.5 lbs
28.5 lbs
32.0 lbs
110 VAC 60Hz 30W
2.5 A - 250V~
Enviromental Requirements:
Temperature:
Operating
Transport & Storage
Humidity:
Operating
Transport & Storage
Atmospheric Pressure:
14°F to 104°F (-10°C to 40°C)
-22°F to 140°F (-30°C to 60°C)
Up to 80%
Up to 90%, non-condensing
700 hPa to 1060 hPa
Electromagnetic Compatibility: In accordance with IECB 1.1.2
Water Enclosure Protection:
Safe Work Load:
Classification:
IPXO
No more than 45 lbs
Class I, Type B
Grounding Instructions:
This product must be connected to ensure safety of the user. This product is equipped with a cord having a
grounding wire with grounding plug. The unit must be plugged into a properly grounded outlet.
DANGER
Improper use or modification of the grounding plug or wire can result in a risk of electric shock. This product is
factory equipped with a specific power supply to permit connection to a proper electric circuit. The unit must be
connected to an outlet with the same configuration as the plug. Do not modify the supplied plug or use an adaptor.
6
CPM UNIT SPECIFICATIONS
All cables will be provided by Sammons Preston and will be the correct length.
Unit is in compliance with IEC 601.1.2 electromagnetic compatibility standard for medical devices.
Table 2
R-FLEX CPM Accessories List
Accessory
Power Cord
Potentiometer Cable
Hand Controller Cable
Snap-on Ferrite
Part Number
RPRF10001000
RPRF10001005
RPRF10001010
RPRF10001015
Contact Sammons Preston at 1-800-228-3693 to order replacement parts.
WARNING
Use of accessories or replacement parts other than those specified above may cause damage to the unit and will
void the warranty on the unit.
7
NOMENCLATURE
R-FLEX CPM Unit Components
1. Calf Support
2. Thigh Support
3. Foot Cradle
4. Hand Controller
5. Thigh Length Adjustment Knobs
6. Calf Length Adjustment Knobs
7. Foot Cradle Adjustment Knobs
8. Transport Handle
9. Bedmount Adjustment Device
10. Bedmount Adjustment Knobs
11. ON/OFF Switch and Fuses
12. Potentiometer Housing
1
2
8
11
4
12
3
5
10
6
7
9
R-FLEX CPM LED Display
1. LED Screen
2. Indicator Light
3. INCREASE/DECREASE Function Key
4. EXTENSION Setting Key
5. FLEXION Setting Key
6. TIMER Function Key
7. PAUSE Function Key
8. SPEED Function Key
9. FORCE Function Key
10. STOP/START Function Key
11. USB Communication Port
1
2
3
4
5
6
7
9
10
8
11
8
UNPACKING
Package Contents:
1 R-FLEX CPM Assembly
1 Foot Cradle Assembly
1 Bedmount Adjustment Device
1 Users Manual
1 Service Manual
Optional Accessories:
1 R-FLEX Management Software and Drive Installation CD
1 USB Cable
Unpacking instructions:
1. Remove R-FLEX CPM assembly from the box
2. Slide the foot cradle out and place it in the up right position
3. Ensure that all required components and parts are present. Refer to the previous page.
4. Save the packaging in the event the machine must be returned to servicing.
5. Connect the hand controller to the CPM unit.
IMPORTANT:
Ensure that the electrical socket is in good condition and suitable for use with the supplied power
cord. Ensure that the cables remain free around the machine to prevent damage.
Power Cord Connection
Hand Controller Connection
9
SET UP INSTRUCTIONS
R-FLEX CPM Unit Set Up
1. Unpack and place the CPM unit where it is to be used
2. Attach the soft goods (pads) on the CPM unit. (Pads need to be purchased separately)
Foot Pad slips over the Foot Plate, attach the straps onto the Calf and Thigh Supports.
Foot Pad
Straps
Attach the Calf and Thigh Pad onto the straps.
Calf and Thigh Pad
3. Plug the power cord into a 110/120V AC wall outlet. Make sure the power switch is in the
‘OFF’ position.
4. To calibrate the unit
a. Adjust the Thigh Support to the maximum reading on the Femur Scale which is 18”.
b. Turn on the power and hold down EXT key and FLX key simultaneously. The code SEL and CAL will blink in
the ‘Extension’ and ‘Flexion’ display windows on the hand controller.
c. Release the EXT and FLX keys.
d. The R-Flex CPM unit should be observed traveling to full extension. The reading on the hand controller in the
‘Range of Motion’ display window should read ZERO when the calibration procedure is completed.
e. After the unit is calibrated, the hand controller can be set and operated as normal.
10
SET UP INSTRUCTIONS
5. Measure the patient’s involved leg in centimeters or inches from the hip joint to the midline of
the knee joint, set the femur scale to this mesurement using thigh length adjustment knobs.
Adjust the thigh support to the corresponding value on the scale.
Femur Scale
Thigh
Adjustment
Calf
Adjustment
6. Adjust the axis of the patient’s hip with the axis rotation of the R-Flex and the axis of the
patient’s knee with the axis rotation of the R-Flex.
7. Adjust the calf support by moving the foot cradle so that it meets the sole of the foot. To adjust the calf support, loosen the adjustment knobs and slide the foot cradle to the proper
length. Secure by tightening the two adjustment knobs.
8. R-FLEX CPM Unit has a unique feature with its bedmount adjustment device. It is used to
prevent migration of the unit during operation. To adjust the device, loosen the two bedmount
knobs and extend the device until it is firm against a solid barrier, such as a foot board. Secure
the two knobs to lock the position.
Caution:
Do not use this as a carry handle or lifting pivot.
11
SET UP FOR PEDIATRICS OR SHORT LEGS
1. Loosen Calf Adjustment Knobs and remove the Foot Cradle. DO NOT REMOVE THIGH ADJUSTMENT KNOBS.
2. Loosen both Foot Cradle Adjustment Knobs and rotate both Foot Tubes 180 degrees so that the
Foot Cradle is in the location shown in the photo below.
Relocate the Foot Cradle
3. Slide the Foot Cradle back into the CPM unit. Secure by tightening the Calf Adjustment Knobs,
adjust the Foot Cradle angle, and tighten the Foot Cradle Adjustment Knobs.
Pediatric Setup
12
HAND-CONTROLLER OPERATION
Before Starting the Machine
Follow the hand-controller operation instructions to set flexion, extension, speed, pause duration, and force. Run
the CPM unit for a full range cycle to ensure the patient’s involved leg is aligned correctly. The machine should
now be fitted to begin the rehabilitation. If the knee joint does not mirror the movement of the machine joint,
adjust the calf or thigh adjustment knobs to keep the knee in the proper alignment.
R-FLEX CPM Unit Technical Parameter
Parameter
Treatment Mode
Extension Limit
Flexion Limit
Extension Pause Duration
Flexion Pause Duration
Timer
Speed
Force
Value Range
Normal
-10 ~ 120 Degrees
-10 ~ 120 Degrees
0 ~ 999 Seconds
0 ~ 999 Seconds
0 ~ 999 Minutes
1 ~ 9 ( 55o ~ 140o /min )
1~9
Hand-Controller Operation Instruction
1. Turn on the power switch located at the base of the machine.
2. Default parameters are preset after the CPM unit is turned on.
3. Press STOP/START key to initiate the CPM unit.
4. To change the parameter setting, follow the instructions below.
Indicator Light
START/STOP the unit
Press START/STOP key once to
start the unit and press it again to
stop the unit. Green indicator light
shows ‘on’ status, and comes off
when the unit is stopped.
Display/Change Extension Range
Press EXT key to display extension
value, the value will blink in the
‘Extension’ display window. Press
/
to reset the extension limit,
the new value will blink and be
locked in 5 seconds. Full range is
from -10o to 120o.
13
HAND-CONTROLLER OPERATION
Display/Change Flexion Range
Press FLX key to display flexion
value, the value will blink in the
‘Flexion’ display window. Press
/
to reset the flexion limit,
the new value will blink and be
locked in 5 seconds. Full range is
from -10o to 120o.
Display/Change Speed Value
Press SPEED key to display speed
value, the value will blink in the
‘Range of Motion’ display window.
Press
/
to reset the speed, the
new value will blink and be locked
in 5 seconds. Or press the SPEED
key again to validate the setting.
Display/Change Force Range
Press FORCE key to display force
value, the value will blink in the
‘Range of Motion’ display window.
Press
/
to reset the force, the
new value will blink and be locked
in 5 seconds. Or press FORCE key
again to validate setting.
Display/Change Pause of Extension Limit
Press PAUSE and EXT key to display the
pause of extension limit, the value will blink
in the ‘Extension’ display window. Press
/
to reset the pause of extension limit, the
new value will blink and be locked in 5 seconds.
14
HAND-CONTROLLER OPERATION
Display/Change Pause of Flexion Limit
Press PAUSE and FLX key to display the
pause of flexion limit, the value will blink in
the ‘Flexion’ display window. Press
/
to
reset the pause of flexion limit, the new value
will blink and be locked in 5 seconds.
Display/Change Timer
Press TIMER key to display timer,
the value will blink in the ‘Range of
Motion’ display window. Press
/
to change the timer setting, the
new value will blink and be locked
in 5 seconds.
Display Count Down of Timer
Press TIMER key twice to display
count down of timer. Press TIMER
key one time to display the time set,
press TIMER key a second time and
the time remaining will be displayed in ‘Range of Motion’ display
window.
15
CLEANING AND MAINTENANCE
Cleaning Procedure
1. Turn the CPM power switch to Off and unplug the power cord from the socket.
2. Dampen a soft cloth with a disinfectant or mild cleaning agent and wipe the body of the unit. Take care
not to get liquid under the covers of the machine.
3. Let the CPM unit air dry and plug it back in use.
Maintenance
Ensure that the unit is turned off and disconnected from the power supply before any maintenance is performed.
1. Use a 4 mm allen wrench to disassemble the 8 pivot joints of the CPM carriage assembly and inspect the
brass bushing inside of each joint.
2. Replace any bushings that appear to be excessively worn.
3. Apply lubricating oil to all joints and reassemble.
4. Remove the top covers of the unit to expose the ball screw.
5. Remove the top cover of each ball bearing set at the ends of the ball screw using a 4 mm allen wrench.
Perform a visual inspection and replace if necessary. Apply grease to the ball bearings.
6. With the bearing cover still removed, inspect the rubber track seal on each side of the ball screw guide.
Replace the seal if necessary.
7. Inspect the ball screw and apply grease if necessary.
8. Replace the rubber track seal and bearing covers.
9. Perform a visual inspection of the coupling located between the motor and ball screw. Check to make sure
that the set screws in the coupling are tight. Replace the coupling if excessive wear is present.
10. Replace the top covers of the machine.
11. Inspect all adjustment knobs and replace if necessary.
16
WARRANTY
Sammons Preston warrants that the R-FLEX CPM units are free of defects in material and workmanship for a
period of 1 year from the original purchase date. The warranty is strictly limited to the replacement or repair
free of charge of the components found to be defective.
Sammons Preston is the only organization able to access the application of the warranty to its CPM units.
WHAT IS NOT COVERED:
Replacement parts or labor furnished by parties other than Sammons Preston or service personnel certified by
Sammons Preston.
Defects or damage caused by labor or components furnished by parties other than Sammons Preston or service
personnel certified by Sammons Preston.
Malfunction or failure caused by abnormal use or conditions of use other than those indicated in the users
manual.
Sammons Preston shall not be liable in any event for incidental or consequential damages.
Some states do not allow the exclusion or limitation of incidental or consequential damages, so the above
limitation or exclusion may not apply to you.
To obtain service from Sammons Preston or the selling dealer under this warranty:
1. A claim must be made within the warranty period to Sammons Preston or the selling dealer by phone or in
writing. Written claims should be sent to:
Sammons Preston
W68 N158 Evergreen Blvd
Cedarburg, WI 53012
2. The product must be returned to Sammons Preston or the selling dealer by the owner.
This warranty gives you specific legal rights and you may have other rights which vary from state to state.
Sammons Preston does not authorize any person or representative to create additional obligations or liabilities
in connection with the sale of the R-FLEX knee CPM.
Any representation or agreement not contained in the warranty shall be void.
17


