1
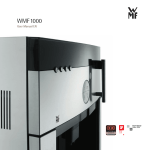
USER MANUAL COFFEE MACHINE WMF 1000 ENGLISH 0.40 WMF1000 33 0915 6010 2006.08 Introduction and General Information Congratulations on the purchase of your WMF coffee machine. You will be impressed by the machine‘s technical design, its long service life and economical operation, and especially by the quality of the coffee it produces. The WMF 1000 pro coffee machine is a fully-automatic single-cup coffee machine for espresso, café crème, cappuccino, café latte, latte macchiato, hot milk, foamed milk and hot water. Each beverage is freshly brewed at the press of a button, which guarantees a high-quality beverage. User guidance for the coffee machine is provided on the display. Keep this user manual near the coffee machine so that you and your operating staff have the right information handy and can take the correct action(s) in the event of any technical problems. The coffee machine is designed to prepare up to 10,000 coffee beverages per year. After every 10,000 beverages, service by the WMF service centre is required. The machine must be cleaned and descaled regularly. Please absolutely head the Chapter 2 of the manual Commissioning > Setting > Water hardness and to make the necessary settings. 2 Please read the user manual prior to using the coffee machine! Make the user manual available to your staff! Important! Chapter 1 Pre-setting Heed signs and symbols in the user manual! Heed Chapter 9 Safety! In the event of failure to comply with cleaning and maintenance information (see Maintenance chapter) no liability is accepted for any resultant damage. Similarly, in that event all guarantee/warranty obligations cease to apply. WMF 1000 user manual Table of Contents Chapter 1 Introduction and General Information 1.1 Parts of the machine 6 1.2 Overview of control buttons 8 Off/C button . . . . . . . . . . . . . . . . . . . . . . . . . . . . . . . . . . . . . . 8 Program button/P cbutton . . . . . . . . . . . . . . . . . . . . . . . . . . . 8 Minus button / Care button / Aroma button . . . . . . . . . . . . . . . 8 Plus button/Aroma button . . . . . . . . . . . . . . . . . . . . . . . . . . . . 8 1.3 Before starting 8 1.4 User manual signs and symbols 9 Hazard instructions. . . . . . . . . . . . . . . . . . . . . . . . . . . . . . . . . 9 Tips and hints . . . . . . . . . . . . . . . . . . . . . . . . . . . . . . . . . . . . . 9 1.5 Displaying the readiness state 10 1.6 Glossary 10 Chapter 2 Commissioning 2.1 Unpacking and Setting up 11 2.2 Testing the water hardness 11 2.3 Preparing the water tank 11 Insert the WMF tank filter . . . . . . . . . . . . . . . . . . . . . . . . . . . . . . . . . . .11 Assembling the milk hose . . . . . . . . . . . . . . . . . . . . . . . . . . . . . . . . . . .12 Fill the water tank. . . . . . . . . . . . . . . . . . . . . . . . . . . . . . . . . . . . . . . . .12 2.4 Connecting the milk hose to the milk 13 2.5 Filling the coffee bean hopper 13 2.7 Commissioning program 13 Basic Settings . . . . . . . . . . . . . . . . . . . . . . . . . . . . . . . . . . . . . . . . . . .14 Time. . . . . . . . . . . . . . . . . . . . . . . . . . . . . . . . . . . . . . . . . . . .14 Date . . . . . . . . . . . . . . . . . . . . . . . . . . . . . . . . . . . . . . . . . . . .14 Water hardness. . . . . . . . . . . . . . . . . . . . . . . . . . . . . . . . . . . .14 Tank filter . . . . . . . . . . . . . . . . . . . . . . . . . . . . . . . . . . . . . . .15 Chapter 3 Operation 3.1 Operating and Lighting concept 16 3.2 Preparing coffee beverages 16 Overview of beverage buttons . . . . . . . . . . . . . . . . . . . . . . . . . . . . . . . .16 Example: Preparing café crème . . . . . . . . . . . . . . . . . . . . . . . . . . . . . .17 Particularity of café latte . . . . . . . . . . . . . . . . . . . . . . . . . . . . . . . . . . .17 Setting coffee strength for the next beverage . . . . . . . . . . . . . . . . . . . .18 Coffee preparation using the manual insert . . . . . . . . . . . . . . . . . . . . . .19 3.3 Dispensing milk and milk foam 20 Dispensing milk - milk lever down . . . . . . . . . . . . . . . . . . . . . . . . . . . . .20 Dispensing milk foam - milk lever up . . . . . . . . . . . . . . . . . . . . . . . . . . .20 3.4 Dispensing hot water 21 3.5 Beverage preparation in general 21 3.6 Cancel beverage dispensing 21 3.7 all-in-one spout 22 Adjusting the height . . . . . . . . . . . . . . . . . . . . . . . . . . . . . . . . . . . . . . .22 Positions of the all-in-one spout . . . . . . . . . . . . . . . . . . . . . . . . . . . . . . .22 3.8 Switching on and off 23 Switching on . . . . . . . . . . . . . . . . . . . . . . . . . . . . . . . . . . . . . . . . . . . .23 Switching off . . . . . . . . . . . . . . . . . . . . . . . . . . . . . . . . . . . . . . . . . . . .23 WMF 1000 user manual 3 Table of Contents 3.9 Switching coffee machineon and off in timer operation 24 Setting the automatic switch-on time . . . . . . . . . . . . . . . . . . . . . . . . . . .24 Display timer operation. . . . . . . . . . . . . . . . . . . . . . . . . . . . . . . . . . . . .24 Manual switch-on for timer operation . . . . . . . . . . . . . . . . . . . . . . . . . . .24 Manual switch-off for timer operation . . . . . . . . . . . . . . . . . . . . . . . . . . .24 Chapter 4 Setting 4.1 Cup size (Cup volumes) 26 Dispensing test . . . . . . . . . . . . . . . . . . . . . . . . . . . . . . . . . . . . . . . . . .26 4.2 Beverage settings 26 Dispensing test . . . . . . . . . . . . . . . . . . . . . . . . . . . . . . . . . . . . . . . . . .27 water volume . . . . . . . . . . . . . . . . . . . . . . . . . . . . . . . . . . . . . . . . . . . .27 Coffee strength . . . . . . . . . . . . . . . . . . . . . . . . . . . . . . . . . . . . . . . . . .27 Milk volume . . . . . . . . . . . . . . . . . . . . . . . . . . . . . . . . . . . . . . . . . . . . .27 Sequence of the dispensing of milk and coffee . . . . . . . . . . . . . . . . . . . .28 Pre brew . . . . . . . . . . . . . . . . . . . . . . . . . . . . . . . . . . . . . . . . . . . . . . .28 Dispensing test . . . . . . . . . . . . . . . . . . . . . . . . . . . . . . . . . . . . . . . . . .28 4.3 Basic settings 29 Date/Time. . . . . . . . . . . . . . . . . . . . . . . . . . . . . . . . . . . . . . . . . . . . . .29 Automatic switch-on time . . . . . . . . . . . . . . . . . . . . . . . . . . . . . . . . . . .29 Switch-off time. . . . . . . . . . . . . . . . . . . . . . . . . . . . . . . . . . . . . . . . . . .29 Brewing temperature . . . . . . . . . . . . . . . . . . . . . . . . . . . . . . . . . . . . . .30 Factory settings. . . . . . . . . . . . . . . . . . . . . . . . . . . . . . . . . . . . . . . . . .30 4.4 Reading counters 30 Chapter 5 Other settings 5.1 Set the grinding degree Chapter 6 31 care 6.1 6.2 6.3 6.4 General customer care programs 32 Overview of customer care 33 Calling Customer care programs 34 Customer care programs 34 Warm-up rinse/Coffee system rinse . . . . . . . . . . . . . . . . . . . . . . . . . . . .34 Rinse milk system . . . . . . . . . . . . . . . . . . . . . . . . . . . . . . . . . . . . . . . .35 Cleaning the machine - Cleaning program. . . . . . . . . . . . . . . . . . . . . . . .36 Change tank filter. . . . . . . . . . . . . . . . . . . . . . . . . . . . . . . . . . . . . . . . .38 Descaling . . . . . . . . . . . . . . . . . . . . . . . . . . . . . . . . . . . . . . . . . . . . . .39 6.5 Manual cleaning 40 Cleaning milk hose . . . . . . . . . . . . . . . . . . . . . . . . . . . . . . . . . . . . . . . .40 Cleaning the milk system . . . . . . . . . . . . . . . . . . . . . . . . . . . . . . . . . . .41 Cleaning the brewing unit . . . . . . . . . . . . . . . . . . . . . . . . . . . . . . . . . . .43 6.6 Cleaning in general 45 Cleaning the coffee grounds container. . . . . . . . . . . . . . . . . . . . . . . . . .45 Cleaning the water tank . . . . . . . . . . . . . . . . . . . . . . . . . . . . . . . . . . . .45 Cleaning the drip try and drip tray grid. . . . . . . . . . . . . . . . . . . . . . . . . .45 Cleaning the bean hopper . . . . . . . . . . . . . . . . . . . . . . . . . . . . . . . . . . .45 Chapter 7 4 HACCP cleaning schedule WMF 1000 user manual Table of Contents Chapter 8 Messages and tips 8.1 Operating messages 48 Empty coffee grounds container . . . . . . . . . . . . . . . . . . . . . . . . . . . . . .48 Refill water tank . . . . . . . . . . . . . . . . . . . . . . . . . . . . . . . . . . . . . . . . . .48 Empty drip tray . . . . . . . . . . . . . . . . . . . . . . . . . . . . . . . . . . . . . . . . . .48 Bean hopper is empty . . . . . . . . . . . . . . . . . . . . . . . . . . . . . . . . . . . . .48 Insert coff. grounds . . . . . . . . . . . . . . . . . . . . . . . . . . . . . . . . . . . . . . .49 Change tank filter. . . . . . . . . . . . . . . . . . . . . . . . . . . . . . . . . . . . . . . . .49 Side door open . . . . . . . . . . . . . . . . . . . . . . . . . . . . . . . . . . . . . . . . . .49 Lower spout . . . . . . . . . . . . . . . . . . . . . . . . . . . . . . . . . . . . . . . . . . . .49 50 8.2 Error messages and faults Fault messages on the display . . . . . . . . . . . . . . . . . . . . . . . . . . . . . . .50 8.3 Problems with no fault display 52 Chapter 9 9.1 9.2 9.3 9.4 Safety Hazards for the user Hazards for the coffee machine Responsibilities of the operator Warranty claims No warranty is provided: . . . . . . . . . . . . . . . . . . . . . . . . . . . . 54 55 56 56 57 Chapter 10 Service and maintenance 10.1 WMF 1000 Service-Center 58 Procedure . . . . . . . . . . . . . . . . . . . . . . . . . . . . . . . . . . . . . . . . . . . . . .58 Service/maintenance/repair in the WMF 1000 Service-Center . . . . . . . . .58 Return delivery ticket WMF 1000 . . . . . . . . . . . . . . . . . . . . . . . . . . . . . .58 Technical data Accessories and spare parts Index WMF 1000 user manual 5 Introduction and General Information Chapter 1 Introduction and General Information 1.1 Parts of the machine 1 2 3 4 7 8 9 5 10 6 11 12 13 15 14 16 18 17 6 WMF 1000 user manual Introduction and General Information 1 Bean hopper 2 Manual insert 3 Heated cup storage 4 Display 5 Hot water button 6 Hot water spout 7 Plus button / Aroma button 8 Minus button / Care button / Aroma button 9 c P button / Confirm 10 Off/C button / Timer 11 Milk button / Milk foam button 12 Beverage buttons 13 Milk lever (conversion milk/milk foam) 14 Height-adjustable all-in-one spout with integrated milk foamer 15 Adjustment lever for all-in-one spout 16 Water tank 17 Removable drip tray with drip tray grid 18 Coffee grounds container WMF 1000 user manual 7 Introduction and General Information 1.2 Overview of control buttons Off/C button • • • • Switching on Off Cancel Timer operation Program button / cP button • Introduction to settings • Confirm a selection Minus button / Care button / Aroma button • Browse back in the programs with minus • Select the care program • Reduce coffee strength for the next beverage Plus button/Aroma button • Browse forwards with plus • Increase coffee strength for the next beverage 1.3 Before starting Read this user manual before starting to prepare coffee. Only then can you operate all functions and the machine safely and spoil yourself with a wonderful coffee beverage. Additional components of the user manual: • Brief manual for beverage dispensing/care 8 WMF 1000 user manual Introduction and General Information 1.4 User manual signs and symbols Hazard instructions Attention! Risk to machine Attention! Risk to user Attention! Hot liquid Attention! Hot surface Attention! Danger of electric shock Attention! Danger of hand injuries Tips and hints Hint [2] Cross-reference Note about the figure Please always heed the safety instructions in Chapter 9. WMF 1000 user manual 9 Introduction and General Information 1.5 Displaying the readiness state The descriptions in the user manual always assume that the coffee machine is ready to operate. your selection pls 24.10.2006 08:15 1.6 Glossary Term • Meaning • Listings, selection options Individual activities, individual steps Italics Description of coffee machine state and/or explanations of steps carried out automatically Beverage dispensing Dispensing of coffee, hot water, milk or milk foam Main tap Water on/off valve, angle valve. Carbonate hardness Indication in °dKH: Water hardness is an indicator of calcium dissolved in the water. Milk system All-in-one spout, milk nozzle and milk hose O-rings Seals Pre-infusion Prior to the brewing cycle, coffee is briefly infused to ensure a more intensive release of its aromatic substances. Press Automatic pressing of coffee grounds prior to brewing cycle. Range For example: litre capacity of the tank filter Rinsing Intermediate cleansing 10 WMF 1000 user manual Commissioning Chapter 2 Commissioning 2.1 Unpacking and Setting up Unpack coffee machine and set up on a stable, horizontal support Check the coffee machine for possible transport damage Plug the connector into a grounded outlet Assemble bean hopper attachment Insert drip tray and drip tray grid 2.2 Test the water hardness Briefly dip carbon hardness test strip into water (approx. 1 second) One minute later, read the degree of hardness on the colour scale of the test strip package The water hardness is set during commissioning. Cable compartment Keep the original packaging to use for transport. Please empty the water tank, drip tray, filter sets and bean hopper before transporting. 2.3 Prepare the water tank Remove the water tank from the coffee machine Remove all accessories from the water tank Rinse the water tank thoroughly with tap water Do not put the water tank back into the machine yet. The milk hose must be assembled first. Insert the WMF tank filter The WMF tank filter ensures the best coffee quality and protects the coffee machine against calcification. Fill water tank with drinking water With water hardness 0-4, do not use a tank filter. Remove the screen built into the water tank [1] Place the cartridge adapter on the water spout supports from above (lock pulled) and lock by pressing the lock down [2] Unpack the tank filter cartridge and place on the cartridge adapter [3] See Tank filter instructions Figures see next page WMF 1000 user manual 11 Commissioning 1 2 3 Assemble the milk hose The milk hose is already mounted on the all-in-one spout. • For refrigerated milk, use the transparent milk nozzle (assembled on delivery) • For non-refrigerated milk, use the grey milk nozzle from the accessories Push the all-in-one spout to the lowest position Insert the milk hose into the guide Set all-in-one spout: Press the adjustment lever to the right of the spout and then move the spout. Fill the water tank Fill the water tank with cold tap water (max. 2.8 litres) Slide the water tank back into the machine Fill the water tank only with fresh, cold water. Never use hot water, mineral water, milk or other liquids. 12 WMF 1000 user manual Commissioning 2.4 Connect the milk hose to the milk Only provide milk if necessary! Place the refrigerated milk directly to the right of the machine Place the milk hose with the milk nozzle on it into the milk container. The hose end with the milk nozzle should reach to the bottom of the milk container. Milk is a very delicate food. When handling milk, always heed hygiene. Heed the HACCP cleaning shedule! See Chapter 7! 2.5 Fill the coffee bean hopper Open the cover towards the back Fill coffee beans (max. 320 g), can be expanded to 500 g with optional, attachable coffee bean hopper Close the cover Heed that no foreign bodies land in the coffee bean hopper. Such foreign bodies can damage the grinders of the coffee mill. This damage is excluded from the warranty. 2.6 Commissioning program Press the Off/C button The commissioning program starts. language: english OK: P change: -/+ Set the desired language for the display guidance here. The commissioning program uses the display to lead you step by step through the commissioning. Follow the display texts. WMF 1000 user manual 13 Commissioning initial setting up of your WMF 1000 The machine is switched on, the commissioning program leads you through the basic settings. The display goes out after 5 seconds. The set values can be changed in the “Settings” program after commissioning. Basic Settings Set the desired values with the - and + buttons. Use the cP button to confirm the values and inputs. After confirmation, the program jumps to the next point of the settings. When exiting the program, the new values are saved. See Chapter 4 Settings Time Select time: hh:mm:ss OK: P change: -/+ Set the current time here. Format: hh=hour (two digits), mm= minute (two digits), ss= seconds (two digits). Date date dd:mm:yyyy OK: P change: -/+ c P Confirm Care button – + Browse backwards Reduce value Browse forwards Increase value The new values are saved when you exit the program. Set the current date here. dd= day two-digit, mm= month two-digit yyyy = year four-digit. Water hardness water hardn.: 13-16 OK: P change: -/+ Set the result of the carbonate hardness test here. Carbonate hardness test See included accessories 14 WMF 1000 user manual Commissioning Tank filter water filter: no OK: P change: -/+ Enter here whether you are using a tank filter (recommended with water hardness 5 °dKH and higher) If “water filter” is set, then the filter should be rinsed now. place 3l container under h.w. spout Set a container with approx. 3 litres capacity under the hot water spout When rinsing the filter, you will hear unusual noises. This is normal. The noises will end during the filter rinse. The machine now heats up. Rinse filter: Follow the display texts see also change filter in Chapter 6 Customer Care heating up ... After the machine is heated up, there is a coffee system rinse. This warms up all the pipes. Place a container for the rinse water under the all-inone spout (approx. 200 ml) A coffee system rinse starts. The coffee system rinse lasts approx. 40 seconds; after this, the machine is ready to operate. Your selection pls 24.10.2006 08:15 Cup size and beverage settings see Chapter 4 Settings Select c P Confirm Care button – + Browse backwards Reduce value Browse forwards Increase value The new values are saved when you exit the program. WMF 1000 user manual 15 Operation Chapter 3 Operation • • • • • • • • Operation and lighting concept Preparing coffee beverages Example: preparing café crème Dispensing milk and milk foam Dispensing hot water All-in-one spout Control buttons Functional parts Always heed the safety instructions to operate the WMF 1000 safely. See Chapter 9 Safety 3.1 Operating and Lighting concept The lighting system helps you with navigation. Only the buttons which can be operated in the current situation are lighted. 3.2 Preparation of coffee beverages The WMF 1000 has four beverage buttons, each of which has two functions. Overview of beverage buttons • For 1st level beverages, press short • For 2nd level beverages, press long short espresso café crème short long 2x espresso 2x café crème long short cappuccino latte macchiato short long 1x café latte 1x espresso macchiato long 16 WMF 1000 user manual Operation Example: Prepare café crème This description serves as an example for the preparation of all beverages. All steps are carried out for the preparation of the other beverages according to the example. If necessary, adjust the height of the all-in-one spout to the height of the drinking vessel. Place an appropriate drinking vessel under the all-in-one spout Press the beverage button for for café crème short Set height all-in-one spout See page 22 The beverage button pressed lights up white. The display indicates: Dispensing milk and milk foam See page 20 See overview of beverage buttons Coffee preparation using the manual insert See page 19 1x café creme Depending on the setting, the coffee beans are ground appropriately for the selected beverage. The preparation occurs as specified in the beverage settings. The beverage is prepared and dispensed into the drinking vessel underneath the spout. The readiness display indicates: Your selection pls 24.10.2006 08:15 Particularity of café latte Select café latte by pressing 1 x long (see overview of beverage buttons) Before preparing café latte: 1x café latte milk lever down Select c P Confirm Care button – + Browse backwards Reduce value Browse forwards Increase value The new values are saved when you exit the program. WMF 1000 user manual 17 Operation Press the milk lever to the left of the all-in-one spout downwards Confirm that the milk lever is pressed downwards by pressing the lighted beverage button Beverage preparation begins. After preparing café latte: See Preparing milk and milk foam Page 20 milk lever up Press the milk lever upwards Confirm with the button cP Setting coffee strength for the next beverage Before each coffee preparation, you can decide how strong you want the next coffee beverage to be. • Mild (approximately 15 % weaker than the saved setting) • Normal (corresponds to your setting) • Strong (approximately 15 % stronger than the saved setting) Place an appropriate drinking vessel under the all-in-one spout Set the desired coffee strength with the - and + buttons Select the beverage The beverage button selected lights up and the beverage name is indicated on the display. The selected beverage is prepared. See preparing beverage 18 WMF 1000 user manual Operation Coffee preparation using the manual insert In addition to the coffee bean hopper, there is a manual insert for a second type of coffee, so that, for example, you can prepare decaffeinated coffee. Place an appropriate drinking vessel under the all-in-one spout Open the cover of the manual insert The display instructs: insert coff. grounds select beverage Place the ground coffee for one brewing cycle in the manual insert Close the cover Select the beverage with the beverage buttons This procedure can be cancelled with the Off/C button. • Always use ground coffee for the manual insert (max. 15 g per preparation). • The coffee machine gets soiled inside if too much ground coffee is put in at once. • Do not use water-soluble, freeze-dried instant coffee. • Each brewing cycle via the manual insert is measured separately. • Coffee ground too fine can cause faults. WMF 1000 user manual See Chapter 6 Customer Care > Cleaning the brewing uni 19 Operation 3.3 Dispense milk and milk foam At the touch of a button, the WMF 1000 dispenses hot milk and milk foam. press short press and hold 1 cup milk Milk/milk foam on request Milk/milk foam is dispensed as long as the button is pressed. Dispensing milk - milk lever down Place an appropriate drinking vessel under the all-in-one spout Press the milk button once short Set cup size see Chapter 4 Settings 1x cup milk milk lever down Put the milk lever in the milk position Confirm the beverage selection with the milk button Milk is dispensed. Afterwards, press the milk lever upwards again Confirm with the cP button Dispense milk: Milk lever down Another press of the milk button ends the dispensing prematurely. Dispensing milk foam - milk lever up Place an appropriate drinking vessel under the all-in-one spout Press the milk button until the desired quantity has been dispensed Dispense milk foam: Milk lever up - refrigerated milk: transparent milk nozzle - unrefrigerated milk: grey milk nozzle 20 WMF 1000 user manual Operation 3.4 Dispense hot water With the hot water function, you can dispense hot water, for tea, for example, or pre-warm your cups. press short press and hold 1 glass hot water Hot water on request Glass of hot water Place an appropriate drinking vessel under the hot water spout Press the hot water button once short Another press of the hot water button ends the dispensing prematurely. Hot water button Set cup size see Chapter 4 Settings Dispensing any quantity of hot water Place an appropriate drinking vessel under the hot water spout Press the hot water button until the desired quantity has been dispensed 3.5 Beverage preparation in general Attention! Burning and scalding hazard! • The all-in-one spout and the hot water spout can get very hot. • The beverages dispensed and the escaping steam are very hot. • Never touch the spouts during or directly after dispensing beverages! • Never touch the beverages, rinse and cleaning water or steam during or directly after beverage dispensing! 3.6 Cancel beverage dispensing You can cancel the current beverage dispensing. Press the Off/C button WMF 1000 user manual 21 Operation 3.7 All-in-one spout The all-in-one spout dispenses coffee and milk foam simultaneously and it can be set steplessly so that you can place anything from an espresso cup to a latte macchiato glass beneath it. The adjustment height ranges from 75-135 mm. Adjusting the height Hold the all-in-one spout between your thumb and forefinger and press the right adjustment lever towards the spout Move the all-in-one spout to the desired height Release the adjustment lever Positions of the all-in-one spout The uppermost position of the all-in-one spout is reserved for the milk system rinse. • Uppermost position = = milk system rinse (spout clicks into position) • Other positions = = beverage dispensing (variable height) If the all-in-one spout is still in the milk system rinse position after a milk system rinse, the display reports: lower spout into beverage position Put the all-in-one spout in a beverage dispensing position As soon as the all-in-one spout is back in a beverage dispensing position, the message disappears and the readiness display appears. 22 WMF 1000 user manual Operation 3.8 Switching on and off Switching on Press the Off/C button The greeting display appears, then the coffee machine heats up. WELCOME WMF 1000 heating up ... Time from switching on until readiness state approx. 2 min. Place a container for the rinse water under the all-in-one spout (approx. 200 ml) After the machine is heated up, there is a coffee system rinse. This rinse warms up all pipes. The coffee system rinse lasts approx. 40 seconds; after this, the machine is ready to operate. Your selection pls 24.10.2006 08:15 Switching off Place a container for the rinse water under the all-in-one spout (approx. 200 ml) Press the Off/C button for approx. 2 seconds If beverages with milk (such as café latte) were prepared, then you will be asked to perform a milk system rinse. A coffee system rinse begins after that. Follow the display texts. The machine switches off. Milk system rinse See Chapter 6 Customer Care > Care programs When switching the machine on and off, an coffee system rinse starts automatically. The coffee system rinse also starts when the machine is switched on and off automatically in timer operation. Empty the drip tray regularly, the rinse water will be emptied into the drip tray by the all-in-one spout (approx. 200 ml). You can place a container under the all-in-one spout and catch the rinse water. WMF 1000 user manual 23 Operation 3.9 Switching on and off in timer operation Setting the automatic switch-on time To use the timer, the basic setting “Automatic switch-on time” must first be set to active. To switch off the machine in timer operation, press the Off/C button short timer 06:30 OK: P change -/+ Set the switch-on time with the - and + buttons Confirm with the cP button The machine rinses and then goes into Timer operation. The display indicates the switch-on time set, the current time and the date. The machine switches on automatically at the set time. Set automatic switch-on time to “active” see chapter 4 settings > basic settings > automatic switch-on time If the machine is not operated within an hour, it switches off again and returns to timer operation. Display timer operation timer 06:30 14.04.2006 08:15 The display of time and date can be hidden. See chapter 4 settings > basic settings Manual switch-on for timer operation Press the Off/C button short In timer operation, the machine switches on again immediately before the automatic set time. Manual switch-off for timer operation Press the Off/C button for approx. 2 seconds The machine switches off and the timer is no longer active. 24 WMF 1000 user manual Setting Chapter 4 Setting About the settings: Press the cP button for approx. 2 seconds select program browse: -/+ + Chapter 4.1 Chapter 4.2 cup size OK: P browse: -/+ beverage settings OK: P browse: -/+ Chapter 4.3 basic settings OK: P browse: -/+ Chapter 4.4 counters OK: P browse: -/+ P P P P cup size select beverage beverage settings select beverage language: english OK: P change: -/+ espresso 269 browse: -/+ P P cup volume: 100% OK: P Test:bev.btn. water volume: 35ml OK: P change: -/+ time: hh:mm:ss OK: P change: -/+ P etc. for all beverages P P P strength: 100% (4s) OK: P change: -/+ date dd:mm:yyyy OK: P change: -/+ reset all counters No: Yes: + P P milk volume: 25sec OK: P change: -/+ date / time: on OK: P change: -/+ P P sequ.: coffee-milk OK: P change: -/+ switch-on time: on OK: P change: -/+ P P pre brew: on OK: P change: -/+ sw.-off time: 60min OK: P change: -/+ P water hardn.: 13-16 OK: P change: -/+ P water filter: no OK: P change: -/+ P brewing temp.: 92°C OK: P change: -/+ Select c P Confirm P factory sett.: no OK: P change: -/+ Care button – + Browse backwards Reduce value Browse forwards Increase value The new values are saved when you exit the program. WMF 1000 user manual 25 Setting 4.1 Cup size (Cup volumes) The coffee machine adjusts the recipe set to the new cup volume. cup size OK: P brwse.: -/+ Selecting the cup size with the cP button Select the beverage whose cup volume should be adjusted to the cup size Set the desired cup volume with the - and + buttons. The cup volume is displayed in %. 100 % corresponds to the current beverage setting. cup volume: 100% OK: P Test:bev.btn. Select c P Confirm Care button – + Browse backwards Reduce value Browse forwards Increase value The new values are saved when you exit the program. As soon as the cup volume is set as desired, confirm the new value with the cP button Dispensing test Press the desired beverage button. The beverage will be dispensed with the newly-set values. Each setting can be tested during setting. 4.2 Beverage settings • • • • • Water volume Coffee strength *Milk volume *Sequence of the dispensing of milk and coffee Pre brew (aroma development) *Menu elements only available for beverages with milk 26 WMF 1000 user manual Setting Dispensing test Each setting can be tested during setting. Water volume water volume: 35ml OK: P change: -/+ Example: press the plus button until the water volume is increased to 37 ml water volume: 37ml OK: P Test:bev.btn. You can start a preparation test with the new values at any time. Place an appropriate drinking vessel under the all-in-one spout Press the beverage button again The beverage is dispensed Confirm the setting by pressing the cP button water volume: 37ml OK: P change: -/+ Coffee strength strength: 86% (5s) OK: P change: -/+ Milk volume in seconds, only beverages with milk milk volume: 25 sec. OK: P change: -/+ The volume dispensed depends on the milk lever position, the milk temperature and the milk nozzle selected. Determine the desired volume with a dispensing test. WMF 1000 user manual 27 Setting Sequence of the dispensing of milk and coffee • First milk then coffee • First coffee then milk • Milk and coffee together. The setting for the sequence of beverage dispensing is only offered for beverages with milk components. sequ.: coffee-milk OK: P change: -/+ Pre brew pre-brew: on OK: P change: -/+ The coffee grounds swell and the coffee aroma can develop. Dispensing test Set and test detail See Set water quantity Page 27 Test: Each setting can be tested during setting. Select c P Confirm Care button – + Browse backwards Reduce value Browse forwards Increase value The new values are saved when you exit the program. 28 WMF 1000 user manual Setting 4.3 Basic settings • • • • • • • • • • Language* Time* Date* Date/time Switch-on time Switch-off time Water hardness* Water filter* Brewing temperature Factory settings For a description of the other basic settings, see Chapter 2 Commissioning For a description of the basic settings marked with *, see the Chapter 2 Commissioning. Date/Time Display of current date and time on the display. (On/Off) date/time: on OK: P change: -/+ You can switch the display of the current date and time on and off here. Automatic switch-on time switch-on time: on OK: P change: -/+ You can switch the automatic switch-on time for the coffee machine on or off; by doing this, you activate the possibility of timer operation. Switch-off time Setting the switch-on time See Chapter 3.9 switching on and off in timer operation (in minutes after the last beverage preparation) sw. off time: 60 min OK: P change: -/+ Here you can set how many minutes after the last beverage preparation the coffee machine should switch off automatically. Attention! If timer operation is activated, the machine switches on again at the set switch-on time. Switch-off time 0 min -> Switch-off time deactivated. WMF 1000 user manual 29 Setting Brewing temperature Brewing temp.: 92°C OK: P change: -/+ You can set the temperature of the brewing water here. The default is 92°C. Factory settings factory sett.: No OK: P change: -/+ You can set all values back to the factory settings here. If you select “yes”, all basic settings and all beverage settings are reset to the factory settings. Attention! All individual settings are lost if you reset to the factory settings. 4.4 Read counters counters OK: P brwse.: -/+ You can display the quantities of beverages prepared here. Use the plus button to browse through the individual beverages Example of espresso: Espresso 269 OK: P brwse.: -/+ As soon as all beverages have been displayed or the Off/C button has been pressed, the message appears: reset all counters No: Yes: + Keep the counters: press the minus button Delete all counters: press the plus button 30 WMF 1000 user manual Other settings Chapter 5 Other settings 5.1 Set the grinding degree Changing the type of coffee can require resetting the grinding degree. Use the included mulititool! Place the multitool into the grinding degree adjustment on the left side of the coffee machine. Release coffee dispenser and wait until grinder starts up • Grinding should be finer: turn clockwise • Grinding should be coarser: turn anticlockwise • The grinding degree may only be set when the grinder is running. • Never adjust more than one rotation at a time. • Do not overwind the stop with force! The factory setting of the grinding degree is designed for the qualities of average coffee beans. When adjusting, there are the following limits: Grinding degree too fine: The dispensing stream is interrupted and/or flow fault -> the ground coffee stops up the brewing filter. Grinding degree too coarse: Especially for espresso, the coffee flows too fast, the crème is too light and has too little body, the aroma is flat. Correct setting: Check your setting by preparing a double shot of espresso. If the dispensing stream is interrupted here or if the display indicates a flow fault, set the grinding degree at least one turn coarser again. WMF 1000 user manual 31 Care Chapter 6 Care The care of your WMF 1000 is especially important. The display notifies you as soon as the WMF 1000 must be rinsed, cleaned or descaled. 6.1 Care program, general When switching the machine on and off, an automatic coffee system rinse starts automatically. This requires that there always be sufficient water in the water tank (200 ml per rinse). The rinse water is caught in the drip tray. Empty the drip tray regularly or place a container (min. 200 ml) under the all-in-one spout during the rinse. After each brewing cycle, in the heating up phase and during the care programs, so-called release water runs into the drip tray. This rinses any remaining coffee from the pipes. This is a completely normal procedure and not an error in the coffee machine. 32 WMF 1000 user manual Care 6.2 Overview of customer care Optional On request Regularly Weekly Daily Care Care programs Coffee system rinse x Milk system rinse x Coffee machine cleaning x x Automatic start when switching the machine on and off. see Customer care programs Filter change Manual cleaning x x x Brewing unit x Milk system x see Manual cleaning Milk container x Drip tray x Drip tray grid x Housing x Water tank x Ground coffee hopper WMF assumes no liability for damage due to lack of cleaning or descaling or due to the use of other cleaning or descaling agents than those provided by WMF. All guarantee and warranty claims are extinguished. Cleaning and descaling agents are irritants and during execution of the programs, they become very hot. Avoid any contact with these liquids. The plastic parts of the coffee machine may not come into contact with the descaling agent. Heed the instructions on the packaging and in Chapter 9 Safety. WMF 1000 user manual 33 Care 6.3 Calling care programs To select the care programs without a previous request on the display: Press the cP button select care-program brwse.: care button Use the care button to browse to the desired program Select the displayed program with the cP button 6.4 Care programs Warm-up rinse/Coffee system rinse rinse coffee system OK:P brwse.:care-bt Place an appropriate container under the all-in-one spout Issue the request with the cP button Start the rinse with the care button The pipes of the coffee machine are rinsed with hot water. Hot rinse water is emptied through the all-in-one spout. After the rinse, the readiness state display appears. your selection pls 08:15 14.04.2006 34 WMF 1000 user manual Care Rinse milk system rinse milksystem OK:P brwse.:care-bt Duration of milk system rinse approx. 30 seconds Select the displayed program with the cP button The display reports the individual activities that must be done before the rinse. milk lever up move spout up max. Check if the milk lever is up? If not, put it up now Push the all-in-one spout to the uppermost position Place an appropriate container under the all-in-one spout connect hose Start: care button Place the milk hose on the hot water spout and turn it clockwise to the stop. Wipe off the outside of the milk hose with a clean, damp cloth Place the milk hose with the milk nozzle on the hot water spout and turn it clockwise to the stop Start the rinse with the care button The coffee machine‘s milk system is rinsed with hot water. Hot rinse water is emptied through the all-in-one spout. After a successful rinse, the following display appears: lower spout into beverage position Turn the milk hose anticlockwise, disconnecting it from the hot water spout WMF 1000 user manual 35 Care After the rinse, some hot water remains in the milk hose. Hold the open end of the milk hose over the drip tray so that the remaining rinse water can run out. Push the all-in-one spout downwards If the all-in-one spout is already in the beverage position, the readiness state display appears: your selection pls 08:15 14.04.2006 If products with milk were prepared, after 20 minutes or at the latest when switching off, the machine automatically requests a milk system rinse. Confirm and perform the milk system rinse with the cP and button. The milk rinse can be put off with the Off/C button. Cleaning the machine - Cleaning program clean machine OK: P brwse.: Care-bt Confirm the machine cleaning with the cP button The individual steps appear on the display on request empty drip tray refill water tank Start the care program without request See Chapter 6.3 Duration of cleaning program approx. 5 minutes. place 3l container under coffee outlet Place an appropriate container (min. 3 litres) under the all-in-one spout 36 WMF 1000 user manual Care insert tablet into manual insert Add a cleaning tablet together with the yellow sponge and close the cover start: care button A cleaning tablet consists of a white tablet and a yellow sponge. Press the care button The cleaning program starts. A minute countdown indicates how long until the descaling will finish. cleaning in progress Remaining time: 5 min. After 5 minutes, the machine cleaning ends. The display calls for a manual milk system cleaning. After the first beverage dispensing, this display disappears. After 230 brewing cycles or 7 days, the request for a machine cleaning appears on the display. The cleaning can be put off with the Off/C button. Cleaning must take place within the next 50 brew cycles, however at the latest on the next day. Otherwise, beverage dispensing will be blocked. The blocking will be cleared after a cleaning. WMF 1000 user manual 37 Care Change tank filter filter change OK: P brwse.: Care ?? Confirm with the cP button remove water tank Remove old filter Insert new filter Remove the old filter Insert a new filter Refill water tank After the change, confirm with the cP button Filter rinse Change tank filter See Chapter 2 Commissioning place 3l container under h.w. spout Place a 3 litre container under the hot water spout Start the filter rinse with the care button Filter rinse running Remaining time: 4 min. When rinsing the filter, you will hear unusual noises. This is normal. The noises will end during the filter rinse. During further operation, everything will sound normal again. After the rinse, the readiness state display appears. your selection pls 08:15 14.04.2006 Depending on the water hardness and the water flow, but after 3 months at the latest, the request appears to change the tank filter. The filter change can be put off with the Off/C button. 38 WMF 1000 user manual Care Descaling descale machine OK: P brwse.: Care ?? Total duration of descaling approx. 37 minutes. The procedure may not be interrupted. Press the care button Empty the drip tray Pull the water tank out of the machine towards the front Remove the filter cartridge if a tank filter is used (important) Empty a whole bottle of WMF liquid descaling agent (750 ml) into the water tank Fill the water tank with water Remove the all-in-one spout Place an appropriate container (min. 3 litres) under the all-in-one spout Place another container (min. 1 litre) under the hot water spout Start the descaling with the care button The descaling begins. A minute countdown indicates how long the descaling will last. Place container underneath Tip: Instead of two containers, you can use a sufficiently large container which fits under both spouts. Descaling running Remaining time: 37 min. After approx. 30 minutes, the following displays appear: Empty water tank OK: P Empty the water tank and rinse thoroughly with clear water The remaining descaling solution must be emptied from the tank so that the coffee machine can then be rinsed with clear water and no descaling solution remains in the coffee machine. Press the cP button to activate WMF 1000 user manual 39 Care Refill water tank OK: care Fill up the water tank Continue the descaling by pressing the care button Descaling running Remaining time: 1 min. Replace the filter cartridge Fill up the water tank and replace it Replace the all-in-one spout The machine now heats up. Steam and condensed water will escape during this process. The water hardness, the water flow and whether a tank filter is used determine the schedule for descaling. The time will be calculated by the WMF 1000 and the request will appear. The descaling can be put off with the Off/C button, however it must be carried out within the next 50 brew cycles. Otherwise, beverage dispensing will be blocked. The blocking will be cleared after a descaling. See Call customer care programs without request 6.5 Manual cleaning Cleaning milk hose The milk hose must be cleaned thoroughly at least once a day. • After switching off the machine, take the milk hose out of the milk and wipe with a clean, damp cloth • Place the parts of the hose that have come into contact with milk in a container with cleanser overnight. • Wipe off the milk hose with a clean, damp cloth • Carry out a milk system rinse 40 Cleaning solution: • 5 ml special cleaner for milk foamers • 200 ml hand-hot water Milk system rinse See Care programs WMF 1000 user manual Care Cleaning the milk system All parts of the milk system must be cleaned thoroughly at least once a week. Remove the water tank from the coffee machine [1] Remove the hose from the milk container and the guide [2] [3] 1 2 The milk system consists of: - all-in-one spout - milk hose - milk nozzle 3 Press the all-in-one spout firmly together and at the same time, pull it downwards [4] [5] [6] 4 5 Taking apart the all-in-one spout [7] Mix 5 ml WMF special cleaner for milk foamers in a container with 200 ml lukewarm water Place all parts of the milk system [8] in the cleaning solution for 5 hours or overnight Then rinse all parts thoroughly with running warm water [9] 7 WMF 1000 user manual 8 6 WMF special cleaner for milk foamers Order no. 33.0683.6000 With the brushes included in the scope of delivery, you can clean the narrow beverage spouts optimally. 9 41 Care Reassemble all parts of the all-in-one spout Place the milk hose on the all-in-one spout [10] Replace the all-in-one spout and push it into the lowest beverage position [11] [12] 10 11 12 Insert the milk hose in the guide [13] [14] [15] 13 14 42 15 WMF 1000 user manual Care Cleaning the brewing unit The brewing unit must cool off before cleaning Switch off the coffee machine with the Off/C button, pull the mains connector Open the side doors on the right [1] Press the handle (marked “PRESS”) firmly downwards and pull the brewing unit out of the coffee machine until it stops [2] Tip the brewing unit slightly forwards and remove it upwards [3] 1 2 Remove the tray for coffee grounds under the brewing unit and clean it with hot water. [4] Use the multitool from the accessories. Unscrew the thread on the brewing unit head with the multitool anticlockwise until the scraper folds out forwards [5] Tip the insertion unit approx. 45 degrees upwards until the brewing filter is visible [6] 4 WMF 1000 user manual 5 3 multitool 6 43 Care Clean the brewing filter under running water or with a cloth [7] Rinse the brewing unit under running water [7] Never clean the brewing unit in a dishwasher and never use any cleaner additives. Dry the brewing unit with a cloth. Allow to dry completely before replacing in the coffee machine. Remove coffee grounds in the chute with a vacuum cleaner [8] Screw the brewing unit back clockwise using the multitool Replace the tray for coffee grounds [9] 7 8 9 Reinstall the dry brewing unit. IInsert the brewing unit and push it firmly back into the housing until the handle (marked “PRESS”) snaps in clearly and is level again Close the side doors If the brewing unit cannot be inserted completely: Turn thread on the brewing unit head slightly to the left or right with the multitool until the brewing unit slides into the guide. Never use force! 44 WMF 1000 user manual Care 6.6 Cleaning in general Never clean the water tank, drip tray or the coffee grounds container in the dishwasher! Cleaning the coffee grounds container Empty the coffee grounds container and rinse with water Cleaning the water tank Empty the water tank Remove the filter cartridge and the adapter (if a filter is used) Remove debris in the tank and on the adapter with a scrub brush Rinse the water tank with water Check smooth running of the float (red plastic part) in the guide Replace the water tank Heavy calcium deposits can be removed with the WMF descaling agent. After descaling, rinse the water tank very thoroughly in order to remove all the descaling debris. Cleaning the drip tray and drip tray grid Empty the drip tray and drip tray grid and rinse with water Insert the drip tray and drip tray grid Cleaning the bean hopper Switch off the machine, pull the mains connector Wipe out the bean hopper with a dry, lint-free cloth WMF 1000 user manual 45 Care Chapter 7 HACCP Cleaning Schedule You are required by law to ensure that your customers are subjected to no health risks as a consequence of consuming food substances you serve. An HACCP Schedule (Hazard Analysis Critical Control Points) for risk identification and assessment is required. You should carry out a risk analysis on your premises. The aim of the analysis is to recognize and preempt food hygiene hazard points. For this, monitoring, and if necessary testing procedures must be specified and implemented. With correct installation, service, care and cleaning WMF coffee machines meet the abovementioned requirements. If the care and cleaning of the coffee machine is not carried out properly, the dispensing of milk beverages becomes a hazard with respect to food hygiene. Please observe the following points in order to comply with the HACCP schedule: “Ordinance concerning food hygiene From 5 August 1997” Use our HACCP cleaning schedule to monitor the regular cleaning. Sterilising the milk system • Adhere to the cleaning instructions for the milk system in the brief manual for daily cleaning. This will ensure that your system contains minimal germs at commencement of operation. When you commence operation, always begin with freshly-opened, pre-refrigerated milk. • Originally-packaged UHT milk is normally free of harmful germs. Always open a new pre-refrigerated package at commencement of operation. • Ensure absolute cleanliness on opening the milk package! Dirty hands or implements when opening may introduce germs. 46 Recommendation: Use only UhT milk with a 1.5 % fat content. WMF 1000 user manual Care Keep the milk cold! • Always have a new pre-refrigerated milk package handy. • If a pre-refrigerated, freshly-opened milk package is consumed within 3 hours maximum, refrigeration during operation may not be necessary. • If milk consumption is lower, then the pre-refrigerated milk must be cooled during operation. The milk should be 6 - 8 °C when operation commences. Depending on the setting, one litre of milk produces approx. 20 cappuccinos. WMF AG offers various cooling possibilities HACCP Cleaning Schedule Month Year Use only refrigerated UHT milk as otherwise health risks due to microbacteria cannot be excluded! For Choc and Topping use only products which are not past their sell-by date. Cleaning steps: Cleaning steps Time 1 2 3 Signature 4 Date Date 1. Execute the cleaning program. See brief manual „Daily cleaning“ 2. Clean the milk hose. See brief manual “Daily cleaning” 3. Exchange the all-in-one spout after 4 hours’ operating time (absolutely necessary with low flow rate and unrefrigerated milk.) 4. General machine cleaning. 1. 17. 2. 18. 3. 19. 4. 20. 5. 21. 6. 22. 7. 23. 8. 24. 9. 25. 10. 26. 11. 27. 12. 28. 13. 29. 14. 30. 15. 31. Cleaning steps Time 1 2 3 Signature 4 16. WMF 1000 user manual 47 HACCP cleaning schedule Chapter 8 Messages and tips 8.1 Operating messages Empty coffee grounds container empty grounds cont. beverage sel. locked grounds cont.missing The coffee grounds container is full Remove the coffee grounds container, empty it and rinse it with water Replace the coffee grounds container Confirm with the cP button Refill water tank refill water tank beverage sel. locked refill water tank The water tank is nearly empty Remove the water tank and fill it Replace the water tank Empty drip tray empty drip tray beverage sel. locked drip tray missing The drip tray must be emptied Remove the drip tray and empty it Replace the drip tray Bean hopper is empty refill beans confirm beverage 48 There are not enough coffee beans in the coffee bean hopper Grinding is interrupted Pour coffee beans into the bean hopper Press the beverage button again The grinding process continues and the additional coffee required for the brewing cycle is ground The selected beverage is then brewed. WMF 1000 user manual Messages and tips Insert coff. grounds insert coff. grounds select beverage The lid manual insert is open Insert the ground coffee Close the manual insert Select the desired beverage with the beverage button This procedure can be cancelled with the Off/C button. Already-inserted ground coffee is removed via the coffee grounds container. Change tank filter your selection pls replace water filter The tank filter must be changed Change filter cartridge (See Chapter 6 Customer Care) Side door open beverage sel. locked side door open The right-hand side door of the coffee machine is open Close the right-hand side door Close lock completely Lower spout lower spout into beverage position WMF 1000 user manual The all-in-one spout is in the milk system rinse position Push the all-in-one spout further downwards into a beverage position 49 Messages and tips 8.2 Error messages and faults Essential procedure in case of error messages or faults: Switch coffee machine off and then on again after a few seconds. Repeat the process which caused the fault. In many cases, this eliminates the fault and you can continue working. If this is not successful: Search in the error list for the error message and follow the instructions. If this is not successful or the error displayed is not listed, please call the WMF service hotline! Some messages lead to blocking of individual functions. You will notice this by the fact that the beverage button light goes out. The beverage buttons which are still illuminated can continue to be served. Fault messages on the display Error message Action Use brewer Brewer is not used: Use brewer Brewer unit not inserted correctly: Use brewing unit correctly Brewing unit stiff: Remove brewer, open brewing chamber with multitool, apply a thin layer of the grease from the accessories kit to the red seal ring Check to make sure that float in the water tank runs smoothly and fill water tank Brewer end switch Flow fault (water tank is empty) See Chapter 6 Customer Care > Water tank Bleed machine: Dispense hot water until a constant stream of water comes out 50 WMF 1000 user manual Messages and tips Flow fault (water tank is full) Air in the system, possibly associated with loud pump noise: Check whether the water tank is pushed in completely Bleed machine: Dispense hot water until a constant stream of water comes out No hot water dispensing: Remove tank filter/dirt trap from tank, try again Brewing unit stopped up: Remove brewing unit, clean manually, insert and carry out cleaning program Clean brewing unit, see Chapter 6 Customer Care > Brewing unit EEPROM Error If the error occurs sporadically: Set grinding degree coarser Switch off pre-brew Switch machine on/off If the error repeats, the fault must be eliminated by the WMF 1000 Service-Center. See chapter WMF 1000 Service-Center Motor driver error Grinder blocked Switch machine on/off If the error repeats, the fault must be eliminated by the WMF 1000 Service-Center. The grinders are blocked by foreign bodies: To eliminate, see section “Manual cleaning” Clean bean hopper; switch off machine, turn grinders clockwise with the multitool in order to be able to remove foreign bodies See Chapter 5 Other Settings Temperature sensor steam Temperature sensor water Timeout level WMF 1000 user manual Grinding degree too fine: Set grinding degree coarser Switch off coffee machine, allow to cool and switch on again If the error repeats, the fault must be eliminated by the WMF 1000 Service-Center. Air in the system, possibly associated with loud pump noise: Check whether the water tank is pushed in completely Take milk hose out of the milk container and press the milk foam button If hot water comes out instead of steam: Carry out descaling If steam comes out: Please call the hotline 51 Messages and tips 8.3 Problems with no fault display Error Action No milk foam/milk output, but milk in reservoir Check that milk hose is not kinked or crimped, lay milk hose again Clean all-in-one spout and milk nozzle See Chapter 6 Customer Care > Milk system cleaning. Put milk lever in milk foam position Carry out foamer rinse, pushing spout completely upwards If necessary, check whether the air intake nozzle of the all-in-one spout is stopped up Milk or milk foam Ensure that the milk nozzle is on the milk hose is too cold Check whether the correct milk nozzle is mounted (transparent for refrigerated milk) Milk is too hot and there Milk is too warm: is too little or Refrigerate milk milk foam has bubbles Check that milk hose is not kinked or crimped Lay milk hose again Check whether the correct milk nozzle is mounted (grey for unrefrigerated milk) Leakage: Check all connections and seals of the all-in-one spout Milk lever is not all the way up for milk foam or not all the way down for milk All-in-one spout: Lightly smear o-rings with WMF sealing grease and Assembly/disassembly make sure that no grease gets into the air intake is stiff opening No milk foam, only hot milk The grease for sealing rings is in the accessories box. Water tank stiff Lightly smear O-rings with WMF sealing grease Display side doors open Brewing unit is not inserted correctly or doors are not closed correctly - check! The lever labeled “Press” must always be in the level position. Pump makes loud Water tank is not inserted correctly (air in the system). noises Push water tank in completely Bleed machine: Dispense hot water until a constant stream of water comes out Hint: it is normal if during operation the water pump runs independently from time to time; it fills the system automatically. 52 WMF 1000 user manual Messages and tips Coffee has no creme • • • • Unsuitable coffee mixture or coffee is not fresh Quantity of ground coffee is set too low Cups too cold: pre-warm Brewing temperature too low: increase temperature Brewing temperature see Chapter 4 Settings > Basic settings • Grinding degree too coarse: set grinding degree finer Grinding degree see Chapter 5 Other Settings Brewing unit can no longer be pulled out or inserted WMF 1000 user manual Brewing unit is not in the basic setting Close the right side door and switch machine on The brewing unit can be adjusted using the multitool until the brewer can be inserted 53 Messages and tips Chapter 9 Safety 9.1 Hazards for the user At WMF, safety is one of the most important product features. The effectiveness of safety devices is only warranted if the following points are observed: • Read the user manual carefully before use • Do not touch hot machine components • Do not use the coffee machine if it is not working properly or if it is damaged. • Do not allow children near the coffee machine. • The built-in safety systems must under no circumstances be altered. Disregarding of the hazard instructions can cause serious injuries. Despite safety devices, every machine remains fraught with hazards if used incorrectly. Please observe the following instructions when using the coffee machine so as to prevent injury and health hazards: Scald hazard! There is a scald hazard in the coffee, milk, milk foam and hot water dispensing area. Make sure that there is always a container below the beverage spout when dispensing. Burn hazard The brewing unit may only be cleaned when the coffee machine is cold. The brewing unit can get hot. Risk of crushing! There is a danger of bruising or crushing when handling all moving parts! When the coffee machine is switched on do not reach into the bean hopper or the brewing unit opening. 54 Attention! Scald Hazard near outlet! Attention! Burn Hazard ! Hot Surfaces! Attention! Risk of Crushing! WMF 1000 user manual Safety Health hazard! The bean hopper and manual insert may only be filled with materials for proper use! Attention! Health Hazard! Health hazard! When handling cleaning tablets and descaling agent, please heed the protective measures on the packaging. The cleaning tablets and descaling agent are an irritant. Only insert the cleaning tablet and the solution with descaling agent after requested to do so on the display. Irritation and scald hazard! Never reach under the spouts during the cleaning/ descaling! During the cleaning/descaling, cleaning liquid/ descaling solution flows out of the all-in-one spout. Attention! Health Hazard! Attention! Danger of irritation or scalding near outlet ! 9.2 Hazards for the coffee machine Please heed the following instructions in order to avoid technical problems with and damage to the coffee machine: • With water with a carbonate hardness in excess of 5°dKH a WMF tank filter should be used; otherwise the coffee machine can be damaged due to build-up of scale. • For insurance reasons, always ensure that at the end of operation, the main electric switch is switched off or the mains connector is pulled. • We recommend damage prevention measures: Installation of smoke detectors. • After lengthy periods out of use, cleaning program must be carried out at least twice before comissioning again. • With a tank filter, the filter must also be rinsed or changed if necessary before commissioning again. See brief manual Daily cleaning WMF 1000 user manual 55 Safety • Do not expose the coffee machine to frost. • This coffee machine is not for use out of doors, do not spray the machine with water. The maximum relative humidity should not exceed 80 %, no dewing. • Do not use water hose, steam jets, steam cleaners or the like to clean the device. • The device must be set on a flat, level and secure surface. 9.3 Responsibilities of the operator The coffee machine meets the requirements of the EC lowvoltage directive (LVD) and the EMC directive and bears the CE mark. The pressure containers are not subject to the EC PED Directive (see Article 1 Paragraph 3.6) as they conform with Article 3 Paragraph 3 of the PED. The hot water/steam generator is neither notifiable nor liable to approval. Calculations confirm to AD 2000. Each machine is subjected to a pressure test. For countries outside the EC, the respectively-valid national rules apply. The operator of such equipment must ensure regular servicing by WMF Customer Service technicians, their agents or other authorised persons and check the safety devices. The operator must ensure that the electrical equipment and operating facilities are in a fit state (e.g. in accordance with BGV A3). In order to ensure the operational safety of your coffee machine, replacement of safety valves after 2 years is advised and boiler replacement after no more than 6 years. These measures are routinely carried out in the course of maintenance by WMF Customer Service. This machine is subject to the electronics waste disposal law (WEEE / EC directive) and it may not be disposed of as domestic waste. 9.4 Warranty claims During the warranty period of 12 months from date of purchase, the purchaser has statutory warranty entitlement. 56 See Chapter 10 Maintenance For disposal, please consult WMF customer service WMF 1000 user manual Safety WMF shall always have the opportunity to rectify faults within an appropriate period. Claims above and beyond these, especially damage claims as a result of consequential damage, are - to the extent that is legally permissible - excluded. Material defects shall be reported to WMF immediately and in writing. Warranty period 12 months No warranty is provided: • For all parts subject to natural wear and tear. These include, among other things, seals, and the brewing unit. • For defects due to the effect of the elements, deposit of boiler scale, chemical, electrochemical or electrical effects unless attributable to fault on the part of WMF. • If a tank filter is not used even though the water hardness where the machine is used requires the use of a tank filter and this causes defects. • For defects which occur as a result of failure to follow handling instructions, service and care of the unit (e.g. user manuals and servicing instructions). • For defects which occur as the result of failure to use original WMF replacement parts or incorrect assembly by the purchaser or by third parties or by faulty or negligent treatment. • For the consequences of improper use and changes made without our permission or commissioning work of the purchaser or third parties. • For defects caused by inappropriate or improper use. • Inappropriate use of the coffee machine takes place especially if within the warranty period of 12 months (as of the date of purchase) the customer exceeds the maximum number of servings than the maximum annual amount specified. The maximum amount in a year is 10,000 coffee beverages. WMF 1000 user manual The customer is instructed in the order Confirmation if the use of a tank filter is required. See Maintenance chapter 57 Maintenance Chapter 10 Service and maintenance 10.1 WMF 1000 Service-Center This procedure applies only in Germany. Do you have a question about the operation or function of your WMF 1000 ? Call our WMF service hotline or send us an e-mail. • Telephone: 07331-25 75 19 • E-mail: [email protected] If your WMF 1000 requires professional help and your questions cannot be answered on the telephone, we will pick up your coffee machine and repair it in the WMF Service-Center in Geislingen. Then we will send the machine back to you. If the location of the WMF 1000 is outside of Germany, please contact the WMF branch office in your country. Procedure • Pick-up will occur shortly. • Prepare your WMF 1000 for shipping, packed in the original carton, and have it ready for pick-up. • Important! Include a copy of the proof of purchase. Service/maintenance/repair in the WMF 1000 Service-Center Check of the incoming coffee machine If there is no warranty claim or if the warranty period has expired, you will receive a cost estimate Repair in our Service-Center within 3 days of receipt of the coffee machine and after agreement to the cost estimate After repair, we will return your WMF 1000 promptly via a package service If the location of the WMF 1000 is outside of Germany, please contact the WMF branch office in your country. Return delivery ticket WMF 1000 Warranty claims see Chapter 9.4 Don‘t forget to include a copy of the completed return delivery ticket and a copy of your receipt with your package. Attention: Handling of the shipping of your WMF 1000 occurs via the WMF 1000 Service-Center. The package is picked up from your premises. 58 WMF 1000 user manual Attachment: Technical data Technical data Power rating 2.2 kW Mains power 1/N/PE ~ 50 Hz/230 V Inspections VDE, CE Coffee bean hopper 320 g (500 g optional) Variable brewing chamber 6 to 15 g Capacity of water tank 2.8 litres Coffee grounds container approx. 20 portions Height-adjustable all-in-one spout with milk nozzle 75 to 135 mm High-performance pump 15 bar Independent heating systems 2 External dimensions Width 380 mm Height 410 mm Depth 450 mm For the maintenance and cleaning, there must be at least 200 mm space on the right side of the machine for brewer disassembly. Weight empty approx. 19.0 kg Weight of brewer 1.2 kg Cable length approx. 1.0 m Item number 03 0500 0001 Manufacturer WMF Group WMF 1000 user manual 59 Attachment: Accessories and spare parts Accessories and spare parts All-in-one spout 1 piece Milk hose; with nipple and nozzle 33 7007 1297 1 piece Air intake cap with o-ring 33 7007 1428 1 piece Air intake tube with o-ring 33 7007 1298 1 piece Milk lever with o-ring 33 7007 1293 1 piece Foam chamber 33 7007 1432 1 piece Spill-over cup 33 7007 1429 1 piece Spill-over cup complete with air intake 33 7007 1295 Hot water spout 1 piece Hose coupling complete 33 7007 1427 Coffee grounds container, drip tray, cover 1 piece Filter set 33 7007 1323 1 piece Drip tray 33 7007 1324 1 piece Drip tray grid 33 7007 1217 1 piece Grinder cover 33 7007 1223 1 piece Manual insert cover 33 7007 1224 1 piece Cable compartment cover back side 33 7007 1201 1 piece Brewer 33 7006 2675 1 piece Tray (brewer) 33 7006 2621 Brewing unit Water tank, Tank filter 1 piece Water tank 33 7007 1322 1 piece Water filter 200 33 2332 2000 1 piece Adapter for water filter 33 2332 0000 Order numbers for the WMF customer care program 1 pack Cleaning tablets (blister 3x10 pieces) 33 2306 2000 1 bottle Milk foam cleaner (1 litre) 33 0683 6000 2 bottles Descaler (0.75 litre) 33 7006 2869 60 WMF 1000 user manual Attachment: Accessories and spare parts Documentation/manuals 1 cover Document set: • Installation manual • User manual • Brief manual daily cleaning WMF 1000 • Return delivery ticket WMF 1000 • WMF carbonate hardness test (with manual) 33 2356 6010 Cleaning agents, cleaning solutions and descaling agents are irritants for people, textiles and for the plastic parts of the machine. Absolutely heed the safety instructions on the package. WMF 1000 user manual 61 Index Index A Accessories and spare parts 59 Adjusting the height 22 All-in-One spout 22 Assembling the milk hose 12 Automatic switch-on time 24, 29 F Factory settings 30 Fault messages on the display 50 Faults 50 Faults with no display 52 Filling the coffee bean hopper 13 Filling the water tank 11 G B General customer care programs 32 Glossary 10 Basic settings 29 Bean hopper 7 Beverage buttons 16 Beverage preparation in general 21 Beverage settings 26 Brewing temperature 30 Browse 8 Browse forwards with plus 8 H C Hazard instructions 9 Hazards for the user 54 Hot water button 21 I Insert the WMF tank filter 11 Introduction to settings 8 Call customer care programs 33 Cancel beverage preparation 21 Care program, general 32 Care programs 34 Change tank filter 38 Cleaning in general 45 Cleaning program 36 Cleaning the bean hopper 45 Cleaning the brewing unit 43 Cleaning the coffee grounds container 45 Cleaning the drip tray and drip tray grid 45 Cleaning the machine 36 Cleaning the milk system 41 Cleaning the water tank 45 Coffee strength for the next beverage 18 Coffee system rinse 23, 34 Commissioning 11 Commissioning program 13 Connecting the milk hose 13 Control buttons 23 Cup size 26 Cup volume 26 Customer care 32 D Date 14, 29 Date/Time 29 Delete all counters 30 Deliming coffee machine 39 Dispensing hot water 21 Dispensing milk 20 Dispensing milk foam 20 E Error list 50 Error messages 50 Errors without fault display 51 62 L Language 29 Lighting system 16 M Maintenance 58 Manual cleaning 40 manual insert 19 Messages 46 Milk cold 47 Milk lever down 17 N No warranty is provided 57 O Off 8 Off/C button 8 Operating messages 48 Operating system 16 Other settings 31 Overview of beverage buttons 16 Overview of customer care 32 P Particularity of cafe latte 17 Parts of the machine 6 P button 8 Plus button 8 Positions of the all-in-one spout 22 Preparing café crème 17 WMF 1000 user manual Index Preparing coffee beverages 16 Procedure for premium service 58 Program button 8 R Reading counters 30 Return delivery ticket 58 Rinse milk system 35 Rinse tank filter 38 S Safety systems 54 Scope of delivery 60 Second type of coffee 19 Sequence milk and coffee 28 Service ticket WMF 1000 58 Set the grinding degree 31 Setting 25 Settings (basic settings) 14 Setting the automatic switch-on time 24 Setting up 11 Softener 60 Spare parts 60 Stand-by mode 24 Sterilising the milk system daily 46 Switching off 23, 24 Switching on 23 Switching the coffee machine on 23 Symbols 8 WMF 1000 user manual T Taking apart the all-in-one spout 41 Tank filter 15, 57, 60 Technical data 60 Testing the water hardness 11 Time 14, 29 Tips 48 Transport and disposal 59 U Unpacking 11 W Warm-up rinse 34 Warranty period 57 Water filter 60 Water hardness 14 WMF replacement parts 57 WMF service hotline 58 WMF 1000 Service-Center 58 WMF 1000 service ticket 58 63 Your nearest WMF Customer Service Centre: © 2006 WMF Aktiengesellschaft Coffee Machines Division Postfach 1401, D-73309 Geislingen/Steige, Germany. All rights reserved, in particular duplication, distribution and translation rights. No part of this Manual may be reproduced in any form or processed, duplicated or distributed using electronic systems without written consent. Design and production / typesetting and print presentation: TecDoc GmbH; Geislingen, [email protected] Printed in Germany. Subject to technical modification. 29.10.2006 WMF 1000