1
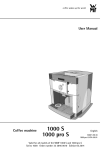
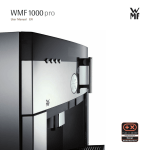
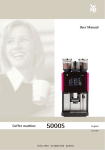
Bedienungsanleitung User Manual Typ 0500 BAL 05/06 Die WMF 1000 is a professional fully automatic coffee machine. The coffee machine is intended for private use and has been developed based on our experience and knowledge of high-performance coffee machines for restaurants and hotels. The WMF 1000 offers you a unique range of beverages and access to well-established technology. You will be impressed by the machine‘s technical design, long service life, and especially by the quality of the coffee it produces. The WMF 1000 operates fully automatically and freshly brews 12 varieties of international specialist beverages: espresso, ristretto, café crème, cappuccino, café latte, latte macchiato, espresso macchiato and hot milk. In addition it provides hot water, for instance for brewing tea. All beverages can be programmed individually for flavour, cup volume and composition. The display makes the operation of your WMF 1000 straightforward and leads you clearly through each program step. The care of your WMF 1000 is especially easy. We have developed a completely new care program for rinsing the milk system. All care programs run fully automatically and ensure that your coffee machine is always clean and prepares perfect coffee for you. Congratulations on choosing your WMF 1000. Introduction and General Information Parts of the machine Bean hopper Manual insert Heated cup storage Display Plus button / Aroma button Minus button/Care button / Aroma button Hot water button P button / Confirm Off/C button / Timer Hot water spout Milk button / Milk foam button Milk hose Beverage buttons Milk lever (milk/milk foam) Height-adjustable all-in-one spout with integral milk foamer Coffee grounds container Removable Drip tray with drip tray grid Adjustment lever for all-in-one spout Water tank Milk container (optional) The first premium machine that brings 125 years of coffee competence into your home WMF has been involved in the preparation of coffee since 1880. The first WMF large coffee machine dates from the year 1927. Barely 30 years later, in 1955, the great victory campaign of WMF coffee machines began, when WMF brought the Italian espresso to German restaurants with the first fully automatic espresso machine. This was followed by a multitude of ground-breaking inno vations which brought WMF world-wide success. WMF was then the first manufacturer to follow the fully automatic espresso with the latte macchiato at the touch of a button for the restaurant trade. The innovative WMF energy and typical quality together with many years of experience are the basis of the reputation that WMF professional machines enjoy today. In recent years top restaurants world-wide rely on our machines to provide them the very best quality coffee. And now you can have it at home: The new WMF 1000. The first professional coffee machine for home use: The WMF 1000 “Blitz” of 1954 Table of Contents Introduction and General Information Parts of the machine User Manual The first premium machine that brings 125 years of coffee competence into your home Before you start User manual signs and symbols 1 1 2 6 6 Commissioning Unpacking and setting up Test the water hardness Prepare the water tank Insert the WMF water filter Assemble the milk hose Fill the water tank Connect the milk hose to the milk Fill the coffee bean hopper Commissioning program Basic Settings 8 8 8 8 9 9 10 10 11 11 Operation Operating and lighting concept Preparation of coffee beverages Overview of beverage buttons Example: Prepare a mug of cappuccino Special feature for café latte Setting coffee strength for the next beverage Coffee preparation using the manual insert Preparing milk and milk foam Dispensing milk - milk lever down Dispensing milk foam - milk lever up Dispense hot water Beverage preparation in general Cancel beverage preparation All-in-one spout Adjusting the height Positions of the all-in-one spout Operating buttons Switching on and off Switching on Switching off Switching on and off in timer operation Setting the automatic switch-on time Display timer operation Manual switch-on for timer operation Manual switch-on for timer operation Manual switch-off for timer operation 15 15 15 16 16 16 17 18 18 18 19 19 19 20 20 20 21 22 22 22 23 23 23 23 23 23 Settings Cup size (Cup volumes) Beverage settings Basic settings Read counters 25 26 29 30 Other settings Set the grinding degree 31 Table of Contents Care Overview of care Care program, general Calling up the care programs Warm-up rinse/Coffee system rinse Rinse milk system Cleaning the machine - Cleaning program Change the water filter Descaling Manual cleaning Cleaning the milk hose Cleaning the milk system Cleaning the brewing unit General cleaning 33 34 34 35 35 36 38 39 41 41 41 43 45 Tips and Tricks for Perfect Coffee Beverages Tips and tricks Water quality Twelve international specialities at the press of a button 46 46 49 Messages and Tips Operating messages Empty coffee grounds container Refill water tank Empty drip tray Bean hopper is empty Insert coffee grounds Change filter Side door open Lower spout Error messages and faults Fault messages on the display 50 50 50 50 51 51 51 52 52 53 53 Safety Safety instructions Hazard instructions Correct use 56 56 57 Warranty/Guarantee 24-Month Premium Service and Maintenance WMF 1000 Service‑Center WMF 1000 service ticket 60 62 Transport and Disposal of the coffee machine Accessories and Spare parts Scope of supply Optional accessories and spare parts Technical Data Index 64 64 Introduction Before you start Read this user manual before starting to prepare coffee. Only then can you operate all functions and the machine safely and spoil yourself with a wonderful coffee beverage. Additional components of the user manual: • Brief manual for beverage dispensing/care User manual signs and symbols Hazard instructions Attention! Risk to machine! Attention! Risk to user! Attention! Hot liquid! Attention! Hot surface! Attention! Danger of electric shock Attention! Danger of hand injuries Tips and hints Hint Cross-reference Tip Always heed the safety instructions in the “Safety” chapter, starting on page 56. Introduction Readiness state The descriptions in the user manual always assume that the coffee machine is ready to operate. your selection pls 24.10.2006 08:15 Glossary Term • > Italics Meaning • Listings, selection options > Individual activities, individual steps Description of coffee machine state and/or explanations of steps carried out automatically Commissioning Commissioning Unpacking and setting up > > > > Unpack coffee machine and set it up on a stable, horizontal support Check the coffee machine for possible transport damage Plug the connector into a grounded outlet Insert drip tray and drip tray grid Test the water hardness Cable compartment > Briefly dip carbon hardness test strip into water (approx. 1 second) > One minute later, read the degree of hardness on the colour scale of the test strip package The water hardness is set during commissioning. Prepare the water tank > Remove the water tank from the coffee machine > Remove all accessories from the water tank > Rinse the water tank thoroughly with tap water Do not put the water tank back into the machine yet. The milk hose must be assembled first. Insert the WMF water filter The WMF water filter ensures the best coffee quality and protects the coffee machine against calcification. With water hardness 0-4, do not use a water filter. > Remove the screen built into the water tank [1] > Place the cartridge adapter on the water spout supports from above (lock pulled) and lock by pressing the lock down [2] > Unpack the water filter cartridge and place on the cartridge adapter [3] Fill water tank with drinking water Commissioning 1 2 3 Assemble the milk hose The milk hose is already mounted on the all-in-one spout. • For refrigerated milk, use the transparent milk nozzle (assembled on delivery) • For non-refrigerated milk, use the grey milk nozzle from the accessories box > Push the all-in-one spout to the lowest position > Insert the milk hose into the guide Set all-in-one spout: Press the adjustment lever to the right of the spout and then move the spout. Fill the water tank > Fill the water tank with cold tap water (max. 2.8 litres) > Slide the water tank back into the machine Fill the water tank only with fresh, cold water. Never use hot water, mineral water, milk or other liquids. Commissioning Connect the milk hose to the milk > Place the refrigerated milk directly to the right of the machine Place the milk hose with the milk nozzle on it into the milk container. The hose end with the milk nozzle should reach the bottom of the milk container. Milk is a very sensitive food. When handling milk, always heed cleanliness. Only open packs with clean hands and utensils. Take care that no bacteria are introduced into the milk. Fill the coffee bean hopper > Open the cover towards the back > Pour in the coffee beans (max. 320 g) > Close the cover 10 Once roasted coffee beans have been unpacked, they lose their aromatic components within days. Therefore only pour as many beans into the coffee bean hopper as you expect to use in the next few days; frequent topping up is better. Heed that no foreign bodies land in the coffee bean hopper. Such foreign bodies can damage the grinders of the coffee mill. This damage is excluded from the warranty. Commissioning Commissioning program > Press the Off/C button The commissioning program starts. language: english OK: P change: -/+ Set the desired language for the display guidance here. The commissioning program uses the display to lead you step by step through commissioning. Follow the display texts. initial setting up of your WMF 1000 The set values can be changed in the “Settings” program after commissioning. The machine is switched on, the commissioning program leads you through the basic settings. See Chapter 4 Settings Basic Settings Set the desired values with the - and + buttons. Use the P button to confirm the values and inputs. After confirmation, the program jumps to the next point of the settings. When exiting the program, the new values are saved. 11 P – Time time: hh:mm:ss OK: P change: -/+ Set the current time here. Format: hh=hour (two digits), mm= minute (two digits), ss= seconds (two digits). Date date dd:mm:yyyy OK: P change: -/+ Set the current date here. dd= day (two digits), mm= month (two digits), yyyy = year (four digits). + select confirm Care button Browse backwards Reduce value Browse forwards Increase value The new values are saved when you exit the program. Commissioning Water hardness water hardn.: 13-16 OK: P change: -/+ Set the result of the lime hardness test here. Water filter Lime hardness test See included accessories water filter: No OK: P change: -/+ Enter here whether you are using a tank filter (recommended with water hardness 5 °dKH and higher) If “water filter” is set, then the filter should be rinsed now. place 3l container under h.w. spout 12 > Set a container with approx. 3 litres capacity under the hot water spout When rinsing the filter, you will hear unusual noises. This is normal. The noises will end during the filter rinse. Rinse filter: Follow the display texts See also change filter in Chapter 6 “Care” The machine now heats up. heating up ... After the machine is heated up, there is a coffee system rinse. This warms up all the pipes. > Place a container for the rinse water under the all-in-one spout (approx. 200 ml) A coffee system rinse starts. The coffee system rinse lasts approx. 40 seconds; after this, the machine is ready to operate. Your selection pls 24.10.2006 08:15 P – + select confirm Care button Browse backwards Reduce value Browse forwards Increase value The new values are saved when you exit the program. Commissioning This completes commissioning You can use the WMF 1000 to make coffee just how you like it. There are many settings available for this: • Set cup size • Set beverages • Basic settings For perfection in your preparation of coffee we have compiled a chapter of “Tips and Tricks”. When switching the machine on and off, the machine automatically starts a Coffee system rinse. This requires that there always be sufficient water in the water tank (200 ml per rinse). Empty the drip tray regularly, since the rinse water is emptied into the drip tray by the all-in-one spout (approx. 200 ml). You can place a container under the all-inone spout to catch the rinse water. Attention! The coffee machine automatically switches itself off are a pre-set time. In this circumstance also, the machine performs a coffee system rinse directly before switching off. Empty the drip tray regularly, since the rinse water is emptied into the drip tray by the all-in-one spout (approx. 200 ml). You can place a container under the all-inone spout to catch the rinse water. Set automatic Switch-off time after last beverage dispensing to active See basic settings 13 Operation Operation This chapter explains all you need to know about simple preparation of coffee using the WMF 1000. • • • • • • • • • Operating and lighting concept Preparing coffee beverages Example: preparing a mug of cappuccino Special considerations for milk coffee Preparing milk and milk foam Dispensing hot water All-in-one spout Control buttons Functional parts Always heed the safety instructions to operate the WMF 1000 safely. See “Safety” chapter Operating and lighting concept The lighting system helps you with navigation. Only the buttons which can be operated in the current situation light up. Preparation of coffee beverages 15 In the centre of the WMF 1000 is a multi-function knob with four beverage buttons. All the international coffee specialities that you can imagine lie behind them. Each of the four buttons is assigned several beverages. Overview of beverage buttons 1x brief 1x espresso 1x café crème 1x brief 2x brief 2x espresso 2x café crème 2x brief 1x long 1x ristretto 1x mug café crème 1x long 1x brief 1x cappuccino 1x latte macchiato 1x brief 2x brief 1x mug cappuccino Not assigned 1x long 1x cafe latte 1x espresso macchiato 1x long Operation Example: Prepare a mug of cappuccino A step-by-step description of how to prepare a mug of cappuccino follows. This description serves as an example for the preparation of all beverages. All steps are carried out for the preparation of the other beverages according to the example. > If necessary, adjust the height of the all-in-one spout to the height of the drinking vessel. > Place an appropriate drinking vessel under the all-in-one spout > Press the beverage button for the mug of cappuccino twice briefly See overview of beverage buttons The beverage button pressed lights up white. The display indicates: 1x mug cappuccino Set the height of the all-in-one spout See Page 20 Coffee preparation using the manual insert See Page 17 Preparing milk and milk foam See Page 18 Depending on the setting, the coffee beans are ground appropriately for the selected beverage. The preparation occurs as specified in the beverage settings. The beverage is prepared and dispensed into the drinking vessel underneath the spout. The readiness display indicates: Your selection pls 24.10.2006 08:15 16 Special feature for café latte > Select café latte by pressing 1 x long (see overview of beverage buttons) Before preparing café latte: 1x café latte milk lever down > Press the milk lever to the left of the all-in-one spout downwards > Confirm that the milk lever is moved downwards by pressing the lighted beverage button Beverage preparation begins. After preparing café latte: milk lever up > Move the milk lever upwards > Confirm with button P Setting coffee strength for the next beverage Before each coffee preparation, you can decide how strong you want the next coffee beverage to be. See Preparing milk and milk foam Page 18 Operation The following coffee strengths are available: • Mild (approximately 15 % weaker than the saved setting) • Normal (corresponds to your setting) • Strong (approximately 15 % stronger than the saved setting) > Place an appropriate drinking vessel under the all-in-one spout > Set the desired coffee strength with the - and + buttons. > Select the beverage The beverage button selected lights up and the beverage name is indicated on the display. The selected beverage is prepared. See Preparing beverage Coffee preparation using the manual insert In addition to the coffee bean hopper, there is a manual insert for a second type of coffee, so that, for example, you can prepare decaffeinated coffee. > Place an appropriate drinking vessel under the all-in-one spout > Open the cover of the manual insert The display instructs: insert coff. grounds select beverage 17 > Place the ground coffee for one brewing cycle in the manual insert > Close the cover > Select the beverage with the beverage buttons This procedure can be cancelled with the Off/C button. Always use ground coffee for the manual insert (max. 15 g per preparation). The coffee machine gets soiled inside if too much ground coffee is put in at once. Do not use water-soluble, freeze-dried instant coffee. Each brewing cycle via the manual insert is measured separately. Coffee ground too fine can cause faults. See chapter care > cleaning the brewing unit Operation Preparing milk and milk foam You don‘t have to be a coffee-lover to enjoy a great taste from the WMF 1000. At the touch of a button, the WMF 1000 also dispenses hot milk and milk foam. Press 1x briefly press and hold 1 cup milk Milk foam on request Milk foam is dispensed as long as the button is pressed. Dispensing milk - milk lever down > Place an appropriate drinking vessel under the all-in-one spout > Press the milk lever (to the left of the all-in-one spout) to the lower milk position > Press the milk button once briefly The display requests you to move the milk lever down to the lower milk position. 1x cup milk milk lever down 18 > Put the milk lever in the milk position > Confirm the beverage selection with the milk button Milk is dispensed > Afterwards, press the milk lever upwards again > Confirm with the P button Prepare milk: Milk lever down Another press of the milk button ends dispensing prematurely. Dispensing milk foam - milk lever up > Place an appropriate drinking vessel under the all-in-one spout > If the milk lever is down, first move it upwards > Press the milk button until the desired quantity has been dispensed Prepare milk foam: Milk lever up - refrigerated milk: transparent milk nozzle - unrefrigerated milk: grey milk nozzle Operation Dispense hot water With the hot water function, you can dispense hot water, for instance for tea, or pre-warm cups. Press 1x briefly press and hold 1 glass hot water Hot water on request Hot water button Glass of hot water > Place an appropriate drinking vessel under the hot water spout > Press the hot water button 1x briefly Another press of the hot water button ends dispensing prematurely. Set cup size See “Settings” chapter Dispensing any quantity of hot water > Place an appropriate drinking vessel under the hot water spout > Press the hot water button until the desired quantity has been dispensed 19 Beverage preparation in general Attention! Burning and scalding hazard! • • • • The all-in-one spout and the hot water spout can get very hot. The beverages dispensed and the escaping steam are very hot. Never touch the spouts during or directly after dispensing beverages! Never touch the beverages, rinse and cleaning water or steam during or directly after beverage dispensing! Cancel beverage preparation You can cancel the current beverage dispensing. > Press the Off/C button Operation All-in-one spout The WMF 1000 is fitted with a unique system which for many years has been standard on our professional machines: The all-in-one spout. It dispenses coffee and milk foam simultaneously and its height can be set steplessly so that you can place anything from an espresso cup to a latte macchiato glass beneath it. The adjustment height ranges from 75-135 mm. Adjusting the height > Hold the all-in-one spout between your thumb and forefinger and press the right adjustment lever towards the spout > Push the all-in-one spout to the desired height > Release the adjustment lever Positions of the all-in-one spout The uppermost position of the all-in-one spout is reserved for the milk system rinse. • Uppermost position • Other positions 20 = milk system rinse (spout clicks into position) = beverage dispensing (variable height) If the all-in-one spout is still in the milk system rinse position after a milk system rinse, the display reports: lower spout into beverage position > Put the all-in-one spout in a beverage dispensing position As soon as the all-in-one spout is back in a beverage dispensing position, the message disappears and the readiness display appears. Operation Operating buttons So that you will be delighted not only by the especially good taste of the coffee but also by the elegant design of the machine, we decided to rely on a small number of multi-function buttons for operation. Off/C button • • • • Switching on Off Cancel Timer operation Program button/ P button • Introduction to settings • Confirm a selection Minus button / Care button / Aroma button • Browse back in the programs with minus • Select the care program • Reduce coffee strength for the next beverage Plus button/Aroma button • Browse forwards with plus • Increase coffee strength for the next beverage 21 Operation Switching on and off Switching on > Press the Off/C button The greeting display appears, then the coffee machine heats up. WELCOME WMF 1000 heating up ... Time from switching on until readiness state approx. 2 min. > Place a container for the rinse water under the all-in-one spout (approx. 200 ml) After the machine is heated up, there is a coffee system rinse. This rinse warms up all the pipes. The coffee system rinse lasts approx. 40 seconds; after this, the machine is ready to operate. Your selection pls 24.10.2006 08:15 The readiness state display appears. 22 Switching off > Press the Off/C button for approx. 2 seconds > Place a container for the rinse water under the all-in-one spout (approx. 200 ml) If beverages with milk (such as café latte) were prepared, then you will be asked to perform a milk system rinse. A coffee system rinse begins after that. Follow the display texts. The machine switches off. Milk system rinse See “Care” chapter > Care programs Operation Switching on and off in timer operation Setting the automatic switch-on time To use the timer, the basic setting “Automatic switch-on time” must first be set to active. > To switch-off the machine in timer operation, press the Off/C button briefly timer 06:30 OK: P change -/+ Set automatic switch-on time to active see Settings > Basic settings > Automatic switch-on time If the machine is not operated within an hour, it switches off again and returns to timer operation. > Set the switch-on time with the - and + buttons > Confirm with the P button The machine rinses and then goes into Timer operation. The display indicates the switch-on time set, the current time and the date. The machine switches on automatically at the set time. Display timer operation timer 06:30 24.10.2006 08:15 Manual switch-on for timer operation > Press the Off/C button briefly In timer operation, the machine switches on again immediately before the automatically set time. Manual switch-on for timer operation > Press the Off/C button briefly In timer operation, the machine switches on again immediately before the automatically set time. Manual switch-off for timer operation > Press the Off/C button for approx. 2 seconds The machine switches off and the timer is no longer active. The display of time and date can be hidden. See “Settings” chapter > Basic settings 23 Settings Settings The Cup size setting allows you to select the cup volume for your coffee specialities. When you do this, the coffee machine adjusts the recipe quantities to the new cup volume, so that you still receive the same coffee taste. You can of course use the Beverage settings to vary the recipe individually. The Basic settings are the settings for the operation and display of the coffee machine. The Counters give you information about the number of beverages that have been prepared. Cup size (Cup volumes) The WMF 1000 allows you to make easy individual adjustment to the cup volume to suit the cup sizes. The essential point is that: The recipe remains unchanged. > Press the P button for approx. 2 seconds select program browse: -/+ All beverage volumes are matched to the WMF Coffee Lounge cups. > Use the + buttons to scroll through the display cup size OK: P brwse.: -/+ > Selecting the cup size with the P button > Select the beverage whose cup volume should be adjusted to the cup size 25 1x brief 1x espresso 1x café crème 1x brief 2x brief no setting no setting 2x brief 1x long 1x ristretto 1x mug café crème 1x long 1x brief 1x cappuccino 1x latte macchiato 1x brief 2x brief no setting no setting 1x long 1x cafe latte 1x espresso macchiato > Set the desired cup volume with the - and + buttons. The cup volume is displayed in %. 100 % corresponds to the current beverage setting. For “2x brief” beverages, no setting is necessary, the cup volumes always correspond to twice the volume of a “1x brief” beverage. 1x long Settings > If necessary the new setting can be tested by a dispensing test cup volume: 100% OK: P test:bev.btn. The taste and the composition of the beverage remains the same, only the volume is changed to your wishes and to match the cup size. > As soon as the cup volume is set as desired, confirm the new value with the P button Technical Data See “Technical Data” chapter Beverage settings Here you can adjust the recipes of your coffee specialities according to your personal tastes. The following settings are available: • Water volume • Coffee strength • *Milk volume • *Sequence of the dispensing of milk and coffee • Pre-brew (aroma development) *Option only available for beverages with milk 26 > Press the P button for approx. 2 seconds select program browse: -/+ > Use the + buttons to scroll through to beverage settings OK: P change: -/+ > Select the beverage setting program by pressing the P button P – + select confirm Care button Browse backwards Reduce value Browse forwards Increase value The new values are saved when you exit the program. Settings > Select the beverage for which the taste and composition should be changed 1x brief 1x espresso 1x café crème 1x brief 2x brief no setting no setting 2x brief 1x long 1x ristretto 1x mug café crème 1x long 1x brief 1x cappuccino 1x latte macchiato 1x brief 2x brief no setting no setting 1x long 1x cafe latte 1x espresso macchiato 1x long For “2x brief” beverages, no setting is necessary, the beverage settings always correspond to twice the quantities for a “1x brief” beverage. Water volume water volume: 35ml OK: P change: -/+ > Example: press the plus button until the water volume is increased to 37 ml water volume: 37ml OK: P Test:bev.btn. You can start a preparation test with the new values at any time. > Place an appropriate drinking vessel under the all-in-one spout > Press the beverage button again > The beverage is dispensed > If the beverage is to your taste, confirm the settings by pressing the P button water volume: 37ml OK: P change: -/+ 27 Settings Coffee strength strength: 86% (5s) OK: P change: -/+ Milk volume In seconds, only beverages with milk milk volume: 25 sec. OK: P change: -/+ The volume dispensed depends on the milk lever position, the milk temperature and the milk nozzle selected. Determine the desired volume with a dispensing test. Sequence of dispensing of milk and coffee First milk then coffee/First coffee then milk/Milk and coffee together. The setting for the sequence of beverage dispensing is only offered for beverages with milk components. sequ.: coffee-milk OK: P change: -/+ 28 Pre-brew > Aroma development (On/Off) pre-brew: on OK: P change: -/+ Pre-brew: Before brewing the ground coffee is wetted with hot water. The coffee grounds swell and the coffee aroma can develop. Test: Each setting can be tested during setting. The settings are performed in relation to the factory setting. Set and test detail see Set water volume Page 27 Settings Basic settings • • • • • • • • • • Language* Time* Date* Date/time Switch-on time Switch-off time Water hardness* Water filter* Brewing temperature Factory settings Description of the other basic settings, see “Commissioning” chapter page 11 For a description of the basic settings marked with *, see the “Commissioning” chapter. > Press the P button for approx. 2 seconds select program browse: -/+ > Use the + buttons to scroll through to basic settings OK: P brwse.: -/+ 29 > Select the basic settings program by pressing the P button. Date/Time Display of current date and time on the display. (On/Off) date/time: on OK: P change: -/+ You can switch the display of the current date and time on and off here. Automatic switch-on time switch-on time: on OK: P change: -/+ You can switch the automatic switch-on time for the coffee machine on or off; by doing this, you activate the possibility of timer operation. Setting the switch-on time see switching on and off in timer operation Settings Switch-off time (in minutes after the last beverage preparation) sw.-off time: 60 min OK: P change: -/+ Attention! If timer operation is activated, the machine switches on again at the set switch-on time. Here you can set how many minutes after the last beverage preparation the coffee machine should switch-off automatically. Brewing temperature brewing temperature:92°C OK: P change: -/+ You can set the temperature of the brewing water here. The default is 92°C. Brewing temperature See “Tips and tricks” chapter Factory settings factory sett.: No: OK: P change: -/+ If you select “yes”, all basic settings and all beverage settings are reset to the factory settings. 30 Read counters counters OK: P brwse.: -/+ You can display the quantities of beverages prepared here. > Use the plus button to browse through the individual beverages Example of espresso: espresso 269 OK: P brwse.: -/+ As soon as all beverages have been displayed or the Off/C button has been pressed, the message appears: reset all counters No: Yes:+ Keep the counters: > Press the minus button Delete all counters: > Press the plus button Attention! All individual settings are lost if you reset to the factory settings. Settings Other settings Set the grinding degree With the steplessly adjustable grinders you can adjust the WMF 1000 ideally to any type of coffee. Changing the type of coffee can require resetting the grinding degree. Use the multitool supplied in the accessories box! > Place the multitool into the grinding degree adjustment on the left side of the coffee machine. > Release coffee dispenser and wait until grinder starts up • Grinding should be finer: turn clockwise • Grinding should be coarser: turn anticlockwise • The grinding degree may only be set when the grinder is running. • Never adjust more than one rotation at a time. • Do not overwind the stop with force! The factory setting of the grinding degree is designed for the qualities of average coffee beans. When adjusting, there are the following limits: Grinding degree too fine: The dispensing stream is interrupted and/or flow fault -> the ground coffee stops up the brewing filter. Grinding degree too coarse: Especially for espresso, the coffee flows too fast, the crème is too light and has too little body, the aroma is flat. Correct setting: Check your setting by preparing a double shot of espresso. If the dispensing stream is interrupted here or if the display indicates a flow fault, set the grinding degree at least one turn coarser again. Grinding degree See Tips and tricks 31 Care Care The care of your WMF 1000 is very important, not least so that your coffee is always prepared perfectly. The display notifies you as soon as the WMF 1000 must be rinsed, cleaned or descaled. The newly developed and unique WMF milk system rinse particularly allows you very easily to maintain perfect hygiene for beverages with milk components. Overview of care Care programs: • • • • • Warm-up rinse/Coffee system rinse Milk system rinse Coffee machine cleaning Filter change Descaling See Care programs Manual cleaning: • • • • • • Brewing unit cleaning Milk system cleaning Milk container cleaning Drip tray cleaning Machine casing cleaning Water tank cleaning 33 See Manual cleaning Care Care program, general When switching the machine on and off, an automatic coffee system rinse starts automatically. This requires that there always sufficient water in the water tank (200 ml per rinse). The rinse water is caught in the drip tray. Empty the drip tray regularly or place a container (min. 200 ml) under the all-in-one spout during the rinse. After each brewing cycle, in the heating up phase and during the care programs, so-called release water runs into the drip tray. This rinses any remaining coffee from the pipes. This is a completely normal procedure and not an error in the coffee machine. Run the care program regularly, and without delay when the request to do so appears in the display. WMF assumes no liability for damage due to lack of cleaning or descaling or due to the use of other cleaning or descaling agents than those provided by WMF. All guarantee and warranty claims then lapse. Cleaning and descaling agents are irritants and during execution of the programs, they become very hot. Avoid any contact with these liquids. The plastic parts of the coffee machine may not come into contact with the descaling agent. Heed the instructions on the packaging and in the Safety chapter. 34 Calling up the care programs To select the care programs without a previous request on the display: > Press the P button select care program browse: care button > Use the care button to browse to the desired program > Select the displayed program with the P button Care Warm-up rinse/Coffee system rinse The warm-up rinse/coffee system rinse is performed automatically when the machine is switched on, and again when it is switched off; it can also be called up on request. rinse coffee system OK:P brwse.:care-bt > Place an appropriate container under the all-in-one spout > Issue the request with the P button > Start the rinse with the care button The pipes of the coffee machine are rinsed with hot water. Hot rinse water is emptied through the all-in-one spout. After the rinse, the readiness state display appears. your selection pls 24.10.2006 08:15 Rinse milk system The WMF milk system rinse is unique world-wide; it allows you very easily to maintain perfect hygiene for beverages with milk components and thus maintain consistently enjoyable coffee. milk system rinse OK:P brwse.:care-bt > Select the displayed program with the P button The display reports the individual activities that must be done before the rinse. 35 Duration of milk system rinse approx. 30 seconds milk lever up move spout up max. > Check if the milk lever is up? If not, put it up now > Push the all-in-one spout to the uppermost position > Place an appropriate container under the all-in-one spout connect hose start: care button > Wipe off the outside of the milk hose with a clean, damp cloth > Place the milk hose with the milk nozzle on the hot water spout and turn it clockwise to the stop > Start the rinse with the care button Place the milk hose on the hot water spout and turn it clockwise to the stop Care The coffee machine‘s milk system is rinsed with hot water. Hot rinse water is emptied through the all-in-one spout. After a successful rinse, the following display appears: lower spout into beverage position > Turn the milk hose anticlockwise, disconnecting it from the hot water spout After the rinse, some hot water remains in the milk hose. Hold the open end of the milk hose over the drip tray so that the remaining rinse water can run out. > Push the all-in-one spout downwards If the all-in-one spout is already in the beverage position, the readiness state display appears: Your selection pls 24.10.2006 08:15 36 If products with milk were prepared, after 20 minutes or at the latest when switching off, the machine automatically requests a milk system rinse. Confirm and perform the milk system rinse with the P and button. The milk rinse can be put off with the Off/C button. Cleaning the machine - Cleaning program clean machine OK:P brwse.:care-bt > Confirm machine cleaning with the P button > The individual steps appear on the display on request empty drip tray refill water tank Start the care program without request See Page 34 The cleaning program takes 5 minutes. Care place 3l container under spout > Place an appropriate container (min. 3 litres) under the all-in-one spout insert tablet into coffee grounds slot > Add a cleaning tablet together with the yellow sponge and close the cover start: care button > Press the care button The cleaning program starts. A cleaning tablet consists of a white tablet and a yellow sponge. A minute countdown indicates how long the cleaning will last. cleaning in progress Time remain: 5 min. After 5 minutes, the machine cleaning ends. The display calls for a manual milk system cleaning. After the first beverage dispensing, this display disappears. After 230 brewing cycles or 7 days, the request for machine cleaning appears on the display. The cleaning can be put off with the Off/C button. Cleaning must take place within the next 50 brew cycles, however at the latest the next day. Otherwise, beverage dispensing will be blocked. The blocking will be cleared after a cleaning. 37 Care Change the water filter filter change OK:P brwse.:care-bt > Confirm with the P button pull water tank remove old filter insert new filter > > > > Remove the old filter Insert a new filter Refill water tank After the change, confirm with the P button filter rinsing 38 place 3L container under h.w. spout > Place a 3 litre container under the hot water spout > Start the filter rinse with the care button rinsing filter ... time remain: 4 min. When rinsing the filter, you will hear unusual noises. This is normal. The noises will end during the filter rinse. During further operation, everything will sound normal again. After the rinse, the readiness state display appears. Your selection pls 24.10.2006 08:15 Depending on the water hardness and the water flow, but after 3 months at the latest, the request appears to change the water filter. The filter change can be put off with the Off/C button. Change water filter See “Commissioning” chapter Care Descaling descale machine OK:P brwse.:care-bt > > > > > Press the care button Empty the drip tray Pull the water tank out of the machine towards the front Remove the filter cartridge if a water filter is used (important) Empty a whole bottle of WMF liquid descaling agent (750 ml) into the water tank Total duration of descaling approx. 37 minutes. The procedure may not be interrupted. See Milk system cleaning > Fill the water tank with water > RePush the all-in-one spout > Place an appropriate container (min. 3 litres) under the all-in-one spout > Place another container (min. 1 litre) under the hot water spout > Start the descaling with the care button The descaling begins. A minute countdown indicates how long until the descaling will finish. descaling ... time remain: 37 min. 39 After approx. 30 minutes, the following displays appear: empty water tank OK: care > Empty the water tank and rinse thoroughly with clear water The remaining descaling solution must be emptied from the tank so that the coffee machine can then be rinsed with clear water and no descaling solution remains in the coffee machine. > Press the P button to activate rinse and refill water tank > Fill up the water tank > Continue the descaling by pressing the care button Place container underneath Tip: Instead of two containers, you can use a sufficiently large container which fits under both spouts. Care descaling ... time remain: 1 min. > > > > Replace the filter cartridge Fill up the water tank and replace it Replace the all-in-one spout The machine now heats up. Steam and condensed water will escape during this process. The water hardness, the water flow and whether a tank filter is used determine the schedule for descaling. The time will be calculated by the WMF 1000 and the request will appear. Descaling can be put off with the Off/C button, however it must be carried out within the next 50 brew cycles. Otherwise, beverage dispensing will be blocked. The blocking will be cleared after a descaling. 40 See Call care programs without request Care Manual cleaning Cleaning the milk hose The milk hose must be cleaned thoroughly at least once a day. • After switching off the machine, take the milk hose out of the milk and wipe it with a clean, damp cloth • Place the parts of the hose that have come into contact with milk in a container with cleanser overnight. • Wipe off the milk hose with a clean, damp cloth • Carry out a milk system rinse The milk system consists of: - all-in-one spout - milk hose - milk nozzle Cleaning the milk system All parts of the milk system must be cleaned thoroughly at least once a week. > Remove the water tank from the coffee machine[1] > Remove the hose from the milk container and the guide [2] [3] 1 2 3 > Press the all-in-one spout firmly together and at the same time, pull it downwards [4] [5] [6] 4 5 6 41 Care > > > > Taking apart the all-in-one spout [7] Stir one measuring cap WMF milk system cleaner into 200 ml lukewarm water in a container Place all parts of the milk system [8] in the cleaning solution for 5 hours or overnight Then rinse all parts thoroughly with running warm water [9] 7 8 9 > Reassemble all parts of the all-in-one spout > Place the milk hose on the all-in-one spout [10] > Replace the all-in-one spout and push it into the lowest beverage position [11] [12] 10 11 12 42 > Insert the milk hose in the guide [13] [14] [15] 13 14 15 With the brushes included in the scope of delivery, you can clean the narrow beverage spouts optimally. See accessories and spare parts. Care Cleaning the brewing unit The brewing unit must cool off before cleaning > Switch-off the coffee machine with the Off/C button, pull the mains connector > Open the side doors on the right [1] > Press the handle (marked “PRESS”) firmly downwards and pull the brewing unit out of the coffee machine until it stops [2] > Tip the brewing unit slightly forwards and remove it upwards [3] 1 2 3 43 > Remove the tray for coffee grounds under the brewing unit and clean it with hot water. [4] Use the multitool from the accessories. > Unscrew the thread on the brewing unit head with the multitool anticlockwise until the scraper folds out forwards [5] > Tip the insertion unit approx. 45 degrees upwards until the brewing filter is visible [6] 4 5 6 Multitool Care > Clean the brewing filter under running water or with a cloth [7] > Rinse the brewing unit under running water [7] > Never clean the brewing unit in a dishwasher and never use any cleaner additives. > Dry the brewing unit with a cloth. Allow to dry completely before replacing in the coffee machine. > Remove coffee grounds in the chute with a vacuum cleaner [8] > Screw the brewing unit back clockwise using the multitool > Replace the tray for coffee grounds [9] 7 44 8 9 Refit the brewing unit after it has been dried. > Insert the brewing unit and push it firmly back into the housing until the handle (marked “PRESS”) snaps in clearly and is level again [10] > Close the side door 10 If the brewing unit cannot be inserted completely: Turn thread on the brewing unit head slightly to the left or right with the multitool until the brewing unit slides into the guide. Never use force! Care General cleaning Never clean the water tank, drip try or the coffee grounds container in the dishwasher! Cleaning the coffee grounds container > Empty the coffee grounds container and rinse with water Cleaning the water tank > > > > > > Empty the water tank Remove the filter cartridge and the adapter (if a filter is used) Remove debris in the tank and on the adapter with a scrub brush Rinse the water tank with water Check smooth running of the float (red plastic part) in the guide Replace the water tank Heavy calcium deposits can be removed with the WMF descaling agent. After descaling, rinse the water tank very thoroughly in order to remove all the descaling debris. Cleaning the drip try and drip tray grid > Empty the drip tray and drip tray grid and rinse with water > Insert the drip tray and drip tray grid Cleaning the bean hopper > Switch-off the machine, pull the mains connector > Wipe out the bean hopper with a dry, lint-free cloth It is best to clean the stainless steel front and the side parts using the WMF stainless steel cleaning cloth from the specialist trade. 45 Tips und Tricks Tips and Tricks for Perfect Coffee Beverages Tips and tricks 46 Water quality Programming the taste of the coffee Water quality is extremely important for preparing your coffee specialities. Excessive lime and chlorine will adversely affect the aroma. Prevent this by using the WMF water filter. Descaling also protects your WMF 1000 against scaling. Programming the strength of the coffee, the quantities of water and milk for individual coffee specialities to your taste. Warm-up rinse Brewing temperature Run a warm-up rinse on the machine after switching on and after long pauses between use. This allows espresso to achieve its ideal temperature more quickly. For a good espresso it is particularly important that it is hot. The brewing temperature is factory-set to 92°C, which is ideal for coffee with 100% Arabica beans. If you are using coffee with a proportion of Robusta beans, a reduction in brewing temperature to 88°C is recommended. Pre-warm the cups Grinding degree You can pre-warm the cups by placing them on the heated cup storage. Alternatively we recommend pre-warming the cups with hot water. Together with the quantity of ground coffee, the grinding degree exerts a critical influence over the generation of what is called “body” or “fill” of the coffee, and the formation and persistence of the crème. The finer the coffee is ground, the more strongly its contents are released into the coffee. You should match the grinding degree to the variety of coffee used. The right cups Quantity of coffee beans Use espresso cups of thick porcelain, which retain the prewarm heat better. Their maximum capacity is 60 ml - but they should only ever be filled two-thirds full - and they are tapered. If the cups are too large, they allow the espresso to cool down too quickly at the surface. Once roasted coffee beans have been unpacked, they lose their aromatic components within days. Therefore only pour as many beans into the coffee bean hopper as you expect to use in the next few days; frequent topping up is better. Water filter insertion - see “Commissioning” chapter; Warm-up rinse - see “Care” chapter; Coffee taste program - see “Beverage settings” chapter; Brewing temperature setting - see “Basic settings” chapter; Grinding degree setting - see “Other settings” chapter; Coffee bean filling - see “Commissioning” chapter. Tips und Tricks Storage Hygiene For best preservation of the aroma, seal your coffee well and store it: in a cool dry place free of odours, since dampness and oxygen are the joint number one aroma killers. Take care to maintain absolute cleanliness when opening milk packaging and when handling the milk hose. Dirty hands and utensils can introduce harmful bacteria into the milk. Unopened UHT milk is generally free of harmful bacteria. Varieties of coffee Care Coffee is assessed by its qualities such as acidity, aroma, body and fragrance. 100% Arabica guarantees top quality. In the end, top top-quality coffee that comes to your breakfast table is down to your individual taste. The care of the WMF 1000 is particularly important for perfectly prepared coffee. Therefore run the appropriate care programs as requested on the display, and also regularly perform manual care. Types of milk Cleaning the bean hopper Milk foam comprises the protein elements in the milk. A high protein content in the milk increases the quality and stability of the milk foam. Coffee contains oils and fats which become deposited on the surfaces of the hopper. In the presence of oxygen, these oils oxidise and seriously affect the taste of the coffee. Therefore, regularly rub down the bean hopper - depending on usage - using a dry, lint-free cloth. Refrigerated milk Latte macchiato Milk is a very sensitive food. We recommend keeping milk in the refrigerator before use. Not long after taking from the refrigerator, return unused milk to the refrigerator. If milk has been left out of the refrigerator longer than two hours, do not use it. Latte macchiato is even better if half-way through the preparation time you move the milk lever from the milk position to the milk foam position - or vice versa. Milk foam preparation - see “Operation” chapter; Milk filling - see “Commissioning” chapter; Milk system cleaning - see “Care” chapter; Care programs - see “Care” chapter; Cleaning the bean hopper - see “Care” chapter; Preparing beverages - see “Operation” chapter; Mill lever setting - see “Milk and milk foam preparation” chapter. 47 Tips und Tricks Twelve international specialities at the press of a button Espresso Two espressos Ristretto The small black one with the strong aroma. Cognoscenti prize the characteristic crème. Due espressi! The Italian way of enjoying coffee - best with a friend. Or you can indulge in a doppio. Small, black and powerful - the concentrated version with little water, for cognoscenti. Café crème Two café crème Mug of café crème A balanced mixture of coffee. The special preparation technique generates the crème. Two cups, when you don‘t want to enjoy your café by yourself. The large serving in a mug. This gives you longer to enjoy your café. Cappuccino Mug of cappuccino Latte Espresso with milk and milk foam cap. It takes its name from the brown habit of the Capuchin monks. The large cappuccino for extended enjoyment. Hot milk and coffee flow together into the cup. The mixture creates a caramel brown colour. Latte macchiato Espresso macchiato Milk The speckled milk with the characteristic 3 layers: hot milk, espresso, milk foam. Espresso with a shot of milk foam. The smaller version of a cappuccino. Hot milk or milk foam. Refined palates sprinkle cocoa power under it. 49 Messages and Tips Messages and Tips Operating messages Empty coffee grounds container empty grounds cont. beverage sel. locked grounds cont.missing The coffee grounds container is full > Remove the coffee grounds container, empty it and rinse it with water > Replace the coffee grounds container > Confirm with the P button Refill water tank refill water tank beverage sel. locked refill water tank The water tank is nearly empty > Remove the water tank and fill it > Replace the water tank 50 Empty drip tray empty drip tray beverage sel. locked drip tray missing The drip tray must be emptied > Remove the drip tray and empty it > Replace the drip tray Messages and Tips Bean hopper is empty refill beans confirm beverage There are not enough coffee beans in the coffee bean hopper Grinding is interrupted > Pour coffee beans into the bean hopper > Press the beverage button again The grinding process continues and the additional coffee required for the brewing cycle is ground The selected beverage is then brewed. Insert coffee grounds insert coff. grounds select beverage The manual insert lid is open > Insert the ground coffee > Close the manual insert > Select the desired beverage with the beverage button This procedure can be cancelled with the Off/C button. Already-inserted ground coffee is removed via the coffee grounds container. Change filter your selection pls replace water filter The water filter must be changed > Change filter (see “Care” chapter) 51 Messages and Tips Side door open beverage sel. locked side door open The right-hand side door of the coffee machine is open > Close the right-hand side door > Close lock completely Lower spout lower spout into beverage position 52 The all-in-one spout is in the milk system rinse position > Push the all-in-one spout further downwards into a beverage position Messages and Tips Error messages and faults Essential procedure in case of error messages or faults: Switch coffee machine off and then on again after a few seconds. Repeat the process which caused the fault. In many cases, this eliminates the fault and you can continue working. If this is not successful: Search in the error list for the error message and follow the instructions. If this is not successful or the error displayed is not listed, please call the WMF service hotline! Some messages lead to blocking of individual functions. You will notice this by the fact that the beverage button light goes out. The beverage buttons which are still illuminated can continue to be served. Fault messages on the display Error message Action Use brewer Brewer is not used: Use brewer Brewer unit not inserted correctly: > Use brewing unit correctly Brewing unit stiff: > Remove brewer, open brewing chamber with multitool, apply a thin layer of the grease from the accessories kit to the red seal ring > Check to make sure that float in the water tank runs smoothly and fill water tank > Bleed machine: Dispense hot water until a constant stream of water comes out Air in the system, possibly associated with loud pump noise: > Check whether the water tank is pushed in completely > Bleed machine: Dispense hot water until a constant stream of water comes out No hot water dispensing: > Remove water filter/dirt trap from tank, try again Brewing unit stopped up: > Remove brewing unit, clean manually, insert and carry out cleaning program If the error occurs sporadically: > Set grinding degree coarser > Switch-off pre-brew Brewer end switch Flow fault (water tank is empty) Flow fault (water tank is full) 53 See chapter Care > water tank Clean brewing unit, see chapter Care > Brewing unit Set grinding degree see chapter other settings Messages and Tips EEPROM Error 54 > Switch machine on/off If the error repeats, the fault must be eliminated by the WMF 1000 Service‑Center. Motor driver error > Switch machine on/off If the error repeats, the fault must be eliminated by the WMF 1000 Service‑Center. Grinder blocked The grinders are blocked by foreign bodies: To eliminate, see section “Manual cleaning” > Clean bean hopper; switch-off machine, turn grinders clockwise with the multitool in order to be able to remove foreign bodies Grinding degree too fine: > Set grinding degree coarser Temperature sensor > Switch-off coffee machine, allow to cool and switch-on again steam If the error repeats, the fault must be eliminated by the WMF 1000 Temperature sensor water Service‑Center. Timeout level Air in the system, possibly associated with loud pump noise: > Check whether the water tank is pushed in completely > Take milk hose out of the milk container and press the milk foam button If hot water comes out instead of steam: > Carry out descaling If steam comes out: > Please call the hotline See chapter WMF 1000 Service‑Center See chapter other settings Problems with no fault display Error Action No milk foam/milk output, > Check that milk hose is not kinked or crimped, lay milk hose but milk in reservoir again > Clean all-in-one spout and milk nozzle No milk foam, > Put milk lever in milk foam position only hot milk > Carry out foamer rinse, pushing spout completely upwards > If necessary, check whether the air intake nozzle of the all-inone spout is stopped up Milk or milk foam > Ensure that the milk nozzle is on the milk hose is too cold > Check whether the correct milk nozzle is mounted > (transparent for refrigerated milk) See chapter Care > cleaning the milk system Messages and Tips Milk is too hot and there is Milk is too warm: too little or > Refrigerate milk milk foam has bubbles > Check that milk hose is not kinked or crimped > Lay milk hose again > Check whether the correct milk nozzle is mounted > (grey for unrefrigerated milk) Leakage: > Check all connections and seals of the all-in-one spout > Milk lever is not all the way up for milk foam or not all the way down for milk All-in-one spout: > Lightly smear O-rings with WMF sealing grease and make sure Assembly/disassembly that no grease gets into the air intake opening The grease for sealing rings is in the accessories box. is stiff Water tank stiff > Lightly smear O-rings with WMF sealing grease Display side doors open > Brewing unit is not inserted correctly or doors are not closed correctly - check! The lever labeled “Press” must always be in the level position. Pump makes loud noises Water tank is not inserted correctly (air in the system). > Push in water tank completely > Bleed machine: > Dispense hot water until a constant stream of water comes out Hint: it is normal if during operation the water pump runs independently from time to time; it fills the system automatically. Coffee has no creme • Unsuitable coffee mixture or coffee is not fresh • Quantity of ground coffee is set too low • Cups too cold: pre-warm • Brewing temperature too low: increase temperature • Grinding degree too coarse: set grinding degree finer Brewing unit can no Brewing unit is not in the basic setting longer be pulled out or > Close the right side door and switch machine on inserted > The brewing unit can be adjusted using the multitool until the brewer can be inserted 55 Brewing temperature See chapter settings > basic settings Grinding degree See chapter other settings Safety Safety Safety instructions At WMF we pay great attention to the product features, to ensure the machine is as safe as possible. The effectiveness of the built-in safety devices is however only guaranteed if the following points are observed: 56 • Carefully read through the user manual before operating the coffee machine. Disregarding the hazard instructions can cause serious injuries and can damage the machine. • Never leave children unsupervised with the coffee machine, since they often do not realise the hazards attendant of using electrical equipment. • When the machine is not in use, and before starting manual cleaning, disconnect it from the mains (unplug it). Let the machine cool down before starting manual cleaning. The same applies when attaching or removing components and accessories. • Do not operate the machine if the mains cable or plug is damaged, or if a fault has developed in the machine or if the machine has been damaged in any other way. The machine must be returned for maintenance and repair to the WMF 1000 Service Center at our Geislingen factory. • Do not allow the mains cable to hang down over the edge of the table or work top. • Do not expose the machine to the effects of weather (frost, damp). Do not use the machine outdoors. • Maintenance and repair work may be performed only by the WMF 1000 Service‑Center at our Geislingen factory, using original spare parts. Hazard instructions Despite all safety devices, hazards remain with every machine if used incorrectly. Please therefore observe the following instructions when using the machine so as to prevent injury and health hazards: Risk of injury! Do not reach into the coffee bean hopper when the machine is switched on and connected to the mains. The mechanical parts in the hopper can cause injuries. Safety Attention! Burning and scalding hazard! The all-in-one spout for hot beverages and milk foam, and the hot water spout become very hot during operation. The liquids that are dispensed and the steam from them are also very hot. Therefore do not touch the components and equipment surfaces in these areas, and do not allow hot liquids and steam to come into contact with you. Attention! Electric shock! Do not allow liquids to enter the inside of the machine casing except within the intended containers. Do not clean the machine using running water, steam cleaners or steam jets. Do not unscrew the machine covers and do not reach into the innards of the machine, even using tools. Attention! Irritant! Health hazard Cleaning and descaling media: • Are irritants and become very hot during execution of the programs. Avoid any contact with these liquids. • Keep away from children and unauthorised persons . • Do not ingest them, nor mix them with other chemicals. • Do not eat or drink whilst using them. • Ensure good ventilation whilst using them. • Thoroughly wash hands and face after using them, even during breaks. • Do not allow plastic parts of the coffee machine to come into contact with the descaling agent. • Take care that no adjacent objects and textiles etc. come into contact with the descaling agent. • Use only and exclusively WMF cleaning and descaling media. Correct use The machine is designed for a maximum of 10,000 brewing cycles during the warranty/ guarantee period. After no later than 10,000 brewing cycles the machine must be serviced at the WMF 1000 Service‑Center at our Geislingen factory. No liability for any damage arising will be accepted in cases of use for improper purposes, connection to incorrect mains supply, incorrect operation, faulty repairs or failure to comply with the above conditions. WMF assumes no liability for damage due to lack of cleaning or descaling or due to the use of other cleaning or descaling agents than those provided by WMF. All guarantee and warranty claims then lapse. The WMF 1000 coffee machine must be used exclusively for preparation of coffee/espresso, milk and hot water. 57 Warranty/Guarantee Warranty/Guarantee During the warranty period the manufacturer, the WMF Württembergische Metallwarenfabrik Aktiengesellschaft, warrants that the product will function faultlessly. The warranty period is two years, during which time a maximum of 10,000 brewing cycles may be performed. The warranty period starts the day the contract of sale of the machine is concluded. If during the warranty period any fault develops on the product, WMF will repair the machine free of charge or exchange the defective parts. Warranty claims are limited exclusively to this liability. Any other claims are excluded from warranty. To validate the claim under warranty, the proof of purchase for the purchase must be produced. Warranty claims are restricted to Germany and are valid only on production of the proof of purchase. To activate the warranty, please return the enclosed warranty card to WMF. Of course this warranty entitlement in no way affects the purchaser‘s statutory rights. Within the warranty period your statutory rights as purchaser to subsequent performance, price reduction, cooling-off period and compensation for damages under §§ 437 ff BGB remain unaffected. The warranty period is fully applicable only if all repairs are performed at the WMF Service‑Center. The warranty entitlement lapses if repairs are performed elsewhere than at the WMF Service Center! No warranty is offered: 58 • for any parts subject to natural wear and tear. • This includes seals, etc. • for faults due to the effect of the elements, scale build-up, chemical, physical, electro chemical or electrical effects unless attributable to fault on the part of WMF. • for faults which occur as a result of failure to follow handling instructions, service and care of the machine • for faults which occur as the result of failure to use original WMF replacement parts or incorrect assembly by the purchaser or by third parties or by faulty or negligent treatment • for faults resulting from improper modifications undertaken without the consent of WMF or from repair or reconditioning work on the part of the purchaser or by third parties • for faults arising from inappropriate or improper use. Improper use of the machine explicitly includes use by the customer of the machine during the warranty period when the machine has performed more than 10,000 brewing cycles. Warranty/Guarantee Name and address of the Warrantor: WMF Württembergische Metallwarenfabrik Aktiengesellschaft, Eberhardstraße, 73309 Geislingen/Steige Claims under warranty should be made directly to the warrantor. 59 Service and Maintenance 24-Month Premium Service and Maintenance WMF 1000 Service‑Center Do you have a question about the operation or function of your WMF 1000 ? Call our WMF service hotline or send us an e-mail. The WMF Service‑Center is the first point of contact, along with your specialist dealer. • Telephone: 0180-2963100 • E-mail: [email protected] If your WMF 1000 requires professional help and your questions cannot be answered on the telephone, we will pick up your coffee machine and repair it in the WMF Service‑Center in Geislingen. Then we will send the machine back to you within 5 days. For warranty claims, this premium service is completely free of charge for two years. Procedure 60 • The machine will be collected during the next working day. • You can specify the time and place to the WMF 1000 Service‑Center when the machine is to be collected. • Prepare your WMF 1000 for shipping, packed in the original carton, and have it ready for pick-up. • Important! The completed service ticket and a copy of the proof of purchase should be available. Service/maintenance/repair in the WMF 1000 Service‑Center This procedure applies only in Germany. Service ticket see page 62 If the location of the WMF 1000 is outside of Germany, please contact the WMF branch office in your country. This procedure applies only in Germany. > Check of the incoming coffee machine > If there is no warranty claim or if the warranty period has expired, you will receive a cost estimate > Repair in our service centre within 3 days of receipt of the coffee machine and after agreement to the cost estimate > After repair, we will return your WMF 1000 promptly via a package service Warranty conditions See page 57 Service and Maintenance WMF 1000 service ticket Don‘t forget to include the completed service ticket and a copy of the proof of purchase in your package. Attention: Handling of shipping of your WMF 1000 occurs via the WMF 1000 Service-Center. The package is collected from your premises. See Service WMF 1000 procedure using the Service‑Center Sent from: Company/name: Street, house number: Post code, town: Telephone: Fax: E-mail: Reason for return Cost estimate If no warranty is applicable. (Place a cross where applicable) by letter by e-mail by fax Repair approval Repair approval up to an amount of Euro Place, date Signature Cut out this service ticket, or copy this page. 62 Service and Maintenance Transport and Disposal of the Coffee Machine • Keep the original packaging for use for transport. • Please empty the water tank, drip tray, filter sets and bean hopper before transporting. • Consult your local authority for options on disposal of the machine at the end of its working life. > This device is subject to the the directive on waste electrical and electronic equipment (WEEE/EU directive) and may not be disposed of as domestic waste. > Further information can be obtained from your local recycling depot or from our WMF 1000 Service‑Center. See WMF 1000 Service‑Center Page 60 63 Accessories and Spare parts Accessories and Spare parts Scope of supply Designation WMF Milk system cleaner (in the polystyrene section) WMF 1000 Documentation (in the envelope: User manual, Brief manual, Warranty certificate, lime hardness test) WMF Water filter cartridge with adapter and fitting instructions (in the water tank) optional WMF 1000 Accessories box with: - Milk nozzle (grey for unrefrigerated milk) - Multitool - WMF Cleaning tablets - Cleaning brush - Small cleaning brush - WMF Sealing ring grease 64 WMF Coffee Lounge Set with: - 1 espresso cup - 1 cappuccino cup - 1 latte macchiato glass Cleaning agents, cleaning solutions and descaling agents are irritants for people, textiles and for the plastic parts of the machine. Strictly comply with the safety instructions on the package. Optional accessories and spare parts You can obtain cleaning media, i.e. WMF milk system cleaner, WMF cleaning tablets, WMF descaler and WMF water filters from your specialist dealer. For cleaning stainless steel surfaces we recommend the WMF stainless steel microfibre cleaning cloth, also available from your specialist dealer. Your enjoyment of coffee will be perfect with the WMF Coffee Lounge set. The WMF brand stands not only for professional coffee machines but for everything that constitutes the entire experience of drinking, eating and cooking. Therefore we have developed the right matching accessories for your WMF 1000. As well as the Coffee Lounge milk container you will receive everything that makes for perfect enjoyment of coffee. Ask your specialist dealer for Coffee Lounge by WMF. Technical Data Technical Data Power rating 2.2 kW Mains power 1/N/PE ~ 50 Hz/230 V Inspections VDE, CE Coffee bean hopper 320 g Variable brewing chamber 6 to 15 g Capacity of water tank 2.8 litres Coffee grounds container approx. 20 portions Height-adjustable all-in-one spout with milk nozzle 75 to 135 mm High-performance pump 15 bar Independent heating systems 2 External dimensions Width 380 mm Height 410 mm Depth 450 mm For maintenance and cleaning, there must be at least 200 mm space on the right side of the machine for brewer disassembly. Weight empty approx. 19.0 kg Weight of brewer 1.2 kg Cable length approx. 1.0 m Item number 03 0500 0001 Manufacturer WMF Group 65 Index Index A Accessories and spare parts 64 Adjusting the height 20 All-in-one spout 20 Automatic switch-on time 23, 29 B Basic settings 29 Beverage buttons 15 Beverage preparation in general 19 Beverage settings 26 Brewing temperature 30, 46 Brief manual 64 Browse 21 Browse forwards with plus 21 Burning and scalding hazard 57 66 Electric shock 57 Error list 53 Error message 53 F Factory settings 28, 30 Fault messages on the display 53 Faults 53 Faults with no display 54 Fill the coffee bean hopper 10 Fill the water tank 8 G General cleaning 45 Glossary 7 Grinding degree 46 C H Calling up the care programs 34 Calling up the care programs when not requested 34 Cancel beverage preparation 19 Care program, general 34 Care programs 33 Change the water filter 38 Cleaning 33 Cleaning program 36 Cleaning the bean hopper 45, 47 Cleaning the brewing unit 43 Cleaning the coffee grounds container 45 Cleaning the drip tray and drip tray grid 45 Cleaning the machine 36 Cleaning the milk system 41 Cleaning the water tank 45 Clean the stainless steel front 45 Coffee Lounge Set 64 Coffee strength for the next beverage 16 Coffee system rinse 35 Coffee system rinse, automatic 13 Commissioning 8 Composition of beverages 26 Connect the milk hose to the milk 10 Correct use 57 Counters 30 Cups 46 Cup size 25 Cup volume 25 Care 33, 47 Hazard instructions 6, 56 Health hazard 57 History of WMF coffee machines 2 Hot water button 19 Hygiene 47 D Date 11, 29 Date/Time 29 Descaling coffee machine 39 Directive on waste electrical and electronic equipment 63 Dispense hot water 19 Dispensing milk 18 Dispensing milk foam 18 Dispensing test 26 Disposal 63 E I Insert the WMF tank filter 8 International specialities 49 Introduction to settings 21 L Language 11, 29 Latte macchiato 47 M Maintenance 60 Manual cleaning 33, 41 manual insert 17 Messages 50 Milk lever down 16 Milk system cleaner 64 Multitool 64 O Off 21, 23 Off/C button 21 Operating buttons 21 Operating messages 50 Operating system 15 Other settings 31 Overview of beverage buttons 15 Overview of care 33 Index P T Parts of the machine 1 P button 21 Plus button 21 Positions of the all-in-one spout 20 Pre-warm the cups 46 Premium service 60 Preparation of coffee beverages 15 Prepare a mug of cappuccino 16 Procedure for premium service 60 Program button 21 Taking apart the all-in-one spout 42 Taste of the coffee 46 Technical Data 65 Test the water hardness 8 This completes commissioning 13 Time 11, 29 Tips and tricks 46 Transport and disposal 63 Types of coffee 46 Types of milk 47 Q U Quantity of coffee beans 46 Unpacking 8 R V Read counters 30 Refrigerated milk 47 Rinse milk system 35 Rinse the water filter 38 Varieties of coffee 47 S Warm-up rinse 35, 46 Warrantor 59 Warranty/Guarantee 58 Warranty certificate 64 Water hardness 12 Water quality 46 WMF service hotline 60 WMF 1000 Service‑Center 60 WMF 1000 service ticket 62 Safety 56 Safety instructions 56 Scope of supply 64 Sealing ring grease 64 Second type of coffee 17 Sequence milk and coffee 28 Settings 25 Settings (basic settings) 11 Setting the automatic switch-off time 23 Setting the grinding degree 31 Setting up 8 Signs 6 Spare parts 64 Special feature for café latte 16 Stand-by mode 23 Storage 46 Switch-off time 29, 30 Switch-on time 23, 29 Switching on the coffee machine 11, 22 Symbols 6 W © 2006 WMF Aktiengesellschaft All rights, especially the rights of reproduction, publication and translation, are reserved. No part of this manual may be reproduced in any form or processed, duplicated or distributed using electronic systems without written consent. Subject to technical alterations. Printed in Germany. 67 Introduction Typ 0500 BAL 05/06 68