1
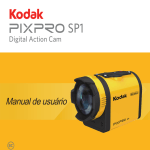
Digital Action Cam
User Manual
SP1
Before You Start
Declaration of Conformity
Responsible Party: JK Imaging Ltd.
Address: 17239 So. Main Street, Gardena, CA 90248 USA
JK Imaging Europe, 71 Clarendon Road, Watford, WD17 1DS, UK
Company Website: http://kodakpixpro.com
For Customers in Canada
This device complies with Industry Canada license-exempt RSS standard(s). Operation is
subject to the following two conditions: (1) This device may not cause interference, and (2)
this device must accept any interference, including interference that may cause undesired
operation of the device.
For Customers in Europe
"CE" mark indicates that this product complies with the European requirements for
safety, health, environment and customer protection. "CE" marked products are intended
for sales in Europe.
This symbol [crossed-out wheeled bin WEEE Annex IV] indicates separate collection
of electrical waste and electronic equipment in the European countries. Please do not
throw the equipment into domestic refuse. Please use the return and collection systems
available in your country for proper, safe disposal of this product.
1
For Customers in the U.S.A.
This equipment has been tested and found to comply with the limits for a Class B digital
device, pursuant to Part 15 of the FCC Rules. These limits are designed to provide reasonable
protection against harmful interference in a residential installation. This equipment generates,
uses and can radiate radio frequency energy and, if not installed and used in accordance with
the instructions, may cause harmful interference to radio communications. However, there is
no guarantee that interference will not occur in a particular installation. If this equipment does
cause harmful interference to radio or television reception, which can be determined by turning
the equipment off and on, the user is encouraged to try to correct the interference by one or
more of the following measures:
-- Reorient or relocate the receiving antenna.
-- Increase the separation between the equipment and receiver.
-- Connect the equipment into an outlet on a circuit different from that to which the receiver is
connected.
-- Consult the dealer or an experienced radio / TV technician for help.
This device complies with part 15 of the FCC Rules. Operation is subject to the following two
conditions:
(1) This device may not cause harmful interference, and (2) this device must accept any
interference received, including interference that may cause undesired operation.
Changes or modifications not expressly approved by the party responsible for compliance
could void the user's authority to operate the equipment.
2
About this Manual
Thank you for purchasing this product. Please read this manual carefully and keep it in a safe
place for future reference.
JK Imaging Ltd. reserves all rights to this manual. No part of this published manual may
be reproduced, transmitted, transcribed, stored in a retrieval system or translated into
any language or computer language, in any form, by any means, without the prior written
permission of JK Imaging Ltd. .
All trademarks mentioned in this manual are used for identification purposes only and are
properties of their respective owners.
This manual provides you with instructions on how to use your new KODAK PIXPRO
Digital Action Cam. Every effort has been made to ensure that the contents of this manual
are accurate. However, JK Imaging Ltd. reserves the right to make changes without notice.
Throughout this manual, the following symbols are used to help you locate information
quickly and easily:
Indicates useful information.
Indicates precautions are to be taken while operating the product.
Indicates long pressing a certain point.
Indicates tap a certain point.
In this manual, digital action cam is referred to as action cam.
3
Safety Notes
Waterproof / Dustproof / Shockproof
/ Freeze-proof
• Do not use or store this product in high
temperature environment.
• JIS / IEC dustproof grade 6 (IP6X).
• Do not expose the lens to strong light
sources (e.g. Daylight, etc.) for extended
periods of time.
• JIS / IEC waterproof grade 8 (IPX8).
• Height for shockproof rating is 2.0m.
• Suitable temperature range for freeze
proof capability is -10°C and above.
Product Notes:
• Do not disassemble or repair the product
by yourself.
• Do not heavily drop or knock this product.
Improper handling may damage this
product.
• Avoid touching the lens cover and
lens element please use professional
lens cleaning paper together with lens
cleaning agents to wipe the lens and
keep the lens clean.
• Do not use corrosive, alcoholic or
organic-solvent-containing cleaners to
wipe this product.
4
• Do not use or store the product in strong
magnetic field environment.
• If the product is quickly transferred from
a low temperature environment to a
high temperature environment, water
condensation may occur in the product
due to physical changes. In this case, it
is recommended to wait until the product
returns to room temperature before you
turn it on.
• If a photo or video cannot be played back
due to human-caused improper operation,
the Company shall assume no liability or
responsibility for compensation.
• Store the product in a dry and clean
environment when you are going to store
the product for a long period of time.
Waterproofing Notes:
• Do not use the product below 10 meters
(32.8 feet) underwater. The product will
remain waterproof for one hour at the
depth of 10m (32.8 feet).
• Do not use this product in a geothermal
spring or in water at a temperature
greater than 40 °C.
• Please do not open the rear cover
underwater.
• If water accidentally comes in contact
with the product, please do not open the
rear cover immediately. Turn the product
off, and dry it with a clean, dry and lint
free cloth. Then open the rear cover, and
remove the battery and the memory card.
• When opening the rear cover, if there
are water drops on the contact surface
between the inside of the rear cover and
the body, please dry the water drops.
• After using the product in water or near
sand, mud or other foreign materials,
please rinse it with clean water (close the
rear cover when cleaning). After cleaning,
dry the product with a clean, dry and lint
free cloth.
• If there is dust, sand or other foreign
materials on the waterproof rubber of the
rear cover and its contact surface, please
wipe it with a clean, dry and lint free cloth
as soon as possible.
• Before using the product underwater,
make sure that there is no damage to or
foreign debris on the waterproof rubber
gasket. Then close the rear cover tightly
to ensure the waterproof capability of the
product.
Waterproof rubber with scratches and
cracks will allow water to penetrate into
the product. Contact customer service
immediately for maintenance with
replacement of new waterproof rubber.
Rear Cover
Waterproof Rubber
5
Battery Notes:
• Use only the battery specified for this
product.
• If the battery overheats during charging
or use, stop charging or use immediately.
Turn off the product, remove the battery
carefully, and wait until it cools down.
• Do not heat the battery or throw it into a
fire to avoid a possible explosion.
• Please keep the battery contacts clean
and dry.
• When the product is stored for a long
period of time, please remove the battery.
• Please install the battery according to the
positive and negative markings on the
battery compartment. Never force it into
the battery compartment.
• Do not store the battery in a hot
environment.
• In colder environments, the performance
of the battery may be noticeably reduced.
• If battery fluid leaks into the product,
please contact your retailer. If battery
fluid leaks onto your skin, rinse your skin
immediately with clean water and seek
for medical attention.
• Do not attempt to disassemble the
battery.
• To prevent the battery from being
damaged, do not drop the battery, impact
it with heavy objects or scratch it with
sharp objects.
6
• Do not let the battery come in contact
with metal objects (including coins)
to avoid short circuiting, discharging,
excessive heat, or possible leakage.
• Disposal of used batteries should be
carried out in accordance with the local
(national or regional) regulations.
Memory Card Notes:
• The memory card referred to in this
manual is Micro SD Card or Micro SDHC
card.
• Please buy a genuine memory card of a
well-known brand.
• Please keep the memory card clean and
dry.
• When inserting a memory card, make
sure the notch direction of the card
matches the notch direction of the
memory card mark near the card slot. Do
not force the memory card into the card
slot.
• Before using a brand new memory card,
please format the memory card first.
• Do not directly edit the data on the
memory card. Copy the data to your
computer disk before editing.
• Do not modify the names of the files or
folders on the memory card using your
PC. Modifying the name of the files or
folders may cause the files to not be
recognized by the product or possibly an
error may occur.
• Please turn the product off before
removing the memory card. Otherwise,
the memory card could be damaged.
• When the product is stored for a long
period of time, please backup the data
on the memory card and remove the
memory card for storage.
• A photo or video taken with the product
will be stored in the folder that is
automatically generated on the memory
card. Do not store photos or videos that
are not taken using the product in these
folders in case that the files cannot be
normally recognized in playback.
7
Other Notes:
• Do not disconnect the power or turn the
product off during the update process.
Doing so may cause incorrect data to be
written and the product may not power on
later.
• When using your product on an airplane,
observe the relevant rules specified by
the airline.
• Due to the limitations of manufacturing
technology, the LCD screen may have a
few dead or bright pixels. These pixels
do no effect the quality of the photos or
video.
• If the LCD screen is damaged, pay
particular attention to the liquid crystal
in the screen. If any of the following
situations arise, take the recommended
immediate action indicated below:
1. If liquid crystal comes in contact with
your skin, please wipe with a dry cloth,
wash thoroughly with soap, and rinse
with plenty of clean water.
8
2. If liquid crystal gets into your eye, flush
the eye immediately with plenty of
clean water for at least 15 minutes and
then seek for medical assistance.
3. If liquid crystal is swallowed,
immediately flush your mouth
thoroughly with clean water and induce
vomiting. Seek for medical assistance.
Contents
Before You Start.....................................................................1
Safety Notes...........................................................................4
Contents.................................................................................9
Getting Ready........................................................................13
Accessories Included.........................................................................................13
Part Names........................................................................................................15
Installing and Dismantling the Lens Cover........................................................18
Installing Battery and Memory Card..................................................................20
Charging............................................................................................................ 22
Introduction to Various Button Functions...........................................................23
9
Operation Method...................................................................25
Turn On / Off......................................................................................................25
Set your Language, Date and Time after the first power-on.............................. 26
LCD Screen Display..........................................................................................27
Introduction to Basic Operation of Recording and Shooting.............................. 28
LCD Screen Display under Playback Status.....................................................30
Introduction to Basic Operation of Playback......................................................31
Introduction to the Setting Mode of Menu Options............................................ 36
Menu Introduction..............................................................................................37
Introduction to General Settings........................................................................38
10
Introduction to Mode Settings............................................................................43
Movie Settings Introduction...............................................................................44
Still Settings Introduction...................................................................................51
AP Settings Introduction....................................................................................54
Connecting the Camera with the Smart Device..................... 57
Download and Install App..................................................................................57
Establish a Connection......................................................................................58
Smart Device APP Operating Method....................................59
Position Service Function..................................................................................59
Remote Viewfinder............................................................................................59
11
Playback............................................................................................................ 67
Connection Port Introduction..................................................82
Connect a Computer..........................................................................................82
HDMI Connected TV Output..............................................................................84
Appendices.............................................................................85
Specifications.....................................................................................................85
Prompts and Warning Messages.......................................................................88
Trouble Shooting................................................................................................92
Special Accessories...............................................................93
12
Getting Ready
Accessories Included
Your product box should contain the product you purchased along with the following
accessories. If anything is missing or appears to be damaged, please contact your retailer.
(Based on sales in different countries or regions, the shape of the AC adapter will vary. The
actual product will prevail.)
Quick St
art Gui
de
Quick Start Guide
Rechargeable
Li-ion Battery
STOP
Service Card
Warranty Card
AC Adapter
CD-ROM
USB Cable
13
Standard Lens Cover
Underwater Lens Cover
Standard Lens Cover has been installed on the product when leaving factory.
14
Part Names
1
6
1
Alignment Point
2
Standard Lens Cover
3
Microphone
2
4
Speaker
3
5
Lens Cover Ring
6
LCD Screen
5 4
15
7 8 9 10
13 12
15 14
16
11
7
Video Recording Button /
Shooting Button
8
Status Indicator
9
Menu Button /
Direction Button (Upper)
10
Power Button / Delete Button
11
Lens Cover Buckle
12
OK Button
13
Playback Button /
Direction Button (Lower)
14
Tripod Socket
15
Location Hole
17
16
18
16
Rear Cover Open Switch
17
Rear Cover
18
Rear Cover Lock
19
Battery Lock
20
Battery Compartment
21
HDMI Port
22
Micro SD Card Slot
23
USB Port
Rear Cover Open Status
20
19
21
22
23
17
Installing and Dismantling the Lens Cover
Two types of replaceable lens covers are
provided for the product.
Standard Lens Cover:
Applicable for general use. Do not use
underwater.
Visual angle in the air is about 160°. Will not
focus underwater.
Steps for dismantling the lens cover:
1. Hold the product with your left hand, and
pull the lens buckle with your finger to the
left end as illustrated in the picture. Hold
the lens cover ring with your right hand
and rotate to the OPEN arrow direction.
2. When three alignment points are in a
straight line, loose your left hand from the
lens buckle, and remove the lens cover
from the right with your right hand.
①
Alignment Points
Underwater Lens Cover:
Applicable for use in water.
Visual angle in the air is about 130°, and
visual angle in water is about 90°.
18
②
Steps for installing the lens cover:
1. Hold the product with your left hand, and
pull the lens buckle with your finger to the
left end as illustrated in the photo, hold
the lens cover ring with your right hand.
Please select appropriate lens cover
when taking videos and pictures,
otherwise it will affect the image effect.
2. When three alignment points are in a
straight line, buckle the lens cover to the
lens, and rotate against the OPEN arrow
direction.
When the product is exposed
to fluctuations in temperature,
condensation may form on the inside
surface of the lens cover. If this
happens, remove the lens cover, clean
it with a soft, dry, lint-free cloth, and
then reinstall the lens.
3. When the notch of the lens cover ring
is aligned with the lens buckle, loose
your left hand from the lens buckle, and
remove your right hand from the lens
cover.
①
②
19
Installing Battery and Memory Card
1. Open the rear cover
First, set the rear cover lock to the right,
and push the open switch of the rear
cover downward. Then rotate the rear
cover around the shaft direction to open
upward.
①
②
20
2. Insert the battery into the battery
compartment according to the negative
and positive directions as illustrated in
the following picture.
3. Insert the memory card into the card slot
according to the direction illustrated in
the picture when the product is turned
off. When inserting a memory card,
make sure the notch direction of the
card matches the notch direction of the
memory card over the card slot. Do not
force the memory card into the card slot.
4. Close the battery cover
First, rotate the back over around the
shaft direction to close upward. The rear
cover will “click” when tightly closed.
Finally, move the rear cover lock to the
left.
Memory card (refers to Micro SD card
or Micro SDHC card) is optional, which
is not included in the product package
and needs to be purchased separately.
Please purchase a genuine memory
card with a storage capacity range
of 4GB to 32GB, in order to ensure
the safe preservation of data. It is
recommended to use a memory card
of Class 4 or higher.
To remove the memory card, please
open the rear cover and gently push
the memory card. After it is ejected,
remove the card carefully.
The product will automatically turn
off if the memory card is inserted and
extracted when the product is on.
21
Charging
Please charge after the product is turned off.
1. Connect the product to the AC adapter
with a USB cable.
2. Then insert the plug of the AC adapter to
the power outlet for charging.
3. You can also connect the product to your
computer with a USB cable to charge the
battery. If you press and hold the power
button
during charging to turn off the
product, the charging will be stopped.
Charging indicator:
Red flash: Charging
The indicator will go out once charging
is finished, and the Action Cam will be
powered off automatically.
To have maximum battery life, charge
the battery for at least 4 hours the first
time.
After the battery is stored for a long
period, use the supplied AC adapter to
charge the battery prior to use.
22
You may use external power supplies
(output voltage of 5V, output current
of 1A), namely vehicle power supply
or mobile power pack to charge the
product.
Please charge the battery indoors
between 0°C and 40°C.
If connected to the computer USB port
of 100mA, the product will have no
response due to insufficient power.
Introduction to Various Button Functions
Viewfinder status refers to viewfinder of recording and shooting.
To save power, if the product is not operated for a period, it will automatically enter the
LCD off status. Press any button can wake LCD.
Button
Name
Power Button /
Delete Button
Menu Status
Viewfinder Status
Recording
No action
Display all information when the
it is hidden
No action
Press and hold: turn off the product
OK Button
Confirm selection
Recording mode /
Shooting mode switch
No action
Menu Button /
Direction Button (Upper)
Switch upward
Enter menu
No action
Playback Button /
Direction Button (Lower)
Switch downward
Enter single photo status
No action
Video Recording Button /
Shooting Button
Enter viewfinder status
(except Wireless feature)
Start recording /
Shooting a photo
Stop recording
In the viewfinder status, when the Motion detection or Time Lapse function is set to be
enabled, press
to enter the state of preparing for video recording.
23
Movie Playback
Button
Name
Single Photo
Playing Back
Delete
Fast Forwarding /
Rewinding
Pausing
Back to the initial state of the movie
Power Button /
Delete Button
Press and hold: turn off the product
24
OK Button
Photo file: no action
Movie file: start playback
Pause
Normal speed
playback
Continue to
play back
Menu Button /
Direction Button (Upper)
Previous File
Rewind
Rewind
Previous
Frame
Playback Button /
Direction Button (Lower)
Next File
Forward
Forward
Next Frame
Video Recording Button /
Shooting Button
Enter viewfinder status
No action
Operation Method
Turn On / Off
Turn on:
When the power is off, press and hold
for more than 2 seconds to turn on the product;
for more than 2 seconds to turn on the product and enter the playback
or press and hold
status.
Turn off:
When the power is on, press and hold
for more than 2 seconds to turn off the product.
If the product cannot be turned on / off normally, you can remove the battery for forced
power cut.
25
Set your Language, Date and Time after the first power-on
1. Press and hold the
2.Press
or
3. After pressing
setting screen;
to turn on the product and enter the language selection screen;
to select language;
button to select desired language, the product will enter「Date / Time」
or
to adjust the date and time display format, and press
4.Press
display format;
5. In the date and time options, press
6. After confirming, automatically go to
status.
or
to adjust the values, and press
, and press
to confirm;
to confirm, and enter the viewfinder
Date / Time
2013 0 7 1 2
H-M 00 : 00
26
to confirm the
LCD Screen Display
8.
5M
9.
10.
1.
2.
3.
00:01:23
SD
4.
11.
12.
13.
5.
I N SD
6.
7.
1. Mode Display
8. Movie Size Display
2. Time Lapse Display
9. Still Size Display
3. Burst Shot Display
10. Field of View Display
4. White Balance Display 11. Remaining Recording
Time Display / Number of
5. Loop recording
remaining shots Display
Display
6. Wind Cut Display
7. Motion detection
Display
Some icons will automatically hide
after a 2 second display. Press
to display all current setting
Message.
Indicates 16:9 display range.
12. Battery Status Display
13. Internal Memory /
Memory Card Display
Indicates 4:3 display range.
27
Introduction to Basic Operation of Recording and Shooting
1. Enter the viewfinder status mode, and press
shooting mode;
to switch between recording mode and
2. Align the lens to the object to be recorded, and press
3. Under the recording mode, repress the
00:56:00
SD
1234
SD
28
for recording or shooting;
to stop recording.
00:01:23
Under shooting mode status, when the product detects a human face, a green focus frame will
appear. When two or more human faces are detected, a green main focus frame and a white
secondary focus frame will appear.
When the product rotates around the lens axis for 180°, the display screen on the LCD is
positive display.
When in still and video record mode, the LCD may turn off to save power. Pressing
will turn on the LCD and immediately initiate / terminate recording. Pressing any other
button will only turn on the LCD.
29
LCD Screen Display under Playback Status
12.
1/1234
1/1234 SD
3.
IN
SD
4.
1.
5.
7.
6.
8.
00:01:23
9.
10.
2013 07-20 12:21
11.
2.
13.
14.
00:01:23
2013 07-20 12:21
1. Movie Display
10. White Balance Display
2. Field of View Display
11. Time Lapse Display
Some icons will automatically
hide after a 2 second display.
3. Memory Card or Internal
Memory Display
12. Display of Current number
of Shots / Total Number of
Shots
Only displayed when
playing back the movie file.
4. Battery Status Display
5. Loop recording Display
6. Burst Shot Display
7. Movie Size Display
8. Still Size Display
30
5M
9. Motion detection Display
13. Movie Time Length
Display
14. Shooting Time and Date
Display
Indicates 16:9 display
range.
Indicates 4:3 display
range.
Introduction to Basic Operation of Playback
Single Photo:
1. When in viewfinder status mode, press
pictures;
to enter the playback status of video and
2. Display movie or picture files on the LCD screen;
or
3.Press
memory.
Press
to view the movies or pictures stored in the memory card or internal
to return to the viewfinder status.
When the memory card is inserted, only files in the memory card will be displayed, files
on internal memory will not be available to display.
If there are no files in the memory card or internal memory, a no image warning window
will appear.
?
31
Movie Playback:
1. Select movie to be played back, and press
to start movie playback.
00:00:47
00:01:23
2. When playing back the movie, an operation guidance will appear on the screen. You can
press buttons to perform the corresponding functions.
32
Press
: Movie playback rewind, multiple presses will fasten the speed: x2 / x4 / x8 / x16
Press
:M
ovie playback forward, multiple presses will fasten the speed: x2 / x4 / x8 / x16
Press
:U
nder normal playback mode, the movie playback will be paused; under the
forward, rewind or pause status, normal speed playback will be recovered
Press
: Movie playback back to the initial state
Movie playback rewind or forward:
00:00:47
00:01:23
00:00:47
00:01:23
Movie playback pause:
There will be no sound output during rewinding or forwarding.
33
Movie or Picture Delete:
1. Select the movies or photos to be deleted, and press
to enter the Delete screen. Press
or
to select 「Delete」, and press
to confirm.
2. After a movie or a photo is successfully deleted, the LCD will display the next movie or
photo. If you wish to delete additional files, please continue per item 1 above.
3. If you want to exit the Delete screen, select 「Exit」, and press
*KRKZK
+^OZ
00:01:23
Movie and / or pictures cannot be restored after being deleted.
A protected file cannot be deleted.
34
to confirm.
Rotation:
The direction sensor comes with the product can automatically adjust the direction during file
playback according to the rotating direction detected during shooting, in order to ensure that
what you see are positive images.
The direction of rotation refers to the direction rotating around the lens center clockwise
or counterclockwise. Only when the direction sensor detects that the product has rotated
for 180°, the rotation feature is effective. Rotation of 90° or 270° is invalid.
The product will record the detected 180 ° rotation information in a file. When you use a
player supporting rotation tag identification (such as Quick Time) for playing, the image
can be automatically converted to positive.
35
Introduction to the Setting Mode of Menu Options
1. Under the viewfinder status, press
to enter first-level menu interface of the menu;
2.Press
or
to select「Mode Settings」, 「Movie Settings」, 「Still Settings」, 「AP
Settings」 and 「General Settings」;
3.Press
to confirm, and to enter the corresponding secondary level menu interface;
4. Select items with * on the secondary level menu, and press
tertiary menu interface;
to confirm and to enter the
5.Select 「Movie」 or 「Shot」 or 「Exit」 in the secondary menu, and press
back to the first level menu interface.
In the menu interface (except for the Wireless connecting status), press
the viewfinder status.
36
confirm to
to return to
Menu Introduction
First Level
Mode
Menu
Settings
Secondary
Level
Menu
Movie Settings
Still Settings
AP
Settings
General Settings
Movie
* Movie Size
* Still Size
* Sound Settings
Shot
* Time Lapse
* Burst Shot
* Power Off
* Loop recording
* Field of View
* Wireless Power
Saving
* Field of View
* White Balance
* Date / Time
* Motion detection
Exit
* Language
* Wind Cut
* Format
* White Balance
* Copy to Card
Exit
* Reset Settings
* FW Version
Exit
37
Introduction to General Settings
10 options in the 「General Settings」 of the
first level menu:
• 「Sound Settings」
There are 4 options in the 「Sound
Settings」:
• 「Power Off」
•
Volume 1
• 「Wireless Power Saving」
•
Volume 2
• 「Date / Time」
•
Volume 3
• 「Language」
•
Off
• 「Format」
Power Off
• 「Copy to Card」
• 「Reset Settings」
Power Off means the product will
automatically shut down after 60 seconds
after the LCD is off.
• 「FW Version」
There are 2 options in 「Power Off」:
• 「Exit」
38
Sound Settings
•
Off
•
60 seconds
The Power Off will be invalid during
recording, movie playing back and
wireless connecting.
Wireless Power Saving
Date / Time
Date and time can be set during the first
power on cycle. If you wish to change the
date or time thereafter, please operate as
the following.
Wireless Power Saving mode means that
after 30 seconds of remote-controlled
recording with the APP, the wireless
connection will automatically disconnect, but
the product will continue to record. Wireless
power saving mode will prolong battery life.
1. Enter the 「Date / Time」in the
secondary level interface and press
confirm;
There are 2 options in 「Wireless Power
Saving」:
3. In the date and time options, press
to adjust the values, and press
confirm;
•
Off!
Off
•
ON!
Enable
to
or
to adjust the date and
2.Press
time display format, and press
to
confirm the display format;
or
to
4. After the setting is completed, select
, and press
to confirm and back to
「Date / Time」in the secondary level
interface;
5.Press
status.
to return to the viewfinder
39
Language
Format
The language can be set during the first
power on cycle. If you wish to change the
language thereafter, please operate as the
following.
Format can clear all data stored in the
memory card or memory (including protected
movies and photos).
1. Enter the 「Language」 in the secondary
to confirm;
level interface and press
2. Press
or
to select language;
to confirm and back to
3. Press
「Language」 in the secondary level
interface;
4. Press
status.
40
to return to the viewfinder
There are 2 options in 「Format」:
•
Cancel
•
Confirm
When a memory card is inserted, only
the card can be formatted. If you need
to format the internal memory, remove
the memory card first.
Copy to Card
Reset Settings
Copy to Card is to copy the files in the
internal memory to the memory card
Reset Settings can recover all product
settings to the factory defaults.
There are 2 options in 「Copy to Card」:
There are 2 options in the 「Reset
Settings」:
•
Cancel
•
Confirm
•
Cancel
•
Confirm
When the memory card cannot be
detected by the product, options will
not be displayed on the 「Copy to
Card」 interface.
41
FW Version
FW Version can display the current version.
When a new version is stored in the memory
card, the firmware can be updated.
There are 2 options in 「Update
firmware? 」:
•
Cancel
•
Confirm
Update Firmware?
New Ver:
x.xx
42
The following operation needs to be followed
to update the firmware:
1. Enter the FW Version interface, and
to enter the tertiary level
press
menu「Update the firmware? 」. LCD
will display 「New version: X.XX」;
, and press
to confirm. The
2.Select
product will start to update;
3. Whether the update is successful or
failed, the product will automatically shut
down.
If the low battery warning is displayed,
charge the battery before updating the
firmware.
Introduction to Mode Settings
2 options in the 「Mode Settings」 of the
first level menu:
•
「Movie」: for recording movies
•
「Still」: for shooting photos
Mode Settings method of operation:
1. After selecting
to confirm.
or
options, press
2. Press
to enter the viewfinder status,
and display your selected
or
status.
Under the viewfinder status, directly
or
status
press , to perform
switch.
43
Movie Settings Introduction
There are 8 options in First Level menu
「Movie Settings」:
• 「Movie Size」
• 「Time Lapse」
• 「Loop recording」
• 「Field of View」
• 「Motion detection」
• 「Wind Cut」
• 「White Balance」
• 「Exit」
Movie Size
Movie Size refers to the image resolution
during recording.
There are 7 options in「Movie Size」:
• 「1080p30」
: 1920×1080 (30fps)
• 「960p50」
: 1280×960 (50fps)
• 「960p30」
: 1280×960 (30fps)
• 「720p60」
: 1280×720 (60fps)
• 「720p30」
: 1280×720 (30fps)
• 「WVGA60」
: 848×480 (60fps)
• 「WVGA120」 : 848×480 (120fps)
When selecting 「WVGA120」,
the product shoots ultra high speed
movies, and plays back with normal 30
fps speed, in order to capture visually
indistinguishable moments easily.
When selecting 「WVGA120」,
the maximum recordable time is 60
seconds, when the time reaches 60
seconds, the product will automatically
stop recording and return to the
viewfinder state.
44
When selecting 「WVGA120」, the sound cannot be recorded.
When selecting 「WVGA120」, 「Time Lapse」, 「Loop recording」or「Motion
detection」 cannot be enabled.
When selecting「WVGA60」, 「Time Lapse」 or 「Loop recording」 cannot be
enabled.
The maximum recording time of a 4GB memory card:
Memory card volume
The maximum recording
time is about
1080p30
4GB
32 minutes
960p50
4GB
32 minutes
960p30
4GB
50 minutes
720p60
4GB
35 minutes
720p30
4GB
64 minutes
WVGA60
4GB
64 minutes
WVGA120
4GB
35 minutes
Movie Size
45
Time Lapse
Time Lapse enables the recording of an
interval of time, and splices the frames
together to present a condensed video
which usually requires a long period of time
to complete.
There are 7 options in 「Time Lapse」:
•
Off
•
1 second
•
2 seconds
•
5 seconds
•
10 seconds
•
30 seconds
•
60 seconds
Time Lapse method of operation:
1. After selecting Time Lapse time, press
to back to the viewfinder status. LCD will
display corresponding icons;
46
2. Press
, the LCD will display red font
time countdown;
3. Press
again to finish recording.
09
00:00:01
Movie Size cannot be selected as
WVGA120 or WVGA60.
The sound cannot be recorded.
When Loop recording or Motion
detection is enabled, the Time Lapse
feature cannot be used.
Loop recording
Loop recording allows for the recording of
independent segments of movies according
to selected time length from the beginning of
recording. The product will continually record
movies of the length selected until the
record button is pressed to end recording.
When the memory card is full, the product
will overwrite the recorded files starting from
the first movie circularly.
00:00:23
There are 3 options in 「Loop recording」:
Movie Size cannot be selected as
WVGA120 or WVGA60.
•
Off
•
5 minutes
•
10 minutes
Loop recording method of operation:
1. After selecting Loop recording time,
to return to the viewfinder
press
status. LCD will display corresponding
icons;
2. Press
to start recording;
3. Press
again to finish recording.
When Time Lapse or Motion detection
is enabled, the Loop recording feature
cannot be used.
Loop recording feature can only be
used when there is a memory card in
the product.
Turn off the product when the Loop
recording function is enabled and then
restart the product. You’ll find the Loop
recording function is still enabled.
47
Field of View
Motion detection
Field of View means the image receiving
angle for the product.
Motion detection means that if the product
detects moving objects entering into the
LCD screen, it will automatically start
recording. During the recording process, if
there is no moving object detected for 10
continuous seconds, the recording will be
automatically paused.
There are 4 options in 「Field of View」:
•
Ultra Wide
•
Medium
•
Narrow
•
Water Ring
Field of View method of operation:
1. After selecting the Field of View angle,
to return to the viewfinder
press
status. LCD will display corresponding
icons;
48
2. Press
to start recording;
3. Press
again to finish recording.
Medium or Narrow can only be
selected when the Movie Size is set
to 「1080p30」. If a Movie Size other
than 「1080p30」is selected under
Medium or Narrow status, the product
will automatically set the Field of View
to Ultra Wide.
There are 2 options in 「Motion detection」:
•
Off
•
Enable
Motion detection method of operation:
1. After the Motion detection is enabled,
press
to back to the viewfinder status.
LCD will display corresponding icons;
2. Press , if the product detects moving
objects, it will automatically start
recording;
3. The product will stop recording when
there is no change in the image within
10seconds;
4. When the image changes again, the
product will start recording automatically,
and this time it will regenerate a video
file;
5. During recording, you may press the
to stop recording.
When the Motion detection feature
is enabled, Time Lapse or Loop
recording setting cannot be performed.
When the memory card is full, ① will
become red font and flashes for 2
seconds.
15:00
00:00:00
00:00:00
Movie Size cannot be selected as
WVGA120.
Motion detection interface icon:
①Indicates the total time of
recording
②Indicates the time of the product
③Indicates the total time from the
beginning of recording
②
③
15:00
00:00:01
00:00:01
①
49
Wind Cut
White Balance
Wind Cut refers to the reduction of noise
caused by wind.
White Balance means that the user adjusts
the color temperature under different light
sources to ensure that the colors are
reproduced correctly.
There are 2 options in 「Wind Cut」:
•
Off
•
Enable
There are 5 options in 「White Balance」:
Wind Cut method of operation:
1. After the Wind Cut is enabled, press
to return to the viewfinder status. LCD will
display corresponding icons;
2. Press
to start recording;
3. Press
again to finish recording.
00:56:00
SD
50
•
AWB
•
Daylight
•
Cloudy
•
Fluorescent
•
Underwater
White Balance method of operation:
1. After the White Balance is enabled, press
to return to the viewfinder status. LCD
will display corresponding icons;
2. Press
to start recording;
3. Press
again to finish recording.
Still Settings Introduction
There are 5 options in First Level menu 「Still Settings」:
• 「Still Size」
• 「Burst Shot」
• 「Field of View」
• 「White Balance」
• 「Exit」
51
Still Size
Burst Shot
The Still Size indicates the number of pixels
used to capture the images. A photo having
higher image resolution contains more details
and is capable of better meeting big-screen
fine photo printing requirements.
Burst Shot allows ten photos to be captured
continuously one single time before auto
pause.
There are 3 options in 「Still Size」:
• 「14MP」 : 4320×3240(4:3)
• 「10MP」 : 4320×2432(16:9)
• 「5MP」 : 2592×1944(4:3)
Number of photos that can be stored on a
4GB memory card:
Memory card
volume
Approximate
maximum
number of
images
14MP
4GB
913 shots
10MP
4GB
1211 shots
5MP
4GB
2398 shots
Still Size
52
There are 2 options in「Burst Shot」:
•
Off
•
Enable
Burst Shot method of operation:
1. After Enable in Burst Shot is selected,
to return to the viewfinder
press
status, LCD will display corresponding
icons;
to enable Burst Shot shooting. It
2. Press
will stop after 10 photos are taken.
Field of View
White Balance
Field of View means the image receiving
angle range of the product.
White Balance means that the user adjusts
the color temperature under different light
sources to ensure that the colors are
reproduced correctly.
There are 4 options in「Field of View」:
•
Ultra Wide
•
Medium
•
AWB ( Auto White Balance )
•
Narrow
•
Daylight
•
Water Ring
•
Cloudy
•
Fluorescent
•
Underwater
Field of View method of operation:
1. After selecting the Field of View angle,
to return to the viewfinder
press
status. LCD will display corresponding
icons;
2. Press
to shoot.
When the image size is set to「5MP」,
Medium and Narrow cannot be
enabled.
There are 5 options in 「White Balance」:
White Balance method of operation:
1. After an option of the White Balance
to return to the
is selected, press
viewfinder status. LCD will display
corresponding icons;
2. Press
to shoot.
53
AP Settings Introduction
The action cam can be wirelessly connected
with your smart device.
5. The action cam and the smart device can
only be connected one to one.
Please review the following items before your
first connection:
6. When the smart device judges the
system to be out of memory, the App will
not be able to run normally. Please clean
up the memory of the smart device.
1. Your smart device system version needs
to be iOS 7 or higher and Android 4.2 or
higher. If not, please upgrade your smart
device system version.
2. Please do not use in places having high
intensity magnetic field, electrostatic and
electric wave interference (for example
near a microwave oven), which may
cause failure in receiving signals.
3. Please maintain a distance between the
action cam and the smart device less
than 10 meters (32.8 feet) without signal
shielding interference.
4. Please do not use wireless connection
functionality on a plane.
54
7. When the temperature of the battery is
higher than 68 °C :
① AP setting cannot be enabled;
② Wireless connection will be
automatically disconnected.
Connection setting method of the
product and the smart device:
Step 1: setting up the product
1. Press
in the viewfinder status, select
「AP Settings」, and press
to enable
wireless connection function so that the
SSID interface in 「AP mode」 appears.
SSID and WPA2 password messages are
displayed in the interface.
AP mode
SSID:PIXPRO-SP1_1234
WPA2-PSK:12345678
Step 2: setting up the smart device
1. Enable the wireless function of the smart
device to search surrounding wireless
devices;
2. Select the name of the action cam to be
connected (PIXPRO-SP1_XXXX), and
input the eight-digit digital password
displayed next to WPA2-PSK on the
action cam;
3. Download the special APP installation
package (APP name: PIXPRO SP1) from
the device appropriate APP store, and
install;
4. Click the icon of the APP
the APP.
to enable
Step 3: set up completion
Wireless connection process takes
about 30 seconds. At this moment,
except for
, other buttons are
deactivated.
1. Once the APP is connected to the
action cam, functional operations can
be enabled on the smart device. If there
is a need to interrupt the connection,
press
, so that the selection interface
appears, select
, press
, interrupt
connection, and return to the SSID
interface;
55
AP mode
3. If there is a need to turn off wireless,
press
button or press
after
selecting
in the SSID interface so
that the selection interface appears.
Select
, press
to turn off wireless.
AP mode
2. If connect APP failed, press
to return
to the SSID interface, select
, press
, so that the selection interface
appears, select
, press
. This
will change the WPA2 password. Next,
perform connection operation again on
the smart device;
56
Connecting the Camera with the Smart Device
Download and Install App
Please download App installation package (App name: PIXPRO SP1)
from the path below and install it.
to your smart device
• Android system
For Android devices, search and download the App “ PIXPRO SP1” in Google play, and
install it following the instructions on the interface.
https://play.google.com/store/Apps/details?id=com.
jkimaging.pixproremoteviewer
• iOS system
For Apple devices, search and download the App “ PIXPRO SP1” in App store, and install it
following the instructions on the interface.
https://itunes.Apple.com/us/App/pixpro-remote-viewer/
id833154167?mt=8
After successful installation, this icon
will appear on the smart device screen.
57
Establish a Connection
Wi-Fi Connections (iOS System and Android System)
To optimize Wi-Fi performance, please close other unnecessary programs running on
the smart device.
to enter
For an Android system smart device, you can directly tap the App icon
the "Select connecting device" screen. Select the SSID name of the camera to be
connected, enter an eight-digit password, and tap "Connect".
If connection fails, tap
to try to reconnect.
Connection Failed!
XXXXXXXXXXXXXXXXXXXX
•XXXXXXXXXXXXXXXXX
•XXXXXXXXXXXXXXXXXXXXXXXXXXXXXXX
XXXXXXXXXXXX
•XXXXXXXXXXXX
•XXXXXXXXXXX
•XXXXXXXXXXXXXXXXX
58
When it is unnecessary to connect to the camera or unable to connect the camera, tap
the icon
on the screen of the smart device to perform related operations under the
playback mode of the smart device.
Smart Device APP Operating Method
Position Service Function
When connected successfully, you can
) to start it. Enable
tap the App icon (
the GPS function on the smart device by
following the prompts on the interface,
PIXPRO SP1 can record GPS location on
picture files. This function is not available for
video files.
Remote Viewfinder
After finishing setting position service, the
App will enter the viewfinder interface.
Camera functions can be accessed from this
screen.
On the Remote Viewfinder interface,
White balance icon to hide, and
tap
tap
to restore display.
1234567
1234567
59
Remote Viewfinder Interface
Shooting Interface
Movie Interface
11121214
56 7
4
3
1234567
12:34:56
8
2
1
10
60
9
15
1
Shooting mode
6
Image size
11
Movie size
2
Angle
7
Number of photos
that can be taken
12
Recordable video time
3
White balance
8
Quick Review
13
Pixel ratio
4
Menu
9
Playback mode
14
Frame rate
5
Battery state
10
Shutter
15
Start video recording
Stop video recording
/
Parameter Settings
Tap the icon to enter the selection screen, and tap any of the options to confirm
selection.
Shooting Mode
There are 3 options:
1234567
Continuous Shot
It can take several photos at a time.
Movie Mode
Enables video recording.
Auto Mode
Enables photo shooting.
61
White balance
The WB function allows the user to adjust color temperatures under different light sources, so
as to confirm that the color can be presented properly.
There are 5 options:
1234567
•
AWB
•
Daylight
•
Cloudy
•
Fluorescent
•
Underwater
Angle
Field of view sets the viewing angle.
There are 4 options:
62
•
Ultra Wide
•
Medium
•
Narrow
•
Water Ring
1234567
Menu
Tap
to show a settable menu. Tap the menu items to be set to enter the item options
to return to the Remote Viewfinder
screen. Tap options to return to the menu screen. Tap
screen.
Menu
Menu
1234567
Tw o liSize
ne item
Image
S econdary text
14M
Tw
o line
Moive
Sizeitem
S econdary
text
FHD
16:9 30p
Tw o liCapture
ne item
Touch
S econdary text
On
Touch Capture
About
On
Tw o line item
S econdary text
Tw o line item
S econdary text
One line item
One line item
Image Size
Set photo resolution.
Icon
Pixel ratio
4:3
16:9
Image Pixel
4320×3240
2592×1944
4320×2432
63
Movie Size
Set video resolution.
Icon
Pixel ratio
Movie Size
16:9
1920×1080 30fps
4:3
16:9
16:9
1280×960 50fps
1280×960 30fps
Recording Time Restraint
The maximum recordable time is 25 minutes.
1280×720 60fps
1280×720 30fps
848×480 60fps
None
848×480 120fps
The maximum recordable time is 60 seconds.
Select 120fps as the frame rate of movie size to carry out high-speed video recording.
The product shoots ultra high speed movies, and plays back with normal 30fps speed,
in order to capture visually indistinguishable moments easily. But the sound cannot be
recorded.
Touch Capture (Photo shooting mode)
There are 2 options:
• On
• Off
About
• View the current version of the App.
64
• Tap the official website on the interface and you can go to the website for more information.
Shooting Method
All files are saved on the memory card of the camera.
Shooting
1. Align the camera lens with the shooting subject, and confirm viewing through the screen of
the smart device.
2. Tap the other icons on the interface to set the corresponding parameters.
3.Tap
to shoot photos.
1234567
65
Video Recording
Tap the shooting mode icon on the shooting screen to enter the mode selection screen, and
tap
to enter the video recording screen.
1. Tap the other icons on the interface to set the corresponding parameters.
2.Tap
to start recording and then tap
12:34:56
to stop.
00:00:10
In Wireless power saving enabled state, a prompting message about breaking of
wireless connection in 30 seconds will be popped up when video recording on the smart
device. At this moment, if the user does not stop video recording, wireless online will be
automatically disconnected, and the wireless disconnection message will be displayed
while video recording is continued on the camera.
66
Stop video recording and lower the temperature of smart device in case the smart
device’s temperature is too high. When the high temperature reaches the limit, the smart
device automatically stops video recording and shuts down after saving the files.
Playback
There are two playback modes: • Single playback (movie / photo)
• Index playback (action cam/smart device)
Switching of the Remote Viewfinder Mode and the Playback Mode
1.Tap
to enter the camera single playback interface.
2.Tap
to enter the index playback interface.
3. Tap any small figure to enter the single playback interface.
4.Tap
to enter the remote viewfinder interface.
Remote Viewfinder
interface
Single playback
interface
Index playback
interface
2
1234567
4 JUL 2014
3
1 JUL 2014
21 JUN 2014
1
67
Switching Camera and Smart Device Index Playback
1. On the camera index playback interface, tap
playback interface.
to enter into the smart device index
2. On the smart device index playback interface, tap
playback interface.
Camera
index playback interface
to enter into the camera index
Smart device
index playback interface
1
2
4 JUL 2014
8 JUN 2015
1 JUL 2014
21 MAY 2015
21 JUN 2014
19 MAY 2015
On the smart device index playback interface, tap a small figure to enter into the smart
device single playback interface.
On the camera index playback interface, tap a small figure to enter into the camera
single playback interface.
68
Introduction of the Icons in the Playback Mode
Single Playback
Smart device
Action cam
Photo playback
interface
Video playback
interface
Photo playback
interface
Video playback
interface
00:02:00
00:02:00
Enter index playback screen
Enter photo or movie mode
Share the current photo or video to
social networks
Download the current photo or video
to the smart device
Delete the current photo or video
Rotate the photo
Play the video
69
Index Playback
Action cam
1 item selected
70
Smart device
1 item selected
4 JUL 2014
8 JUN 2015
1 JUL 2014
21 MAY 2015
21 JUN 2014
19 MAY 2015
Menu
Return to the previous interface
Enter photo or movie mode
Select multiple files to share
Enter the download mode to
move the files in the camera
into the smart devices
Select multiple files to delete
Description of the Functions in the Playback Mode
Gestures in the Playback Mode
Rotate
(Smart device single playback
1. Hide/display the icons: Single finger tap
the photo or video once.
mode)
2. Zoom in: Quickly tap the photo twice or
use two fingers apart to expand the photo
(Sliding a finger to move around the
photo).
Zoom out: Quickly tap the photo twice
again, and it will restore the original size
or use two fingers folded to reduce the
photo.
, the photo will rotate 90 counterTap
clockwise each time this icon is pressed.
3. Browse fore-and-aft files: Slide around
with one finger.
Rotate the photo by 90°.
71
Select One or More File(s) (Camera and Smart device index playback mode)
1. Long press a file thumbnail to enter the
multiple-selection screen.
1 item selected
72
2. View fore-and-aft files by sliding a finger
up and down on the screen.
1 item selected
4 JUL 2014
4 JUL 2014
4 JUL 2014
1 JUL 2014
1 JUL 2014
1 JUL 2014
21 JUN 2014
21 JUN 2014
21 JUN 2014
3. Select one or more file(s).
3.1. Tap
after date folder (
1 item selected
) to select all files under the date folder;
4 items selected
1 JUL 2014
1 JUL 2014
21 JUN 2014
21 JUN 2014
18 JUN 2014
18 JUN 2014
3.2. Tap a file thumbnail to select a single file (tap again to cancel the selection);
4 items selected
5 items selected
4 items selected
1 JUL 2014
1 JUL 2014
1 JUL 2014
21 JUN 2014
21 JUN 2014
21 JUN 2014
18 JUN 2014
18 JUN 2014
18 JUN 2014
73
3.3.Tap
to select all files; tap
playback interface.
4 items selected
74
to cancel the selections and return to the index
35 items selected
1 JUL 2014
1 JUL 2014
1 JUL 2014
21 JUN 2014
21 JUN 2014
21 JUN 2014
18 JUN 2014
18 JUN 2014
18 JUN 2014
Download
Download the photos or movie in the camera to your smart device.
Camera Single playback mode:
to start downloading.
1. Select the file you want to download, and tap
2.Tap
in the downloading process, and select “Yes” in the pop-up interface to cancel
downloading.
3. After downloading is complete, tap
to return to the playback interface.
1
Download Finished!!
1/1
Download Successful : 1
Download Failed : 0
2
3
Camera index playback mode:
1. Select one or more file(s) you want to download, and tap
to start downloading.
2.Tap
in the downloading process, and select “Yes” in the pop-up interface to cancel
downloading.
3. After downloading is complete, tap
to return to the playback interface.
75
Share
Share the photos or videos to the social network site.
Camera single playback and index playback mode:
1. Select one or more file(s) you want to share, and tap
to start downloading.
2.Tap
in the downloading process, and select “Yes” in the pop-up interface to cancel
downloading.
3. After the download is completed, the photos or videos on the smart device can be shared.
• When the mobile data network is open: Select the social network site to share.
• Mobile data network not open:
iOS system
Please share according to the interface prompt.
Android system
1
XXXXXXXXXXXXXXXXXXXXXXXXXXXXXX
XXXXXXXXXXXXXXXXXXXXXXXXXXXXXX
XXXXXXXXXXXX
N/N
SETTING NETWORK
2
76
CANCEL
3
「SETTING NETWORK」: Open mobile data network or Wi-Fi for internet access.
「CANCEL」: Cancel sharing.
After the “SETTING NETWORK” is selected and the network is switched, the interface
has 3 options:
“SETTING NETWORK”: change the network settings.
“SHARE”: select the social network site to share.
“CANCEL”: cancel sharing.
When the network is changed, the App will close automatically.
Smart device single playback and index playback mode:
Please share according to the operating methods for sharing in single playback and index
playback mode of the camera.
Delete
Delete the selected photos or videos.
Camera and Smart device index playback mode:
1. Select one or more file(s) you want to download, and tap
.
2. Select “DELETE” to confirm the deletion in the pop-up prompt screen.
77
Camera and Smart device single playback mode:
1. Select the file you want to delete, and tap
.
2. Select “DELETE” to confirm the deletion in the pop-up prompt screen.
Android system
iOS system
Would you like to Delete?
CANCEL
DELETE
DELETE
CANCEL
78
Play the Video
(Camera and Smart device single playback mode)
Slow wireless transmission may impact viewing. We suggest downloading the file to your
device before viewing.
1.Tap
to play the video.
2.Tap
to pause the video.
3.Tap
to continue the video.
4.Tap
to return to the previous interface.
00:02:00
00:01:12
00:02:00
00:01:12
00:02:00
79
Android User Notification:
To ensure proper playback of video files created with the KODAK PIXPRO SP1 Digital
Camera, we suggest using the MX Player application.
1. Download and install MX Player to your Android smart devices.
Download link: https://play.google.com/store/apps/details?id=com.mxtech.videoplayer.ad
2. Run MX Player.
3. Choose "Decoder" under "Settings" and check the options as shown in the pictures.
The following video applications will also work: VPlayer, VLC for Android, BSPlayer Free.
80
Menu
(Camera and Smart device index playback mode)
1.Tap
or slide from the left to the right of the screen to display the menu.
2. Tap your desired setup item.
Menu
3. Tap the option to return to the menu.
4.Tap
to return to playback interface.
YouTube
4 JUL 2014
Login
About
YouTube
This option is only under the iOS system.
1 JUL 2014
About
See Page 64 for explanations.
21 JUN 2014
81
Connection Port Introduction
Connect a Computer
The product can be connected to the
computer using a USB cable to allow for
copying the files from the product into the
computer.
Steps:
1. Open the rear cover of the product,
connect one end of the USB cable to the
computer (the computer needs to be in
on state) and the other end to the USB
port of the product;
2. The product display will show a rolling
connection cartoon. The computer will
automatically sense the product.
3. Open the folder of the product on the
computer and copy the data you need to
the computer.
4. After transmission is completed, please
cancel the USB connection by safely
pulling out the USB device from the
computer system;
5. Pull out the USB cable. The product will
automatically shut down.
82
The product supports Windows operating
systems (Windows XP, Windows Vista ,
Windows 7, and Windows 8) and the Mac
operating system.
If connected to the computer USB port of 100mA, the product will have no response due
to insufficient power supply.
for more than 2 seconds will cause shut-down and stop of communication
Pressing
between the computer and the product.
If a memory card is inserted in the product, only files in the memory card will be read. If
needing to read the files in the internal memory, please pull out the memory card before
connecting to the computer.
83
HDMI Connected TV Output
The product is capable of realizing movie and photo playback on a TV through HDMI.
The HDMI connection defaults to automatic connection mode.
Steps:
1. Open the rear cover of the product, connect one end of the HDMI cable (not included) to a
TV which is up to the HDMI standard (the TV and the product both need to be turned on)
and the other end to the cable to the HDMI port of the product;
2. The product will automatically enter the playback state after the connection is complete.
The operating method is the same as the 「Introduction to Basic Operation of Playback」
on page 31.
If the product is connected to the TV while in the off state, press and hold
power on. The product will automatically enter the playback state.
84
and
to
Appendices
Specifications
「Design and specifications are subject to change without notice.」
Active Pixels
14.24 Megapixels
Total Pixels
15.31 Megapixels [1/2.33" MOS]
Lens
Focal Length
3.0mm
Equivalent to 35mm film
16.8mm
F number
F2.8
Lens Construction
6 groups 6 elements
Optical Zoom
Fixed focus
Focusing Range
Normal: 60cm ~ ∞
Field of View
Ultra Wide, Medium, Narrow, Water Ring
Anti-Handshake
EIS
File Format
Still Image
Exif 2.3 (JPEG)
Movie
Movie Format: MOV (H.264),
Audio: Linear PCM (Stereo)
85
Still Size
Image
Dimensions
Movie Size
86
(4:3) 14MP: 4320×3240
5MP: 2592×1944
(16:9) 10MP: 4320×2432
1920×1080(30fps), 1280×960(50fps), 1280×960(30fps),
1280×720(60fps), 1280×720(30fps), 848×480(60fps)
High-Speed Movie: 848×480(120fps)
Detection Features
Face detection
Waterproof Feature
Up to 10 m underwater
Shockproof Feature
Up to 2 m
Dustproof Feature
Equivalent to JIS / IEC ( IP6X )
Freeze-proofing Feature
-10°C
Wireless
Supported
LCD Screen
1.5 inch ( 115k Pixels )
ISO Sensitivity
Auto ( 100 ~ 800 )
Exposure Metering Method
Artificial Intelligence AE (AiAE), Face AE
Exposure Control Method
Program AE
Burst Shot
Supported
Playback Modes
Single Photo
White Balance
Auto (AWB), Daylight, Cloudy, Fluorescent, Underwater
Internal Memory: Approx. 100 MB
Storage Media
Micro SD / Micro SDHC Card (Up to 32GB Support) \
[ MMC Card not supported ]
Language
Support
Support 27 languages: English, Chinese (simplified and traditional), Japanese,
Korean, French, Spanish, Portuguese, Thai, Indonesian, Vietnamese, Italian,
German, Dutch, Russian, Polish, Swedish, Danish, Finnish, Norwegian, Greek,
Turkish, Hungarian, Croatian, Czech, Arabic, Hindi
Interface
USB 2.0 ( Micro 5 pin USB ) , HDMI ( Type D )
Power supply
Rechargeable Li-ion Battery LB-080, 3.6V 1250mAh, In-action cam Charging
Battery
Performance
Approx. 350 Shots (Based on CIPA Standards); Approx. 130 min for Video
(@1080p/30fps )
Operation
Environment
Temperature: -10 ~ 40°C, Humidity: 0 ~ 90%
Dimensions
84.7×51.4×39.5mm (Based on CIPA Test Standards)
Weight
Approx. 155g (excluding battery and memory card)
87
Prompts and Warning Messages
Message
Description
When using “Copy to card”, if the number
of folders in the memory card exceeds the
maximum number of folders (999), the copy and
access actions cannot be performed.
!
MAX 999
This message indicates that a long read time
may be caused due to too many folders in the
product.
During shooting, if the files or folders have
reached the maximum number (9999 for files,
999 for folders), the memory card cannot be
accessed.
!
!
88
SD
Reset Mode
End the message after the
product processing.
End the message after the
product processing.
The message will disappear
after 2 seconds.
When the file is protected, the message will
appear on the screen if the delete action is
performed.
The message will disappear
after 2 seconds.
When turning on the product or pressing
,
the product detects that the memory card is out
of space.
The message will disappear
after 3 seconds.
Message
!
IN
Description
Reset Mode
When turning on the product or pressing
,
the product detects that the internal memory is
out of space.
The message will disappear
after 3 seconds.
Updating firmware.
User should do nothing.
The product will turn off
automatically after the
update is completed.
The memory card still cannot be recognized
after format.
!
An error occurs when reading the memory card.
SD
Interruption logging problem is encountered
in the period of writing in the memory card or
recording in the video recording or shooting
process.
The message will disappear
in 2 seconds, and the screen
of format or not will appear.
The message will disappear
in 2 seconds, and the screen
of format or not will appear.
Return to the viewfinder
status will be displayed in 2
seconds.
89
Message
Description
The internal memory still cannot be recognized
after format.
!
!
90
IN
SD
Interruption logging problem is encountered
in the period of writing in the memory card or
recording in the video recording or shooting
process.
Reset Mode
The message will disappear
in 2 seconds, and the screen
of format or not will appear.
Return to the viewfinder
status will be displayed in 2
seconds.
When a memory card lower than Class 4
is used to record a HD or above movie, the
writing speed is too slow and recording will
not continue.
Cancel the message and
return to the viewfinder
status in 4 seconds.
The time of file processing (imaging
processing, in synthesis, in saving, edition
after-processing, archiving coping, in Format
and the like) exceeds 2 seconds.
The message will
disappear after the
operation is completed.
Message
Description
Connecting to the computer USB.
Connecting to the HDMI device.
Reset Mode
The display is ended after
connection is succeeded.
Caution will appear before power off when the
battery of the product is already dead.
The firmware cannot be updated when power
is insufficient.
It will shut down after
displaying for 2 seconds.
A message appears to prompt
updating after full charging and
returning to the update screen.
The message will be displayed when the
temperature of the battery reaches 70 °C
during recording.
It will shut down automatically
in 2 seconds, and can be
recovered to use only after the
temperature is reduced.
When the AP setting is enabled, the message
will be displayed when the temperature of the
battery is in the range from 68 to 70 °C.
Return to the menu interface
in 2 seconds and recover use
only after the temperature is
reduced.
91
Trouble Shooting
Problem
92
Possible causes
Solution
Product does not
turn on
The battery has been depleted.
Charge the battery.
Exceeded maximum
folder number
If the files or folders have reached the
maximum number (9999 for files, 999
for folders), the memory card cannot be
accessed.
Copy the data to the
computer disk, and format
the memory card using the
product.
Writing speed of the
memory card is slow
When a memory card lower than Class 4
is used to record a HD or above movie,
the writing speed will be slower and
recording will not continue.
Use a higher-class
memory card, or format
this card before shooting.
Too many videos to
process
The number of pictures or folders in the
memory card exceeds the specifications,
so the playback cannot be displayed or
played back by date.
Delete unwanted files.
High temperature
warning
Battery overheat.
Remove the battery when
the product is turned off.
Continue to use the battery
when it cools.
Special Accessories
Let the action cam accommodate to your activity, there are different options of accessories
available. Accessories bundle vary per distribution retailer. To purchase additional accessories
separately, please contact your local retailer customer service support, or visit http://
kodakpixpro.com for more customer service details.
Before using (especially in water or strenuous activity), please pay attention to make
sure the product is tightly secured to prevent damage or loss to the product.
Please ensure that the adhesive surface is clean before using double-sided adhesive
accessories. Dirt, grease, or other foreign matter will reduce the effectiveness of the
double-sided adhesive.
After fully assembling the accessories, please check to make sure that the screw and
pre-tightening handle are in the proper position and fully secure.
For ease of assembly, please line up the marks on the base and pre-tightening handle
per the diagrams below.
Pre-tightening handle
Mark
93
94
Adhesive mount (flat) : accessory applicable to skateboard
Adhesive mount (curved) : accessory applicable to helmet
95
Installation Method:
There are two types of adhesive mounts: flat and curved. You may select based on the shape
of the object to be used.
Both types can be assembled in the same way, taking the adhesive mount (flat) as an
example:
1. Align the location pole of the base to the location hole of the action cam, and align the
screw on the base to the tripod socket of the action cam. Rotate the screw for fixing.
Base
Location Pole
Screw
96
2. Tie one end of the tether to the adhesive mount, and the other end to the rear cover shaft.
3. Assemble the base, pre-tightening handle and adhesive mount according to the direction
illustrated in the picture. First press the base into the adhesive mount, and then rotate and
tighten the pre-tightening handle.
Pre-tightening Handle
Tether
Adhesive Mount
4. Tack the double-sided adhesive at the bottom of the adhesive mount to the object to be
used.
Double-sided adhesive is disposable. It can be purchased separately and replaced if
needed.
Double-sided adhesive
97
Bar mount: accessory applicable to bicycle
Installation Method:
1. Set the bar clamp to the handlebar, and rotate the screw for fixing.
Bar Clamp
Screw
98
2. Open the bottom part of the fixing sleeve and set it in the Action Cam. Insert the connector
into the bottom part of the fixing sleeve, and then tighten them with screw.
Fixing sleeve
Screw
Connector
3. Assemble the base, pre-tightening handle and bar clamp according to the direction
illustrated in the picture. First press the base into the bar clamp, and then rotate and tighten
the pre-tightening handle.
Pre-tightening Handle
99
Suction cup mount: accessory applicable to be attached to the automotive
windshield (or smooth surface)
Installation Method:
1. Align the location pole of the base to the location hole of the action cam, and align the
screw on the base to the Tripod Socket of the action cam. Rotate the screw for fixing.
100
2. Assemble the base, pre-tightening handle and suction mount according to the direction
illustrated in the Picture. First press the base into the suction cup mount, and then rotate
and tighten the pre-tightening handle.
Base
Pre-tightening Handle
Suction Mount
3. First, clean the suction mount and the windshield, and then attach the suction cup to the
windshield (or smooth surface). Press the handle to make it attached to the windscreen.
Handle
101
Vented helmet strap mount-A: accessory applicable to bicycle helmet
Installation Method:
1. Expand the band first, and then thread both ends of the band into the helmet.
Band
102
2. Thread both ends of the band into the buckle, and then press the buckle clamp.
Buckle
Buckle Clamp
3. Align the location pole of the base to the location hole of the action cam, and align the
screw on the base to the tripod socket of the action cam. Rotate the screw for fixing.
4. Assemble the base, pre-tightening handle and vented helmet strap mount according to the
direction illustrated in the picture. First press the base into the vented helmet strap mount,
and then rotate and tighten the pre-tightening handle.
Base
Pre-tightening Handle
Buckle Adhesive Mount
103
Vented helmet strap mount-B: accessory applicable to bicycle helmet
Installation Method:
1. Align the location pole of the mount to the location hole of the action cam, and align the
screw on the holder to the tripod socket of the action cam, and then rotate the screw with a
tool like a coin to fasten.
3
2
1
104
2. Expand the band first, and then thread both ends of the band into the buckle.Thread both
ends of the band into the buckle, and then press the buckle clamp
Buckle
3
Band
1
2
Buckle Clamp
105
Handheld mount : accessory applicable to be handheld
Installation Method:
1. Align the location pole of the mount to the location hole of the action cam, and align the
screw on the holder to the tripod socket of the action cam, rotate the screw for fixing.
2
Location Pole
Screw
1
106
Surfboard adhesive mount: accessory applicable to surfboard
Plane Support (Small)
Plane Support (Large)
Installation Method:
1. Align the location pole of the base to the location hole of the action cam, and align the
screw on the base to the Tripod Socket of the action cam. Rotate the screw for fixing.
2. Tie one end of the tether to the plane support (small), and the other end to the rear cover
shaft of the action cam.
107
3. Assemble the base, pre-tightening handle and plane support (large) according to the
direction illustrated in the Picture. First press the base into the plane support (large), and
then rotate and tighten the pre-tightening handle.
Base
Pre-tightening Handle
Plane Support (Large)
4. Tack the double-sided adhesive at the bottom of the plane support (large) and the plane
support (small) to the object to be used.
Double-sided adhesive is disposable. It can be purchased separately and replaced if
needed.
108
Head strap mount : accessory applicable to mount the action cam on your
head
Location Pole
Installation Method:
1. Insert the angle bracket into the mount, align the location pole on the angle bracket to
the location hole of the action cam, and align the screw on the angle bracket to the tripod
socket of the action cam. Rotate the screw for fixing.
Angle Bracket
Screw
Mount
Band
2. Set the band to your head and adjust the degree of tightness.
109
If you need to remove the mount, please use one hand to push forward the angle
bracket (as directed by arrow ①), and use a pointed object to push the buckles in the
two side holes by order with another hand (as directed by arrow ②) . Then remove the
angle bracket out from the mount.
Extended Arm:
You can add one or two extended arms (except head bank mount) to each kit, to help you to
adjust the mounting angle of the action cam more flexibly.
Extended Arm
110
Licensed
Product
The Kodak trademark and trade dress are used under license from Kodak.
© 2013 JK Imaging Ltd. All Rights Reserved.
JK Imaging Ltd., 17239 So. Main Street, Gardena, CA 90248 USA
JK Imaging Europe, 71 Clarendon Road, Watford, WD17 1DS, UK
http://kodakpixpro.com
Ver. 8