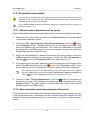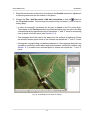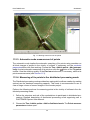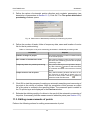
Download USER MANUAL
Transcript
Digital Photogrammetric System Version 5.21 USER MANUAL GeoMosaic PHOTOMOD 5.21 GeoMosaic Table of Contents 1. About ....................................................................................................................................... 4 2. About program ......................................................................................................................... 4 2.1. Purpose and main definitions .......................................................................................... 4 2.2. Features at a Glance ..................................................................................................... 4 2.3. Input data ...................................................................................................................... 5 2.4. Output data ................................................................................................................... 6 3. Preparation .............................................................................................................................. 6 4. Start of work ............................................................................................................................. 7 5. GUI elements ........................................................................................................................... 7 5.1. Brief description of main menu ........................................................................................ 8 6. Workflow of mosaic creation ...................................................................................................... 9 7. Mosaic project creation ........................................................................................................... 10 7.1. Project menu ............................................................................................................... 10 8. Loading images in the mosaic project ...................................................................................... 11 8.1. Adding images ............................................................................................................. 11 8.2. Images preview ........................................................................................................... 12 8.3. Setting background color of the images ......................................................................... 14 8.4. Processing of block images .......................................................................................... 15 8.5. The Images list window ................................................................................................ 16 8.6. Images menu .............................................................................................................. 17 9. Cutlines creation ..................................................................................................................... 18 9.1. Requirements of the cutlines creation ............................................................................ 19 9.2. Automatic cutlines creation ........................................................................................... 20 9.3. Cutlines creation in distributed processing mode ............................................................ 23 9.4. Editing cutlines ............................................................................................................ 24 9.5. Using attributes of Cutlines layer ................................................................................... 24 9.6. Cutlines menu ............................................................................................................. 26 10. Splitting into sheets ............................................................................................................... 27 10.1. Splitting into sheets by the specified parameters .......................................................... 28 10.2. Creating the single sheet covering all images block ...................................................... 31 10.3. Splitting by images ..................................................................................................... 31 10.4. Creating the single sheet with arbitrary boundaries ....................................................... 31 10.5. Editing sheets ............................................................................................................ 31 10.6. Working with the attributes of the Sheets layer ............................................................. 32 10.7. Saving sheets ............................................................................................................ 35 10.8. Setting output parameters .......................................................................................... 35 10.9. Sheets menu ............................................................................................................. 37 11. Stitching by tie points ............................................................................................................ 38 11.1. Pre-setting ................................................................................................................. 39 11.2. Tie points measurement ............................................................................................. 40 11.3. Editing measurements of points .................................................................................. 43 11.4. Measurement of GCPs ............................................................................................... 44 11.5. Parameters of points measurements ........................................................................... 46 11.6. Information about tie point ........................................................................................... 47 11.7. Attributes of Tie points layer ........................................................................................ 47 11.8. Ties menu .................................................................................................................. 48 11.9. Tie points toolbar ........................................................................................................ 49 12. Using auxiliary data ............................................................................................................... 50 12.1. Misc (Miscellaneous) menu ........................................................................................ 50 13. Mosaic creation .................................................................................................................... 51 13.1. “Mosaic parameters” window ...................................................................................... 51 13.2. Mosaic’s main parameters .......................................................................................... 52 13.3. Brightness adjustment parameters .............................................................................. 54 2 PHOTOMOD 5.21 GeoMosaic 13.4. Mosaic output parameters .......................................................................................... 13.5. Additional parameters ................................................................................................ 13.6. Creation of output mosaic sheets ................................................................................ 13.7. Mosaic menu ............................................................................................................. 14. Common parameters ............................................................................................................ 14.1. Preview parameters ................................................................................................... 3 59 60 62 62 63 64 PHOTOMOD 5.21 GeoMosaic 1. About The current User Manual contains information about information of Geomosaic program functionality. This program is designed to merge the georeferenced orthorectified imagery and create the orthomosaic from them. The main part of document contains description the technology of mosaic creation. 2. About program 2.1. Purpose and main definitions The GeoMosaic program (hereinafter is referred to as “program”) is purposed to create the orthomosaic from georeferenced orthorectified aerial and satellite imagery, splitting of created orthomosaic with the capable of saving sheets in popular raster file formats. The orthoimage is the image, obtained after the transformation from the central projection to the orthogonal projection with automatic removal of distortions, which were caused by the imaging equipment, elevation angle and relief. The orthomosaic is the single image, which obtained during the brightness adjustment and merging the multiple georeferenced orthorectified images. The program uses the following conventions and terms: • Throughout this User Manual, the source geoereferenced orthoimage is referred to as “mosaic project image” or “source image”. • Throughout this User Manual, the orthomosaic, created from the source images, is referred to as “output mosaic” or “mosaic”. • Throughout this User Manual, the cutline is the boundaries of the specified area from the source image, which will be included in the output mosaic. The vector polygons are used for the cutlines creation. The common boundaries of neighbouring cutlines are completely topologically coincide, i.e. the areas of source images, selected using the cutlines, which are the single area without overlaps and “holes”. • Throughout this User Manual, the sheet is the output mosaic area, which is saved in the separate output format file. The vector polygons are used for creation of sheet boundaries. 2.2. Features at a Glance The program provides the following features: • The cutlines creation in automatic mode to define the area of the source images, which were be included in the output mosaic; 4 PHOTOMOD 5.21 GeoMosaic • The global and local brightness adjustment of areas; • Smoothing area along the cutlines; • Merging area in the neighborhood of the cutline by tie points using the correlator; • Splitting into sheets of mosaic; • The coordinate system selection, pixel size and sheets export format of output mosaic. 2.3. Input data The sources data for mosaic creation in the GeoMosaic program are the orthoimages, referenced to the coordinate system, in the files of following formats: • Tag Image File Format (TIFF) – TIFF и GeoTiff format, included tags for saving of georeference information; • Windows Bitmap File (BMP); • VectOr Raster Maps (RSW) – рraster formats of PHOTOMOD VectOr program; • ERDAS IMAGINE (IMG) – ERDAS system raster format; • NITF (NITF); • JPEG (JPEG); • GIF (GIF); • PNG (PNG); • USGS DEM (DEM); • PCIDSK (PIX) – raster format with georeference in the heading developed by PCI Geomatics company; • JPEG2000 (JP2) – raster format with jpeg compression and georeference in the heading developed1. The program also provides the ability to load and process of palette images in TIFF, GIF and BMP files format. The source images can be placed to resources of the active profile as well as to conventional file system.2 1 The limitation on output file size of JPEG2000 format – no greater then 500 Мb. 2 See “PHOTOMOD system” User Manual 5 PHOTOMOD 5.21 GeoMosaic 2.4. Output data The program provides the supporting of multiple raster formats to export the output mosaic sheets; the program also provides the output formats to export the georeference data. The cutlines, sheet boundaries and tie points, created in the mosaic project, are stored in vector files of internal format. The program supports the multiple import/export formats of vector data. Table 1. Output data Output data File formats File placement Mosaic project X-GMOS internal format in the active profile resources2 Cutlines and tie points (vector data) X-DATA internal vector format in the active profile resources2 External georeference data for mosaic sheets • PHOTOMOD GEO in Windows file system • MapInfo TAB • ArcWorld (*.TFW, *.PBW) Mosaic sheets (orthoimages) • TIFF и GeoTIFF (*.TIFF, *.TIF) in Windows file system • Windows Bitmap File (*.BMP) • ERDAS IMAGINE (*.IMG) • NITF (*.NITF) • JPEG (*.JPG, *.JPEG) • PNG (*.PNG) • Microstation (*.DGN) • JPEG2000 (*.JP2) • PCIDSK (*.PIX) • PHOTOMOD MegaTIFF (*.PRF) • VectOr Raster Maps (*.RSW) 3. Preparation Define the folder, in which are placed the sources data before the beginning work in the program. The program allows to place the files with the source data in the folders of Windows file system, as well as in the profile resources. Activate this profile when the source images placing in the profile resources. Supported file formats list of source images see in Section 2.3. 6 PHOTOMOD 5.21 GeoMosaic Description of resource system see in the PHOTOMOD system User Manual. 4. Start of work Do one of the following actions to start the program: • Choose the Start › Programs to select the Geomosaic program. • Double click the PHOTOMOD Geomosaic icon on the desktop. • Choose the Geomosaic in PHOTOMOD System Monitor context menu in the Windows system tray by clicking the button. • Start the PHOTOMOD system and choose the Service › GeoMosaic.3. 5. GUI elements The GUI contains the following elements: • The main menu, which contained the all program functionality; • The main toolbar is used for quick main program functions access; • The optional toolbars is used for quick miscellaneous program functions access; • The 2D window, used for data displaying, contains the following elements: ○ The toolbar is used for the 2D window modes managing; ○ The work area is used for viewing and processing with loaded data of mosaic project; ○ The navigation bar is used for fast moving on the specified block images area of mosaic project; ○ The Layer manager is used for managing of mosaic project layers; ○ The status bar is used for viewing current real (ground) and pixel marker coordinates and brightness, contrast and gamma data adjustment in the work area. 3 If the PHOTOMOD system is installed on the workstation. 7 PHOTOMOD 5.21 GeoMosaic Fig. 1. GeoMosaic 5.1. Brief description of main menu The program main menu contains the menu items for mosaic creation, vector data processing, additional applications starting and setting parameters. Table 2. Main menu Menu Purpose Project The menu is purposed for creation, opening and mosaic project saving, and also obtaining information about project. Images The menu is purposed for images block forming of mosaic project. Cutlines The menu is purposed for cutlines creation – the vector polygons defining areas of source images, which will be included in output mosaic. The Cutlines layer is provided for cutlines creation. Sheets The menu is purposed for mosaic splitting – the mosaic areas saving in the separate output format files. The sheet boundaries are specified using vector polygons in Sheets layer. 8 PHOTOMOD 5.21 GeoMosaic Menu Purpose Ties The menu is purposed for searching and tie points measurement in the cutlines region to adjust the stitching along the neighbour cutlines. Stitching from tie points is provided the images transforming in the specified region. The Tie points vector layer is provided for tie points measurement. Misc The menu is purposed for additional data viewing: images boundaries (with or without the background), grid of fragments, which is used to gather statistics for local brightness adjustment. All the miscellaneous data are the vector objects and placed on the Miscellaneous layer. Mosaic The menu is purposed for defining the output parameters of mosaic and creating the sheets of mosaic with saving in output format files. Edit The menu is purposed for vector data creating, editing and importing/exporting. See description of menu in “Project processing” User Manual. Service The menu is purposed for starting of additional applications and setting of general parameters . See description of menu in “Project processing” User Manual. Window The menu is purposed for opening the optional toolbars and windows (new 2D window, Marker and Measurements windows, Objects attributes window). See description of menu in “Project processing” User Manual. Help The menu is purposed for starting of Help system. Exit The menu is purposed for closing of GeoMosaic program. 6. Workflow of mosaic creation Creation of mosaic implies a number of following actions: 1. Gathering of input data (see Section 3). 2. Starting of Geomosaic program (see Section 4). 3. Creating of mosaic project (see Section 7). 4. Loading of images in the mosaic project: adding, viewing and setting of transparency for the input background color of images (see Section 8). 5. Gathering of output raster channels. It specified in the Mosaic parameters window on the Mosaic tab (see Section 13.2). 9 PHOTOMOD 5.21 GeoMosaic 6. Defining of the output coordinate system for mosaic and using it for storing of vector data (the cutlines, sheets boundaries and tie points). The output coordinate system for mosaic is defined in the Mosaic parameters window on the Mosaic tab (see Section 13.2). Use the Misc tab to specify the save parameters of vector data in output coordinate system (see Section 13.5). 7. The cutlines creation: automatic cutlines creation (also using the relief from DEM); creating and editing of cutlines (see Section 9). 8. [optional] Adjustment of mosaics area: global and local brightness adjustment, smoothing area along the cutlines (see Section 13.3). 9. [optional] Stitching of the area from the tie points in the cutlines region manually or using correlator in the automatic/semi-automatic modes (see Section 11). 10. Splitting of the images area into sheets and selection for creating of output files (see Section 10). 11. Defining of the output parameters for mosaic creation: pixel size, map scale, file format for the mosaic sheets and etc. (see Section 13.2 and Section 13.4). 12. The mosaic creation (also in the distributed processing mode) with saving of the mosaic sheets in the files of selected format (see Section 13.6). 7. Mosaic project creation Choose the Project › New or click the button to create the mosaic project. The four clear vector layers: Tie points, Miscellaneous, Sheets and Cutlines are created automatically and displayed in the Layer manager. 7.1. Project menu Table 3. Brief description of Project menu Project menu Purpose New This menu item is used for creation of the new mosaic project Open This menu item is used to open the saved mosaic project from file with the x-gmos extension in the resources of active profile Save This menu item allows to save the opened mosaic project in the file with the same name and the xgmos extension in the resources of active profile Save as This menu item allows to save the opened mosaic project in the new file and the x-gmos extension in the resources of active profile Statistic This menu item is used to open the window with information about selected project 10 PHOTOMOD 5.21 GeoMosaic 8. Loading images in the mosaic project The step forming of source images block follows after the mosaic project creation. It implies a number of following actions: 1. Loading source images and forming block images of mosaic project. 2. Setting transparency for the background color of source images to exclude the background from the output mosaic. The current section contains the following descriptions: • Modes of the loading source images; • View images; • Setting of the source images background color; • Editing of the block images; • Working with the list of images; • Brief description of the Images menu. 8.1. Adding images Depending on the source images placement the following modes of the loading images in mosaic project are possible: • Adding images from the resources of active profile; • Adding images from the Windows file system. Irrespectively of the source images placement the following modes of selecting raster images to load in project are possible: • Selection of images manually; • Automatic selection of supported raster files in the specified folder and its subfolders (optional). Automatic selection is recommended when large number of source raster files are located in the folder along with files of other formats, and/or when source images are located in several subfolders of the selected folder. Besides, images may be added via list of filenames stored in a text file: The Images menu allows to load images in the project. 11 PHOTOMOD 5.21 GeoMosaic Table 4. Adding images in mosaic project Modes of loading images Actions Adding source images from the resources of the Choose the Images › Add images (resources) or active profile. click the button. The Open resource dialog opens. Select the images manually using the Shift and Ctrl keys. Click the Open button. Adding source images from a resource folder. Choose the Images › Add images (resources) from folder. The Add images from folder window opens. Click the button. The Browse for folder window opens. Select the folder, which contains the sources images, and click OK to return to the Add images from folder window. The path to selected folder is displayed in the Folder entry field. Check the Search in subfolders for searching the raster images in subfolders of selected folder. Click OK for automatic search of raster images in the specified folder and adding them to the mosaic project. Adding source images from the resources of the Choose the Images › Add images (files) or click Windows file system the button. The Open resource dialog opens. Select the images manually using the Shift and Ctrl keys. Click the Open button. Adding source images from a file system folder. Choose the Images › Add images (files) from folder. The Add images from folder window opens. Click the button. The Select folder dialog opens. Select the folder, which contains the sources images, and click OK to return to the Add images from folder window. The path to selected folder is displayed in the Folder entry field. Check the Search in subfolders for searching the raster images in subfolders of selected folder. Click OK for automatic search of raster images in the specified folder and adding them to the mosaic project. Adding source images from text file, which contains Choose the Images › Add images from files list. the file names list of images. The Open window opens. Select the text file containing the list of source image filenames (each including full path). Click the Open button. 8.2. Images preview To view added images in the Preview window choose the Mosaic › Preview or click the button. By default, added images are shown immediately in the Preview window. To open added images automatically in the Preview window during their adding to mosaic project, set the Open preview immediately option (seeSection 14.1). All mosaic project images are inscribed into rectangular raster of predefined color, which is called mosaic background color later on. This color is visible on output mosaic sheets. It is black by default, but it is not shown in the Preview window (it is transparent for convenience). 12 PHOTOMOD 5.21 GeoMosaic You should set the Transparent mosaic background on preview option in the Preview window to manage mosaic background color visibility (seeSection 14.1). Use the Background color option to select mosaic background color (see Section 13.2). Moreover, mosaic project images have their own background color (near images edges), which is called images background color later on. For correct images binding during mosaic creation you should exclude this background, i.e. setup the transparency of images background color (see Section 8.3). Fig. 2. Mosaic background color (white) and images background color (black) Use the window. , buttons for viewing one of the mosaic project images in a separate 2D There are two ways for viewing one or several of the mosaic project images in a separate 2D window: 1. Choose the Misc › Source images outlines to create images borders in the Miscellaneous vector layer (see Section 13.5). Select images borders and then choose the Images › Open selected. To select several images drag rectangle along with pressed Shift key and using one of group selection tools on the Tools panel. 13 PHOTOMOD 5.21 GeoMosaic 2. Choose the Images › Project images list to open the Images list window. Select images in the list and click the button. To select several images in the list use Shift and Ctrl hot keys, and selection tools in the Images list window (see Section 8.5). Choose the Mosaic › Open image (duplicated by the button) and select the image in the file system folder for viewing the any georeferenced orthoimages of the supported raster format in the separate 2D window. Choose the Images › Create pyramids for creating the overview pyramid. That overview pyramid helps to speed up the rasters viewing in the 2D window. The pyramids are saved to the files with the *.pyr extension in the Pyramid folder. 8.3. Setting background color of the images Setting transparency of loaded images is the next stage after the forming of block images. It provides correct stitching of images during the creation of output mosaic. Do the following actions for setting background color of images: • Specify the background color of source images. If the background color is not uniform, set the Source rasters background color range option (see Section 13.2); • Set the transparency of the input background color. Table 5. Setting of images background color and transparency Images background color Actions White background color of source images Choose the Images › Transparent color: white. The block of images in the Preview window will be updated considering the transparency setting applied to the white background. Black background color of source images Choose the Images › Transparent color: black. The block of images in the Preview window will be updated considering the transparency setting applied to the black background. All images have another (not white or black) or dif- Select one of two ways: ferent background colors 1. Choose the Images › Transparent color: auto to assign automatically images background color and set up transparency to all mosaic project images. 2. Choose the Images › Project images list (duplicated by the button) to set up the background transparency to images selected in the Images list window. Select the images in the list and click the button to define the images background color (see detailed description in 14 PHOTOMOD 5.21 GeoMosaic Images background color Actions Section 8.5). This background transparency setting is applied after closing the Images list window. Choose the Images › Transparent color: none to cancel transparency setting for images background color. Fig. 3. Setting transparency for images background color 8.4. Processing of block images The option for deleting of selected images is provided to edit the images block. Perform the following actions to delete the images from the mosaic project: • Select the image in the Preview window. Choose the Images › Delete selected images. Perform the following actions to select the images: ○ Choose the Misc › Source images outlines to create the edges of the images on the Miscellaneous layer. ○ Select the images boundaries using the group selection tools of the Tools panel. 15 PHOTOMOD 5.21 GeoMosaic • Choose the Images › Project images list. The Images list window opens. Select the images in the list and click the button. Use the hot keys and tools of the Images list window to select the several images in the list (see Section 8.5). The program also provides an option for deleting images not falling within frames of active sheets (see Section 10). If necessary, the images not falling within frames of active sheets can be deleted. Choose the Images › Delete images outside active sheets to do this. 8.5. The Images list window The Images list window is provided to view and edit the images list of mosaic project. Choose the Images › Project images list or click the button to open the Images list window. Fig. 4. The Images list window The images list of mosaic project is displayed in the main part of window. Each line of the list contains the full path to a file and input background color for that file. The toolbar for working of the images list is located in the top part of window. Table 6. Functions overview of the Images list window Purpose Actions Searching images in the list by name Enter the filename or part of the file name in the entry field. Click the button for searching of the image. Selecting images in the list Images may be selected by the mouse click. Use the Shift and Ctrl hot keys to select several images in the list, as well as the standard tools for selecting lines of the list: (Select all), (Unselect all), (Invert selection). Deleting of the selected images Select the images and click the button. Close the Images list window to refresh the block images in the Preview window. Opening of the selected images in the separate 2D Select the images and click the windows. 16 button. PHOTOMOD 5.21 GeoMosaic Purpose Actions Obtaining information about the selected image Select one image and click the button. The Statistic window opens. It shows the information about the selected image. Canceling transparency of the selected images Select the images and click the button. Close background color the images list window to cancel the transparency of the selected images background color in the Preview window. Setting transparency of the selected images back- Select the images. Define the input background ground color color of the selected images. Click the button. The Color window opens. Select the input background color in the palette of the main or additional colors or click the Define color button to select the other color. Click OK. The input background color of the selected images is displayed in the Images list window list. Close the Images list window to apply transparent background color of the selected images in the Preview window. Showing tie points residuals of the selected image Click the button to show error vectors for selected image in case of stitching by tie points (see Section 11). Change images order for mosaic creation without Change of images order in the list results in images cutlines block rebuild in the Preview window (only in no cutlines case). If you would like to restore the initial images order after its rearranging click the button. To move selected images to the top of the list click the button, to the bottom – , step up – , step down – . To invert order of the selected images or images groups (“mirror-like”) click the button. To invert order of all images click the button. 8.6. Images menu Table 7. Brief description of Images menu Images menu Purpose Add images (files) This menu item is used for the selecting image files, locating in the Windows file system, and adding to mosaic project. Add images (resources) This menu item is used for selecting image files, locating in the resources of active profile, and adding to mosaic project. Add images (files) from folder This menu item is used for automatic selection of all images from the specified folder of Windows file system and adding to mosaic project. Add images (resources) from folder This menu item is used for automatic selection of all images from the specified folder of active profile and adding to mosaic project. Add images from files list This menu item allows to use the text file, containing the full network paths to the images (useful when 17 PHOTOMOD 5.21 GeoMosaic Images menu Purpose the project files are located in different local and network folders), for adding the images to mosaic project Delete selected images This menu item allows to delete the selected images from mosaic (choose the Misc › Source images outline to select images along with pressed the Shift key) Delete images outside active sheets This menu item allows to delete the images outside active sheets from mosaic (see Section 10) Project images list This menu item allows to open the added images list for editing list, search images by name, view the selected image and its properties; define images background color; show tie points residuals Open selected This menu item is used to open in separate 2D windows those images, with highlighted boundaries (see Section 13.5) Check source images This menu item is used for the checking of the project images (the file presence, georeference data presence, the correct file format) Images › Transparent color: auto Allows to assign images background color automatically (including also different background colors of different project images) and to set up transparency Images › Transparent color: white This menu item allows to set the transparency for the white images background color Images › Transparent color: black This menu item allows to set the transparency for the black images background color Images › Transparent color: none Allows to cancel transparency setting for images background color Create pyramids This menu item allows to create the overview pyramid set for the fast images refreshing on screen (the pyramids are saved in the files with the *.pyr extension in the Pyramid folder during this process) Delete pyramids This menu item allows to delete all pyramids, created for loaded images (all pyramids are deleted from the Pyramid folder during this process) 9. Cutlines creation The stage of cutlines creation (vector polygons defining the images area, which will be included in output mosaic) follows after the forming the block images of the mosaic project. The Cutlines vector layer is provided for cutlines creation. Combination of automatic and manual cutlines creation means, optional use of DEM, as well as definition of the cutlines type by attributes provide high quality the stitching of the areas during the output mosaic creation. Performing the following steps is recommended for the cutlines creation: 18 PHOTOMOD 5.21 GeoMosaic 1. Automatic cutlines creation. 2. Editing cutlines: manual editing of vector polygons and their attributes in the Cutlines layer. Current section contains the following information: • Requirements of the cutlines creation; • Automatic cutlines creation; • Creation/editing cutlines; • Obtaining information about cutlines and using attributes of the Cutlines layer; • The import/export of the cutlines; • Brief description of the Cutlines menu. 9.1. Requirements of the cutlines creation There are following rules to go by when creating the cutlines for building of the high quality mosaic: • Cutlines should not have intersections and self-intersections. The common boundaries of the neighbour cutlines should be fully correspond. I.e. all areas of the source images, outlined by cutlines, form one united coverage without overlaps or holes. • It is not recommended to draw cutlines over elevated objects (bridges, buildings, utility poles, etc). Otherwise, these objects may be lost or appear distorted in the output mosaic. • It is not recommended to draw cutlines along extended objects (for example, along road, forest edge), i.e along brightness edges on the images. Otherwise, the blur may appear in the resulting mosaic. It is recommended either to intersect the extended objects at angle close to the direct or create the cutline at the sufficient distance from the edge of extended objects. • It is desirable that the statistics got the necessary information on each color channel to prevent the abnormal brightness areas during the local brightness adjustment. Thus it is recommended to draw the cutline so that it passes through areas of different color, or it may as well be drawn along the line separating such areas, but far enough from it. 19 PHOTOMOD 5.21 GeoMosaic 9.2. Automatic cutlines creation It is recommended to create cutlines in automatic mode. The program provides two algorithms of automatic cutlines creation: Voronoy diagram, and more detailed algorithm which consider DEM data, if any. We recommend to use at the beginning fast method (Voronoy diagram). If you are satisfied with the cutlines quality created by this method, edit the cutlines in vector objects drawing mode. Otherwise, apply detailed algorithm of cutlines creation, which is specially recommended for images with urban or rural building, since in this case cutlines are created bypassing separate objects (houses) and crossing roads at the right angle. Perform the following actions for automatic cutlines creation: 1. Choose the Cutlines › Build. The Cutlines creation parameters window opens. Click the Show advanced parameters button to open parameters of detailed algorithm. Fig. 5. Parameters of automatic cutlines creation 2. Select the algorithm of automatic cutlines creation and define the additional parameters. 20 PHOTOMOD 5.21 GeoMosaic Table 8. Description of parameters of the automatic cutlines creation Parameter Purpose Fast (Voronoy diagram) This parameter allows to select the algorithm of Voronoy diagram for automatic cutlines creation. Creating cutlines by this method consists in splitting all the project area into polygons based on proximity to nadir points or, if the latter are not given, to image centers. Detailed This parameter allows to select more fine algorithm for automatic cutlines creation. In this case edges of Voronoy’s diagram, belonging to two different images, are replaced by broken lines, which provide optimal images joining. You can also adjust the following settings. Non-dimensional Maximal shift from Voronoy diagram parameter (from zero to one): at zero value you will get Voronoy diagram, if the value is one – maximal area is used for cutlines creation. This algorithm allows to calculate estimation function on images. Cutlines are created on lines in such a way, that maximal value of this function on them is minimal among all possible lines (minimax method). The function consists of several summands, with specified weight (from zero to one) each. The Weight of objects outlines parameter allows to avoid separate objects (houses) during cutlines creation or to cross them at the right angle (in case of roads). This parameter has the maximal value on objects’ outlines. The Weight of images heterogeneity parameter allows to avoid small cities and settlements during cutlines creation, including also urban blocks, since at certain pixel size settlements look more heterogeneous, comparing with forested areas, agricultural fields, etc. The Weight of images correlation parameter: the bigger the differences of point’s neighborhood on adjacent images, the bigger this component for each point. The Weight of images brightness parameter is used for cutlines creation in darkened areas of images, where human eye is less receptive to images inconsistency. Thin out precision This parameter allows to define the thin out coefficient of polylines. Polylines with segment length of 1 pixel appear in the process of creation. Then, they are thinned out so that the thinned lines were deviated from the sources by not more than the specified value (in meters on the ground). Source images cutting This parameter allows to exclude the edges of the image during the cutlines creation. The size of the edge images (in fractions) is determined 21 PHOTOMOD 5.21 GeoMosaic Parameter Purpose by the value in the Cut part entry field during the cutting. Background cutting This parameter allows to exclude the edge images with input background color during the cutlines creation, i.e exclude the no-data areas of images (cut edge of film images or areas during the previous stages). The background color is defined automatically, cutting edge is performed from the polylines. The value in the Maximal shift from background color entry field allows to specify the background color range of images. I.e, if the color of any pixel is different from the calculated background color no more than the specified value, then this pixel is also part of the background color. Unique background color This parameter allows to take into account the uniqueness of image’s background color while creating cutlines. This checkbox should be activated if there are no pixel having background color. Small images overlap This parameter allows to take into account the small overlap images while cutlines creation. This checkbox should be activated if project images have insufficient overlap. Attribute name This parameter allows to define the attribute name of vector object (cutline) containing full network path to image. Use DEM This parameter allows to take into account while creating cutlines (if DEM is present). Using DEM is recommended for mountain terrain imagery. It is not recommended to use the DEM for the urban area. 3. Click OK. The process of cutlines creation starts. The vector polygons are created in the Cutlines layer after the process completion. The Cutlines layer becomes editable and marked by asterisk, this means that the layer has been edited but not saved. Created cutlines are displayed in the Preview window. 4. Perform the following actions: • If necessary, modify the parameters of cutlines creation and/or edit the cutlines considering thecutlines requirements and data peculiarities (areas or objects) in the mosaic images (see Section 9.4). • Choose the Cutlines › Save to save the created cutlines in the internal file format of the active profile resources. Choose the Edit › Export to export the cutlines into other formats (see Project processing User Manual). 22 PHOTOMOD 5.21 GeoMosaic 9.3. Cutlines creation in distributed processing mode The Distributed processing mode provides the saving of time while cutlines creation by making optimal use the hardware computing capacity. This mode is recommended to use in case of large volume of source images in the mosaic project. Perform the following actions to create cutlines in distributed processing mode: 1. Define the structure and role of the workstations to participate in distributed processing. Detailed description of distributed processing mode organizing see in PHOTOMOD System User Manual. 2. Choose the Cutlines › Build. The Cutlines creation parameters window opens. 3. Choose the auto cutlines creation algorithm and define the additional parameters (see parameters description in Section 9.2). Click the Distributed processing button. The Cutlines distributed processing window opens. Fig. 6. Cutlines distributed processing parameters 4. Define the number of tasks, folder of temporal data, name and placing of vector file for cutlines storing. Table 9. Description of cutlines creation parameters in distributed processing mode Parameter Purpose Number of images in project Field displaying the number of source project images. Max. number of simultaneous tasks Entry field for defining tasks number on which the process of cutlines creation will be divided. Temporary folder for parallel processing Entry field for defining the folder in the resources of active profile for temporary data storing. The button is used for folder selecting or new folder creating in the resources of active profile. Output cutlines resource Entry field for defining placing and the name of output vector file for storing cutlines in the resources of active profile. The button is used for selecting of folder and file name. 23 PHOTOMOD 5.21 GeoMosaic 5. Click OK. The process of cutlines creation starts. After its completion, the output vector file with cutlines will be created in the specified folder. Created cutlines are added into the Cutlines layer and displayed in the Preview window. 9.4. Editing cutlines The following options are provided for cutlines editing: • Deleting all created cutlines, i.e all vector objects from the Cutlines layer by choosing Cutlines › Clear. • Manual editing/drawing vector objects (see Project processing User Manual). • Editing of attribute values for cutlines: cutline’s name, type, etc. (see Section 9.5). 9.5. Using attributes of Cutlines layer The attributes of Cutlines layer attributes extend the capabilities of editing cutlines. Basing on file attributes, the cutline gets the name and the area type of cutline is defined: area with current image, transparent area for using another image; area with filling by background for blurring of some terrain objects. In the case, where the imported objects have another attributes, the capability of setting attributes provides the correct import of cutlines, created in other programs. The Culines layer has following attributes by default: • image – the filename image attribute; • image_title – the cutline name attribute; • rgn_type – the cutline type attribute; • ref_image_name – the filename of reference image attribute. Choose the Cutlines › Parameters for viewing and editing of the attribute’s name. The Cutlines parameters window opens. Select the name in the list or specify the new attribute name using the button to modify the attribute name. Modifying attributes name may be required during the importing cutlines to coordinate the attributes of imported objects and attributes of the Cutlines layer (see description of the vector data import in the Project processing User Manual). 24 PHOTOMOD 5.21 GeoMosaic Fig. 7. Attributes of the Cutlines layer Perform the following actions to obtain the information about cutline and edit attributes value of selected cutline: • Select cutline in the Preview window by double click; • Choose the Cutlines › Cutline info. The Cutline info window opens. Fig. 8. The attributes value of cutline Window contains the following entry fields: • Reference to the Main image is contained in the image attribute. Full path to file associated with the cutline is shown in this entry field by default. Open the list, which contains all mosaic project images, to modify the field value. Click the button on the right to return to the current image. • Reference to the Cutline type is contained in the rgn_type attribute. The type of cutlines area is defined in this entry field. Use the list contained the follows: Image, Transparent, Background to choose the type of cutline area. Choose the Image in the list to use in the cutline area of main image. Choose the Transparent type to make the cutline area transparent. It is possible to use the reference image, falling within cutline area, in the transparent cutline area. Choose the Background to fill the cutline area by background. As the background is used the output background color, defined in the parameters window of output mosaic (see Section 13.2). • Reference to the Source image is contained in the ref_image_name attribute. 25 PHOTOMOD 5.21 GeoMosaic Full path to reference image file, falling within cutline area, is specified in this field. Using reference image is available in the transparent cutline area only; i.e the Source image field is available in the case if the Transparent value is specified in the Cutline type field. Open the list, containing all mosaic project images, to select the reference image. Click the button on the right to delete the value from the entry field. Perform the following actions to view and edit the attributes value of selected cutline: • Select the cutline using double click in the Preview window; • Choose the Window › Objects attributes or click the The Object attributes window opens. button in the Vectors toolbar. Fig. 9. Cutlines attributes The following attributes are provided: • image – full path to the main image file; • image_title – cutline name (is generated automatically from the filename of source image); • The following values of cutline area type are allowed for the rgn_type : 1– The main image in the cutline area 2 – The transparent area 3 – The background in the cutline area • ref_image_name – full path to reference image file, provided that the cutline area is transparent, i.e rgn_type=2. 9.6. Cutlines menu Table 10. Brief description of Cutlines menu Cutlines menu Clear Purpose This menu item allows to delete the cutlines, i.e completely clean the Cutlines layer (without closing of this layer) 26 PHOTOMOD 5.21 GeoMosaic Cutlines menu Purpose Open This menu item allows to open the cutlines, previously saved in the vector file with *.x-data extension in the resources of active profile. Save This menu item allows to save the cutlines in vector file with the previously defined name and the *.xdata extension in the resources of active profile. Save as This menu item allows to save the cutlines in new vector file with the *.x-data extension in the resources of active profile. Build This menu item allows to specify the parameters of automatic cutlines creations and start the process of cutlines creation; The vector polygons are created in the Cutlines layer after the cutlines creation process is complete. Compute in distributed mode This menu item allows to specify the parameters of auto cutlines creation and run the process of cutlines creation in distributed processing mode. After its completion, the vector polygons are created in the Cutlines layer with saving into the specified file in the resources of active profile. Parameters This menu item allows to redefine the attributes of the Cutlines vector layer Cutline info This menu item is used for viewing and editing attribute values of the selected cutline Check cutlines This menu item is used for checking the correspondence between cutlines and project images. 10. Splitting into sheets The program allows cutting the output mosaic into sheets for saving them in the separate files of output raster formats. On the other hand existence of at least one sheet covering all or part of the block is required for creating the mosaic. The Sheets vector layer is provided for the creation of sheets boundaries. The program provides the different splitting options, the capability of sheets selection for creating output files and setting output parameters. Throughout this User Manual, the Active sheet is referred to as sheet, from which the output mosaic file will be created. The sheet status is defined by the attributes value of sheets status. It is recommended to pass the following number of actions during the mosaic sheets creation: 1. Definition of the mosaic output coordinate system (see description of the Output coordinate system panel in Section 13.2). 27 PHOTOMOD 5.21 GeoMosaic 2. Splitting block images into sheets, i.e creating sheets boundaries (the vector objects with the attributes for storing information about sheets in the Sheets layer). 3. Editing attribute values and sheets boundaries. 4. Managing sheets status. 5. Setting output parameters of sheets. 6. Creating output sheets of mosaic (see Section 13.6). To create mosaic sheets use the Sheets menu or the Sheets toolbar, that provide a quick access to sheets creation operations. To open the Sheets toolbar choose the Window › Toolbars › Sheets. The current section contains following information: • Mosaic splitting methods: ○ splitting into sheets by the specified parameters; ○ creating a single sheet covering all block images; ○ splitting into sheets by the images; ○ creating a single sheet with an arbitrary boundaries for any block images area; ○ standard and custom splitting; • Editing attribute values of the Sheets layer and sheets boundaries; • Managing sheets status; • Setting output parameters of sheets; • Brief description of the Sheets menu. 10.1. Splitting into sheets by the specified parameters This mode allows splitting specified area of block images in accordance with specified number of sheets and/or sheet size. Perform the following actions for splitting block images into sheets by specified parameters: 1. Choose the Sheets › Sequential splitting or click the toolbar. The Sheets splitting parameters window opens. 28 button in the Sheets PHOTOMOD 5.21 GeoMosaic Fig. 10. Parameters of sequential splitting 2. Define the splitting area, parameters of sequential splitting and attributes name of the Sheets layer. Table 11. Description of the sequential splitting parameters Parameter Purpose Block extents This parameter allows to specify the area boundaries (in meters) for splitting. Overlap This parameter allows to define the overlap size (in meters) by width and/or height. By default the sheets are created without overlap (dock). Sheets base name This parameter allows to define the sheets name prefix. By default the Sheet is proposed. The rest of the sheet name is generated by program automatically. It contains the serial number of sheets row (upward) and serial number of the sheet in a row (left to right). Sheet size This parameter allows to specify sheet size (in meters) by width and/or height. The modifying sheet size leads to recalculation of sheets number in the specified splitting area. Number of sheets This parameter allows to specify the number of sheets by width and/or height. The splitting begins from the bottom left corner of the specified splitting area (see the Block extents parameter) in accordance with specified number of sheets and sheet size (see the Sheet size parameter). Thus, sheet size not recalculated when the modifying number of sheets. Attribute with sheet names This parameter allows to define the name of attribute for storing the sheet names. 29 PHOTOMOD 5.21 GeoMosaic Parameter Purpose Sheets creation attribute This parameter allows to define the attribute name for storing information about sheet status. By default the create is proposed. 3. Click OK. The process of sheets creation starts. The sheets boundaries are created in the Sheets layer after this process completion. The Sheets layer becomes editable and marked by asterisk, this means that the layer has been edited but not saved. The sheet boundaries are displayed in the Preview window. All sheets are signed in accordance with the specified template for sheet name (Sheets base name+Row number+“_”+Number of the sheet in a row). All sheets, falling within block images, are active, i. e. selected for creating output mosaic files. Active sheet is shown by green outline and has not color filling. Inactive sheet is shown by red outline and red transparent filling, by default. You can select color and set up transparency options for inactive sheets on the Preview tab of the Settings window (seeSection 14.1). Fig. 11. Sequential splitting See also Section 10.5 and Section 10.7. 30 PHOTOMOD 5.21 GeoMosaic 10.2. Creating the single sheet covering all images block This mode allows creating the single sheet covering all images block of mosaic project. Choose the Sheets › Full mosaic sheet or click the button in the Sheets toolbar for creating the single sheet covering all images block of mosaic project. The sheet boundary that is the vector polygon which includes all images of mosaic project, is created in the Sheets layer. Sheet boundaries are displayed in the Preview window. Mosaic is a sheet name. The sheet status is active, since it is selected for creating of output mosaic file. See also Section 10.5 and Section 10.7. 10.3. Splitting by images This splitting mode allows to create sheets covering each image of the mosaic project. Choose the Sheets › Split into sheets by images for creating sheets covering each image. The sheet boundaries are created in the Sheets layer and displayed in the Preview window. Each sheet includes one of the project images. The name of image is used as the sheet name. All sheets are active, i.e. are selected for creating of output mosaic files. The Build sheets by images parameter on the Mosaic tab in the Mosaic parameters window has the effect on creating output mosaic sheets ( see Section 13.2). See also Section 10.5 and Section 10.7. 10.4. Creating the single sheet with arbitrary boundaries Creating the single sheet mode allows to create it from the any part of block images. Perform the following actions for creating the single sheet: 1. Choose the Sheets › Full mosaic sheet or click the button in the Sheets toolbar. 2. Stretch the rectangle in the Preview window along with pressed Shift key. The boundaries of single sheet are the single vector polygon with attributes of sheet name and sheet status. They are created in the Sheets layer. Mosaic is a sheet name. The sheet status is active, i.e sheet is selected for creating output mosaic file. See also Section 10.5 and Section 10.7. 10.5. Editing sheets The following capabilities are provided for editing the Sheets layer: • Refreshing sheets take into account while changing the parameters or splitting mode. 31 PHOTOMOD 5.21 GeoMosaic The program provides saving the already created sheets boundaries in the file of the profile resources while refreshing sheets. The Sheets layer is refreshed automatically with take into account the specified parameters or splitting mode after the confirmation or cancellation saving. • Deleting all created sheets, i.e deleting all vector objects from the Sheets layer. Choose the Sheets › Clear for deleting all sheets boundaries. • Manual editing/drawing vector objects (see Project processing User Manual). • Editing sheet’s features (values of attributes): name of a sheet, is it active or not. See Section 10.6. 10.6. Working with the attributes of the Sheets layer Each sheet is given the name and defined sheet status using the attributes of the Sheets layer. The capability of presetting provides correct import of sheets, which were created in third party software, in case when the imported objects have another names of attributes for storing information about sheet (see Project processing User Manual). By default the Sheets layer contains the following names of attributes: • create – for storing information about sheet status; • sheet_name – for storing sheet name. Choose the Sheets › Parameters or click the button in the Sheets toolbar for changing default attributes names of the Sheets layer, before the splitting into sheets. The Parameters window opens. Choose the From attribute option and define the new name of attribute for storing sheets name: select the name from list or specify it using the button. The same way change the name of attribute for storing information about sheet status in the Attribute name input field of the Sheets activity panel. Click OK. Thus, after the completion of splitting process, the data about the sheet name and sheet status will be stored in the defined attributes irrespective of splitting mode. 32 PHOTOMOD 5.21 GeoMosaic Fig. 12. Setting attributes names Perform the following actions for obtaining and editing information about a sheet: • Select the sheet boundaries by double click in the Preview window; • Choose the Sheets › Sheet info. The Sheet info window opens. Fig. 13. Values of cutline attribute Window contains the following information: • The sheet name in the Sheet name field corresponds to the sheet_name attribute value. • Set Sheet will be created checkbox corresponds to the “1” value in the create attribute, i.e. the sheet status is active. Cleared checkbox corresponds to the “0” value, i.e. the sheet status is not active. Perform the following actions for viewing and editing attributes values of selected sheet: • Select the sheet boundaries by double click in the Preview window; • Choose the Window › Object attributes or click the The Object attributes window opens. 33 button in the Vectors toolbar. PHOTOMOD 5.21 GeoMosaic Fig. 14. Values of sheet attributes The “1” value in the create attribute corresponds to the active sheet status, the “2” value corresponds to the inactive sheet status. The image name in the attribute is generated automatically and depends on the splitting mode and parameters. Click the string of the Value input field and insert another value for changing of attributes value. There are also other facilities in the program interface that provide fast managing of the sheet activity status (see Section 10.6.1). 10.6.1. Sheets status management In the Sheets menu and in the Sheets toolbar the following facilities provided to change sheets status: • To assign ’active’ status to all sheets choose the Sheets › Activate all sheets or click the button. • To assign ’non-active’ status to all sheets choose the Sheets › Deactivate all sheets or click the button. • To assign ’active’ status to selected sheets choose the Sheets › Activate selected sheets or click the button. • To assign ’non-active’ status to selected sheets choose the Sheets › Deactivate selected sheets or click the button. • To invert sheets status choose the Sheets › Invert sheets status or click the button. • To assign ’active’ status to sheets, which fall into images entirely including their background, and to simultaneously assign ’non-active’ status to the rest of sheets, choose the Sheets › Set sheets status by rasters or click the button. • To assign ’active’ status to sheets, which fall into images without their background, and to simultaneously assign ’non-active’ status to the rest of sheets, choose the Sheets › Set sheets status by useful areas or click the button. In order to use provided modes of sheets activation you should activate the Sheets layer and choose in the Sheets › Sheets activation mode menu one of three modes: 34 PHOTOMOD 5.21 GeoMosaic • Select for activation – by default, this mode assumes standard selection of sheets and further assigning them ’active’ or ’non-active’ status. In order to select sheets drag a rectangle along with pressed Shift key, and use one of group selection modes from the Tools toolbar. • By first sheet – this mode allows to change sheets status without sheets selection. When you drag a rectangle in this mode along with pressed Shift key, the sheets that fall into the rectangle, obtain the status of the first sheet of the rectangle created. • Use selection mode – this mode allows to change sheets status without sheets selection too. At that, status of sheets that fall into rectangle created, depends on a group selection tool selected in the Tools toolbar. To select sheets use the following modes: • To select ’active’ sheets choose the Sheets › Select active sheets or click the button. • To select ’non-active’ sheets choose the Sheets › Select non-active sheets or click the button. 10.7. Saving sheets Choose the Sheets › Save for saving sheets boundaries and specify the filename of internal vector format in the resources of active profile. Choose the Sheets › Save as for creating a new file. Choose the Edit › Export to export sheets boundaries into other vector format files (see Project processing User Manual). 10.8. Setting output parameters The output parameters allow to define the method of output files naming and criteria of selection sheets for creating output files. After splitting the block, and editing sheets boundaries and attributes, choose the Sheets › Parameters or click the button in the Sheets toolbar. The Sheets parameters window opens. 35 PHOTOMOD 5.21 GeoMosaic Fig. 15. Sheets parameters Table 12. Description of the output sheets parameters Parameters Purpose Sheet names This parameter allows to define the names of output mosaic sheets. Choose the From attribute input field and specify the attribute of name in the input field for using names, stored in the attribute of name of the Sheets layer. For using the serial numbers choose the Serial numbers input field and define the file name prefix. In this case, while creating mosaic, the sheet names are generated as follows: Prefix+Sheet serial number. Number of vertices This parameter defines criterion of sheets selection for creating output files by number of vertices within sheets boundaries. For selecting sheets by number of vertices choose the Value option and specify the number of vertices in the input field. Otherwise, choose the Arbitrary option. In this case, sheets selection by number of vertices within the boundaries of created sheets is not performed. Sheets activity This parameter allows to perform the selection of sheets for creating output files by the attribute values from the Sheets layer. Choose the Create all sheets mode for creating all sheets irrespective of attribute values. Choose the Create sheet with attribute value mode (by default) and specify the attribute and value of it as criterion of sheets selection. For example, while selecting the “1” value for the sheets status attribute, the output files for all active sheets will be created. Choose the Do not create sheets with attribute value mode for excluding sheets, which are satisfied the value specified in the Attribute name field of specified attribute in the Attribute value field. 36 PHOTOMOD 5.21 GeoMosaic 10.9. Sheets menu The Sheets menu is used for splitting mosaic into sheets for saving their in the separate files of selected output format. The sheets boundaries are the vector polygons in the Sheets layer. Table 13. Brief description of Sheets menu Sheets menu Purpose Clear This menu item allows to delete the created sheets boundaries, i.e delete all vector objects from the Sheets layer without closing of this layer. Open This menu item allows to open sheets boundaries, which were been saved in the vector file with the *.x-data extension in the resources of active profile. Save This menu item allows to save the sheets boundaries. Save as This menu item allows to save the sheets boundaries in new file with the same extension. Sequential splitting This menu item allows to define the sequential splitting parameters of block images area and start the process of sheets boundaries creation by the specified parameters. Full mosaic sheet This menu item allows to create the single sheet covering all block images. Split into sheets by images This menu item allows to create the sheets from each image of block. Single sheet creation mode This menu item allows to create the single sheet with arbitrary boundaries from any part of block images. Activate all sheets This menu item allows to select all sheets for creating output mosaic files, i.e the value of status attribute will be equal to “1” (active status) for boundaries of all sheets of Sheets layer. Deactivate all sheets This menu item allows to exclude all sheets from the process of mosaic creation and output mosaic files creation, i.e the value of status attribute will be equal to “0” (inactive status) for boundaries of all sheets of Sheets layer. Activate selected sheets This menu item allows to activate selected sheets for creating mosaic and creating output mosaic files, i.e the value of status attribute will be equal to “1” (active status) for boundaries of selected sheets of Sheets layer. Deactivate selected sheets This menu item allows to exclude selected sheets from the mosaic creation and creation of output mosaic files, i.e the value of status attribute will be equal to “0” (inactive status) for boundaries of selected sheets of Sheets layer. 37 PHOTOMOD 5.21 GeoMosaic Sheets menu Purpose Set sheets status by rasters This menu item allows to select only sheets containing at least part of block image for creation of output mosaic files (input background color on the images edges is taken into consideration), i.e the value of status attribute will be equal to “1” (active status) for boundaries of non-empty sheets. Invert sheets status This menu item allows to invert the status of all created sheets, i.e the value of status attribute will be inverted (the “0” value is inverted to “1” and and vice versa) for boundaries of all sheets of the Sheets layer. Parameters This menu item allows to define the output parameters for creation of output mosaic Sheet info This menu item allows to obtain and modify information about selected sheet, which is stored in the attributes of the Sheets layer. 11. Stitching by tie points The program provides an option of tie points measurement for more precise correspondence of cutlines area. Adjustment of the project source images is the result of tie points measurement and transforming source images close to cutline. Measuring ties points consists in defining correspondence between projections of the same terrain point on two or more source images of the mosaic project in the vicinity of cutlines. Also, the program provides the option of using reference image for measuring GCPs on the source images. The reference image is the raster image on the same area, but with more accurate georeference, then source images of mosaic project. I.e the reference image is used as standard for measuring GCPs, from which is defined the correspondence between the source images. The coordinates of terrain point on the reference image is assigned the same terrain point on the source images. The Tie points vector layer with the attributes for data storing about measured points is provided for storing the GCPs or tie points. The program provides three modes of tie/GCPs measurement: • Manual mode measurement of points without correlator; • Semi-automatic mode measurement of points using correlator; • Automatic mode measurement of points using correlator. 38 PHOTOMOD 5.21 GeoMosaic It is not recommended to measure the tie points far away from the cutlines to avoid the rough transformation of images. Also, it is not recommended measuring points on the extended objects (for example, on the roads), buildings and low-contrast areas. The current section contains the following information: • Tie points measurement; • GCPs measurement; • Editing measurement of points; • Attributes of the Tie points layer; • Brief description of the Ties menu. 11.1. Pre-setting Choose the Window › Toolbars › Tie points for quick access to the options of GCP/tie points measurement. The Tie points toolbar opens, which buttons are partially duplicated in the Tie points menu (see buttons description in Section 11.9). To display of images transformation in the result of stitching by the tie points (fast refreshing of images) perform the following actions in the Preview window before the start working: • Choose the Mosaic › Parameters. The Mosaic parameters window opens. Choose the Mosaic tab. • Set the Use tie points checkbox. Previously define the transformation type, which is used automatically on the edges of block images while the accumulation of GCPs measurement data. Perform the following actions: • Choose the Mosaic › Parameters. The Mosaic parameters window opens. Choose the Mosaic tab. • Set the Apply shift only to image edges when use GCPs checkbox to apply the shift on the Mosaic tab. Clear this checkbox to apply projective transformation type. For measurement of GCPs/tie points using the correlator in semi-automatic or automatic modes are used the correlator parameters. Choose the Ties › Parameters for viewing and editing parameters of correlator (see Section 11.5). 39 PHOTOMOD 5.21 GeoMosaic 11.2. Tie points measurement A pre-requisite for measurement of tie points is the presence of cutlines created in the Cutlines layer (see Section 9). Otherwise, the message about that cutlines must be created is shown. And measuring of tie points is not possible. Set the Use tie points checkbox for dynamic displaying of cutlines during the adding of tie points (see Section 11.1). 11.2.1. Manual mode measurement of tie points Perform the following actions for measuring tie point in manual mode without correlator: 1. Select the point in the vicinity of cutlines in the Preview window and set the marker in this place to add the tie point. 2. Choose the Ties › Add tie points › Add without correlation or click the button of the Tie points toolbar. The 2D windows with source images are opened. New tie point is added in the specified place. The visual non-conformities of tie points are displayed in the 2D windows on the source images, because the points are displayed by the data of georeference. 3. Select the new placement of selected tie point on the source images in the each of 2D windows for editing of its measurement. Choose the Ties › Remeasure or click the button of the Tie points toolbar. (see also Section 11.3). 4. For measuring the next point: select the another terrain point on the images in the each of the 2D windows and click the button of the Tie points toolbar. A new point is added as a result. Repeat the “3” item for editing of tie point measuring. For measuring of the next point using correlator: select the terrain point on the images in the each of 2D windows and choose the Ties › Add tie points › Add with correlation or click the button of the Tie points toolbar (see “2” item in Section 11.2.2). 5. Choose the Ties › Finish measurement or click the button for completing of measuring tie points in 2D windows and displaying of the stitching results in the Preview window. The areas stitching is performed in the middle of the interval between points in the 2D windows. 11.2.2. Semi-automatic mode measurement of tie points The semi-automatic mode implies the automatic computing of tie points using correlator in the marker placement. If necessary, set the Correlator parameters before the start working. Perform the following actions for measuring of tie points in semi-automatic mode: 40 PHOTOMOD 5.21 GeoMosaic 1. Select the terrain point in the vicinity of cutlines in the Preview window for adjustment of stitching areas and set the marker in this place. 2. Choose the Ties › Add tie points › Add with correlation or click the button of the Tie points toolbar. Tie point may be measured by correlation in one of the following ways: • In case of successful correlation the tie point is added on the Tie points layer. The images of the Preview window are refreshed taking into account coinciding cutlines areas by the specified tie point. Repeat the “1” and “2” items for measuring new tie point or edit the point (see Section 11.3). • The message about the point is far away from the cutlines is displayed. Select the another terrains point closer to the cutlines and repeat the “1” and “2” items. • Change the corresponding correlation parameters, if the message about the low correlation coefficient and/or about high autocorrelator coefficient is shown (see Section 11.5) or select more contrast point on terrain and repeat the “1” and “2” items. Fig. 16. Coinciding source areas of cutlines 41 PHOTOMOD 5.21 GeoMosaic Fig. 17. Stitching areas from two tie points 11.2.3. Automatic mode measurement of points The automatic mode implies the automatic searching of tie points using correlator on all block images of project in the vicinity of cutlines. If necessary, set the correlator parameters before the start working. Choose the Ties › Add tie points › Add automatically for start automatic measuring of tie points or click the button of the Tie points toolbar. View the stitching quality in the Preview window and, if necessary, edit the tie points measurements (see Section 11.3). 11.2.4. Measuring of tie points in the distributed processing mode The Distributed processing mode provides time saving while cutlines creation by making optimal use the hardware computing capacity. This mode is recommended to use in case of large volume of source images in the mosaic project. Perform the following actions for measuring points in the vicinity of cutlines in the distributed processing mode: 1. Define the structure and role of the workstations to participate in distributed processing. Detailed description of distributed processing mode organizing see in PHOTOMOD System User Manual. 2. Choose the Ties › Add tie points › Add in distributed mode. The Points measure parameters window open. 42 PHOTOMOD 5.21 GeoMosaic 3. Define the values of automatic points collection and correlator parameters (see description of parameters in Section 11.5). Click OK. The Ties points distributed processing windows opens. Fig. 18. Parameters of distributed processing for measuring tie points 4. Define the number of tasks, folder of temporary data, name and location of vector file for the tie points storing. Table 14. Description of tie points measuring parameters in distributed processing mode Parameter Purpose Number of images in project Info field for displaying number of created cutlines in the mosaic project. Max. number of simultaneous tasks Entry field for defining number of tasks, into which the entire auto searching process and tie points measuring is split. Temporary folder for parallel processing Entry field for defining the storing folder of temporary data. Click the button to select the folder or create the new folder in the resources of active profile. Output resource with tie points Entry field for defining location and name of output vector file to store the tie points in the resources of active profile. Click the button to select the folder and file name. 5. Click OK to start the process of creating an automatic searching and measuring of tie points in the vicinity of cutlines. After the completion of this process an output file of tie points is created in the specified folder. The measured point is added in the Tie points layer and displayed in the Preview window. 6. Estimate the stitching quality of cutlines in the result of the automatic measuring of tie points. If necessary, edit the measurement of added tie points (see Section 11.3). 11.3. Editing measurements of points Perform the following actions for editing measurements of point: 43 PHOTOMOD 5.21 GeoMosaic • Make editable the Tie points layer in the Layer manager. • Select the point in the Preview window by mouse clicking. Choose the Ties › Show windows by current point or click the button of the Tie points toolbar. The 2D windows with source images are opened. They are showing the selected point. • Insert the marker in another terrains point on the source images in each of the 2D windows. Choose the Ties › Remeasure or click the button of the Tie points toolbar. The tie point will move in new placement and show in the Preview window. The visual non-conformities of tie points are displayed in the 2D windows on the source images, because the points are displayed by the data of georeference. Perform the following actions to delete point: • Make editable the Tie points layer in the Layer manager. • Select the point in the Preview window by mouse clicking and press the Del key. Choose the Ties › Clear or click the button of the Tie points toolbar for deleting all measuring points on the Tie points layer. The Objects attributes window is used for viewing and editing tie points data from attributes (see Section 11.7). Choose the Ties › Show residuals to show residuals as the measurement point data is accumulating or click the button of the Tie points toolbar. Analysis of error vectors reveals “bad” points, having error vectors noticeably different from other points in size and direction. Choose the Ties › Delete by maximal residual or click the button of the Tie points toolbar for rejection the points, the measurement of which causes the noticeable shift of images relative to each other. The Delete parameters window opens. Specify the maximal tie points residuals (in meters) for rejection points, the measurement of which causes the noticeable shift of images at the distance greater than the specified (in meters). 11.4. Measurement of GCPs In case there is an image (reference image) with more accurate georeferencing covering the same area as source images, this reference image can be used for measuring of ground control points on the source images. The program provides three measurement modes of GCPs: manual (without correlation), semi-automatic and automatic (using the correlation). The correlator parameters are defined in the Points measure parameters window (see Section 11.5). 44 PHOTOMOD 5.21 GeoMosaic For GCP measurement you should define in advance a type of transformation which will be applied automatically on edges of images block while GCP measurements are accumulating. Perform the following actions to choose a transformation type: 1. Choose the Mosaic › Parameters. The Mosaic parameters window opens. Choose the Mosaic tab. 2. In order to apply shift as a transformation type set the Apply shift only to image edges when use GCPs option on the Mosaic tab. Or clear this option to apply projective transformation. Perform the follows for defining correspondence between the source images by control point on reference image in the manual mode: 1. Choose the Service › Load georeferenced images. Specify the file with reference image and click the OK button. The Load georeferenced images window opens. If necessary, convert the coordinate system and set the background color for reference image. Click the OK button. 2. Hide the layer with reference image in the Layer manager and make active the Tie points layer. 3. In the window with the source images insert the marker in the place of adding point on the one of the images in the vicinity of cutline. Choose the Ties › Add ground control points › Add without correlation or click the button of the Tie points toolbar. Turn on visibility of the layer with reference image. Move up the Tie points layer in the Layer manager for displaying the added point on the reference image. 4. Specify the point placement on the reference image corresponding selected terrain point on the source images. For this move the point use the mouse and pressed Ctrl key. Press Enter to confirm measurement. 5. Hide the layer with reference image in the Layer manager. 6. Repeat the “3” item to measure point on the neighbour image. 7. Repeat the “4” item. Hence we get a tie point on the source image with coordinates taken from the reference image. The source images in the Preview window are refreshed taking into account the stitching by added point. For measuring GCPs in the semi-automatic mode choose the Ties › Add ground control points › Add with correlation (duplicated by the button of the Tie points toolbar). For automatic searching of corresponding points on the reference image and source images of mosaic project choose the Ties › Add ground control points › Add automatically (duplicated by the button of the Tie points toolbar). 45 PHOTOMOD 5.21 GeoMosaic 11.5. Parameters of points measurements For measuring of tie/ground control points in semi-automatic and automatic mode you can use and adjust the following correlator parameters. For automatic mode you can use parameters for automatic points search in cut-lines neighborhood. To view and setup parameters of tie points measurements choose the Ties › Parameters or click the button on the Tie points toolbar. The Points measure parameters window opens. Fig. 19. Points measure parameters window Table 15. Description of point’s measurement parameters Parameter Description Fragment size Allows to define a size (in pixels) of a fragment which contains the point indicated on one image in cutline neighborhood. Search area Allows to define a search area (in meters) of appropriate point on another image. A search area is scanned by defined fragment-mask to find a similar point. Correlation pixel size Allows to define a value of a pixel size of images, where correlation to be performed, if the images have different pixel size. Max. auto-correlation Allows to control auto-correlation of a point, i. e. a degree of point’s uniqueness in some its neighborhood on the left image. The more the auto-correlation radius value, the less the point’s uniqueness and the more probable its incorrect comparison with the right image even when the correlation coefficient is high. Min. correlation Allows to define minimal acceptable value of correlation coefficient. Min. fragment RMS Allows to define a brightness value of image fragment. The less the value, the worse the correlation. 46 PHOTOMOD 5.21 GeoMosaic Parameter Description Min. distance between points Allows to define a minimal distance between points during automatic points measurement. Distance between points Allows to define a step along cutline for point search in automatic mode. Random shift from cutline Allows to define acceptable deviation from cutline when searching a point in automatic mode. Delete all points with same type before search- Allows to clear the Tie points layer from GCP or tie ing points before start a search of GCP or tie points (correspondingly) in automatic mode. 11.6. Information about tie point In order to obtain the information about tie/ground control point, select the point on editable layer Tie points and choose the Ties | Point info. In the opened Statistic information window you can see the following data: • point’s name (with tie prefix for tie point, and GCP – for GCP); • number of images where the point is measured; • path to file of each image where the point is measured. Fig. 20. Information about a point 11.7. Attributes of Tie points layer After tie/gcp point measuring the information about measured point is saved to attributes of the Tie points layer. To view point’s attributes data perform the following actions: 1. Make the Tie points layer editable and select a point. 2. Choose the Window › Object attributes. The Object attributes window is open. Fig. 21. Point’s attributes data 47 PHOTOMOD 5.21 GeoMosaic Point’s attributes contain the following data: • image_name_image_number – contains a path to one of the image files where the point is measured; • image_x_image_number – contains X-coordinate of the point on one of the images; • image_y_ image_number – contains Y-coordinate of the point on one of the images; • image_count – shows a number of images where the point is measured; • points_name – contains a name of point (with tie prefix for tie point, and GCP – for GCP); • tie_type – contains information about type of point (with 0 value for tie point, and 1 – for GCP). 11.8. Ties menu Table 16. Brief description of the Ties menu Ties menu Description Clear allows to delete all tie/gcp points from Tie points layer Open allows to open tie/gcp points previously saved in vector file with x-data extension in active profile resources Save allows to save tie/gcp points to vector file in active profile resources with the same name and x-data extension Save as allows to save tie/gcp points to vector file in active profile resources with different name and x-data extension Add ground control points opens sub-menu for measurement of GCP in manual, semi-automatic and automatic modes Add tie points opens sub-menu for measurement of tie points in manual, semi-automatic and automatic modes Remeasure allows to edit a measurement of selected tie/gcp point Show windows by marker allows to open 2D windows with initial images containing marker position Show windows by current point allows to open 2D windows with initial images containing selected tie point Finish measurement used to close the 2D windows with the sources images and return to the Preview window for viewing the results of cutlines stitching by measured points. 48 PHOTOMOD 5.21 GeoMosaic Ties menu Description Show residuals used to display residuals reveals “bad” points, having error vectors noticeably different from other points in size and direction. Delete by maximal residual used to remove blunders of tie/gcp points automatic measurement: allows to reject those points, which measurement value results in shift of images relatively each other at distance more than specified (in meters) Parameters allows to setup correlator’s parameters for measurements of tie/gcp points in semi-automatic or automatic mode Point info shows brief information about selected tie/gcp point 11.9. Tie points toolbar For quick access to options of tie/gcp points measurements you can use an additional Tie points toolbar. Some of its buttons duplicate items of the Tie points menu. Choose the Window › Toolbars › Tie points to open the Tie points toolbar. Fig. 22. Tie points toolbar Table 17. Brief description of the Tie points toolbar buttons Buttons Description allows to clear the Tie points layer allows to measure ground control point in manual mode without correlator allows to measure ground point in semi-automatic mode using correlator allows to run automatic search and measurement of GCP on the whole images block using correlator allows to measure tie point in manual mode without correlator allows to measure tie point in semi-automatic mode using correlator allows to start operation of tie points automatic search and measurement for the entire images block using correlator allows to edit a measurement of selected tie/gcp point opens 2D windows with initial images, which contain marker position opens 2D windows with initial images, which contain selected tie point 49 PHOTOMOD 5.21 GeoMosaic Buttons Description used to close the 2D windows with the source images and return to the Preview window for viewing the results of cutlines stitching by measured points. allows to setup correlator parameters used for tie/gcp points measurement in semi-automatic or automatic mode used to display residuals reveals “bad” points, having error vectors noticeably different from other points in size and direction. used to remove blunders of tie/gcp points automatic measurement: allows to reject those points, which measurement value results in shift of images relatively each other at distance more than specified (in meters) 12. Using auxiliary data 12.1. Misc (Miscellaneous) menu Misc menu is used to show in the Preview window an auxiliary data that may be considered during mosaics creation. For auxiliary data (that is vector data) the Misc layer is provided. Table 18. Brief description of Misc menu Misc menu Description Clear allows to delete all vector objects created in the Misc layer Save as allows to save the Misc layer data to vector file with different name and x-data extension in active profile resources Local adjustment allows to show in the Preview window a grid of fragments for preliminary estimation. The grid of fragments is intended for collecting of statistics data of local brightness adjustment (see Section 13.3.1) Source images outlines allows to show in the Preview window boundaries of source images with background. You may use the boundaries for cutlines creation or for images selection in order to show them in separate 2D windows using Images › Open selected menu item. Source images useful areas allows to show in the Preview window boundaries of source images without background. You may use the boundaries for cutlines creation or for images selection in order to show them in separate 2D windows using Images › Open selected menu item. 50 PHOTOMOD 5.21 GeoMosaic 13. Mosaic creation Perform the following actions to build mosaic: 1. If some mosaic’s areas differ considerably in brightness and contrast, you should perform their brightness adjustment, which includes global and/or local brightness adjustment, and seams feathering (see Section 13.3). 2. Split the mosaic into sheets and specify active sheets for output files creation (see Section 10). 3. Setup output parameters of mosaic’s building: main parameters and output file parameters (see Section 13.2 и Section 13.4). 4. Start mosaic’s output sheets creation (see Section 13.6). 13.1. “Mosaic parameters” window If you would like to setup mosaic building parameters, choose the Mosaic › Parameters or click the button. The the Mosaic parameters window opens. The window contains the following groups of parameters: 1. Main parameters of mosaic building on the Mosaic tab (see Section 13.2). 2. Parameters of local and global brightness adjustment on the Brightness adjustment tab (see Section 13.3). 3. Parameters of output mosaic sheets on the Output tab (see Section 13.4). 4. Additional parameters on the Misc tab (see Section 13.5). In order to save current mosaic settings made in the Preview window for the purpose of their further use in other projects choose the Mosaic › Save parameters preferences. To load saved mosaic settings into the Mosaic parameters window at the program start, set the Use saved mosaic settings checkbox on the Geomosaic tab in the Settings window (see Section 14). Otherwise, the default mosaic parameters will be loaded at the program start. 51 PHOTOMOD 5.21 GeoMosaic Fig. 23. “Mosaic parameters” window 13.2. Mosaic’s main parameters If you would like to setup main options of mosaic building, choose the Mosaic › Parameters or click the button. The Mosaic parameters window opens. Click the Mosaic tab. Table 19. Description of options on the Mosaic tab Parameter Description Cell size Allows to specify the size of output mosaic cell on the terrain. The cell size by default is equal to the cell size of the first image of mosaic project. The Calculate button opens a dialog used to set a mosaic size in pixels and recalculate its cell size accordingly. Background color Allows to set a color for mosaic background, since output mosaic always inscribes into a rectangular raster shape. The Transparent mosaic background on preview parameter influences on background color of mosaic in the Preview window (see Section 14.1). Resampling method Allows to choose the brightness interpolation mode during orthomosaic creation: bilinear, cubic or nearest neighbor. 52 PHOTOMOD 5.21 GeoMosaic Parameter Description Shift background color Allows to specify a shift of color on the image if this color coincides with defined color of mosaic’s background. Fill background out of sheet boundaries Allows to specify a type of filling outside of sheet boundaries in the output mosaic. If the option is set this area is filled with mosaic background color. Otherwise, the images of adjacent sheets are used for the filling. Raster offset of sheet Allows to specify a tolerance distance (in pixels) of raster extend beyond the sheet borders. Geometry correction cell size Allows to setup a fragment size (in pixels) when creating mosaic using fragments with projective dependence. The larger the fragment, the faster the mosaic building and the lower the accuracy of output mosaic. The value of 32 pixels is optimal for “speedaccuracy” ratio. Output raster channels Opens the window Output image parameters, used for specifying of channels for output mosaic. Build sheets by images Defines a content of sheets when creating a mosaic that is split on sheets by images (see Section 10.3). If the option is on, each sheet will contain the only image corresponding to the sheet, i.e. the mosaic will be not created. If the option is off, each sheet will contain all images that fall into this sheet. At that after splitting of sheets by images, sheets names in attributes of the Sheets layer should be the same as images names. The option is helpful when you only need to perform export of initial images into different coordinate system or export to files of other raster formats. Use images without cutlines Allows to use images without cutlines for preview and mosaic creation. See also a description of means of images order change when creating mosaic without cutlines in Section 8.5. Use source rasters base layer only Allows to use a base layer of initial images pyramid if the mosaic is created using docking (not overlapped) images without creating cutlines. If this option is off the program uses a pyramid layer corresponding to specified resolution, i. e. the pyramid layer is taken based on the Cell size parameter value. Use tie points Allows to immediately show results of merging along cutlines in the Preview window when measuring tie/gcp points. Apply shift only to image edges when use GCPs Allows to define a type of transformation which is applied automatically on the images block edges while collecting GCP measurements. If the option is off, projective transformation is applied, if it is on – just shift. 53 PHOTOMOD 5.21 GeoMosaic Parameter Description Rotation angle Allows to setup a rotation angle (in degrees) of mosaic’s images. This option is used if a block of initial images has elongated shape and you need to remove unnecessary background area in rectangular window of created mosaic. Source rasters background color range Allows to define a deviation from selected background color of initial images, i. e. to specify a range of color, existing in initial images background (see Section 8.3). Input coordinate system Allows to define coordinate system of initial images. Output coordinate system Allows to define coordinate system of output mosaic. If you would like to re-calculate an output mosaic into different coordinate system, it is highly recommended to specify output coordinate system before splitting it into sheets (see Section 10). 13.3. Brightness adjustment parameters If you would like to adjust brightness and contrast features of cutline areas during their merging, choose the Mosaic › Parameters or click the button. The Mosaic parameters window opens. Click the Brightness adjustment tab, allowing to setup the options of global brightness adjustment of output mosaic, to turn on local brightness adjustment, and to feather seams in cutline’s areas. Global brightness adjustment means transformation equally applied to all pixels of each source image. Local brightness adjustment means transformation applied along merging lines of individual images with gradual smoothing going down to the image central point and mosaic edges (i. e. processing of each pixel during local adjustment depends on its coordinates). 54 PHOTOMOD 5.21 GeoMosaic Fig. 24. Brightness adjustment parameters Table 20. Description of brightness adjustment parameters shown on the Brightness adjustment tab Parameter Description None Allows to use un-adjusted images. By average brightness Allows to apply brightness adjustment using average images brightness. At that brightness and contrast of all images are set to values, found using averaging of brightness and contrast values calculated over all mosaic images. This method is recommended when there are big differences between brightness’ of images, but each of them contains relatively smooth scenes. It should be noted that in case of scenes with sharp different brightness within one image (for example “sea” and “coast”) this method may produce incorrect brightness adjustment results. By project image Allows to apply global brightness adjustment corresponding to selected image, i. e. brightness and contrast of images are adjusted in accordance with parameters of selected (“reference”) image. Use the button to select the reference image. It is recommended to use image located in the middle of images block as a reference. It is not recommended to use this method in case of abnormal local brightness fluctuations (“trends”) on images, since in this case you can face a problem of smooth increasing or reducing of the brightness and contrast 55 PHOTOMOD 5.21 GeoMosaic Parameter Description from the reference image to the block edges right up to complete “lightening” (“blackening”). By image file Allows to apply global brightness adjustment corresponding to selected image, i. e. brightness and contrast of images are adjusted in accordance with parameters of selected (“reference”) image. Click the button to select the reference image. You should specify the background color for selected image. Match histogram An additional parameter of brightness adjustment allows to apply full (nonlinear) adjustment with histograms matching. Local adjustment Allows to apply local brightness adjustment along cutlines of images that are merged into mosaic. If you would like to specify local brightness adjustment parameters click the Parameters button (see Section 13.3.1). Brightness adjustment cell size Allows to specify a size of a cell (in pixels), which is used for brightness estimation and correction. Not use for brightness adjustment Allows to omit brightness adjustment on mosaic areas, specified by borders of vector polygons. Vector polygons created in advance are saved to file of active profile resources. Click the button to open the file with polygons. Seams feathering Allows to smooth seams on images cutlines and in the narrow zone around. The size of smoothing zone along cutlines is defined by the Smooth aperture size parameter. Set the Consider image edges when use feathering option to smooth seams on the edges of images block, where may be no statistics enough for correct smoothing. Check transparency inside cutlines Allows to consider image color in a cutline, coincident with input image background. If the option is set, the transparency for cutline sections with the same color is applied. Otherwise, the cutline will include sections with background color. 13.3.1. Local brightness adjustment Local brightness adjustment is a transformation applied along cutlines of images that are merged into mosaic with a smoothing going down to the image central point and mosaic edges. Thus during local brightness adjustment each pixel of the image is processed depending on its coordinates. At that the program performs simultaneous change of brightness (additive component) and contrast (multiplicative component) of initial images. For preliminary estimation of local brightness adjustment choose the Misc › Local adjustment. In the Preview window you will see a grid of fragments (rectangles), used 56 PHOTOMOD 5.21 GeoMosaic for statistics collection for local brightness adjustment. Fragments for statistics collection between images in the same strip are shown by green color, between strips – by blue, on the mosaic edges – by red, inside separate images – by yellow. The fragments are vector objects located on the Miscellaneous layer. You can make the Miscellaneous layer editable when necessary and change the fragments grid (see the chapter “Редактирование векторных объектов” в Руководстве пользователя “Обработка проекта”). Fig. 25. Preliminary estimation of local brightness adjustment To apply local brightness adjustment you should perform the following: 1. Choose the Mosaic › Parameters. The Mosaic parameters window is open. 2. Click the Brightness adjustment tab. In the Local adjustment panel set the On checkbox and then click the Parameters button. The Local adjustment parameters window is open. 57 PHOTOMOD 5.21 GeoMosaic Fig. 26. Local brightness adjustment parameters Table 21. Description of local brightness adjustment parameters Parameter Description Fragment size Allows to setup a size of image fragments used to create a model of local brightness adjustment. The bigger the fragment size the better the adjustment, but the slower the processing. Number of fragments Sets the number of fragments located on each image. The greater the number the better the adjustment, but the slower the process of parameters calculation and mosaic creation. Inner points Sets the number of points inside the image and on the edges of output mosaic, where the brightness should be preserved. Lack of inner points leads to brightness anomalies when moving away from the cutlines. Excess number of inner points causes the brightness un-adjustment along the cutlines. Contrast coefficient In some cases when the contrast of initial images is defined incorrectly it causes poor brightness adjustment or errors in creating of local brightness adjustment model. You can increase the value of this parameter from 2 to 7 to improve the result. Density coefficient Sets the amount of tie points on the edges of mosaic used for adjustment. Lack of these points leads to brightness anomalies when moving away from the cutlines. Excess number of tie points causes the brightness un-adjustment along the cutlines. Search additional fragments with 50% overlap- If you have insufficient statistics amount, the ping parameter allows to shift fragments grid in relation to cutlines with 50 % overlap, that may help to collect additional local adjustment statistics. Minimal valid part in fragment The parameter is used for space borne images processing which usually have small overlap areas. In this case a cutline may lie too close to the image edge, so that image background falls into cutline area. In this case the parameter 58 PHOTOMOD 5.21 GeoMosaic Parameter Description defines a minimal part of terrain image in a fragment, at which the local adjustment statistics will start to collect. If after cutlines editing you need to rebuild only local adjustment, choose the Mosaic › Rebuild local adjustment. 13.4. Mosaic output parameters If you would like to setup options of mosaic output, choose the Mosaic › Parameters or click the button. The Mosaic parameters window is open. Click the Output tab. Fig. 27. Mosaic output parameters Table 22. Description of mosaic output parameters Parameter Description Map scale Allows to setup a scale for output mosaic sheet. Click the Calculate map scale button to open the window where you can specify a scale and calculate a map sheet size (in meters) and print resolution. Create MS TIFF Allows to create output mosaic sheets in MS TIFF format with pyramid that helps to redraw images more quickly on a screen, when using systems with MS TIFF format support. 59 PHOTOMOD 5.21 GeoMosaic Parameter Description Create Geo TIFF Allows to create output mosaic sheets in Geo TIFF format with pyramid. Extended ERDAS Imagine (IMG+IGE) Allows to create output mosaic sheets in IMG files format for heading and IGM format for image (with no limitations for size). Compression Allows to compress files with output mosaic sheets (JPEG-compression for TIFF files is used). You can select a compression level using the Image quality slider. Default compression level is 75 %, that provides the 5-7 times compression of initial image volume. Georeference file Allows to select the format of the additional file created along with output mosaic and containing the information for mosaic referencing to coordinate system. Swap X, Y Allows to swap Х,Y coordinates to obtain output mosaic in left coordinate system. Create georeference only Allows to create just georeference files of sheets without building mosaic sheets (i. e. without files creation). Set background color as “transparent” When saving the resulting mosaic in MapInfo format (or “Map 2011”), you can set the background color which is shown in MapInfo system, as transparent. Save georeference as “NonEarth” Allows you to save georeference as NonEarth coordinate system, when saving the resulting mosaic in MapInfo format. Used if MapInfo system does not support coordinate system of mosaic project. File names Allows to open the Sheets files window to select format and target folder of output mosaic sheets (see also a list of output formats in Section 2.4). 13.5. Additional parameters If you would like to setup additional options, choose Mosaic › Parameters or click the button. The Mosaic parameters window is open. Click the Misc tab. 60 PHOTOMOD 5.21 GeoMosaic Fig. 28. Additional options Table 23. Description of miscellaneous parameters Parameter Description Save local adjustment Allows to turn on/off saving of parameters and settings of local brightness adjustment to file of mosaic project. Vector data coordinate system Allows to select input or output coordinate system of a project for storing of vector data (cutlines, sheets boundaries, tie points etc.). It is recommended to select output coordinate system (by default), since it is impossible to re-calculate coordinate system during sheets creation. Coordinate system of initial images and output mosaic are specified on the Mosaic tab. Preview extents The panel allows to define a type of mosaic project data to be shown in the Preview window, if sheets borders are out of initial images block (after coordinate system re-calculating, for instance). Choose the By source images option to show images of mosaic project, choose the By sheets option to show sheets borders (vector polygons), choose the By images and sheets option to show both sheets borders and project images. 61 PHOTOMOD 5.21 GeoMosaic 13.6. Creation of output mosaic sheets For creation of resulting output product – georeference files and sheets of mosaic (orthophotos) in specified coordinate system and scale – perform one of the following actions: • To create output orthophoto for current sheet perform the following: ○ On the Sheets layer select a border of a sheet, for which the output file will be created. ○ Choose the Mosaic › Build current sheet. The Save as window is open, where you can specify name, format and target folder of output file. Default file name is a name of sheet stored in attributes of the Sheets layer. • To create output orthophotos for several mosaic sheets perform the following: ○ Define active sheets on the Sheets layer, for which the output files will be created (see Section 10). ○ Choose the Mosaic › Build full mosaic or click the button. The Sheets file window is open. Specify format and target folder for output files. • To create output mosaic in distributed processing mode choose the Mosaic › Distributed processing or the Mosaic › Distributed processing with sheets splitting to start mosaic creation using distributed processing with sheets splitting. 13.7. Mosaic menu Table 24. Brief description of Mosaic menu Mosaic menu Description Parameters allows to setup parameters of mosaic preview and creation, as well as brightness adjustment and output data save Preview allows to open Preview window for the entire block of loaded images considering data processing results Preview (current sheet) allows to open Preview window for the selected sheet of mosaic Rebuild brightness adjustment allows to rebuild local adjustment after cutlines change Build full mosaic is used for start of mosaic building and creation of output files for selected active sheets Build current sheet is used for start of mosaic building and creation of output file for selected sheet 62 PHOTOMOD 5.21 GeoMosaic Mosaic menu Description Distributed processing allows to start mosaic creation for specified active sheets considering user settings and parameters in parallel (distributed) processing mode Distributed processing with sheets splitting allows to start mosaic creation using distributed processing with splitting of active sheets Open image allows to open any image of acceptable raster format for preview in the application window Save parameters preferences allows to save mosaic parameters setting for further use them in other mosaic projects (see a description of the Use saved mosaic settings option in Section 14). 14. Common parameters For convenient work the program provides adjusting of common parameters and mosaic visualization parameters in the Preview window (see Section 14.1). Perform the following actions to set up common program parameters: 1. Choose the Service › Settings or click the button. The Settings window opens. 2. Click the Geomosaic tab. Fig. 29. Common parameters 63 PHOTOMOD 5.21 GeoMosaic Table 25. Description of common parameters Parameter Description Save local adjustment Allows to turn on/off saving of parameters and settings of local brightness adjustment to file of mosaic project. Create backup Allows to setup automatic save of mosaic project backups to active profile resources. Switch off computer after mosaic is built Allows to setup computer automatic switch off after completion of mosaic creation. PHOTOMOD Geomosaic exit affirmation Allows to show a prompt on confirmation of exit from the program when user tries to close main program window. Use saved mosaic settings Allows to load mosaic settings (saved by choosing the Mosaic › Save parameters preferences) during the program start. 14.1. Preview parameters Perform the following actions to setup mosaic visualization options in the Preview window: 1. Choose the Service › Settings or click the button. The Settings window opens. 2. Click the Preview on the Geomosaic tab. Fig. 30. Preview parameters 64 PHOTOMOD 5.21 GeoMosaic Table 26. Description of preview parameters Parameter Description Show rasters in zoom greater than Allows to setup a zoom at which a visualizing of mosaic project images in the Preview window begins. Transparent mosaic background on preview Allows to setup a transparency of output mosaic background visible in the Preview window. Redraw preview on editing Allows to setup automatic refresh of mosaic data in the Preview window during editing of this data. Open preview immediately Allows to show added images in the Preview window right away (the option is set by default). See also Section 8.2. Skipped sheets fill color Allows to select a fill color to show inactive sheets of mosaic (i.e. sheets excluded from output files creation). You can adjust the transparency degree for selected color using the Skipped sheets color transparency slider (in percent). See also Section 10.6. 65