1
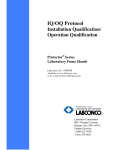
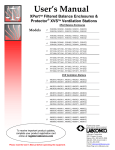
User’s Manual
Purifier® Non-Ventilated
PCR & Tissue Culture Enclosures
Models
3951400
3951420
3952400
3952420
Register your product online at
www.labconco.com/productreg.html
or return the attached card and
receive FREE LabbyWear™!
Labconco’s Mascot,
Labby the LABster
LABCONCO CORPORATION
8811 PROSPECT AVENUE
KANSAS CITY, MO 64132-2696
800-821-5525, 816-333-8811
FAX 816-363-0130
E-MAIL [email protected]
HOME PAGE www.labconco.com
Copyright Information
Copyright © 2004 Labconco Corporation. All rights reserved.
Labconco Corporation
8811 Prospect Avenue
Kansas City, Missouri 64132
The information contained in this manual and the accompanying product is copyrighted and all rights are
reserved by Labconco Corporation. Labconco Corporation reserves the right to make periodic design
changes without obligation to notify any person or entity of such change.
Purifier Passive PCR Enclosure and Purifier Tissue Culture Enclosure
Warranty
Labconco provides a warranty on all parts and factory workmanship. The warranty includes areas of
defective material and workmanship, provided such defect results from normal and proper use of the
equipment.
The warranty for all Labconco products will expire one year from date of installation or two years from
date of shipment from Labconco, whichever is sooner, except the following:
•
•
•
•
Purifier® Delta® Series Biological Safety Cabinets and PuriCare® Procedure Stations carry a
three-year warranty from date of installation or four years from date of shipment from Labconco,
whichever is sooner.
FlaskScrubber®, SteamScubber and FlaskScrubber Vantage™ Series Glassware Washers carry a
two-year warranty from date of installation or three-years from date of shipment from Labconco.
Carts carry a lifetime warranty.
Glass is not warranted from breakage due to accident or mishandling.
This limited warranty covers parts and labor, but not transportation and insurance charges. In the event of a
warranty claim, contact Labconco Corporation or the dealer who sold you the product. If the cause is
determined to be a manufacturing fault, the dealer or Labconco Corporation will repair or replace all
defective parts to restore the unit to operation. Under no circumstances shall Labconco Corporation be
liable for indirect, consequential, or special damages of any kind. This statement may be altered by a
specific published amendment. No individual has authorization to alter the provisions of this warranty
policy or its amendments. Lamps and filters are not covered by this warranty. Damage due to corrosion or
accidental breakage is not covered.
Limitation of Liability
The disposal and/or emission of substances used in connection with this equipment may be governed by
various federal, state, or local regulations. All users of this equipment are required to become familiar with
any regulations that apply in the user’s area concerning the dumping of waste materials in or upon water,
land, or air and to comply with such regulations. Labconco Corporation is held harmless with respect to
user’s compliance with such regulations.
Contacting Labconco Corporation
☞
If you have questions that are not addressed in this manual, or if you need technical
assistance, contact Labconco’s Customer Service Department or Labconco’s Product
Service Department at 1-800-821-5525 or 1-816-333-8811, between the hours of 7:00
a.m. and 6:00 p.m., Central Standard Time.
Visit Labconco’s web site at: http://www.labconco.com or email Labconco at: [email protected].
Part #3939200, ECO B730
TABLE OF CONTENTS
CHAPTER 1: INTRODUCTION
Polymerase Chain Reaction® Definition (PCR)
About This Manual
Typographical Conventions
1
1
2
3
CHAPTER 2: PREREQUISITES
Support Requirements
Location and Air Current Requirements
Electrical Requirements
Space Requirements
4
4
4
5
5
CHAPTER 3: GETTING STARTED
Unpacking Your Enclosure
Installing the Enclosure on a Supporting Structure & Work
Surface
Connecting the Electrical Supply
Sealing the Enclosure to the Work Surface
6
7
7
9
9
CHAPTER 4: FEATURES AND SAFETY PRECAUTIONS
Features
Safety Precautions
10
10
12
CHAPTER 5: USING YOUR ENCLOSURE
14
CHAPTER 6: MAINTAINING YOUR ENCLOSURE
Routine Maintenance Schedule
UV Light Replacement
Fluorescent Light Replacement
15
15
15
16
CHAPTER 7: ACCESSORIZING YOUR ENCLOSURE
Work Surfaces
Storage Cabinets
Base Stands & Mobile Stands
17
17
18
18
CHAPTER 8: TROUBLESHOOTING
19
APPENDIX A: REPLACEMENT PARTS
20
APPENDIX B: DIMENSIONS
23
APPENDIX C: SPECIFICATIONS
24
DECLARATION OF CONFORMITY
27
CHAPTER 1
INTRODUCTION
Congratulations on your purchase of a Labconco Purifier Passive
PCR Enclosure or Purifier Tissue Culture Enclosure. Your nonventilated enclosure is designed to reduce cross-contamination in
laboratory applications.
The Purifier Passive PCR Enclosure and Purifier Tissue Culture
Enclosure offer a UV light for disinfecting the interior and an
interior switched electrical outlet. The Purifier Passive PCR
Enclosure UV light has the added feature of a digital timer to
accommodate PCR protocol. To take full advantage of all the
features, please acquaint yourself with this manual and keep it
handy for future reference.
Polymerase Chain Reaction
Definition (PCR)
Polymerase Chain Reaction® (PCR), is a laboratory process in
which a particular DNA segment from a mixture of DNA chains is
rapidly replicated, producing a large, readily analyzed sample of a
piece of DNA. In PCR, DNA is immersed in a solution containing
the enzyme DNA polymerase, unattached nucleotide bases (the
subunits that DNA is composed of), and “primers”, short
sequences of nucleotides designed to bind with an end of the
desired DNA segment. Two primers are used: one primer binds at
one end of the desired segment on one of the two paired DNA
strands and the other primer binds at the other end but on the other
strand. The solution is heated to break the bonds between the
Product Service 1-800-522-7658
1
Chapter 1: Introduction
strands of the DNA. When the solution cools, the primers bind to
the separated strands, and DNA polymerase quickly builds a new
strand by joining the free nucleotide bases to the primers. When
this process is repeated, a strand that was formed with one primer
binds to the other primer, resulting in a new strand that is restricted
solely to the desired segment. Thus, the region of DNA between
the primers is selectively replicated. Further repetitions of the
process can produce billions of copies of a small piece of DNA in
several hours. PCR was developed in 1985 by Kary B. Mullis,
who was awarded the 1993 Nobel Prize in chemistry for his work.
It is used in a broad range of applications from DNA fingerprinting
to medical tests to identify diseases from the infectious agent’s
DNA. See also nucleic acid. The Concise Columbia Encyclopedia
is licensed from Columbia University Press. Copyright © 1995 by
Columbia University Press. All rights reserved.
About This Manual
This manual is designed to help you learn how to install, use, and
maintain your non-ventilated enclosure. Instructions for installing
optional equipment on your enclosure are also included.
Chapter 1: Introduction provides a brief overview of the nonventilated enclosure, explains the organization of the manual, and
defines the typographical conventions used in the manual.
Chapter 2: Prerequisites explains what you need to do to prepare
your site before you install the enclosure. Electrical and service
requirements are discussed.
Chapter 3: Getting Started contains the information you need to
properly unpack, inspect and install the enclosure.
Chapter 4: Features and Safety Precautions explains how the
enclosure operates and the appropriate precautions you should take
when using it.
Chapter 5: Using Your Enclosure discusses the basic operation of
how to prepare, use and turn off your non-ventilated enclosure is
included.
Chapter 6: Maintaining Your Enclosure explains how to perform
routine maintenance.
2
Product Service 1-800-522-7658
Chapter 1: Introduction
Chapter 7: Accessorizing Your Enclosure explains acceptable
modifications or how to add accessories.
Chapter 8: Troubleshooting contains a table of problems you may
encounter while using the product including the probable causes of
the problems and suggested corrective actions.
Appendix A: Components contains labeled diagrams of all of the
components of the enclosures.
Appendix B: Dimensions show all of the dimensions for the
enclosures.
Appendix C: Specifications contains the electrical requirements.
Wiring diagrams are also included in this section.
Typographical Conventions
Recognizing the following typographical conventions will help
you understand and use this manual:
•
•
•
•
•
•
•
•
Book, chapter, and section titles are shown in italic type (e.g.,
Chapter 3: Getting Started).
Steps required to perform a task are presented in a numbered
format.
Comments located in the margins provide suggestions,
reminders, and references.
Critical information is presented in boldface type in paragraphs
that are preceded by the exclamation icon. Failure to comply
with the information following an exclamation icon may result
in injury to the user or permanent damage to the enclosure.
Critical information is presented in boldface type in paragraphs
that are preceded by the wrench icon. A trained certifier or
contractor should only perform these operations. Failure to
comply with the information following a wrench icon may
result in injury to the user or permanent damage to your hood.
Important information is presented in capitalized type in
paragraphs that are preceded by the pointer icon. It is
imperative that the information contained in these paragraphs
be thoroughly read and understood by the user.
The PCR icon indicates the text is specific to the Purifier PCR
Enclosure.
The TC icon indicates the text is specific to the Purifier Tissue
Culture Enclosure.
Product Service 1-800-522-7658
!
☞
PCR
TC
3
CHAPTER 2
PREREQUISITES
Before you install the enclosure, carefully examine the location.
You must be certain that the area is level and of solid construction.
In addition, a dedicated source of electrical power should be
located near the installation site to power the enclosure.
Carefully read this chapter to learn the requirements for your
installation site:
•
•
•
•
The support requirements.
The location and air current requirements.
The electrical power requirements.
The space requirements.
Support Requirements
At a minimum, the supporting structure usually consists of a base
cabinet and chemically resistant work surface. A mobile stand or
cart is allowable. See Chapter 7 for accessory work surfaces,
stands, mobile stands and cabinets.
Location and Air Current
Requirements
The Purifier Passive PCR and Purifier Tissue Culture Enclosures
have been designed to reduce cross drafts and air circulation with
the sash and UV sash closure shut. However, as a precautionary
measure of safety and a higher level of quality management, it is
recommended that the enclosure be placed in such an area away
from:
4
Product Service 1-800-522-7658
Chapter 2: Prerequisites
•
•
•
High traffic areas where walking might cause an air
disturbance.
Overhead or wall HVAC diffusers, fans, radiators or other lab
equipment producing air currents.
Next to doorways or windows that may be opened.
Electrical Requirements
Standard duplex electrical receptacles should be nearby for
connecting the non-ventilated Purifier Passive PCR Enclosure or
Purifier Tissue Culture Enclosure. For your convenience the
enclosures have a switched auxiliary outlet receptacle. The
auxiliary switched outlet is rated for either 115V, 8 amps or 230V,
4 amps.
Space Requirements
The dimensions for the non-ventilated enclosures are shown in
Appendix B: Enclosure Dimensions.
Product Service 1-800-522-7658
5
CHAPTER 3
GETTING STARTED
Now that the site for your non-ventilated Purifier PCR or Purifier
Tissue Culture Enclosures is properly prepared, you are ready to
unpack, inspect and install your non-ventilated enclosure. Read
this chapter to learn how to:
• Unpack and move the enclosure.
• Set up the enclosure with the proper supporting structure
and work surface.
• Connect the electrical supply.
• Seal the enclosure to the work surface.
Depending upon which model you are installing, you may need
wrenches, ratchets, sockets, a nut driver set, a flat-blade
screwdriver, a Phillips screwdriver, and a carpenter level to
complete the instructions in the chapter.
!
6
The enclosures weigh 100 lbs. (45 kg). The
shipping container allows for lifting with a
mechanical lift truck or floor jack. If you must
lift the enclosure manually, follow safe-lifting
guidelines. Do not lift by the front lower
support.
Product Service 1-800-522-7658
Chapter 3: Getting Started
Unpacking the Enclosure
Carefully remove the shrink-wrap or carton on the enclosure and
inspect it for damage that may have occurred in transit. If
damaged, notify the delivery carrier immediately and retain the
entire shipment intact for inspection by the carrier.
☞
DO NOT RETURN GOODS WITHOUT THE
PRIOR AUTHORIZATION OF LABCONCO.
UNAUTHORIZED RETURNS WILL NOT BE
ACCEPTED.
☞
IF ENCLOSURE WAS DAMAGED IN TRANSIT,
YOU MUST FILE A CLAIM DIRECTLY WITH
THE FREIGHT CARRIER. LABCONCO
CORPORATION AND ITS DEALERS ARE NOT
RESPONSIBLE FOR SHIPPING DAMAGES.
The United States
Interstate Commerce
Commission rules
require that claims be
filed with the delivery
carrier within fifteen (15)
days of delivery.
Do not discard the packing material until you have checked all of
the components and tested the enclosure.
We recommend that you do not remove the enclosure from its
shipping container until it is ready to be placed into its final
location. Move the unit by using a floor jack.
!
Do not move the enclosure by tilting it onto a
hand truck.
Installing the Enclosure on a
Supporting Structure and Work
Surface
When installing the enclosure onto a chemically-resistant work
surface or benchtop, ensure that the structure can safely support the
combined weight of the enclosure and any related equipment. The
work surface should be at least as wide and deep as the nonventilated enclosure to properly support it. The front of the nonventilated enclosure should be aligned within 1/8" of the front of
the work surface. Mounting holes are provided in the Labconco
accessory work surfaces to secure the enclosure.
Product Service 1-800-522-7658
7
Chapter 3: Getting Started
Work Surface Specifications
The work surface should be smooth, rigid, and durable, such as a
chemically-resistant epoxy resin. The surface should be
non-porous and resistant to the materials used in conjunction with
the Purifier PCR or Purifier Tissue Culture Enclosures. The work
surface should also contain a dished recessed area for containing
primary spills.
Work Surface and Non-Ventilated Enclosure Installation
1. Level the base cabinets and the work surface. Work
surface should be placed flush with the front of the base
cabinet as shown in Figure 3-1.
2. Position the work surface in its intended location and with
the front of the work surface, (wide flange), towards you.
3. Secure the work surface to the base cabinet with a
structural adhesive or silicone sealant.
4. Insert the supplied mounting screws in the four holes.
Allow a minimum of 1/8" clearance under the head of the
screw for positioning the enclosure.
5. Place the enclosure on the work surface and slide the rear
flange and lower front bracket flanges under the mounting
screw heads.
6. Tighten the four screws to complete the installation.
Figure 3-1
Side View of Typical Installation
8
Product Service 1-800-522-7658
Chapter 3: Getting Started
Connecting the Electrical Supply
A grounded receptacle should be nearby for connecting the Purifier
PCR or Purifier Tissue Culture Enclosures. Please review Chapter
2 for electrical prerequisites.
All wiring for the building electrical outlets
SHOULD be performed by a licensed electrician
and conform to all local codes.
Sealing the Enclosure to the
Work Surface
When the enclosure has been set in place, it may be sealed at the
work surface to prevent spilled materials from collecting under the
walls. A bead of silicone sealant is recommended to seal it to the
work surface.
Product Service 1-800-522-7658
9
CHAPTER 4
FEATURES AND SAFETY
PRECAUTIONS
Features:
Labconco engineered the Purifier Passive PCR Enclosure and
Purifier Tissue Culture Enclosure to provide a non-ventilated,
circulation-free work area to reduce cross-contamination in
laboratory applications. A spacious interior and convenience
outlet give ample room for media preparation and equipment
used for procedures. A UV light with digital timer, included
on the Purifier PCR Enclosure, provides decontamination
control after PCR protocols are conducted. The Purifier Tissue
Culture Enclosure may be used for techniques such as tissue
staining, culture growth and virus harvesting. A built-in UV
light on the Purifier Tissue Culture Enclosure provides
secondary surface decontamination while the enclosure is not
in use.
10
Product Service 1-800-522-7658
Chapter 4: Features and Safety Precautions
5
7
9, Internal
3
8
6
4
10, Not
Shown
2
1
Figure 4-1
Features
1. Ergonomic Slope and Front of 20° provides maximum
visibility, and comfort, reduces glare, thereby minimizing
operator fatigue.
2. Internal Depth of 23" and interior height of 22"
provides necessary depth and height to support procedures
and other auxiliary equipment without extending outside
the non-ventilated enclosure.
3. Flush Sash has a wiping seal and features a spring-loaded
latch for loading auxiliary equipment. The sash pivots
down for normal operation.
4. Electrical Pass-Through Iris allows electrical cords and
data cords to pass through the back of enclosure. The unit
ships with solid plugs and the iris plugs are included with
the User’s Manual for your convenience.
Product Service 1-800-522-7658
11
Chapter 4: Features and Safety Precautions
5. Fluorescent Light provides illumination for the interior of
the enclosure.
6. Ultraviolet Germicidal Light provides surface
decontamination and maintains sterility inside the
enclosure. It is located above the work area.
PCR
7. Variable PCR Digital UV Light Timer (Purifier PCR
Enclosure only) allows the operator to time the surface
disinfection of the work area for PCR protocols. The UV
light timer has eight settings of 5, 10, 15, 30, 60, 120, 240
minutes and infinitely ON. It is easily changed by selecting
the time necessary on the control panel.
8. UV Sash Closure provides added safety to prevent access
and air currents inside the non-ventilated enclosure when
the UV light is activated.
9. Switched Outlet is located inside the non-ventilated
enclosure for powering electrical equipment.
10. Accessory Work Surface is dished to contain spills and is
contoured to fit the dimensions of the non-ventilated
enclosures.
Safety Precautions
!
!
Use good housekeeping in the enclosure at all
times. Clean up spills immediately.
Periodically clean all interior surfaces.
Do not work with hazardous volatile
chemicals in this enclosure.
All acid use in this enclosure is prohibited.
!
12
Radioisotope materials are prohibited in this
enclosure.
Product Service 1-800-522-7658
Chapter 4: Features and Safety Precautions
The use of safety goggles, protective clothing,
gloves and any other personal protective
equipment recommended by your safety
officer should be used.
The sash should remain in the down position
while using the enclosure.
Ensure the enclosure is connected to an
electrical service in accordance with local and
national electrical codes. Failure to do so
may create a fire or electrical hazard. Do not
remove or service any electrical components
without first disconnecting from electrical
service.
Ensure only trained operators use the nonventilated enclosure. All users should review
the User’s Manual and become familiar with
the operation.
Avoid direct exposure to ultraviolet (UV)
radiation; NEVER work in the nonventilated enclosure with the UV light on.
Always use the UV sash closure in the closed
position when using the UV light to provide
added protection.
Product Service 1-800-522-7658
13
CHAPTER 5
USING YOUR
ENCLOSURE
Planning
• Thoroughly understand procedures and equipment required
before beginning work.
• Arrange for minimal disruptions, such as room traffic or
entry into the room while the enclosure is in use.
Start-up
• Clean and surface disinfect the inside of the enclosure. Use
UV light as required for protocol.
• Turn on the fluorescent light.
• Only raise the sash for loading.
• Wear a long sleeved lab coat and rubber gloves. Use
protective eyewear. Wear a protective mask if appropriate.
Consult your Safety Officer for additional personal
protective equipment recommendations.
Work Techniques
• Keep all materials inside and perform all operations inside
the work area.
Unloading Materials and Equipment
• All open trays, weigh vessels and containers should be
covered before being removed from the enclosure.
Shutdown
• Turn off the fluorescent light and close the UV sash
closure.
• Clean and surface disinfect the interior surfaces after
completion.
• Turn on the UV light to decontaminate the work area as
determined by your protocol.
14
Product Service 1-800-522-7658
CHAPTER 6
MAINTAINING YOUR
ENCLOSURE
Now that you have an understanding of how to work in the nonventilated enclosure, we will review the suggested maintenance
schedule and common service operations.
Routine Maintenance Schedule
Weekly
• Clean the enclosure interior appropriate for the application.
Monthly (or more often as required)
• Using a cloth and glass cleaner, clean the exterior surfaces
of the non-ventilated enclosure, particularly the front to
remove any accumulated dust.
• All weekly activities.
Annually
• Replace the UV lamp.
• All monthly activities.
UV Light Replacement
1.
2.
3.
4.
5.
Disconnect power.
Locate the UV lamp inside.
Rotate and remove the old UV lamp.
Reinstall the new UV lamp.
Switch unit on and try the new UV lamp.
Product Service 1-800-522-7658
15
Chapter 6: Maintaining Your Enclosure
Fluorescent Light Replacement
1. Disconnect power.
2. Locate the two Phillips machine screws on top of the light
and remove. Lift up the light assembly.
3. Rotate and remove the old fluorescent lamp.
4. Reinstall the new fluorescent lamp, light and screws in
reverse order.
5. Switch unit on and try the new fluorescent lamp.
16
Product Service 1-800-522-7658
CHAPTER 7
ACCESSORIZING YOUR
ENCLOSURE
There are several ways to accessorize the enclosure for your
individual requirements. These include the addition of accessory
work surfaces, storage cabinets, base stands and mobile stands.
1. Work Surfaces
An optional dished work surface is available.
Dished work surfaces are contoured to fit the enclosure to
contain spills. Epoxy is chemical resistant.
Catalog #
3908402
3908405
Description
Black, 4-foot wide
Gray, 4-foot wide
Product Service 1-800-522-7658
Dimensions (W x D x H)
48" x 26.66" x 1"
48" x 26.66" x 1"
17
Chapter 7: Accessorizing Your Non-Ventilated Enclosure
2. Storage Cabinets
Size/Description
48"
36"
30"
24"
18"
12"
48" w/Self Closing Doors
36" w/Self Closing Doors
30" w/Self Closing Doors
24" w/Self Closing Doors
24" ADA
24" ADA w/Self Closing
Doors
18" ADA
12" ADA
Size/Description
48"
36"
30"
24"
18"
12"
48" w/Self Closing Doors
36" w/Self Closing Doors
30" w/Self Closing Doors
24" w/Self Closing Doors
24" ADA
24" ADA w/Self Closing
Doors
18" ADA
12" ADA
Dual Doors
9902000
9902100
9902200
9903000
9903100
9903200
-
SOLVENT
Right Hinge
9902300
9903300
9906000
9906200
-
STANDARD BASE
Dual Doors
Right Hinge
9900000
9900100
9900200
9900300
9900400
9900500
9904000
-
9904100
9904200
Left Hinge
9902400
9903400
9906100
9906300
Dual Doors
9901000
9901100
9901200
-
ACID
Right Hinge
9901300
9901400
9905000
-
-
-
9905100
-
Left Hinge
9900600
9900700
9900800
9904300
9904400
9904500
Left Hinge
9901500
9901600
9905200
9905300
-
VACUUM PUMP
Dual Doors Right Hinge Left Hinge
9907000
9907100
-
-
3. Base Stands and Mobile Stands
3746702
4'
Telescoping Base Stand with Fixed Feet
48" w x 29.25" d x 27.5" to 33.5" h
3746712
4'
Telescoping Base Stand with 5" Casters
48" w x 29.25" d x 27.5" to 33.5" h
18
Product Service 1-800-522-7658
-
CHAPTER 8
TROUBLESHOOTING
Refer to the following table if your enclosure fails to operate
properly. If the suggested corrective actions do not solve your
problem, contact Labconco for additional assistance.
PROBLEM
CAUSE
CORRECTIVE ACTION
Reset or replace circuit breaker.
Lights do not work.
Circuit breaker(s)
tripped.
Lamp not installed
properly.
Lamp Wiring
disconnected.
Defective lamp.
Light switch is
defective.
No power.
UV light timer does
not work. (PCR only)
No lights on.
No display.
Product Service 1-800-522-7658
Inspect lamp installation.
Inspect lamp wiring.
Replace lamp.
Replace light switch.
Power cable to UV light timer circuit
board is disconnected.
Verify connection.
Replace circuit board for UV light
timer if it malfunctions.
19
APPENDIX A
REPLACEMENT PARTS
The following illustrations indicate the replacement parts.
20
Product Service 1-800-522-7658
Appendix A: Replacement Parts
Item
1
2
3
4
5A
5B
5C
5D
6
7A
7B
7C
7D
7E
8
9A
9B
10A
10B
10C
11A
11B
12
13A
13B
14
15
16
17A
17B
18A
18B
18C
19A
19B
20A
20B
21A
21B
22
Qty.
1
1
1
2.3 Ft.
1
1
1
2
1
1
1
2
2
2
1
1
1
2
2
2
1
1
1
1
1
1
1
1
1
1
2
1
1
1
1
1
1
1
2
8
Part Number
3906500
3906102
3905602
6913700
1927403
3906700
6916500
1893206
3945200
3907400
3907401
1932401
1912108
1909217
3905302
1934601
1936800
7868402
1912108
1889316
3929400
3929500
3945300
1307000
1306300
9721901
1271300
1294000
1233400
1233600
1333800
1334500
1334100
1333900
1306000
1230700
1294400
1327201
1327204
1591606
Description
Glass, Side Short
Glass, Sash 4' Short
Lower Foil 4'
Wiper, Sash
Spring, Compression Sash Latch
Latch Bracket
Latch Sash
Screw, #8-32 x .38 Phil, SS, Type F
Sash Assembly 4'
Bracket, Air Foil Right
Bracket, Air Foil Left
Washer, Shoulder Plastic
Washer, .194 ID x .38 OD x .03 thick plastic
Cap Nut #10-24 SS
Header 4'
Bushing, Heyco with Flex Shutter 1.50 dia.
Bushing, Heyco Closed 1.50 dia.
Spacer Bushing
Washer, .194 ID x .38 OD x .03 T. Plastic
Screw, #10-24 x 1.00 PH. (SS)
Label, Tissue Culture Enclosure
Label, PCR Enclosure
Timer, Digital UV PCB
Switch, 2 position Aux. Outlet
Switch, 3 position Light
Lamp, Fluorescent (FT25T8) 25 Watt
Lamp, UV (G30T8) 30 Watt
Ballast, Fluorescent
Ballast, UV 115V
Ballast, UV 230V
Inlet, Power IEC
Power Cord 115V
Power Cord 230V
Receptacle, Outlet Power
Power Cord, Outlet Power
Receptacle, Interior Switched Outlet, 115V
Receptacle, Interior Switched Outlet, 230V
Circuit Breaker, 10 Amp, 115V
Circuit Breaker, 5 Amp, 230V
Rubber Bumper, UV Sash Closure
Product Service 1-800-522-7658
21
Appendix A: Replacement Parts
12
13
14
11
15, Interior
13,
Light (3 Pos.)
8
5
10
6
1
2
5
22
3
4
7
Figure A-1
21
19
18
16
17
20
Interior
9
Figure A-2
22
Product Service 1-800-522-7658
APPENDIX B
DIMENSIONS
See the following dimensions.
Product Service 1-800-522-7658
23
APPENDIX C
SPECIFICATIONS
This appendix contains electrical specifications, environmental
conditions and wiring diagrams.
Electrical Specifications
• 10 Amps, 115V, 60 Hz, or 5 Amps, 230V, 50/60 Hz,
Purifier Passive PCR Enclosure or Purifier Tissue Culture
Enclosure. The auxiliary outlet load is 8 Amps on 115V
and 4 Amps on 230V.
Environmental Conditions
•
•
•
•
•
•
•
24
Indoor use only.
Maximum altitude: 6562 feet (2000 meters).
Ambient temperature range: 41° to 104°F (5° to 40°C).
Maximum relative humidity: 80% for temperatures up to
88°F (31°C), decreasing linearly to 50% relative humidity
at 104°F (40°C).
Main supply voltage fluctuations not to exceed ±10% of the
nominal voltage.
Transient over-voltages according to Installation Categories
II (Over-voltage Categories per IEC 1010). Temporary
voltage spikes on the AC input line that may be as high as
1500V for 115V models and 2500V for 230V models are
allowed.
Used in an environment of Pollution degrees 2 (i.e., where
normally only non-conductive atmospheres are present).
Occasionally, however, a temporary conductivity caused by
condensation must be expected, in accordance with IEC
664.
Product Service 1-800-522-7658
Appendix C: Specifications
Product Service 1-800-522-7658
25
Appendix C: Specifications
26
Product Service 1-800-522-7658
Product Service 1-800-522-7658
27
PRODUCT REGISTRATION CARD
Register Online! Go to
www.labconco.com/productreg.html
By registering your product, you will receive these important benefits: • Warranty Confirmation • Product Registration
• Product Protection • Free LabbyWear™ Merchandise
NAME ______________________________________
TITLE
__________________________________________________
DEPARTMENT ______________________________
INSTITUTION
____________________________________________
ADDRESS ______________________________________________________________________________________________
CITY/STATE/ZIP/COUNTRY ________________________________________________________________________________
TELEPHONE ________________________ EXT ____ FAX__________________ E-MAIL ______________________________
Which of the following comes closest to describing the type of activity in which you are engaged?
❑ Quality Control
❑ Teaching/Instructional
❑ Testing
❑ Other (please specify)
❑ Clinical/Diagnostic
❑ Research & Development
❑ Production
________________________________
Of what type organization is your work a part?
❑ Industrial, Manufacturing, Utility
❑ Educational Institution (except Medical School)
❑ Medical, Medical School, Hospital, Public Health
❑ Other (please specify) ________________________
Which comes closest to describing
❑ Biological Science
❑ Bio-Chemistry
❑ Polymer Chemistry
❑ Organic Chemistry
❑ Government (except Medical)
❑ Independent, Foundation, Consulting
❑ Pharmaceutical Research
your scientific discipline?
❑ Inorganic Chemistry
❑ Analytical Chemistry/R & D
❑ Analytical Chemistry/Quality Control
❑ Physical Chemistry
❑ Engineering or Physics
❑ Other (please specify)
______________________________
Which product did you purchase?
❑ Purifier® PCR Enclosure
❑ Purifier® Tissue Culture Enclosure
Model Number* ______________________Serial Number* __________________________Date of Installation __________
*Model and serial numbers are located on the top and on the back.
Indicate Labconco accessories purchased with your enclosure.
❑ Work Surface
❑ Other ________________________________
❑ Base Stand
❑ Base Cabinet
How did you learn about the enclosure?
❑ Dealer Sales Rep
❑ Dealer Catalog
❑ Labconco Sales Rep
❑ Labconco Literature
❑ Other (please specify) ________________________
❑ Colleague
❑ Trade Show
❑ Advertisement
❑ Internet/WWW
What factors most influenced your decision to purchase the enclosure?
(Number up to 3, #1 being the most important)
__ Appearance
__ Reputation
__ Service Program
__ Performance Specifications
__ Ease of Operation
__ Safety Features
__ Price
__ Dealer Recommendation
__ Availability
__ Colleague Recommendation __ Other (please specify) ______________________
From whom did you purchase your enclosure? ______________________________________________________________
(DEALER)
Please fold card over, tape edges and mail. No postage is required.
NON-VENTILATED ENCLOSURES
REV 09/04
800-821-5525 or 816-333-8811
Fax 816-363-0130
LabbyWear™ is the official uniform
of LABsters everywhere! Be a LABster!
As a token of our thanks for returning your Product
Registration Card, we would like to send you the LabbyWear
of your choice. Please select from one of the three items
listed or collect Labby Bucks and redeem for other LabbyWear
merchandise. Then just complete the information requested
on the reverse side, fold, tape edges and mail.
Labby
The LABster
❑ T-shirt. 100% cotton, short-sleeved, white, with Labby
The LABster embroidered on the front left side. Specify
unisex size.
❑ Large
❑ XLarge
❑ Twill cap. Pigment-dyed, two-color, with six panels and
Labby The LABster embroidered on the front.
❑ Lunch bag. Insulated, teal with royal blue accent and
Labby The LABster embroidered on the front.
❑ 10 Labby Bucks and LabbyWear Catalog.
LABCONCO CORPORATION
8811 PROSPECT AVENUE
KANSAS CITY MO 64132-9971
POSTAGE WILL BE PAID BY ADDRESSEE
FIRST-CLASS
MAIL PERMIT NO 1166
KANSAS CITY MO
BUSINESS REPLY MAIL
NO POSTAGE
NECESSARY
IF MAILED
IN THE
UNITED STATES