1
DTS1 SCOREBOARD
OPERATING INSTRUSTIONS
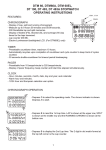
FEATURES
- 24 hour clock display
- Count up timer with range to 9 hr. 59 min. 59 sec.
- Presettable countdown timer with loud beep
- Large 4 inch LCD digits for viewing from as far away as
150 feet
- RF remote control – no cords required
- Displays scores of two teams up to a maximum score of 199
- Powered by AC adapter (included) or batteries (four D size – not included)
Fig. 1
- Wall mounted or free standing
- 16 different RF channels, user-adjustable to another channel to avoid interference with nearby
units
LIST OF ACCESSORIES
- Scoreboard
- Remote control with four AAA batteries
- Tripod rod
- AC adapter(For indoor use only)
- Instruction manual
Fig. 2
HOW TO OPEN NAME PLATE DOORS
Use a suitable screwdriver to open the side doors as shown in Figure 2. Do this carefully so as
not to damage the plastic side doors. This will allow the removal or insertion of the nameplates
and advertisements.
MOUNTING THE SCOREBOARD
Fig. 3
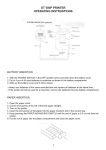
The scoreboard can be mounted on the wall by the means of two screws
hooked into the eyelets on the back of the top housing. Make sure the
screws are securely fixed in the wall. The scoreboard can also stand-alone
on the floor or on a table using the tripod rod secured to the back of the
scoreboard as shown in figure 3.
POWER UP
ON/OFF switch
(BATTERY)
For AC connection, use only the AC adapter (9V) supplied with
the unit. Verify the power rating indicated on the adapter is the
same as the AC power supplied in your location. Plug the
adapter into the socket on the right side of the scoreboard
as shown in Figure 3. The digits will light up automatically
and be ready for setting.
1
AC adapter socket
PUSH & OPEN
SIZE AAA 4X1.5V
BATTERIES
SIZE D 4X1.5V
BATTERIES
Fig. 4
PUSH
Fig. 5
When AC power is not available, insert four D size batteries into the battery compartment on the
back of the scoreboard as shown in Figure 4. When using battery power, the ON/OFF SWITCH
should be used to turn the scoreboard on and off. If the batteries are left in the scoreboard during
AC operation, they serve as a back-up in the event of AC power interruption.
The batteries for the remote control can be inserted as shown in Figure 5.
Fig. 6
Fig. 7
TIME SETTING
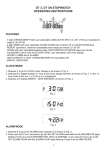
From the Time Display Mode with display as shown in Figure 6. Press and hold <MODE> for 3
seconds to go to the Time Setting Mode with display as shown in Figure 7. In this mode press
<SET> once for time setting and the time digits will blink. Adjust the minute by using the <+/TEAM 2> and the hour by using the <+/-TEAM 1>. When time is set, press <SET> for exit to the
Time Display Mode.
2
COUNT UP MODE
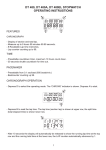
When the scoreboard is in the Time Display Mode, press and
hold <MODE> 3 seconds and repeat this action once more. It
will enter the Count Up Mode with the display showing “C UP”
as shown in Figure 8. Press <SET> once and 0:00:00 will be
displayed. Press <START/STOP> to start and press again to
stop the count up timer. After timing is stopped, press and hold
<SET> 3 seconds for resetting to zero.
COUNT DOWN MODE
Fig. 8
When the scoreboard is in the Time Display Mode, press
and hold <MODE> 3 seconds and repeat this action twice
to enter the Count Down Mode with the display showing
“C dn”, as shown in Figure 9. Press <SET> once to enter
SET COUNT DOWN MODE. The previously set countdown
time digits will be blinking. Press <+/- TEAM 1> to adjust
the minutes and hours. Press <+/- TEAM 2> to adjust the
seconds. When the countdown period is set, press <SET>
once and the time will be stored in memory. The countdown
timer can be started and stopped by pressing <START/
STOP >. At 0:00:00 the scoreboard will give a long beep to
indicate that the time is up. The countdown period can be
reset to the memorized period by pressing and holding
<SET> for 3 seconds. If setting of countdown period is
desired at this stage, press <MODE> momentarily to enter
SET COUNT DOWN MODE and set using the <+/-> Buttons
as before.
Fig. 9
THE SCORE
For resetting the score to zero, press the center of both <+/-TEAM 1> and <+/- TEAM 2> together
for 5 seconds. When the screen is displaying “hour”, “C UP” or “C dn”, the scores cannot be
adjusted.
3
CARE OF YOUR SCOREBOARD
CHANNEL DESIGNATION
- Each packing box, main scoreboard and remote control box are labeled with the color codes of one
of the four preset RF channels (yellow, green, blue and orange). Each set should have the same
color code. You are suggested to choose different label set for purchasing 2 to 4 set in order to
avoid interference. If you wish to purchase more than 4 sets, you can adjust the scoreboard to a
different channel by opening the backs of the remote control and the lowest compartment of the
scoreboard and change the 4 position mini-toggles to a different position. Make sure that both of
the 4 position mini-toggles are set to identical ON/OFF positions otherwise the unit will not work.
A maximum of 16 different settings can be achieved.
WATER RESISTANCE
- The scoreboard is not water-resistant so it should be kept and used in a dry location. For outdoor
use, avoid contact with water or rain.
TEMPERATURE
- Do not leave the scoreboard in direct sunlight or in very high temperatures for an extended time, as
the display may become black. Do not leave the scoreboard in very low temperatures, as this may
result in slow-moving digits. The above conditions will be corrected when the scoreboard is
returned to normal temperatures.
SHOCKS
- Be careful not to drop the scoreboard or hit it against hard surfaces as it may cause mechanical
damages.
MAGNETISM
- Not affected.
CHEMICALS
- Do not expose the scoreboard to solvents such as gasoline, alcohol, cosmetic sprays, cleaners,
paints, etc., as they may cause damage to the scoreboard.
BATTERY CHANGE (when powered by DC)
- When the display becomes dim or blank, or the remote control does not function, battery
replacement is necessary. Replace with alkaline battery size D 1.5 V for the scoreboard and
alkaline size AAA 1.5V for the remote control. Remove the batteries from the scoreboard and
remote control when not being used for an extended time (over 3 months).
TROUBLESHOOTING
- If for any reason the scoreboard does not function, contact your dealer for an authorized service
center. Do not try to repair it yourself.
www.digisportinstruments.com
4