1
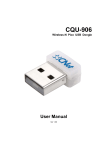
CWL-907 Wireless-N High Power USB Adapter User Manual Table of Contents Chapter 1 Introduction………………………………………………………………….…………3 1.1 About CWL-907.…………………………………………………………………………….3 1.2 Main Features………………………………………………………………………………..3 1.3 Getting to Know CWL-907………………………………………………………………….4 Chapter 2 Installing the Software of the USB dongle……………………………….………….5 Chapter 3 Uninstall the USB dongle……………………………………………….…………….8 Chapter 4 Configuring Your Wireless Network…………………………………….……..……10 4.1 Basic Setup…………………………………………………………………..….………….10 4.2 Wi-Fi Protect Setup (WPS)………………….………………………….…………………15 Appendix 1 Troubleshooting…………………………………………………….……………….22 Appendix 2 Planning Your Wireless Network………………………………………………….23 2 Chapter 1. Introduction 1.1. About CWL-907 The Wireless-N High Power USB adapter can be installed on most desktops and notebooks and provides true flexibility by allowing the computer to be positioned almost anywhere in the building without the cost and hassle of running network cables. Using the USB adapter, you do not have to worry about thrilling holes on your walls and climbing through the attic or cellar to get connected to the network. Once installed and connected, you can keep in touch with friends and work through e-mail, instant messages and chatting programs as well as sharing files and other network resources such as printer and network storage with other computers. The Wireless-N High Power USB adapter connects to 802.11n network at an incredible speed of 300Mbps and for added versatility; it is also compatible with almost all of the Wireless-b/g products found in home or business environments as well as public wireless hotspots around the country. The adapter’s antenna is designed to be detachable and adjustable, this making the USB adapter more convenient to carry and use. 1.2. Main Features The following lists the main features of the Wireless-N High Power USB adapter. Complies with IEEE 802.11n and backward compatible with IEEE 802.11b/g Maximum transmission rate up to 300Mbps WMM(802.11e) improves the quality of VoIP and Video service. Supports one touch encryption method (WPS) to simplify the secure establishment of a wireless network Supports 64/128bits WEP, WPA1/2-PSK, WPA1/2-802.1x and AES-CCM security Easy setup with the setup utility Compatible with Windows 2000/2003/XP/Vista/7 High power design for extended reception coverage and better performance. 3 1.3. Getting to Know CWL-907 This section describes the WPS button and LED indicator of the Wireless-N USB adapter. LED State Description On (Stable) Wireless USB dongle is powered on. Off Wireless USB dongle is powered off. LINK / ACT Blinking WPS mode enabled. Fast Blinking Data is transmitting or receiving. Slow 4 Chapter 2. Installing the Software of the USB adapter Notes: Driver installation process of Windows 2000/2003/Vista/7 is similar to Windows XP Before installing your Wireless-N USB adapter, insert the Auto-Install CD into your CD-ROM drive. Unless you have disabled the auto-run feature of Windows, the AutoPlay Menu should appear automatically. If not, you can manually access the installation by clicking the Start button and choosing Run. In the drop-down box type D:\ AUTORUN.EXE (where D: is the drive letter for your CD-ROM drive). Alternatively, double-click My Computer and double-click on the CD-ROM drive icon. 1. Click on Driver to install driver for your Wireless-N USB adapter. 2. Please select the language what you want to use and click Next. 5 3. Click Install to continue or click Cancel to abort the installation process. 4. The software installation should begin. This may take a few minutes. 6 5. Click Finish to complete the installation. Please select Yes if you want to restart your computer, or select No to complete the installation. 6. Once the installation is completed, you may now configure your wireless network. 7 Chapter 3. Uninstall the USB adapter You could uninstall the USB adapter driver and utility through uninstall program. 1. Uninstall the WLAN Driver from Start -> All Programs and click Uninstall (or Change/Remove) to remove the driver. 2. Click “Yes” to remove the PCI adapter driver and utility. 8 3. Then click Finish to complete the installation program. You could select Yes to restart your computer immediately, or select No to go back the computer. 9 Chapter 4. Configuring Your Wireless Network 4.1. Basic Setup 1. Double click on the green wireless signal icon in your taskbar or the shortcut icon on the desktop. 2. It should pop up the Wireless Utility window. And then utility shows the connecting wireless network that connected automatically or was the default network in profile. 10 3. Click the “Available Network” tab to the wireless network surveying page. Click the “Refresh” button to scan the area for wireless network(s). Once the scan is completed, select the desired wireless network from the list and double click it or click the “Add to Profile” button. 4. It should pop up the wireless Network Properties window. If you do not have any wireless security (WEP, WPA, WPA2, and etc.) set on your wireless network, simply click the “OK” button and skip to step7. If you do have wireless securities on your wireless network, configure the security setting in “Wireless network security” column. 11 5. Set your wireless securities settings, when it completed, click the “OK” button. Select the Network Authentication and Data encryption to set the encryption type. - If you have WEP, typically you select the format and enter your WEP key below the Data encryption. - If you have WPA-PSK or WPA2-PSK, typically you only enter your key in the “Network Key” and type again to confirm it. - If you have 802.1x configure, typically you only configure your setting in 802.1x configure column. 6. After connected to wireless network, utility will back to “General” page and show the wireless network status. Once the wireless network connected successfully, the Network Address will show the CWL-907 has been assigned an IP address by the AP/Router’s DHCP server. 12 7. Click the “Profile” tab to check the profile page. The wireless network configuration has added in Available Profile(s). It could remove, edit, duplicate and set default the profiles in this page. 13 Wi-Fi Protect Setup (WPS) WPS is an easy and secure setup solution for Wi-Fi network. Please click the Wi-Fi Protect Setup tab. CWL-907 has two methods, PIN (Pin Input Config) and PBC (Push Button Config), to setup the network. Pin Input Config (PIN) 1. Click on the “Pin Input Config (PIN)” button, and then it should pop up a message box. If you want to connect to a specific AP, please click the “Yes” button. Or please click the “No” button to continue and skip to step3. Note: Every time you click the tab to change the page, the PIN code will be changed. 14 2. Select the specific AP which you want to connect. If you can not find the WPS AP in this page, please click the ”Refresh” button. And then click the”Select” button. 15 3. CWL-907 is waiting for the AP to establish the connection. And then enter the PIN code into the AP that you want to connect. Note: The PIN function in AP should be started before the WPS setup in CWL-907 times out. 16 4. Once the WPS connected successfully, wireless utility will show the connection status. 17 Push Button (PBC) 1. Click on the “Push Button Config (PBC)” button. Note: The PBC button can click the visual button on the page or push the physical button on AP. 2. CWL-907 is waiting for the other AP to start the PBC function. The other AP starts the PBC function should be before CWL-907 WPS times out. 18 3. Once WPS connected successfully, Wireless Utility will show the connection status. 19 Radio Off Enable the Radio Off will turn off the radio function. It means CWL-907 will turn off the wireless function. The wireless network connection will be disconnected. Disable Adapter Disable the CWL-907 adapter will turn off the USB adapter function. It means all functions of CWL-907 will be turn off. 20 Windows Zero Configuration (WZC) You may also switch the adapter to be controlled by Windows Zero Configuration (WZC) by checking the WZC box. The windows wireless icon on the task bar will be showing disconnected. 21 Double click the wireless icon, and choose desired wireless network to connect. Then input the encryption key of the access point. 22 If successful, the wireless icon will be showing it is connected to the wireless network now. 23 Troubleshooting PR O BL EM COR RECT IV E A CTI ON None of the LEDs turn on when I plug in the wireless USB adapter. Make sure you have turned on your computer Make sure you have installed the correct utility and driver for your WLAN card. Restart your computer and plug in the adapter again. Make sure there is no hardware conflict. Check your computer resource information. I cannot access the configuration utility Make sure the WLAN adapter is installed / plugged in properly. I cannot connect to a wireless network Make sure the ACT LED on the WLAN adapter is blinking. Make sure you have installed the correct utility version. Make sure the wireless router is within range. Move your computer closer to the wireless router. Make sure that you have set the wireless network settings correctly. For example, the SSID and security settings. Make sure there is no radio interference (for example, cordless phones, microwave oven, etc) that may affect wireless transmission quality. 24 Appendix 1. Planning Your Wireless Network A2-1 Network Topology A wireless local area network (WLAN) is exactly like a regular local area network (LAN), except that each computer in the WLAN uses a wireless device to connect to the network. Computers in a WLAN share the same frequency channel and SSID, which is an identification name for wireless devices. A2-2 Ad-hoc versus Infrastructure Mode An ad-hoc wireless LAN is a group of computers, each equipped with one WLAN adapter, connected as an independent wireless LAN. Computers in a specific ad-hoc wireless LAN must all be configured to share the same radio channel. Figure 4-1 Ad-hoc Mode An integrated wireless and wired LAN is called an Infrastructure configuration. In this mode, a group of wireless nodes and an Access Point compose a Basic Service Set (BSS). Each wireless node in a BSS can talk to any computer in the wired LAN infrastructure via the Access Point. Figure 4-2 Infrastructure Mode 25