1
User Instructions
4. Smoke Control Kit
This section applies to the Riva Studio products listed:
4.1
Product Code
Appliance
RVST-500
Riva Studio Cassette 500
RVST-1HT
Riva Studio Cassette 1
RVST-2HT
Riva Studio Cassette 2
The Studio models listed are supplied with a pre-fitted smoke
control kit and have been independently tested to PD6434
making them exempt from the controls that generally apply in
Smoke Control Areas.
4.2
These models are suitable for use in a Smoke Control Area
when burning wood and following the instructions for use
specified in this manual but ONLY if the Smoke Kit has not
been removed.
4.3
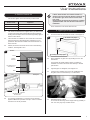
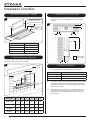
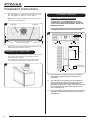
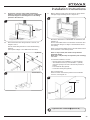
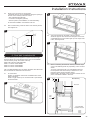
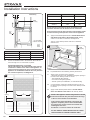
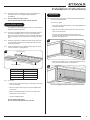
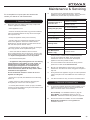
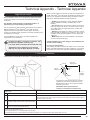
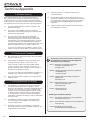
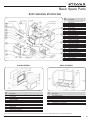
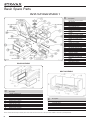
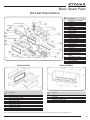
If fitted, the Smoke Control kit can be seen in the following
locations, see Diagrams 7 & 8.
7
If these Studio models are installed outside of a
Smoke Control Area then the Smoke Control kit can
be removed to give more control over the lower
burn rates.
Removing the kit should only be done by a suitably
qualified installer and must be done at the time of
installation.
These instructions must be left with the User.
5. Lighting the Appliance
5.1
9
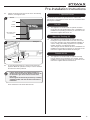
For best results set air controls as shown, see Diagram 9.
Air Wash: Fully Open
Airwash
Primary Air: Fully Open
Frame
Airwash
Restrictor
Gap between Inner
and Outer box
Glass
8
Primary Air
Door
5.2
Place firelighters or paper and dry kindling wood on the
base bricks.
A successful fire initially requires plenty of kindling to
establish a hot firebox and warm the chimney to aid flue
performance.
5.3
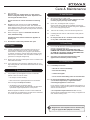
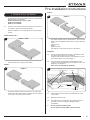
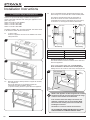
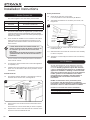
Light the paper or firelighters, see Diagram 10.
5.4
Leave the door slightly open as the fire establishes and the glass warms to avoid build up of condensation.
10
Primary Air
Restrictor
Gap between Inner
and Outer box
4.4
To meet the requirements of a Smoke Control Area the
appliance MUST be operated correctly in order to minimise
the amount of smoke produced.
5.5
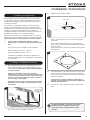
Add larger pieces of wood.
Do not use full sized logs at this stage, build up gradually in
size. Too many logs may smother the fire.
7