1
Mini Pony DMX
Theatrical and Museum Led Spot
Cod. 9801036605 (F)
Cod. 9801016605 (PC)
Manuel de programmation
User manual
PANADIFFUSION ZA réalpanier 210 rue Rudolph Serkin 84000 AVIGNON
Tél: 04 90 88 28 98 - [email protected]
Ver. 1
English
5
Mini pony DMX512 Cod. 9801036605 (F)– Cod. 9801016605 (PC) v 1
EN
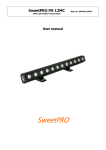
With its compact dimensions and modern elegant design, Mini pony dmx is ideal for theatrical, live shows and architectural applications.
The new high power COB LED technology allows a bright and uniform illumination, reduces considerably the consumption and removes
maintenance and lamp changing.
IMPORTANT!
READ CAREFULLY THE INSTRUCTION LEAFLET IN ALL ITS PARAGRAPHS. THE KNOWLEDGE OF THE INFORMATION AND OF THE
LIMITATION HELD IN IT, IS BASIC AND FOUNDAMENTAL FOR A CORRECT AND SAFE USAGE OF THIS PRODUCT.
IMPORTANT!
BEFORE ANY (MAINTENANCE, CLEANING ETC.) ACTION, SWITCH OFF THE POWER SUPPLY.
IMPORTANT!
This device is suitable for indoor use (room temperature cannot be higher than 35°C).
This device is suitable for direct assembling on normally flammable surfaces.
5
5
Technical specifications:
•
•
•
•
•
•
•
•
•
•
5
5
5
3
3
3
Dimensions:
Body made of die-cast aluminium + steel sheets
Black epoxy powder coating
Power supply:100/240V 50/60Hz
Current: 0,22 A (230v)
Power: 50 Watts
Source: 1 COB LED
Colour temperature: 3200°K or 5400°k
Functioning: DMX Signal and automatic mode
Channels: ½ DMX 512, 8/16 bit
Weight: 1,7Kg
Installation:
The projector can be fixed in any position. For suspending use, it is needed to install an appropriate clamp. It must be located in a well
ventilated position, using an M8 screw, a nut and a washer. Make sure the structure You are fixing the product to can stand the
product load.
Connection
The projector is fitted with a power supply cable and two XLR 5 Poles connectors for DMX IN and OUT signal (Fig.1)
3
Power supply connection:
Power supply: 100/240V 50/60Hz
2
1
1
DMX IN
DMX OUT
2
3
DMX connectors:
1: GND (shield)
2: data –
3: data +
4: NC
5: NC
RJ45
RJ45 connectors:
1: DALI / Cont1
2: DALI / Cont2
3: Common
4: CAN H
5: CAN L
6: Analogue 0 +10V
7: DMX 8: DMX+
Any modification to this product is forbidden.
This lantern must be powered according to the voltage and frequency showed on its label (100/240V 50/60Hz). Connect the power
cable to the socket. We suggest to connect each projector to its own switch so that they can be individually switched on with a remote
control.
Pagina 5
Mini pony dmx Cod. 9801036605 (F)– Cod. 9801016605 (PC) v 1
EN
To remote control the projectors is required the use of a DMX512 control desk.
For the connection of signal use cable EIA rs-485 type: two core screened, 120Ω characteristic impedance, 22-24 AWG, low capacity, 1
XLR 5 poles MALE connector and 1 XLR 5 poles FEMALE connector.
To form a DMX chain, connect the DMX control desk to the first projector’s DMX IN, then from its DMX OUT to the DMX IN of the
second projector and so on.
For a correct functioning of the DMX signal, it is necessari to put a terminal into the DMX OUT of the last projector. This terminal is
made of 1 XLR MALE connector with a 120Ω resistance welded between PIN 2 and PIN 3.
Digital display and functioning options
Using the digital display, it is possible to change the functioning options, drive the projector in manual mode with possibility to regulate
the light output intensity, display projector information and reset settings to default.
After 10 seconds without working, the display will turn off (if set on menu).
DMX address and state
LED temperature
Firmware version
Icon for regular functioning
Intensity of projector
Encoder wheel for navigation
Enter push button
The Led indicate the presence of
DMX signal.
Led on: presenza del segnale
Led off: assenza del segnale
Led red: overheating of LED
source. Fan will turn on at
maximum speed.
Addressing of the projector
To control many Mini pony DMX individually, it is necessary to assign to each one a different DMX address , setting the starting channel
taking into consideration that one Mini pony DMX books 1 or 2 channels depending on the functioning mode set.
For example, if we have 6 projectors and need to use the 16 bit resolution, it will be necessary to set them on the channels 1, 3, 5, 7,
9, 11…
To set DMX address it is needed to press ‘Enter’ and follow this path Mode>Setup>Mux setup>DMX setup>Set address> on
the display. Change DMX address using the encoder and press ‘Enter’ to confirm.
Description of the main menu
To scroll the items of this menu use the encoder wheel.
Manual
It is used to regulate the light output manually.
Press ‘Enter’. To regolate the intensity set a value between 0 and 255 using the encoder wheel.
Press ‘Enter’ again to esc from regulation.
Remote
Here you can set the controlling mode f the fixture. Some modes are optional in this version.
Press ‘Enter’, to choose the desired mode and press ‘Enter’ again to confirm.
Press ‘Enter’ again to esc.
Setup
From this menù it is possible to setup every parameter of the fixture. Press ‘Enter’ to go in.
Pagina 6
Mini pony dmx Cod. 9801036605 (F)– Cod. 9801016605 (PC) v 1 IT/EN
EN
MUX Setup
Access to the digital control configuration menù.
DMX Setup
Access to the DMX configuration menù.
Set Address
Set the DMX address.
Press ‘Enter’, change DMX canne with the encoder wheel and press ‘Enter’ again to confirm.
Set Resolution (Courbes)
Set the dimming resolution of the fixture.
8-bit Basic resolution. Books 1 DMX chanel.
8-bit extra Medium resolution, software simulation of 11 bit. Books 1 DMX channel.
16-bit HL High resolution, the first channel is High, the second is Low. Books 2 channels.
16-bit LH High resolution, the first channel is Low, the second is High. Books 2 channels.
Set Hold
Set the DMX fail function.
If selected, when DMX signal fail, intensity hold at last received value.
If de-selected, when DMX signal fail, intensity snap to 0.
DALI Setup Not installed in this version.
CAN Setup Not installed in this version.
Analogue Setup
It is used to setup the analogical part of the fixture.
Encoder Setup Configures the encoder wheel functioning.
Enable Enable or disable the use of the encoder wheel.
Keep on exit If set, the fixture keep the value set with the encoder wheel after leaving the regulation
page.
0-10V Setup Not installed in this version.
Contacts Setup Not installed in this version.
Wireless Setup Not installed in this version.
System Setup Used to configure the system.
LED Setup It is used to setup the functioning of LED source.
PWM frequency Not installed in this version.
Current scale Set the quantity of current to drive the LED source.
LCD Setup Setup the illumination of LCD display
Autodim If set, thedisplay illuminationfade down after 10 seconds of inactivity.
If not set, display is always illuminated.
Cooling Setup Configure the cooling system
Full speed If set, fan always work at full speed.
If not set, fan works automatically only when needed.
LumenRadio Not installed in this version.
Description of the DMX channels:
Resolution 8-bit
Resolution 8-bit Extra
Resolution 16-bit HL
Resolution 16-bit LH
Ch1
Dimming intensity 1-100%
Ch1
Dimming intensity 1-100%
Ch1
Dimming intensity 1-100%
Ch2
Low 16 bit value 1-100%
Ch1
Low 16 bit value 1-100%
Ch2
Dimming intensity 1-100%
Pagina 7