1
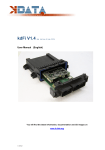
kdFi V1.3
User Manual
You will find the latest information, documentation and CD images on
www.k-data.org
1 of 14
Index
1.
INTRODUCTION ...................................................................................................................................................................................................... 3
2.
INCLUDED IN DELIVERY .......................................................................................................................................................................................... 3
3.
SOFTWARE ........................................................................................................................................................................................................... 3
3.1
3.2
3.3
4.
CONNECTION ........................................................................................................................................................................................................ 4
4.1
4.2
4.3
4.4
4.5
5.
CABLE TYPES ...............................................................................................................................4
USB CONNECTION .......................................................................................................................4
SCHEMATIC ..................................................................................................................................4
ASSIGNMENT................................................................................................................................5
TEST PINS .....................................................................................................................................6
SOLDER JUMPERS ................................................................................................................................................................................................. 7
5.1
5.2
5.3
5.4
5.5
5.6
5.7
5.8
6.
USB.............................................................................................................................................3
MEGATUNE ..................................................................................................................................3
JAW ............................................................................................................................................3
F-IDLE ........................................................................................................................................7
RPM_IN ......................................................................................................................................8
RPM_OUT ..................................................................................................................................8
OPTO_GND................................................................................................................................8
JAW ............................................................................................................................................9
R0 ................................................................................................................................................9
IGN_A – IGN_D .........................................................................................................................9
SJ201 – SJ204..............................................................................................................................9
START-UP ........................................................................................................................................................................................................... 10
6.1
6.2
6.3
6.4
6.5
6.6
6.7
6.8
6.9
6.10
6.11
6.12
6.13
6.14
6.15
LIGHT EMITTING DIODES ............................................................................................................10
RPM INPUT ................................................................................................................................10
SENSORS ....................................................................................................................................11
THROTTLE POTENTIOMETER.......................................................................................................11
KNOCK INPUT............................................................................................................................11
DIGITAL INPUT ...........................................................................................................................11
BAROMETRIC CORRECTION ........................................................................................................12
TACHO OUTPUT .........................................................................................................................12
IDLE SPEED CONTROLLER ...........................................................................................................12
IGNITION ....................................................................................................................................12
INJECTION ..................................................................................................................................12
RELAY OUTPUT..........................................................................................................................13
BOOST CONTROL ........................................................................................................................13
JAW ..........................................................................................................................................13
CAN BUS ...................................................................................................................................13
7.
FIRMWARE UPDATES ........................................................................................................................................................................................... 13
8.
NOTES ................................................................................................................................................................................................................ 14
2 of 14
1. Introduction
Congratulation for buying the kdFi V1.3.
The circuit of the kdFi based on Megasquirt MS2 V3.0 was enhanced for the firmware MS2extra and provided with
additional circuits in order to enable simple adaptation to a great number of engine types.
A Wideband Lambda Controller (JAW) is also arranged on the PCB. The Bosch LSU 4.2 Lambda Sonde and the JAW
Micro-processor have to be bought as accessories to use their functions.
In addition the serial inputs were replaced by a USB connection for ease of use.
2. Included in delivery
- kdFi V1.3 device ready for use
- Software CD
- USB cable
- User manual
3. Software
It is recommended installing the software from the starting menu of the CD before connecting the kdFi for the first time.
3.1
USB
You will find the USB driver of the FTDI company on the CD in the directory „USB“. It is the FTDI2232 Chip.
3.2
Megatune
The Megatune installation files can be found on the CD, directory “Megatune”. We recommend installing the BETA
Software, as this runs very smoothly and has got large advantages compared to the Release.
If you want to use the Release version, you have to perform a firmware update using the corresponding version.
During installation the engine parameters are sampled. The best is to enter the future settings immediately for this
simplifies considerably the start-up operation afterwards.
When using JAW we recommend selecting the innovative LC-1 as wideband sensor and adjusting afterwards the
characteristic of the LC-1 in the software “JAW Deploy”.
The two systems are freely adjustable, that means you can in principle use any characteristic as long as it is the same
in both systems (MS und JAW).
3.3
JAW
You can find the JAW Deploy installation files on the CD, directory „JAW“.
3 of 14
4. Connection
4.1
Cable types
Recommended cable types:
Ignition:
min 1,5 mm²
Injection:
min 1,5 mm²
VR sensor:
min 0,5 mm², shield
Sensors:
min 0,5 mm², shield
Others:
min 0,75 mm²
4.2
USB connection
The USB component is compatible to USB 1.1 as well as to USB 2.0. You can use each standard mini USB cable for
connecting cable.
Due to the integrated USB connection two serial interfaces are available. They are displayed at the device manager of
Windows. The MS2 processor is connected to the first COM Port, the JAW to the second one.
ATTENTION: The COM Ports should not exceed COM8, because this could produce communication trouble with
Megatune. In this case you have to delete unused / invisible ports (incl. the kdFi Ports) from
your configuration and to re-install the driver.
4.3
Schematic
B
JAW
USB
RS232
MS2
9S12C64
Air Temp
Water Temp
TPS
VR input
Digital Input
Knock Input
Baro Correct
CAN
Injection
INJ1 INJ2
4 of 14
A
Tacho Output
Fast Idle
Relay
Boost Control
A
Ignition
B C
D
4.4
Assignment
The programmable kdFi inputs / outputs are already connected to the corresponding additional circuits on the PCB.
Circuit points:
Ground, available in multiple number
GND
FP
Fuel pump
A
FDL2
Idle speed controller 2-pin / clocked ground connection
A
FDL3Z
Idle speed controller 3-pin – CLOSED
A
FDL3A
Idle speed controller 3-pin - OPEN
A
5V / GND
Power supply 5V (throttle potentiometer)
A
TPS
Throttle potentiometer signal
E
OXY
Lambda sensor signal
E
CLT / GND E
Water temperature sensor
AIR / GND
Air temperature sensor
E
JS2
Boost-pressure control (waste gate)
A
JS5
Knock sensor
E
JS7
Digital input
E
JS10
Tacho output (signal for the tachometer)
A
JS11
Relay output (R0)
A
12V
Input voltage 12V
E
GR
JAW Bosch LSU 4.2 : GREY
WS
JAW Bosch LSU 4.2 : WHITE
GE
JAW Bosch LSU 4.2 : YELLOW
SW
JAW Bosch LSU 4.2 : BLACK
GN
JAW Bosch LSU 4.2 : GREEN
RT
JAW Bosch LSU 4.2 : RED
V1
JAW Analog output V1
V2
JAW Analog output V2
INJ1
INJ Injection valves group 1
GND
INJ Ground injection groups – ground separately
INJ2
INJ Injection valves group 2
A1
IGN Ignition output cylinder 1
A2
IGN Ignition output parallel to cylinder 1 (wasted spark)
B1
IGN Ignition output cylinder 2
B2
IGN Ignition output parallel to cylinder 2 (wasted spark)
C1
IGN Ignition output cylinder 3
C2
IGN Ignition output parallel to cylinder 3 (wasted spark)
D1
IGN Ignition output cylinder 4
D2
IGN Ignition output parallel to cylinder 4 (wasted spark)
IGN_GND
IGN Ground ignition – ground separately
5 of 14
Software outputs:
JS0
PT6/IAC1
JS1
JS2
PT7/IAC2
JS3
JS4
JS5
PA0
JS6
JS7
JS8
JS10
JS11
D14
D15
D16
4.5
Relay Output (Output JS11)
--Boost Control PWM Output
--Constant Barometric Correction
Knock Input
CAN High
Digital Input (Launch Control / VE Table Switch)
CAN Low
Tacho Output
Spark Output D / Relay Output
Spark Output A
Spark Output B
Spark Output C
Test pins
Pin assignment:
FP
(Relay Output)
INJ2
INJ2
INJ1
INJ1
JS11
FDL2
JS2
+12V
FDL3A
TPS +5V
FDL3Z
RPM IN
OXY
TPS
CLT
AIR
6 of 14
36
34
32
30
28
26
24
22
20
18
16
14
12
10
8
6
4
2
35
33
31
29
27
25
23
21
19
17
15
13
11
9
7
5
3
1
USB P1
USB P2
USB P3
USB GND
GND
GND
GND
GND
GND
GND
GND
GND
P6
JS7
JS5
JS10
RESET (9S12C64)
BKGD (9S12C64)
5. Solder jumpers
The solder jumpers are used for the permanent selection of certain engine parameters, like the speed measurement
mode, the number of ignition coils, the type of idle controller, the activation of the JAW controller etc.
5.1
F-IDLE
2-pin idle controller:
Function: The controller opens a supplementary air supply parallel to the throttle valve/s as long as the output FDL2 is
connected to ground. When the kdFi doesn’t connect the output to ground any more, the spring integrated in the idle
controller stops the air supply again. That is the reason for this output to be very fast pulsed (PWM) in order to hold a
certain position with the corresponding pulse width.
3-pin idle controller:
Function: The same as for the 2-pin idle controller, but without spring. The
CLOSE command is also controlled by a magnetic coil. The idle controller opens, when FDL3A (Fast Idle 3-pin OPEN)
switches to ground, and closes, when FDL3Z (Fast Idle 3-pin CLOSE) is activated.
7 of 14
5.2
RPM_IN
The type of speed measurement is selected by the solder jumper RPM_IN.
When using a VR sensor the factory settings can be retained unchanged.
When using a hall sensor the connection has to be changed – as shown on the pictures below.
VR Sensor: (Standard)
5.3
Hall Sensor:
RPM_OUT
This one has to be selected according to PM_IN. See pictures 5.2
5.4
OPTO_GND
Connection to ground of the hall sensor if needed is the same as for MS V3.
Connection:
8 of 14
5.5
JAW
The option JAW has to be activated if the JAW wideband controller is intended to be used. This establishes a
connection between the JAW output V2 and the input OXY and transmits the analog wideband signal directly.
For this you will need the accessories JAW µC and Bosch LSU 4.2.
If you select this option, any external lambda signal must not be connected to the OXY input.
5.6
R0
R0 activates the output JS11 as “Relay Output“. For this you have to connect the coil of a relay to +12V (ignition), the
second contact of the coil to JS11.
The function of this output is now adjustable via Megatune “Extended” – “Output Port Settings”.
5.7
IGN_A – IGN_D
The jumper IGN_A is used for triggering the ignition output A. IGN_B to IGN_D are responsible for the ignition signals B
to D accordingly. Software settings: Megatune “Basic Setup” – “Tacho input / Ignition Settings”
Examples:
Engine with mechanical distributor: Only IGN_A
1-cylinder engine: Only IGN_A
2-cylinder in-line engine with wasted spark: IGN_A with 2 power drivers
4-cylinder in-line engine with wasted spark: IGN_A, IGN_B with 2 power drivers each
6-cylinder in-line engine with wasted spark: IGN_A, IGN_B, IGN_C with 2 power drivers each
8-cylinder V engine with wasted spark: IGN_A, IGN_B, IGN_C, IGN_D with 2 power drivers each (max. equipment)
5.8
SJ201 – SJ204
Halving the series resistance of the ignition groups
If only one power driver is used per ignition output, the series resistance for the power driver can be halved. In
operation, however, it turned out to be useful to always set a jumper in order to reduce the susceptibility to failure.
9 of 14
6. Start-up
Attention:
- The kdFi V1.3 is protected by a self-resetting thermal fuse (Polifuse). It is reset by switching off the power supply AND
by cooling down at the same time.
- Take care that the TO220 housings of the power elements don’t all have the same potential and so need to be
isolated from the heatsink by i.e. mica washer and plastic stopper.
- Operation of the kdFi without heatsink will cause total damage of the power elements!
6.1
Light emitting diodes
Description
Colour
Function
RS232 A TxD
yellow
Data packet from USB to MS2
RS232 A RxD
green
Data packet from MS2 to USB
RS232 B TxD
yellow
Data packet from USB to JAW
RS232 B RxD
green
Data packet from JAW to USB
D15
blue
Depending on software (Standard: Firing pulse)
D16
blue
Depending on software (Standard: Cold advance)
D17
blue
Depending on software (Standard: Acceleration)
Knock
red
Knock identified
6.2
RPM Input
1. VR sensor
The measurement via VR sensor is the most widespread way in Europe for car engines. An AC voltage is induced in
the coil of the VR sensor by a metal wheel with 60-2 or 36-1 cogs. The voltage threshold has to be set by the
potentiometer R55 and the hysteresis by the potentiometer R54.
These potentiometers don’t have any mechanical end stop. The end can be recognized by a light, repetitive click at
every rotation. In case of doubt you may make 30 counter clockwise rotations, and then the potentiometer is sure to be
in zero position.
2. HALL sensor
3. Ignition coil signal
For “Fuel only” versions, where the existing ignition control should be retained, the speed signal is directly gripped at the
primary side (12V) of the ignition coil.
Attention:
Never connect a measuring line to the high voltage side of the ignition coil. This will cause the complete
destruction of the kdFi and can produce life-threatening situations!
10 of 14
6.3
Sensors
The factory settings of kdFi are adapted to Bosch sensors. If desired this can be changed by exchanging the two wired
resistors R4 and R7 on the PCB.
Sensor
Manufacturer
Series resistance
2.49k
AC Delco/GM
Daewoo, Buick, Cadillac, Chevrolet, Oldsmobile, Pontiac, GMC
27k
Ford
Ford, Lincoln, Mercury
Bosch and Nippon Acura, Audi, BMW, Honda, Infiniti, Jaguar, Kia, Lexus, Mazda,
2.2k (Standard)
Denso
Mitsubishi, Nissan, Suzuki, Toyota, Volkswagen, Volvo (96-up)
9.31k
Mopar
Chrysler, Dodge, Plymouth
6.4
Throttle potentiometer
The throttle potentiometer is connected up by a 3-wire cable. +5V and GND are connected to the outer static pins of the
potentiometer. The voltage relating to the throttle position is tapped via the sliding contact and connected to the input
TPS (Throttle Position Sensor).
The covered distance of the potentiometer can be longer than the rotation of the throttle axle. The corresponding
calibration is done via Megatune “Tools” – “Calibrate TPS”.
6.5
Knock Input
You can employ usual knock sensors (preferentially original engine sensors). The knock frequency can be regulated via
the potentiometer R88. For controlling or multiplying the setting, the control voltage relating to the adjusted knock
frequency is measured at the connector JP1. The red LED D30 is used as calibration assistance. It signalises that an
identified knock is transmitted to the processor input.
6.6
Digital Input
There is a digital input that can be used both for changing the engine characteristics and as “Launch Control”. The
corresponding function has to be defined in Megatune. Specify JS7 as input.
11 of 14
6.7
Barometric Correction
For using the constant barometric correction there must be a second absolute pressure transmitter (MPX4250) at the
back side that is not installed ex works.
The option “Barometric Correction” has to be activated in Megatune “Basic Settings” – “General Lags” and adjusted in
“Extended” – “Barometric Correction”.
Choose JS4 as input.
6.8
Tacho Output
The output “Tacho Output” is provided for standard tachometers. It can be activated in Megatune “Extended” – “Tacho
Output”. Choose “IGN (JS20)” as “Output on”.
6.9
Idle speed controller
The kdFi V1.3 supports the 2-pin as well as the 3-pin idle speed controller. The pin type of the idle controller has to be
selected on the back side by the solder jumper F-IDLE (see 5.1)
Pins of the idle speed control:
2-pin: +12V and FDL2
3-pin: +12V and FDL3A (open) and FDL3Z (closed)
6.10 Ignition
The ignition coil can be activated directly by the power drivers integrated in the kdFi V1.3. We recommend using a
shielded multi-conductor cable for connection. The kdFi can be extended to up to 8 power drivers enabling direct
activation of 8 ignition coils according to the wasted spark principle.
Alternatively ignition modules such as EDIS or Bosch can be used as well. Therefore the triggering signal can be tapped
from the solder jumper IGN_A to IGN_D.
6.11 Injection
There are two outputs (INJ1, INJ2) for injection groups. The additional ground connection between the outputs should
be connected to ground with low resistance (with large conductor cross-section) in order to avoid potential shifts on the
PCB. The injection valves are supplied with +12V via the ignition, the ground wires of the valves are activated via the
control unit.
Attention:
The setting whether the injection valves are of high or of low resistance has to be entered in
Megatune “Basic Settings” – “Injector Characteristics” in any case prior to the first test run. False
settings can cause destruction of the injection valves or of the kdFi.
12 of 14
6.12 Relay Output
See 5.6 R0
6.13 Boost control
The boost pressure is controlled by means of a fast acting valve at the Waste Gate. In MSextra this part of the software
is described as “EXPERIMENTAL – use with care”. For further information please refer to actual details on the internet.
6.14 JAW
(Just Another Wideband from Alan To - www.14point7.com)
The JAW circuit was integrated in the kdFi V1.3 for obtaining a space-saving, advantageous solution. By retrofitting the
socketed Jaw processor, a wideband lambda controller is available at once. Its analog output “V2” can be connected to
the “OXY” input of the kdFi by the solder jumper “JAW” on the back side of the PCB.
JAW can be activated and configured by the JAW Deploy software and the second serial port installed after the
connection of the kdFi.
6.15 CAN Bus
Like for the Megasquirt 2 the CAN Bus is prepared concerning the hardware, but has to be programmed by the user if
desired. For further information on this item please read the respective Megasquirt /MSextra websides on the internet.
7. Firmware updates
As usual for MSextra the firmware updates are performed without setting a boot jumper. You have to start the program
“Download-Firmware” from the Megasquirt folder of your Windows starting menu and to select the same COM port as in
Megatune.
Megatune has to be closed during the firmware updates to avoid access troubles.
Disconnect the ignition coils in any case during the firmware update; otherwise this could cause destruction of the power
driver as well as of the ignition coils!
13 of 14
8. Notes
_________________________________________________________________________________________________
_________________________________________________________________________________________________
_________________________________________________________________________________________________
_________________________________________________________________________________________________
_________________________________________________________________________________________________
_________________________________________________________________________________________________
_________________________________________________________________________________________________
_________________________________________________________________________________________________
_________________________________________________________________________________________________
_________________________________________________________________________________________________
_________________________________________________________________________________________________
_________________________________________________________________________________________________
_________________________________________________________________________________________________
_________________________________________________________________________________________________
_________________________________________________________________________________________________
_________________________________________________________________________________________________
_________________________________________________________________________________________________
_________________________________________________________________________________________________
_________________________________________________________________________________________________
_________________________________________________________________________________________________
_________________________________________________________________________________________________
_________________________________________________________________________________________________
_________________________________________________________________________________________________
_________________________________________________________________________________________________
_________________________________________________________________________________________________
_________________________________________________________________________________________________
_________________________________________________________________________________________________
_________________________________________________________________________________________________
_________________________________________________________________________________________________
_________________________________________________________________________________________________
_________________________________________________________________________________________________
_________________________________________________________________________________________________
_________________________________________________________________________________________________
_________________________________________________________________________________________________
_________________________________________________________________________________________________
_________________________________________________________________________________________________
_________________________________________________________________________________________________
_________________________________________________________________________________________________
_________________________________________________________________________________________________
_________________________________________________________________________________________________
14 of 14