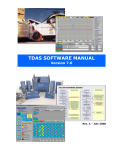
1
Agilent G6578 Low Thermal Mass System User Manual Agilent Technologies Notices © Agilent Technologies, Inc. 2009, 2010 Warranty No part of this manual may be reproduced in any form or by any means (including electronic storage and retrieval or translation into a foreign language) without prior agreement and written consent from Agilent Technologies, Inc. as governed by United States and international copyright laws. The material contained in this document is provided “as is,” and is subject to being changed, without notice, in future editions. Further, to the maximum extent permitted by applicable law, Agilent disclaims all warranties, either express or implied, with regard to this manual and any information contained herein, including but not limited to the implied warranties of merchantability and fitness for a particular purpose. Agilent shall not be liable for errors or for incidental or consequential damages in connection with the furnishing, use, or performance of this document or of any information contained herein. Should Agilent and the user have a separate written agreement with warranty terms covering the material in this document that conflict with these terms, the warranty terms in the separate agreement shall control. Manual Part Number G6578-90003 Edition Fourth edition, March 2010 Printed in USA Agilent Technologies, Inc. 2850 Centerville Road Wilmington, DE 19808-1610 USA Safety Notices CAUTION A CAUTION notice denotes a hazard. It calls attention to an operating procedure, practice, or the like that, if not correctly performed or adhered to, could result in damage to the product or loss of important data. Do not proceed beyond a CAUTION notice until the indicated conditions are fully understood and met. WA R N I N G A WARNING notice denotes a hazard. It calls attention to an operating procedure, practice, or the like that, if not correctly performed or adhered to, could result in personal injury or death. Do not proceed beyond a WARNING notice until the indicated conditions are fully understood and met. Contents 1 Safety Important Safety Warnings 8 Some parts of the LTM system carry dangerous voltages Electrostatic discharge is a threat to GC electronics 8 LTM parts are dangerously hot 8 Hydrogen Safety 10 Description of Fuses 11 LTM Power Supply Outputs 12 Safety and Regulatory Certifications Information 14 Symbols 14 Cleaning 13 16 Recycling the Product 2 8 16 Introduction Intended Use 18 Principle of Operation 19 The LTM System Components 20 LTM System Door 20 Power Supply 20 DC Power Cable 21 Power Line Cord 21 Transfer Line Modules 22 Column Modules 23 Fan Bracket 23 Gasket 24 Union Brackets 24 Description of Connections 25 3 Column Modules Attaching Column Modules To Transfer Line Modules Module Assembly 29 Attachment of Unions 32 CFT Union 33 Valco ULM Union Brackets 40 Inserting the Module Assembly into the Door Agilent LTM System User Manual 28 42 3 4 Operation Keypad Control 46 Quick Start Example 46 Powering On/Main Menu 47 Creating/Editing a GC Method 49 Setting the Active Method 50 Running the Active GC Methods 51 GC Operation without LTM 5 53 Diagnostics and Troubleshooting Diagnostics 56 Software Diagnostics 56 Error Code Descriptions 56 Temperature Status Display 58 Temperature Cool Down Display 61 Hardware Diagnostics 61 Troubleshooting 6 68 Installation About Installation 72 Tools Required for Installation Removing the Existing Door Agilent 6890 73 Agilent 7890A 74 73 73 Installing the LTM System 75 Install the LTM door 75 Install the power supply 75 Install the fan module 75 Attach the fan cable to the power supply 76 Attach the remote start cable to the GC 77 7 Service Remote Start Cable Connection 80 Cabling of the Heater Controllers to the Interface Board 81 Installing Additional Heater Controllers and Power Supplies Adding a Heater Controller Board 83 Adding a Second Power Supply 84 RS-232 Cable Connection to the LTM system 84 4 83 Agilent LTM System User Manual 8 Replacement Parts LTM Door Assembly Power Supply 88 92 Column Module Components Tools 9 93 95 Site Preparation Temperature and Humidity Ranges 98 Ventilation Requirements 98 Venting Oven Exhaust 98 Venting Toxic or Noxious Gases 98 Benchtop Space Requirements Electrical Requirements Grounding 100 Line Voltage 100 Agilent LTM System User Manual 99 100 5 6 Agilent LTM System User Manual Agilent G6578 Low Thermal Mass System User Manual 1 Safety Important Safety Warnings 8 Hydrogen Safety 10 Description of Fuses 11 Safety and Regulatory Certifications 13 Cleaning 16 Recycling the Product 16 Agilent Technologies 7 1 Safety Important Safety Warnings Before using the Agilent LTM system the user must be familiar with the operation and safety of the Agilent 6890 series GC or Agilent 7890A GC on which the LTM system is installed. This operation and safety information is provided by Agilent when the GC is purchased. Some parts of the LTM system carry dangerous voltages If the LTM system is connected to a power source potentially dangerous voltages exist on: • The power cable between the LTM power supply and the line power, the LTM power supply, and the wiring from the LTM power supply to the LTM electronics enclosure, everywhere within the electronics enclosure, and the wiring between the LTM electronics enclosure and the column modules. WA R N I N G The electronics and power supply are shielded by covers and the external wiring by insulated coverings. With the covers in place, it should be difficult to accidentally make contact with dangerous voltages. Unless specifically instructed to, never remove a cover unless the LTM power supply is disconnected from its power source. WA R N I N G If the power cord insulation, or insulation on any of the other external cables is frayed or worn, the cord or cable must be replaced. Contact your Agilent service representative. Electrostatic discharge is a threat to GC electronics The printed circuit (PC) boards in the LTM system can be damaged by electrostatic discharge. Do not touch any of the boards unless it is absolutely necessary. If you must handle them, wear a grounded wrist strap and take other antistatic precautions. Wear a grounded wrist strap any time you must remove the LTM electronics enclosure cover. LTM parts are dangerously hot WA R N I N G 8 Many parts of the externally mounted LTM column module and the interior of the LTM oven door including the column unions operate at temperatures high enough to cause serious burns. Agilent LTM System User Manual Safety 1 You should always cool the LTM system column modules and the GC oven and oven accessories to room temperature before working on them. They will cool faster if you first set the temperature of the heated zone to room temperature. Turn the GC and the LTM system zones off after they have reached a safe setpoint. If you must perform maintenance on hot parts, use a wrench and wear thermally protective gloves. Whenever possible, cool the part of the instrument that you will be maintaining before you begin working on it. WA R N I N G The oven door insulation around the interface between the GC oven and LTM column module is made of refractory ceramic fibers. To avoid inhaling fiber particles, we recommend the following safety procedures: ventilate your work area; wear long sleeves, gloves, safety glasses, and a disposable dust/mist respirator; dispose of insulation in a sealed plastic bag; wash your hands with mild soap and cold water after handling the insulation. Agilent LTM System User Manual 9 1 Safety Hydrogen Safety Please refer to the Agilent 7890A Gas Chromatogram Safety Manual, the Agilent 6890 User Information Manual, or the Agilent 5975 Mass Selective Detector Hydrogen Safety Manual for important information regarding hydrogen safety. WA R N I N G 10 Hydrogen is flammable. Leaks, when confined in an enclosed space, may create a fire or explosion hazard. Agilent LTM System User Manual 1 Safety Description of Fuses The fuses are located in the power entry module of the LTM power supply. The fuses are accessible from outside the power supply by removing the fuse tray. These fuses are the only user-serviceable part in the LTM power supply. There are two versions (older and newer) of LTM power supplies with different fuse requirements. REPLACEMENT FUSES MUST BE CHOSEN ACCORDING TO THE FUSE REQUIREMENT LABEL on the back of the power supply next to the power entry module. Fuse requirements for each version of power supply are as follows: • For older power supplies (identified by a RED LED on the front next to the output socket). 4 A, 250 VAC time-lag 5×20 mm • For newer power supplies (identified by a GREEN LED on the front next to the output socket). 5A, 250 VAC fast-acting 5×20 mm Agilent LTM System User Manual 11 1 Safety LTM Power Supply Outputs Table 1 PIN# 12 Total Output Power 350W (max.) Outputs 1 +5VDC 10 A 2 COM (+/-15V, +5V) 3 COM1 (+-15V, +5V) 4 +15VDC 5 FG 6 COM2 (48V, +12V) 7 -15VDC 2.7 A 8 +12VDC 4.2 A 9 +48VDC 6.3 A 4A Agilent LTM System User Manual Safety 1 Safety and Regulatory Certifications The Agilent LTM system conforms to the following safety standards: • Canadian Standards Association (CSA): C22.2 No. 1010.1-1-04 • USA/Nationally Recognized Test Laboratory (NRTL): UL 61010-1 Second edition 2004 • International Electrotechnical Commission (IEC): 61010–1 • EuroNorm (EN): 61010–1 • IEC 61326-1:2005 Instructions for Disposal of Waste Equipment by Users in the European Union. This symbol on the product or its packaging indicates that this product must not be disposed of with other waste. Instead, it is your responsibility to dispose of your waste equipment by handing it over to a designated collection point for the recycling of waste electrical and electronic equipment. The separate collection and recycling of your waste equipment at the time of disposal will l help conserve natural resources and ensure that it is recycled in a manner that protects human health and the environment. For more information about where you can drop off your waste equipment for recycling, please contact your local city recycling office or the dealer from whom you originally purchased the product. N This device contains a duel fused input inlet. This device complies with the requirements of CISPR II, Group1, Class A. Operation is subject to the following two conditions: • This device may not cause harmful interference. • This device must accept any interference received, including interference that may cause undesired operation. Agilent LTM System User Manual 13 1 Safety If this equipment does cause harmful interference to radio or television reception, which can be determined by turning the equipment off and on, the user is encouraged to try one or more of the following measures: 1 Relocate the radio or television antenna. 2 Move the device away from the radio or television. 3 Plug the device into a different electrical outlet, so that the device and the radio or television are on separate electrical circuits. 4 Make sure that peripheral devices are also certified. 5 Make sure that appropriate cables are used to connect the device to peripheral equipment. 6 Consult your equipment dealer, Agilent Technologies, or an experienced technician for assistance. Changes or modifications not expressly approved by Agilent Technologies could void the user’s authority to operate the equipment. Information The Agilent Technologies LTM system meets the following IEC (International Electro-technical Commission) classifications: Safety Class I, Transient Overvoltage Category II, Pollution Degree 2. This unit has been designed and tested in accordance with recognized safety standards and is designed for use indoors in non-classified locations. If the instrument is used in a manner not specified by the manufacturer, the protection provided by the instrument may be impaired. Whenever the safety protection of the Agilent LTM system has been compromised, disconnect the unit from all power sources and secure the unit against unintended operation. Refer servicing to qualified service personnel. Substituting parts or performing any unauthorized modification to the instrument may result in a safety hazard. Symbols Warnings in the manual or on the instrument must be observed during all phases of operation, service, and repair of this instrument. Failure to comply with these precautions violates 14 Agilent LTM System User Manual Safety 1 safety standards of design and the intended use of the instrument. Agilent Technologies assumes no liability for the customer’s failure to comply with these requirements. See accompanying instructions for more information. Indicates a hot surface. Indicates hazardous voltages. Indicates earth (ground) terminal. Indicates potential explosion hazard. or Indicates radioactivity hazard. Indicates electrostatic discharge hazard. Indicates a hazard. See the Agilent 7890A GC user documentation for the item labeled. Indicates that you must not discard this electrical/electronic product in domestic household waste DC Voltage AC Voltage Indicates double pole/neutral fusing Agilent LTM System User Manual ' $ N 15 1 Safety Cleaning To clean the unit, disconnect the power and wipe down with a damp, lint-free cloth. Recycling the Product For recycling, contact your local Agilent sales office. 16 Agilent LTM System User Manual Agilent G6578 Low Thermal Mass System User Manual 2 Introduction Intended Use 18 Principle of Operation 19 The LTM System Components 20 This chapter introduces the user to the LTM system and describes the components that make up the system.22 Agilent Technologies 17 Intended Use The Agilent LTM system is designed to enhance the column temperature programming capabilities of the Agilent 7890A and 6890 series gas chromatographs. The LTM oven door contains a built-in electronics module with a standalone power supply. This door accepts one or more LTM column modules containing a GC capillary column that can be independently temperature controlled by the LTM electronics. These column modules provide a faster ramp temperature programming capability compared to the standard GC oven. Individual column modules are independently temperature programmed to provide greater analytical flexibility. By interfacing through the existing oven, the operator retains the use of the original chromatograph’s automated sampling, sample injection, detection options, and software. 18 Agilent LTM System User Manual Principle of Operation The Agilent LTM system quickly and efficiently controls the temperature of capillary gas chromatography (GC) columns packaged in LTM modules. Within these modules the GC columns are formed into packed coils using a proprietary design containing resistively heated wire and a temperature sensor. The high efficiency provides fast heating and cooling of the GC columns. This also greatly reduces the power requirements for temperature programming and cooling times compared to the operation of a conventional chromatograph oven. Using a proprietary design, these modules are located outside the conventional GC oven so that the modules can be cooled rapidly with ambient air. The oven of the Agilent 7890A\ 6890 series gas chromatograph is used to heat the sample introduction hardware or sample line, the detector hardware or sample line, any additional hardware in the GC oven which must be heated for sample transit, and the sample line connections to the Agilent LTM system. This provides great flexibility to the Agilent LTM system because the GC oven can easily be configured in many ways with different means of sample introduction, sample manipulation, and sample detection. Agilent LTM System User Manual 19 The LTM System Components The LTM is made up of the following major components listed below in this section. LTM System Door The main component of the LTM for an Agilent GC is the oven door. This door contains the electronics for temperature control of the LTM column assemblies. The interior side of the LTM door also provides the LTM column module connections inside the GC oven. This connections permit direct attachment to the GC’s inlets, detectors, and other column accessory devices. The above picture shows a LTM system installed on an Agilent 7890 series gas chromatograph. The blue plate covering the injectors has been temporarily removed to facilitate installation of the replacement door. The LTM system has a single large format fan bracket installed with a pair of the lower slots in the door open to accept a large format column module assembly. Power Supply The LTM power supply provides power to operate the electronics in the LTM door, heat the LTM GC column assemblies, and run the column cooling fans. One power supply is usually sufficient to power two LTM GC column assemblies. A second power supply can be also be attached to the LTM door 20 Agilent LTM System User Manual electronics housing to power additional column modules or to help meet the power requirements for aggressive heating applications. DC Power Cable This cable connects the LTM power supply to one of the connectors on the underside of the electronics housing. The cable ends are keyed and secured by a twisting lock ring. For units using a single power supply, the supply must be connected to the rearmost connector, PS1. Power Line Cord The AC line power cord meets regulatory standards and is approved for the country of operation. It terminates in a standard IEC 320 plug for attachment to the LTM power supply. The LTM power supply accepts 100-240 VAC 50/60 Hz. Agilent LTM System User Manual 21 Transfer Line Modules The transfer line module provides the interface between the column module and the oven of the GC. The transfer line module has two heated tubes (transfer lines) through which the GC column leads pass from the LTM GC column module into the oven. These transfer lines are temperature programmed by the LTM electronics to prevent cold spots in the GC sample path between the heated oven and the LTM GC column module. The LTM GC column modules attach to the transfer line module, and the resulting module assembly inserts into the slots in the door according to the size of the assembly. There are two sizes of transfer line modules available that match two sizes of LTM GC column modules that are currently available: a smaller size for 7.6 cm column coil sizes that can fit in any of the four slots in the replacement door; and a larger standard format size which adapts a 12.7 cm column coil size to fit a horizontal pair of slots in the replacement door. It is possible to first insert the transfer line modules into the replacement door before attaching column modules, but it is often easier to attach column modules to transfer line modules before inserting the resulting module assembly into the door. There are two different series of designs for transfer line modules and transfer line modules. The designs are nearly identical and differ only in the details of the attachment of the two parts. The newer Series II uses a design in which the column module has guides which allow it to slide to a predetermined position and then be secured with two screws. The older series used a pair of clamp brackets to attach the column module to the transfer line module. The newer Series II transfer line module is compatible with older series column modules, but the new Series II column modules will not attach to older series transfer line modules. 22 Agilent LTM System User Manual Column Modules Column modules are currently available in two sizes: a small format that accommodates a 7.6 cm (3 inch) coil size; and a standard format that accommodates a 12.7 cm (5 inch) coil size. The standard format is required for GC capillary column bore sizes greater than 0.32 mm, and is strongly recommended for most GC columns having Porous Layer Open Tubular (PLOT) phases. The standard format consumes slightly more power, but provides faster cooling speeds than the small format and is usually the preferred format for this reason. Because of the module size, however, simultaneous module operation with standard format is limited to two modules in the LTM system. Module sizes can be mixed so that one standard format module can be used with either one or two small format modules. Column modules are designed to slide into a predetermined position and screw in place with the transfer line modules. Fan Bracket Two sizes of fan bracket are available which must match the size of the transfer line module/column module being used. The brackets attach to the front of the replacement door below the slots unit using 4-40x3/16 hex head cap screws using a long-handled Allen driver tool provided with the unit. The Series II electronics provide control of an indicating light which is integrated into the Series II fan brackets. All transfer line module/column modules are compatible with all series of fan brackets of matching size, but only Series II fan brackets provide the indicating light that is operational with the Series II electronics. Agilent LTM System User Manual 23 Gasket Insulation gaskets are provided for seating the end of the transfer line module in the oven interface of the replacement door. These gaskets provide a tight seal to prevent heat from leaking through the interface resulting in unwanted heating of the module components. These gaskets are re-usable, but do age with use at high temperatures and should be replaced when they become too fragile for reuse. Union Brackets Two union bracket designs are shown below. Figure 1 Union bracket with Valco ULM union . Figure 2 CFT fitting These brackets attach to the posts which extend into the oven from the end of the transfer line module and hold in place a chromatography union for making the transfer line/guard column connections from the module to the other GC components. Different brackets are available for the Valco Ultra Low Mass (ULM) unions and the Agilent CFT Ultimate unions. 24 Agilent LTM System User Manual The ULM unions use re-usable ferrules and require no special tools. The ULM unions are integrated with the bracket and are non-removable. We recommend Valco re-usable ferrules of the following part numbers for use with the ULM unions: Table 2 Valco re-usable ferrules for use with ULM unions Fused silica capillary column O.D. Recommended Ferrule 0.4 mm (typically 0.25mm or smaller I.D.) 5190-1437 0.5 mm (typically 0.32mm I.D.) 5190-1438 0.8 mm (typically 0.53mm I.D.) 5190-1439 The CFT Ultimate union ferrules are available for the capillary column sizes listed below. Table 3 Siltite ferrules for Agilent CFT Ultimate unions Fused silica capillary column O.D. Recommended Ferrule 0.4 mm (typically 0.25mm or smaller I.D.) 5188-5361 0.5 mm (typically 0.32mm I.D.) 5188-5362 0.8 mm (typically 0.53mm I.D.) 5188-5363 Description of Connections The electrical connections to the LTM system are described as follows: Line Power Cord to LTM Power Supply The power entry module on the rear of the LTM power supply has a standard IEC 320 outlet to which is attached a power line cord approved for the country of operation. DC Power Cord to LTM Power Supply The DC power cord for the operation of the electronics and module heating in the LTM door unit connects to the connector labeled DC POWER on the front of the LTM power supply. Only one end of the DC power cord will attach because of both the physical size and gender of the connectors on the end of the DC power cord. Agilent LTM System User Manual 25 DC Power Cord to LTM Door Unit The DC power cord connects to the left underside of the electronics housing attached to the LTM door unit. Only one end of the DC power cord will attach because of both the physical size and gender of the connectors on the end of the DC power cord. There are two identical connectors, labeled PS1 and PS2. PS1 is nearest the door and must be used when connecting a single LTM power supply to the door unit. RS-232 Cable to Electronics Housing There is a connector for an RS-232 cable on the left end of the LTM electronics housing labeled RS-232. Only a special cable provided by Agilent can be used for this connection. This cable can provide remote control of the LTM system when used with special software operated on a remote computer. 26 Agilent LTM System User Manual Agilent G6578 Low Thermal Mass System User Manual 3 Column Modules Attaching Column Modules To Transfer Line Modules 28 Attachment of Unions 32 Inserting the Module Assembly into the Door 42 Please refer to this chapter when it is necessary to change the column in the LTM system. This chapter explains how to assemble a column with its transfer line module and attach the column to unions for the connection to oven components. It also explains how to attach the column to the oven door and make the necessary electrical connections required for temperature control. Agilent Technologies 27 Attaching Column Modules To Transfer Line Modules It is important to read through this set of instructions before you attach the column module to the transfer line module. It is usually more convenient to complete this assembly on a desktop or table top, rather than in the door. The completed assembly then slips into the door for final attachments. A column module inserts into a slot in the door only by first combining it with a transfer line module, a tray-like device with two heated steel and aluminum tubes which guide and heat the column between the coil of the column module and the GC oven. There are two sizes available for column modules and their associated transfer line modules. The small format 7.6 cm (3 inch) coil modules attach to a transfer line module using two screws, and the resulting module assembly fits a single slot of the LTM door. A completed 7.6 cm (3 inch) LTM column and transfer line module assembly is shown the below. The standard module size contains a 12.7 cm (5 inch) column coil. This coil size is compatible with delicate PLOT columns and fused silica capillary columns with inner diameter ranging from 0.1mm to 0.53mm. It also cools faster because of the larger surface area of the capillary GC column assembly. The transfer line module for the 12.7 cm coil module uses a horizontal pair of slots in the LTM door. The standard format size column 28 Agilent LTM System User Manual module slides to a predetermined position and then screws down for easier assembly. A completed 12.7 cm (5 inch) coil module assembly is shown below. Please note that older RVM column modules using the screw clamps for attachment are compatible with the newer, clampless transfer line modules, but the clampless column modules are not backwards compatible with the older transfer line modules. Module Assembly The column module and transfer line module are shown below: 1 If attached, remove the two screws from the ends of transfer line module. These 6-32 x 1/4-inch screws will be used to Agilent LTM System User Manual 29 attach the two corners of the column module to the ends of the transfer line module. WA R N I N G Wear safety glasses to protect your eyes from flying particles while handling, cutting, or installing glass or fused silica capillary columns. Use care in handling these columns to prevent puncture wounds. 2 Carefully guide both column ends into the inner tubes of the transfer line module. The column is guided into the smaller steel tube lining the inside of the aluminum tube. 3 Guide the side edges of the column module around the edges of the transfer line module as shown below. The meeting of the column assembly with the transfer line heater tubes can be observed through the perforations in the top of the column module cover. 4 Carefully slide the column module forward until it stops due to the end of the column module track. WA R N I N G If resistance is encountered when sliding the parts together, ensure the wiring to the transfer lines on the column module housing is not damaged. Damage to these wires can result in electrical shock and equipment failure. CAUTION To avoid breaking the column, the transfer lines should very closely approach, but not press into, the column assembly. The column assembly within the column module should just meet the ends of the transfer line heater tubes when the travel stops. The transfer line should cover the exposed column at this point. If the column assembly and the transfer line heater tubes do not appear to correctly meet, contact 30 Agilent LTM System User Manual Agilent. A close-up (column cover removed for better viewing) of the meeting of the column assembly with the transfer line heated tubes is shown below. 5 Secure the column module to the transfer line module using the two thumb screws. The free column leads should extend past the two posts where the column leads exit the module assembly. It is good practice to always handle the column assemblies as though the pieces are not secured together to prevent any damage, just in case the screws were to come loose. It is also good to check periodically that the screws are tight if the module is being subjected to a lot of handling, or, conversely, it has not been handled for a very long time. The free column leads should extend past the two posts where the column leads exit the module assembly. You now need to attach a union to each column end to complete this assembly. CAUTION Agilent LTM System User Manual Do not trim these column ends before understanding how the sliding union attachment works. The correct position of the union increases the number of times the column may be trimmed in its lifetime. 31 Attachment of Unions Methods to use different types of capillary chromatography unions have been developed for the LTM system. These unions use brackets to attach to the posts that extend from the oven end of the module assembly. It is easiest to attach the unions to the module assembly before the assembly is inserted into the slot in the GC door. Unions directly connect the module assembly to the injector or detector using fused silica transfer lines within the GC oven. A high-quality chromatography union is required so that the chromatography is not adversely affected by unswept volume or adsorption sites in the union connections. Match the capillary tubing to the ferrules and type of union for the best chromatography results. Agilent recommends the CFT union (page 33) for the best chromatographic results with minimal leakage concerns during temperate cycling. Use of this union requires trimming the column to remove the ferrules each time the column is changed. Use Valco Ultra Low Mass (ULM) fittings (page 40) with reusable ferrules to minimize repeated trimming of the GC column. The column leads exiting the transfer line to the union are very short by design and cannot be trimmed repeatedly. The reusable ferrules allow disassembly of the module assemblies without trimming the GC column in most cases. While the reusable ferrules are not designed for use with the ULM fittings, the dead volume is adequately swept for reasonable chromatography in most circumstances. Because of the reusable design of this fitting, it is necessary to tighten the fitting after each temperature cycle in the GC oven. These two types of unions and their attachment to the module assemblies are described in the following sections. These fittings have provided good chromatography results for 0.25 mm and larger i.d. capillary columns with excellent ease of use. The chromatography with 0.1 mm i.d. columns using these unions has been adequate in some applications, but demanding separations in 0.25 mm and smaller i.d. capillary columns may require alternative unions. Please inquire with Agilent regarding union solutions for these most demanding situations. 32 Agilent LTM System User Manual CFT Union This procedure is used to attach an LTM column module to the retention gaps using a CFT Union (Ultimate Union) and supporting bracket. Retention gaps connect the module to the inlet and detector. Materials needed: • Siltite ferrules, four needed per module, two needed per retention gap (Table 4) • Two 1/4-inch open-end wrenches • Two LTM union holder brackets (union hangers) G6578-60120 • Column cutting tool (5181-8836) • Torx T20 Driver • Four Internal nuts per module, two internal nuts per retention gap (G2855-20530) • Lint free gloves • Short metric ruler • Swaging nut for SilTite ferrules (G2855-20555) or swaging tool (G2855-60200) • One 7/16-inch open-end wrench Table 4 CAUTION Siltite Ferrules Part number Siltite Ferrule description 5188-5361 for 0.2 to 0.25mm columns 5188-5362 for 0.32mm columns 5188-5363 for 0.53mm columns Wear clean, lint-free gloves to prevent contamination of the parts. 1 Slide the column module into the transfer line assembly. 2 Cut the column as shown in the photo to approximately 60 mm from the face of the transfer line assembly. Agilent LTM System User Manual 33 3 Clean the column end with an alcohol wipe. 4 Slide one internal nut onto the inlet column end. 5 Slide the appropriate Siltite ferrule onto the inlet column end. 6 Slide one union hanger assembly onto the inlet transfer line arm as shown. Be sure the hanger is at maximum extension on the arm. Use a T20 torx driver to tighten the screw until the hanger does not slide freely. Do not tighten completely. End of arm Maximum extension Lightly tighten 34 Agilent LTM System User Manual 7 Slide the column end through a CFT union and place the CFT union into the hanger as shown. Again check that the hanger is at maximum extension without extending past the end of the arm as shown below. 8 Using two 1/4-inch open end wrenches as shown in the photo, swage on the Siltite ferrule by turning the internal nut until it grips the column. Then turn 45 to 60 degrees (one flat) further. Do not rotate more than 60 degrees. 9 After tightening, gently pull the column to determine if the swage is secure. 10 Loosen the internal nut completely and remove the CFT union from the hanger. Agilent LTM System User Manual 35 11 Using a wafer column cutter, trim the tubing at the small end of the ferrule. Leave approximately 0.3 mm of tubing extending beyond the ferule. See the photo below. NOTE It is important that the tube end does not extend beyond 0.5 mm from the end of the ferrule. 12 Check the end of the tube with a magnifier. The end of the tube need not be perfectly square, but should not have cracks that extend from the end of the ferrule. 13 Place the CFT union back into the hanger and insert the assembled ferrule. Slightly loosen the screw on the hanger. Then carefully tighten the internal nut using two 1/4-inch wrenches. 36 Agilent LTM System User Manual 14 Use a Torx T20 driver to carefully tighten the hanger to the arm. See the photos below for the final positioning. 15 Follow the same procedure for the other column end. The 5-inch column is shown. NOTE To separate a LTM column module from the transfer line assembly when a CFT union is used, loosen the internal nut and remove the union from the hanger. Now using the wafer column cutter, cut off the Siltite ferrule just at the back of the ferrule. The module can now be removed. When reinstalling follow the above procedures again and move the bracket appropriately for the new length. Agilent LTM System User Manual 37 Attaching a Retention Gap to the CFT Union/LTM Bracket Assembly This procedure is used to attach a retention gap to a CFT Ultimate Union. CAUTION Wear clean, lint-free gloves to prevent contamination of the parts. 1 Pass the column end through the internal nut and SilTite ferrule leaving approximately 1 cm of fused silica column protruding beyond the ferrule. Thread the swaging nut or swaging tool onto the internal nut with the column protruding. 2 Using two wrenches against each other, tighten the two nuts together a little at a time, occasionally checking to see if the ferrule is gripping the column. When the ferrule starts to grip, tighten one of the nuts an additional 45 to 60 degrees (one flat). 38 Agilent LTM System User Manual 3 Remove the swaging nut or swaging tool. 4 Use a wafer column cutter to trim the column at the small end of the ferrule. Leave approximately 0.3 mm of column extending beyond the ferrule. The column cannot extend more than 0.5 mm from the end of the ferrule. Check the end of the column with a magnifier. The end of the column does not need to be perfectly square, but cracks should not extend under the ferrule. 5 Insert the assembled ferrule and nut into the CGT Union attached to the LTM column assembly. Tighten with a wrench by 15 to 20 degrees of rotation. 6 Install the free end of the retention gap into the inlet or detector using the appropriate nut and ferrule. Agilent LTM System User Manual 39 Valco ULM Union Brackets A union bracket for the LTM system using the Valco ULM union is shown below. The union is not removable from the bracket. Start by observing the clamps with the mini-unions. The screw on each of these can be loosened just enough that the brackets can slide along the rails projecting from the oven-side of the transfer line module. It is not necessary to remove the screw; just loosening the screw will allow the bracket to slide on and off of the rail. With the screw toward the underside of the rail, note that there are two choices for how the pair of brackets can be used: the unions can be away from the module; or the two brackets can be exchanged on the rails, and the unions can instead be positioned between the bracket and the module body. The first position, with the unions pointed away, increases the distance between the unions and the module and is recommended for the initial installation because this minimizes the amount of column that must be trimmed. This leaves enough length of column past the ends of the transfer lines to permit the column to be cut back several times if you want to change columns and the ferrules cannot be separated from the column. CAUTION 40 Before trimming the column for the first time make sure the unions are pointed away from the column module as noted in the paragraph above. The union must also be slid to the position furthest away from the module. This union position will result in the maximum length of column available for future column trims. Agilent LTM System User Manual 1 Slide the knurled nut and ferrule over the capillary column. WA R N I N G Wear safety glasses to protect your eyes from flying particles while handling, cutting, or installing glass or fused silica capillary columns. Use care in handling these columns to prevent puncture wounds. 2 Trim the capillary column to a length approximately equal to, but not past the end of the support post as shown. 3 Slide the union bracket onto the post so that the column stops in the end of the union. Unions with a small inner bore do not allow 0.4 mm and 0.5 mm outer diameter tubing to pass through the union. These columns must stop in the end of the union. At this position, the bracket should be firmly clamped onto the post using a 6.4 mm (1/4-inch) open end wrench. 4 Slide the ferrule and knurled nut up to the ULM union and tighten the nut using your fingers until the nut is snug (note that this is LESS than finger tight). Because the seal at the ferrule occurs near the tip of the ferrule, over tightening will crush the tip of the ferrule and the capillary column. It is recommended that the knurled nut be tightened until it feels snug, and then tightened an additional 10 degrees. To undo this connection, simply remove the knurled nut and gently pull back on the ferrule. Because the rear part of the re-usable ferrule poorly fits the ULM union, it is easy to pull back with a small pair of tweezers to dislodge the ferrule if it appears to be stuck in the union. If the ferrule has not been overly tightened, it should slide off of the column leaving minimal debris on the column. Typically, these ferrules can be re-used many times. Agilent LTM System User Manual 41 Inserting the Module Assembly into the Door After the column module is attached to the transfer line module, as described in the previous section, you are ready to insert the module assembly into the LTM door. WA R N I N G Be careful! The oven or internal oven accessories may be hot enough to cause burns. If either is hot, wear heat-resistant gloves to protect your hands or allow the parts to cool before beginning the work. 1 Place a felt insulation gasket over the two rails with the union connections and past the retaining springs for the transfer lines so that it sits evenly over the end face of the transfer line module. The tight clearance of the gasket over the retaining springs should hold it in place. One of the two gaskets properly placed on a large format module assembly is shown. 2 Carefully align the union brackets with the feed through holes in the oven. The tolerances are close, and you may have to spread the posts slightly to clear the feed through holes. There are two slots on the underside of the transfer line module in which the tabs on the fan bracket will fit. If you also watch the assembly from the side as it is slid into the oven, you can watch this alignment. If you have an assembly that is not clampless, lift up slightly on the module to clear the thumbscrew heads of the clamps and then the assembly will drop down into place and slide forward into the oven and the tabs will lock into the slots in the transfer line module. CAUTION 42 When securing the module from inside the oven do not over tighten. Finger tight is too tight! Agilent LTM System User Manual 3 Secure the module with the captive screw from the inside of the oven door now. Tighten enough to establish a reasonable seat against the highly compressible ceramic paper gasket. If there is resistance in engaging the captive screw with the module assembly, do not force the screw. Instead, loosen and back the screw out of its fixture, and examine it for insulation debris. The screw should be wiped clean with a paper towel, and lubricated with either graphite powder or an anti-seize compound such as Loctite Heavy Duty Antiseize, P/N 51609 (Loctite Corporation, Rocky Hill, CT) or Sprayon Dry Graphite Lube, P/N S00204 (Sherwin Williams, Solon, OH). WA R N I N G Disconnect the power cord to the LTM power supply from the building power supply. Never power the LTM power supply when the LTM electronics housing cover is open. Dangerous voltages exist inside the LTM electronics housing when powered by the power supply. 4 Open the front of the electronics housing by gently turning the small black knob counterclockwise as described in the installation section. This provides access to the connections on the heater controller card. 5 Route the transfer line and column module connections (total of three cables and connections per module) down and through the oblong slot on the top left of the electronics housing. The connections are all keyed. CAUTION All electrical cable connectors for any one module (column and transfer line) must connect to a single heater controller board. Some LTM systems contain multiple heater controller boards for multiple column use. 6 Connect the column cable connector to the small circuit board in the uppermost connector, J1 (a 10-pin connector), on the left side of the card. The circuit board side of the connector faces outward and this is the only way the connector will join with the connector on the board. Agilent LTM System User Manual 43 7 Connect the transfer line cable connectors, which are interchangeable, to either of the lower two 8-pin connectors, J2 and J3. These also are keyed and will only go onto the board one way. When removing the transfer line connectors from the board, remove them by gripping the connector and not by pulling on the cable because there are several fine wires in the connector. 8 Close and secure the cover on the LTM electronics housing before providing power supply current to the LTM power supply. WA R N I N G Never power the LTM power supply when the LTM electronics housing cover is open. Dangerous voltages exist inside the LTM electronics housing when powered by the power supply. Now you are ready to connect phaseless capillary tubing (typically intermediate polarity deactivated fused silica transfer lines or guard column) from the detector and inlet to the union connections. Using approximately 40-50 cm per connection is typically adequate to allow easy opening and closing of the door. It is also possible to use retention gap or guard column to connect to other devices such as valves or additional modules. 44 Agilent LTM System User Manual Agilent G6578 Low Thermal Mass System User Manual 4 Operation Keypad Control 46 GC Operation without LTM 53 This chapter explains how to program the LTM system with an analytical method and run the method. Agilent Technologies 45 Keypad Control The internal software runs when the LTM system power is turned on. The internal software is designed for applications involving repetitive analyses in that once temperature programs are entered into the LTM system, they are stored in non-volatile memory and easily activated by the remote start cable. The unit can also be fully programmed and controlled by remote software from a computer via the LTM system RS-232 cable. Quick Start Example These steps will create a simple temperature program that will heat a module from 40 °C to 50 °C as a demonstration. This procedure assumes that you have a module assembly properly connected to a heater controller board, and that this controller board is connected to the module #1 connector on the interface board. Keypad entries are underlined in the following text. 1 Turn on the LTM power supply. You will see the start-up screen. Press # to go to the main menu. 2 In the main menu there are 3 choices. Press 9 (down arrow) to move the cursor to the Edit Methods choice. Press # to select. 3 In the Edit Methods menu, we will choose method #2 to create the method. Press 9 (down arrow) to move the cursor to the second method. Press # to select. 4 In the method editor, the current cursor position should be at the first segment. Press # to select. Use the # key to move right and the * key to move left. Type over the entry for the temperature in the second column with the value 40. Type over the value in the final column with 30 (this will provide a 30 second isothermal segment at 40 °C). Typing # or * to scroll all the way right or left will return the cursor the beginning of the line. 5 Now press 9 (down arrow) to go to the second segment. Press # to begin editing this segment. Type 60 over the value in the ramp rate (first column). Type 50 over the value for the temperature, and type 20 over the value for time. These values will ramp the module assembly at 1 °C/s to 50 °C and hold for 20 s. 6 With the cursor at the left edge of the screen. Press 3 (up arrow) twice and this will move the cursor to the top line to create a name for the method. We will enter TEST 3 for the method name as an example. The # and * work as before to scroll the cursor right and left. Press 8 for the letter T, then scroll right one space. Press 3 twice for the letter E (note that if you keep pressing the number 3 it will cycle through the letters D-F), then scroll right again. Press 7 until you have the 46 Agilent LTM System User Manual letter S. Scroll right and press 8 again for the letter T. Scroll right. If there was an unwanted character in a space, simply type over it. To replace a character with a blank space, press zero. Scroll to where you want the number 3, then press 0 until you get the number 3 (the zero key scrolls through the set of digits after providing a blank space). Scroll all the way right or left when you are done with creating the method name. This takes the cursor back to its position to select a segment for editing. 7 Press * to exit the editing of method # 2. 8 Press * to exit the method editor. 9 Press 9 (down arrow) to scroll down to the third choice on the main menu Set Active Methods and press # to select. 10 Press # to edit the method selections. Again the # and * keys will scroll the cursor to the right or left. We will want to make module #1 run method #2. After the 1: type over the entry with a 2. If modules 2-4 have nonzero methods, type over these with a zero. Again, scrolling all of the way to the right or left will exit the editing. Press * to exit the set active methods menu. 11 Scroll up to the first choice in the main menu by pressing 3 (up arrow). 12 Press # to select Run Active Methods. You will see the temperature control sweep its initialization set point from 0 °C to the starting temperature at a rate of 2 °C/s. If any of the temperature set points are not within range, you will see a screen showing the temperature status of the three different heated zones with numbers indicating which of the four modules is out of range. Otherwise, the software will proceed to a Ready screen and wait for a remote start signal. Pressing the start button on your GC should trigger the unit to start its temperature ramp. When triggered it will go through the new temperature program and then cool down. At the end of the run, the fans will turn on 100% while the module assembly cools. The temperature readout during cooling approximates the temperature based on indirect sensing of the temperature. Once the starting temperature for the method is reached, the unit will equilibrate for 3 seconds and then the fan speed will decrease. The unit should now be ready and waiting for the next start signal. 13 Press * to abort the run cycle at any time. Powering On/Main Menu After switching on the power supply, the introductory screen should appear on the LCD. Press the # button to proceed to the main menu. In the main menu are 3 choices: Run Active Methods, Agilent LTM System User Manual 47 Edit Methods, and Set Active Methods. First use the buttons 3 and 9 next to the up and down arrows to move the selection arrow. Pressing the # button then continues with the selected choice. These three choices are described briefly as follows: Run Active Methods This choice initializes the GC controller to run the method or methods selected to be active. First an initialization screen is shown while the temperature set points are ramped from zero up to their set points for the initial temperatures of the method. A fixed rate of 120 °C/min is set in the software for this initialization. A bar shows the progress of this initialization. The initialization can be aborted at any time by pressing the * button to return to the main menu. Following the initialization, a status screen may briefly appear until all temperature zones are at ready status. This screen is described more fully in a following section. Once all temperatures are ready, the LCD then shows a Ready screen and the green ready light should be on. When a remote start signal is received, the GC method is run. At the conclusion of the run, the fan(s) are activated to speed the cooling of the module and the status screen shows the approximate temperature during cooling. If any temperature zones are out of range at the end of the 3 second equilibration, the over or under temperature status for the separate heated zones for each module is then displayed. The method will automatically continue to the Ready screen when all temperature zones are within bounds, and await the next start signal. Again, the * button can be pressed at any time during a run, cool down, or Ready to return to the main menu. Edit Methods This choice provides access to up to 10 different methods stored in non-volatile memory in the controller. Each can be fully edited and named or renamed. Each method is numbered and these numbers are used to assign methods to the modules. Each method consists of up to 8 conventional style ramping segments. The editing is described in a section below. As a new user you should begin by creating a method you wish to run. See “Quick Start Example" on page 46 for an initial demonstration of creating and naming a method. Set Active Methods This third choice determines which methods are assigned to the modules. In the bottom of the screen, module numbers from 1-4 are shown along with the method number assigned to each module. The number of modules which can actually be operated will depend upon the number of heater controller boards which have been installed. With a typical installation with a single controller board, only one module can be temperature programmed (and this will normally be configured in the hardware to be module #1. All other module numbers should have the method number set to 48 Agilent LTM System User Manual zero. A simple type-over editor is used to edit the method number assigned to the module and is described more fully below. Creating/Editing a GC Method Select Edit Methods in the main menu and press the # button to proceed. You are now in the edit menu and a list of methods is shown. Note that the names are blank if methods haven’t been created or have not been named. Using the buttons next to the up and down arrows will scroll through the list of 10 editable methods that are stored in non-volatile memory. With the select arrow positioned at a method of choice to create or edit the method, again press the # button. Alternatively, note that pressing the * button returns back to the main menu. If editing or creating a method, you should now see a list of the segments for the selected method. The first segment consists of a starting temperature and a hold time (in seconds). Each of the following (maximum of 8 total segments) consist of a ramp rate (in degrees Celsius per minute), an ending temperature for the segment, and a hold time (in seconds) that will be applied to the ending temperature. Using the buttons next to the up and down arrows, you can scroll through the method segments. There are two types of editing possible: (1) Method Naming Attempting to scroll above the first segment with the up arrow (button 3) will place the cursor in the Name field for editing the name of the method. Use the buttons to enter letters according to the ranges of letters shown below the keypad buttons. Repeated pressing of a button cycles through the range of choices. For numerals and creating blank spaces (overwriting characters with a blank), press the 0 button at the bottom and this cycles through a blank space and the sequence 0-9. Use the # button to scroll to the right and the * button to scroll to the left. Scrolling all the way to either edge of the input field (8 characters) returns to the edit menu. (2) Segment Editing/Creating Edit a method segment by placing the select arrow (using the buttons next to the up and down arrows) by this method and then press the # button to proceed. Use the # to scroll to the right and the * button to scroll to the left. The cursor will scroll through each available field. Where desired, press the buttons for the values desired. The cursor automatically scrolls to the right following the entry of each digit. Leading zeros are ignored by the software when inputting values or typing over existing values to be replaced. (Note that this process uses the numbers on the buttons as one would use a telephone keypad, rather than the process of cycling through the digits with the zero button as used for numeral creation in Agilent LTM System User Manual 49 names as described earlier.) Again, scrolling all the way to the right or to the left completes the editing of the segment and returns the edit menu. A fast way to zero out an unwanted segment is to enter # to start editing the segment and continue to press the 0 button until the segment is completely overwritten. The cumulative time of the method in seconds is shown at the top of the edit menu. When done editing the segments of the method, return to the main editing menu from the edit method menu by pressing the * button. Using the * button one more time will return you to the main menu. Setting the Active Method In the main menu, scroll the select arrow down to Set Active Method. Press the # button. At the bottom of this screen are the method numbers which have been assigned to the four separate heater controller ports on the interface board. A typical single module system will have a single heater controller plugged into connector #1. The method number should be entered for this module number and zeros should be entered if not already shown for any unused ports or ports with controller hardware, but not to be operated. An entry of zero for any port indicates that no GC method will be run for the port. To edit the method numbers assigned to the ports, press the # button to start editing. Using the # button to scroll right and the * button to scroll left, type over using the numerical keypad to enter the desired values. Scrolling all the way to the right or the left completes the editing. To return to the main menu, press the * button. Some example Select Method screens: Module : Method 0 = Inactive/None # to Edit, * to Exit 1:4 2:0 3:0 4:0 Method #4 being run with a single controller board connected to port #1 of the interface board Module : Method 0 = Inactive/None # to Edit, * to Exit 1:1 2:6 3:0 4:0 Two controllers connected to slots #1 and #2, running methods #1 and #6, respectively 50 Agilent LTM System User Manual Module : Method 0 = Inactive/None # to Edit, * to Exit 1:0 2:5 3:0 4:0 Two controllers connected to slots #1 and #2, but only controller #2 is operating using method #5 (a single controller connected to port #2 running method #5 would also appear this way). Running the Active GC Methods To initialize the temperatures for running the method selected, scroll the select arrow up to the Run Active Methods choice and press the # button. The column module temperature set point is now ramped from a theoretical zero °C setting to the initial temperature at a rate of 120 °C/min. When the target temperature is reached for the start of the method, either a Ready screen will appear with the green Ready light on, or a screen showing over or under temperature conditions will appear. If you see the over/under temperature screen, it will show out-of-bounds temperature conditions for any of the three heated zones for each module (the column assembly and each of the two heated transfer lines in the transfer line module). This screen is read as follows: under each of the headings Col, TL#1 and TL#2, the module number will appear if this particular zone is over or under the range of accepted starting temperatures. With a single heater controller installed in port #1, temperature over or under status will be indicated by a number 1 appearing in the appropriate locations. If additional modules were being operated, their port numbers of 2, 3 or 4 could also appear. The temperature over/under status screen will typically only be briefly observed, if at all. The system will remain at this screen and not proceed to ready in the event of various hardware faults. These are described in the chapter Diagnostics and Troubleshooting. Transfer lines generally cool faster than column modules because of their small thermal masses and large surface areas, and sometimes these can be observed in the status screen to fluctuate above and below temperature for a short time before the system goes to ready. Once these zones have heated or cooled to their target starting temperatures, the ready screen will then appear on the LCD. A remote start signal from the GC will then commence the run. The target temperature for the column module is shown along Agilent LTM System User Manual 51 with a progress bar for the method. Just before the progress bar is a number indicating which of the segments of the method is currently running. When a method is concluded, an estimated temperature is displayed using the over/under status information to track the cooling process. At the conclusion of the cooling process the system will attempt to go to ready if all temperature zones are in compliance with the set point, and the controller will wait for the next remote start signal. The controller automatically cycles the method to be run in this manner until the * button is pressed to abort this process (this can be done at any time during the run cycle) and return to the main menu. 52 Agilent LTM System User Manual GC Operation without LTM The GC oven can be operated without using the LTM system. Remove the modules from the LTM door and fill the vacant slots with wool insulation. Slot cover plates must be installed to further cover these openings. WA R N I N G Slot opening covers must be installed to prevent heat leakage and burns caused by a high oven temperature. Alternatively, module assemblies can remain in the door provided the temperatures of the oven will not damage the column extensions from the module into the oven. Any suitable blank (no-hole) ferrules can be used with the union fittings to limit air exposure and contamination to the column module. For any extended use without operation of the LTM system, the remote cable should be detached from the GC, otherwise the GC may receive a remote Not Ready signal from the unpowered hardware. It is possible to provide a Ready signal from LTM system without disconnecting the remote cable by spoofing it with a virtual method. This is done by selecting a valid method for an empty module slot only on the interface board. Continuing past the diagnostics error will provide a Ready condition which will cycle. It is recommended, however, that the unit be left unpowered if it is not to be used, and that the remote cable is disconnected from the GC. Agilent LTM System User Manual 53 54 Agilent LTM System User Manual Agilent G6578 Low Thermal Mass System User Manual 5 Diagnostics and Troubleshooting Diagnostics 56 Software Diagnostics 56 Error Code Descriptions 56 Temperature Status Display 58 Temperature Cool Down Display 61 Hardware Diagnostics 61 Troubleshooting 68 This chapter helps to diagnose problems that may happen when using the LTM system. If the resolution to the problem involves opening electrical covers on the LTM system, only Agilent trained personnel should perform the work since this product contains hazardous voltages that may cause death or injury. Agilent Technologies 55 Diagnostics The LTM system software provides run-time diagnostics of encountered problems, and the hardware also provides more basic diagnostics. These diagnostics are described in the following sections. Software Diagnostics The LTM system software auto-detects the connection of heater controller boards to the interface board. If methods are assigned to connectors on the interface board lacking a connection to a controller card, a warning is given. The assignment of a nonexistent method results in a warning and a return to the main menu. This auto-detection with any associated warnings occurs only at the initiation of a run cycle from the main menu. If a hardware malfunction develops in the run cycle, this will typically result in the software not advancing past the status screen to a ready state. In addition to the information displayed on the status screen, the abort button * can be pressed to exit to the main menu, and then restarting the run cycle will provide additional auto-detection messages regarding hardware malfunctions. The different diagnostic warnings are described in the following section. Error Code Descriptions ERROR # 1 No Valid Methods The attempt to start a run cycle without the selection of any valid methods will result in this warning and a return to the main menu. Proceed to the Set Active Methods choice in the main menu and select method numbers for the different modules. Check to see that methods exist for any methods already selected. ERROR # 2 Invalid Method The attempt to start a run cycle with an invalid method will result in this warning and a return to the main menu. Proceed to the Set Active Methods choice in the main menu and review the method numbers selected for the different modules. Check to see that methods exist for these method numbers. ERROR # 3 No Controller Hardware Found This error indicates that the software is programming a method to a connector on the interface board having no connections to a heating controller board. The next screen on the software will indicate which connectors on the interface board have connections to heater controller boards. The error can be corrected by changing the module number to which the method is assigned in 56 Agilent LTM System User Manual the Set Active Methods menu (selectable from the main menu), or by changing the cabling configuration of the heater controller boards to the interface board. Note that it is possible to proceed with the run cycle, but this is only of diagnostic value in that the software will cycle through the assigned method, but without the temperature control signals reaching the controller hardware or modules. ERROR # 4 Missing Column Module This error happens when auto-detection finds a heating controller card connected to the interface board for an assigned method, but fails to find a functioning column module. First check that the connector to the column module is properly connected to the (J1) top left connector of the heating controller board. The small circuit board on the module connector should be facing outward, and also check that the connector is not offset and missing an entire row (the connector is keyed so it cannot go on backwards, but it is possible to miss an entire row -- this does not cause any damage to the hardware, but fails to make the required connections). If there are more than one heater controller cards installed, check that the column module is connected to the (J1) connector of the heating controller board that is connected to the correct module numbered connector on the interface board. You may have to remove the keypad cover plate by removing the front four screws to view this connection, or it may be sufficiently visible from the side when opening the front panel to the electronics housing. Make any required corrections to the cabling so that the column module connects via a heating controller to the correctly number controller connection on the interface board. Proceeding to the status screen will typically result in the display of the number of the module being both over and under temperature at the column. Note that it is possible to proceed with the run cycle, but the ability to proceed beyond the status screen will depend on the hardware configuration; it is possible, for example, using specially configured cables to partially implement the three heated zones on the heating controllers for special applications. ERROR # 5 Missing Transfer Line (J2) This error indicates a failure by the auto-detection to find a transfer line connection to the heating controller at J2. If Error # 3 has also been received, follow first the directions to resolve Error # 3. If this error is received without any associated error in column module connections, then check the transfer line connection to J2 on the heating controller board. Note that the connections of the two transfer lines are interchangeable at J2 and J3, so switching these connections can be of diagnostic value in the event of a malfunction of a transfer line sensor - in this event the error should move to Error # 5 for J3. A malfunctioning transfer line must be replaced. Note that it is possible to Agilent LTM System User Manual 57 proceed with the run cycle, but the ability to proceed beyond the status screen will depend on the hardware configuration; it is possible, for example, using specially configured cables to partially implement the three heated zones on the heating controllers for special applications. ERROR # 6 Missing Transfer Line (J3) This error indicates a failure by the auto-detection to find a transfer line connection to the heating controller at J3. If Error # 3 has also been received, follow first the directions to resolve Error # 3. If this error is received without any associated error in column module connections, then check the transfer line connection to J3 on the heating controller board. Note that the connections of the two transfer lines are interchangeable at J2 and J3, so switching these connections can be of diagnostic value in the event of a malfunction of a transfer line sensor; in this event the error should move to Error # 5 for J2. A malfunctioning transfer line must be replaced. Note that it is possible to proceed with the run cycle, but the ability to proceed beyond the status screen will depend on the hardware configuration; it is possible, for example, using specially configured cables to partially implement the three heated zones on the heating controllers for special applications. ERROR # 7 Temperature Sensor Problem (J1) This error indicates a failure by the auto-detection to detect a properly functioning temperature sensor in the column module. This particular error occurs if the temperature sensor in the column module is electrically open. This open condition is interpreted by the controller board as a high temperature and results in shutdown of the heating circuitry. When proceeding to the status screen following this warning, the Under Power light is typically on to indicate that power has not been delivered to the module for heating. Also the status screen will display the module number as over temperature at the column, but not under temperature (a simultaneous reading of over temperature and under temperature at the column is indicative rather of a missing cable connection to a column module). The failure of a temperature sensor indicates that the column module must be replaced. Temperature Status Display The status screen is shown prior whenever the LTM system is waiting for temperatures to settle within the range required before going to Ready This screen can occur following initialization or the end of a run as the software readies the system to cycle the temperature program. The screen may be skipped over if all temperatures are within their ranges and the system can proceed to ready. Alternatively, if there is a 58 Agilent LTM System User Manual component problem preventing the achievement of the required temperature conditions for the ready state, then the software will not proceed beyond the display of this screen. This screen consists of an over and under temperature display showing out-of-bounds temperature conditions for any of the three heated zones for each module (the column assembly and each of the two heated transfer lines in the transfer line module). This screen is read as follows: the top line shows modules and the method numbers assigned to them in the same format as the Set Active Methods menu; the second line shows the headings Col, TL#1 and TL#2, for the column module, and the two heated zones of the transfer line module connected to connectors J2 and J3, respectively, of the heater controller board; the third line shows module numbers having any of the three heated zones reporting over temperature conditions; and the fourth line shows module numbers for any of the three heated zones showing under temperature conditions. With a single heater controller board cabled to the connector for module #1 on the interface board, for example, temperature over or under status will be indicated by a number 1 appearing in the appropriate locations. If additional modules are also installed, the numbers 2, 3 and 4 could also appear depending on the specific installation configuration. It is common for the transfer lines (TL#1 and TL#2) to cool faster than the columns, so these can sometimes be observed to fluctuate about the starting temperature conditions while waiting on other components. The status display is particularly useful in conjunction with the auto-detection diagnostics described in the previous section. If during temperature cycling the software will not advance past this screen, the screen can be exited by pressing the * key, and then restarting the Run choice from the main menu will invoke the auto-detection diagnostics for further information on the problem. Some status display screens for different problems are shown in the following examples for a single module installed with a controller board cabled to module connector #1 on the interface board: 1:3 Mod# Col TL#1 TL#2 High: 1 Low: Method #3 is attempting to initialize on module #1, but only the column is reading over temperature. This may indicate a failed temperature sensor in the column module. The red under power Agilent LTM System User Manual 59 light should also be on indicating a shut-down of the heating control for the module. Alternatively, the initial temperature could be too close to ambient, and the under power light is off. 1:3 Mod# Col TL#1 TL#2 High: 1 Low: 1 Method #3 is attempting to initialize on module #1, but only the column is reading over and under temperature. This is typically indicative of a missing cable connection between the column module and the controller. 1:3 Mod# Col TL#1 TL#2 High: 1 1 1 Low: Method #3 is attempting to initialize on module #1, but all temperature zones are reading over temperature and the red under power light is off. Check to see that the initial method temperature is not too close to ambient temperature. 1:3 Mod# Col TL#1 TL#2 High: 1 1 Low: Method #3 is attempting to initialize on module #1, and both transfer lines are remaining over temperature. There are several possibilities: (a) This can indicate missing transfer line connections to the heater controller board. Check the cabling. (b) If the heater controller board has been powered without transfer lines connected at J2 and J3, the board may require several minutes for the circuits to settle. Over temperature readings will be seen until the circuit has settled. (c) It can also indicate that the transfer lines are experiencing too much heat transfer from the oven interface to cool sufficiently. Check that the gasket is seated in the module-to-oven interface. If the problem persists, the transfer lines should be checked (described in the troubleshooting section below). 60 Agilent LTM System User Manual Temperature Cool Down Display At the conclusion of a temperature program, the approximate temperature of the column module is shown as it is cooling. In this mode, the column over temperature reading is used in a dynamic way with the column temperature set point to track the cooling progress; the temperature set point is stepwise reduced in steps greater than the estimated cooling speed of the module when the over temperature diagnostic signal is relieved. Because of this stepwise tracking process, the displayed temperature may also move abruptly in steps, especially when the cooling speed is very fast. When the starting temperature is reached, the module undergoes a 3 second equilibration with the correct temperature set point before the software checks status for readiness. Hardware Diagnostics There are a variety of built-in hardware diagnostics that include visible LED indicators on the circuit boards for the presence of power and certain functions in addition to the light on the fan bracket. Also, a cable can be attached to connector J8 on the heater controller board for access to additional analog voltage signals of diagnostic value. These diagnostics are described below. LED Indicator on Fan Bracket The fan bracket has an indicator light to show the status of the module assembly attached to the bracket. If more than one heater controller board is present, then the fan bracket must be connected to the same board as the module assembly for this indicator light to be indicative of the module status. The module status is indicated as follows: Table 5 Fan Bracket LED LED State Module Operation On Temperature programming Blinking Slowly Cooling after a program Blinking Quickly Ready, awaiting start signal The fans in the fan brackets operate at a reduced speed at module temperatures of 60 °C or less. This prevents thermal creep and also minimizes first run effects following a Agilent LTM System User Manual 61 temperature program caused by latent heat transfer to the GC column assembly from other parts of the module which may still be cooling. LEDs on the Heater Controller Board There are several LEDs for diagnostics purposes on the heater controller board. The positions of these LEDs on the heater controller board are shown below. Figure 3 Table 6 62 LED locations on the heater controller board Heater controller Board LED Status LED # Normal Purpose Appearance 1 100% ON Indicates the presence of +5 VDC. Power is supplied from the interface board via the cable attached to J4. If +5 VDC not present and unit appears to be cabled to the interface board, then check the interface board s diagnostic LED for +5 VDC. If the interface board has +5 VDC, then there is either a cabling or heater controller board problem. Agilent LTM System User Manual Table 6 Agilent LTM System User Manual Heater controller Board LED Status LED # Normal Purpose Appearance 2 100% ON Indicates the presence of +15 VDC. Power is supplied from the interface board via the cable attached to J4. If +15 VDC not present and unit appears to be cabled to the interface board, then check the interface board s diagnostic LED for +15 VDC. If the interface board has +15 VDC, then there is either a cabling or heater controller board problem. 3 100% ON Indicates the presence of -15 VDC. Power is supplied from the interface board via the cable attached to J4. If -15 VDC not present and unit appears to be cabled to the interface board, then check the interface board s diagnostic LED for 15 VDC. If the interface board has -15 VDC, then there is either a cabling or heater controller board problem. 4 100% ON Indicates the presence of +48 VDC for heating power. Power is supplied directly from the remote power supply via the 2-pin connector at the lower edge of the heater controller board to the left of the large connector J4. Typically if there is no voltage present, then the automatic shut-down relay on the controller board should also be buzzing. There are 4 of these connectors in the electronics housing, and when operating with a single power supply, only the two power connectors wired to the rear cable connector for the remote power supply will provide power. If power is missing at these connectors, then there is a problem with the +48 VDC supply or the DC power cable connecting the electronics housing to the power supply. 5 100% ON Indicates the presence of +12 VDC used for powering the fans. Power is supplied from the interface board via the cable attached to J4. There is not a diagnostic light on the interface board for the presence of this voltage. This voltage is provided to the interface board by the 2-pin connector at the bottom left of the interface board that connects directly to the inside of power supply connector PS1 (rear most connector). If there is voltage at this connector, then there is likely a problem with either the cable to the heater controller board or the controller board itself. 6 OFF at start-up ON dimly at standby at 40 °C Indicates the delivery of heating power to the column module. This should be off at power-up of the LTM system. The brightness will depend on the power demand. Using a method which has a starting temperature of 40 °C should result in a dimly lit LED that is flickering. A strong oscillation in which the LED comes on 100% and then off for several seconds should not be observed as this would be indicative of a temperature control problem in the heating control circuitry. The LED should be on brightly with high power demand situations. 63 Table 6 Heater controller Board LED Status LED # Normal Purpose Appearance 7 OFF at start-up ON dimly at standby at 40 °C Indicates the delivery of heating power to the transfer line TL#1 connected to J2. This should be off at power-up of the LTM system. The brightness will depend on the power demand. Using a method which has a starting temperature of 40 °C should result in a dimly lit LED that is flickering. A strong oscillation in which the LED comes on 100% and then off for several seconds should not be observed as this would be indicative of a temperature control problem in the heating control circuitry. The LED should be on brightly with high power demand situations. 8 OFF at start-up ON dimly at standby at 40 °C Indicates the delivery of heating power to the transfer line TL#2 connected to J3. This should be off at power-up of the LTM system. The brightness will depend on the power demand. Using a method which has a starting temperature of 40 °C should result in a dimly lit LED that is flickering. A strong oscillation in which the LED comes on 100% and then off for several seconds should not be observed as this would be indicative of a temperature control problem in the heating control circuitry. The LED should be on brightly with high power demand situations. LEDs on the Interface Board There are several LEDs for diagnostics purposes on the heater controller board. The locations of these LEDs on the heater controller board are shown below. Figure 4 64 LED locations on the interface board Agilent LTM System User Manual The LEDs can be observed from the side without removing the cover plate with the keypad by opening the door to the electronics cabinet. Their purpose and normal appearances are described in the following table. Table 7 Interface board LED status LED # Normal Appearance Purpose 1 100% ON Indicates the presence of +5 VDC. Power is supplied to the interface board via the cable connecting the +5V+-15V connector to the PS1 power cable connector. Check that the DC power supply cable is connected to the power supply and to PS1 (the rear most connector) on the electronics cabinet. Check that the indicator light functions when the power supply is turned on. 2 100% ON Indicates the presence of +15 VDC. Power is supplied to the interface board via the cable connecting the +5V+-15V connector to the PS1 power cable connector. Check that the DC power supply cable is connected to the power supply and to PS1 (the rear most connector) on the electronics cabinet. Check that the indicator light functions when the power supply is turned on. 3 100% ON Indicates the presence of -15 VDC. Power is supplied to the interface board via the cable connecting the +5V+-15V connector to the PS1 power cable connector. Check that the DC power supply cable is connected to the power supply and to PS1 (the rear most connector) on the electronics cabinet. Check that the indicator light functions when the power supply is turned on. Diagnostic Signals on J8 of the Heater Controller Board An IDC-10 cable provided by Agilent can be connected to J8 of the heater controller board to provide access to analog voltages indicative of the operation of the heater controller circuits. These signals range from 0-5 VDC and can be read with a voltmeter. These are intended for advanced diagnostics of the unit. The available signals and their diagnostic utilities are described in the following table. Agilent LTM System User Manual 65 Table 8 66 Diagnostic readings for J8 cable 10 pin connector Pin # Description 1 This pin has the temperature sensor circuit output for the column module. This voltage ranges from 0 to +5 VDC and is driven by the circuit to match the set point voltage on pin #7 when heating. It should be within approximately 10 mV of the value on pin #7. The small difference is determined by the circuit parameters used on the board. Note that the column module cannot normally cool below ambient temperatures, so that sub ambient settings of temperature at pin #7 will result in a discrepancy between pin #1 and pin #7. An open sensor wire element in the column module will result in a voltage of 5 V or more at pin #1 that is not responsive to temperature. Isothermal operation at 40 °C should result in a voltage of approx. 0.53 V at pins 1 and 7. 3 This pin has the temperature sensor circuit output for transfer line TL#1 (J2). This circuit should exhibit the same values compared to pin #7 as described for pin #1 (above). 5 This pin has the temperature sensor circuit output for transfer line TL#2 (J3). This circuit should exhibit the same values compared to pin #7 as described for pin #1 (above). 7 This pin provides the temperature set point determined by the micro controller. At power up or when the software is in the main menu, edit methods menus, or the set active methods menu, this value is set to zero. With the Run method choice, this set point sweeps from zero up to the value for the initial temperature at a rate of approx. 25 mV/s. The set point is an approximately linear function of temperature with an average slope of 12.5 mV/ °C and a value of zero at 0 °C. This set point is varied during the temperature program to establish the temperatures for the program. At the end of the temperature programming run, it is reduced stepwise in coordination with a diagnostic output of the column temperature to approximately track the temperature of the column module during cooling. 9 Ground 2 This pin displays the temperature set point voltage with a negative offset for establishing the temperature under voltage for the transfer lines for system diagnostics in the heater controller circuit. A typical value of the offset is approximately 165 mV (13 °C). This value is determined by the potentiometer R76 at the upper right hand corner of the controller board next to the relay. This potentiometer sets the values for both the negative and positive offsets (pins 2 and 4) which are similar in magnitude, but not identical. Agilent LTM System User Manual Table 8 Agilent LTM System User Manual Diagnostic readings for J8 cable 10 pin connector Pin # Description 4 This pin displays the temperature set point voltage with a positive offset for establishing the temperature over voltage for the transfer lines for system diagnostics in the heater controller circuit. A typical value of the offset is approximately 165 mV (13 °C). This value is determined by the potentiometer R76 in the upper right hand corner of the controller board next to the relay. This potentiometer sets the values for both the negative and positive offsets (pins 2 and 4) which are similar in magnitude, but not identical. If this value is too small and too much heat is being transferred to the transfer lines from the oven interface at low transfer line temperatures, then the transfer lines will not come within the required range preventing a system ready signal. 6 This pin displays the temperature set point voltage with a negative offset for establishing the temperature under voltage for the column module for system diagnostics in the heater controller circuit. A typical value of the offset is approximately 12 mV (1 °C). This value is determined by the potentiometer R63 at the upper right hand corner of the controller board. This potentiometer sets the values for both the negative and positive offsets (pins 6 and 8) which are similar in magnitude, but not identical. 8 This pin displays the temperature set point voltage with a positive offset for establishing the temperature over voltage for the column module for system diagnostics in the heater controller circuit. A typical value of the offset is approximately 12 mV (1 °C). This value is determined by the potentiometer R63 at the upper right hand corner of the controller board. This potentiometer sets the values for both the negative and positive offsets (pins 6 and 8) which are similar in magnitude, but not identical. 10 Ground 67 Troubleshooting Table 9 Problem Probable Cause Resolution Power supply light does not come on Power supply not receiving power Check power cord connection to power supply. Check fuses to power supply entry module (removable tray in rear of power supply). If fuse is blown, replace only with 5A Fast-Acting 250 VAC fuse. Note that there are no user-serviceable parts inside the power supply. LCD display does not come on, but power supply is on Retrofit electronics not powered Check that DC power cord from the door unit is connected between PS1 (rear most connector) on the electronics cabinet and the power supply. Check that the +5V+-15V connector at the bottom left edge of the interface board is connected to PS1. Check that the three LEDs on the interface board beyond the connector are lit indicating power on the interface board. If these are lit, turn off the power to the unit, remove the metal plate with the display and keypad by removing the 4 screws, and check the cable between the LCD and the interface board. Software diagnostics indicates an error condition Invalid methods, missing connections, hardware faults Follow the directions for the different errors listed in this manual under Error Code Descriptions to resolve the problem Missing heater power Under power light goes connection or hardware fault on immediately during “Run” temperature initialization and stays on Under power light goes on partway through a temperature ramp and stays on Module under powered Return to main menu and restart Run to check software diagnostics for fault. Check heater power connections and column module sensor integrity. Reduce the temperature programming rate or allow time with an isothermal hold for the column module temperature to catch up; long column lengths being ramped to high temperatures may have difficulty maintaining fast programming rates. If multiple modules are being operated from a single supply and the heating rates are too aggressive, an additional power supply may be required. Under power light flickers Normal fluctuations in power during Run draw from supply This is normal and not a cause for concern. Method not progressing past “Temperature Status” display to Ready Initial temperature too low; too much heat transfer from the oven interface to the transfer lines; missing connections; hardware faults; transfer line circuits not yet settled after powering without connections Review the examples and discussion of these conditions in the Temperature Status Display section of this manual. Exit to the main menu and restart Run to invoke the software diagnostics. Follow the directions for any error codes discussed in the Description of Error Codes section of this appendix. Module immediately ready following a ramp without requiring any cooling time Missing cabling Exit to the main menu and restart Run to invoke the software diagnostics. Follow the directions for any error codes discussed in the Description of Error Codes section of this appendix. 68 Agilent LTM System User Manual Table 9 Problem Probable Cause Resolution Module heating when it should not be Possible heater short If starting temperature is moderately above ambient, the column module should be over temperature and unable to reach ready status because of improper heating. The module should be replaced. Module cooling is too fast Missing cabling If the software is running a virtual method for a module connector on the interface board having no connection to a heater controller board, the software will not receive any over/under temperature diagnostics and the column module will be reported to be cooling at approx. 10 °C/s. GC not ready when LTM system not in use LTM system not powered with Either disconnect the remote connector to the GC and leave a virtual method the LTM system unpowered; or if powering the LTM system, then assign a valid method to a module number having an empty controller slot on the interface board; continuing past the diagnostics warnings will allow this virtual method to cycle in software and issue a Ready signal; use a short virtual method if the GC needs to cycle ready signals quickly. Heater controller board buzzes when system powered on Missing cabling There is an automatic shutdown relay which chatters if the unit is missing +48 VDC power; check that LED4 is lit indicating power on the heater controller board. Follow diagnostics for LED4 described in the section LEDs on the Heater Controller Board in this manual. Heater controller board buzzes briefly at power up or in use Variable Current transients on the controller board may occasionally cause the relay to briefly buzz. This is not common, but it has not been related to any performance problems with the heating controller. Agilent LTM System User Manual 69 70 Agilent LTM System User Manual Agilent G6578 Low Thermal Mass System User Manual 6 Installation About Installation 72 Tools Required for Installation 73 Removing the Existing Door 73 Installing the LTM System 75 This chapter explains how to field install the LTM system. If the LTM system is already installed on your Agilent GC you may skip this chapter. For column installation or change out please refer to the Column Module chapter. Agilent Technologies 71 About Installation The Agilent LTM System is available as an accessory for the Agilent 7890A GC and the Agilent 6890 series GC. These instructions are intended to be used by Agilent trained personnel when installing the LTM system in the field. If the LTM system door is already installed on your GC you can skip this chapter. Installation covered in this chapter includes: • TLM Oven Door • Power supply • Cabling between power supply and electronics enclosure • Fan module • Cabling between fan module and electronics enclosure • Connecting the LTM remote start cable to the GC Once the components above are installed on your GC, see “Attaching Column Modules To Transfer Line Modules" on page 28 and “Inserting the Module Assembly into the Door" on page 42 for completion of the LTM system hardware installation. You will refer to these two sections in the future when changing or maintaining columns. Also, if in the future you decide to add additional column modules to the LTM system you should refer to this chapter for installation of a possible second power supply, heater controller cards, and inter-connecting cables. 72 Agilent LTM System User Manual Tools Required for Installation • Phillips head screwdriver (HP 6890 only) • Torx T20 screwdriver (Agilent 7890/6890 only) • 1/16-inch Allen long-reach driver Removing the Existing Door Carefully remove the existing door from your GC as follows: Agilent 6890 1 Remove the blue cover plate on the front left that covers the injectors and the door hinge area. Use a Torx T20 screwdriver to remove the six screws that secure this plate. This will expose the captive screw that attaches to the door. By fully opening the door, you can observe where this screw passes through a Teflon shoulder washer in the top of the door and then threads through a nut. 2 Using a small wrench, undo this screw. To get the screw threads engaged with the nut, push the screw upward with your finger from below. Keep a firm grip on the door to support it while the screw is being removed. Once removed, lift the door from its bottom hinge. Carefully wrap the door and it can be stored in the shipping container for the LTM system. Agilent LTM System User Manual 73 Agilent 7890A 1 Remove the grey cover plate on the front left that covers the inlets and the door hinge area. Use a Torx T20 screwdriver to remove the six screws that secure this plate. 2 Position the GC so the front left corner hangs over the edge of the table. You need access to the bottom of the door shaft. The bottom of the door shaft has a notch for a flat blade screwdriver. 3 Open the door. This will expose the top of the shaft that attaches the door to the GC. 4 Use a screwdriver to press up on the bottom of the door shaft. 5 Turn the screwdriver a few times to engage the threads on the bottom of the shaft with the top threaded plate of the bottom door hinge. 6 Once the threads are engaged, use a Torx driver on the top of the door shaft to unscrew it from the bottom hinge plate. 7 Use pliers to pull the door shaft up and out of the door while supporting the weight of the door. 8 Once removed, lift the door from its bottom hinge. Carefully wrap the door and it can be stored in the shipping container for the LTM system. 74 Agilent LTM System User Manual Installing the LTM System Install the LTM door 1 Position the LTM door in the GC hinge maintaining a firm grip on the door. Be careful not to tear or damage the fabric on the inner side of the door with any sharp edges or objects. 2 Use the original GC hinge bolt to attach the LTM door. The captive screw first threads into the door hardware, then once past the threads the screw drops to lower the threads so that the door cannot work itself loose and accidentally disengage (just as in the original door). 3 Attach the inlet cover plate using the previously removed torx screws. Install the power supply 1 Locate the power supply along the left side of the GC. The power supply should be in the switched OFF position with the AC line cord unplugged before removing protective electrical cover plates or making any electrical connections. 2 Attach the female end of the DC power supply cable to the door mounted electrical housing recessed connector labeled PS1. This connector is located closest to the door on the left underside of the electronics housing. To install a second power supply attach it to the recessed connector labeled PS2. When correctly aligned, the female cable connector should slip into the housing connector easily and a turn of the outer ring on the cable connector shroud pulls the connector tight and locks it. 3 Connect the male connector of the DC power supply cable to the LTM DC Power receptacle on the power supply. Install the fan module Decide on which slot(s) to use for the position of your module(s). First consider the configuration you have already established for your injector and detector connections in your existing GC oven. If you are using a position in the top of the Agilent LTM System User Manual 75 oven for the detector that is close to the door opening, then using a lower slot in the door for the module will provide better clearance of the union and column ends. 1 Remove the slot cover using a 1/16-inch Allen driver to remove the two securing screws. 2 Remove the insulation from the slot opening by gently pressing it out from the inside of the oven door. 3 Seal the cover plate, insulation, and two screws in a bag . Save this bag for possible future closing of the slot. 4 Attach a fan bracket below this slot using a 1/16-inch Allen key with the small black screws. Be careful to not over tighten. 5 Route the fan cable through the gap in the lower left of this bracket where it attaches to the door. Attach the fan cable to the power supply 1 Open the electronics housing on the front of the LTM door. Gently turn the small black knob several turns counterclockwise. Then pull the door open. Observe how the mechanism for the latch knob works from the inside. When turning clockwise, the latch should flip upward and slowly engage to fasten the door closed. This should never be over tightened. If the mechanism has already been turned too far to close the door, turn it counterclockwise to open the latch adequately to clear the door. 2 Route the fan cable through the oblong slot opening in the upper left end of electronics housing. 3 Connect the fan cable to the 4-pin fan connector, J6, at the bottom left of the heater controller card. See Figure 5 on page 77. If there are multiple heater control cards installed in the left side of the electronics housing, the column module connections will need to connect to the same board to which the module's fan cable is connected. 76 Agilent LTM System User Manual Figure 5 Fan cable connection to the LTM heater controller board. Attach the remote start cable to the GC Attach the remote start cable to the 15 pin DB-9 connection on the back of the GC labeled REMOTE. Agilent LTM System User Manual 77 78 Agilent LTM System User Manual Agilent G6578 Low Thermal Mass System User Manual 7 Service Remote Start Cable Connection 80 Cabling of the Heater Controllers to the Interface Board 81 Installing Additional Heater Controllers and Power Supplies 83 This chapter is intended for use by Agilent trained service personnel. It provides details required for servicing or expanding an LTM system. Agilent Technologies 79 Remote Start Cable Connection WA R N I N G Disconnect the power cord to the LTM power supply from the building power supply. Never power the LTM power supply when the LTM electronics housing cover is open. Dangerous voltages exist inside the LTM electronics housing when powered by the power supply. A cable connects the interface board in the electronics control box to the connection labeled Remote on the back of the GC. This cable terminates in a 15-pin DB-9 connector. The REMOTE START signal from the Agilent 7890A/6890 GC starts the LTM. This signal is generated by the Agilent 7890A/6890 GC by pressing the start button on the front of the GC, or by starting an analysis sequence using software. The host GC and software receive a READY signal from the LTM system when it has achieved the initial setpoints for its method. The GC delays the start of an analysis sequence until it receives this ready signal. If running the GC without using the LTM system, disconnect this Remote Start Cable from the back of the GC. GC remote connector LTM Interface board Figure 6 80 GC Remote Start cable Agilent LTM System User Manual Cabling of the Heater Controllers to the Interface Board The LTM system is capable of programming the independent temperature control of up to four module assemblies simultaneously. Each module assembly requires its own heater controller board, and up to 4 of these boards can be stacked in the electronics control cabinet attached to the door. The standard configuration of the instrument is to provide control for one or two modules (i.e., a single heater controller board or a stack of two heater controller boards). Note that only two of the wide format (12.7 cm) size of column module which provides faster cooling can only be accommodated in a door. A need for programming three or more modules simultaneously will require at least partial use of the 7.6 cm format which consumes somewhat less power than the 12.7 cm format, but cools more slowly. The LTM system contains a micro controller board that is attached to a larger interface board. These electronics boards are located in the right side of the electronics cabinet beneath the keypad and display panel. When a GC method is programmed by the controller for a particular module number ranging from 1-4 in software, these numbers refer to the physical connector locations on the interface board. These connectors are numbered sequentially from left to right along the bottom of the board. Thus, the temperature programming of module number 1 will result in electrical control signals being sent to the connector on the interface board labeled module number 1. This requires that the heater controller board that is attached to module number 1 be cabled to this specific connector on the interface board. While the LTM system uses interchangeable heater controller boards, it is important to keep track of which boards are cabled to which connectors on the interface board. As a convention, we recommend that the first heater controller board installed in the electronics cabinet be cabled to the module number one connector, the first heater controller to be stacked be cabled to the connector for module number 2, etc. This recommended cabling scheme is shown with diagrams of the boards. Agilent LTM System User Manual 81 While many configurations are possible, this sequence of implementing board connections is recommended for simplicity. Board #1 would be the first heater controller board installed and at the bottom of the stack of controller boards in a system controlling multiple modules. 82 Agilent LTM System User Manual Installing Additional Heater Controllers and Power Supplies Adding a Heater Controller Board WA R N I N G Disconnect the power cord to the LTM power supply from the building power supply. Never power the LTM power supply when the LTM electronics housing cover is open. Dangerous voltages exist inside the LTM electronics housing when powered by the power supply. The LTM system uses the heater controller board for tandem control of the three heated zones in the modules: the column coil in the column module, and the two heated transfer line tubes in the transfer line module. To connect an additional heater controller board to the system, you will need the following items: • An additional heater controller board • A set of four 12.7 mm (1/2 inch) stand-offs for mounting the additional card • An interface cable for the heater controller card to the interface board • An additional fan bracket with fan • A 5/64-inch Allen wrench With the LTM system power off, position the additional controller board like the original and secure with the 4 screw-in stand-offs. This results in the connectors for the module assembly positioned on the left. You will now have 4 stand-offs into which the next controller board can be mounted. Use a 5/64-inch Allen wrench and remove the 4 black socket head screws which hold down the LCD control panel cover from the front. This will expose the interface board with the micro controller board attached to it. Along the bottom of the interface board are 4 connectors identified as module #1-4 as shown in the previous section. Starting from the left, plug in one end of the interface cable into the first available slot. Notice that the cable is keyed to go in one way only; do not force it in reverse. Connect the other end of the cable to the matching connector, J4, on the bottom edge of the heater controller board. Locate the additional, unused power connector from the inside of the rear most DC power cable connector (PS1) and attach this to the board's power connector J5 on the bottom of the board. (For more than two modules, a second power supply is required. Agilent LTM System User Manual 83 In this case, locate and use an available power connector from the inside of the DC power cable connector PS2.) Reattach the LCD control panel cover with the 4 black socket head screws. Complete the new module connections to the new board. Turn on the power. Create any new methods needed and select the new method for the controller from the main menu. Note that any module can be made inactive for operation or test purposes at any time by setting the method assigned to the module to zero. Follow this procedure for adding up to a maximum of 4 heater controllers to the retrofit control system. Adding a Second Power Supply The power supply provides 48 VDC with up to 350 W for the heating of two module assemblies. This is usually sufficient, but in the event that more power is needed for additional modules, the LTM system is pre-wired with a secondary connector (PS2) for an additional power supply. This connector is adjacent and forward from the primary power supply connector (PS1). This connector internally provides two additional power connectors for heater controller boards. This additional source of power is normally required for the third and fourth modules, but is sometimes required for the second module with fast heating of certain wide format (12.7 cm) modules. RS-232 Cable Connection to the LTM system WA R N I N G Disconnect the power cord to the LTM power supply from the building power supply. Never power the LTM power supply when the LTM electronics housing cover is open. Dangerous voltages exist inside the LTM electronics housing when powered by the power supply. A 3.5mm connector for making an RS-232 link to a remote computer is located on the left end of the electronics housing on the replacement door. The RS-232 adapter cable for the LTM system has a plug for this connector and terminates in a DB-9 connector at the other end. This external cable and the internal cable is available from Agilent. This cable can be used for remote programming and operation of the LTM system with appropriate software using a rate of 115200 baud, n, 8, 1. The cabling information for this connector is shown in the table below. 84 Agilent LTM System User Manual Table 10 Parts and Descriptions Agilent LTM System User Manual Description DB-9 connector 3.5 mm connector IDC-10 connector Ground Pin 5 Socket ground Pin 9 RX Pin 3 Socket ring Pin 5 TX Pin 2 Socket tip Pin 3 85 86 Agilent LTM System User Manual Agilent G6578 Low Thermal Mass System User Manual 8 Replacement Parts LTM Door Assembly 88 Power Supply 92 Column Module Components 93 Agilent Technologies 87 LTM Door Assembly Table 11 LTM Door Assembly parts Part description Part name Part number Heater controller board LTM TC4 Heater Controller Board Calibrated G6578-65603 Interface board LTM Interface Board G6578-65502 Micro controller board LTM AE-86P - Programmed G6578-65604 Controller board to interface board cable LTM TC4 Cable - Short G6578-60508 LTM TC4 Cable - Long G6578-60006 LTM LCD with header G6578-65505 LTM Membrane Keypad G6578-60002 LCD display with header Membrane keypad 88 Agilent LTM System User Manual Table 11 LTM Door Assembly parts Part description Part name Part number Remote cable LTM Remote Cable G6578-60014 Heater controller board mounting stand-offs Stand-offs hex male-female 4-40×0.5 in. LG STL ZN-clear chromate 0380-5127 LCD to interface board cable LTM LCD Cable G6578-60507 Screws for LCD/Keypad plate Button-HD hex 6-32×0.25 in. LG STL BLK 0330-1300 Screws for slot cover plate Metric, PAN-HD Torx-T10 M3×0.5 6 mm-LG SST passivated 0515-0680 English, Button-HD hex 4-40×0.25 in. LG SST BLK 3030-0494 Wool insulation for slots Wool insulation for slots G6578-00503 Slot cover plate LTM Cover Plate G6578-00501 Agilent LTM System User Manual 89 Table 11 LTM Door Assembly parts Part description Part name Part number Fan bracket, standard format for 12.7 cm Fan bracket, standard format for 12.7 G6578-64025 (5 in.) module assemblies cm (5 in.) module assemblies Fan bracket, small format for 7.6 cm (3 in.) module assemblies Fan bracket, small format for 7.6 cm (3 in.) module assemblies G6578-64023 Module retaining bolt LTM Module bolt G6578-80504 Shield assembly LTM Safety Shield G6578-00005 Diagnostics Board, with cable LTM diagnostics board w/cable G6578-60509 90 Agilent LTM System User Manual Table 11 LTM Door Assembly parts Part description Part name Part number RS232 Cable, External LTM Remote RS-232 Cable G6578-60013 Agilent LTM System User Manual 91 Power Supply Table 12 Power Supply parts Part description Part name Part number Power supply unit LTM Power Supply G6578-64031 DC power cable from power supply to LTM door unit LTM DC Power Cable G6578-60504 Fuses for power entry module at rear of power supply Fuse, 5A, 250 VAC Fast-Acting 5×20mm 2110-0637 Fuse, 4A, 250 VAC Time-lag 5×20 mm 2110-0734 92 Agilent LTM System User Manual Column Module Components Table 13 Column Modules For column module ordering instructions, please access the Agilent web site at www.agilent.com/chem/LTMcol. When the Agilent J&W LTM Column Modules page appears select the Ordering Details link. Part description Part number Standard format 12.7 cm (5 inch) LTM column module See the Agilent web site above. Small format 7.6 cm (3 in.) LTM column module See the Agilent web site above. Agilent LTM System User Manual 93 Table 14 Transfer Line parts Part description Part name Part number Transfer line module, standard format for LTM Transfer Line Module, Standard 12.7 cm (5 inch) assembly sizes Format G6578-64015 Transfer line module, small format for 7.6 cm (3 in.) module assembly sizes LTM Transfer Line Module, 3-Inch Small Format G6578-64013 Module gasket LTM Module Gasket G6578-00502 Module clamp bracket (for older modules using Series I design) Module Clamp Bracket NEED PART NUMBER 94 Agilent LTM System User Manual Table 14 Transfer Line parts Part description Part name Part number ULM union bracket (left) LTM ULM Union Bracket, Left G6578-00504 ULM union bracket (right) LTM ULM Union Bracket, Right G6578-00505 Re-usable ferrules, 0.4 mm O.D. capillary Valco P/N FS1.35-R10 5190-1437 Re-usable ferrules, 0.5 mm O.D. capillary Valco P/N FS1.45-R10 5190-1438 Re-usable ferrules, 0.8 mm O.D. capillary Valco P/N FS1.75-R10 5190-1439 Replacement knurled nuts for ULM union Valco P/N EN.5 KN G6600-80072 Tools Table 15 Tools parts Agilent LTM System User Manual Part description Part number Allen key, 5/64-inch G6578-80500 Allen driver 1/16-inch, 4 inch handle G6578-80501 Wrench, 1/4-inch combo G6578-80502 95 96 Agilent LTM System User Manual Agilent G6578 Low Thermal Mass System User Manual 9 Site Preparation Temperature and Humidity Ranges 98 Ventilation Requirements 98 Benchtop Space Requirements 99 Electrical Requirements 100 Your Agilent 6890\7890A gas chromatograph must first be installed following the site preparation and instructions provided by Agilent. This chapter can be skipped if the LTM system is installed on your GC. Agilent Technologies 97 Temperature and Humidity Ranges The LTM system must be operated within the recommended ranges for the gas chromatographs. • Recommended temperature operating range: 15 to 35°C • Storage Temperature Range -5 to 55°C • Recommended humidity range: 50-60%, non-condensing • Humidity Range: Up to 31 °C, 5 to 80% At 40 °C, 5 to 50% • Recommended altitude range: Up to 2000 m • Air pressure of 75 KPa to 106 KPa • No frost, dew, percolating water, rain, solar radiation, etc. • Indoor use After exposing the GC system to temperature or humidity extremes, allow 15 minutes for the system to return to the recommended ranges. Ventilation Requirements Observe the safety instructions regarding operation of the Agilent 6890\7890A GC regarding the venting of heat. Do not obstruct air flow around the instrument with your installation of the LTM system or placement of the LTM power supply. Venting Oven Exhaust Hot air (up to 450°C) exits vents from the rear of the gas chromatograph. Do not place any cables or other components where they may be damaged by excessive heat in the normal operation of the gas chromatograph. Venting Toxic or Noxious Gases Observe the Agilent GC instructions for the venting of toxic or noxious gases, or the exhausting of hydrogen if hydrogen gas is used as a carrier gas. The LTM system does not alter the exhaust of gases or vapors from the GC. If any sample components are toxic, noxious, or present another hazard, the GC system including the LTM system should be properly ventilated or placed in a fume hood. 98 Agilent LTM System User Manual Benchtop Space Requirements The LTM models for the Agilent 6890\7890A GC have electronics and GC column modules built into the doors, and a standalone power supply. Because the modules and electronics are built into the oven doors, the LTM system extends forward from the GC by as much as 18.4 cm (7.25 in.). Additional bench space in front of the GC is required. The LTM system should not overhang from the bench top. This could create a bump-in hazard to passersby. The recommended position for the power supply is on the bench to the left side of the GC because the DC power cable to the power supply attaches at the left (hinge side) of the door. The power supply has a length of 36 cm (14.1 in.) and a width of 18 cm (7.1 in.), plus an additional 10 cm (4 in.) should be allowed in front and 5 cm allowed behind the power supply for cable connections to the supply. Table 16 Weights and dimensions of the LTM system major components LTM Component Dimensions Average Weight Oven Door Assembly 43.2 cm (17.0 in.) W × 36.8 cm (14.5 in.) H × 25.4 cm (10 in.) L 6.7 kg (14.7 lb.) Power Supply 18 cm (7.1 in.) W × 13 (5.1 in.) H × 36 cm (14.1 in.) L 3.2 kg (7.1 lb.) Agilent LTM System User Manual 99 Electrical Requirements Grounding The LTM power supply and electrical cabinet are grounded through the three-conductor power line cord in accordance with International Electrotechnical Commission (IEC) requirements. The three-conductor power line cord should be plugged into a properly grounded receptacle having an earth ground. Line Voltage The LTM power supply is designed to operate on a range of voltages from 100 VAC to 240 VAC at 50/60 Hz. Line input is rated at 350 VA. LTM systems with multiple column modules can require a second power supply. A single 10-amp dedicated service is adequate to power the LTM system configured with two power supplies. 100 Agilent LTM System User Manual