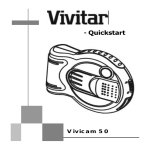
Download ViviCam 5 User Manual
Transcript
- User Manual
ViviCam 5
INDEX
1. Camera Precautions
2
2. Vivicam 5 Specifications
3
3. Vivicam 5 Features
5
4. Taking Images (Pictures)
9
5. Installing Driver and Utility Software
12
6. Transferring Images To Your PC
20
7. TWAIN Driver Function Introduction
22
8. Using the Vivicam 5 as a PC Camera
25
Supplement – PC Connectivity
26
Rev. Dec 3, 2002
1. Camera Precautions
Follow these guidelines when using your Vivicam:
n Keep camera away from the following:
• High temperatures and excessive humidity
• Direct sunlight or other heat sources
• Dust
• Extreme vibration
n Do not use camera outdoors if it is raining or snowing.
n If the lens or the viewfinder becomes dirty, clean them
with a lens brush or soft, clean cloth. Never touch the
lens with your fingers.
n If water or a foreign substance should get in the
camera, turn the camera off immediately and remove
the batteries.
n Do not open the camera case or attempt your own
repairs. High-voltage internal components may create
risk of electrical shock or fire.
n Do not open the battery compartment when the camera
power is on.
n Transfer important images to your computer as soon
as possible to avoid losing image data.
Note : Images can be stored and retained in camera memory
only as long as a battery is present and in good condition.
If the battery goes dead or is removed your images will be lost.
Make sure to download your images as soon as possible.
2. Vivicam 5 Specifications
2.1 Specification
n Resolution choices (in pixels):
Digital Camera mode: 1024 x768 (XGA, by Interpolation)
640 x 480 (VGA)
352 x 288 (CIF)
PC Camera mode: 640 x 480
320 x 240
160 x 120
n Range of Focus: Three feet to infinity
n 24-bit full color
n Memory: Built-in 8MB SDRAM
n File Format: JPG
n Power: AAA alkaline battery x 1
n PC Interface: USB
Auto Power Off: Automatically turns off power if inactive after
approximately 60 seconds
2.2 Accessories
1. Camera Cradle (stand)
2. One AAA alkaline battery
3. Camera chain necklace
4. Camera driver and utility software CD
5. USB cable
6. Quick start Guide
3. Vivicam 5 Features
3.1 General Guide
Front
Back
Face Plate is interchangeable)
£Manual eject hole
3.2 LCD Panel indicator
n
1
Image Counter
n
: Number of images you have captured
n
:
2
n
lmage Resolution
n
No Icon indicates 640 x 480 resolution (default setting)
n
n
3
n
Memory is full
: 352 x 288 pixels
Low Battery warning
: When the battery icon flashes on & off, and the
camera beeps three times it indicates that the
battery power is very low. The camera will turn off
u Important Note:
When the batteries are low, the camera will no longer
take images. Download your images as soon as
possible! After downloading your images replace the
battery as soon as possible.
n4 Shooting Environment
n
: Outdoor (Cloudy, default setting)
n
: lndoor
n5 Image Delete
n
: Deletes all images from camera memory
n
: Deletes the last image taken
6
n
Continuous Capture
: Continuous capture mode
3.3 Camera Function Selection
n Press the Mode button repeatedly to select a function.
The function icon on the LCD panel will blink. Press and hold
the Shutter button until you hear two confirmation beeps.
n Function Icons:
3.4 Tips & Trouble Shooting
n To steady the camera stand while
on a monitor or desktop, insert the
barrel of the USB cable within the
base of the stand as shown.
You may find that turning the stand
around gives more stability in
some situations.
n The Camera can also be
placed on top of a notebook
monitor using the stand
as shown.
4. Taking Images (Pictures)
4.1 Turning Power On and Off
n Power on: Press the Mode
button, camera will beep
n Power off: Press and hold the Mode button until the
camera displays "OFF" The camera will then beep and turn off.
(Note : The camera will automatically turn off if inactive for
about 60 seconds)
4.2 Taking Images
n Press Shutter button to take an image –camera will beep
n LCD Panel will indicate:
: the number of images you have taken
: When memory is full
4.3 Deleting Images
1. Deleting all images
n Press
Mode
n Press
Shutter
n
select to
until you hear two beeps
The camera will delete all images and
the image counter will reset to " 0 ".
2. Delete the last image
n Press
Mode
select to
n Press
Shutter
until you hear two beeps
n
The camera will delete the last image and
the image counter will decrement by one
4.4 Selecting image resolution
1. Selecting VGA (640 x 480) resolution:
n Press
Mode
select to
n Press
Shutter
until you hear 2 beeps
n
: Default Setting (No Icon) - 640 x 480
2. Select CIF mode :
n Press
Mode
select to
n Press
Shutter
until you hear two beeps
n
: CIF is 352 x 288 resolution
4.5 Selecting a shooting environment
n
: Outdoor mode - (default setting, normally use
this mode)
n
:
Indoor mode (Optional - try this setting for
taking images indoors)
5. Installing Driver and Utility Software
5.1 Computer System Requirements
Please check your PC system requirements before
installing the software :
1. Windows 98, ME, 2000, XP
2. Pentium or higher CPU
3. CD-ROM drive
4. Mouse
5. USB port
5.2 Installation of Vivicam TWAIN Driver and AVI Maker on
Windows 98, ME and 2000
1. Turn on your computer
2. lnsert the camera software CD into the CD-ROM drive,
the following Window will appear :
Click on "lnstall Vivicam TWAIN Driver"
3. To display the list of languages available, click on the
down arrow and highlight your selection.
Click " OK " to proceed to next step.
4. Your computer will display:
Click " Next " and follow setup procedure.
5. The TWAIN driver and AVI Maker installation is complete.
Click " Finish " to finish installation.
5.3 Installation of Vivicam TWAIN Driver and AVI Maker on
Windows XP
1. Insert the CD installation disk into your CD-ROM drive.
2. The Vivicam Installation Menu appears. Click Install
Vivicam Twain Driver on the Software Installer dialog box.
(Or double click the CD drive icon in My Computer and run
InstallMgr.exe in the root directory of the CD.)
3. Follow the on screen instructions to complete the installaation and it will finish installing all the necessary files on
your computer.
4. Please plug-in your Vivicam with USB cable.
5. System will detect Vivicam.
6. When the Found New Hardware Wizard window appears,
please select Install from a list or specific location
[ Advanced],and click Next to continue.
7. When the following window appears, please select Search
removable media [floppy, CD-ROM...] , and click Next to
continue.
8. Files are copied as the following screen appears:
9. Click Finish to continue the installation.
10. The Found New Hardware Wizard window appears again.
Please select Install from a list or specific location
[Advanced], and click Next to continue.
11. When the following window appears, please select Search
removable media [floppy, CD-ROM...] , and click Next to
continue.
12. System files are copied and the following screen appears:
13. Click Finish to complete the installation
5.4 Installation of Vivicam TWAIN Driver and AVI Maker
on Windows XP ( If you plug-in your Digital Camera
first without installing drivers. Please follow the steps
to complete of installation for Digital Camera. )
1. Insert the CD installation disk into your CD-ROM drive.
2. When the Found New Hardware Wizard window appears.
Please select Install from a list or specific location
[Advanced], and click Next to continue.
Click on the utility software you wish to install.
6.Transferring Images To Your Computer
Once you have TWAIN driver and utility software installed,
you may start downloading pictures from your Vivicam.
6.1 Connecting Vivicam 5 to your PC
Use the USB cable to connect the camera to your computer.
VIVICAM 5
Computer
6.2 Windows will complete the following USB device
setup: (Under Device Manager – Imaging Devices)
- Dual-Mode DSC (Controller)
- Dual-Mode DSC (Video Camera)
- Dual-Mode DSC (Still Camera)
6.3 Transferring Images From Vivicam
1. Start the Photo impression application software
2. Click the "Get Photo" button
3. Click on the "Camera/Scanner" button and the "Select
Source" list appears
4. Select "Vivicam 5" or "DSC-06 Dual Mode Camera"
5. Choose the destination album for your images from
the " Select Album " list.
Camera/Scanner
Select Source
acquire
6. Click on the "Acquire" button and the Vivicam TWAIN
software window will open.
7. The images you have taken will automatically display in the
TWAIN window.
8. Choose the images that you want, or click "Select All" to
select all images, then click the "Transfer" button.
9. When clicking images to be transferred, you can choose
either Standard (CIF / VGA) or Large (VGA / XGA
Interpolation) resolution.
Select All
Transfer
7. TWAIN Driver Function Introduction
Vivicam 5 Twain User Interface:
(1) Save to disk - Select images you want to save directly to
your hard disk. Click this icon to bring up the following
dialog box :
A. Directory: Select the directory or file folder to which you
wish to save your images
B. Filename: Enter a file name for your image
C. Format: Select the desired image file format you want
to use, either BMP or JPG
D. Image Size: Select image size you prefer
E. JPEG Quality: For JPGs you can specify the image
quality (and file size) by adjusting the slide bar
(2) Select All: Click to select all images
(3) Deselect All: Click to deselect all images
(4) Delete Last: Click to delete the last image in the camera
(5) Delete All: Click to delete all images in camera memory
(6) Transfer: Click to transfer selected images to the
application software
(7) Take an image: Click to take an image with the camera
(8) Self Timer: Click this button and the TWAIN driver will
present a self-timer window:
A : Timer adjustment buttons
B : Exit this window
C : Start the self-timer
D : Time you have set
(9) Page up and down: Display the previous or next
page images
(10) Enlarge preview: you can preview an enlarged image
by moving your mouse cursor over that image
(11) About: Displays version information
(12) Exit: Quits the TWAIN Window
8.Using the Vivicam 5 as a PC Camera
You can connect Vivicam 5 to your computer and use
it as a PC camera.
1. Connect USB cable to Vivicam and to your PC's USB port.
The LCD panel on the camera will show
.
2. Please refer to related instructions for using the camera
as a PC camera if your PC already has PC camera
soffware installed.
(select "Vivicam 5 " if the software has a video capture
source list)
? Important Note:
Do not disconnect the USB cable while you are
running Fashion Cam as a PC camera in order
to avoid a function failure.
SUPPLEMENT – PC Connectivity
If you plug-in your Digital Camera without first installing the
drivers - Please follow the steps to complete the installation.
1. Insert the CD installation disk into your CD-ROM drive.
2. When the Found New Hardware Wizard window appears.
Please select Install from a list or specific location
[Advanced], and click Next to continue.
3. When the following window appears,
please select Search removable media [floppy, CDROM...] , and click Next to continue.
4. System files are copied and then the following screen
appears. Click Finish to continue the installation.
5.Next, the Found New Hardware Wizard window appears
again. Select Install from a list or specific location
[Advanced], and click Next to continue.
6. When the following window appears, select Search
removable media [floppy, CD-ROM ...], click Next
to continue.
7. System files are copied and then the following screen
appears. Please click Finish to continue the installation.
8. Please double click the CD drive icon in My Computer
and run InstallMgr.exe in the root directory of the CD.
9. Click Install VIVICam Twain Driver on the
Software Installer dialogue box, and follow the
instructions to complete the installation. Setup will
finish installing the necessary files on your computer.
It will prompt you to restart your computer. Click
Yes and then Finish to restart your computer and to
complete Setup.
10. After your computer restarts, the following window
appears.
Please select Install the software automatically
[Recommended], and click Next to continue.
11. System copies files and the following screen appears.
Please click Finish to continue the installation
12. When the following window appears,
please select Install the software automatically
[Recommended], and Click Next to continue.
13. System files are copied and the following screen
appears. Click Finish to complete the installation.


