1
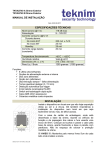
TECHNICAL SPECIFICATIONS
Siren loudness (@1 m)
1 piezo
2 piezo
Supply Voltage(min – max)
Current consumption (@12 V)
Siren
1 piezo, in SAB mode
1 piezo, in SCB mode
2 piezo, in SAB mode
2 piezo ,in SCB mode
Strobe
Stand by
Strobe frequency (@12 V)
Dimensions(Width x Length x Height)
Weight/ (Packaged) - VAS-730
Weight/ (Packaged) - VAS-770
118 dB max.
121 dB max.
9 – 13 V DC
240 mA
25 mA
420 mA
25 mA
200 mA
10 mA
1,5 Hz
215 x 300 x 60 mm
1195 gr / (1350 gr)
1292 gr / (1447 gr)
VAS-730 & VAS-770
OUTDOOR SIREN
MOUNTING & OPERATING
MANUAL
MANUFACTURER
BILGI ELEKTRONIK TELEKOMUNIKASYON SIST.
SAN. ve TIC A.S.
ADDRESS : ATATURK MAH.NAMIK KEMAL CD.
NO:11 ATASEHIR(GUMRUK CIKISI) 34758 KADIKOY
ISTANBUL /TURKEY
TEL : +(90 216) 455 88-46-47-48-49
FAX : +(90 216) 455 99 06
www.teknim.com,
info@ teknim.com
Issue Date: 23.06.2005
This product is produced by Bilgi Elektronik A.S. which has 158211
numbered certificate of ISO 9001:2000 Quality Management
Systems certified by BVQI.
BD-1/05-035
8/8
BD-1/05-035
SAFETY PRECAUTIONS
Please read this guide carefully before operating device and keep this guide for later
reference.
Follow all operating and safety instructions in this manual.
Do not use this device indoor, or else it may cause personal injury due to high sound
pressure level. While mounting, use ear protection.
The device produces high voltage while operating. After turning off the power, wait for a
minute before servicing.
Disconnect the electricity before cleaning. Don’t use liquid or aerosol cleaners, use a
damp cloth for cleaning.
Keep away devices from dust and moisture.
Locate device to the straight place, or else it may damage device and its environment.
OPERATING CONDITIONS :
Don’t operate device beyond following values.
Temperature :
Humidity
:
Between -40°C and +65°C
%95 in +40°C
POWER SUPPLY :
Use the device only with voltage mentioned in this guide. If you are not sure about
supply voltage you will connect, please contact with your vendor.
CONFIGURATIONS
Siren tone (TONE) option :
4 different siren tone can be choosed.
A
B
TONE
INTRUDER 1
ON
INTRUDER 2
ON
FIRE
ON
ON
POLİCE
Cutoff time (TIMER) :
This option provides selecting how much time the sounder works during alarm. Default
value is “Continuous”.
C
D
E
TIME
3 min.(*)
ON
5 min.
ON
8 min.
ON
ON
10 min.
ON
15 min.
ON
ON
20 min.
ON
ON
30 min.
ON
ON
ON
Continuous
(*) Default Value
Siren speed (SPD):
Siren speed can be increased by two times by using this switch.
Default mode is HIGH.
SUPPLY CABLE PROTECTION:
Protect the supply cable against crushing and breaking.
SERVICE:
Do not attempt to service this unit yourself as there is no user serviceable part inside. To
prevent electric shock, do not remove covers.
In case of breakdown, contact with your vendor or manufacturer. Refer all servicing to
qualified personnel.
CONDITIONS NEED SERVICE
ALARM ON:
If 12V is disconnected
If 0V is disconnected
If 12V is connected
If 0V is connected (*)
If the device is dropped or the device’s cover is damaged.
If you realize that, device doesn’t operate properly.
If the device doesn’t operate as mentioned in operating guide
If the device isn’t operated in operating conditions.
SPARE PART :
If maintenance includes changing , ensure that technician uses original parts against
electrical shock, fire, etc.
SECURITY CONTROL:
To control if your device operates in healthy and convenient conditions, demand service
from your vendor.
BD-1/05-035
SİREN SPEED
Low
High
Triggering option (POL):
This option is configured together with “POL” switch and J8 PULL jumper. Configure
triggering as the following:
Contact with your vendor on the following conditions.
abcd-
SPD
ON
OFF
2/8
POL
OFF
ON
ON
OFF
J8- PULL
DN
UP
DN
UP
(*)Default value.
Pre-warning (PWE):
When using this option, siren creates warning sound during 6-8 sec before siren is
triggered. If triggering continue, siren goes into alarm. Default value is “OFF”.
PWE
ON
OFF
BD-1/05-035
PRE-WARNING
ENABLE
DISABLE
7/8
VAS-730 & VAS-770 OUTDOOR SIREN
MOUNTING and OPERATING INSTRUCTIONS
Thank you for choosing VAS 730/770 outdoor sirens. VAS 730/770 offers different
colour options, programmable siren tone options, sliding lights, SAB/SCB power option
and also provides wide area for firm logo with its body designed with 3D CAD/CAM.
OPERATING
To operate device, connect supply voltage and put the battery (BATT) jumper to “ON”
position. At this time 4 LED begins flashing to inform you that siren is ready and then
device goes into the stand by mode. In stand by mode, LEDs slide to show that siren is
ready. Also in stand by mode battery charges.
In stand by mode if supply voltage is cut off, the device perceives this as a sabotage and
goes into alarm immediately. This situation continues until the end of cutoff time. If supply
voltage is connected again siren becomes silent immediately.
If siren is triggered in standby mode and pre-warning system is “OFF”, siren goes into
alarm. If pre-warning system is “ON”, siren generates small beep sounds to indicate that
siren will go into action in a few seconds. At this time if the switch is in SAB mode, siren
current is provided by alarm panel. If the switch is in SCB mode, siren current is provided
by siren battery. Siren continues to be in alarm mode until the end of triggering or until
the end of the cutoff time.
By pressing the test button, siren can be controlled if it works or not.
Features
4 different siren tone
High/Low speed sounder
Delay time with warning tone
Configurable Cutoff Timer (3 / 15 minute)
SAB / SCB operating mode
Sliding light
Test Button
Rechargeable NI-MH Battery
Sabotage switch
Second sabotage switch against cover screw
protection
ABS cover
Polycarbonate cover
Metal cover against impact
2 piezo
BD-1/05-035
6/8
BD-1/05-035
VAS 730
•
•
•
•
•
•
•
•
•
VAS 770
•
•
•
•
•
•
•
•
•
•
•
•
•
•
•
3/8
FIRST MOUNTING
VAS-730/770 has a special system to prevent technician and other people from
disturbing on first mounting. Before connecting supply voltage to siren, battery (BATT)
bridge is taken to ON position. Normally siren alarms if supply voltage isn’t connected.
But this doesn’t work at this moment and then when the supply voltage is connected,
device becomes normal.
CABLE CONNECTIONS
Example 1: 6 wire connection with sabotage alarm
MOUNTING INSTRUCTIONS
Mount the device to places that won’t be exposed to direct sun light and rain. Also give
importance to mount the device on a place where it is seen but can’t be reached easily.
Point the mounting holes and cable in hole by using siren back plaque or the template on
its cartoon box and then drill holes by using 8mm tip.
By using longer drill tip than the thickness of the wall, drill the wall as the cable pass
through the wall. Mount the siren by using the given screws and suitable screwdriver.
Don’t forget to pass cables through the hole on the body.
JUMPER SETTINGS
J11 Battery (BATT) jumper:
After mounting the device take this jumper to ON position(Default value is OFF) to
activate siren battery.
J2 POWER MODE jumper:
SAB position: Supply voltage is provided by panel normally. If supply voltage is cut off,
this voltage is provided by battery.
SCB position: Supply voltage is provided by battery in all conditions.. At this time current
consumption will be lower but siren loudness too.
Example 2: Connection with VAP-404 Alarm panel
This jumper’s default position is SAB.
J5 PIEZO jumper:
If the jumper is in “1” position, one piezo becomes active. If the bridge is in “2” position ,
two piezo become active. If siren operates with two piezo, current consumption
increases by 250 mA.
J6 TAMPER jumper:
Tamper output could be done with 2 wire connection(NORM) or 1 wire connection(NEG).
In NEG position “OUT” can be used as Tamper output(“IN” is in GND). Default value is
“NORM”(2 wire connection).
J8 PULL jumper:
Look at the triggering options.
BD-1/05-035
4/8
BD-1/05-035
5/8