1
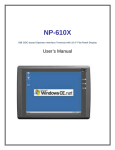
NP-880S
RISC-based operator interface terminal with 8” flat panel display
User’s Manual
Copyright .................................................................................................................. 4
Safety Instructions ..................................................................................................... 5
Chapter 1 Introduction............................................................................................... 6
1.1 Introduction ................................................................................................... 6
1.2 Specifications ................................................................................................ 6
Chapter 2 Installation Instructions ............................................................................. 9
2.1 Mounting Instructions .................................................................................... 9
2.1.1 Location Considerations........................................................................ 9
2.1.2 Making a NEMA-4 Mounting ............................................................... 9
2.1.3 Environmental Considerations............................................................. 10
2.2 Power Connections ...................................................................................... 10
2.2.1 Power Requirements ............................................................................11
2.2.2 Grounding Requirements..................................................................... 12
2.2.3 CE Requirements ................................................................................ 12
2.2.4 Safety Guidelines ................................................................................ 12
2.3 Communications Connections...................................................................... 14
2.3.1 Connector COM 1 [RS232]................................................................. 14
2.3.2 Connector COM1 [RS485], COM3 [RS-485] and COM3 [RS-232]..... 15
2.3.3 USB Master ports................................................................................ 16
2.3.4 44Pin IDE Interface............................................................................. 16
2.3.5 Ethernet port ....................................................................................... 16
2.3.6 Dip Switch .......................................................................................... 17
2.4 LED Indictors .............................................................................................. 17
2.5 CE Requirements ......................................................................................... 18
2.6 VESA Standard hole .................................................................................... 18
2.7 Dimensions of NP-880S............................................................................... 19
Chapter 3 Windows CE.NET................................................................................... 20
3.1 Introduction ................................................................................................. 20
3.2 Utilities ........................................................................................................ 20
3.2.1 Soft-Keyboard..................................................................................... 20
3.2.2 System Settings ................................................................................... 21
3.2.3 NOR Flash .......................................................................................... 24
3.2.4 Startup................................................................................................. 25
3.2.5 Remote Desktop Connection ............................................................... 25
3.3 NP-880S Networking................................................................................... 27
3.3.1 Networking via Ethernet...................................................................... 27
2
3.3.2 ActivSync............................................................................................ 28
3.3.3 Web browser ....................................................................................... 31
3.4 Application program development ............................................................... 32
3.4.1 Microsoft eMbedded Visual C++ 4.0................................................... 32
3.4.2 EP3915 SDK....................................................................................... 33
3.5 Print ....................................................................................................... 34
3
Copyright
This document is copyrighted March, 2006, by IVC Displays, Inc. All rights are
reserved. IVC Displays, Inc. reserved the right to make improvements to the products
described in this manual at any time. Specifications are thus subject to change without
notice.
No part of this manual may be reproduced, copied, translated, or transmitted in any
form or by any means without the prior written permission of IVC Displays, Inc.
Information provided in this manual is intended to be accurate and reliable. However,
IVC Displays, Inc. assumes no responsibility for its use, nor for any infringements
upon the rights of third parties which may result from its use.
4
Safety Instructions
Overview
This section states the safety instructions, which must be followed when installing,
operating and servicing the NP-880S. If neglected, physical injury and death may
follow, or damage may occur to controller and related equipment. The material in this
chapter must be studied before attempting any work on, or with, the unit.
Warnings and Notes
This manual distinguishes safety instructions. Warnings are used to inform of
conditions, which can, if proper steps are not taken, lead to a serious fault condition,
physical injury or death. Notes are used when the reader is required to pay special
attention or when there is additional information available on the subject. Notes are
less crucial than warnings, but should not be disregarded.
Warnings
Readers are informed of situations that can result in serious physical injury
and/or serious damage to equipment with the symbol shown to the left. A
Warning symbol indicates that the reader should pay special attention to the
accompanying text. Precautionary steps should be taken to insure that the
installation is in compliance with warnings. Warnings include hazardous
conditions that could cause personal injury or equipment damage if care is not
taken. The text next to this symbol describes ways to avoid the danger.
Warnings
Dangerous Voltage Warnings: Warns of situations in which high voltage can
cause physical injury and or damage equipment.
General warning: Warns of situations, which can cause physical injury and
or damage equipment by means other than electrical.
Electrostatic Discharge Warning: Warns of situations in which an
electrostatic discharge can damage equipment.
Readers are notified of the need for special attention or additional in formation
available on the subject with the following symbols:
CAUTION! Aims to draw special attention to it.
Note:
Note: gives additional information or points out more information available
on the subject.
5
Chapter 1 Introduction
1.1 Introduction
The MT608 is a miniature and compact platform that has no redundant functions. It is
designed for small-sized operator interface market. Its RISC kernel, the CIRRUS
LOGIC EP9135 200MHz processor design with a memory management unit (MMU),
that supports Windows CE. The ARM920T's 32-bit microcontroller architecture, with a
five-stage pipeline, delivers impressive performance at very low power.
The EP9315 includes a hardware graphics acceleration engine that improves graphic
performance by handling block copy, block fill and hardware line draw operations. The
graphics accelerator is used in the system to off load graphics operations from the
processor.
Features
Built-in flash memory and Windows CE OS inside
All in one platform: the CPU, DRAM and Windows CE are integrated
Low power consumption and Fan-less
NEMA 4 / IP65 compliant front panel
One CompactFlash™ slot
Audio
Ethernet port(10/100Base-T)
44-pin IDE Interface
1.2 Specifications
Construction: plastic molding housing
Display: 8" 640x480 65536 Color TFT LCD
CPU and core logic: CIRRUS LOGIC EP9315 200MHz ARM920T core
processor
DRAM: 64 MB on board
Storage: 32 MB flash memory on board
1 CompactFlash™ card slot
44-pin IDE Interface
6
I/O: 3 serial ports
o Com1: RS-232/RS-485 2w/4w
o Com2: RS-232
o Com3: RS-232/RS-485 2w
1 Ethernet port (10/100Base-T)
3 USB 2.0 full-speed host (12Mbps)
Sound output: 20-bits Stereo output
Microphone In
RTC: Built-in
Power input: 24 VDC, 440mA maximum
Dimension (W x H x D): 240 x 179 x 50mm
Weight: Approx. 1.3kg
FUSE
BUSSMANN Fast Acting, Glass Tube
Rating: 250VAC, 1A
Size: 5x20mm
LCD Display
Display type TFT color LCD
Display size (diagonal) 8"
Max colors 65536
Resolution
640 x 480
Pixel pitch (HxV, mm) 0.2535 x 0.2535
Viewing angle (°) 56/65/65/65 (T/B/R/L)
Luminance (cd/m2) 400
Storage temperature (°C)
Operating temperature (°C)
Backlight
CCFLx1
Contrast ratio 250:1
-25~70
0~45
Touch screen
Type: 4-wire, analog resistive
Resolution: continuous
Light transmission: above 80%
Life: 1 million activation minimal
7
Environmental Specifications
Operating temperature: 0° ~ 45°C (32° ~ 113°F)
Relative humidity: 10% ~ 90% @ 40°C, non-condensing
Shock (operation): 10 to 25Hz(X,Y,Z direction 2G 30minutes)
EMI: Complies FCC class A
CE: Complies with EN50081-2 and EN50082-2 standards
Front panel meets NEMA4 / IP65
8
Chapter 2 Installation Instructions
2.1 Mounting Instructions
2.1.1 Location Considerations
Care should be taken when locating equipment behind the unit to ensure that AC power wiring,
PLC output modules, contactors, starters and relays, and any other source of electrical
interference are located away from the back of the unit.
Particular note should be taken to the position of variable speed drives and switching power
supplies. Their input and load cables should be screened to a central star earth point.
2.1.2 Making a NEMA-4 Mounting
Panel Details
The unit can be mounted into panels with a depth of 4”(105mm). It
is recommended that the unit be mounted on the front panel of a steel
enclosure, through an appropriate opening*. Allow a clearance of
1”(25mm) around the sides of the unit for mounting hardware.
Allow clearance for cable connections to the back of the unit. Unit
depth may vary according to cable type used. Typically, plan a depth
to accommodate at least 4”(105mm) behind the panel.
NEMA-4
Mounting
Put the unit through the panel cut out. Slide the clamps into the 6
holes provided around the case. Tighten the clamping screws in an
Caution!
even pattern until the unit is secured in the panel.
Do not over tighten mounting clamps!
Note:
Specifications Note:
To seal to NEMA-4 specifications, all supplied mounting clamps
must be used and panel cannot flex more than 0.010”.
9
2.1.3 Environmental Considerations
The NP-880S are to be used indoors as built in displays. Make sure that the displays are
installed correctly and that the operating limits are followed (See Specifications).
Do not operate the unit in areas subject to explosion hazards due to flammable gases,
vapors or dusts.
The unit should not be installed where fast temperature variations and/or high humidity
are present. This will cause condensation of water in the device.
Do not install these terminals in environments where have inflammable gases.
Panel-mounting clamp
4 places (only 2 shown)
Side View
2.2 Power Connections
Make sure that all local and national electrical standards are met when the installing the unit.
Contact your local authorities to determine which codes apply.
10
2.2.1 Power Requirements
Power
The NP-880S can be powered by DC power only. The specified
voltage range is 25 ±5% Volts DC. This insures compatibility with
most controller DC systems. The power conditioning circuitry inside
the unit is accomplished by a switching power supply. The peak
starting current can be as high as 700mA.
Fusing
Requirements
If the display does not come on within 2 seconds of power up,
remove power. An internal fuse will prevent damage if the polarity
of the DC power is incorrect. Check wiring to insure proper
connections and try to power up again.
Caution
High Voltage
An Internal fuse will prevent damage for over voltage condition
however it isn’t guaranteed.
DC voltage sources should provide proper isolation from main AC
power and similar hazards.
Caution
Emergency
Stop
A Hard-wired EMERGENCY STOP should be fitted in any system
using an NP-880S to comply with ICS Safety Recommendations.
Do not power the NP-880S and inductive DC loads, or input
Caution
circuitry to the controller, with the same power supply. Note: The 24
Supply Voltage
VDC output from some controllers may not have enough current to
Condition
power the NP-880S.
Caution
Wire Routing
Wire lengths should be minimized (Maximum 1600’ (500 m)
shielded, 1000’ (300 m) unshielded).
Wires should be run in pairs with a neutral or common paired with a
hot or signal line.
If wiring is to be exposed to lightning or surges, use appropriate
surge suppression devices.
Keep AC, high energy, and rapidly switching DC wiring separate
from signal wires.
Equip ungrounded DC supplies with a resistor and capacitor in
parallel to earth ground. This provides a path for static and high
frequency dissipation. Typical values to use are 1MOhm and
4700pF.
Connection
To make a connection, strip about 3/8” of insulation off the end of
the wire, turn the connector screw counterclockwise until the gap is
wide open, insert the wire all the way in, and turn the screw
clockwise until it’s tight.
Connect positive DC line to the ‘+24V’ terminal and the DC ground
to the ‘GND‘ terminal.
11
FUSE Replacement:
BUSSMANN
Fast Acting, Glass Tube
Rating: 250VAC, 1A
Size: 5x20mm
Warning:
1. Make sure the power off before replace the fuse.
2. Do not replace the fuse with a different rating fuse.
2.2.2 Grounding Requirements
Chassis ground must be used. DC ground is not directly coupled to Earth ground
internally. It is preferable not to ground DC negative return to chassis ground as poor site
earths can introduce noise into a system, but if necessary an earth connection should be made,
from the power supply return point to the central star earth point. Ground conductors should be
as short and as large in size as possible. The conductors must always be large enough to carry
the maximum short circuit current of the path being considered. Ground conductors should be
connected to a tree from a central star earth ground point. This ensures that no ground
conductor carries current from any other branch.
2.2.3 CE Requirements
To make an NP-880S comply with EMC directives, and to reduce susceptibility to electrical
interference, a separate #14 AWG ground wire should be taken to the chassis ground terminal
of the power connector. This ground connection should be run directly to the central star earth
connection point (as recommended in most Installation Instructions).
2.2.4 Safety Guidelines
This section presents recommended installation practices, and procedures. Since no two
applications are identical, these recommendations should be considered as guidelines.
Hardware Considerations WARNING!
The system designer should be aware that devices in Controller systems could fail and thereby
create an unsafe condition. Furthermore, electrical interference in an operator interface, such
12
as an NP-880S, can lead to equipment start-up, which could result in property damage and/or
physical injury to the equipment operator.
If you, or your company, use any programmable control systems that require an operator or
attendant, you should be aware that this potential safety hazard exists and take appropriate
precautions. Although the specific design steps depend on your particular application, the
following precautions generally apply to installation of solid-state programmable control
devices. In addition, these precautions conform to the guidelines for installation of Controllers
as recommended in the NEMA ICS 3-304 Control Standards.
Programming Considerations
To conform with ICS Safety Recommendations, checks should be placed in the controller to
ensure that all writable registers that control critical parts of plant or machinery have limit
checks built into the program, with an out-of-limit safe shut down procedure to ensure safety
of personnel.
ICS 3-304.81 Safety Recommendations:
Consideration should be given to the use of an emergency stop function, which is
independent of the programmable controller.
Where the operator is exposed to the machinery, such as in loading or unloading a machine
tool, or where the machine cycles automatically, consideration should be given to the use of an
electromechanical override or other redundant means, independent of the programmable
controller, for starting and interrupting the cycle.
If provision is required for changing programs while the equipment is in operation,
consideration should be given to the use of locks or other means of assuring that only
authorized personnel can make such changes.
These recommendations are intended as safeguards against the failure of critical
components and the effects of such failures or the inadvertent errors that might be introduced
if programs are changed while the equipment is in operation. *
The ICS 3-304.81 Safety Recommendations are reproduced by permission of the
National Electrical Manufacturers Association from NEMA ICS 3-304
13
2.3 Communications Connections
The ports as you look at the back of the case, are the ports for connecting to a PLC or
some external device (Controller Connectors).
Cable
Different cables are required for various devices.
Requirements
Caution
Restrict cable length to less than 500’ (150m) for
RS485/422 devices and 50’ (15m) for RS232 devices to
avoid communications problems.
The COM light on the front of the NP-880S will turn on
with each communication.
Shielded cable must be used for long lengths or cables run
in an electrically noisy environment.
Do not run cables next to AC power lines or near sources
of electrical noise.
Be sure that the cable ends have been inserted all of the
way into mating connectors and are secure
2.3.1 Connector COM 1 [RS232]
Pin Designations
Pin assignment of the 9 Pin, Male,
SUB-D, COM1 [RS-232] and COM2 [RS-232] Port.
COM1[RS-232]
COM2[RS-232]
14
2.3.2 Connector COM1 [RS485], COM3 [RS-485] and
COM3 [RS-232]
Pin Designations
Pin assignment of the 9 Pin, Male,
SUB-D COM1 [RS-485], COM3 [RS-485] and COM3
[RS-232] Port
COM1 [RS-485]
COM3 [RS-485]
COM3 [RS-232]
COM1 [RS-485] connect
RS-485 2 wire Device
COM1 [RS-485] connect
RS-485 4 wire Device
NP-880S
COM1 [RS-485]
9P D-SUB Female
RS-485 2 wire Device
1
Data-
Data-
2
Data+
Data+
5
GND
NP-880S
COM3 [RS-485]
9P D-SUB Female
RS-485 4 wire Device
1
Rx-
Tx-
RS485 Transmit
2
Rx+
Tx+
RS485 Transmit
3
Tx-
Rx-
RS485 Receive
4
Tx+
Rx+
RS485 Receive
5
GND
15
2.3.3 USB Master ports
The USB Master ports can connect USB mouse and USB keyboard. The USB Master ports
support USB 2.0 full-speed host (12Mbps). This ports support USB Mass storage device. But
the USB hard disk must use external power.
2.3.4 44Pin IDE Interface
The 44 Pin IDE Interface support D.O.M (Disk On Module) and 2.5” hard disk.(The 2.5” hard
disk need a female to female 44Pin cable.)
Please turn off the power, before plug or pull the D.O.M or 2.5” hard disk.
2.3.5 Ethernet port
MT608T has open 10/100 Base-T Ethernet port.
There are two LED indicators on the Ethernet port.
Orange LED: LAN Link status.
Green LED: Active status.
16
2.3.6 Dip Switch
Touch Screen Calibrate mode: In this mode when you power on the NP-880S, the
screen will display a “+” sign at the
center of the screen. Use a stylus or
finger to push the center of the “+”
until it moves. The “+” moves to
upper-left, lower-left, lower-right and
upper-right corners. When all five “+”
are done the “+” will disappear. The
Touch Screen parameter will store at
Flash Rom.
Boot Loader mode: Load new Windows CE image file.
If the NP-880S already load the CE image with boot loader. Set the DIP SW3 ON then
power ON into boot loader mode. Refer the load Win CE image document.
2.4 LED Indictors
COM
Communication(Red)
Ethernet communication active
CPU
CPU(Green)
When the unit power on the CPU LED will ON, after
CPU boot-up it will turn OFF. Normal is OFF. If the
CPU LED still ON that mean CPU boot-up fail.
When download CE image, the CPU LED will slowly
flash.
PWR
Power(Orange)
System power LED indicator
17
2.5 CE Requirements
EU directives that apply to the NP-880S Series:
EMC Directive (89/336/EEC, 92/31/EEC, 93/68/EEC) electromagnetic emissions and
immunity
Machinery Directive (89/392/EEC, 91/368/EEC, 93/44/EEC, 93/ 68/EEC) machine
safety
NP-880S products will be CE-marked to indicate compliance with the EMC Directive.
The NP-880S Series has been designed to operate satisfactorily in electromagnetic noise
(immunity) and without emitting high levels of electrical noise into the environment
(emission). The units are designed to meet European Community standards when installed per
the wiring instructions in this manual.
Compatibility
Standards
The NP-880S has been designed to meet electromagnetic
compatibility for industrial environments.
• CISPR (EN 55011) Group 1, Class A Radiated Emissions levels
• EN50081-2 Generic emission standard, industrial environment
(Also US FCC Class A)
• EN50082-2 Generic immunity standard, industrial environment
2.6 VESA Standard hole
The NP-880S VESA
Standard hole for wall
mounting or arm
mounting.
The M4 screw
length is 10 to
15mm. Don’t over
15mm. The CPU board
will damage.
18
2.7 Dimensions of NP-880S
Cutout dimensions NP-880S
222mm [8.74”] W x 167mm [6.57”] H
19
Chapter 3 Windows CE.NET
3.1 Introduction
The NP-880S series operator interface terminal is designed to serve on the Windows
CE platform. Windows CE .NET is the successor to Windows CE 3.0. Designed from
the ground up for the embedded marketplace, Windows CE .NET delivers a robust
real-time operating system for rapidly building the next generation of smart mobile and
small footprint devices. With a complete operating system feature set and end-to-end
development environment, Windows CE .NET contains everything you need to create
a custom Windows CE–based device that requires rich networking, hard real-time, and
a small footprint, as well as rich multimedia and Web browsing capabilities.
3.2 Utilities
There are several useful utilities built in the standard Windows CE OS of NP-880S:
3.2.1 Soft-Keyboard
The NP-880S is dedicated to the small-sized operator interface. It is often inconvenient
for users to attach a keyboard to such small machine. Thus, a software keyboard is
20
embedded in the standard Windows CE OS. Upon boot-up, a small keyboard icon will
appear on the status bar. Tap this icon by the stylus to activate/hide this Soft-keyboard.
3.2.2 System Settings
NP-880S provides an integrated utility for users to make basic setting of the machine.
Step
1.
Tap the “cecp” icon from Desktop.
2.
Launch the System Settings
Control Panel.
Touch Screen settings
The touch screen calibration can be executed from the Control Panel.
Step
1.
Launch the System Settings
Control Panel.
21
Tapping the “Calibrate” button.
The screen will display a “+” sign
at the center of the screen.
Use a stylus or finger to push the
center of the “+” until it moves.
The “+” moves to upper-left,
lower-left, lower-right and
upper-right corners. When all five
“+” are done the “+” will
disappear. The Touch Screen
parameter will store at Flash Rom.
Backlight
“LCD Settings” page of the cecp provides the function to turn off the LCD backlight,
and thus elongates the period of service. For example, if the user wants the backlight
turned off automatically after 10 minutes when the device was no longer used. The
user must select “10 minutes” in the put down box and then press “OK” button. Then
the screen save function is enabled. Once the backlight was turned off, events or
perturbations from the touch screen can turn it on.
On the other hand, if users want to disable the screen save function, select “Never” and
press “OK” button.
22
MAC address
The MAC address page the block shows the
network MAC address.
Save
Tap the Save registry button, will save the
registry data to the NORFlash folder. The
next time the NP-880S reboots, the
Windows CE system will use the stored
registry data.
System version
Show current CE image version.
Set serial port mode
Set Com1 mode. Select
RS232/RS485 2wire or 4wire mode.
Set Com3 RS232/RS485 mode.
The serial port mode can be saved by
“Save registry”.
23
HOME Directory Change
This can set the Web Server directory.
(Must reboot HMI)
Contrast
Adjust the LCD backlight brightness.
3.2.3 NOR Flash
The NORFlash
serves as a small
capacity hard disk.
You can store your data and
application in the Flash ROM
via NORFlash function to
prevent unexpected loss of data
as power failure. When power
is shutdown and cold boot, the
data in the Flash ROM area
would be saved.
24
3.2.4 Startup
After the system boot up, the startup execution function would automatically perform.
This function is useful for control system to do the initialization processes or some
other programs.
Step1: Create "startup" directory in the "\NORFlash\" folder.
Step2: Copy executable files or Shortcut to "StartUp" directory which is created in
Step 1.
An alternative way to setup startup files is to make a shortcut and copy it to
"NORFlash\StartUp". A shortcut can execute a program with Parameters.
Follow the following procedure to create the shortcut (.lnk) file.
A .lnk file is a text file that contains the command line for the linked target, which may
be enclosed in double quotation marks, along with the length of that command line.
Optionally, you can also pass parameters into the linked target. By default, a .lnk file
uses the following format.
[number of ASCII characters after pound sign]#[command line] [optional parameters]
For example, to start MyApp.exe and pass two optional parameters into the application,
a sample MyApp.lnk file contains the following.
40#\Windows\MyApp.exe parameter1 parameter2
3.2.5 Remote Desktop Connection
Use Remote Desktop Connection you can remotely control your
computer.
To use Remote Desktop, you need the following:
Windows XP Professional installed on your office computer, or whichever
computer you plan to operate remotely. This computer is known as the host.
You must first enable the Remote Desktop feature on your office computer so that you
can control it remotely from another computer. You must be logged on as an
administrator or a member of the Administrators group to enable Remote Desktop on
your Windows XP Professional-based computer.
25
To create a new Remote Desktop Connection
1. Open Remote Desktop Connection.
2. In Computer, type the computer name for your computer running Windows XP
Professional that has Remote Desktop enabled and for which you have Remote
Desktop permissions.
3. Click Connect. The Log On to Windows dialog box appears.
4. In the Log On to Windows dialog box, type your user name, password, and
domain (if required), and then click OK. The Remote Desktop window will open
and you will see the desktop settings, files, and programs that are on your office
computer. Your office computer will remain locked. Nobody will be able to work at
your office computer without a password, nor will anyone see the work you are
doing on your office computer remotely.
Note: To change your connection settings, (such as screen size, automatic logon
information, and performance options), click Options before you connect.
26
3.3 NP-880S Networking
3.3.1 Networking via Ethernet
The NP-880S is equipped with a 10/100Base-T Ethernet controller. To utilize it,
change the device name when the NP-880S is first turned on.
Step
1
Click “Start/Settings/Control Panel”
2
Double click “Network and Dial-up
Connections”
3
Find the default device name.
Change it to a unique one depending
LAN90001
on the plan of individual LANs.
4
If the NP-880S is a node of a LAN
with DHCP servers, it is now
available.
5
If the NP-880S is a node of a LAN
with fixed IP server, please consult
with MIS to get specific IP address.
Click “Start/Settings/Control Panel”.
Double click “Network and Dial-up
Connections” and update the IP
address.
6
Use the cecp utility “Save registry”
to save this changed.
27
3.3.2 ActivSync
The NP-880S uses the COM1 RS232 connect the PC.
Windows CE .NET 4.2 please use ActiveSync version 3.8.0.
Windows CE .NET 5.0 please use ActiveSync version 4.1.0.
Step
1 Make sure the
Microsoft ActiveSync
service is properly
Microsoft
ActiveSync
installed on the host
PC.
2 Click the
“Connection
Settings…”
3 Allow serial cable or
infrared connection to
this COM port
4 Connect the NP-880S
Com1 RS232 and PC
RS232 by the RS232
ActiveSync cable.
28
5 Run NP-880S
\Windows\repllog.exe
6 Follow the onscreen instructions to
establish a partnership and
synchronize your NP-880S with
your desktop computer.
7 Now you can synchronize the
information between the NP-880S
and host computer with
ActiveSync.
29
Use Ethernet connect to PC ActiveSync. (Only ActiveSync 3.8.1)
1 Before you begin Set up a
partnership, between your
device and desktop computer
using RS232 connection.
2 Follow the onscreen
instructions to establish a
partnership and synchronize
your NP-880S with your
desktop computer.
Enable a network (Ethernet)
connection in ActiveSync.
1 On the File menu, click
Connection Settings.
2 Select Allow network
(Ethernet) and Remote Access
Service (RAS) server
connection with this desktop
computer.
30
NP-880S Run
\Windows\repllog.exe /remote
Choose “Network Connection”
And choose PC’s name.
Click “Connect…” button
The NP-880S connect to PC via
Ethernet.
3.3.3 Web browser
The NP-880S built-in Windows CE OS includes Microsoft Pocket Internet Explorer. It
can be used to browse web pages on World Wide Web via LAN or dial-up connection.
31
3.4 Application program development
The NP-880S is bundled with built-in Windows CE operating system. In real
applications users need to execute various applications programs on it. However,
unlike its other family the Windows CE is a hardware-dependent operating system.
That is to say, Windows CE application programs are only portable in the source code
level. Users must rebuild the runtime file for a different Windows CE platform even
though the source code may not be changed at all.
The following development tools must be installed on the PC:
Microsoft eMbedded Visual C++ 4.0
Microsoft eMbedded Visual C++ 4.0 Service Pack 1
EP931X SDK
3.4.1 Microsoft eMbedded Visual C++ 4.0
System Requirements
To use Microsoft eMbedded Visual C++ 4.0 you need the following:
A desktop computer with a Pentium-II class processor, 450 MHz or faster
Microsoft Windows® 2000 Professional SP2, Microsoft Window 2000 Server
SP2, or Microsoft Windows XP Professional.
96 MB (128 MB recommended) memory for Windows 2000 Professional or
Windows XP Professional. 192 MB (256 MB recommended) memory for
Windows 2000 Server.
CD-ROM drive required
VGA or higher-resolution monitor. A Super VGA (800 x 600 or larger) monitor is
recommended.
Mouse or compatible pointing device.
200 MB hard disk space.
32
3.4.2 EP3915 SDK
The EP3915 SDK provides developers with access to an extensive set of functions that
are specific to the NP-880S hardware.
Step Installing the EP391X_SDK
1.
Download the
EP391X_SDK.msi file.
Double click the file’s name to
start the Setup Wizard.
2.
The installer will be prompted
for acceptance of a license
agreement.
Following that, the SDK should
install itself automatically on the
host machine without further
operator intervention.
3.
When installation is complete
the following message should
appear: “Completing the
EP931X Setup Wizard”. The
installer must press the “Finish”
button in the install window to
exit.
Open the eVC++, in WCE Configuration toolbars select EP931X.
33
3.5 Print
NP-880S support PCL language printer. You can connect a PCL printer at USB
Host port or via Network connect to a shared printer.
From Internet Explorer or user’s application menu click
“File” / ”Page Setup…” will appear print setup dialog.
After the “Page Setup…”, click “File” / “Print”, printer
will print out the data.
Printer:
PCL Inkjet: HP DeskJet series inkjet
printer. Support color printer.
PCL Laser: HP LaserJet printer.
Port:
COM1: 57600 / COM1: 9600: via COM1
RS232 connect to printer
IRDA: NP-880S doesn’t support
IRDA connect.
LPT1: When connect a USB printer to
NP-880S’s USB Host port will appear this
item.
Network: via network connect to a shared
printer.
34
Net Path:
When select “Network” will enable the
Net Path field. Key-in the computer name
and shared printer name.
Paper Size:
Draft Mode:
Desktop PC shares the printer.
35