1
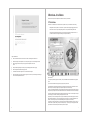
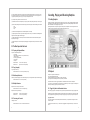
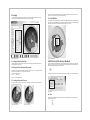
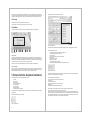
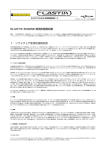
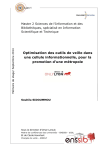
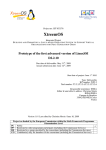
5 Creating User Presets
A user preset is an individualized compilation of samples from the factory presets. The settings of the samples are also saved in
the user presets. The upper keyboard (C4 to B6) is reserved for the creation of user presets.
Figure 06 Trigger Play Button
3.3 Bouncing & Export
One or more samples can be saved as WAV files in a directory on your hard drive. This procedure is known as “bouncing.” A popup
menu for this is called by holding the CTRL key and clicking with the mouse on a keyboard key (MAC) or right mouse click (PC).
Within the menu choose either
• “bounce loop original” or
• “bounce loop modified”
Figure 09 User Preset
The following method is recommended for the creation of a user preset:
5.1 Basic Method
to save either the original sample or the modified sample.
First load a factory preset onto the lower keyboard (C1 to B3) and find a sample for the user preset.
Alternatively you can easily drag and drop the samples out of Elastik by holding down the ALT-Button and drag them out of the
player.
Then, by holding the ALT key and Drag&Drop, copy the sample onto any key on the upper keyboard (C4 to B6).
It is also possible to copy several selected samples at once. The samples are mapped in order, starting at the target key and
ascending to the right.
To select more than one sample at a time, click on the samples while holding down the SHIFT key (for several samples listed together)
or with the APPLE key (MAC) / CTRL key (PC) for any single samples within the list.
IMPORTANT!
During the copy, the samples will automatically be synchronized to the master tempo (upper right next to the preset display). This
tempo is normally the host sequencer tempo, which should be set once at the beginning of a project. (See the chapter “Tempo
Synchronization.”)
In the standalone version an individualized tempo can be entered in the upper right master tempo field.
Tip: By clicking on the display “filter” the “map” tool can be selected for automatic mapping. (see the chapter “Multi Tool Area”) Here
the modes “slice map” and “chromatic map” can be selected. With these you can quickly and efficiently create interesting user
presets out of a single sample.
5.2 Saving and Opening
Figure 07 bounce loop
4 Tempo Synchronization
After selecting a factory preset, all the samples will initially be played in their original tempo. This tempo is shown in the field “bpm.”
To play all the samples in the tempo set in the host sequencer, click in the master tempo field (in the upper right next to the preset
display) on the “S” button. The samples of this preset will then be converted to the host sequencer’s tempo.
To the left of the preset selection display is an icon for saving and loading user presets. When this icon is clicked for the first time
after opening the Elastic engine, a “Save as” dialog is opened to set the storage location and name of the user preset. Subsequent
clicking on the icon will save the current settings with this name. For other options regarding the saving and loading of user presets,
hold the CTRL key while clicking on the icon. The following menu will be opened:
• save as...
• new preset...
• open preset...
The order of the conversion begins with the C1 and ascends. Depending on the speed of the computer, the conversion almost occurs
in real-time. The progress of the conversion can be read in the red progress bar underneath the keyboard. In the default setting all
rhythmic samples will be converted with the “Drum” algorithm, all others with the “Tonal” mode.
By selecting a new preset, the synchronization with the host is deactivated, so that you can hear the samples in their original tempo.
Hearing the samples in the original tempo is important because it allows you to get a feel for the different ways you could use it.
Figure 10 Save Menu
Under “save as…” you can set the preset name and location of the current user preset. If this has already been done once, you
only have to click on the icon to save the current settings to the same file.
By clicking on “new preset…” the current keyboard layout (upper and lower keyboards) is erased so that a new preset can be created.
With “open preset...” you can reload a saved preset.
The extension for a user preset is “*.elt”.
Figure 08 Tempo Synchronization
10
11