1
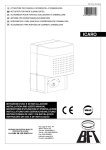
D811418 ver. 01 08-03-04 GB ACTUATOR FOR RACK SLIDING GATES ICARO UL INSTALLATION AND USER'S MANUAL Via Lago di Vico, 44 36015 Schio (VI) Tel.naz. 0445 696511 Tel.int. +39 0445 696533 Fax 0445 696522 Internet: www.bft.it E-mail: [email protected] D811418_01 2 - ICARO UL Ver. 01 D811418_01 USER’S MANUAL ENGLISH Thank you for buying this product, our company is sure that you will be more than satisfied with the product’s performance. The product is supplied with a “Warnings” leaflet and an “Instruction booklet”. These should both be read carefully as they provide important information about safety, installation, operation and maintenance. This product complies with the recognised technical standards and safety regulations. WARNINGS Correct controller operation is only ensured when the data contained in the present manual are observed. The company is not to be held responsible for any damage resulting from failure to observe the installation standards and the instructions contained in the present manual. 1) GENERAL OUTLINE The ICARO actuator offers ample installation versatility, thanks to the extremely low position of the pinion, the compactness of the actuator and to the height and depth which can be very easily adjusted. It is equipped with an antisquash electronic device, which ensures utmost safety. The emergency manual release can be activated very easily by means of a knob featuring a personalised key. The gate stop is controlled by electromechanical end-of-stroke microswitches or, for very cold areas, by proximity sensors. The control board can be built-in or installed onto a separate cabinet. The descriptions and illustrations contained in the present manual are not binding. The Company reserves the right to make any alterations deemed appropriate for the technical, manufacturing and commercial improvement of the product, while leaving the essential product features unchanged, at any time and without undertaking to update the present publication. 2) SAFETY If correctly installed and used, this automation device satisfies the required safety level standards. However, it is advisable to observe some practical rules in order to avoid accidental problems. Before using the automation device, carefully read the operation instructions and keep them for future reference. • Keep children, persons and things outside the automation working area, particularly during operation. • Keep radio control or other control devices out of children’s reach, in order to avoid any unintentional automation activation. • Do not intentionally oppose the leaf movement. • Do not attempt to open the gate by hand, if the actuator has not been released by means of the appropriate release knob. • Do not modify the automation components. • In case of malfunction, disconnect the power supply, activate the emergency release to gain access to the actuator and request the assistance of a qualified technician (installer). • Before proceeding to any external cleaning operation, disconnect the mains powers supply. • Keep the photocell optical components and luminous signal indication devices clean. Check that the safety devices (photocells) are not obscured by branches or shrubs. • For any direct assistance to the automation system, request the assistance of a qualified technician (installer). • Have qualified personnel check the automation system once a year, and in particular control mechanism for force, speed, and sensitivity. • Fig. 1 THE ENTRANCE IS FOR VEICHLES ONLY. PEDESTRIANS MUST USE SEPARATE ENTRANCE. 1 3) MANUAL RELEASE The manual or emergency release should only be activated when the gate has to be opened manually or whenever the automation is not correctly or totally functioning. To carry out the emergency manoeuvre, proceed as follows: • Insert the personalised key into the lock and turn it anticlockwise by 90°. • Turn the release knob clockwise (fig. 1) as far as it will go. The pinion will therefore become idle and the gate can then be opened manually. • Push the leaf of the gate all the way down to the end-of-stroke. Warning: do not push the gate leaf roughly, but move it gently all along its stroke. The key can be removed from the lock only after the knob has been moved back to its initial position (motor-driven operation) • To re-activate motor-driven control, turn the knob anticlockwise as far as it will go. Move the key back to its closing position, remove it and then store it in a safe place, which is known to anyone who may need the knob. 2 4) MAINTENANCE AND DEMOLITION The maintenance of the system should only be carried out by qualified personnel regularly. The materials making up the set and its packing must be disposed of according to the regulations in force. CLOSE OPEN ICARO UL Ver. 01 - 3 INSTALLATION MANUAL Thank you for buying this product, our company is sure that you will be more than satisfied with the product’s performance. The product is supplied with a “Warnings” leaflet and an “Instruction booklet”. These should both be read carefully as they provide important information about safety, installation, operation and maintenance. This product complies with the recognised technical standards and safety regulations. • • 1) GENERAL OUTLINE The ICARO actuator offers ample installation versatility, thanks to the extremely low position of the pinion, the compactness of the actuator and to the height and depth which can be very easily adjusted. It is equipped with an antisquash electronic device, which ensures utmost safety. The emergency manual release can be activated very easily by means of a knob featuring a personalised key. The gate stop is controlled by electromechanical end-of-stroke microswitches or, for very cold areas, by proximity sensors. The control board can be built-in or installed onto a separate cabinet. The gearmotor (fig. 1) is made up of the following: M Motor R Worm screw - worm wheel reduction gear S Electromechanical end-of-stroke unit or proximity sensor P Pinion with release C Control board with capacitor E Obstacle detection device (Encoder) 2) GENERAL SAFETY WARNING! An incorrect installation or improper use of the product can cause damage to persons, animals or things. • • • • • • • • • • • • • • • • • • • • The “Warnings” leaflet and “Instruction booklet” supplied with this product should be read carefully as they provide important information about safety, installation, use and maintenance. Scrap packing materials (plastic, cardboard, polystyrene etc) according to the provisions set out by current standards. Keep nylon or polystyrene bags out of children’s reach. Keep the instructions together with the technical brochure for future reference. This product was exclusively designed and manufactured for the use specified in the present documentation. Any other use not specified in this documentation could damage the product and be dangerous. The Company declines all responsibility for any consequences resulting from improper use of the product, or use which is different from that expected and specified in the present documentation. Do not install the product in explosive atmosphere. The Company declines all responsibility for any consequences resulting from failure to observe Good Technical Practice when constructing closing structures (door, gates etc.), as well as from any deformation which might occur during use. Disconnect the electrical power supply before carrying out any work on the installation. Also disconnect any buffer batteries, if fitted. Fit an omnipolar or magnetothermal switch on the mains power supply, having a contact opening distance equal to or greater than 3mm. Check that a differential switch with a 0.03A threshold is fitted just before the power supply mains. Check that earthing is carried out correctly: connect all metal parts for closure (doors, gates etc.) and all system components provided with an earth terminal. Fit all the safety devices (photocells, electric edges etc.) which are needed to protect the area from any danger caused by squashing, conveying and shearing. Position at least one luminous signal indication device (blinker) where it can be easily seen, and fix a Warning sign to the structure. The Company declines all responsibility with respect to the automation safety and correct operation when other manufacturers’ components are used. Only use original parts for any maintenance or repair operation. Do not modify the automation components, unless explicitly authorised by the company. Instruct the product user about the control systems provided and the manual opening operation in case of emergency. Do not allow persons or children to remain in the automation operation area. Keep radio control or other control devices out of children’s reach, in order to avoid unintentional automation activation. The user must avoid any attempt to carry out work or repair on the automation system, and always request the assistance of qualified 4 - ICARO UL Ver. 01 personnel. Anything which is not expressly provided for in the present instructions, is not allowed. • • • • INSTALL THE GATE OPERATOR ONLY WHEN: The operator is appropriate for the construction of the gate and the usage Class of the gate, All exposed pinch points are eliminated or guarded, The operator is intended for installation only on gates used for vehicles. Pedestrians must supplied with a separate access opening, The gate must be installed in a location so that enough clearance is supplied between the gate and adjacent structures when opening and closing to reduce the risk of entrapment. Swinging gates shall not open into public access areas, The gate must be properly installed and work freely in both directions prior to the installation of the gate operator. Do not over-tighten the operator clutch or presure relief valve to compensate for a damaged gate. FOR GATE OPERATORS WITH HOLD-TO-RUN CONTROL: • The gate operator controls must be placed so that the user has full view of the gate area when the gate is moving, • A sign with the message “WARNING” must be positioned near the controls. The characters for the writing should be at least 6.4 mm high. The following statement should also be indicated: “Moving Gate Has the Potential of Inflicting Injury or Death - Do Not Start Gate Unless Path is Clear”. • An automatic closing device (such as a timer, loop sensor, or similare device) shall not be employed • No other activation device shall be connected. Controls must be far enough from the gate so that the user is prevented from coming in contact with the gate while operating the controls. controls intended to be used to reset an operator after 2 sequential activations of the entrapment protection device or devices must be located in the line-of-sight of the gate. Outdoor or easly accesible controls shall have a security feature to prevent unauthorized use. All warnings signs and placards must be installed where visible in the area of the gate. FOR GATE OPERATORS PROVIDED WITH SENSOR FOR CONTACTFREE DETECTION: • See instructions on the placement of non contact sensor for each type of application, • Care shall be exercised to reduce the risk of nuisance tripping, such as when a vheicle, trips the sensor while the gate is still moving, and • One or more non-contact sensor shall be located where the risk of entrapment or obstruction exist, such as the perimeter reachable by a moving gate. FOR GATE OPERATORS PROVIDED WITH CONTACT DETECTION (SAFETY EDGE OR SIMILAR): • On or more contact sensor shall be located at the pinch point of a vehicular vertical pivot gate. • A hardwired contact sensor shall be located and its wiring arranged so that the communication between the sensor and the gate operator is not subjected to mechanical damage. • A wireless contact sensor such as one that transimts radio frequency (RF) signals the gate operator for entrapment protection functions shall be located where the transimission of the signals are not obscrtucted or impeded y building structure, natural landscaping or similar obstruction. A wireless contact sensor shall function under the intended end-use conditions. • • • • • IMPORTANT SAFETY INSTRUCTIONS WARNINGS: to reduce the risk of injury or death: Read and follow all instructions. Never let children operate or play with gate control. Keep the remote control away from children. Always keep people and objects away from the gate. NO ONE SHOULD CROSS THE PATH OF THE MOVING GATE. Test the gate operator montly. The gate MUST reverse on contact with a rigid object activates the non-contact sensor. After adjusting the force or the limit of travel, reset the gate operator. Failure to adjust and retest the gate operator properly can increase the risk of injury or death. Use the emergency realease only when the gate is not moving. D811418_01 ENGLISH D811418_01 INSTALLATION MANUAL • • • • • • All openings of a horizontal slide gate are guarded or screened from the bottom of the gate to a minimum of 4 feet (1.22 m) above the ground to prevent a 2-1/4 inch (57.2 mm) diameter sphere from passing through the openings anywhere in the gate, and in that portion of the adjacent fence that the gate covers in the open position, All exposed pinch points are eliminated or guarded, and guarding is supplied for sliding gates exposed rollers. Controls must be far enough from the gate so that the user is prevented from coming in contact with the gate while operating the controls. Controls intended to be used to reset an operator after 2 sequential activations of the entrapment protection device or devices must be located in the line-of-sight of the gate. Outdoor or easily accessible controls shall have a security feature to prevent unauthorized use. KEEP GATES PROPERLY MAINTAINED. Read the owners manual. Have a qualified service person make repairs to gate hardware. THE ENTRANCE IS FOR VEICHLES ONLY. PEDESTRIANS MUST USE SEPARATE ENTRANCE. Save these instructions. 3) TECHNICAL SPECIFICATIONS Power supply: .................................. 120V ±10% single-phase 60Hz (*) Motor revolutions: ...................................................................... 1400 min-1 Absorbed power: ............................................................................. 750 W Capacitor: ........................................................................................ 100 µF Thermal protection: ......................................................................... 140 °C Insulation class: ........................................................................................ F Reduction gear ratio: .......................................................................... 1/38 Output revolutions: ........................................................................ 37 min-1 Pinion pitch: .................................................. 0.15” (4 mm) 18 or 25 teeth Leaf speed: . 18 teeth:29.5ft/min(9m/min) 25 teeth:39.3ft/min(12m/min) Max. capacity: ................ with pinion Z18: 4.496lbf (20.000 N (≈2000 kg)) with pinion Z25: 2.248lbf (10.000 N (≈1000 kg)) Max. torque: ................................................................... 29.5 lbf/ft (40 Nm) Impact reaction: ............................... Obstacle detection device (Encoder) Lubrication: ................................................................................... ERGOIL Manual manoeuvre: ........................................... Mechanical knob release No. manoeuvres in 24 hours: ....................................... continuous service Control unit: ............................................................................ LEO-MA UL Weather conditions: ................ from 5°F to +140°F (from -15°C to +60°C) Protection degree: ............................................................................. IP 24 Dimensions: .................................................................................. See fig.2 Actuator weight: ................................................................................. 25 kg (*) Special voltages on request 4) PRELIMINARY CHECKS Before proceeding to any installation work, check that the gate structure conforms to whatever is prescribed by the current standards, and in particular that: • The gate sliding track is linear and horizontal, and the wheels are suitable for supporting the gate weight. • The gate manual operation can be carried out smoothly along its entire run, and there is no excessive side slipping. • A correct play is provided between the upper guide and the gate to ensure regular noiseless movement. • The opening and closing gate stops are positioned. • The established position for gearmotor fixing allows the emergency manoeuvre to be carried out smoothly and safely. In the case where the elements checked do not meet the above requirements, proceed to carrying out the necessary corrective actions or replacements. WARNING: Remember that motor drive facilitates the use of the gate, but does not solve the problems due to faults and defects in the installation or failure to maintain the gate itself. Fix the “Warning” sign provided (Fig. 14) on both sides of the gate, stick the adhesive labels provided on the three visible sides of the operator (Fig. 2). Take the product out of its packing and inspect it for damage. Should it be damaged, contact your dealer. Remember to dispose of its components (cardboard, polystyrene, nylon, etc.) according to the current prescriptions. 5) BASE PLATE ANCHORING 5.1) Standard position • Dig a hole where the cement pad with the buried base plate log bolts is to be placed in order to fix the reduction gear unit (fig.3). If the sliding track is already there, digging must be partly carried out in the track foundation casting. This way, should the track foundation casting sag, the gearmotor base would also lower, thus maintaining the play between ENGLISH pinion and rack (approximately 0.04”-0.08” (1-2 mm)). • Position the base plate according to the dimensions specified in fig.4. • The pinion symbol printed on the base plate must be visible and directed towards the gate. This also ensures the correct positioning of the raceways for electrical connections. • Let the flexible pipes containing electrical cables protrude from the base plate. • In order to keep the base plate in its correct position during installation, it may be useful to weld two iron flat bars under the track, and then weld the log bolts onto them (fig.3). • Make a concrete casting in such a way as to embody the base plate casting into that of the gate track. • Accurately check that: The positioning dimensions are correct. That the base plate is well levelled. That the 4 stud threads are well clear of cement. Let the casting harden. 5.2) Other positions The gearmotor can be positioned in different ways. As an example, fig.5 illustrates a particular type of installation. In the case where the gearmotor is not fixed on the level of the sliding track (Standard position), you must ensure that the gearmotor is tightly secured also in relation to the gate position, so as to maintain a correct play (0.04”-0.08”(1-2mm)) between rack and pinion. The current safety standards with respect to persons, animals and things must be strictly observed, and in particular risks of accidents due to squashing in the area of pinion-rack meshing, as well as other mechanical risks, must be carefully avoided. All the critical spots must be protected by safety devices in compliance with the current prescriptions. 6) GEARMOTOR FIXING When the casting has hardened, observe fig. 6 and proceed as follows: • Position an M10 nut on each of the tie rods, keeping a distance of at least 1” (25mm) from the base to allow the gearmotor to be lowered after the installation is completed, or for subsequent adjustments of the play between pinion and rack. • Position a plate “P” supplied as standard on each pair of tie rods and, with the help of a level, adjust the plane in both directions. • Remove the cover and screw-cover guard from the gearmotor, and position the reduction gear unit on the four tie rods with the pinion facing the gate. • Position the two upper plates P (Fig.6) and tighten the four locking nuts of the gearmotor. • Adjust the depth of the gearmotor, making it slide in the appropriate slots found in the base, and fix it at a distance between pinion and gate which is adequate to the type of rack to be installed. The rack teeth must mesh into the pinion along their entire width. In the paragraph headed “Rack fitting” we specify the measurements and installation methods of the most widely used types of rack. 7) RACK FITTING A rack having a 4 tooth pitch must be fitted to the gate. As far as the length is concerned, this must include the passage space, as well as the space for securing the brackets activating the limit microswitches, and for the pinion meshing section. There are different types of rack, each one differing in terms of capacity and gate fixing method. The Company markets three types of racks, which are. 7.1) Mod. CFZ (Fig.7). Galvanised iron rack - 0.8”x0.8” (22x22mm) section - supplied in 6.5ft (2 metre) lengths - capacity over 4409 lb (2000kg - ≈ 20000N). First weld these pieces onto an adequate iron angle bar and then weld the lot to the gate. Besides maintaining the distance between the rack and the side of the gate, the angle bar makes it easy to fix the rack to the gate, even when the latter is subject to slight side slipping. When join welding the various rack pieces, you are advised to arrange a section of rack as in (fig.8) to ensure a correct pitch along the entire length of the rack. 7.2) Mod. CPZ (Fig.7). Plastic rack - 0.8”x0.8” (22x22mm) - supplied in 6.5ft (1- metre) lengths max. capacity 1102 lb (500kg - ≈ 5000N). This model is to be fixed to the gate by means of normal or self-threaeSng screws. Also in this case, you are advised to insert a section of rack the other way round in the joint between the various pieces, so as to maintain the correct tooth pitch. This type of rack is quieter and allows height adjustments to be made even after having been fixed, using the slots provided. 7.3) Mod. CVZ (Fig.7) Galvanised iron rack - 1.18”x 0.47” (30x12mm) section - supplied in 6.5ft (1metre) lengths - threaded spacers to be welded - max. capacity 4409 lb ICARO UL Ver. 01 - 5 INSTALLATION MANUAL (2000kg - ≈ 20000N). Having fixed the spacers in the middle of each of the slots in the various rack pieces, weld the spacers to the gate. Also in this case, arrange a section of rack the other way round in the joining points of the various rack pieces to ensure a correct tooth pitch. The screws which fix the rack to the spacers allow the rack to be adjusted in height. 7.4) Rack fitting To fit the rack, proceed as follows: • Activate the emergency release by rotating the appropriate release knob (See paragraph “Emergency manoeuvre”). • Rest the rack end on the control pinion and secure it (by welding or using screws) in correspondence with the pinion, while sliding the gate along by hand (fig. 9). • In the case of incorrect gate alignment (excessive side curving) which cannot be corrected, place a few shims between the rack and gate in order to ensure continuous centring of the rack with respect to the pinion (fig. 10). DANGER - The welding operation is to be carried out by a competent person who must be provided with all the personal protection equipment required by the current safety standards. 8) PINION ADJUSTMENT Having finished fixing the rack, the rack-pinion play needs to be adjusted to approximately 0.08” (2mm) (fig.6): this is obtained by slackening the four M10 nuts under the gearmotor base by approximately 0.08” (2mm), and then securing the four upper nuts. Make sure that the rack and pinion are aligned and centred (fig.10). WARNING - Remember that the rack and pinion life strictly depends on their correct meshing. 9) ELECTROMECHANICAL LIMITING DEVICES The operation must be carried out with the emergency release activated and the mains power supply disconnected. The runners which control the limiting devices are to be positioned at both ends of the rack. - Push the gate fully open by hand. - Position the opening end-of-stroke runner (fig.11) so that it intercepts the microswitch control lever and makes it trigger. Having identified the correct position, tighten the runner screws. - Push the gate fully closed by hand. - Position the closing end-of-stroke runner (fig.11) so that it intercepts the microswitch control lever and makes it trigger. Having identified the correct position, tighten the runner screws. - The runners must lock the gate before this intercepts the mechanical backstops placed on the track. The closing end-of-stroke runner adjustment must be made in such a way as to leave a clearance of approximately 2” (50mm) between the gate and the fixed swing leaf, as prescribed by the current safety standards, otherwise fit an electric edge at least 2” (50 mm) thick (fig.12). 10) GATE BACKSTOPS DANGER - The gate must be provided with mechanical backstops, both on opening and closing, in order prevent it from coming out of the upper guide (fig.13); the backstops must be tightly secured to the ground, a few centimetres beyond the electrical stop point. 11) ELECTRICAL INSTALLATION SETUP Lay out the electrical installation as indicated in Fig. 14, making reference to the current national standards for electrical installations. Warning! For the connection to the power supply, use a multipolar cable having minimum 3x1.5 sq mm cross section (16AWG) and complying with the current standards (UL1015). Connect the control and safety devices in compliance with the previously mentioned technical installation standards. The cables (mains and auxiliary) must be distinctly separated in their cable clamp (P1-P2/Fig.15). Fig.14 shows the number of connections and their cross sections for a length of approximately 328ft (100 metres); for greater lengths, calculate the cross section for the true automation load. The main automation components are (fig.14): I Type-approved adequately rated omnipolar circuit-breaker with at least 3-mm contact opening, provided with protection against overloads and short circuits, suitable for cutting out automation from the mains. If not already installed, place a type-approved omnipolar circuit-breaker with a 0.03A threshold just before the 6 - ICARO UL Ver. 01 QR S AL M P Fte, Fre T automation system. Control panel and incorporated receiver. Key selector. Blinker with tuned antenna. Actuator Wall-mounted pushbutton panel. Pair of external photocells. 1-2-4 channel transmitter. 12) TERMINAL BOARD CONNECTIONS First pass the appropriate electric cables through the raceways and fix the various automation components to the chosen points, then connect them following the directions and diagrams contained in the control unit instruction manual. Carry out phase, neutral and (compulsory) earth connections. The protection wire (earth) with yellow/green insulating sheath must be connected to the appropriate terminals marked by their symbol. Operate the automation only after having connected and checked all the safety devices. The mains power supply cables must be stripped as little as possible; the power supply cable earth wire must be stripped for a greater length, in order to reach the terminal purposely arranged in the box (Fig. 15 ref. “A”). The P1 cable-clamp is reserved for the mains power supply cables, the P2 cable-clamp is reserved for the accessory cables and safety devices. The cables must be tied by additional fastening next to the terminals, by means of clips for example. All the operator wiring operations must be carried out by qualified personnel. For actuator wiring and accessory connection, refer to the relevant instruction manuals. The control panels and accessories must be suitable for use and conform to current standards. WARNING - If the opening direction is not correct, invert the motor connections no. 6 and 8 and connections no. 25 and 26 of the opening and closing limit switches. 13) MOTOR TORQUE SETTING The setting of the motor torque is electronically controlled by an encoder. Refer to the LEO control board instructions for a correct setting of the electronic antisquash safety device. WARNING! The ICARO actuator does not offer the possibility of adjusting the safety clutch. It is therefore necessary to use a control board prearranged for the electronic control of the motor torque. 14) MANUAL RELEASE The manual or emergency release should only be activated when the gate has to be opened manually or whenever the automation is not correctly or totally functioning. To carry out the emergency manoeuvre, proceed as follows: • Insert the personalised key into the lock and turn it anticlockwise by 90°. • Turn the release knob clockwise (Fig. 16) as far as it will go. The pinion will therefore become idle and the gate can then be opened manually. • Push the leaf of the gate all the way down to the end-of-stroke. Warning: do not push the gate leaf roughly, but move it gently all along its stroke. The key can be removed from the lock only after the knob has been moved back to its initial position (motor-driven operation) • To re-activate motor-driven control, turn the knob anticlockwise as far as it will go. Move the key back to its closing position, remove it and then store it in a safe place, which is known to anyone who may need the knob. 15) INSTALLATION CHECK Before the automation device finally becomes operational, scrupulously check the following conditions: • Check that all the safety devices (limit microswitches, photocells, electric edges etc) operate correctly. • Check that the rack and pinion are correctly meshed (minimum play 2mm). • Check that the pushing force of the gate is within the limits provided for by the current standards. • Check that the opening and closing end-of-stroke runners are correctly positioned and tightly secured. • Check the starting and stopping operations using the manual control. • Check the starting and stopping operations using the remote radio control. • Check the normal or customised operation logic. D811418_01 ENGLISH D811418_01 INSTALLATION MANUAL 16) AUTOMATION DEVICE USE Since the automation device can be controlled both remotely and in sight, by means of a radio control device or a button, all the safety devices must be frequently checked in order to ensure their perfect efficiency. WARNING! In the event of any safety device malfunction, request immediate assistance from qualified personnel. Children must be kept at a safe distance from the automation operation area. ENGLISH The descriptions and illustrations contained in the present manual are not binding. The Company reserves the right to make any alterations deemed appropriate for the technical, manufacturing and commercial improvement of the product, while leaving the essential product features unchanged, at any time and without undertaking to update the present publication. 17) AUTOMATION CONTROL The use of this control device allows the gate to be opened and closed automatically. There are different types of controls (manual, radio control, magnetic card access etc.) depending on the installation requirements and characteristics. For the various control systems, see the relevant instructions. The installer undertakes to instruct the user about correct automation operation, also pointing out the actions to be taken in case of emergency. 18) MAINTENANCE WARNING! Before proceeding to any maintenance, disconnect the mains power supply and, if the battery is fitted, one of its poles. These are the check and maintenance operations to be carried out: • Check the condition of lubrication of the metal racks once a year. • Keep the sliding track always clean and free from debris. • Occasionally clean the photocell optical elements. • Have a qualified technician (installer) check the correct torque limit setting. • When any operational malfunction if found, and not resolved, disconnect the mains power supply and request the assistance of a qualified technician (installer). When the automation controller is out of service, you can activate the manual release device (see paragraph on “Emergency manoeuvre”) in order to set the pinion idling and therefore allow the gate to be opened and closed by hand. 19) NOISE The environmental noise produced by the gear-motor in normal operation conditions is constant and does not exceed 70 dB (A). 20) SCRAPPING Materials must be disposed of in conformity with the current regulations. In case of scrapping, the automation devices do not entail any particular risks or danger. In case of materials to be recycled, these should be sorted out by type (electrical components, batteries, copper, aluminium, plastic etc.). 21) DISMANTLING When the automation system is disassembled to be reassembled on another site, proceed as follows: • Disconnect the power supply and the entire electrical installation. • Remove the gearmotor from its fixing base. • Disassemble the control panel, if separate, and all installation components. • In the case where some of the components cannot be removed or are damaged, they must be replaced. 22) MALFUNCTIONS AND REMEDIES 22.1) Faulty actuator operation • Use an appropriate instrument to check that the actuator ends are supplied with voltage after the opening or closing command. • If the leaf movement is opposite to that required, reverse the motor drive connections in the control unit. 22.2) Faulty operation of electrical accessories In case of fault, all the control and safety devices can cause the automation controller to malfunction or lock. If the control unit is provided with selfdiagnosing facility, identify the fault. If a fault is found, it is advisable to disconnect and, if necessary, bridge, all the automation control devices one by one, until the one causing the fault is identified. Replace or repair it, then reset all the devices which were previously disconnected or bridged. For all the devices installed, make reference to the respective instruction manual. WARNING! Correct controller operation is only ensured when the data contained in the present manual are observed. The company is not to be held responsible for any damage resulting from failure to observe the standards relating to safety, installation and good technical practice, as well as the instructions contained in the present manual. ICARO UL Ver. 01 - 7 D811418_01 Fig. 1 C M M E S C R P P Fig. 2 7" (178mm) 0.43" 2.36" (60) 1.3" 0.84" (35) (21.5) 2.1" (55) 14.8" (376mm) 6.6" (168mm) 2.5" (65) 5.98"(152) 0.84" 1.3" (21.5) (35) 0.86" 10.2" (260mm) 0.42" (10.75) ) 1.24" (31.5) 10 3.54" (90) 2.22" (56.5) CENTRO PIGNONE - PIGNON CENTER AXI PIGNON - RITZELACHSE - CENTRO PINON Min.3.7" ( 94 mm) Min. 5.5" (141 mm) (Z25) Min. 5" (127 mm) (Z18) Fig. 4 0.8" (20) 10.6" (270mm) 8.5" (217mm) 0.42" (10.75) Fig. 3 8 - ICARO UL Ver. 01 8.89" (226mm) 40 m 0m 26 "( 20 "( 6.3 ( .2" 0.86" 22 . 10 m) m 160 1,5" (40) ) 00 "(1 3.9 ) mm 260 8.36" (212.5mm) 9" 3. " Øp 2.8 5 p Z2 8 Ø Z1 0.6" (16) 2.26" (57.5) 8.9" (226mm) 0.6" (16) 4.21"(107) Fig. 6 1-2mm D811418_01 Fig. 5 (10) >1.14" (>29) 2.55" (65) P P Fig. 8 0.5" (12) 1.45" (37) 0.78" (20) 0.8" (22) 1.25" (32) 1.10" (28) CFZ 1.18" (30) 0.8" (22) 1.18" (30) Fig. 7 CPZ (20) CVZ Fig. 9 Fig. 10 NO OK ICARO UL Ver. 01 - 9 SX D811418_01 Fig. 11 DX Fig. 13 Fig. 12 Min. 2" (50mm) Min. 0.8" (20mm) Fig. 14 AL C Fre QR S M G Fte W 18A 3x18AWG 4x P I 3x1 3x 16 AW G T 10 - ICARO UL Ver. 01 16AWG = 1.5mm2 18AWG = 1mm2 6AW G 2x18AWG 3x16AWG 2x16AWG RG58 3x16AWG D811418_01 Fig. 15 P1 P2 A GND A JP1 1 GND 2N 3L LEO Fig. 16 2 1 CLOSE OPEN ICARO UL Ver. 01 - 11 BFT S.p.a. ITALIA Via Lago di Vico, 44 36015 Schio (VI) Tel.naz. 0445 696511 Tel.int. +39 0445 696533 Fax +39 0445 696522 Internet: www.bft.it E-mail: [email protected]