1
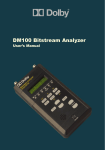
DM100 User’s Manual Dolby Laboratories, Inc. Corporate Headquarters Dolby Laboratories, Inc. 100 Potrero Avenue San Francisco, CA 94103-4813 Telephone 415-558-0200 Facsimile 415-863-1373 www.dolby.com European Headquarters Dolby Laboratories Wootton Bassett Wiltshire, SN4 8QJ, England Telephone (44) 1793-842100 Facsimile (44) 1793-842101 DISCLAIMER OF WARRANTIES: Equipment manufactured by Dolby Laboratories is warranted against defects in materials and workmanship for a period of one year from the date of purchase. All warranties, conditions, or other terms implied by statute are excluded to the fullest extent allowed by law. LIMITATION OF LIABILITY: It is understood and agreed that Dolby Laboratories’ liability whether in contract, in tort, under any warranty, in negligence or otherwise shall not exceed the cost of repair or replacement of the defective components and under no circumstances shall Dolby Laboratories be liable for incidental, special, direct, indirect, or consequential damages (including but not limited to damage to software or recorded audio or visual material), or loss of use, revenue, or profit even if Dolby Laboratories or its agents have been advised, orally or in writing, of the possibility of such damages. Dolby, the double-D symbol, AC-3, and Surround EX are trademarks of Dolby Laboratories. Toslink is a trademark of Toshiba Corporation. Windows is a trademark of Microsoft Corporation. 2000 Dolby Laboratories Inc; all rights reserved. Issue 1 Part No. 91751 S00/13416 i DM100 User’s Manual Table of Contents Note: References to the front-panel buttons are shown using brackets throughout this manual (e.g., “[STATUS]”). References to multiple button combinations means sequences, not simultaneous button presses. Press the first button, release, and press the next button. Chapter 1 Introduction 1.1 About the DM100..................................................... 1-1 Chapter 2 Getting Started 2.1 Power........................................................................ 2-1 Battery Installation........................................ 2-1 [Power] Button.............................................. 2-2 Battery Low LED.......................................... 2-2 Auto-Power Off ............................................ 2-2 External DC Power Supply........................... 2-3 2.2 Rear Belt Clip/Stand................................................. 2-3 2.3 Inputs........................................................................ 2-4 Dolby Digital ................................................ 2-4 Dolby E ......................................................... 2-4 PCM .............................................................. 2-4 Other ............................................................. 2-4 Video............................................................. 2-4 2.4 Outputs ..................................................................... 2-5 Headphone Output ........................................ 2-5 Speaker Output ............................................. 2-5 2.5 Hookup ..................................................................... 2-6 2.6 Quick Start ............................................................... 2-7 Making Your First Reading .......................... 2-7 Generating a Bitstream ................................. 2-7 ii DM100 User’s Manual Chapter 3 Operation: Status Mode 3.1 Main Status Screen................................................... 3-1 Dolby E ......................................................... 3-2 Dolby Digital ................................................ 3-3 PCM .............................................................. 3-4 3.2 The Status Menus ..................................................... 3-5 3.2.1 Dolby E Metadata Input Menu...................... 3-6 Px Prog Desc................................................. 3-7 Px Dialogue Lev............................................ 3-7 Px Channel Mode.......................................... 3-8 Px LFE Channel ............................................ 3-8 Px Bitstrm Mode ........................................... 3-8 Px Line Mode Pro ......................................... 3-9 Px RF Mode Pro............................................ 3-9 Px RF Ov Protect .......................................... 3-9 Px Center Dwnmx......................................... 3-10 Px Srnd Dwnmx ............................................ 3-10 Px Dolby Srnd............................................... 3-10 Px Mixing Level............................................ 3-11 Px Room Type .............................................. 3-11 Px Copyright ................................................. 3-11 Px Orig Bitstrm ............................................. 3-11 Px Extnd Bitstrm........................................... 3-12 Px DC Filter .................................................. 3-13 Px Lowpass Filt............................................. 3-13 Px LFE Filter................................................. 3-13 Px Srnd 3dB Attn .......................................... 3-13 Px Srnd Ph Shift............................................ 3-13 Px Begin Gain ............................................... 3-13 Px End Gain .................................................. 3-13 iii DM100 User’s Manual 3.2.2 Dolby Digital Metadata Input Menu............. 3-14 DD Dialogue Lev.......................................... 3-15 DD Channel Mode ........................................ 3-15 DD LFE Channel .......................................... 3-15 DD Data Rate................................................ 3-16 DD Bitstrm Mode ......................................... 3-16 DD Line Mode Pro ....................................... 3-17 DD RF Mode Pro.......................................... 3-17 DD Center Dwnmx ....................................... 3-17 DD Srnd Dwnmx .......................................... 3-18 DD Dolby Srnd ............................................. 3-18 DD Mixing Level.......................................... 3-18 DD Room Type............................................. 3-19 DD Copyright ............................................... 3-19 DD Orig Bitstrm ........................................... 3-19 DD Extnd Bitstrm ......................................... 3-20 DD Dual Mono MD...................................... 3-21 DD Format .................................................... 3-22 DD Sample Rate ........................................... 3-22 DD Bitstream ID ........................................... 3-22 DD Stream # ................................................. 3-23 3.2.3 AES3 Status Menu........................................ 3-24 3.2.4 Input Level Menu.......................................... 3-25 3.2.5 Generator Status Display .............................. 3-26 3.2.6 Video Reference Status Display ................... 3-26 3.2.7 Timecode Status Display .............................. 3-27 3.2.8 Error Statistics Menu .................................... 3-28 3.2.9 DM100 Firmware Version............................ 3-28 iv DM100 User’s Manual Chapter 4 Operation: Setup Mode The Setup Menus .............................................................. 4-1 4.1 Monitor Control........................................................ 4-2 4.2 Gen Control .............................................................. 4-4 4.3 AES3 Output ............................................................ 4-6 4.4 User Presets .............................................................. 4-7 4.5 I/O Control ............................................................... 4-8 4.6 System Settings ........................................................ 4-9 Chapter 5 Reference Information 5.1 Data Transfer ............................................................ 5-1 Test Bitstream Loading................................. 5-1 Data Logging................................................. 5-1 Firmware Upgrade ........................................ 5-2 Data Transfer Error Messages: ..................... 5-2 5.2 Unit Reset ................................................................. 5-3 Restore Default Settings................................ 5-3 Hardware Reset ............................................. 5-3 5.3 Connector Pinout Information.................................. 5-4 RS-232 Serial Port.................................................... 5-4 5.3.2 XLR Connectors ........................................... 5-4 5.3.3 Headphone Connector................................... 5-4 5.4 DM100 Specifications .............................................. 5-5 5.5 System Block Diagram............................................. 5-5 v DM100 User’s Manual Chapter 1 Introduction 1.1 About the DM100 The Dolby DM100 is a hand-held diagnostic tool that can monitor or generate Dolby Digital, Dolby E, and PCM bitstreams. The unit allows audio systems integrators and service engineers to quickly test the integrity and composition of these signals throughout a facility. The DM100 is intended for use in broadcast, cable, DBS, and post-production facilities, as well as DVD mastering and home theater installation. The DM100 accepts input signals via XLR, BNC, and Toslink™ connectors. The unit identifies the format of the input signal and activates the appropriate built-in decoder. The decoded analog signal, sent to a standard 1/8-inch stereo headphone jack, can be switched to monitor any two decoded channels, while a small built-in speaker can monitor the sum of any channel pair. A front-panel LCD displays Dolby Digital and Dolby E metadata information. Six front-panel LEDs indicate critical bitstream and system status information. A set of Dolby Digital, Dolby E, and PCM test bitstreams is stored in internal, nonvolatile RAM, and can be changed in the field via software download. The selected test bitstream is produced simultaneously on all output connectors. The unit can receive and decode an input signal while generating a test bitstream. The DM100 also features a pass-through mode that allows modification of the input signal’s AES channel status bits before passing the signal to the output connectors. (The input signal can be monitored simultaneously.) 1-1 DM100 User’s Manual Chapter 2 Getting Started 2.1 Power The DM100 is powered by four standard AA 1.5 V batteries or from an external 6V, 800 mA DC power supply via the power input connector. The internal batteries are disconnected when the external DC power supply is used. Battery Installation Push the cover as shown, and slide out. Insert four AA batteries with alternating positive terminals, and replace the cover. 2-1 DM100 User’s Manual Getting Started [Power] Button To turn on the DM100, press and hold the [Power] button down for two seconds. The display reads as shown for approximately one second while a self-test diagnostic runs. Model DM100 Unit Name The power-on process ends with the DM100 operating in the last-used state. If the diagnostic test fails, the Error LED lights and an error message is displayed. To turn off the DM100, press [Power] again. The display reads “Power Off,” and the unit shuts off. Power Off… Battery Low LED The front-panel battery LED flashes when the battery voltage drops below 4.3 V. If the battery voltage drops below 4.1 V, the DM100 display reads “Dead Battery” and the unit shuts off. Dead Battery… Auto-Power Off When the DM100 is powered from the batteries (external power supply not connected), the unit can be set to turn itself off after a selectable number of minutes with no user activity (5, 10, 15, or 30 minutes). This feature can be disabled. The factory default setting is 15 minutes. The wait time is set from the Setup menu under System Settings, Power Management. See section 4.6. 2-2 DM100 User’s Manual Getting Started External DC Power Supply When powered from the external power supply, the Power Management setting is ignored and the unit remains switched on. The LCD backlight and keypad backlights are also enabled, overriding the LCD Backlight setting. See section 4.6. 2.2 Rear Belt Clip/Stand The pull-out clip on the rear of the DM100 can be used as a handy belt clip, or a stand. Raise the clip by following these two steps: 1. Lift to Release 1 2 2. Pull 1 2 2-3 1 LIFT TO UNLATCH 2 PULL OUT DM100 User’s Manual 2.3 Getting Started Inputs Each input connector (XLR, BNC, or Toslink) is active when specifically selected, or, if the input selection is set to autodetect, the first input with a valid AES3 signal will become the active input. See section 4.5 for setting the input select function. See the specifications at the back of this manual for details on supported sample rates, impedances, etc. The Digital input format can be Dolby Digital, Dolby E, or PCM. Dolby Digital The DM100 accepts 16- and 32-bit Dolby Digital bitstreams. It also accepts AES3 data that contains multiple Dolby Digital bitstreams (i.e., one 16-bit mode bitstream in each AES3 channel). Dolby E The DM100 accepts 16-, 20-, and 24-bit Dolby E bitstreams at NTSC (27.97 Hz) and PAL (25 Hz) rates. PCM If the input signal does not contain a header indicating that a preencoded bitstream is being received, the DM100 assumes the input signal is PCM audio. Other The DM100 also accepts other non-audio data over AES3. In this case, the LCD will indicate that data is being received and the audio output will mute. Video The unit can use an analog composite NTSC or PAL black burst reference video signal for signal generation, via the Ref Video RCA connector. The input is internally terminated. 2-4 DM100 User’s Manual 2.4 Getting Started Outputs The XLR and BNC output connectors are always active. The Toslink connector is enabled when it is selected. The digital output signal can be: • Pass-through Dolby Digital, Dolby E, or PCM The output clock is locked to the digital input. Or • An internally generated Dolby Digital, Dolby E, or PCM test bitstream. The output clock can be locked to an internal 48 kHz clock, a digital input signal, or to 48 kHz derived from the video reference input. See section 4.5. Headphone Output The headphone output is used to monitor the decoded Dolby Digital, Dolby E, or PCM signal. Front-panel buttons adjust the headphone volume. Speaker Output The speaker output is used to monitor the decoded Dolby Digital, Dolby E, or PCM signal when headphones are not being used. The signal is a mono version of the headphone output. Front-panel buttons adjust the speaker volume. 2-5 DM100 User’s Manual 2.5 Getting Started Hookup The figure shows the locations for connecting components to the DM100. RCA F to BNC M Part Number 70218 Ref Video In BNC F to RCA M Part Number 70217 Toslink Cable Power Adapter Part Numbers: 54065 USA 54066 UK 54067 Europe 54068 Australia 2-6 DM100 User’s Manual 2.6 Getting Started Quick Start The DM100 is designed to be quick and intuitive to use. Follow these simple procedures to begin taking your first readings and generating your first test streams. Making Your First Reading 1. Power up the unit. 2. Connect the input signal to the appropriate connector. 3. Press [MON]. This resets all the internal monitoring setup functions to the defaults. The LEDs should display the signal type received, and the display will show information about the incoming signal. If you cannot see this information, press [STATUS], then use [ENTER], [ESC], and the [Up/Down] buttons to navigate through the status menus in order to view information about the incoming signal. See section 3.2. Adjust the audio level with the dedicated [Volume] buttons. Generating a Bitstream 1. Press [GEN] once. This will turn the generator on and output a PCM test signal. 2. To select other test streams, continue to press [GEN]. Different clock sources can be used for the generator; these can be set in the I/O Control Gen Clock Source setup menu. See section 4.5. To read the current status of the generator, press [STATUS] and navigate using the [Down] button until “Generator ENTER to View” is displayed. Press [ENTER] to see the current settings. See section 3.2.5. You can even connect the output of the DM100 to the input. By doing this you can listen to the test stream and view all of the streams’ settings. 2-7 DM100 User’s Manual Chapter 3 Operation: Status Mode After power-on, the DM100 defaults to Status mode, with the top-level main status screen displayed. Status mode is used for displaying, monitoring, and analyzing the input bitstream. 3.1 Main Status Screen The main status screen is the top level of the status menu tree. It displays one of the following possible combinations of information. The display shown below gives a typical example: Valid Dolby E bitstream Valid 32-bit Dolby Digital bitstream Valid 16-bit Dolby Digital packed in left channel Valid 16-bit Dolby Digital packed in right channel Two valid Dolby Digital bitstreams Valid PCM bitstream No incoming bitstream Dolby E Dolby Digital DD/PCM PCM/DD DD/DD PCM No Input Active Input Connector A Set to Autodetect B Set to BNC X Set to XLR O Set to Optical Dolby Digital B 3/2L 448kbps The following sections describe the information displayed on the second line for each type of input data. 3-1 DM100 User’s Manual Operation: Status Mode Dolby E When the incoming bitstream is Dolby E, the following information will be displayed: Dolby E 5.1+2 Program Configuration Invalid Dolby E program configuration 5.1+2 5.1+2x1 4+4 4+2x2 4+2+2x1 4+4x1 4x2 3x2+2x1 2x2+4x1 2+6x1 8x1 5.1 4+2 4+2x1 3x2 2x2+2x1 2+4x1 6x1 4 2+2 2+2x1 4x1 ******* 3-2 B 24bit 16bit 20bit 24bit Bit Depth DM100 User’s Manual Operation: Status Mode Dolby Digital When the incoming bitstream is Dolby Digital, the following information will be displayed: Dolby Digital B 3/2L 448kbps 1+1 1/0 2/0 3/0 2/1 3/1 2/2 3/2 3/0L 2/1L 3/1L 2/2L 3/2L “L”means the LFEenabled bit is set in the bitstream 3-3 56kbps 64kbps 80kbps 96kbps 112kbps 128kbps 160kbps 192kbps 224kbps 256kbps 320kbps 384kbps 448kbps 512kbps 576kbps 640kbps DM100 User’s Manual Operation: Status Mode PCM When the incoming bitstream is PCM, and the DM100 has locked to it, the following information will be displayed: PCM B 44.1 kHz 48 kHz 44.1 kHz 32 kHz Unknown Rate 3-4 DM100 User’s Manual 3.2 Operation: Status Mode The Status Menus From the top-level main Status display described above, you can step through the status menus by pressing the [Up] or [Down] button. Each menu below the top main Status display is described in the following manual sections. Dolby E 5.1+2 A 24bit Top level Status display (A typical display is shown) [Down] Dolby E MD ENTER to View Dolby E metadata menu [Down] Dolby Digital MD ENTER to View Dolby Digital metadata menu [Down] AES3 Status ENTER to View AES3 status menu [Down] Input Level ENTER to View Input level menu [Down] Generator ENTER to View Bitstream generator status display [Down] Video Ref 29.97 fps Video reference display [Down] Timecode 00:00:00:00 Dly N/A Timecode/Delay display [Down] Error Stats ENTER to View Error status menu [Down] Firmware Version 1.0.0.0 DM100 firmware version [Down] 3-5 DM100 User’s Manual 3.2.1 Operation: Status Mode Dolby E Metadata Input Menu After pressing [ENTER] to view this menu, press the [Down] or [Up] button to select the submenu options you wish to display. Dolby E MD ENTER to View Px Prog Desc DE Prog Config ENTER to View [Down] See page 3-2 for the list of possible program configurations displayed. Dolby E Prog 1 ENTER to View [Down] Dolby E Prog 2—8 23.98 fps 24 fps 25 fps [PAL] 29.97 fps [NTSC] 30 fps 50 fps 59.94 fps 60 fps **************** N/A (depending on Dolby E program configuration) [Down] DE Bit Depth 16, 20, or 24Bit [Down] DE Frame Rate 29.97 fps [Down] DE Guard Band 500 Lines [Down] Px Dialogue Lev [Down] Px Channel Mode [Down] Px LFE Channel [Down] Px Bitstrm Mode [Down] Px Line Mode Pro [Down] Px RF Mode Pro [Down] Px RF Ov Protect [Down] Px Center Dwnmx [Down] Px Srnd Dwnmx [Down] Px Dolby Srnd [Down] Px Mixing Level [Down] The number of video lines between xxx Lines the video reference frame boundary and the Dolby E frame boundary. Dolby E input not present or DM100 blank decode format is not Dolby E Video reference not present N/A Video reference not equal to Dolby E *** lines frame rate During an audio-follow-video switch, the Dolby E frame is in danger of corruption if the “lines” value displayed in this status screen is less than 8 or greater than 30 for 29.97-frame (NTSC), or, less than 7 or greater than 35 for 25-frame (PAL). Px Room Type [Down] Px Copyright [Down] Px Orig Bitstrm [Down] Px Extnd Bitstrm [Down] Px DC Filter [Down] Px Lowpass Filt [Down] Px LFE Filter [Down] Px Srnd 3dB Attn “Px” represents the selected program number, where x is a number between 1 and 8. Valid program numbers depend on the Dolby E program configuration. For example, 5.1+2 is two programs; therefore, only P1 and P2 are valid. Each metadata program parameter selection is described in the following sections. 3-6 [Down] Px Srnd Ph Shift [Down] Px Begin Gain [Down] Px End Gain DM100 User’s Manual Operation: Status Mode Px Prog Desc Dolby E program description display: Px Prog Descr Description text The DM100 has a 32-character buffer for each program, which stores the first characters in the description text field for that program. The display scrolls through the text automatically if the string is greater than 16 characters. Px Dialogue Lev A typical example is shown for the Dolby E Dialogue Normalization display: P2 Dialogue Lev –27 dB *************** –1 dB –2 dB –3 dB –31 dB N/A 3-7 DM100 User’s Manual Operation: Status Mode Px Channel Mode A typical example is shown for the Dolby E Channel Mode display: P2 Channel Mode 2/0 Stereo 1+1 1/0 Mono 2/0 Stereo 3/0 2/1 3/1 2/2 3/2 N/A Px LFE Channel P2 LFE Channel Disabled Disabled Enabled N/A Px Bitstrm Mode A typical example is shown for the Dolby E Bitstream Mode display: P2 Bitstrm Mode Main Complete Main Complete Main M&E Assc Visual Imp Assc Hear Imp Assc Dialogue Assc Commentary Assc Emergency Assc Voice Over Main Sv Karaoke N/A 3-8 DM100 User’s Manual Operation: Status Mode Px Line Mode Pro Px RF Mode Pro The Dolby E Line Mode and RF Mode Profile program parameters display the same second-line display. A typical example is shown for the RF Mode Profile display: P2 RF Mode Pro Music Standard If dynamic range control presets are present If actual dynamic range control data is present ±xx dB Press the [ENTER] button to toggle between a numeric display and a bar graph level display RF: –48 dB Line: –24 dB g g g|g g g 0 0 +48 dB +24 dB None Film Standard Film Light Music Standard Music Light Speech Invalid N/A Px RF Ov Protect RF overmodulation protection. P2 RF Ov Protect Disabled Disabled Enabled N/A 3-9 DM100 User’s Manual Operation: Status Mode Px Center Dwnmx A typical example is shown for the Dolby E Center Downmix display: P2 Center Dwnmx 0.500 (-6.0 dB) 0.707 (-3.0 dB) 0.596 (-4.5 dB) 0.500 (-6.0 dB) *************** N/A Px Srnd Dwnmx A typical example is shown for the Dolby E Surround Downmix display: P2 Srnd Dwnmx 0.707 (-3.0 dB) 0.707 (-3.0 dB) 0.500 (-6.0 dB) 0 (-999 dB) *************** N/A Px Dolby Srnd A typical example is shown for the Dolby E Surround Mode display: P2 Dolby Srnd Not Indicated Not Indicated Not Dolby Srnd Dolby Srnd *************** N/A 3-10 DM100 User’s Manual Operation: Status Mode Px Mixing Level A typical example is shown for the Dolby E Mixing Level display: P2 Mixing Level 80 dB 80 dB 81 dB 82 dB 111 dB Does Not Exist N/A Px Room Type A typical example is shown for the Dolby E Room Type display: P2 Room Type 80 dB Not Indicated Large Small **************** Does Not Exist N/A Px Copyright Px Orig Bitstrm A typical example is shown for the Dolby E Copyright display. The Original Bitstream program parameters displays the same second line: P2 Copyright No No Yes N/A 3-11 DM100 User’s Manual Operation: Status Mode Px Extnd Bitstrm A typical example is shown for the Extended Bitstream metadata display. Other possibilities are shown: Px Extnd Bitstrm ENTER to view Dolby E Preferred Downmix Status P2 Pref Dwnmx Lt/Rt Not Indicated Lt/Rt Lo/Ro ***************** Does Not Exist N/A Px Pref Dwnmx [Down] Px Lt/Rt C Dwnmx [Down] Dolby E Downmix Level Status Dolby E Surround EX Status Dolby E A/D Converter Type 1.414 (+3.0 dB) 1.189 (+1.5 dB) 1.000 (+0.0 dB) 0.841 (–1.5 dB) 0.707 (–3.0 dB) 0.595 (–4.6 dB) 0.500 (–6.0 dB) 0 (–999 dB) Not Active Does Not Exist N/A Px Lt/Rt S Dwnmx [Down] Px Lo/Ro C Dwnmx [Down] Px Lo/Ro S Dwnmx [Down] Px Dolby Srnd EX Not Indicated Not Srnd EX Dolby Srnd EX **************** Not Active Does Not Exist N/A [Down] Px A/D Conv Type Standard HDCD Does Not Exist N/A 3-12 DM100 User’s Manual Operation: Status Mode Px DC Filter Px Lowpass Filt P2 Lowpass Filt Disabled Px LFE Filter Px Srnd 3dB Attn Disabled Enabled N/A Px Srnd Ph Shift When any of these Dolby E metadata program is selected, the DM100 displays the same information as shown in the example. A typical example is shown for the Dolby E Lowpass Filter display. Px Begin Gain Px End Gain A typical example is shown for the Dolby E Begin Gain and End Gain display: Px Begin Gain ENTER to view P2 LFE Begin Gain +12.34 dB On Programs 1, 2, 3, 4 Gain ± yy.yy dB –inf N/A “N/A” indicates Dolby E input is not present or DM100 decode format is not Dolby E. Px L Bgn Gain [Down] On Programs 1–8 Px C Bgn Gain [Down] On Program 1 Px Ls Bgn Gain [Down] On Programs 1, 2, 3, 4 Px R Bgn Gain [Down] On Program 1 Px LFE Bgn Gain [Down] On Program 1 Px Rs Bgn Gain [Down] On Programs 1,2 3-13 Px S Bgn Gain DM100 User’s Manual 3.2.2 Operation: Status Mode Dolby Digital Metadata Input Menu After pressing [ENTER] to select this function, press the [Down] or [Up] button to select the parameter you wish to display. Dolby Digital MD ENTER to View DD Dialogue Lev [Down] DD Channel Mode [Down] DD LFE Channel [Down] DD Data Rate [Down] DD Bitstrm Mode [Down] DD Line Mode Pro [Down] DD RF Mode Pro [Down] DD Center Dwnmx [Down] DD Srnd Dwnmx [Down] DD Dolby Srnd [Down] DD Mixing Level [Down] DD Room Type [Down] DD Copyright [Down] DD Orig Bitstrm [Down] DD Extnd Bitstrm [Down] DD Dual Mono MD [Down] DD Format [Down] DD Sample Rate [Down] DD Bitstream ID [Down] DD Stream # Each Dolby Digital metadata parameter display is described in the following manual sections. 3-14 DM100 User’s Manual Operation: Status Mode DD Dialogue Lev A typical example is shown for the Dolby Digital Dialogue Normalization Status display: DD Dialogue Lev –27 dB *************** –1 dB –2 dB –3 dB –31 dB N/A DD Channel Mode A typical example is shown for the Dolby Digital Channel Mode display: DD Channel Mode 2/0 Stereo 1+1 1/0 Mono 2/0 Stereo 3/0 2/1 3/1 2/2 3/2 N/A DD LFE Channel A typical example is shown for the Dolby Digital LFE Status display: DD LFE Channel Disabled Disabled Enabled N/A 3-15 DM100 User’s Manual Operation: Status Mode DD Data Rate A typical example is shown for the Dolby Digital Data Rate display: DD Data Rate 448 kbps 56 kbps 64 kbps 80 kbps 96 kbps 112 kbps 128 kbps 160 kbps 192 kbps 224 kbps 256 kbps 320 kbps 384 kbps 448 kbps 512 kbps 576 kbps 640 kbps N/A DD Bitstrm Mode A typical example is shown for the Dolby Digital Bitstream Mode display: DD Bitstrm Mode Main Complete Main Complete Main M & E Assc Visual Imp Assc Dialogue Assc Commentary Assc Emergency Assc Voice Over Main Sv Karaoke N/A “N/A” indicates that a Dolby Digital input is not present, or the DM100 decode format is not Dolby Digital. 3-16 DM100 User’s Manual Operation: Status Mode DD Line Mode Pro DD RF Mode Pro The Dolby Digital Line Mode and RF Mode Profile parameters give the same display style. A typical example is shown for the RF Mode Profile display: DD RF Mode Pro ±xx dB If compre or dynrnge = 0, the level displayed is 0. If compre or dynrnge = 1, The level displayed is the decoded compr or dynrng value from the metadata. ±xx dB Press [ENTER] to toggle between a numeric display and a bar graph level display Rf: –48 dB Line: –24 dB g g g|g g g 0 0 +48 dB +24 dB DD Center Dwnmx A typical example is shown for the Dolby Digital Center Downmix display: DD Center Dwnmx 0.707 (–3.0 dB) 0.707 (-3.0 dB) 0.596 (-4.5 dB) 0.500 (-6.0 dB) *************** Not Active N/A 3-17 DM100 User’s Manual Operation: Status Mode DD Srnd Dwnmx A typical example is shown for the Dolby Digital Surround Downmix display: DD Srnd Dwnmx 0.707 (-3.0 dB) 0.707 (-3.0 dB) 0.500 (-6.0 dB) 0 (-999 dB) *************** Not Active N/A DD Dolby Srnd A typical example is shown for the Dolby Digital, Dolby Surround Mode display: DD Dolby Srnd Not Indicated Not Indicated Not Dolby Srnd Dolby Srnd *************** Not Active N/A DD Mixing Level A typical example is shown for the Dolby Digital Mixing Level status display: DD Mixing Level 80 dB 80 dB 81 dB 82 dB 111 dB Does Not Exist N/A 3-18 DM100 User’s Manual Operation: Status Mode DD Room Type A typical example is shown for the Dolby Digital Room Type display: DD Room Type Large Not Indicated Large Small ************** Does Not Exist N/A DD Copyright DD Orig Bitstrm A typical example is shown for the Dolby Copyright status display. The Original Bitstream program parameters displays the same second-line: DD Copyright Yes No Yes N/A 3-19 DM100 User’s Manual Operation: Status Mode DD Extnd Bitstrm A typical example is shown for the Extended Bitstream information display. Other possibilities are shown: Px Extnd Bitstrm ENTER to view Dolby Digital Preferred Downmix Status DD Pref Dwnmx Lt/Rt Not Indicated LtRt LoRo ***************** Does Not Exist N/A DD Pref Dwnmx [Down] DD Lt/Rt C Dwnmx [Down] Dolby Digital Downmix Level Status Dolby Digital Surround EX Status Dolby Digital A/D Converter Type 1.414 (+3.0 dB) 1.189 (+1.5 dB) 1.000 (+0.0 dB) 0.841 (–1.5 dB) 0.707 (–3.0 dB) 0.595 (–4.6 dB) 0.500 (–6.0 dB) 0 (–999 dB) Not Active Does Not Exist N/A DD Lt/Rt S Dwnmx [Down] DD Lo/Ro C Dwnmx [Down] DD Lo/Ro S Dwnmx [Down] DD Dolby Srnd EX Not Indicated Not Srnd EX Dolby Srnd EX **************** Not Active Does Not Exist N/A [Down] DD A/D Conv Type Standard HDCD Does Not Exist N/A 3-20 DM100 User’s Manual Operation: Status Mode DD Dual Mono MD After pressing [ENTER] to select this function, press the [Down] or [Up] button to select the Dual Mono metadata parameter you wish to display. A typical example screen is shown: DD Dual Mono MD ENTER to view Dual Mono Dialogue Normalization Status DM Dialogue Lev –27 dB ***************** –1 dB –2 dB –3 dB [Down] DM Mixing Level –31 dB N/A [Down] DM Room Type 80 dB 81 dB 82 dB Dual Mono Mixing Level Status [Down] DM RF Mode Pro 111 dB Does Not Exist N/A Dual Mono Room Type Status DM Dialogue Lev [Down] DM Line Mode Pro Not Indicated Large Small **************** Does Not Exist N/A ±xx dB If the Dolby Digital bitstream is not a Dual Mono bitstream, the level displayed will be 0 Press [ENTER] to toggle between a numeric display and a bar graph level display RF: –48 dB Line: –24 dB g g g|g g g 0 0 +48 dB +24 dB 3-21 DM100 User’s Manual Operation: Status Mode DD Format A typical example is shown for the Dolby Digital Format status display: DD Format Pro 32-bit Pro 32-bit Pro 16-bit Ch1 Pro 16-bit Ch2 Pro 16-bit Ch1&2 Consumer N/A DD Sample Rate A typical example is shown for the Dolby Digital Sample Rate status display: DD Sample Rate 48 kHz 48 kHz 44.1 kHz 32 kHz N/A DD Bitstream ID A typical example is shown for the Dolby Digital Bitstream ID status display: DD Bitstream ID 8 1 8 N/A 3-22 DM100 User’s Manual Operation: Status Mode DD Stream # A typical example is shown for the Dolby Digital Stream Number status display: DD Stream # 0 1 7 N/A 3-23 DM100 User’s Manual 3.2.3 Operation: Status Mode AES3 Status Menu After pressing [ENTER] to select this menu, press the [Down] or [Up] button to select the AES3 parameter you wish to display. A typical example screen is shown: AES3 Status ENTER to view AES3 Mode Professional Consumer Professional N/A AES3 Mode [Down] Audio Mode Audio Non-Audio N/A [Down] Emphasis Not Indicated Reserved (1) Reserved (2) Reserved (3) No Emphasis Reserved (5) 50/15-us Emph J.17 Emph N/A [Down] Freq Mode [Down] Sample Freq Locked Unlocked N/A Not Indicated 48 kHz 44.1 kHz 32 kHz N/A 3-24 DM100 User’s Manual 3.2.4 Operation: Status Mode Input Level Menu Press [ENTER] to display Input Level status. The display combinations are shown below. A typical example screen is shown: DE DD PCM blank Input is Dolby E Input is Dolby Digital Input is PCM No input, or channel not present in input bitstream Prog 1—8 Blank Displays program number if the input bitstream is Dolby E. Input not Dolby E Ch1 — 8 Input Level ENTER to view Ch1 DE Prog 1 L -10 dB –6 dB dB RMS dB Peak Press [ENTER] to toggle between numeric display and a bargraph RMS level display. g g g|g g g g g – 90 dB RMS level 0 dB Digital Full-Scale 3-25 Left Front Right Front Center Low Frequency Effects Left Surround Right Surround Mono Surround Ch 1 of a 1+1 stream Ch 2 of a 1+1 stream Channel not present in input bitstream L R C LFE Ls Rs S C1 C2 Blank DM100 User’s Manual 3.2.5 Operation: Status Mode Generator Status Display Press [ENTER] to display Generator status. The possible display combinations are shown below: Generator ENTER to view The unit is generating a non-PCM bitstream The unit is generating a PCM bitstream The unit is in pass through mode Generating bitstream name OR PCM name OR blank Pass Through Waveform is Sine or Square Frequency and level in dBFS Waveform is Frequency Sweep Frequency range and level in dBFS Waveform is Pink or White Noise Level in dBFS Waveform is Silence xxxxxHz –yydB F1—F2 –yydB –yydB blank See section 4.2 for selecting stream and waveform names and frequencies. 3.2.6 Video Reference Status Display A typical example is shown for the Video Reference input status display: Video Ref 29.29 fps Frame Rate No video input Video input present but invalid 3-26 25 fps 29.97 fps No Input Video Ref Error DM100 User’s Manual 3.2.7 Operation: Status Mode Timecode Status Display Timecode 00:00:00:00 Dly N/A Timestamp data burst delay, if present, indicates the encode latency referenced to A/V sync. A positive number indicates an advance in milliseconds from the reference, while a negative number indicates a delay. Timecode Dolby Digital Timecode data as derived from the timestamp of the stream currently being decoded (if present). Encoding latency can be conveyed to a downstream MPEG broadcast encoder with a Dolby Digital stream. Dolby E Timecode data as carried within the Dolby E bitstream, derived from the metadata. “00:00:00:00 N/A” The display shown above occurs under any of the following conditions: • • A Dolby E or Dolby Digital bitstream is not being decoded (this includes selecting the PCM portion of a 16-bit Dolby Digital/PCM stream). The current Dolby E timecode field is set to “invalid” or the Dolby Digital bitstream does not contain timecode. 3-27 DM100 User’s Manual 3.2.8 Operation: Status Mode Error Statistics Menu After pressing [ENTER] to select the Error Statistics menu, press the [Down] or [Up] button to select the error screen for each format. A typical example screen is shown. The display is a running count of a particular error. Error counts over 99 will display as 99. Press [ENTER] to reset a displayed error count to 00. Error Stats ENTER to view Dolby E Errors CRC:04 Dolby E Errors CRC:xx [Down] Dolby D Errors CRC:xx [Down] AES3 Errors 1 Parity, Code, Confidence P:aa CD:bb CF:cc [Down] AES3 Errors 2 Professional Channel Status CRC 3.2.9 CCRC:dd DM100 Firmware Version This last Status menu item displays the version of the firmware currently installed in your DM100. Firmware Version 1.0.0.0 Pressing [DOWN], [ESC], or [STATUS] returns the display to the top-level Main Status screen. 3-28 DM100 User’s Manual Chapter 4 Operation: Setup Mode Pressing [SETUP] switches the DM100 into Setup mode. Use this function to configure your DM100. All setup settings are saved when the unit is turned off. The settings shown in bold are the factory defaults. The Setup Menus DM100 Main Setup Monitor Control Monitor Control [Down] Gen Control [Down] AES3 Output [Down] User Presets [Down] I/O Control [Down] System Settings The following pages show the setup selections available for each of the menu choices. 4-1 DM100 User’s Manual 4.1 Operation: Setup Mode Monitor Control The Monitor Control menu contains all of the functions that control the audio output of the DM100. Decode Format chooses the type of bitstream the DM100 will decode. This will normally be set to Autodetect; however, it is possible to force the DM100 to decode only one stream type if required. Output Ch Map chooses which audio channels or downmix (Lt,Rt or Lo,Ro) are output from the headphone or speaker. Dolby E Prog Sel selects one of the available programs in a Dolby E stream for monitoring. DE Dialogue Lev applies the metadata parameter Dialogue Level or ’dialnorm’ to the audio output of a Dolby E stream. DD Stream Select and AES3 Ch Select choose which signal from a multiplexed Dolby Digital bitstream will be decoded. DD Compression applies Dolby Digital dynamic range control data to the audio output. RF is the heaviest compression and Custom the lightest. DD compression can be useful when listening in a noisy environment. 4-2 DM100 User’s Manual Operation: Setup Mode Monitor Control Decode Format Autodetect Dolby E Dolby Digital PCM L=Lo L=Lt L=L L=C L=Ls L=LFE Decode Format [Down] Output Ch Map R=Ro R=Rt R=R R=C R=Rs R=LFE [Down] Dolby E Prog Sel [Down] DE Dialogue Lev Program 1 Program 8—2 [Down] DD Stream Select Enabled Disabled [Down] AES3 Ch Select Autodetect Stream 0—7 [Down] DD Compression Autodetect Channel 1 Channel 2 Channel 1+2 [Down] Headphone Mode Line Mode RF Mode Custom Stereo Mono 4-3 DM100 User’s Manual 4.2 Operation: Setup Mode Gen Control The Gen Control menu contains all of the settings for the bitstream generator. Output Mode switches the generator on or off, either passing through the input signal to the output connectors or connecting the generated signal to the output connectors. Gen Stream Sel selects the generator output stream from a list of Dolby E, Dolby Digital, and PCM streams. There is a whole host of settings for the PCM generator signal, allowing sine, square, sweep, and pink or white noise signals to be created. DE Offset allows the Dolby E bitstream to be placed a number of lines away from the video sync point (a valid video reference input is needed for this function). DD Ch Mode chooses where to place a Dolby Digital stream in the output AES3 stream (Channel 1+2 is the usual setting). New bitstreams may be uploaded to the DM100 using the Upload Bitstream function. To load and store new streams, connect a Windows® PC to the DM100 using the supplied cable. The baud rate is fixed at 115.2 kbps. Activate the Upload Bitstream function on the DM100 and follow the prompts on the PC software supplied. During the upload, the DM100 display will show progress. When complete, the DM100 will reboot. 4-4 DM100 User’s Manual Operation: Setup Mode Gen Control Output Mode Output Mode Pass Through Generator PCM DE stream names DD stream names [Down] Gen Stream Sel [Down] PCM Waveform Sine Square Freq Sweep Silence Pink Noise White Noise Use [Up] [Down] buttons to step frequency, [SHIFT] toggles between 10 Hz and 1 kHz steps, [ENTER] selects When generating PCM stream [Down] PCM Frequency 1000 Hz When generating PCM Sine or Square stream [Down] PCM Channel Both, Left, Right [Down] When generating PCM stream PCM Sweep Min F 20 Hz [Down] PCM Sweep Max F 16000 Hz When generating PCM Freq Sweep Waveforms [Down] 1 to 10 seconds, Use [Up] [Down] buttons PCM Sweep Time 5 sec [Down] –60 to 0 dB, Use [Up] [Down] buttons PCM Amplitude -20 dBFS When generating PCM Streams (except silence) [Down] The number of video lines between the video reference frame boundary and the Dolby E frame boundary. Use [Up] [Down] buttons. DE Offset 12 lines When generating Dolby E streams [Down] Channel 1 Channel 2 Channel 1+2 DD Ch Mode [Down] Upload Bitstream ENTER=Yes ESC=No During the upload, the display Ready to Load will show progress. When complete, <ESC> to Abort the DM100 will reboot. The baud rate is fixed at 115.2 kbps. 4-5 When generating Dolby Digital streams DM100 User’s Manual 4.3 Operation: Setup Mode AES3 Output The AES3 Output menu allows the user to control the value of the AES3 status bits present on the output of the DM100. The output can be set to pass through each parameter from the input (or from the generator), or each parameter can be manually set to a desired value. When a value has been changed, the current decode LED will flash slowly to indicate this change. To reset all of the parameters, use the pass through all function. AES3 Output AES3 Mode Professional Consumer Pass Through AES3 Mode Audio Non-Audio Pass Through Audio Mode [Down] [Down] Emphasis Pass Through J.17 Emph 50/15-us Emph Reserved (5) No Emphasis Reserved (1–3) Not Indicated Sample Freq Pass Through Unlocked Locked Pass Through All ENTER=Yes ESC=No [Down] Freq Mode [Down] [Down] Pass Through 32 kHz 44.1 kHz 48 kHz Not Indicated 4-6 DM100 User’s Manual 4.4 Operation: Setup Mode User Presets Up to four user presets can be saved, named, and recalled. These presets contain a copy of the DM100 setup information. User Presets Recall Presets 01-<name 02-<name 03-<name 04-<name After selecting preset number using [Up]/[Down] buttons, press [ENTER] to move to the editing screen. 1> 2> 3> 4> Recall Preset [Down] Save Preset 01 02 03 04 xx is the preset number. Press the [Up] or [Down] buttons to move through the alphabet. Press [ENTER] to select the character and move to next position. Use [ESC] to make any corrections. After 12 characters (including spaces) have been entered, the preset and name can be saved. 4-7 Enter xx Name name Save Settings? ENTER=Yes ESC=No DM100 User’s Manual 4.5 Operation: Setup Mode I/O Control The I/O control menu configures the physical input and output connections of the DM100. Input Select allows the user to choose a specific physical input rather than the default of Autodetect. Gen Clock Source chooses the reference signal for the generator. If the unit is set to Digital Input but one is unavailable, it will default automatically to the internal 48 kHz clock. DAC on Non-Audio controls whether the audio output will mute when the incoming bitstream is flagged as non-audio data. Optical Output switches the Toslink optical output on or off. If not required, disable it to extend battery life. Logging Output can be used for long-term data recording. See section 5.1. I/O Control Input Select Autodetect BNC XLR Optical Input Select [Down] Gen Clock Source Digital Input Video Ref 48 kHz Internal 48 kHz [Down] DAC on Non-Audio [Down] Mute Active Optical Output Enabled Disabled Logging Output [Down] 4-8 DM100 User’s Manual 4.6 Operation: Setup Mode System Settings The System Settings menu contains options for setting user preferences for the DM100. RS-232 Baud Rate controls the speed of the RS-232 port logging data. Unit Name allows entry of up to 12 characters to give a DM100 a unique identity. This is displayed during power on. The Power Management function controls how long the unit will remain switched on after the last button press when operating on battery power. LCD Backlight and Contrast Adjust control aspects of the LCD. Firmware Upgrade is used to load new firmware into the DM100. System Settings RS232 Baud Rate Used for data logging (see Section 4.5) RS232 Baud Rate 115.2 kbps 38.4 kbps 19.2 kbps [Down] Unit Name To edit this line, see section 4.4 DM100 [Down] Power Management Auto power-off setting 15 min 10 min 5 min Disabled 30 min [Down] LCD Backlight [Down] Backlight always on, if enabled. Note: Backlight can also be toggled on or off by pressing [SHIFT] then [POWER] button. (battery operation only) Contrast Adjust Enabled Disabled Use [Up]/[Down] [Down] Firmware Upgrade ENTER=Yes ESC=No During the upgrade, the display Ready to Load will show progress. When complete, <ESC> to Abort the DM100 will reboot. The baud rate is fixed at 115.2 kbps. Note: This function can be accessed directly. Turn off the DM100 by pressing the [POWER] button, press the [POWER] button again, then hold down the [SETUP] button. 4-9 DM100 User’s Manual Operation: Setup Mode Note When powered from the external power supply, the Power Management setting is ignored and the unit remains switched on. The LCD backlight and keypad backlights are also turned on, overriding the LCD Backlight setting. 4-10 DM100 User’s Manual Chapter 5 Reference Information 5.1 Data Transfer Connect the RS-232 port on the front of the DM100 to a computer using the cable provided. The RS-232 serial interface is used for: • • • Test bitstream loading. Data logging. Status information can be transferred from the DM100 via a terminal program. The status information is transmitted in the form of text messages that can be read on the terminal display. Firmware upgrades. Test Bitstream Loading Test bitstream loading is accomplished using the Gen Control setup menu. Press the [SETUP] button, then use the [down] button to step to the Gen Control menu. See section 4.2. The table at the end of this section lists possible error messages. Data Logging This function can be used for long-term data recording. Any standard terminal program may be used on the computer. The logged data is the in the form: time, parameter, and value. The logged time is the elapsed time since the DM100 was last switched on. A fixed set of parameters is always logged (input format, errors, etc.). One additional parameter may be logged by navigating to the status screen that contains that parameter. First, set the baud rate you wish to use via the System Settings menu: Press the [SETUP] button, then use the [Down] button to step to the System Settings menu. Press [ENTER] and select the desired baud rate with the [Up/Down] buttons. Press [ENTER] to save. Next, to initiate logging: Press the [SETUP] button again, then use the [down] button to step to the I/O Control menu. Press 5-1 DM100 User’s Manual Reference Information [ENTER], then use the [down] button to step to Logging Output. Press [ENTER] then use the [down] button to select Enable. Press [ENTER] to start logging via the RS-232 connection to your terminal program. See sections 4.5 and 4.6. Firmware Upgrade With the DM100 powered off, press the [Power] button, then hold down the [Setup] button. The DM100 will display the Firmware Upgrade screen. The data transfer operates at a fixed baud rate of 115.2 kbps. If an error occurs during the upgrade, the Error LED will illuminate, an error message will be displayed, and the data transfer will halt. Pressing the [ESC] button exits the upgrade mode if data is not being transferred, or turns the unit off if a data transfer error occurs. Data Transfer Error Messages Error Message Display HDR CHKSUM ERR HDR LENGTH ERR DATA CHKSUM ERR DATA LENGTH ERR FLASH INIT ERR FLASH ERASE ERR FLASH PGM ERR XX AT ADDR YYYYYY IMAGE SIZE ERR VERIFY ERR PRODUCT ERR FLASH MEM FULL TOO MANY STREAMS Description Invalid checksum in file’s header Invalid length in file’s header Invalid checksum in data portion of file Invalid data length specified in file’s header Flash memory detection failed - device code not recognized Flash sector protected and can not be erased Flash not blank at address YYYYYY (hex). Flash module error code given in XX (hex). Error in downloaded image size or address - either too large for RAM or too large for flash. Programmed image in flash does not match downloaded image after programming. Product code in file’s header is not "DM100" No space left in flash memory (when loading test bitstreams) There is a limit of 200 streams in the unit. 5-2 DM100 User’s Manual 5.2 Reference Information Unit Reset Restore Default Settings With the DM100 powered off, press [POWER], then hold down the [ENTER] button. The factory default settings are restored without changing your presets or stored test bitstreams. Hardware Reset In the unlikely event that the restore procedure above does not work, the unit can also be reset by inserting a pen or paper clip into the RESET hole on the back of the DM100. The unit will reset and power off. 5-3 DM100 User’s Manual Reference Information 5.3 Connector Pinout Information 5.3.1 RS-232 Serial Port 5.3.2 5.3.3 Pin Function 1 2 3 4 5 6 7 8 NC NC TX Ground RX NC NC NC Description asynchronous data out asynchronous data in XLR Connectors Pin Connection 1 2 3 Signal Ground Signal + Signal - Headphone Connector Pin Connection Tip Ring Sleeve Left Channel Right Channel Common 5-4 DM100 User’s Manual 5.4 Reference Information DM100 Specifications Sampling Rates 48 kHz for all modes, 32 kHz and 44.1 kHz for Dolby Digital and PCM Headphone Output +5.8 dBu max (adjustable) into 600Ω, 1/8-inch standard stereo headphone jack Case ABS plastic hand-held enclosure Video Frame Rates 29.97 and 25 fps Dimensions and Weight 100 × 200 × 41mm (4 × 7.9 × 1.6 inches) Net 0.68 kg (1.5 lb) Frequency Response Digital Outputs: 20 Hz–20 kHz, ±0.25 dB Distortion <0.01% at 1 kHz <0.02%, 20 Hz–20 kHz Environmental Conditions Operating: 0° to 50°C (32° to 122°F), 0–98% relative humidity (noncondensing) Non-operating: –20° to +70°C (–68° to +158°F) Dynamic Range >100 dB Digital Audio Inputs AES/EBU via XLR female connector, 110Ω. AES3ID-1995/SMPTE 276M via BNC connector, 75Ω. Fiber optic via Toslink connector. Input word lengths up to 24 bits. Supported digital bitstreams: 16- and 32-bit Dolby Digital, Consumer Dolby Digital, 16-, 20-, and 24-bit Dolby E, Non-audio AES3. Power Requirements External 6 VDC, 800 mA or four internal 1.5 V AA batteries Typical battery life 4 hours, continuous use Supplied Accessories User's manual Warranty card Carrying case Batteries External DC power adapter BNC (F)-to-RCA (M) adapter for video reference input, RCA (F)-to-BNC (M) adapters for the two audio inputs, RS-232 serial data cable Reference Video Input Analog composite NTSC or PAL black burst video reference, 1V p-p, via RCA connector, 75Ω internally terminated. Digital Audio Outputs AES/EBU via XLR female connector, 110Ω. AES3ID-1995/SMPTE 276M via BNC connector, 75Ω. Fiber optic via Toslink connector. Output word lengths up to 24 bits Regulatory Notices North America: This unit complies with the limits for a Class A digital device, pursuant to Part 15 of the FCC rules, and Industry Canada ICES-003 regulations. Europe: This unit complies with the requirements of EMC Directive 89/336/EEC. Serial Input/Output Port 8-pin female mini DIN, RS-232 5-5 5-6 RS-232 XLR BNC Toslink Video Reference AES-3 Receiver Front Panel LCD and LEDs Digital Signal Processor Keypad AES-3 Transmitter Internal Speaker Headphones XLR . .. BNC Toslink 5.5 V-Ref Clock generation DM100 User’s Manual Reference Information System Block Diagram