1
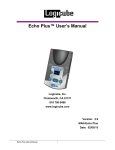
Echo Plus™ User’s Manual
Logicube, Inc.
Chatsworth, CA 91311
818 700 8488
www.logicube.com
Version: 1.7
MAN-Echo Plus
Date: 11/15/11
Echo Plus Users Manual
i
Table of Contents
ECHO PLUS™ USER’S MANUAL ............................................................. I
TABLE OF CONTENTS ............................................................................. II
Logicube Technical Support Contact Information .......................... ii
1. INTRODUCTION TO THE LOGICUBE ECHO PLUS ............................ 1
Introduction ......................................................................................... 1
System Description ......................................................................... 1
2. GETTING STARTED ............................................................................. 1
Connecting Drives to the Logicube Echo Plus ................................ 1
IDE Drive Installation ...................................................................... 1
SATA Drive Installation ................................................................... 2
Echo Plus Overview ............................................................................ 3
Operation Buttons ........................................................................... 4
3. CLONING MODES AND SETTINGS .................................................... 5
User Interface ...................................................................................... 5
Main Screen .................................................................................... 5
About Screen .................................................................................. 5
Using the Settings Menu ................................................................. 6
Copy Modes .................................................................................... 6
CleverCopy Mode ........................................................................... 6
Mirror Mode..................................................................................... 6
CHS Mode ...................................................................................... 7
Verify ............................................................................................... 8
Speed Setting ................................................................................. 8
Cloning Screens............................................................................ 10
Preview Screen ............................................................................. 10
Progress Screen ........................................................................... 10
End of the Cloning Session........................................................... 10
Cloning Windows 7 ....................................................................... 10
Cloning Windows Vista ................................................................. 11
Echo Plus Users Manual
ii
Vista Installations .......................................................................... 11
Cloning Scenarios and how to handle them ................................. 12
A Simple Vista partition with logical drivers .................................. 12
Hidden RE (Recovery Environment) Partition with Vista .............. 12
Other VISTA Scenarios ............................................................... 12
4. SOFTWARE LOADING INSTRUCTIONS............................................ 13
Logicube Echo Plus Software Updating Procedures .................... 13
Important Notes Regarding Software Versions ............................ 13
Software Loading .......................................................................... 13
Installing the VCP Controller Software and drivers ....................... 13
Attaching the Echo Plus to the PC ................................................ 15
Determining the COM Port for the Echo Plus ............................... 15
Configuring Hyperterminal or other third party terminal program and
installing the software ................................................................... 17
5. FREQUENTLY ASKED QUESTIONS AND ANSWERS...................... 20
FAQ’s .................................................................................................. 20
Advanced Topics ............................................................................... 23
SID changing issues ..................................................................... 23
6. INDEX .................................................................................................. 25
Echo Plus Users Manual
iii
Limitation of Liability and Warranty Information
Logicube Disclaimer
LOGICUBE IS NOT LIABLE FOR ANY INCIDENTAL OR CONSEQUENTIAL DAMAGES,
INCLUDING, BUT NOT LIMITED TO PROPERTY DAMAGE, LOSS OF TIME OR DATA
FROM USE OF A LOGICUBE PRODUCT, OR ANY OTHER DAMAGES RESULTING
FROM PRODUCT MALFUNCTION OR FAILURE OF (INCLUDING WITHOUT LIMITATION,
THOSE RESULTING FROM: (1) RELIANCE ON THE MATERIALS PRESENTED, (2) COSTS
OF REPLACEMENT GOODS, (3) LOSS OF USE, DATA OR PROFITS, (4) DELAYS OR
BUSINESS INTERRUPTIONS, (5) AND ANY THEORY OF LIABILITY, ARISING OUT OF OR
IN CONNECTION WITH THE USE OR PERFORMANCE (OR FROM DELAYS IN
SERVICING OR INABILITY TO RENDER SERVICE ON ANY) LOGICUBE PRODUCT.
LOGICUBE MAKES EVERY EFFORT TO ENSURE PROPER OPERATION OF ALL
PRODUCTS. HOWEVER, THE CUSTOMER IS RESPONSIBLE TO VERIFY THAT THE
OUTPUT OF LOGICUBE PRODUCT MEETS THE CUSTOMER’S QUALITY REQUIREMENT.
THE CUSTOMER FURTHER ACKNOWLEDGES THAT IMPROPER OPERATION OF
LOGICUBE PRODUCT AND/OR SOFTWARE, OR HARDWARE PROBLEMS, CAN
CAUSE LOSS OF DATA, DEFECTIVE FORMATTING, OR DATA LOADING. LOGICUBE
WILL MAKE EFFORTS TO SOLVE OR REPAIR ANY PROBLEMS IDENTIFIED BY
CUSTOMER, EITHER UNDER WARRANTY OR ON A TIME AND MATERIALS BASIS.
Warranty
LOGICUBE PROVIDES A BASIC ONE-YEAR PARTS AND LABOR WARRANTY FOR ALL
OF ITS PRODUCTS (EXCLUDING CABLES, ADAPTERS AND OTHER “CONSUMABLE”
ITEMS). A TWO-YEAR EXTENDED WARRANTY IS ALSO AVAILABLE FOR AN ADDED
COST. TELEPHONE AND EMAIL SUPPORT IS AVAILABLE FOR THE LIFE OF THE
PRODUCT AS DEFINED BY LOGICUBE.
Echo Plus Users Manual
i
RoHS Certificate of Compliance
LOGICUBE PRODUCTS COMPLY WITH THE EUROPEAN UNION RESTRICTION OF
THE USE OF CERTAIN HAZARDOUS SUBSTANCES IN ELECTRONIC EQUIPMENT,
ROHS DIRECTIVE (2002/95/EC).
THE ROHS DIRECTIVE PROHIBITS THE SALE OF CERTAIN ELECTRONIC
EQUIPMENT CONTAINING SOME HAZARDOUS SUBSTANCES SUCH AS
MERCURY, LEAD, CADMIUM, HEXAVALENT CHROMIUM AND CERTAIN FLAMERETARDANTS IN THE EUROPEAN UNION. THIS DIRECTIVE APPLIES TO
ELECTRONIC PRODUCTS PLACED ON THE EU MARKET AFTER JULY 1, 2006.
Logicube Technical Support Contact Information
1. By website: www.logicube.com
2. By email: [email protected]
3. By telephone: 1 - (818) 700 8488 ext. 3 between the hours of 7am –5pm PST, Monday
through Friday, excluding U.S. legal holidays.
Echo Plus Users Manual
ii
1. Introduction to the Logicube Echo Plus
Introduction
Thank you for buying the Logicube Echo Plus. You
are now the proud owner of a state-of-the-art IDE
and SATA disk cloning device. The Echo Plus is
designed to be easy enough to be used by a novice,
yet offers many professional features that are not
available anywhere else.
The Echo Plus copies the contents of one hard disk
drive to another. The first drive is typically called the
Master, while the second is termed a Target. It
performs the copy at speeds that are typically 32 to
64 times faster than they would be on a PC. The
Echo Plus first analyzes the partitions on the
Master, then acts according to a user set mode.
Depending on the mode, the unit will adjust
structures to ensure the validity of the Target. This
process is often called disk cloning.
Both the Master and Target drives connect directly
to the Echo Plus thorugh the IDE or SATA ports,
providing the fastest data path possible
System Description
In the box you will find the following items:
The Echo Plus unit
An external power supply
Two 40-pin flat UDMA cables (5” long). These
connect to Master and Target drives
Two power cables (5” long). These supply power
to the drives
Two 9” SATA (Serial-ATA) cables. These connect
SATA drives to the unit
A “Mini-B” USB cable - Used to update the unit‟s
embedded software
Echo Plus™ Users Manual
1
INTRODUCTION
A software CD-ROM that includes:
A. A backup copy of the current Echo Plus
software (called soli.h86)
B. VCP Drivers that facilitate the software
download through the USB port of a PC
C. A copy of the manual in .PDF format
A nylon carrying case
If any of the above is missing, please call Logicube
(818 700-8488 x3) immediately and replacement
parts will be shipped to you right away.
Echo Plus Users Manual
2
2. Getting Started
Connecting Drives to the Logicube Echo Plus
IDE Drive Installation
.
Figure 1. IDE connections.
1. Lay the unit on a flat non-conductive surface. Note
the connectors on the left and right of the unit. The
Master drive always connects to the left side, while
the Target is connnected to the right side. (Arrows
on the unit‟s case show the direction of data flow).
2. Plug one of the 5 inch UDMA cables into the 40- pin
IDE connector on the left, the cable is clearly
marked as to which side plugs into the duplicator.
Plug one of the 5” power cables to the power
receptacle. Make sure that the clip on the 4-pin
plug lines up with the small tab on the socket.
IMPORTANT NOTE: The hard drives are not
powered until you actually start a copy
operation. Connect the Master drive to the
UDMA and power cables.
IMPORTANT NOTE: The supplied cables are
NOT standard IDE cables like the ones found in
a PC. Do not attempt to use these cables in a PC
nor to use PC cables with the Echo Plus unit.
Although damage to the drive is unlikely, the
Echo Plus will not function correctly.
Echo Plus™ Users Manual
1
GETTING STARTED
4. Connect the other set of UDMA/power cables to the
connectors on the right side of the unit following the
same information as step 2.
5. You may now connect a Target drive to these
cables. Target drives can either be placed on a
suitable surface (non-conductive, or antistatic) or be
left inside an open-cover PC.
NOTE: Make sure that the Master and Target drives
are jumpered as Single Master.
NOTE: Please call Logicube to acquire longer data
and power cables, if needed.
SATA Drive Installation
Please refer to Fig. 2 below.
Figure 2. SATA connections
1. Lay the unit on a flat non-conductive surface. Note
the connectors on the left and right of the unit. The
Master drive always connects to the left side, while
the Target connected to the right side. (Arrows on
the unit‟s case show the direction of data flow).
2. Plug one of the SATA cables into the SATA and
power connectors on the left. Make sure that the
clip on the 4-pin power plug lines up with the small
tab on the socket.
NOTE: The power outlet is not powered until you
actually start a copy operation.
3. Connect the Master drive to the SATA cable.
IMPORTANT NOTE: The supplied cables are
NOT standard SATA cables like the ones found
in a PC. Do not attempt to use these cables in a
PC nor to use PC cables with the Echo Plus
unit. Although damage to the drive is unlikely,
the Echo Plus will not function correctly.
NOTE: Jumper settings do not need to be changed
on SATA drives.
Echo Plus Users Manual
2
4. Connect the other SATA cable to the connectors on
the right side of the unit following the same
information as step 2.
5. You may now connect a Target drive to this cable.
Target drives can either be placed on a suitable
surface (non-conductive, or antistatic) or be left
inside an open-cover PC.
NOTE: Jumper settings do not need to be changed
on SATA drives.
Things to remember:
The Echo Plus unit (but not the drives) is
powered by connecting the external power
supply to the power input at the top. There is no
On/Off switch. When requested to power-cycle
the unit, please pull the plug, wait a couple of
seconds and push it in again. The unit boots
and is ready to use in about 3 seconds. Wait
for the Main Screen to appear.
The Echo Plus supplies power to both drives
during a cloning session. There is no need to
connect an external power source to the drives.
It is OK to connect and disconnect Master or
Target drives while the Echo Plus is powered.
However, do NOT connect or disconnect drives
in the middle of a cloning session. The Status
light will typically blink to indicate the unit is
cloning.
Echo Plus Overview
Figure 3. Echo Plus
Echo Plus™ Users Manual
3
GETTING STARTED
Operation Buttons
START/STOP Button – Press it twice to begin a
cloning operation using the current settings; press
the START/STOP button in mid process to abort it.
A single key stroke presents a preview screen
where you can see the current setting, and decide
whether to press it again to begin the capture, or
back out to reconfigure.
SET Button – This button brings you to the settings
screen where you can change capture modes and
other settings of the unit.BACK Button – This button
allows you to go back in the menu system or cancel
out of a given operation.
SELECT Button – This button allows you to select
an option, scroll through multiple available options
or select a sub-menu.
In addition to the buttons there are also three
indicator lights:
POWER Light – This stays lit whenever power is
applied to the Echo Plus unit.
STATUS Light – This blinks during a cloning
session to show that the clone is running.
ERROR Light – This lights up whenever the cloning
session is stopped prematurely. An error
message will appear on the display.
Echo Plus Users Manual
4
CLONING MODES AND SETTINGS
3. Cloning Modes and Settings
User Interface
Main Screen
The Echo Plus boots to this screen. It shows the
software version currently loaded on the unit. After
thirty seconds, a Screen Saver will appear. Press
any button to go back to the screen.
About Screen
Press the Back button to go into the About Screen.
This is where the unit‟s Firmware version appears
as well as Logicube‟s website information. Press the
Back button again to go back to the Main Screen.
NOTE: The firmware version displayed on your
Logicube Echo Plus may be different than the
picture above.
Echo Plus™ Users Manual
5
CLONING MODES AND SETTINGS
Using the Settings Menu
Pressing the Set button repeatedly will allow you to
scroll through the Echo Plus Settings. Here they
are in order:
Copy Modes
The Echo Plus has two major cloning modes;
CleverCopy and Mirror Copy.
CleverCopy Mode
This is the default mode. It clones ALL partitions on
the Master drive to the Target drive, automatically
deciding the fastest method possible for each
partition found. It scales certain partitions (FAT16/
32, and NTFS) to fill the Target in its entirety and
makes all the necessary adjustments to ensure a
valid and bootable Target drive.
If an unknown partition is encountered on the
Master during the copy session, that partition retains
its original size.
Mirror Mode
It simply makes a mirror copy of the Master drive. It
does not adjust any values. This mode is
recommended when all else fails an even then only
between similar geometry drives. It is also used for
unknown partition types (i.e. UNIX, LINUX, etc). If
the Target is larger than the Master, the session will
complete when the last sector of the Master is
reached. If the Master is larger, the unit will
complete when reaching the last Target sector.
NOTE: Although the subsequent setting screens
come up and can be changed, they are irrelevant
for Mirror Clone and ignored during the cloning
session.
NOTE: Some PC manufacturers will place a
“hidden” partition on the drive. This partition usually
contains recovery or diagnostic information. The
Echo Plus Users Manual
6
CLONING MODES AND SETTINGS
Echo Plus will automatically Mirror Clone any hidden
partitions.
Press the Select button to cycle between the two
modes. Press the Set button to go to the next
screen.
CHS Mode
CHS Mode sets the geometry (Cylinder, Head and
Sector) translation used on the Target drive. CHS
information is stored in the partition table of the hard
drive and is used by the BIOS to determine from
which partition to boot.
The correct setting will depend upon the capacity of
the Target drive and on the BIOS of the PC in which
it will be used. Check with the hard drive and PC
manufacturer to determine which CHS mode is best
as different BIOS systems use different translation
methods for large (over 528 MB) capacity drives.
Following are the CHS modes supported by the
Echo Plus™:
LBA (Default) – This CHS Mode will work for most
hard drive and PC combinations and should be
used unless otherwise indicated.
Large – Also known as Extended CHS (ECHS)
mode.
LBA-1, LBA-2, Large-1 and Large-2 – These
settings instruct the Echo Plus to “shave off” one or
two cylinders from the total drive size when
constructing the Target partition tables.
NOTE: It is important to use -1 or -2 settings for all
Windows 2000 and Windows XP installations.
These operating systems use the unallocated space
to store certain tables required for Active Directory
and sometimes for Dynamic Partitioning.
NOTE: Most of the time, blocking out one cylinder
is enough but two may need to be blocked out to
achieve good results.
Echo Plus™ Users Manual
7
CLONING MODES AND SETTINGS
Press the Select button to cycle between the two
modes. Press the Set button to go to the next
screen.
Verify
Both CleverCopy and Mirror will allow you to set the
Verify option. If Verify is set to Yes, the Echo Plus
can detect bad sectors on the Target. Data cloned
onto such sectors may be unreadable. Engaging the
verification feature slows the speed of cloning by a
small amount.
If a bad sector is detected on the Target (with Verify
turned on), the cloning process will abort with an
error message. Logicube recommends not using
that drive as new defects are likely to develop.
NOTE: The Echo Plus always checks the Master
drive for bad sectors during a cloning session. It is
designed to skip any bad sectors that are found.
The unit will skip up to 200 bad sectors before it
stops with an error message.
Press the Select button to cycle between the two
modes. Press the Set button to go to the next
screen.
Speed Setting
The speed setting provides the option to set the
speed at which an operation will be performed at.
Echo Plus Users Manual
8
CLONING MODES AND SETTINGS
UDMA-4 - The software performs a test procedure
to determine the fastest setting that the drives will
tolerate while streaming data from one to the other.
When set to UDMA-4, all lower speed grades will be
tested (UDMA 0-4, PIO 0-4).
UDMA-3 - Force the unit to use at most this speed.
Set the unit to this mode in some rare situations
where one or both drives do not support the higher
speeds, and “misbehave” during automatic speed
benchmarking.
UDMA-2 - Same as UDMA-3.
UDMA-1 - Same as UDMA-3.
UDMA-0 - Same as UDMA-3.
PIO-Auto (PIO-4) – Force the unit to use this as the
highest speed (PIO-4). Set the unit to this mode in
some rare situations where one or both drives do
not support higher speeds, and “misbehave” during
speed benchmarking.
PIO-Medium – This is a fixed value that almost all
drives will tolerate. It will result in copying speeds
from about 200 to over 500 MB per minute
depending upon the characteristics of the drives.
PIO-Slow – This is a speed value that all drives will
be able to tolerate. It supports copying speeds from
100 to over 300 MB per minute depending on the
characteristics of the drives.
NOTE: Use the MEDIUM or SLOW modes if you
encounter drive “time-outs” or if you are cloning
older drives. Many 2.5” notebook drives require this
setting.
When multiple copies are required, all you need to
do is change the TARGET drive, and press the
Start/Stop button. Your last selections are used.
Echo Plus™ Users Manual
9
CLONING MODES AND SETTINGS
Cloning Screens
Preview Screen
Once the desired settings are in place, press the
Start/Stop button once to enter the Preview Screen.
This screen displays the chosen settings. Press the
Back button to go back to the Main Screen, the Set
button to go to the Settings or the Start/Stop button
to begin cloning.
Progress Screen
This screen is displayed during the cloning session
itself. It shows the speed (in GB/min), time
remaining and percentage of drive cloned.
End of the Cloning Session
When the Echo Plus is finished with a successful
Clever or Mirror cloning session, the drives will turn
off and a “clone successful” message will appear on
the display. At this point the drives can be removed.
If the unit stops prematurely with an error, the error
message will display instead.
Cloning Windows 7
With the release of the Windows 7 Operating
System, Microsoft has added some security
features to protect the integrity of the partition.
These features can cause problems when cloning
Windows 7 with Clever Clone mode.
This section will discuss the best ways to clone
Windows 7 hard drives.
Echo Plus Users Manual
10
CLONING MODES AND SETTINGS
SCENARIO 1: When the Master and Target
drives are the same size
With this scenario, you can use Clever Copy mode
to clone the Windows 7 hard drive. Since the
Master and Target drives are the same size, the
size of the partitions should remain the same.
SCENARIO 2: When the Master and Target
drives are different sizes
With this scenario, you must use Mirror mode to
clone the Windows 7 hard drive. The Logicube Echo
Plus is unable to Clever Copy Windows 7 drives if
the Master and Target drives are different sizes.
Cloning Windows Vista
With the release of the Windows Vista operating
system in late 2006, Microsoft has added some
security features to protect the integrity of the
partition. These features can cause problems when
cloning Vista with Clever Clone mode.
This section will discuss the best ways to clone
Windows Vista hard drives. These instructions
apply to all flavors of Vista (Home Basic, Home
Premium, Business and Ultimate).
Vista Installations
The following Vista installations are supported by
Clever Copy mode:
Supports a standard Clever of Vista with one
partition.
Supports Vista with extended partitions
Supports RE (Recovery Environment) + Vista but
only if RE is built with a partition tag of 0X27
NOTE: New software updates are being developed
all the time. Please check www.logicube.com
periodically for new software updates.
Echo Plus™ Users Manual
11
CLONING MODES AND SETTINGS
Cloning Scenarios and how to handle them
A Simple Vista partition with logical drivers
This is the most common cloning scenario. No
extra treatment is required to prepare the Master
drive.
Hidden RE (Recovery Environment) Partition
with Vista
Assuming the RE partition is of type 0X27 (as is
specified by Microsoft®), no special handling is
required to yield bootable target drives. The Echo
Plus will detect and copy the RE partition correctly
followed by the Vista bootable partition.
Other VISTA Scenarios
Other cloning scenarios may require the use of
Selective which is not supported on the Echo
Plus™.
After performing a Clever Copy of Vista under any
scenario, “Check file systems” will display the first
time the drive is booted. Windows will run CHKDSK
as a normal operating procedure.
Echo Plus Users Manual
12
SOFTWARE LOADING INSTRUCTIONS
4. Software Loading Instructions
Logicube Echo Plus Software Updating Procedures
Important Notes Regarding Software Versions
When downloading software for the Echo Plus, it is important to
download the correct version. The color of the display on the
Echo Plus will determine the version of the software to download.
1. If the color of the display has blue letters, download
software version 2.6.
2. If the color of the display has green or orange letters,
download software version 2.5.
Software Loading
Loading or updating software for the Echo Plus comes in four
sections:
Installing VCP Controller and drivers from the Echo Plus
CD-ROM.
Attaching the Echo Plus to the PC
Determining the COM Port for the Echo Plus
Configuring Hyperterminal or other third party terminal
program to communicate with the Echo Plus and
installing/loading the software to the Echo Plus
Installing the VCP Controller Software and
drivers
Windows 7/Vista
1. Insert the Echo Plus CD-ROM in the PC.
If the installation wizard automatically
comes up, cancel it. Browse the
contents of the CD-ROM and go into the
X:\Windows Vista & 7\TUSB3410
Single Driver Installer v3.3 folder
Echo Plus™ Users Manual
13
SOFTWARE LOADING INSTRUCTIONS
(where X:\ is the drive letter for the CDROM).\
NOTE: If your CD-ROM does not have
the Windows Vista & 7 folder, you can
download the Windows Vista and 7
drivers from Logicube‟s website.
2. Run the Setup.exe file from the folder
above.
3. Accept the License Agreement and
continue the rest of the installation.
4. After the installation, browse to
C:\Program Files\Texas Instruments
Inc\TUSB3410 Single Driver Installer
(for Windows Vista/7 32-bit) or
C:\Program Files (X86)\Texas
Instruments Inc\TUSB3410 Single
Driver Installer (for Windows Vista/7
64-bit) and run Setup.exe.
5. Accept the License agreement and
continue with the rest of the installation.
6. The VCP Controller and drivers will
automatically install on your PC. Click
Finish when the installation has
finished.
Windows 2000/XP
1. Insert the Echo Plus CD-ROM in the PC.
The installation wizard should
automatically come up. If not, run
Setup.exe from the root of the CD-ROM.
2. Accept the License Agreement and
continue the rest of the installation.
3. You may get a prompt warning you that
the program was not validated by
Microsoft. Select CONTINUE ANYWAY
to move on.
4. The VCP Controller and drivers will
automatically install on your PC. Click
Finish when the installation has
finished.
Windows 98/ME
1. Insert the Echo Plus CD-ROM in the PC.
Run Setup.exe from the “Windows 9x
Driver” folder of the CD-ROM.
Echo Plus Users Manual
14
SOFTWARE LOADING INSTRUCTIONS
2.
Accept the License Agreement and
continue. The VCP Controller and
drivers will automatically install on your
PC. Click Finish when the installation
has finished.
Attaching the Echo Plus to the PC
Windows 98 / ME / 2000 / XP / Vista / 7
1. Power the Echo Plus and wait for the
Main Screen.
2. Attach the USB cable to the Echo Plus
and the PC.
3. The PC will automatically detect the
Echo Plus and bring up an “Add new
Hardware” Wizard.
a. If you are running Windows 98/ME,
the wizard may ask for the location
of the USB drivers. Point it to the
following path: C:\Program
Files\Texas Instruments\TI34109
b. If you are running Windows
2000/XP/Vista/7 the wizard will
automatically install the right drivers.
NOTE: You may get a prompt warning
you that the program was not validated
by Microsoft. Select Continue Anyway
to move on.
4. This will allow Windows to see the Echo
Plus properly and assign a COM Port to
it.
NOTE: Keep the Echo Plus powered on
and connected to the PC until instructed
otherwise.
Determining the COM Port for the Echo Plus
The easiest way to determine the assigned COM
Port for the Echo Plus is to look at Device
Manager. There are several different ways to
access Device Manager, depending on the
Operating System. Depending on your Operating
System, Listed below are the ways to access
Device Manager.
Echo Plus™ Users Manual
15
SOFTWARE LOADING INSTRUCTIONS
NOTE: The Echo Plus must be powered on and
connected to the PC for the COM Port to be
seen.
For Windows 7:
Click Start then click Control Panel. Click either
Device Manager or System and Security, then
Device Manager (in the System section).
For Windows Vista:
Click Start then click Control Panel. Click either
Device Manager or System and Maintenance,
then Device Manager.
For Windows XP:
Click Start then click Control Panel. Click either
System or Performance and Maintenance,
then System. Click the Hardware Tab then click
the Device Manager button.
For Windows 2000:
Click Start, point to Settings, then click Control
Panel. Double-click the System icon. Click the
Hardware tab. Click the Device Manager
button.
Windows 98/Me:
Click Start, point to Settings, then click Control
Panel. Double-click the System icon. Click the
Device Manager tab.
Once Device Manager is open, expand the
section labeled Ports (COM & LPT). The Echo
Plus will appear next to the correct COM Port.
Echo Plus Users Manual
16
SOFTWARE LOADING INSTRUCTIONS
Configuring Hyperterminal or other third party
terminal program and installing the software
Hyperterminal comes installed with Windows 98,
ME, 2000, and XP. If you are using Windows
Vista or 7 you will need to download a third party
terminal program.
Before continuing, follow these steps to prepare
the Echo Plus for the software update:
1. Disconnect the AC adapter from the Echo
Plus. Keep the USB cable attached between
the Echo Plus and the PC.
2. Press and hold the START/STOP button
while re-connecting the AC adapter to the
Echo Plus.
NOTE: If the color of the display on your
Echo Plus is green or orange you will see
„Software Load. Press Select to Start‟. If the
color of the display on your Echo Plus is blue
you will see a pixelated screen (several
pixels will be lit up, but no letters or words
will be seen). DO NOT PRESS THE
SELECT BUTTON YET.
Windows Vista/7
Windows Vista and 7 do not have a built-in
program that will allow us to connect with the
Echo Plus. A third party program must be used.
In these instructions, we will use Tera Term.
Echo Plus™ Users Manual
17
SOFTWARE LOADING INSTRUCTIONS
1. Download Tera Term from
www.logmett.com.
2. Install the software using the default settings
except on the fourth screen. Change the
selection from “Standard Installation” to
“Compact Installation”.
3. When the installation has finished, run Tera
Term from your Start menu. The „New
connection‟ window will appear. Click the
Cancel button.
4. From the menu system, click Setup then
Serial port… The serial port setup window
will appear.
5. Set the following settings then click OK:
a. Port: Use the COM Port the Echo
Plus is assigned to
b. Baud rate: 115200
c. Data: 8
d. Parity: none
e. Stop: 1 bit
f. Flow control: none
6. From the menu system, click File then go to
Transfer then XMODEM then Send…
7. Browse to the folder where you
extracted/unzipped the soli.h86 file and
select the sol8.h86 file. DO NOT click OK
yet.
8. On the Echo Plus, press the SELECT
button.
9. On the PC, make sure at the bottom of the
window checksum is selected. Click OK.
10. A progress window will appear and you
should see the number of packets, bytes
transferred, and percentage count upwards.
When the process is complete, the progress
window will disappear and you can close
Tera Term.
11. Disconnect the AC adapter from the Echo
Plus then reconnect it back. The Echo Plus
will boot up and display the current version
of the software during the boot process.
Windows 98/ME/2000/XP
1. Go to Start - Programs - Accessories Communication - Hyperterminal.
Echo Plus Users Manual
18
SOFTWARE LOADING INSTRUCTIONS
2. Choose “File - New Connection” or
follow the connection wizard if it comes
up automatically.
3. Name the Connection “Echo Plus” and
choose an icon.
4. In the next screen, choose the COM
Port assigned to the Echo Plus. You can
also refer back to Windows Device
Manager to determine the correct port.
5. In the next screen, set Bits Per Second:
115200, Data Bits: 8, Parity: None, Stop
Bits: 1 and Flow Control: None. Click OK
when finished.
6. In the menu system, click Transfer then
Send File… The „Send File window will
come up.
7. Browse to the folder where you
extracted/unzipped the soli.h86 file. DO
NOT click Send yet.
8. On the Echo Plus, press the SELECT
button.
9. On the PC, change the Protocol to 1K
XMODEM then click Send.
1. Browse to the folder where you put
soli.h86. Set “Protocol” to “1K
XMODEM” or “XMODEM”. Click OK.
2. A progress window will appear and you
should see the number of packets count
upwards. When the process is complete,
the progress window will disappear and
you can close Hyperterminal.
3. Disconnect the AC adapter from the
Echo Plus then reconnect it back. The
Echo Plus will boot up and display the
current version of the software during
the boot process.
Echo Plus™ Users Manual
19
FAQS
5. Frequently Asked Questions and Answers
FAQ’s
Q. What are partitions?
A. Partitions are areas on the drive that define a storage unit. Each partition is represented
by a drive letter at the operating system level (e.g. C:, D:,...). For that reason, partitions
are commonly called logical drives, or volumes. A partition is also associated with a file
system, or a structure for laying out files on the partition. Hundreds of different types of
file systems have been designed through the years. Only a handful are in common use.
Among those are FAT16, FAT32, and NTFS.
FAT16 – The file system used by DOS since version 3.3. This file system can be at
most 2GB in size, and can be used under DOS, Win3.1. Win95/98/NT, Win2000,
and XP. FAT is the acronym for File Allocation Table, with entries that are 16 bit
wide, hence the FAT16 name.
FAT32 – Supported by Win98, Win2000 and XP. Entries in the FAT are 32 bits
each,thus eliminating the 2GB limit and offering an improved space efficiency.
NTFS – In use by Windows NT, Win2000 and WinXP. Offers improved access
speed,and some security and recoverability features.
Q. How does the Echo Plus determine the size of partitions on the Target drive?
A. In the default CleverCopy mode, all known partitions (FAT16/FAT32/NTFS) are scaled
proportionally to the ratio of Master/Target size. All unknown partitions (e.g. HPFS, UNIX
etc.) are mirrored, that is they maintain their size. Please note that FAT16 partitions
cannot exceed 2.1GB when scaled up, nor be smaller than 32MB when scaled down.
Q. Can the Echo Plus defragment a partition?
A. The Echo Plus will resort to defragmenting a FAT16 or FAT32 partition if the partition is
scaled down (cloning to a smaller drive). There is no way to manually perform a defrag
operation on a drive.
Echo Plus Users Manual
20
FAQS
Q. Can the Echo Plus clone to dissimilar drives?
A. Yes. The Echo Plus will take care of all the necessary adjustments of Target drive
structures to ensure the drive (of any size) will be valid and bootable. Many mixtures of Master
and Target. drive sizes were tested and found to be valid. The same is true for all Master
drives that contain FAT16/FAT32/NTFS type partitions. Unknown partition types are cloned in
mirror mode, and typically require identical (or very similar) Master and Target drives to
guarantee a successful clone. of the partition. It such cases, the Echo Plus “engages” a more
complex algorithm to ensure proper alignment of structures on the Target. This results in a
slower process.
Q. Why do I sometimes see transfer speeds as fast as 1800MB/min., and other times as slow
as 200MB/min.?
A. There are many factors that determine transfer speed:
The age of the drives – The speed of the operation is governed by the slowest drive in
the system. If an old drive is used, chances are it cannot sustain high transfer speeds.
Newer drives have faster electronics and larger caches, and can sustain rates as high as
16MB/sec.
The type of operation performed – When cloning FAT16 or FAT32 partitions, it is
sometimes necessary to change the cluster class
Master drive with bad or weak sectors – The system will attempt to skip bad or weak
sectors found on the Master drive. This is a time consuming operation that could cause
the overall speed of cloning to drop. Once the bad sector is skipped, the cloning session
will continue.
Q. Can the Echo Plus clone file systems such as UNIX, and HPFS?
A. Yes, but results are guaranteed only if cloned between identical drives and using the Mirror
mode. However, it is reported that UNIX partitions will self-repair upon the first boot.
Q. Do Target drives have to be partitioned and formatted prior to copying?
A. No. Target drives need not be partitioned or otherwise treated. The Echo Plus disregards
everything on the Target drive, and re-formats and partitions the Target on-the-fly.
Q. My Target drive will not boot? Why?
A. Please check several things:
If the Target drive is bigger than 4GB, and is hosted by a PC with a Phoenix BIOS dated
earlier than Nov. 1997, you may need to set the CHS translation setting to Large, and try to
clone again. The same setting (Large) applies to target drives that reside inside a Compaq
PC. If this is not the case, please check that the above setting is NOT set to Large, but rather
to the default setting: LBA.
The Master drive is corrupted. This may not show-up with casual booting of the Master, but
problems such as cross-linked clusters can prevent booting.
Echo Plus™ Users Manual
21
FAQS
Q. All but the first partition is missing from the Target drive? How did that happen?
A. This is usually a result of a wrong CHS translation setting (LBA or LARGE).
Q. How does the Echo Plus handle bad sectors on the Master and Target?
A. Bad (or “weak”) sectors on the Master are handled in the following way:
The Echo Plus will attempt to skip any bad Master sector encountered during the cloning
session. In rare cases, the bad sector cannot be skipped, and the unit will abort the
operation. Bad sectors on Targets are handled as follows:
If the Verify setting is disabled, the Echo Plus will not detect bad sectors on the
Target. Note, however, that newer drives use automatic reallocation and will rarely
exhibit a bad sector, and thus reduce the probability of a problem to a negligible
amount.
With the Verify setting On, the Echo Plus will abort the operation upon detecting the
first bad sector.
Q. Are NT 4GB FAT16 partitions supported?
A. Yes, through Mirror Clone Mode only.
Q. How does the Echo Plus handle NT Security Identification ID (SID) duplication issues?
A. The Echo Plus duplicates the SID. It is recommended that a SID changer be installed on
the Master drive, so that the next time the Target is booted-up, all SID‟s will be replaced with
fresh ones. Any one of a number of freeware and for- fee SID changers can be used.
Q. Can you briefly explain the difference between mirror copy and CleverCopy?
A. Mirror copy merely copies all sectors in a given partition (or drive) from the beginning to the
end. It does not look at drive structures, and can thus copy any type of known or unknown
data. Since Mirror copy does not determine where useful data starts and stops, it ends up
copying every sector on the drive, a time consuming operation. CleverCopy analyzes the drive
structures, and copies only sectors that are occupied by useful files and data. It also adjusts
the various drive structures to assure a valid and fully partitioned Target drive. CleverCopy is
by far the most recommended mode of cloning.
Q. Can I clone to/from drives larger than 8.5 Gigabytes?
A. Yes. Echo Plus software was designed to support drive up to 2 Terabytes in size. It has
been tested on drives larger than 250GB in size. Please note that some PC‟s cannot “see”
drives larger than 8.5GB due to BIOS limitations.
Echo Plus Users Manual
22
FAQS
Q. Can I copy from a larger drive to a smaller drive?
A. Yes, as long as the data content of each partition fits into the scaled down size of its corresponding partition. Otherwise, an error messageis displayed. With NTFS partitions, certain
files cannot be moved, so the ability to scale a partition down is somewhat limited. Typically,
an NTFS partition can be scaled down to 55% of its original size.
Q. Can I clone to/from laptop drives?
A. Yes. Logicube sells 2.5” drive adapters, and can provide adapters to many of the special
drive connections on the market. Please call for availability. In cases where the drive cannot
be removed from the laptop, use the CloneCard (call Logicube sales for details).
Q. Can I clone drives with virus protection software installed?
A. Yes. But remember to decline the “repair” of the Target drive should the protection program
complain about an altered Master boot record, etc.
Q. The Echo Plus does not recognize my Master (or Target) drive? What can be done?
A. Make sure that the drive jumpers are set as a single Master. Drive jumper settings can be
found at the drive manufacturer web site. Also, make sure all cables (data and power) are
connected properly to BOTH drives. Note that WesternDigital drives require all jumpers to be
removed, for proper Echo Plus operation.
Q. Why do I have an un-partitioned free space at the end of my Target drive?
A. This typically occurs when the Master drive has FAT16 partitions only, and the Target is
much larger. FAT16 partitions cannot scale to more than 2.1GB each. Otherwise, CHS
Settings LBA-1, LBA-2, LARGE-1 and LARGE-2 will leave 1 or 2 cylinders unallocated at the
end of the drive.
Q. Can the Echo Plus handle dual boot scenarios in conjunction with NTFS.
A. Yes. The Echo Plus will clone a FAT16 followed by either an NTFS, or another FAT16
partition correctly, and adjust all the necessary structures, so that dual booting is possible.
It will also handle dual boot scenarios where the different Operating Systems reside in the
same partition.
Advanced Topics
SID changing issues
The WinNT operating system, Windows 2000 and
WinXP (previously known as NT 5.0) attach a
unique number (a security ID or SID) to all files and
Echo Plus™ Users Manual
23
FAQS
directories on the drive to provide security and
authentication services. The same SID‟s are found
in the registry in various locations. When such
drives are cloned, the security ID‟s (SID‟s) get
copied without change. If the Target drive
participates in the same network as the Master,
there will be a security breach which will cause
undesirable network behaviors.
It is thus recommended to use one of the many SID
changing utilities available in the marketplace.
We recommend a freeware SID changer called
NewSid. Updated versions can be downloaded at
www.sysinternals.com. Logicube is in no way
associated with SysInternals and cannot offer any
technical support for the SID changer. Other
commercial SID changers can be found in major
software stores.
Note: NewSID is not compatible with WinXP, we
suggest utilizing Microsoft Sysprep to change the
SID‟s in a Windows XP system prior to cloning.
Echo Plus Users Manual
24
6. Index
mirror mode, 6, 7, 8, 10, 11, 21, 22
Mirror Clone, 10
NTFS, 20
Partitions, 20
Phoenix BIOS, 21
PIO, 9
RoHS Directive (2002/95/EC), ii
SATA, 1, 2, 3
SID, 22
Speed, 8
Target., 1, 8, 21, 22
Technical Support, Logicube, ii
VCP Controller, iii, 13, 14, 15
Verify, 8
virus protection, 23
volumes, 20
Warranty, Parts and Labor, i, ii
Website, Logicube, ii, 11
Win95/98, 20
Windows Vista, 11
bad sectors, 22
Button, START/STOP, 4
CHS Mode
CHS, 7
CleverCopy, 6, 8, 20, 22
Client, 4
Clone, 11
cloning, 1
defragment, 20
Disclaimer, Liability Limitation, i
EU, EUROPEAN UNION, ii
FAT16, 20
FAT32, 20
file system, 20
format, 21
Hyperterminal, iii, 13, 17, 19
IDE, 1
Jumper settings, 3
logical drives, 20
Master, 1, 2, 3, 6, 8, 11, 12, 20, 21, 22, 23, 24
Mirror
For further assistance please contact Logicube’s Technical Support at: 818 700 8488 ext. 3, or by email to
[email protected]. Logicube tech support is available 7am – 5pm PST, Monday through Friday,
excluding U.S. legal holidays.
Echo Plus™ Users Manual
25