Download Safety Instructions
Transcript
®
GB Subject to change
Electric Chain Saw
User’s Guide
After Sales Support
Now you have purchased a Gardenline® product you can rest
assured in the knowledge that as well as your 3 year parts
and labour warranty you have the added peace of mind of
dedicated helplines and web support:
AFTER SALES SUPPORT
UK / N.IRELAND HELPLINE NO 0905-1460005
(£ 0,06/min)
REP. IRELAND HELPLINE NO 1520-932626
WEB SUPPORT www.heltec.eu
(E 0,15/min)
MODEL NUMBER: GCS-2000
www.servotool.nl
GB-0805-27
Content
03
Introduction
04
Machine data
07
Safety instructions
19
Assembly instructions
22
Operation instructions
31
Maintenance
38
Warranty
39
Parts List
40
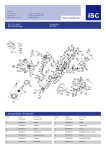
Exploded view
HELPLINE No. UK 0905-1460005
WEB SUPPORT: www.heltec.eu
Model Number: GCS-2000
(£ 0,06/min)
• IRELAND 1520-932626
(E 0,15/min)
02
HELPLINE No. UK 0905-1460005
WEB SUPPORT: www.heltec.eu
Model Number: GCS-2000
(£ 0,06/min)
• IRELAND 1520-932626
(E 0,15/min)
43
1
Introduction
2000W ELECTRIC CHAIN SAW
Congratulations on choosing to buy a Gardenline® product. By doing so
you now have the assurance and peace of mind that comes with
purchasing a product made by one of Europe’s leading manufacturers.
All products brought to you by Gardenline® are manufactured to the
highest standards of performance and safety, and, as part of our
philosophy of customer service and satisfaction, are backed
by our comprehensive 3 Year Warranty.
Please fill in and return the Warranty Card to the address provided.
We hope you will enjoy using your purchase for many years to come.
For your own safety and that of others, we recommend that you
read this instruction manual carefully before using this Electric
Chain Saw. Keep this instruction manual and the documentation
provided with the Electric Chain Saw for future reference.
Introduction
This unit is designed for occasional homeowner use and should not be used
for commercial purposes or subjected to heavy continuous use. Your new
chain saw can by used for a variety of projects such as cutting firewood,
making fence posts, felling small trees, limbing, pruning at ground level, and
light carpentry. Cut only wood or wood products with your saw.
HELPLINE No. UK 0905-1460005
WEB SUPPORT: www.heltec.eu
Model Number: GCS-2000
(£ 0,06/min)
• IRELAND 1520-932626
(E 0,15/min)
42
HELPLINE No. UK 0905-1460005
WEB SUPPORT: www.heltec.eu
Model Number: GCS-2000
(£ 0,06/min)
• IRELAND 1520-932626
(E 0,15/min)
03
2
Machine data
Specifications
Input
Power
No load speed
Cutting speed
Cutting length
Net weight
Oil capacity
Braking time
Vibration front handle
Vibration rear handle
Lpa (sound pressure)
Lwa (sound power)
16
230V~, 50 Hz
2000 W
7800/min
15 m/s (900 m/min)
400 mm
5.4 kg
200 ml
< 0.15 sec
5.77 m/s2
4.89 m/s2
91 dB (A)
105 dB (A)
9
11
10
1
3
13
HELPLINE No. UK 0905-1460005
WEB SUPPORT: www.heltec.eu
Model Number: GCS-2000
7
(£ 0,06/min)
15
• IRELAND 1520-932626
8
(E 0,15/min)
04
HELPLINE
HELPLINE No.
No. UK
UK 0905-1460005
0905-1460005 (£(£0,06/min)
0,06/min) •• IRELAND
IRELAND 1520-932626
1520-932626 (E(E0,15/min)
0,15/min)
WEB
WEB SUPPORT:
SUPPORT: www.heltec.eu
www.heltec.eu
Model
Model Number:
Number: GCS-2000
GCS-2000
41
41
9
Exploded View
Machine data
2
18
17
4
5
6
14
19
12
General Information
Page 2
1. Rear handle
2. Oil tank cap
3. Trigger start
4. Sprocket cover
5. Chain cover control knob
6. Chain tension ring
7. Electric motor
8. Electric cord
9. Chain brake lever/hand guard
10. Lock / button
11. Front handle
12. Guide bar
13. Saw chain
14. Spiked bumper
15. Rear hand guard
16. Guide bar nose
17. Oil tank inspection window
18. Cord retainer
19. Chain catcher
HELPLINE No. UK 0905-1460005
WEB SUPPORT: www.heltec.eu
Model Number: GCS-2000
(£ 0,06/min)
• IRELAND 1520-932626
(E 0,15/min)
40
HELPLINE No. UK 0905-1460005
WEB SUPPORT: www.heltec.eu
Model Number: GCS-2000
(£ 0,06/min)
• IRELAND 1520-932626
(E 0,15/min)
05
Machine data
Safety features
Numbers preceding the descriptions correspond with the numbers above to
help you locate the safety feature.
3
Trigger start / stop switch
Stops saw motor when released.
9 Chain brake lever / hand guard
Activates the chain brake and protects the operator’s left hand in the event
it slips off the front handle while saw is running.
7 Electric motor
Is double insulated for added safety.
10 Lock / off button
Prevents accidental acceleration of the saw motor. The trigger cannot be
squeezed unless lock/off button is pushed forward to end.
13 Low-kickback chain
helps significantly reduce kickback, or the intensity of kickback, due to
specially designed depth gauges and Guard links.
19 Chain catcher
---
HELPLINE No. UK 0905-1460005
WEB SUPPORT: www.heltec.eu
Model Number: GCS-2000
(£ 0,06/min)
8
Parts list
• IRELAND 1520-932626
(E 0,15/min)
06
Position
Description
No.
409725
409726
409727
409728
409729
501534
409737
409730
409731
409732
409733
409735
409734
409736
409738
KZA1004
KZA1005
501543
Sprocket wheel
Oiler cap
Spring
Gear (set)
Gripping teeth
Insert plate
Chain tension adjustment
Rotor
Carbon brush holder
Carbon brush (set)
Carbon brush cap
Switch + button
Switch junction rod
Micro switch
Guard
Chain guide bar, 40 cm
Saw chain, 40 cm
Chain bar cover
1 till 3
8
9-2
9-5 + 23-6
10
15
16 + 18
23-9
23-19
23-20
23-21 + 23-22
29 +34
35
36
49
64
65
66
HELPLINE No. UK 0905-1460005
WEB SUPPORT: www.heltec.eu
Model Number: GCS-2000
(£ 0,06/min)
• IRELAND 1520-932626
(E 0,15/min)
39
7
Warranty
Warranty
The guarantee conditions can be found on the separately enclosed guarantee
card.
3
Safety Instructions
Meaning of symbols marked on the product
The following pictograms are used in these instructions for use:
CE DECLARATION OF CONFORMITY (GB)
Read the user manual before using the machine
We declare under our sole responsibility that this product is in conformity
with the following standards or standardized documents:
GCS-2000 Chain Saw
In accordance with essential applicable safety standards of
European directives
EN 50144-1, EN 50144-2-13, EN55014-1, EN55014-2,
EN 61000-3-2, EN 61000-3-11
Class II machine – Double insulation – You don’t need any earthed
plug.
In accordance with the regulations:
Whenever the machine is in use, safety goggles must be worn to
safeguard against flaying object, as must ear protectors, such as a
soundproof helmet, in order to protect the operator’s hearing. If
the operator is working in an area where there is a risk of falling
objects, a safety helmet must also be worn.
98/37/EC, 2000/14/EC, 2006/95/EC, 2004/108/EC,
2002/95/EC, 2002/96/EC
from 01-09-2005
ZWOLLE NL
Wear gloves to protect your hands
Warning! Danger
J.A. Bakker - van Ingen
CEO Ferm BV
Do not expose to rain
J. Lodewijk
Quality Manager Ferm Global
Remove plug from the mains immediately if cable is damaged or
cut
It is our policy to continuously improve our products and we therefore reserve
the right to change the product specification without prior notice.
Wear safety boots to protect against electric shock
Servotool BV. Lingenstraat 6. 8028 PM Zwolle. The Netherlands
Sound power level 105 dB (A)
Faulty and/or discarded electrical or electronic apparatus have to
be collected at the appropriate recycling locations.
HELPLINE No. UK 0905-1460005
WEB SUPPORT: www.heltec.eu
Model Number: GCS-2000
(£ 0,06/min)
• IRELAND 1520-932626
(E 0,15/min)
38
HELPLINE No. UK 0905-1460005
WEB SUPPORT: www.heltec.eu
Model Number: GCS-2000
(£ 0,06/min)
• IRELAND 1520-932626
(E 0,15/min)
07
Safety Instructions
Maintenance
Keep bystanders away
1.
2.
Warning! When using electric tools, basic safety precautions,
including the following, should always be followed to reduce the
risk of fire, electric shock and personal injury. Read all these
instructions before operating this product and save
these instructions.
3.
4.
5.
6.
7.
Warning! Take care not to expose this tool to rain and remove plug
from mains immediately if the supply cable is damaged.
Warning!
Read all instructions. Failure to follow all instructions listed below may
result in electric shock, fire and/or serious injury. The term “power tool” in
all of the warnings listed below refers to your mains operated (corded)
power tool or battery operated (cordless) power tool. Save these instructions.
8.
Place switch in “off” position and unplug the power supply before the
appliance is serviced, cleaned, or maintenance is performed.
Keep the air intake clean and air vents free of debris to avoid overheating the motor.
Clean with a damp sponge and mild soap. Do not squirt with a water
hose or douse with water or other liquids.
Inspect the saw chain for proper tension before each use and frequently during cutting. Sharpen as required.
Clean the guide bar and bar pad to ensure free path for oil.
Turn the bar over after each use to achieve even wear.
No motor lubrication is necessary. The motor is equipped with lifetime
lubricated bearings.
If the saw does not operate, turn switch to OFF position and disconnect the extension cord, first from the power supply, then from the
saw. Check the power supply for blown fuses or tripped circuit breakers. If it still does not operate, contact your local dealer. Do not
attempt to repair it yourself. No serviceable parts are inside.
1) Work area
a. Keep work area clean and well lit. Cluttered and dark areas invite accidents.
b. Do not operate power tools in explosive atmospheres, such as in the presence of flammable liquids, gasses or dust. Power tools create sparks
which may ignite the dust of fumes.
c. Keep children and bystanders away while operating a power tool.
Distractions can cause you to lose control.
2) Electrical safety
a. Power tool plugs must match the outlet. Never modify the plug in any
way. Do not use any adapter plugs which earthed (grounded) power
tools. Unmodified plugs and matching outlets will reduce risk of electric
shock.
b. Avoid body contact with earthed or grounded surfaces such as pipes,
radiators, ranges and refrigerators. There is an increased risk of electric shock if your body is earthed or grounded.
c. Do not expose power tools to rain or wet conditions. Water entering a
power tool will increase the risk of electric shock.
d. Do not abuse the cord. Never use the cord for carrying, pulling or
unplugging the power tool. Keep cord away from heat, oil, sharp edges
HELPLINE No. UK 0905-1460005
WEB SUPPORT: www.heltec.eu
Model Number: GCS-2000
(£ 0,06/min)
• IRELAND 1520-932626
(E 0,15/min)
08
HELPLINE No. UK 0905-1460005
WEB SUPPORT: www.heltec.eu
Model Number: GCS-2000
(£ 0,06/min)
• IRELAND 1520-932626
(E 0,15/min)
37
Maintenance
Safety Instructions
Chain tension
Check the chain tension frequently and adjust as
often as necessary to keep the chain snug on the
bar, but loose enough to be pulled around by
hand. (See Section Saw Chain Tension
Adjustment).
min 4 mm
(0,16")
Fig. 18
or moving parts. Damaged or entangled cords increase the risk of electric shock.
e. When operating a power tool outdoors, use an extension cord suitable
for outdoor use. Use of a cord suitable for outdoor use reduces the risk
of electric shock. Always use tool in conjunction with a residual circuit
breaker device.
f. Take extra care not to severe or snag the electrical cord. Unplug the
cord immediately.
Breaking in a new saw chain
A new chain and bar will need readjustment after
as few as 5 cuts. This is normal during the breakin period, and the interval between future adjustments will begin to lengthen quickly. Over a period of time, however, the moving parts of the saw
chain will become worn, resulting in what is called chain strength. This is normal. When it is no
longer possible to obtain correct chain tension
adjustment, a link will have to be removed to
shorten the chain. See your Authorized Service
Center to have this repair performed.
3) Personal safety
a. Stay alert, watch what you are doing and use common sense when
operating a power tool. Do not use a power tool while you are tired or
under the influence of drugs, alcohol or medication.
A moment of inattention while operating power tools may result in serious personal injury.
b. Use safety equipment. Always wear eye protection. Safety equipment
such as dust mask, non-skid safety shoes, hard hat, or hearing protection used for appropriate conditions will reduce personal injuries.
c. Avoid accidental starting. Ensure the switch is in the off position before
plugging in. Carrying power tools with your finger on the switch or plugging in power tools that have the switch on invites accidents.
d. Remove any adjusting key or wrench before turning the power tool on.
A wrench or a key left attached to a rotating part of the power tool may
result in personal injury.
e. Do not overreach. Keep proper footing and balance at all times. This
enables better control of the power tool in unexpected situations.
f. Dress properly. Do not wear loose clothing or jewellery. Keep your hair,
clothing and gloves away from moving parts. Loose clothes, jewellery or
long hair can be caught in moving parts.
g. If devices are provided for the connection of dust extraction and collection
facilities, ensure these are connected and properly used. Use of these
devices can reduce dust related hazards.
h. Use clamps or a vice to hold work. It’s safer than using your hand and
it frees both hands to operate tool.
Warning! Never have more than 3 links removed from a loop
of chain this could cause damage to the sprocket.
Chain lubrication
Always make sure the automatic oiler system is working properly. Keep
the oil tank filled with special chainsaw oil. Adequate lubrication of the bar
and chain during cutting operations is essential to minimize friction with
the guide bar. Never starve the bar and chain of lubricating oil. Running
the saw dry or with too little oil will decrease rapid cutting efficiency, shorten saw chain life, cause rapid dulling of the chain, and lead to excessive
wear of the bar from overheating. Too little oil is evidenced by smoke or
bar discoloration.
Preventative maintenance servicing a double insulated appliance
In this double insulated appliance, 2 systems of insulation, instead of
earthed, are provided. No earthed means is provided on a double insulated appliance, nor should a means for earthed be added to the appliance. No serviceable parts are inside. A double insulated appliance is marked with the words, “Double Insulation” or “Double Insulated”. The symbol
may also be marked on the appliance.
HELPLINE No. UK 0905-1460005
WEB SUPPORT: www.heltec.eu
Model Number: GCS-2000
(£ 0,06/min)
• IRELAND 1520-932626
4) Power tool use and care
a. Do not force the power tool. Use the correct power tool for your application. The correct power tool will do the job better and safer at the
rate for which it was designed.
b. Do not use the power tool if the switch does not turn it on and off. Any
(E 0,15/min)
36
HELPLINE No. UK 0905-1460005
WEB SUPPORT: www.heltec.eu
Model Number: GCS-2000
(£ 0,06/min)
• IRELAND 1520-932626
(E 0,15/min)
09
Safety Instructions
c.
d.
e.
f.
g.
h.
i.
j.
Maintenance
Warning! The risk of kick-back increases when:
• file-angle is too big
• cutting-angle is too small
• diameter of round file is too small
power tool that cannot be controlled with the switch is dangerous and
must be repaired.
Disconnect the plug from the power source before making any adjustments, changing accessories, or storing power tools. Such preventive
safety measures reduce the risk of starting the power tool accidentally.
Store idle power tools out of the reach of children and do not allow persons unfamiliar with the power tool or these instructions to operate the
power tool. Power tools are dangerous in the hands of untrained users.
Maintain power tools. Check for misalignment or binding of moving
parts, breakage of parts and any other condition that may affect the power tools operation.
If damaged, have the power tool repaired before use. Many accidents
are caused by poorly maintained power tools.
Keep cutting tools sharp and clean. Properly maintained cutting tools
with sharp cutting edges are less likely to bind and are easier to control.
Use the power tool, accessories and tool bits etc., in accordance with
these instructions and in the manner intended for the particular type of
power tool, taking into account the working conditions and the work to
be performed. Use of the power tool for operations different from intended could result in hazardous situation.
Damaged switches must be replaced at a customer service repair centre. Do not use power tools that cannot be switched on and off.
Do not leave power tools unattended while they are switched on.
Always switch off the tool and wait until it has come to a full standstill
before leaving.
If the mains cable has been damaged, it must be replaced with a special mains cable. These can be obtained from the manufacturer or the
manufacturer's customer service department. The mains cable may
only be replaced by the manufacturer, the manufacturer's customer service department or equally qualified persons.
B. Sharpening the tooth
To sharpen the teeth of the saw you need a
round file and a file mould. Consult a specialist
store in chain saws for these items.
1.
2.
3.
1
5
Fig. 17
C. The cutting-depth
When you sharpen the teeth, the cutting-depth will decrease. To maintain
the maximum saw capacity, the ridge (B) has to be lowered. To attain a
perfect cutting-depth you should use also a depth-mould. Consult a specialist store in chain saws for the specific tool and measurements. Adjusting
the cutting-depth has to be done directly after the teeth are sharpened.
You use a flat file and a depth-mould for this. The cutting-depth is correct
when you don’t feel resistance anymore, while moving the file across the
mould.
5) Service
a. Please use a qualified expert who uses original replacement parts to
repair your power tool. This will ensure proper functioning of the power
tool.
b. Caution! The use of any accessories or additional tools other than
those recommended in this manual may lead to an increased risk of
injury. Only use original replacement parts.
HELPLINE No. UK 0905-1460005
WEB SUPPORT: www.heltec.eu
Model Number: GCS-2000
(£ 0,06/min)
• IRELAND 1520-932626
Check if the chain is stretched out completely. Otherwise the chain is not stable enough
and cannot be sharpened correctly.
Always file from the inside of the tooth to the
outside. Always lift up the file when you start
sharpening another tooth. First file all teeth
on one side, turn round the chain saw and
then file the teeth on the other side.
After filing, the teeth should all have the
same length. When the length of the teeth is
only 4 mm, the chain is worn and should be
replaced.
(E 0,15/min)
10
HELPLINE No. UK 0905-1460005
WEB SUPPORT: www.heltec.eu
Model Number: GCS-2000
(£ 0,06/min)
• IRELAND 1520-932626
(E 0,15/min)
35
Maintenance
Safety Instructions
Chain Saw safety warnings:
• Keep all parts of the body away from the saw chain when the
chain saw is operating.
• Before you start the chain saw, make sure the saw chain is not
contacting anything.
A moment of inattention while operating chain saws may cause entanglement of your clothing or body with the saw chain.
• Always hold the chain saw with your right hand on the rear handle and your left hand on the front handle. Holding the chain saw
with a reversed hand configuration increases the risk of personal injury
and should never be done.
• Wear safety glasses and hearing protection. Further protective
equipment for head,hands, legs and feet is recommended.
Adequate protective clothing will reduce personal
injury by flying debris or accidental contact with the saw chain.
• Do not operate a chain saw in a tree. Operation of a chain saw
while up in a tree may result in personal injury.
• Always keep proper footing and operate the chain saw only when
standing on fixed,secure and level surface. Slippery or unstable
surfaces such as ladders may cause a loss of balance or control of the
chain saw.
• When cutting a limb that is under tension be alert for spring back.
When the tension in the wood fibres is released the spring loaded limb
may strike the operator and/or throw the chain saw out of control.
• Use extreme caution when cutting brush and saplings. The slender material may catch the saw chain and be whipped toward you or
pull you off balance.
• Carry the chain saw by the front handle with the chain saw switched off and away from your body. When transporting or storing
the chain saw always fit the guide bar cover. Proper handling of the
chain saw will reduce the likelihood of accidental contact with the
moving saw chain.
• Follow instructions for lubricating, chain tensioning and changing accessories.Improperly tensioned or lubricated chain may either
break or increase the chance for kickback.
• Keep handles dry, clean, and free from oil and grease. Greasy, oily
handles are slippery causing loss of control.
• Cut wood only. Do not use chain saw for purposes not intended.
For example: do not use chain saw for cutting plastic, masonry or
non-wood building materials. Use of the chain saw for operations
different than intended could result in a hazardous situation.
Warning! Always wear heavy duty protection work gloves and
disconnect the extension cord when working on the saw chain.
A
B
Fig. 16
Chain sharpening
A. General information about sharpening the
chain
Never saw with a blunt chain. The chain is blunt
when you have to push the chain saw into the
tree and the chips are very small. The saw-link is
the part of the chain which does the sawing (fig.
16). The height-distance between the tooth A and
the ridge B is the cutting-depth. When sharpening the chain you have to consider the next
points (fig.17):
•
File-angle
•
Cutting-angle
•
File-position
•
Diameter of round file
•
File-depth
For correct sharpening of the chain you need good tools; for example a
mould to obtain a correct file-angle. If in doubt consult a specialist service
centre. Consult specialist assistance and advice if you are at all unsure
about task.
HELPLINE No. UK 0905-1460005
WEB SUPPORT: www.heltec.eu
Model Number: GCS-2000
(£ 0,06/min)
• IRELAND 1520-932626
(E 0,15/min)
34
HELPLINE No. UK 0905-1460005
WEB SUPPORT: www.heltec.eu
Model Number: GCS-2000
(£ 0,06/min)
• IRELAND 1520-932626
(E 0,15/min)
11
Safety Instructions
Maintenance
Causes and operator prevention of kickback:
Kickback may occur when the nose or tip of the guide bar touches an
object, or when the wood closes in and pinches the saw chain in the cut.
Tip contact in some cases may cause a sudden reverse reaction, kicking
the guide bar up and back towards the operator.
Pinching the saw chain along the top of the guide bar may push the guide
bar rapidly back towards the operator.
Either of these reactions may cause you to lose control of the saw which
could result in serious personal injury. Do not rely exclusively upon the
safety devices built into your saw. As a chain saw user, you should take
several steps to keep your cutting jobs free from accident or injury.
Kickback is the result of tool misuse and/or incorrect operating procedures
or conditions and can be avoided by taking proper precautions as given
below:
•
•
•
•
•
•
•
•
Oil passages
Oil passages at bar pad should be cleaned to ensure proper lubrication of
the bar and chain during operation. This can be done using a soft wire
small enough to insert into the oil discharge hole or stiff brush.
Note: The condition of the oil passages can be easily checked. If the passages are clear, the chain will automatically give off a spray of oil within
seconds of starting the saw. Your saw is equipped with an automatic oiler
system.
Chain maintenance instructions
Warning! Unless you have experience and specialized training
for dealing with kickback (see Safety Precautions), always use
a low-kickback saw chain, which significantly reduces the danger of kickback. Low-kickback saw chain does not completely
eliminate kickback. A low-kickback or “safety chain”, should
never be regarded as total protection against injury.
Maintain a firm grip, with thumbs and fingers encircling the chain
saw handles, with both hands on the saw and position your body
and arm to allow you to resist kickback forces. Kickback forces
can be controlled by the operator, if proper precautions are taken. Do
not let go of the chain saw.
Do not overreach and do not cut above shoulder height. This
helps prevent unintended tip contact and enables better control of the
chain saw in unexpected situations.
Only use replacement bars and chains specified by the manufacturer. Incorrect replacement bars and chains may cause chain breakage and/or kickback.
Follow the manufacturer’s sharpening and maintenance instructions for the saw chain. Decreasing the depth gauge height can lead
to increased kickback.
A low-kickback saw chain should always be used in conjunction with
other kickback protection devices such as the chain brake / Hand Guard
furnished with your unit. Always use a replacement saw chain designed as
“low-kickback” or a saw chain which meets the low-kickback performance.
A standard saw chain (a chain which does not have the kickback reducing
guard links) should only be used by an experienced professional chain
saw operator.
What is a Low-Kickback Saw Chain
A low-kickback saw chain is a chain which has met the kickback performance requirements of ISO 9518.
By keeping the chain brake and saw chain in good working condition
and correctly serviced as recommended in this manual, you will be able to
maintain the safety system of your chain saw over the life of the product.
Power supply
Connect the chain saw to correct voltage; be sure that the voltage
supplied is the same as that specified on the nameplate of the tool.
Do not operate a chain saw that is damaged, improperly adjusted, or
not completely and securely assembled. Be sure that the saw chain
stops moving when the trigger is released.
Do not attempt operations beyond your capacity or experience.
Do not operate a chain saw with one hand! Serious injury to the operator, helpers, or bystanders may result from one-handed operation. A
chain saw is intended for two-handed use.
HELPLINE No. UK 0905-1460005
WEB SUPPORT: www.heltec.eu
Model Number: GCS-2000
(£ 0,06/min)
• IRELAND 1520-932626
Warning! Never remove, modify or make inoperative any safety device furnished with your unit. The Chain Brake/Hand
Guard and low-kickback saw chain are major safety features
provided for your protection.
(E 0,15/min)
12
HELPLINE No. UK 0905-1460005
WEB SUPPORT: www.heltec.eu
Model Number: GCS-2000
(£ 0,06/min)
• IRELAND 1520-932626
(E 0,15/min)
33
Maintenance
Safety Instructions
Note:
It is not necessary to remove the saw chain to lubricate the guide bar
sprocket tip. Lubrication can be done on the job.
2.
3.
4.
•
•
•
Clean the guide bar sprocket tip.
Using disposable Lube gun, insert needle nose into the lubrication
hole and inject grease until it appears at the outside edge of the
sprocket tip (Fig.14).
Make sure that the chain brake is deactivated. Rotate the saw chain
by hand. Repeat the lubrication procedure until the entire sprocket tip
has been greased.
•
•
•
•
To Clean Guide Bar Rails
1. Remove sprocket cover, bar and chain.
2. Using a screwdriver, putty knife, wire brush or other similar instrument,
clear residue from the rails on the guide bar. This will keep the oil
passages open to provide proper lubrication to the bar and chain. (Fig.
15)
3. Reinstall the bar, chain (and adjust tension) and sprocket cover.
(See Section Guide bar / saw chain installation).
•
•
•
Guide bar maintenance
Most guide bar problems can be prevented merely by keeping the chain
saw well maintained. Incorrect filing and non-uniform cutter and depth
gauge settings cause most guide bar problems, primarily resulting in uneven bar wear. As the bar wears unevenly, the rails widen, which may
cause chain clatter and difficulty in making straight cuts. Insufficient guide
bar lubrication and operating the saw with a chain that is too tight will contribute to rapid bar wear (see Section Chain maintenance instructions). To
help minimize bar wear, the following guide bar maintenance is recommended.
•
•
•
•
Bar wear
Turn guide bar frequently at regular intervals (for example, after 5 hours of
use), to ensure even wear on top and bottom of bar.
Bargrooves
Bar grooves (or rails which support and carry the chain) should be
cleaned if the saw has been heavily used or if the saw chain appears
dirty. Rails should always be cleaned every time the saw chain is removed.
HELPLINE No. UK 0905-1460005
WEB SUPPORT: www.heltec.eu
Model Number: GCS-2000
(£ 0,06/min)
• IRELAND 1520-932626
•
(E 0,15/min)
32
To reduce potential for electric shock, do not operate the saw on wet
or slippery surfaces, or during snow storms, rain storms, and other
adverse weather conditions.
Keep the handles dry, clean, and free of oil or grease.
Do not allow dirt, debris or sawdust to build up on the motor or outside air vents.
Follow the manufacturer’s sharpening and maintenance instructions
for the saw chain, how to sharpen the saw.
Cut at high motor speeds.
Operation of a chain saw should be restricted to adults, properly
instructed individuals.
Your chain saw is intended for occasional homeowner use. It is not
made for heavy continuous use.
Do not force a small saw to do a job requiring a heavier duty unit.
Examine the electrical switches. Do not use the chain saw if the switches do not properly turn on and off. Do not attempt to make any
repairs to the electric switches. Take your saw to a Authorized Service
Center.
Maintain extension cords. Inspect the extension cords periodically and
replace if damaged. Only use power cords that are suitably marked
for outdoor use (wiring ≥ 1,5 mm2).
Do not operate your chain saw near or around flammable liquids or
gases, whether in or out of doors. An explosion and/or fire may result.
All chain saw service, other than the items listed in the user manual
safety and maintenance instructions should be performed by competent chain saw personnel. Do not attempt to repair it yourself; there
are no user serviceable parts inside.
Never remove, modify or make inoperative any safety device furnished with your unit. The Chain Brake®/Hand Guard is a major safety
feature. The saw will not run when the Chain Brake® is tripped.
It is intended for infrequent use by homeowner’s, cottagers and campers, and for such general applications such as clearing, pruning, cutting firewood, etc. It is not intended for prolonged use. If the intended
use involves prolonged periods of operation, this may cause circulatory problems in the user’s hands due to vibration. It may be appropriate to use a saw having an anti-vibration feature.
Safety clothing required by your safety organizations, government
regulations, or your employer should be used; otherwise, snug fitting
clothing, safety footwear, eye and face protection and hand and ear
protection should be worn.
HELPLINE No. UK 0905-1460005
WEB SUPPORT: www.heltec.eu
Model Number: GCS-2000
(£ 0,06/min)
• IRELAND 1520-932626
(E 0,15/min)
13
Safety Instructions
•
•
•
•
6
Maintenance
Guide bar maintenance
When felling, keep at least 2 tree lengths between yourself and your
fellow workers.
Keep everyone, especially children and pets, away from the area of
operation. Never allow children to operate the appliance. Turn off unit
immediately if you are approached.
Avoid sawing in the soil, in fences and in wiring. The chain saw also
is not developed to saw young/thin trees and prepared balks.
Do not allow children or young persons to operate the chain saw.
The chain saw for use for over 18’s only.
Warning! Ensure that the power cord is disconnected before
performing any maintenance on your saw.
Proper maintenance of the guide bar, as explained in this section, is
essential to keep your saw in good working order.
Sprocket tip lubrication
For units supplied with sprocket tip guide bars only.
Highly Recommended:
• The appliance should be supplied via a Residual Current Device
(RCD) with a tripping current of not more than 30 mA.
• The first time user should have practical instruction in the use of
the chainsaw and the protective equipment from an experienced
operator. The initial practice should be cutting logs on a saw
horse or cradle.
Caution! Failure to lubricate the guide bar sprocket tip as
explained below will result in poor performance and seizure,
voiding the manufacturer’s warranty.
Lubrication of the sprocket tip is recommended after each saw use.
Always thoroughly clean the guide bar sprocket tip before lubrication.
Important safety
How to read symbols
Fig. 1
Warning! Wear heavy duty work gloves when performing this
application to reduce risk of personal injury.
Warning! Used to warn that an unsafe procedure should not
be performed.
Recommended: Recommended cutting procedure.
To Lubricate Sprocket Tip:
1. Unplug the chain saw from the power source.
HELPLINE No. UK 0905-1460005
WEB SUPPORT: www.heltec.eu
Model Number: GCS-2000
(£ 0,06/min)
• IRELAND 1520-932626
(E 0,15/min)
14
HELPLINE No. UK 0905-1460005
WEB SUPPORT: www.heltec.eu
Model Number: GCS-2000
(£ 0,06/min)
• IRELAND 1520-932626
(E 0,15/min)
31
Operations instructions
Safety Instructions
Bucking using a sawhorse
For personal safety and ease of cutting, the correct position for vertical
bucking is essential (Fig. 13).
Warning!
1. Beware of kick back.
2. Do not attempt to hold saw with one hand.
3. Avoid bar nose
contact.
Vertical cutting:
A.
Hold the saw firmly with both
hands and keep the saw to
the right of your body while
cutting.
B.
Keep the left arm as straight
as possible.
C.
Keep weight on both feet.
Recommended
4. Hold saw properly with both hands. Never use the machine with one
hand: the chain brake does not work!
Danger! Beware of kickback!
Caution! While the saw is cutting, be sure the chain and bar
are being properly lubricated.
A
B
Fig. 3A
Fig. 3C
Fig. 3B
HELPLINE No. UK 0905-1460005
WEB SUPPORT: www.heltec.eu
Model Number: GCS-2000
(£ 0,06/min)
• IRELAND 1520-932626
(E 0,15/min)
30
HELPLINE No. UK 0905-1460005
WEB SUPPORT: www.heltec.eu
Model Number: GCS-2000
(£ 0,06/min)
• IRELAND 1520-932626
(E 0,15/min)
15
Safety instructions
Operations instructions
Limbing
Limbing a tree is the process of removing the branches from a fallen tree.
Do not remove supporting limbs (A) until after the log is bucked (cut) into
lengths (Fig. 11). Branches under tension should be cut from the bottom
up to avoid binding the chain saw.
C
Warning! Never cut tree limbs while standing on tree trunk.
Bucking
Bucking is cutting a fallen log into lengths. Make sure you have a good
footing and stand uphill of the log when cutting on sloping ground. If possible, the log should be supported so that the end to be cut off is not resting on the ground. If the log is supported at both ends and you must cut
in the middle, make a downward cut halfway through the log and then
make the undercut. This will prevent the log from pinching the bar and
chain. Be careful that the chain does not cut into the ground when bucking
as this causes rapid dulling of the chain. When bucking on a slope,
always stand on the uphill side.
B
Fig. 3D
Guide bar/saw chain installation
To install guide bar & saw chain:
1. Place power unit on flat surface.
2. To remove the side cover (A), turn the knob (B) counter-clockwise.(Fig.
3A).
3. Slide the bar on to the saw, and place the chain correctly on the sprocket wheel (Fig. 3B).
4. Spread the chain out with the cutting edges (E) of the chain pointing in
the direction of rotating (Fig. 3C).
5. Place the side cover back in its place and turn the knob (B) clockwise.
6. Turn the tension ring (C) untill the chain tension is correct (Fig. 3D +
4).
7. After running the chain saw for 1 hour, check the chain tension again
and adjust when necessary.
1.
2.
3.
Note: The best way to hold a log while bucking is to use a sawhorse.
When this is not possible, the log should be raised and supported by the
limb stumps or by using supporting logs. Be sure the log being cut is
securely supported.
Saw chain tension adjustment
Proper tension of the saw chain is extremely important and must be
checked before starting, as well as during, any cutting operation.
Taking the time to make needed adjustments to the saw chain will
result in improved cutting performance, prolonged chain life and safety.
HELPLINE No. UK 0905-1460005
WEB SUPPORT: www.heltec.eu
Model Number: GCS-2000
(£ 0,06/min)
• IRELAND 1520-932626
Log supported along entire length: Cut from top (overbuck), being
careful to avoid cutting into the ground (Fig. 12A).
Log supported on 1 end: First, cut from bottom (underbuck) 1/3 diameter of log to avoid splintering. Second, cut from above (overbuck)
to meet first cut and avoid pinching (Fig. 12B).
Log supported on both ends: First, overbuck 1/3 diameter of log to
avoid splintering. Second, underbuck to meet first cut and avoid pinching (Fig. 12C).
(E 0,15/min)
16
HELPLINE No. UK 0905-1460005
WEB SUPPORT: www.heltec.eu
Model Number: GCS-2000
(£ 0,06/min)
• IRELAND 1520-932626
(E 0,15/min)
29
Operations instructions
Safety instructions
Felling cut
1. Use wooden or plastic wedges (G) to prevent binding the bar or chain
(H) in the cut. Wedges also control felling (Fig. 10C).
2. When diameter of wood being cut is greater than the bar length,
make 2 cuts as shown (Fig. 10D).
Warning! As the felling cut gets close to the hinge, the tree
should begin to fall. When tree begins to fall, remove saw from
cut, unplug, put chain saw down, and leave area along retreat
path (Fig. 10A).
HELPLINE No. UK 0905-1460005
WEB SUPPORT: www.heltec.eu
Model Number: GCS-2000
(£ 0,06/min)
• IRELAND 1520-932626
(E 0,15/min)
28
HELPLINE No. UK 0905-1460005
WEB SUPPORT: www.heltec.eu
Model Number: GCS-2000
(£ 0,06/min)
• IRELAND 1520-932626
(E 0,15/min)
17
Safety instructions
Operations instructions
Beware of rotational kickback
Fig. 2A
A = Kickback path
B = Kickback reaction zone
General guidelines for felling
trees
Normally felling consists of 2 main
cutting operations, notching (C) and
making the felling cut (D). Start
making the upper notch cut (C) on
the side of the tree facing the felling
direction (E). Be sure you don’t
make the lower cut too deep into
the trunk. The notch (C) should be
deep enough to create a hinge (F)
of sufficient width and strength. The
notch should be wide enough to
direct the fall of the tree for as long
as possible.
The push (pinch kickback) and pull reactions
Fig. 2B
A = Pull
B = Solid objects
C = Push
Kickback may occur when the nose or tip of the guide bar touches an
object, or when wood closes in and pinches the saw chain in the cut. Tip
contact in some cases may cause a lightning-fast reverse reaction, kicking
the guide bar up and back toward the operator. Pinching the saw chain
along the bottom of the guide bar may pull the saw forward, away from
the operator. Pinching the saw chain along the top of the guide bar may
push the guide bar rapidly back toward the operator. Any of these reactions may cause you to lose control of the saw, which could result in serious personal injury.
Warning! Never walk in front of a tree that has been notched.
Make the felling cut (D) from the other side of the tree and 35cm above the edge of the notch (C) (Fig. 10B).
Warning! Don’t use the saw above shoulder-height, because
of difficult handling of the chainsaw which can cause serious
injury. Take care of a stable position so you have good control
on the chain saw.
Never saw completely through the trunk. Always leave a hinge. The hinge
guides the tree. If the trunk is completely cut through, control over the felling direction is lost. Insert a wedge or felling lever in the cut well before
the tree becomes unstable and starts to move. This will prevent the guide
bar from binding in the felling cut if you have misjudged the falling direction. Make sure no bystanders have entered the range of the falling tree
before you push it over.
HELPLINE No. UK 0905-1460005
WEB SUPPORT: www.heltec.eu
Model Number: GCS-2000
(£ 0,06/min)
• IRELAND 1520-932626
(E 0,15/min)
18
HELPLINE No. UK 0905-1460005
WEB SUPPORT: www.heltec.eu
Model Number: GCS-2000
(£ 0,06/min)
• IRELAND 1520-932626
(E 0,15/min)
27
Operations instructions
Assembly instructions
General cutting instructions
Felling
Felling is the term for cutting down a tree. Small trees up to 15-18cm in
diameter are usually cut in a single cut. Larger trees require notch cuts.
Notch cuts determine the direction the tree will fall.
4
Assembly requirements
Your new chain saw may require installation of the guide bar, saw chain,
sprocket cover, adjustment of chain, and filling the oil tank with lubricating
oil, before the chain saw is ready for operation. Do not start the saw motor
until the unit is properly assembled. Read all instructions carefully. Do not
install any other size bar and chain than what is recommended for your
model.
Warning! A retreat path (A) should be planned and cleared as
necessary before cuts are started. The retreat path should
extend back and diagonally to the rear of the expected line of
fall, as illustrated in Fig. 10.
Warning! Whenever handling the saw chain, wear work gloves for
protection against sharp cutting edges.
Warning! If felling a tree on sloping ground, the chain saw
operator should keep on the uphill side of the terrain, as the
tree is likely to roll or slide downhill after it is felled.
Felling atree
Note:Direction of fall (B) is controlled by the notching cut. Before any
cuts are made, consider the location of larger branches and natural
lean of the tree to determine the
way the tree will fall.
Warning! Do not cut
down a tree during high
or changing winds or if
there is a danger to property. Consult a tree
professional. Do not cut
down a tree if there is a
danger of striking utility
wires; notify the utility
company before making
any cuts.
A
B
C
Note: A new chain and bar will need readjustment after as few as 5 cuts.
This is normal during the break-in period, and the interval between future
adjustments will lengthen quickly (Fig. 4).
Caution! If a chain is too loose or too tight, the bar chain and
saw bearings will wear more rapidly. Study Fig. 4 for
information concerning correct cold tension (A), correct warm
tension (B), and as a guide for when saw chain needs adjustment (C).
HELPLINE No. UK 0905-1460005
WEB SUPPORT: www.heltec.eu
Model Number: GCS-2000
(£ 0,06/min)
• IRELAND 1520-932626
(E 0,15/min)
26
HELPLINE No. UK 0905-1460005
WEB SUPPORT: www.heltec.eu
Model Number: GCS-2000
(£ 0,06/min)
• IRELAND 1520-932626
(E 0,15/min)
19
Assembly instructions
Operations instructions
Caution! If the chain is too loose, more than 3mm after applying down force with finger, as shown in Fig. 4. It needs to be
adjusted, otherwise the stopping time might result in safety
hazard.
activated if pressure is applied against the guard or when, in the event of
kickback, the operator’s hand strikes the lever. When the chain brake is
activated, chain movement abruptly stops and the power supply to the
motor is immediately cut off. The purpose of the chain brake is to reduce
the possibility of injury due to kickback. The chain brake cannot, however, provide the measure of intended protection if the saw is carelessly
operated. The chain brake is disengaged (chain can move) when the
brake is pulled back and locked. This is the normal running position (Fig.
9A). The chain brake is engaged (chain cannot move) when the brake is
in forward position (Fig. 9B).
Note: The motor will not start if the chain brake is in the engaged position.
Caution! The chain brake should not be used for starting and
stopping the saw during normal operation.
Chain brake test:
Before cutting with your saw, the chain brake should be tested as follows:
A. Make sure the chain brake is disengaged (Fig. 9A).
B. Place the saw on a firm, flat, dry surface that is clear of any debris.
Do not let he saw come in contact with any objects.
C. Plug the unit into the power source 230 V.
D. Grasp the front handle (not the Chain Brake / Hand Guard Lever) with
your left hand. Thumb and fingers should encircle the handle.
E. Grasp the rear handle with your right hand. Thumb and fingers should
encircle the handle.
F. Depress the lock / off button with your right thumb. Squeeze the trigger with your index finger. (Fig. 7D, page 13)
G. While the motor is running, activate the chain brake by rolling your left
hand forward against the lever.
H. Chain and motor should stop abruptly.
Fig.5
To adjust saw chain tension:
1. To adjust the chain is simple, turn the knob (B) clock wise. To loosen
the chain just turn anticlockwise. (Fig. 5)
2. After adjustment and while wearing heavy duty work gloves, move the
saw chain back and forth on the guide bar to be sure the chain moves
freely and is properly engaged with socket.
Warning! If the chain and motor fail to stop when the chain
brake is engaged, take the saw to the nearest authorized dealer. Do not use the saw if the chain brake is not in proper wor-
Note: If the chain is difficult to rotate or if it binds on the guide bar, too
much tension has been applied and must be adjusted. To decrease tension, turn the tension ring anticlockwise slowly. Move the chain back and
forth until it moves freely.
HELPLINE No. UK 0905-1460005
WEB SUPPORT: www.heltec.eu
Model Number: GCS-2000
(£ 0,06/min)
• IRELAND 1520-932626
king order.
(E 0,15/min)
20
HELPLINE No. UK 0905-1460005
WEB SUPPORT: www.heltec.eu
Model Number: GCS-2000
(£ 0,06/min)
• IRELAND 1520-932626
(E 0,15/min)
25
Operations instructions
Assembly instructions
tank level can be checked in the inspection window (A) provided on the
right side of the saw. Tank is full when oil is at the top of the slot (Fig. 8).
Caution! Never starve the bar and chain of lubrication oil.
Running the saw dry or with too little oil will decrease cutting
efficiency, shorten chain saw life, and cause rapid dulling of
the chain and excessive wear of the bar from overheating. Too
little is evidenced by smoke or bar discoloration.
Note: The saw chain stretches during use, particularly when it is new, and
occasional adjustment will be needed. A new chain requires more frequent
adjustment during the break-in period. This is normal. See Section for
Saw Chain Tension Adjustment instructions.
Fig.6
Caution! A loose chain can jump off the bar while you are
cuting, as well as wear the bar and chain. A chain that is too
tight can damage the saw. Either situation, chain too loose or
too tight, could cause serious personal injury.
Filling oil tank
Using a funnel, fill oil tank with special chainsaw oil. Wipe up any spills.
Make sure no dirt gets into the oil tank. The saw chain requires lubrication
while in use to minimize friction with the guide bar. The oil tank holds
110ml of oil, enough to lubricate the chain for 15-20 minutes of sawing.
We recommend using special (supplied) chainsaw oil, which contains
additives to reduce friction wear, reduce resin residue formations and is
biodegradable. The replacement oil should be available at a reliable hardware supplier.
Caution! The oil tank level should be frequently checked
during operation to avoid starving the bar and chain of lubrication.
Note: Your chain saw is equipped with an Automatic Oiler system and is
the only source of lubrication for the bar and chain (Fig. 6)
Chain brake/ hand guard
All Gardenline chain saws are equipped with a Chain brake /Hand guard
which stops a moving chain in milliseconds, helping to reduce the hazard
of kickback, a fast upward motion of the guide bar which occurs when the
saw chain at the nose of the bar accidentally strikes an object or is pinched in the cut. The Hand Guard also protects your left hand in the event
it slips off the front handle. The chain brake is a safety feature which is
HELPLINE No. UK 0905-1460005
WEB SUPPORT: www.heltec.eu
Model Number: GCS-2000
(£ 0,06/min)
• IRELAND 1520-932626
(E 0,15/min)
24
HELPLINE No. UK 0905-1460005
WEB SUPPORT: www.heltec.eu
Model Number: GCS-2000
(£ 0,06/min)
• IRELAND 1520-932626
(E 0,15/min)
21
Operations instructions
5
Operations instructions
2.
3.
4.
An extension cord retainer is built into the switch handle that prevents
the extension cord from pulling out of the handle. To use this feature,
simply double the extension cord, about a foot from the end, and
insert it into the end of the handle. Hook the loop formed by doubling
the cords over the tab. Gently tug on the cord to ensure that it is firmly retained in the saws handle. Plug the receptacle end of the extension cord into the tool’s power supply cord. (Fig. 7B)
Grip the saw with both hands, left hand holding the front /handle (do
not hold chain brake) and the right hand holding the rear handle.
Thumbs and fingers should encircle both handles (Fig. 7C).
With your Right thumb, push the Lock/Off button (C) forward at end
the top of the rear handle, and at the same time squeeze the trigger.
To stop the saw, release the trigger (Fig. 7D).
Note: It is not necessary to maintain pressure on the Lock/Off button once
the trigger is squeezed and the motor is running. The lock / off button is a
safety device to avoid accidental starting.
To stop the motor
The saw motor will automatically stop when the trigger is released. The
lock/ off button will have to be depressed and the trigger squeezed to restart the motor.
To start the saw
1. Make sure the chain brake is disengaged whilst in a forward position.
The motor will not start if the chain brake is in the engaged position.
Disengage the chain brake by pulling backward toward the motor
(Fig. 7A).
Fig.8
Chain and bar lubrication
Adequate lubrication of the saw chain during cutting operations is essential to minimize friction with the guide bar. Your chain saw is equipped with
an automatic oiler system. The oiler automatically delivers the proper
amount of oil to the bar and chain. There is no flow adjustment. The oil
Warning! Ensure the extension cord is of the proper size and
type for your saw (≥ 1,5 mm2)
HELPLINE No. UK 0905-1460005
WEB SUPPORT: www.heltec.eu
Model Number: GCS-2000
(£ 0,06/min)
• IRELAND 1520-932626
(E 0,15/min)
22
HELPLINE No. UK 0905-1460005
WEB SUPPORT: www.heltec.eu
Model Number: GCS-2000
(£ 0,06/min)
• IRELAND 1520-932626
(E 0,15/min)
23


