1
Assembly instructions
Operations instructions
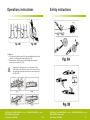
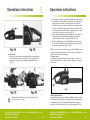
Caution! If the chain is too loose, more than 3mm after applying down force with finger, as shown in Fig. 4. It needs to be
adjusted, otherwise the stopping time might result in safety
hazard.
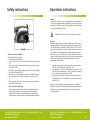
activated if pressure is applied against the guard or when, in the event of
kickback, the operator’s hand strikes the lever. When the chain brake is
activated, chain movement abruptly stops and the power supply to the
motor is immediately cut off. The purpose of the chain brake is to reduce
the possibility of injury due to kickback. The chain brake cannot, however, provide the measure of intended protection if the saw is carelessly
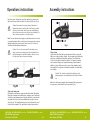
operated. The chain brake is disengaged (chain can move) when the
brake is pulled back and locked. This is the normal running position (Fig.
9A). The chain brake is engaged (chain cannot move) when the brake is
in forward position (Fig. 9B).
Note: The motor will not start if the chain brake is in the engaged position.
Caution! The chain brake should not be used for starting and
stopping the saw during normal operation.
Chain brake test:
Before cutting with your saw, the chain brake should be tested as follows:
A. Make sure the chain brake is disengaged (Fig. 9A).
B. Place the saw on a firm, flat, dry surface that is clear of any debris.
Do not let he saw come in contact with any objects.
C. Plug the unit into the power source 230 V.
D. Grasp the front handle (not the Chain Brake / Hand Guard Lever) with
your left hand. Thumb and fingers should encircle the handle.
E. Grasp the rear handle with your right hand. Thumb and fingers should
encircle the handle.
F. Depress the lock / off button with your right thumb. Squeeze the trigger with your index finger. (Fig. 7D, page 13)
G. While the motor is running, activate the chain brake by rolling your left
hand forward against the lever.
H. Chain and motor should stop abruptly.
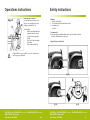
Fig.5
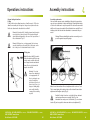
To adjust saw chain tension:
1. To adjust the chain is simple, turn the knob (B) clock wise. To loosen
the chain just turn anticlockwise. (Fig. 5)
2. After adjustment and while wearing heavy duty work gloves, move the
saw chain back and forth on the guide bar to be sure the chain moves
freely and is properly engaged with socket.
Warning! If the chain and motor fail to stop when the chain
brake is engaged, take the saw to the nearest authorized dealer. Do not use the saw if the chain brake is not in proper wor-
Note: If the chain is difficult to rotate or if it binds on the guide bar, too
much tension has been applied and must be adjusted. To decrease tension, turn the tension ring anticlockwise slowly. Move the chain back and
forth until it moves freely.
HELPLINE No. UK 0905-1460005
WEB SUPPORT: www.heltec.eu
Model Number: GCS-2000
(£ 0,06/min)
• IRELAND 1520-932626
king order.
(E 0,15/min)
20
HELPLINE No. UK 0905-1460005
WEB SUPPORT: www.heltec.eu
Model Number: GCS-2000
(£ 0,06/min)
• IRELAND 1520-932626
(E 0,15/min)
25