1
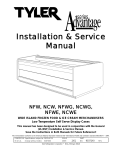
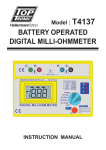
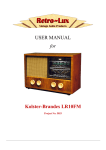
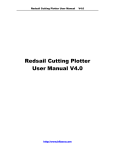
BSR BSECR BSCB BSH BSECH PC “Regular” BLUE STREAK ROLLER Right End Blue Streak Roller (used at right end if End Caps are attached) Connecting Brace “Regular” BLUE STREAK Jack Handle “Left End” BLUE STREAK Jack Handle (If End Caps are attached) Pull Chain Gondola Train User’s Manual Before & During the Move Gondola Train User’s Manual DAYS BEFORE MOVE BEGINS 1. Prepare a Detailed Fixture and Floor Plan, numbering gondolas on new layout design. 2. Analyze the positioning of the present gondolas and write a plan that will be the most efficient sequence of movements of the gondolas to their final position. ** This will be extremely helpful in reducing double or triple moving of the gondolas 3. Place a temporary mark and number on gondolas that correspond to the numbers on your new floor plan. This will provide everyone involved the easiest way to locate the final position of any gondola. 4. Remove solid panel or open kickplates. 5. Sweep & Clean under gondolas and all open floor space!! 6. Remove/secure high or easily tip-able items 7. De-merchandise shelves, as necessary, to be in accordance with load chart – (below). This chart established a maximum load per side, per gondola section, as a function of deck depth. “Load” applies to the sum total weight of all merchandise, on all shelves on one side, within a 4’ section of gondola. If de-merchandising is required, begin removing merchandise from the top shelves first. This will lower the center of gravity and make the gondolas more stable during the move. Gondola Load Chart Deck Depth Maximum Section Load ** 13” 1400 lbs (per side per section) 16” 1000 lbs 19” 800 lbs 22” 700 lbs 25” 600 lbs 28” 500 lbs 31” 400 lbs Caution ** When a gondola has unequal deck depths on each side, use the load limit on the deepest deck for both sides. 8. You are now prepared to start moving your gondolas. MOVING DAY WARNINGS: Do not attempt to move shelving that does not have feet on both sides (wall units). Island shelving can be moved with the Gondola Train system. Do not attempt to move shelving that is heavily weighted on one side and little or no weight on the other side. Do not move if the height to foot ratio is more than 6 to 1. When de-merchandising shelving to comply with load chart, begin removing product from the top shelves first. When placing Gondola Roller under gondolas: Place hand/fingers on the side behind the vertical stop (opposite side of angle on top of roller) Since the gondola will tip slightly during the lifting, no one should stand on opposite side of gondola side being lifted. Always lift the heavy side of gondola first to prevent potential instability during lifting. Only one person should lift the gondola at a time. Do not leave the Gondola Rollers under the gondolas for an extended length of time. Rollers should be removed immediately after the gondola is relocated. Failure to comply with these warnings could cause personal injury and/or property damage. 1. Place Blue Streak Rollers (BSR) & Braces (BSCB)in front of each section of the first gondolas to be moved. a. Be sure to verify compliance with load chart. Failure to do so may damage the base brackets and could result in shelving collapse, merchandise damage or injury. 2. Lift gondolas with the Gondola Handle (BSH). perpendicular base foot, apply even downward a. Always lift heavy side first when raising last. b. Lift only as high as needed to place Blue c. Never lift higher than 1 1/2 inches. Place tip of handle behind the pressure on handle. the gondola - Lower the heavy side Streak Roller (BSR) under shelf unit. 3. The Lime Green tipped Jack Handle (BSECH) is to be used when an End Cap is attached on the left end of the gondola, when you are unable to access the foot bracket with the standard Blue Jack Handle. Use with the standard Blue Streak Roller 4. Install the regular Blue Streak Rollers (BSR)*from the right side of the foot bracket. Move roller under the foots’ horizontal beam until the vertical stop on top of roller abuts the Horizontal beam of foot. Slide roller out to front of fixture until the 2 square Connecting Brace pocket brackets on roller are positioned on the sides of the perpendicular foot beam and flush with the front of the fixtures foot. 5. The Red Roller (BSECR) is used when an End Cap is attached on the right end of the gondola, when you are unable to install the roller from the right side of the foot bracket. Use with the standard Blue Jack Handle 6. With the rollers out to the front of fixture, connect ALL rollers by installing the Connecting Brace (BSBC.)Insert the round pins on Connecting Brace into the square brace pockets on the roller. Installing of Connecting Braces will keep rollers in place and help maintain rigidity in the base brackets and entire fixture during the move. Failure to do this could cause failure of the Gondola components, merchandise damage, or injury to persons. a. Make sure retaining angles on the end of the Connecting Brace are positioned to lock roller onto fixture leg. 7. Once an individual section of gondola has been lifted, Rollers installed & Connecting Brace is properly installed, we suggest turning the wheels in the direction of your initial movement of shelves. This will help in making the initial push easier. On new tile, place a piece of carpet or cardboard under the handle/floor pivot point and keep wheels clean to prevent marking of the new tile. ** LIFT HEAVY SIDE UP FIRST ** SET HEAVY SIDE DOWN LAST * one person per handle READY TO MOVE 1. Length and weight of gondola will determine the quantity of people needed to move the unit. 2. Roll gondola to holding area or to its final location as designated on your Detailed floor plan. 3. Using the Pull Chain (PC)is the easiest way to initiate movement of fixture. Attach S-HOOK onto main upright post as low on fixture as possible. Pull the Pull Chain (PC) with a smooth even force to initiate movement. Continue using PC, guiding the fixture is better to grab fixture and guide with hands. 4. When pushing, place hands on bottom half of fixture. Pushing from the top half will cause additional stress on fixture while moving fixtures. 5. Do not leave the Gondola Rollers under the gondolas for any extended length of time. Rollers should be removed immediately after gondola has been moved. 6. Lower gondolas into position and replace base fronts if they were removed. THE GONDOLAS ARE MOVED HOW TO MOVE A DEPARTMENT AFTER SHELVING IS MOVED 1. Set up an empty 8’ or 12’ gondola on Gondola Rollers. 2. Move the empty gondola to an area that needs to be relocated. 3. Place the merchandise onto the empty, movable gondola in the exact position as it was on the original gondola. ** counter balance the empty side of movable gondola with weight that is equivalent to the weight of merchandise being relocated (5-gal paint, cases of oil, detergent etc.) ** 4. Roll this gondola to the new location. If there is product in the location, place these items in the exact order on the backside of the movable gondola (remove the counter balance weight items). Rotate the gondola and place the merchandise onto its new location. 5. Replace counter balance weight and move to the area that the merchandise on the reverse side will be placed. 6. Continue this process until all merchandise is in its proper place reduces broken items, damaged packages, lost bin tags, and is positioned merchandise. THIS ENABLES ANY EMPLOYEE TO PROPERLY RESTOCK AND MERCHANDISE DURING THIS BUSY TIME. EMPLOYEE AND MANAGEMENT’S MORALE WILL REMAIN HIGH