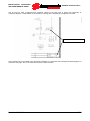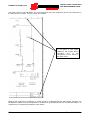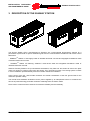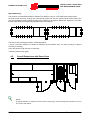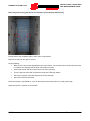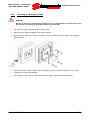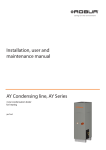
1
15P00SSB100 SUNWAY STATION LS/LC ELECTRICAL SUBSTATION USER MANUAL - INSTALLATION, OPERATION AND MAINTENANCE GUIDE - Issued on 30/09/2013 English Rev. 00 • This manual is integrant and essential to the product. Carefully read the instructions contained herein as they provide important hints for use and maintenance safety. • This product is to be used only for the purposes it has been designed to. Other uses should be considered improper and dangerous. The manufacturer is not responsible for possible damages caused by improper, erroneous and irrational uses. • Elettronica Santerno is responsible for the product in its original setting. • Any changes to the structure or operating cycle of the product must be performed or authorized by Elettronica Santerno. • Elettronica Santerno assumes no responsibility for the consequences resulting by the use of nonoriginal spare-parts. • Elettronica Santerno reserves the right to make any technical changes to this manual and to the product without prior notice. If printing errors or similar are detected, the corrections will be included in the new releases of the manual. • The information contained herein is the property of Elettronica Santerno and cannot be reproduced. Elettronica Santerno enforces its rights on the drawings and catalogues according to the law. Elettronica Santerno S.p.A. Via della Concia, 7 - 40023 Castel Guelfo (BO) Tel. +39 0542 489711 - Fax +39 0542 489722 santerno.com [email protected] SUNWAY STATION LS/LC INSTALLATION, OPERATION AND MAINTENANCE GUIDE TABLE OF CONTENTS 1. PRELIMINARY INFORMATION ............................................................................... 5 1.1. SCOPE OF THIS MANUAL ...................................................................................... 5 1.2. FOR WHOM THIS MANUAL IS INTENDED ............................................................. 5 1.3. ATTACHED DOCUMENTATION.............................................................................. 5 1.4. PRESERVATION OF THE DOCUMENTATION ....................................................... 6 1.5. ELECTRICAL AND MECHANICAL SCHEMATIC ..................................................... 6 1.6. SYMBOLS USED ..................................................................................................... 9 1.7. DEFINITIONS ........................................................................................................ 10 2. CAUTION STATEMENTS .......................................................................................11 2.1. INTENDED USE .................................................................................................... 12 2.2. QUALIFIED TECHNICAL PERSONNEL ................................................................ 12 2.3. EXECUTION OF WORK ........................................................................................ 12 2.4. ACCESSING THE EQUIPMENT: SAFETY PROCEDURE ..................................... 13 3. DESCRIPTION OF THE SUNWAY STATION .........................................................15 3.1. MAIN INTEGRATED STANDARD FUNCTIONS .................................................... 16 3.2. OPTIONALS........................................................................................................... 17 3.3. LAYOUT OF A SUNWAY STATION....................................................................... 18 3.4. BLOCK DIAGRAM OF THE POWER CIRCUIT ...................................................... 19 3.5. SOLAR INVERTERS (+INV1, +INV2)..................................................................... 19 3.6. DC-PARALLEL (+QPS1, +QPS2) .......................................................................... 20 3.7. AUXILIARY CABINET (+QCN) ............................................................................... 20 3.8. MEDIUM VOLTAGE CABINET (+QMT) ................................................................. 20 3.9. COMPARTMENTS VENTILATION......................................................................... 21 3.10. MV/LV TRANSFORMER ........................................................................................ 21 3.11. SAFETY DEVICES................................................................................................. 21 3.12. LIGHTING SYSTEMS AND SOCKETS .................................................................. 22 3.13. DOORS .................................................................................................................. 22 3.14. WARNING SIGNS AND LOGOS ............................................................................ 23 3.15. NAMEPLATE ......................................................................................................... 26 3.16. CONNECTION TO THE GROUND COLLECTOR BAR IN THE SUNWAY STATION LS ...................................................................................................................... 27 3.17. PERSONAL PROTECTIVE EQUIPMENT .............................................................. 28 4. HANDLING AND ASSEMBLY .................................................................................29 4.1. INTRODUCTION.................................................................................................... 29 4.2. SAFETY INSTRUCTIONS...................................................................................... 29 4.3. PREPARING THE INSTALLATION SITE ............................................................... 29 2/73 Rev. 00 - 30/09/2013 INSTALLATION, OPERATION AND MAINTENANCE GUIDE SUNWAY STATION LS/LC 4.4. SIDE-TO-SIDE MOUNTING ................................................................................... 31 4.5. OVERALL DIMENSIONS WITH DOORS OPEN .................................................... 32 4.6. TRANSPORT AND PLACEMENT OF THE CONCRETE STRUCTURES .............. 33 4.7. LIFTING INSTRUCTIONS ...................................................................................... 34 5. CABLE CONNECTIONS TO BE MADE BY THE CUSTOMER ...............................36 5.1. CABLE ROUTING .................................................................................................. 37 5.2. CONNECTION TO THE EXTERNAL GROUND BONDING ................................... 39 5.3. CONNECTION OF THE STRING BOXES TO THE DC-PARALLEL ....................... 40 5.4. INSERTING THE FUSES IN THE DC-PARALLEL ................................................. 40 5.5. CONNECTING THE AUXILIARY POWER SUPPLY CABLES FROM EXTERNAL SOURCES ............................................................................................................. 41 5.6. CONNECTING THE CABLES TO THE MEDIUM VOLTAGE CABINET FROM AN EXTERNAL SOURCE ............................................................................................ 41 6. ACTIVITIES TO BE PERFORMED BY THE CUSTOMER ......................................42 7. ACCESSING THE MV/LV TRANSFORMER COMPARTMENT ..............................43 8. PLC SEQUENCE ....................................................................................................44 8.1. I/OS ...................................................................................................................... 44 8.2. OPERATING LOGICS............................................................................................ 44 8.2.1. EMERGENCY .............................................................................................................. 44 8.2.2. MV CIRCUIT BREAKER RELEASED DUE TO TRANSFORMER OVERTEMPERATURE ................................................................................................ 44 8.2.3. INVERTER DISABLED ................................................................................................ 44 8.2.4. INVERTER FANS AND INVERTER COMPARTMENT FANS ACTIVATION.............. 45 8.2.5. MV/LV TRANSFORMER COMPARTMENT FANS ACTIVATION............................... 45 8.2.6. MV/LV TRANSFORMER COMPARTMENT HEATER ACTIVATION.......................... 45 8.2.7. MV/LV TRANSFORMER FANS ACTIVATION ............................................................ 45 8.2.8. MV/LV TRANSFORMER POWER FACTOR CORRECTION ..................................... 46 8.2.9. ALARM RESET BUTTON ............................................................................................ 46 8.3. ALARMS AND WARNINGS GENERATED FROM THE PLC ................................. 47 8.3.1. ALARMS ...................................................................................................................... 47 8.3.2. WARNINGS ................................................................................................................. 48 9. OPTIONALS ............................................................................................................49 9.1. OPTIONAL PREMIUM REMOTE MONITORING ................................................... 49 9.2. MAIN OPTIONALS ................................................................................................. 49 9.2.1. PANIC BARS ............................................................................................................... 49 9.2.2. BURGLAR SWITCHES ................................................................................................ 49 9.2.3. FIRE DETECTION SYSTEM ....................................................................................... 49 9.2.4. RODENT SYSTEM ...................................................................................................... 49 9.3. OPTIONALS IN THE LOW VOLTAGE CABINET AND INVERTER CABINETS ..... 50 9.3.1. FISCAL METERS KIT .................................................................................................. 50 9.3.2. SWITCH ETHERNET KIT WITH FO PORTS .............................................................. 51 Rev. 00 - 30/09/2013 3/73 SUNWAY STATION LS/LC INSTALLATION, OPERATION AND MAINTENANCE GUIDE 9.3.3. SELF-POWER SUPPLY KIT ....................................................................................... 51 9.3.4. UPS AND UPS ADDITIONAL BATTERIES KIT .......................................................... 52 9.3.5. LV INTERFACE PROTECTIVE DEVICE KIT .............................................................. 52 9.3.6. DIGITAL MULTIMETER KIT ........................................................................................ 52 9.3.7. REMOTE I/OS KIT ....................................................................................................... 52 9.3.8. INDUSTRIAL ROUTER 3G KIT ................................................................................... 52 9.3.9. MV/LV TRANSFORMER POWER CORRECTION KIT ............................................... 52 9.4. MV/LV TRANSFORMER COMPARTMENT KIT ..................................................... 53 9.4.1. PT100 ON THE MV/LV TRANSFORMER CORE ........................................................ 53 9.4.2. MV/LV TRANSFORMER FORCED VENTILATION .................................................... 53 9.5. MEDIUM VOLTAGE COMPARTMENT OPTIONALS ............................................. 53 9.5.1. MEDIUM VOLTAGE CABINET - INGOING/OUTGOING COMPARTMENTS ............ 53 9.5.2. MEDIUM VOLTAGE CABINET FEATURING GENERAL PROTECTION ................... 53 9.6. EXTERNAL OPTIONALS ....................................................................................... 53 10. 9.6.1. (SMART) STRING BOX ............................................................................................... 53 9.6.2. METEO CENTER STATION ........................................................................................ 53 9.6.3. ENVIRONMENTAL SENSORS ................................................................................... 54 MAINTENANCE ..............................................................................................55 10.1. MAINTENANCE SHEET ........................................................................................ 56 10.2. VISUAL INSPECTION OF THE STATION ............................................................. 57 10.3. CHECK THE LOCKS AND HINGES OF THE COMPARTMENT DOORS .............. 57 10.4. CLEANING THE GUTTERS ................................................................................... 58 10.5. MAINTENANCE OF THE AIR FILTERS ON THE DOORS AND GRILLES OF THE SUNWAY STATION ............................................................................................... 59 10.6. CHECKING THE FANS, THE GRAVITY SHUTTERS AND THE PLENUM AREA.. 61 10.6.1. CHECKING THE INVERTER COMPARTMENT FANS AND AREA PLENUM ........... 61 10.6.2. CHECKING THE FANS IN THE MV/LV TRANSFORMER COMPARTMENT ............ 62 10.6.3. CHECKING THE GRAVITY SHUTTERS .................................................................... 63 10.7. CHECKING THE TIGHTENING OF ALL THE CONNECTION TERMINALS OF THE AC AND DC POWER CABLES .............................................................................. 64 10.8. CHECKING THE EMERGENCY STOP .................................................................. 65 10.9. CHECKING THE ANTICONDENSATION HEATER IN THE MV/LV TRANSFORMER COMPARTMENT ................................................................................................... 66 10.10. CHECKING THE FOUNDATIONS ................................................................ 67 10.11. CHECKING THE LIGHTING SYSTEM .......................................................... 68 11. TECHNICAL DATA .........................................................................................69 11.1. ELECTRICAL SPECIFICATIONS OF THE CABINETS .......................................... 72 11.2. SPECIFICATIONS OF THE UPS AND ADDITIONAL BATTERIES ........................ 72 12. 4/73 REFERENCE REGULATIONS .......................................................................73 Rev. 00 - 30/09/2013 INSTALLATION, OPERATION AND MAINTENANCE GUIDE SUNWAY STATION LS/LC 1. PRELIMINARY INFORMATION CAUTION Make sure that all instructions provided by the Manufacturer are observed and that all check-up procedures are correctly performed, thus preventing any risks and ensuring the correct use of the equipment. Accessing an electrical substation is allowed only to authorized, skilled and trained personnel. The operating personnel shall be able to give first aid to an injured person. 1.1. Scope of this Manual This manual applies to Sunway Station LS or LC. 1.2. For Whom this Manual is Intended This manual must be read by: • • • Installers Operators Plant Manager of a photovoltaic system equipped with Sunway Stations LS or LC manufactured by Elettronica Santerno. Please refer to section 1.7 Definitions. 1.3. Attached Documentation CAUTION Carefully read, understand and observe the instructions provided in the Installation and Maintenance Manuals relative to the electrical cabinets, the MV/LV transformer and the devices installed in the Sunway Station. Rev. 00 - 30/09/2013 5/73 INSTALLATION, OPERATION AND MAINTENANCE GUIDE SUNWAY STATION LS/LC The Sunway Station is supplied complete with the following documents: Name of the document Scope Installation Guide This Guide. Contains all the information necessary for the transport, assembly, installation and maintenance of the product. Electrical Schematic of the Sunway Station Contains detailed information on the internal layout and the interconnections of the product. Electrical and Mechanical Schematic of all the cabinets installed in the Sunway Station (both LV and MV) Contains detailed information on the internal layout and electrical schematic of the product. User Manuals of all the cabinets (both MV and LV) and datasheets of all the devices installed in the Sunway Station Contain all the information necessary for the transport, assembly, installation and maintenance of the product. Declaration of Conformity of the system to the state-of-the-art rules (Annex I to article 7 of Italian Decree 37 2008) Contains the Declaration of Conformity to the standards applicable to the product. Final Test Certificates of all the cabinets, systems and devices installed in the Sunway Station Contain all the information concerning the execution and outcome of the Production Tests. Fiscal certificates of the systems (if fitted) measuring the output energy Declaration of Conformity of all the cabinets and devices installed in the Sunway Station 1.4. Contains the Declaration of Conformity to the standards applicable to the product. Preservation of the Documentation All documents relative to the Sunway Station LS must be kept for the entire life span of the equipment together with the system documentation. They must be kept in a place where they are readily available. 1.5. Electrical and Mechanical Schematic To facilitate understanding of the Electrical and Mechanical Schematic and help the user identify the various parts illustrated therein, here is a description of how it has been drawn up. The first page of the Electrical and Mechanical Schematic contains the technical features and configuration of the inverter, as illustrated below: "Field” indicates the location of the components: +Q1 +Q1F +EXT = Inside the electrical cabinet = On the front of the electrical cabinet = External device "Sheet" indicates the progressive number of each sheet in the electrical schematic "Continued" indicates the number of the following sheet 6/73 Rev. 00 - 30/09/2013 INSTALLATION, OPERATION AND MAINTENANCE GUIDE SUNWAY STATION LS/LC The ID code for each component and conductor relates to the first page in which the component or conductor appears, usually based on the direction of energy flow, followed by a progressive number. Example of component ID Cross-references are provided in the electrical schematic for conductors and components which appear on more than one page. The cross-reference format is: Sheet. Column. Rev. 00 - 30/09/2013 7/73 SUNWAY STATION LS/LC INSTALLATION, OPERATION AND MAINTENANCE GUIDE The sheet number is not indicated in the cross-references when the component has its own references on the same sheet. Therefore, only the column is indicated. Example: If the sheet number is not given in the crossreference, this means that a secondary item of the component is to be found on the same sheet. Because the equipment is installed in a system made up of different devices with specific functions, the identification criterion of some components or conductors may be different than the one described above, as components or contactors are defined in other sheets. 8/73 Rev. 00 - 30/09/2013 INSTALLATION, OPERATION AND MAINTENANCE GUIDE 1.6. SUNWAY STATION LS/LC Symbols Used KEY: DANGER Indicates an operating procedure which, if not carried out correctly, may lead to injuries or even death caused by electric shock. WARNING Indicates an operating procedure which, if not carried out correctly, may cause serious damage to the equipment. NOTE Indicates important information concerning use of the equipment. Rev. 00 - 30/09/2013 9/73 SUNWAY STATION LS/LC 1.7. INSTALLATION, OPERATION AND MAINTENANCE GUIDE Definitions Installer Technician responsible for setting up, positioning and installing the equipment in compliance with the system diagram and in accordance with first-class, professional criteria. Operator Worker who has been suitably trained and informed on the risks and relative safety procedures to be adopted. The operator can carry out routine maintenance on the equipment. Plant manager Person who co-ordinates or manages system management activities and is responsible for ensuring health and safety standards are adhered to. Technical room Place used for housing the technological systems such as the wiring, plumbing, heating, air-conditioning, lifting and telecommunications systems. It is equipped with suitable forced-air ventilation and/or air conditioning and is also fitted with appropriate safety devices governing access, maintenance and fire-prevention. Person in charge of running the electrical system (System Manager) Person with the highest level of responsibility concerning operation of the electrical system. If required, some of his/her tasks may be delegated to others. Person in charge of working activities (Works Supervisor) Person with the highest level of responsibility concerning the execution of work. If required, some of his/her tasks may be delegated to others. The Works Supervisor must give all persons involved in the execution of work activities the relative instructions concerning reasonably foreseeable dangers which may not be immediately apparent. Skilled electrician Someone who has been trained and has enough technical knowledge or experience to enable him/her to avoid the dangers which may be generated by electricity. Instructed person Someone who has been adequately advised or supervised by a skilled person to enable him/her to avoid the dangers which may be generated by electricity. 10/73 Rev. 00 - 30/09/2013 INSTALLATION, OPERATION AND MAINTENANCE GUIDE SUNWAY STATION LS/LC 2. CAUTION STATEMENTS This section covers safety statements. The non-observance of the safety instructions below may cause serious injury or death and equipment failure. Carefully read the instructions below before installing, starting and operating the equipment. Only competent personnel must carry out the equipment installation. SAFETY RECOMMENDATIONS TO FOLLOW DURING USE AND INSTALLATION OF THE EQUIPMENT: NOTE Always read this instruction manual thoroughly before starting the equipment. DANGER ALWAYS EARTH THE EQUIPMENT. CAUTION The Sunway Station must be used exclusively as described in this manual. Any use other than that described in this manual is to be considered improper and therefore noncompliant. DANGER RISK OF ELECTRIC SHOCK – Do not touch electric components of the cabinet when it is powered. NEVER carry out operations on the equipment when it is powered. EXPLOSION AND FIRE RISKS – The risk of explosion or fire may exist if the equipment is installed in a room containing flammable vapours. Do not install the equipment where there is a risk of explosion or fire. CAUTION Do not connect supply voltages which exceed the rated voltage. If voltage exceeding the rated value is applied, the internal circuits may be damaged. Do not carry out isolation tests between the power terminals or between the control terminals. Make sure that the screws on the connection terminal board have been tightened correctly. Observe the ambient conditions for installation. The electronic boards contain components which are sensitive to electrostatic charges. Do not touch the boards unless absolutely necessary. Should this be the case, take all the necessary precautions to prevent damages caused by electrostatic discharges. Rev. 00 - 30/09/2013 11/73 SUNWAY STATION LS/LC 2.1. INSTALLATION, OPERATION AND MAINTENANCE GUIDE Intended Use The Sunway Station must only be used as described in this manual. Any use other than that described in this manual is to be considered improper and therefore non-compliant. 2.2. Qualified Technical Personnel All work on the cabinets must be carried out by skilled technical personnel only. By skilled personnel it is intended persons who have been suitably trained to carry out the work in question. To commission and use the self-power supply cabinet, personnel must know and understand the instructions for installation and use. In particular, all safety warnings must be strictly observed. 2.3. Execution of Work Maintenance, configuration modifications and management operations require the involvement of all production and maintenance personnel. These activities must be carried out in observance of health and safety regulations. The Standards and Laws governing this aspect vary depending on the personnel involved, methods of access and/or the tasks which may be carried out on the product and envisage constructive measures aimed at guaranteeing adequate levels of safety. Standard EN 50110-1, second edition, identifies the people who are granted access to the product: • Person in charge of running the electrical system (System Manager). • Person in charge of work activities (Works Supervisor). • Skilled electrician. • Instructed person. Please refer to section 1.7 Definitions. Standard EN50110-1 governs the way work in a plant is carried out and the relationship between the aforementioned persons who may work on the plant to maintain the electrical safety conditions stipulated by European Directives. 12/73 Rev. 00 - 30/09/2013 INSTALLATION, OPERATION AND MAINTENANCE GUIDE 2.4. SUNWAY STATION LS/LC Accessing the Equipment: Safety Procedure CAUTION Circuits may be live even when the master switches are in “disconnect” position. CAUTION Check the safety statements in the User Manuals relative to the electrical cabinets installed in the Sunway Station. DANGER Before accessing the input compartment of the MV Cabinet, disconnect the circuit breaker upstream and connect the circuit to ground (e.g. in the main distribution substation). DANGER In the substations with aux power supply coming from external sources, disconnect the upstream circuit breaker before accessing the Auxiliary Cabinet. Before carrying out any operations inside the substation, make sure that it is in safety conditions. Do the following: 1. Open the master switch of the Medium Voltage cabinet and ground the line via the ground disconnect switch. The figure on the left shows the position of the switches-disconnectors in the EG configuration. For the correct manoeuvre of the switches-disconnectors, refer to the nameplate affixed on the cabinet front and to the cabinets’ user manuals. Rev. 00 - 30/09/2013 13/73 INSTALLATION, OPERATION AND MAINTENANCE GUIDE SUNWAY STATION LS/LC 2. Open the AC-line master switch (cabinet front) and the DC-line master switch (cabinet inside) of all the inverters in the Sunway Station. The figure below shows the position of the switches in the Sunway TG 750 TE inverter. AC Switch DC Switch 3. Turn off the UPS by pressing the ON/OFF front button. Please refer to the user manual of the UPS. 4. Open the UPS input line switch inside the Auxiliary Cabinet. 5. In the substations powered through external auxiliary power supply (featuring no self-power supply optional kit), open the master switch of the Auxiliary Cabinet. The figure below shows the position of the circuit breakers in model ZZEJQCN042 and the position of the UPS. AC Switch UPS output line switch 6. Open all the switches in the String Boxes in the PV field. Please refer to the Installation Guide of the String Boxes for the position of the switches. 7. If additional UPS batteries are installed and if the equipment has been inoperative for a long time, set the ON_OFF switches on the back of the case of the additional UPS batteries to OFF. 14/73 Rev. 00 - 30/09/2013 INSTALLATION, OPERATION AND MAINTENANCE GUIDE SUNWAY STATION LS/LC 3. DESCRIPTION OF THE SUNWAY STATION The Sunway Station LS/LC manufactured by Santerno are a technological plug-and-play solution for a photovoltaic system both for power distribution grids and for communications backbones and remote control backbones. TM - SUNWAY Station LC thoroughly made of vibrated reinforced concrete and segregate foundations made of vibrated reinforced concrete. TM - SUNWAY Station LS featuring “sandwich” metal sheet walls and integrated foundations made of vibrated reinforced concrete. Santerno Sunway Stations are pre-assembled substations, fully fitted out and tested to reduce the plant costs to a minimum, ensuring easy laying and wiring. They are 2400 mm wide. The cooling system consists in forced ventilation provided directly from the inverters outside the substation. Active control of the AC- and DC-side insulation and mutual coordination of the first ground fault for the maximum operation safety. The inverter and substation auxiliaries can be power supplied by an independent source to maximize the amount of produced energy and take maximum advantage from the feed-in tariffs. Full access to inverters and accessories for maximum reliability and serviceability. Rev. 00 - 30/09/2013 15/73 SUNWAY STATION LS/LC 3.1. INSTALLATION, OPERATION AND MAINTENANCE GUIDE Main Integrated Standard Functions Compartment 1 Low Voltage Cabinets - Inverter cabinets DC-Parallel cabinets for the second parallel level, equipped with 16 inputs per pole Auxiliary Cabinet Air fans for compartment air cooling PT100 probe for the control of the compartment temperature Lighting system featuring fluorescent ceiling lights, IP55, 2x36W; back-up battery mounted on one ceiling light Lighting socket with switch Powder fire extinguisher Ground bar Metal door, opening outwards, optionally equipped with filter. Filter classification EN 779: G3 Ventilation grille equipped with filter, classification EN 779: G3 Compartment 2 MV/LV Transformer - Dual secondary MV/LV transformer Air fans for compartment air cooling PT100 probe for the control of the compartment temperature Ventilated anticondensation heater Ground collector bar Metal door, opening outwards, optionally equipped with filter. Filter classification EN 779: G3. The door is equipped with Arel safety lock. Compartment 3 Medium Voltage Cabinet - 16/73 Medium Voltage cabinet Arel safety lock for access control to the transformer compartment Lighting system featuring n.1 fluorescent ceiling light IP55 2x36W provided with back-up battery Light socket with switch Insulating rubber mat Dielectric gloves Ground collector bar Metal door, opening outwards, optionally equipped with filter. Filter classification EN 779 G3 Rev. 00 - 30/09/2013 INSTALLATION, OPERATION AND MAINTENANCE GUIDE 3.2. SUNWAY STATION LS/LC Optionals • Kit, energy meter supplied with fiscal certificates • Kit, interface safety relay compliant to Italian “Allegato A70” concerning the TERNA Grid Code • Kit, “Premium” remote monitoring featuring the Sunway TM Bridge • Kit, LV/LV transformer for Sunway Station self-power supply • UPS kit • Kit, UPS additional batteries • Kit, digital multimeter on substation auxiliary services • Kit, Ethernet switch with N.4 RJ45 ports + 2 FO ports • Kit, remote I/Os • Kit, industrial router 3G • Kit, FO RS485 converters for data network connection to String Box • Kit, MV/LV transformer power factor correction • Kit, positive/negative earthed • Kit, burglar switch • Kit, fire detection device • Kit, antirodent system • MV Cabinet configuration • Panic bars on door inside • Different colours of the substation Rev. 00 - 30/09/2013 17/73 INSTALLATION, OPERATION AND MAINTENANCE GUIDE SUNWAY STATION LS/LC 3.3. Layout of a Sunway Station Key: +QPS +INV +QCN +TRAFO +QMT M H X P E R C SD31 = = = = = = = = = = = = = DC-Parallel Inverter Auxiliary Cabinet MV/LV Transformer Medium Voltage Cabinet Fan Lamp Socket PT100 Emergency button Anticondensation heater Ground bar Key distributor The cabinets in the inverter compartment are provided with hinged doors for 180° opening, thus ensuring a clear way of escape. Anticondensation heaters are provided to avoid condensation. 18/73 Rev. 00 - 30/09/2013 INSTALLATION, OPERATION AND MAINTENANCE GUIDE 3.4. SUNWAY STATION LS/LC Block Diagram of the Power Circuit The block diagram and the description of the cabinets for a Sunway Station featuring 2 inverters is given below. Key: +PV +SSB +QPS +INV +TRAFO +QMT 3.5. = = = = = = Photovoltaic field (Smart) String Box DC-Parallel Inverter MV/LV Transformer Medium Voltage Solar Inverters (+INV1, +INV2) The Sunway TG TE solar inverters are made up of the following functional blocks: DC Input Section The DC input section enables DC-Parallel connection and is equipped with on-load disconnect switch, input EMI filters, surge protective devices and a device controlling the ground insulation of the generator. The Earthed Kit for the connection of modules with an earthed pole may be installed by request. Static Converter The static converter comprises the forced-switching IGBT bridge and the electronic control card. It implements the most advanced functionality, such as control logics, current and voltage measurement, interface protections integrated into the system software, autodiagnostics, serial communications. AC Output Section The AC Output section comprises control devices, such as the Grid Connection Contactor, that may act as the Interface Device, the output sinusoidal filters, the AC-side ground insulation control device (optional) and the generator device, which is equipped with open position key lock. Rev. 00 - 30/09/2013 19/73 SUNWAY STATION LS/LC 3.6. INSTALLATION, OPERATION AND MAINTENANCE GUIDE DC-Parallel (+QPS1, +QPS2) N.2 DC-Parallel cabinets are fitted for the second parallel level. The DC-Parallel cabinets are equipped with fuses both on the positive pole and the negative pole. The DC-Parallel input cables come from the String Boxes installed on the PV field (first parallel level). Wiring of each input is made on a special copper bar allowing connecting two conductors per pole. The input power cables coming from the String Boxes are to be supplied and wired by the customer. The output connection from the DC-Parallel to the Inverter Cabinet is comprised in the Sunway Station supply. 3.7. Auxiliary Cabinet (+QCN) The following devices/functions are integrated into the Auxiliary Cabinet: - Power supply to the auxiliary services and LV distribution - Interface node to external network for the remote monitoring services - Station device control via PLC - Energy meters complete with fiscal-purpose certification - Modem for remote reading of energy data - Interface protective devices 3.8. Medium Voltage Cabinet (+QMT) The substation is standard supplied with the following: - N.1 Medium Voltage compartment for incoming line - n.1 Medium Voltage compartment equipped with: • N.1 MCB-disconnect switch with shunt trip and grounding disconnect switch upstream of the fuses • grounding disconnect switch downstream of the fuses • fuses with striker sized based on the transformer power Each compartment is provided with a thermostat-controlled anticondensation heater (50W 220V 50Hz), a capacitive shunt and lamps indicating when voltage is applied. 20/73 Rev. 00 - 30/09/2013 INSTALLATION, OPERATION AND MAINTENANCE GUIDE 3.9. SUNWAY STATION LS/LC Compartments Ventilation Ventilation in the Low Voltage Cabinet and the MV/LV Transformer Cabinet The cooling system consists in forced ventilation through air fans mounted on the walls of the Sunway Station. Gravity shutters are installed outside the substation, one per fan in the substation. The figure on the left shows the gravity shutter when the fans are on; the figure on the right shows the gravity shutters when the fans are off. 3.10. MV/LV Transformer N. 1 MV/LV transformer is installed. Normally, this is a dry transformer with cast resin windings; reduced losses, dual secondary, aluminum windings, where required. The transformer is provided with N.3 PTCs installed on the LV windings. The transformer temperature controller is implemented in the substation PLC. The transformer may be extracted from the Sunway Station through the access door of the MV compartment. The transformer is equipped with a reversible truck and is installed on rails. 3.11. Safety Devices The Sunway Station is provided with the following safety devices: - emergency push-button with safe crash glass installed outside the substation. The activation of the emergency button causes the MV main switch as well as the AC and DC switches on all the inverters to open, and also enables releasing all the switches installed on the (Smart) String Boxes. - insulation control both on DC- and AC side; AC- and DC-dual fault coordination - inverters provided with automatic disconnect device for critical situations - PT100 probes are installed on windings and metal core, read by the substation PLC. Temperature data are processed with pre-alarm signalisation, probe malfunction or wiring failure signalisation and release of the station MV switch if a critical temperature is detected. Rev. 00 - 30/09/2013 21/73 INSTALLATION, OPERATION AND MAINTENANCE GUIDE SUNWAY STATION LS/LC 3.12. Lighting Systems and Sockets The substation is provided with lighting systems and sockets. The lighting devices are watertight and made of self-extinguishing polycarbonate. One of the lighting devices is provided with emergency light inside the inverter compartment. To prevent the battery from discharging when the station is unattended, the emergency light is activated only through the relative switch in “lamp on” position. The lighting sockets are located in the inverter compartment and MV compartment. 3.13. Doors The pictures show the inverter compartment door, the warning signs, the air filters, the panic bar (optional) and the internal door catch. The door catch installed on the lower part of the door allows 110° angle opening. 22/73 Rev. 00 - 30/09/2013 INSTALLATION, OPERATION AND MAINTENANCE GUIDE 3.14. SUNWAY STATION LS/LC Warning Signs and Logos Safety warning signs and hoisting mode signs, in compliance with local regulations, are affixed. Warning signs affixed outside the Sunway Station Inverter cabinet door n.1 n.1 n.1 Sign for voltage level inside the cabinet Danger multi-symbol sign Cabinet identification sign Transformer cabinet door n.1 n.1 n.1 Sign for voltage level inside the cabinet Danger multi-symbol sign Cabinet identification sign Medium Voltage cabinet door n.1 n.1 n.1 Rev. 00 - 30/09/2013 Sign for voltage level inside the cabinet Danger multi-symbol sign Cabinet identification sign 23/73 INSTALLATION, OPERATION AND MAINTENANCE GUIDE SUNWAY STATION LS/LC Next to the emergency push-button (between the inverter compartment door and the transformer compartment) n.1 n.2 Nameplate Emergency push-button sign The picture also shows the emergency push-button and the hammer for breaking the safety glass. In the lower part, between the inverter compartment door and the transformer compartment n.1 Sign indicating how to lift the station On the left of the inverter compartment door n.1 n.1 24/73 PPE sign Sign indicating the presence of a fire extinguisher inside the inverter compartment Rev. 00 - 30/09/2013 INSTALLATION, OPERATION AND MAINTENANCE GUIDE SUNWAY STATION LS/LC Warning signs affixed inside the station Inverter compartment n.1 n.1 n.1 First aid sign Fire extinguisher sign Block diagram of the station Medium Voltage compartment n.1 Safe access sign (above the Arel key distributor) Rev. 00 - 30/09/2013 25/73 SUNWAY STATION LS/LC 3.15. INSTALLATION, OPERATION AND MAINTENANCE GUIDE Nameplate The nameplate includes the following data: - Job order, Identifier (Code), Type and Serial Number of the Sunway Station LS / LC Maximum DC voltage in respect to LV Rated AC voltage in respect to low voltage Rated AC voltage in respect to high voltage Standards of reference The aluminum nameplate is 250x170mm. Example of a nameplate affixed outside the Sunway Station: 26/73 Rev. 00 - 30/09/2013 INSTALLATION, OPERATION AND MAINTENANCE GUIDE 3.16. SUNWAY STATION LS/LC Connection to the Ground Collector Bar in the Sunway Station LS For details on how to connect the ground bar of the station please refer to the relative electrical and mechanical schematic. Top view of the foundations and connection to the ground collector bar in the Sunway Station LS. Detail C1 A= B= C, C1 = D= E= F= G= H= I= Detail D Detail of the ground connection of the access doors Connection to the common joist Ground bar for common joists, dimensions 40x2 mm Ground connection to the foundations iron rods Ground connection to the floor structure Connection to the ground bar Threaded bar welded to the foundations iron rods Metal common joist Copper braid Door Rev. 00 - 30/09/2013 27/73 INSTALLATION, OPERATION AND MAINTENANCE GUIDE SUNWAY STATION LS/LC 3.17. Personal Protective Equipment The following personal protective equipment is supplied with the Sunway Station: Compartment Description Features Inverter Compartment POWDER FIRE EXTINGUISHER 6KG Powder fire extinguisher, EN3-7 D.M. 07/01/2005 approved Class 21A-144BC. Tank diameter: 130mm. Height: 425mm. Gross weight: 5.1Kg. Inverter Compartment FIRE EXTINGUISHER SIGN 25x31mm MV Cabinet DIELECTRIC GLOVES MADE OF LATEX MV Cabinet GLOVE CASE MV Cabinet INSULATING MAT 1000x500mm 28/73 Test voltage: 30KV; operating voltage: 26.5KV. Length: 36 cm – Compliant with European standard CEI EN 60903 and ENEL EA 0065 unification. Test voltage: 30KV; operating voltage: 26.5KV. Thickness: 3mm. Grey, anti-slip surface. Testing marking. Compliant with standards CEI-IEC 1111 and CEI-ENV 61111. Rev. 00 - 30/09/2013 INSTALLATION, OPERATION AND MAINTENANCE GUIDE SUNWAY STATION LS/LC 4. HANDLING AND ASSEMBLY 4.1. Introduction This section includes the guidelines for the transportation and assembly of the Sunway Station LS. 4.2. Safety Instructions Transportation, loading and unloading is governed by occupational H&S rules. The main Italian standards the activities described in this document shall adhere to are given in section 12 REFERENCE REGULATIONS. 4.3. Preparing the Installation Site The recommendations below allow preparing the construction site for the Sunway Stations. Peculiar conditions of the soil (friability, slopes…) might require complex work to be evaluated on a case by case basis. The Sunway Station LS consists of a single block composed of a prefabricated tank made of reinforced concrete and of a steel structure covered with sandwich panels and featuring a floating floor acting as the support for the electrical equipment. Avoid mounting the Sunway Station where the ground sinks due to water stagnation and/or flooding due to heavy rain. The reinforced concrete foundations are provided with watertight closures that can be removed for LV and MV cable run. Carefully seal the cable slots being used. The suggested method for the placement of the whole structure, independently of its dimensions, is shown in Fig.1. Figure 1a shows a wrong placement, as the cable basin is located higher than the tank and could create a sort of “water conduit” of stagnant water collected in the cable basin. Figure 1b indicates the correct positioning of the cable basin in respect to the tank. The dimensions of the structure are given in the drawing supplied with the Sunway Station. (Figures 1a and 1b show the minimum strengthening work required). The soil study and the strengthening works are charged to the Customer. Rev. 00 - 30/09/2013 29/73 INSTALLATION, OPERATION AND MAINTENANCE GUIDE SUNWAY STATION LS/LC Fig. 1a (wrong placement) Fig. 1b (proper placement) The figure above shows the Sunway Station with its foundations and the wreckage used for earthing up. STEP 1: The excavated area must be +0.5m per side wider than the foundations. It must be as deep as the land surface. STEP 2: The excavated area is filled in with a stabilized mixture up to -10cm. STEP 3: A 10cm layer of lean concrete is laid. IMPORTANT: THE LAYING SURFACE MUST BE PERFECTLY HORIZONTAL. STEP 4: The corrugated pipes are laid. STEP 5: The corrugated pipes are covered with wreckage. 30/73 Rev. 00 - 30/09/2013 INSTALLATION, OPERATION AND MAINTENANCE GUIDE SUNWAY STATION LS/LC The drawing shows that the foundations must be placed on the land surface level, not at a lower level than the natural water drainage level. Pipes and catch basins must be placed at a lower level than the foundations level, in order to prevent water from flowing into the foundations. Moreover: It is recommended that the Sunway Station be NOT mounted where the ground sinks due to water stagnation and/or flooding due to heavy precipitations. Carefully seal the cable slots being used. The figure below shows the structure of the Sunway Station mounted on the tank. The values of the lifting points are also indicated in the figure (measures in mm). NOTE The Sunway Station LS, with the foundations height reduced to facilitate construction works, may be placed onto the ground. 4.4. Side-to-Side Mounting Close Mounting Close mounting is to be avoided because: - the pass-through pipes cannot be sealed from the outside - any ground shifting could cause the stations to be misaligned. Close mounting can be done only under particular conditions. However, the minimum allowable clearance between two stations is 30 cm. Rev. 00 - 30/09/2013 31/73 SUNWAY STATION LS/LC INSTALLATION, OPERATION AND MAINTENANCE GUIDE Spaced Mounting The minimum recommended clearance between two stations is 50 cm. This makes pipe sealing easier. For side-to-side mounting, arrange the pass-through pipes and seal the relevant slots before placing the concrete foundations (the foundations placement is not to be charged to Elettronica Santerno). The passthrough cable slots shall be perfectly aligned between the stations. The side-to-side mounting procedure is described below. 1 Leave a minimum clearance of 30/50 cm between each foundation tank, for close mounting or spaced mounting accordingly 2 Run the pipes through the slots in each tank 3 Seal the pass-through pipes 4.5. Overall Dimensions with Doors Open NOTE A greater distance is required for the access road (if any), thus ensuring that vehicles do not run too close to the station. 32/73 Rev. 00 - 30/09/2013 INSTALLATION, OPERATION AND MAINTENANCE GUIDE 4.6. SUNWAY STATION LS/LC Transport and Placement of the Concrete Structures The following requirements are to be met when transporting, unloading and placing the concrete structures (that are delivered free at destination): It is the Customer’s responsibility to make sure that the requirements affecting the placement of the Sunway Station—such as logistics, road communications for the transport of heavy loads, utilization of special transport means—are met. Elettronica Santerno S.p.A., or authorized third party, may carry out on-the-spot investigations to inspect the site and the progress of work. The minimum requirements for the placement of the concrete structures are as follows: - The construction site shall allow heavy goods vehicles (with an overall weight of 44t and not running offroad) to pass through. It is therefore required that the road surface is load-bearing and plain, with maximum 6% slope. - The concrete structure shall not be mounted when traffic is forbidden or on Sundays and public holidays. - The mounting operations will be performed from the personnel of Elettronica Santerno S.p.A. or authorised third party, with the means of Santerno S.p.A. or authorised third party, according to scheduled tasks agreed upon with the Customer’s Delegate. - Make sure that a truck crane (width: 2.60m, height: 4.00m) can enter the installation site; also consider the room for manoeuvre required. - The truck crane shall be placed with its side close to the longest side of the excavated area, not over 7.00m far from the truck crane centre/excavation-foundation centre. - The clearance surrounding the installation place shall be free of obstacles (electrical cables, telephone cables, etc.) for at least 15m from the installation perimeter and height. - If Medium Voltage lines are to be found within the clearance surrounding the installation place, voltage must be removed from the MV line before placing the Sunway Station. Please contact your local Grid Administrator. - The radius of curvature of the access road must be of at least 25m. - The minimum room for manoeuvring the crane arm must be 15m in the air. - The room for manoeuvring the truck and the crane must be of at least 30x30m over tamped ground. - The roadway must be at least 3m wide. - The minimum clearance from the station back allowing proper operation of the air extractors shall be of approx. 1 metre, whilst the minimum allowable clearance for the ventilation grilles on the inverter compartment is 0.5 metres. - Gutters are provided, so catch basins are recommended to drain rain water (installation of catch basins is charged to the customer). - Special handles are required to displace the station. Rev. 00 - 30/09/2013 33/73 SUNWAY STATION LS/LC 4.7. A B C D 34/73 INSTALLATION, OPERATION AND MAINTENANCE GUIDE Lifting Instructions = = = = Lifting points Spreader bars Lifting ropes Hooking points Rev. 00 - 30/09/2013 INSTALLATION, OPERATION AND MAINTENANCE GUIDE SUNWAY STATION LS/LC A = N.4 hooking points on each long side Lifting eyelet in the hooking point Rev. 00 - 30/09/2013 35/73 SUNWAY STATION LS/LC INSTALLATION, OPERATION AND MAINTENANCE GUIDE 5. CABLE CONNECTIONS TO BE MADE BY THE CUSTOMER The Sunway Stations are pre-assembled, fully fitted out and tested. The customer is charged to do the following connections: 1. Cable connection to the external safety ground bonding 2. Cable connection to the DC-Parallel cabinet from the String Boxes 3. Cable connection for auxiliary power supply from an external source 4. Cable connection to MV cabinet from an external source 5. Cable connections to data network and power supply to the String Boxes Refer to the +EXT section in the electrical schematic to identify the connections to be made for the specific application. The cabinets may be accessed only from the front side and are provided with cable entries in the lower part. CAUTION To ensure high safety level, the equipment has been designed and constructed in compliance with all the applicable regulations. Moreover, essential information and instructions have been provided in this manual. However, the safety level also depends on the sense of responsibility infused in all the operators working on the installation. In any case, absolute safety does not exist, as stated in the CEI 11 - 15 standard, paragraph 1.1.02 quoted below: Omissis...... No regulation, notwithstanding its degree of accuracy, is able to guarantee absolute immunity to people and goods against the dangers of electricity. The implementation of the prescriptions contained in these standards can reduce hazard exposure but cannot avoid a condition in which accidental events may determine a dangerous situation for people and goods. As a matter of facts, 'safe' stands as a synonym for 'compliant with state-of-the-art practices'. Such practices represent a set of rules that allow implementing a safety level which is considered to be acceptable by the community, on the basis of current technical and technological knowledge and economical resources. The state of the art continually evolves and the standards describe its evolution over time. In particular, according to the Italian law no. 186 of March 1, 1968 a product compliant with CEI (Comitato Elettrotecnico Italiano) standards means a product constructed in compliance with state-of-the-art practices. The equipment described in this manual is compliant with CEI standards and, therefore, it is to be considered safe in the sense of what is described above. 36/73 Rev. 00 - 30/09/2013 INSTALLATION, OPERATION AND MAINTENANCE GUIDE 5.1. SUNWAY STATION LS/LC Cable Routing The PE flanges allow connecting the pipes (diam. 160mm) to the foundation tank. The flange ensures water tightness up to 1 bar, both from the outside and from the inside. The parallel edges of the flange allow inserting watertight loops. The side fins fit the thermal expansion of the concrete and the polyethylene to avoid microcracks letting liquids enter the prefabricated tanks from the inside and the outside of the substations. The drawings below show the position of the PE flanges for the cable entries. Flanges for Sunway Station W=6500mm Flanges for Sunway Station W=7500mm Rev. 00 - 30/09/2013 37/73 SUNWAY STATION LS/LC INSTALLATION, OPERATION AND MAINTENANCE GUIDE Flanges for Sunway Station W=8500mm Flanges for cable entries on the shortest side of the station 38/73 Rev. 00 - 30/09/2013 INSTALLATION, OPERATION AND MAINTENANCE GUIDE 5.2. SUNWAY STATION LS/LC Connection to the External Ground Bonding A copper bar is provided inside the inverter compartment for the connection to the external ground bounding (A). CAUTION The customer is responsible for designing the ground bonding and connecting the ground to the station ground bars. The customer shall check the trip times of the protective devices when a fault current occurs (trip times are defined by the Utility Administrator). Each compartment in the station is provided with a ground bar and the station is supplied complete with equipotential circuits inside the cabinets, the ground bonding and external power supply sources (if any), floor networks and ground collector bars. The electrowelded mesh in the floor (touch and step voltage) is connected only to the inverter compartment connector. The LV/MV ground connections coming from the PV field shall be connected to the ground bars in the station. The ground collector bar external to the station shall be connected to the ground bars as well. In the inverter compartment, the ground collector bar for the ground connections from the PV field is separate from the internal ground collector bar, although it is interconnected with the internal collector bar. For details on the ground bonding, please refer to the electrical schematics. NOTE The ground collector bars in the station compartments are connected internally to each other in a 2 radial manner through a N07 V-K cable, cross-section 50, 70, 95, 120 mm (Isc, LV side), yellow/green cable. The customer is charged to do the following: 1. 2. 3. Carry out and connect the external ground bonding to the ground collector bar in the inverter compartment; Connect the ground cable(s) of the PV field to the collector in the inverter compartment; Connect the shielding of the MV cables to the ground collector bars of the MV cells. Rev. 00 - 30/09/2013 39/73 SUNWAY STATION LS/LC 5.3. INSTALLATION, OPERATION AND MAINTENANCE GUIDE Connection of the String Boxes to the DC-Parallel DANGER In order to operate under safe conditions and when no voltage is applied internally to the DC-Parallel cabinets, it is necessary to open all the switch-disconnectors installed in the String Boxes. CAUTION Please refer to the electrical and mechanical schematics and to the manuals of the equipment adopted for the connection activities. The following steps are to be taken by the customer: 1. Open the master switch controlling all the parallel string boxes in the PV field, so that no voltage is applied to the String Box cables 2. Remove all the fuses installed on the DC-Parallel 3. Check that no voltage is applied to the String Box inputs in the DC-Parallel 4. Make sure that the DC-side master switch controlling the inverters is open 5. Connect the string cables to the terminal boards. Do not mismatch +/- polarity of the conductors; special comb strips are provided for the incoming cable ties 6. Close the master switch controlling the parallel string boxes 7. Check the input voltage coming from the String Boxes; in particular: 7a check polarity; 7b check the DC voltage value in each string to make sure that no strings are series-connected 8. Open the String Box circuit breaker NOTE The activities described in steps 6-8 are to be repeated for each DC-Parallel cabinet. 5.4. Inserting the Fuses in the DC-Parallel DANGER In order to operate under safe conditions and when no voltage is applied internally to the DC-Parallel cabinets, it is necessary to open all the switch-disconnectors installed in the parallel string boxes. • • • Make sure that the master switch controlling all the parallel string boxes in the PV field is open Insert the fuses into the DC-Parallel using the special fuse puller/extractor supplied with every DCParallel cabinet Close the switches of the parallel string boxes For the correct insertion/extraction of the DC-Parallel fuses, please refer to the Installation Guide of the Sunway TG TE, “DC-Parallel” section. 40/73 Rev. 00 - 30/09/2013 INSTALLATION, OPERATION AND MAINTENANCE GUIDE 5.5. SUNWAY STATION LS/LC Connecting the Auxiliary Power Supply Cables from External Sources DANGER In order to operate under safe conditions and when no voltage is applied internally to the Auxiliary Cabinet, it is necessary to open all the switch-disconnectors in the distribution cabinets upstream. When the UPS is installed, voltage may be applied to the cabinet even when the switch upstream is open. CAUTION Please refer to the electrical and mechanical schematics and to the User Manuals of the devices being used. The customer is responsible for designing the power supply line and for the ground bonding. When the self-power supply kit is fitted, voltage comes from the station power circuit. Elettronica Santerno will provide for the connections. When the self-power supply kit is not fitted, the customer will provide for power supply delivery and connection (400V 50Hz 3 ph + neutral). Please refer to the User Manual of the Auxiliary Cabinet for details on the input terminals. The customer is charged to do the following: 1. Open the upstream distribution cabinet which powers the aux services of the Sunway Station; 2. Connect the line input cable by marking the phases as 3PH+N. 5.6. Source Connecting the Cables to the Medium Voltage Cabinet from an External DANGER Danger of death from electrocution and burns due to contact with live components of the AC- and DC Low Voltage grid, Medium Voltage grid and UPS. Before carrying out any operation, open all the switches that cut off the Sunway Station input voltage (LV and MV). Before accessing the cabinet, make sure that no voltage is applied to the equipment. To do so, use special tools and wear proper PPE. Rev. 00 - 30/09/2013 41/73 SUNWAY STATION LS/LC INSTALLATION, OPERATION AND MAINTENANCE GUIDE CAUTION Connecting and operating the MV cabinet is to be done by “skilled personnel” (refer to CEI 11-27). For the correct sequence of the steps to take to gain access to the MV/LV compartment, please refer to section 7 ACCESSING THE MV/LV TRANSFORMER. Please refer to the electrical and mechanical schematics and to the User Manuals of the devices being used. The customer is responsible for designing the power supply line and for the ground bonding. The customer is charged to do the following: 1. Cut out the equipment as described in section 7 ACCESSING THE MV/LV TRANSFORMER; 2. Make sure that no voltage is applied to the cabinet; 3. Connect the line input cables and mark the conductors. The phase sequence must be observed. Please refer to the Medium Voltage cabinet for the activities to be done. 6. ACTIVITIES TO BE PERFORMED BY THE CUSTOMER The customer shall make sure that particular requirements are met before connecting the Sunway Station to the power line. This section defines some preliminary checks and activities required. The activities described below are NOT charged to Santerno. - Check the trip thresholds of the Interface Protective Devices (e.g. NV10 P Thytronic). The programming parameters are factory-set by default and are described in the Programming Guide of the inverters. The customer will just have to change the trip thresholds with the values required by the Utility Administrator. Under no circumstances shall the customer change other parameters other than the trip thresholds, to avoid affecting the correct operation of the Interface Protective Device. - Check the trip thresholds of the Master Protective Device (e.g. NA30 Thytronic). The programming parameters are factory-set by default and are described in the Programming Guide of the inverters. The customer will just have to change the trip thresholds to the values required by the Utility Administrator. Under no circumstances shall the customer change other parameters other than the trip thresholds, to avoid affecting the correct operation of the Master Protective Device. - Check voltage polarity in the subfields at the input of the DC-Parallel cabinets - Check fuse sizes in the DC-Parallel cabinet and check fuse compatibility with the subfield currents - Manoeuvres on MV cabinets - Test efficiency of the plant 42/73 Rev. 00 - 30/09/2013 INSTALLATION, OPERATION AND MAINTENANCE GUIDE SUNWAY STATION LS/LC 7. ACCESSING THE MV/LV TRANSFORMER COMPARTMENT The doorlock of the MV/LV transformer compartment is composed of a cylinder activating the locking mechanism and of a matching part. Insert and rotate the key to open the door. The key will be kept locked until the door is safely locked. The key locking the MV/LV transformer compartment is the left-most one in the MV cabinet key distributor. When inserting and turning that key, the remaining 3 keys turn by 90° and are unlocked. The key is locked into the doorlock until the remaining 3 keys are inserted and turned into the key distributor. DANGER Follow the procedure below to safely access the transformer compartment. Accessing the transformer compartment is allowed only when no voltage is applied to the transformer. Follow the cut-off procedure below. Before accessing the cabinet, make sure that no voltage is applied to the equipment. To do so, use special tools and wear proper PPE. a) Remove voltage from inverter 1. Open the AC switch on inverter 1 and pull out the key joined with the distributor key. Insert the key into the key distributor and turn the key. b) Remove voltage from inverter 2. Open the AC switch on inverter 2 and pull out the key joined with the distributor key. Insert the key into the key distributor and turn the key. c) Close the MV cabinet ground disconnector and pull out the key joined with the distributor key. Insert the key into the key distributor and turn the key. d) Turn the distributor key joined with the transformer compartment key and pull it out from the key distributor. To open the transformer compartment door, insert the key in the doorlock and turn the key. Rev. 00 - 30/09/2013 43/73 SUNWAY STATION LS/LC INSTALLATION, OPERATION AND MAINTENANCE GUIDE 8. PLC SEQUENCE 8.1. I/Os Please refer to the electrical schematic of the Auxiliary Cabinet to know the functions allocated to the digital inputs, analog inputs and digital outputs. 8.2. Operating Logics 8.2.1. Emergency An emergency push-button with safe crash glass is installed outside the substation. When this emergency push-button is pressed, the station is cut off both on grid-side and on PV-field side due to the following: • The shunt trip is power supplied, thus opening the MV circuit breaker protecting the MV/LV transformer • The shunt trips in the DC and AC circuit breakers of all the inverters installed on the Sunway Station are power supplied and the DC and AC circuit breakers open • The shunt trips of all the circuit breakers on the string boxes are power supplied and the circuit breakers open. The connection (if any) of the shunt trips is charged to the customer. 8.2.2. MV Circuit Breaker Released due to Transformer Overtemperature The release command of the MV circuit breaker protecting the MV/LV transformer is sent when transformer overtemperature is detected by the PT100 probes inside the LV windings and/or the transformer core. The release temperature is set via the RemoteSunway when the Sunway Station is commissioned. The default value is 130°C. 8.2.3. Inverter Disabled Inverters are disabled and their startup is inhibited when one of the following conditions occur: • MV circuit breaker protecting the MV/LV transformer open (ID PLC 8.01) • Input line MV circuit breaker open (ID PLC 8.02). If this circuit breaker is not fitted, this input’s processing is disabled • Master switch of the Auxiliary Cabinet open (ID PLC 0.3) • Interface protective devices tripped (ID PLC 1.1) • Emergency push-button pressed (ID PLC 1.5) • Maximum temperature achieved inside the Sunway Station (45°C) • Alarms relating to MV/LV transformer tripped (see section 8.2.2 MV Circuit Breaker Released due to Transformer Overtemperature) • Auxiliary circuit breaker for inverter fan power supply open. When a circuit breaker trips, only the relative inverter will be disabled. 1. Inverter 1 ID PLC 0.7 2. Inverter 2 ID PLC 0.8 44/73 Rev. 00 - 30/09/2013 INSTALLATION, OPERATION AND MAINTENANCE GUIDE SUNWAY STATION LS/LC Prior to start up the inverter, the following are individually controlled for each inverter: • DC-side ground fault (Inverter 1 ID PLC 0.0, Inverter 2 ID PLC 10.4) • AC-side ground fault (Inverter 1 ID PLC 0.1, Inverter 2 ID PLC 10.7) If both ground faults occur at the same time, the inverter is disabled and cannot be started. The ground fault control is disabled when the inverter is running. 8.2.4. Inverter Fans and Inverter Compartment Fans Activation When at least one of the inverters is started up, all the fans in the Sunway Station are activated. Fans deactivation occurs when both inverters have been stopped since at least 30 seconds. The fans in the inverter compartment activate at the same time as the inverter fans. 8.2.5. MV/LV Transformer Compartment Fans Activation The fans are activated (with a preset delay time of 5 seconds) when one of the following conditions occur: • The temperature in the transformer compartment is equal to or higher than 32°C • The transformer temperature is equal to or higher than 70°C The fans may activate when at least one of the two inverters is started up. The fans are stopped (with a preset delay time of 5 seconds) when one of the following conditions occur: • The temperature in the transformer compartment is equal to or lower than 30°C • The transformer temperature is equal to or higher than 65°C The fans may stop when both inverters are stopped (with a preset delay time of 15 minutes). The fans activation/deactivation depending on the inverters run/stop may be activated when commissioning the equipment. The fans activation/deactivation default values are the ones given above, but they can be modified when commissioning the equipment. If failures occur in the PT100 probes installed in the transformer compartment, fans are activated as soon as at least one of the inverters is started up. Fans are stopped 15 minutes after both inverters are stopped. Fans are immediately stopped when the emergency command is given. 8.2.6. MV/LV Transformer Compartment Heater Activation The heater in the MV/LV transformer compartment is activated when the temperature drops below 8°C (with a preset delay time of 5 seconds). The heater is disabled when the MV/LV transformer compartment is equal to or higher than 10°C (with a preset delay time of 5 seconds). The heater is immediately de-energized when the emergency command is given. 8.2.7. MV/LV Transformer Fans Activation The PLC output controls the activation of the ventilation bar (if any) fitted on the MV/LV transformer. The fans are activated (with a preset delay time of 5 seconds) when the LV/MV temperature is 95°C. The fans are stopped (with a preset delay time of 5 seconds) when the LV/MV temperature is 90°C. Rev. 00 - 30/09/2013 45/73 SUNWAY STATION LS/LC INSTALLATION, OPERATION AND MAINTENANCE GUIDE The default values for fans activation/deactivation are the ones given above, but they can be modified when commissioning the equipment. If failures occur in the PT100 probes installed in the transformer compartment, fans are activated as soon as at least one of the inverters is started up. Fans are stopped 15 minutes after both inverters are stopped. Fans are immediately stopped when the emergency command is given. 8.2.8. MV/LV Transformer Power Factor Correction If the power factor correction kit is fitted, it is activated 5 minutes after both inverters have been stopped. It is deactivated when at least one inverter is started up or when an alarm trips. 8.2.9. Alarm Reset Button A light button is located on the Auxiliary Cabinet front. The indicator light comes on when an alarm trips or an event fires. When the alarm/event is reset, the lamp can be manually turned off. The alarm tripped/event fired may be displayed via the RemoteSunway. 46/73 Rev. 00 - 30/09/2013 INSTALLATION, OPERATION AND MAINTENANCE GUIDE 8.3. Alarms and Warnings Generated from the PLC 8.3.1. 1 2 3 4 5 6 7 8 9 10 11 12 13 14 15 16 17 18 19 20 21 22 23 24 25 26 27 28 29 30 31 32 SUNWAY STATION LS/LC Alarms Transformer disconnect switch MV line input disconnect switch open Master switch of Auxiliary Cabinet open External emergency Interface protective device Not used Not used No ventilation in inverter1 No ventilation in inverter2 Not used Transformer temperature from digital input Transformer temperature from PT100 processing Low oil level in the transformer Low oil pressure in the transformer Maximum allowable temperature achieved in the station Not used Not used GND fault INV1 GND fault INV2 Not used Not used Not used Not used Not used AC1 fault AC2 fault DC1 fault DC2 fault MV disconnect switch open Not used Not used Not used Rev. 00 - 30/09/2013 47/73 SUNWAY STATION LS/LC 8.3.2. 1 2 3 4 5 6 7 8 9 10 11 12 13 14 15 16 48/73 INSTALLATION, OPERATION AND MAINTENANCE GUIDE Warnings SPDs tripped Burglar switch Not used Wire broken in PT100 probe in the MV/LV transformer Not used Not used Transformer temperature pre-alarm (from digital input) Transformer temperature pre-alarm (from PT100 processing) Not used Comms failure Wrong node numbering Wire broken in PT100 probe in the inverter compartment Wire broken in transformer PT100 probe, phase U Wire broken in transformer PT100 probe, phase V Wire broken in transformer PT100 probe, phase W Wire broken in transformer core PT100 probe Rev. 00 - 30/09/2013 INSTALLATION, OPERATION AND MAINTENANCE GUIDE SUNWAY STATION LS/LC 9. OPTIONALS The Sunway Stations are widely configurable and can be customized to meet the customer’s requirements. 9.1. Optional Premium Remote Monitoring Please refer to the User Manual of the Sunway Bridge. 9.2. Main Optionals 9.2.1. Panic Bars The panic bars are installed on one or more access doors. 9.2.2. Burglar Switches The burglar switches are installed inside the Sunway Stations and detect when the access doors are opened. The burglar switches are controlled by the PLC. 9.2.3. Fire Detection System The fire detection system is based on optical barrier sensors installed on the ceiling in one or more station compartments. The detecting system is controlled by a 2/2 logics; when one fire detector triggers, a local and remote signal is sent, whilst when two fire detectors trigger simultaneously, a signal is sent and the whole station is put in safety conditions. The fire detection system is controlled by the PLC. 9.2.4. Rodent System The rodent system is located in the station foundations and is composed of a control unit equipped with a sound emitter. The rodent system control unit may be accessed by removing the floor panels. A special circuit checks the correct operation of the rodent system and detects when failures occur. In that case, a signal is sent. The sound emitter is an electronic transducer emitting medium-frequency vibrations generated by the resonance of a brass case. Those medium-frequency vibrations, emitted with a calibrated sound pressure level, spread in the air in a straight way and are reflected by non-soundproof solid bodies. The system affects the rodents’ hearing altering their sense of direction. Rev. 00 - 30/09/2013 49/73 SUNWAY STATION LS/LC 9.3. INSTALLATION, OPERATION AND MAINTENANCE GUIDE Optionals in the Low Voltage Cabinet and Inverter Cabinets 9.3.1. Fiscal Meters Kit N.2 fiscal meters may be installed inside the Auxiliary Cabinet. The meter unit is accompanied by check certificates for the CT and VT transformers, the fiscal meter and the power metering unit (Italy’s GSE-TERNA-GRTN) for customs purposes. Certificates are complete with revenue stamps of the Italian Revenue Agency. The modem for the remote readout of the logs of the two fiscal meters is installed. A strain relief is installed on the cabinet roof for the modem antenna, so that it can be located outside the cabinet. The fiscal meters are installed on the cabinet front and may be read also when the cabinet doors are closed. 50/73 Rev. 00 - 30/09/2013 INSTALLATION, OPERATION AND MAINTENANCE GUIDE SUNWAY STATION LS/LC The fiscal meter specifications are detailed below: MID ‘C’ former 0.5S (IEC 62053-22) Active energy Bidirectional energy flow Class 2 (IEC 62053-23) Reactive energy 4 quadrants, incoming and outgoing (Q1,Q2,Q3,Q4,Q+,Q) Apparent energy Class 1%, P² + Q² Voltage (V) Multirange, 57-240 V ± 20% (phase/neutral) Current (A) 0.05÷5A (Imax.=6A - Isc=20Imax) Communications IR – optical interface max. 9600 Baud RS485 IEC62056-21 (shared with the optical port) RS485 Modbus RTU Ethernet (RJ45) Modbus TCP 9.3.2. Switch Ethernet Kit with FO Ports The switch is provided with the following: N.4 RJ45 ports. At least one port is allocated to the customer’s grid cable connection. N.2 FO ports for the multimodal fiber and ST connector. 9.3.3. Self-power Supply Kit The power supply for the auxiliary services of the Sunway Station comes from one of the two LV secondaries of the LV/MV transformer prior to meter the actual energy produced. The +QF box is installed inside the LV/MV transformer cabinet. The LV/LV cabinet is installed inside the Auxiliary Cabinet (+QCN). For more details on the Self-power supply kit, please refer to the User Manual of the Auxiliary Cabinet. Rev. 00 - 30/09/2013 51/73 SUNWAY STATION LS/LC INSTALLATION, OPERATION AND MAINTENANCE GUIDE 9.3.4. UPS and UPS Additional Batteries Kit The UPS is installed inside the Auxiliary Cabinet (+QCN). For more details on the UPS kit, please refer to the User Manual of the Auxiliary Cabinet. 9.3.5. LV Interface Protective Device Kit The LV interface protective device kit is composed of N. 2 interface protection relays. Each relay operates on the interface protective devices installed in the inverter cabinet. 9.3.6. Digital Multimeter Kit The Digital Multimeter Kit is installed inside the Auxiliary Cabinet (+QCN). For more details on the kit, please refer to the User Manual of the Auxiliary Cabinet. 9.3.7. Remote I/Os Kit The kit is installed inside the Auxiliary Cabinet (+QCN). For more details on the kit, please refer to the User Manual of the Auxiliary Cabinet. 9.3.8. Industrial Router 3G Kit The kit is installed inside the Auxiliary Cabinet (+QCN). For more details on the kit, please refer to the User Manual of the Auxiliary Cabinet. 9.3.9. MV/LV Transformer Power Correction Kit The kit is installed inside the Auxiliary Cabinet (+QCN). For more details on the kit, please refer to the User Manual of the Auxiliary Cabinet. 52/73 Rev. 00 - 30/09/2013 INSTALLATION, OPERATION AND MAINTENANCE GUIDE 9.4. SUNWAY STATION LS/LC MV/LV Transformer Compartment Kit 9.4.1. PT100 on the MV/LV Transformer Core A PT100 probe is fitted, detecting the temperature of the magnetic core. 9.4.2. MV/LV Transformer Forced Ventilation A forced ventilation system is installed to enhance heat dissipation in the MV/LV transformer cabinet. NOTE This system is not considered as increasing the transformer rated power. The fan is controlled by the PLC. 9.5. Medium Voltage Compartment Optionals 9.5.1. Medium Voltage Cabinet - Ingoing/Outgoing Compartments The MV Cabinet enables making a ring connection of all the conversion substations installed in the PV plant. The two ingoing/outgoing compartments are provided with a switch-disconnector and a ground disconnector. The compartment protecting the transformer may be ordered either complete with the switch-disconnector equipped with fuses or complete with the switch equipped with line safety relay. 9.5.2. Medium Voltage Cabinet featuring General Protection The MV Cabinet may be configured to provide General Protection. 9.6. External Optionals 9.6.1. (Smart) String Box The (Smart) String Boxes feature the parallel connection of the PV generator strings. Polycarbonate flame-proof and UV ray-resistant box, provided with DC load-break switch and shunt trip. The Smart version is provided with a serial comms system and is capable of measuring the current of each individual string. Please refer to the (Smart) String Box Installation Guide for details on the product. 9.6.2. Meteo Center Station The Meteo Center is a system acquiring the PV plant data. It is provided with the following sensors: • Pyranometer Class 1 ISO 9060 • Thermohygrometric sensor • PT100 air temperature sensor, class 1/3 DIN EN 60751 • High-precision wind speed and wind direction sensor • Contact temperature sensor for photovoltaic modules Please refer to the Meteo Center User Manual for details on the product. Rev. 00 - 30/09/2013 53/73 INSTALLATION, OPERATION AND MAINTENANCE GUIDE SUNWAY STATION LS/LC The electrical connections to the Sunway Station are detailed below: Meteo Center Terminal board Terminal 230Vac 230Vac PE TB1 1 TB1 2 9.6.3. -------------------------------------------------------- Aux Cabinet Terminal board Terminal X4 9 Power supply line to cable FG7 2 X4 10 3x1.5mm PE X14 1 RS485 line to cable Belden 3106A X14 2 Environmental Sensors The environmental sensors include the following: • First/second class Pyranometer, according to ISO9060 • PT100 sensor, cylindrical, flat or in box IP65 • Solarmeter • Wind speed/direction sensor Please refer to the environmental sensors datasheet. Sensors are generally connected to the String Boxes; if connected to the Sunway Station, they are connected to the inverter cabinet as follows: Wind speed/direction sensor Signal Terminal 24Vdc + 5 24Vdc 6 Speed 4 Speed 3 Direction 2 Direction 1 PT100 Ambient temperature White Red PT100 Module temperature Brown Red Module surface radiation Black Orange 54/73 ------------------------------------------------------------------- Inverter cabinet Terminal board Terminal X3 51 X3 52 X3 9 X3 10 X3 11 X3 12 Inverter cabinet Terminal board Terminal -----------X3 1 -----------X3 2 Inverter cabinet Terminal board Terminal -----------X3 3 -----------X3 4 Inverter cabinet Terminal board Terminal -----------X3 5 -----------X3 6 Cable FG70H2R 7Gx1.5mm 2 Cable FG70H2R 3Gx1.5mm 2 Cable FG70H2R 3Gx1.5mm 2 Cable FG70H2R 3Gx1.5mm 2 Rev. 00 - 30/09/2013 INSTALLATION, OPERATION AND MAINTENANCE GUIDE SUNWAY STATION LS/LC 10. MAINTENANCE Adequate maintenance ensures conversion performance and product reliability is maintained over time. This heading describes all the activities required to keep machine parts which are subject to wear and deterioration and/or components which are essential for guaranteeing safety and optimum performance in good condition. Access to products for the purpose of maintenance, modifications and management involves all persons responsible for production and maintenance. It must be carried out in observance of the health and safety regulations described in section 2.3 Execution of Work. The minimum maintenance interval is indicated in Table 1: Maintenance sheet. Equipment installed in an environment where there is a high concentration of dust requires more frequent maintenance than generally indicated. CAUTION The non-observance of the maintenance instructions may void the product warranty. CAUTION The scheduled maintenance activities to be performed on the cabinets are detailed in the User Manuals of the cabinets installed. NOTE In the event of any fault, please contact the Elettronica Santerno SpA CUSTOMER SERVICE for instructions on the necessary corrective action to be taken. Rev. 00 - 30/09/2013 55/73 INSTALLATION, OPERATION AND MAINTENANCE GUIDE SUNWAY STATION LS/LC 10.1. Maintenance Sheet Maintenance Tasks Minimum Frequency Inverter Cabinet maintenance See Installation Guide of the inverter Auxiliary Cabinet maintenance See Installation Guide of the Cabinet DC-Parallel Cabinet maintenance Medium Voltage Cabinet maintenance LV/MV Cabinet maintenance See Installation Guide of the Cabinet See Installation Guide of the Cabinet See Installation Guide of the Cabinet Lighting system maintenance 3 months Station external/internal inspection 6 months Cleaning the gutters 6 months Check of the air filters on the doors and grilles 6 months Check of the fans, gravity shutters, plenum area 6 months Check of the tightening of all the connection terminals of the AC and DC power cables 12 months Emergency stop check 12 months Check of the compartment door switches (if fitted) 12 months Check of the locks and hinges of the compartment doors 12 months Check of the anticondensation heater in the MV/LV transformer 12 months Fire extinguisher check According to local regulations Foundations check 12 months Check of the product identification labels and warning signs 24 months The frequency of scheduled maintenance may need to be increased depending on the location in which the equipment is installed and the relevant ambient conditions. Table 1: Maintenance sheet 56/73 Rev. 00 - 30/09/2013 INSTALLATION, OPERATION AND MAINTENANCE GUIDE 10.2. SUNWAY STATION LS/LC Visual Inspection of the Station Visually inspect the station outside and inside to check that the walls or the doors are not damaged and to make sure that no rust, dirt, humidity, condensation are found. Take the necessary corrective actions. 10.3. Check the Locks and Hinges of the Compartment Doors • Make sure that the door locks open and close smoothly. • Make sure that the door hinges operate smoothly. • Check correct operation of the door stops. Repair or replace the locks/hinges if required. Check the product identification labels and warning signs. Rev. 00 - 30/09/2013 57/73 SUNWAY STATION LS/LC 10.4. INSTALLATION, OPERATION AND MAINTENANCE GUIDE Cleaning the Gutters Cleaning the gutters prevents water from leaking into the station. Leaves, bird nests and solid matters that build up and decay into the gutters may cause acid solutions that could lead to gutter deterioration associated with rain seepage. Clean the gutters on the four sides of the station. Do the following: • Suck the solid waste; • Thoroughly de-clog the gutters; • Use compressed air to clean the gutters; • Check to see if cracks or fissures are to be found in the gutters. DANGER Observe the national regulations in terms of minimum health and safety requirements when using special equipment (such as ladders, scaffolding and access/position systems with ropes) for overhead works. CAUTION Do not climb into the station roof to clean the gutters. CAUTION Do not rest the ladder against the gutter. 58/73 Rev. 00 - 30/09/2013 INSTALLATION, OPERATION AND MAINTENANCE GUIDE 10.5. Station SUNWAY STATION LS/LC Maintenance of the Air Filters on the Doors and Grilles of the Sunway The position of the air filter felts is shown in the figure above (A). Those felts shall be cleaned or replaced (only when damaged) with equivalent felts featuring dust collection efficiency class G3. Removing and cleaning the felts on the doors of the three compartments in the SS Internal view of the inverter compartment door. Remove the felts from the air filters to clean them. Remove the 4 screws from each frame (see figure on the left). Clean the felts with compressed air. You can also wash them with water (max 40°C) and gentle soap. When felts are dry, put them back into their frame. Do the same with the felts on the doors of the MV/LV transformer and the MV compartment. Rev. 00 - 30/09/2013 59/73 SUNWAY STATION LS/LC INSTALLATION, OPERATION AND MAINTENANCE GUIDE Removing and cleaning the felt on the ventilation grille (Sunway Station side) Internal view of the ventilation grille in the inverter compartment Remove the felt from the grille to clean it. Do the following: • Remove the 2 side screws highlighted in the figure above. The screws may be located under the felt; be careful not to damage the felt when removing the screws. • Lift the filter frame until its low part comes out of the doorstop • Turn the low part of the filter towards the inside of the Sunway Station • Pull out the top part of the filter frame from the top doorstop • Pull out the felt from the frame Clean the felt with compressed air. You can also wash it with water (max 40°C) and gentle soap. When the felt is dry, replace it into its frame. 60/73 Rev. 00 - 30/09/2013 INSTALLATION, OPERATION AND MAINTENANCE GUIDE 10.6. SUNWAY STATION LS/LC Checking the Fans, the Gravity Shutters and the Plenum Area 10.6.1. Checking the Inverter Compartment Fans and Area Plenum In order to gain access to the plenum area (N.2 doors on each inverter compartment) remove the screws highlighted in the figure on the left. Rotate and lift the door to remove it. You can now reach the inverter. Rev. 00 - 30/09/2013 61/73 SUNWAY STATION LS/LC INSTALLATION, OPERATION AND MAINTENANCE GUIDE Check the following: • Remove dust and condensation (if any) and carefully clean the cabinet top • Make sure that no objects or components are to be found on the grilles (A) protecting the inverter compartment top fans • N.4 wall-mounted fans are installed on each inverter compartment. Start up the air fans (B), check their operation and noise level. Do the following to start up the fans: force relay 20KA2 installed internally on each inverter cabinet. To obtain the relay switching without powering on the coil, bring the relay lever in upright position. Put back the lever to horizontal position when the activity is over. 10.6.2. Checking the Fans in the MV/LV Transformer Compartment N.2 wall-mounted fans are installed internally to the LV/MV transformer compartment. • Start up the air fans, check their operation and noise level. Do the following to start up the fans: force relay 36KA10 installed on the Auxiliary Cabinet. To obtain the relay switching without powering on the coil, bring the relay lever in upright position. Put back the lever to horizontal position when the activity is over. 62/73 Rev. 00 - 30/09/2013 INSTALLATION, OPERATION AND MAINTENANCE GUIDE 10.6.3. SUNWAY STATION LS/LC Checking the Gravity Shutters Outside view of the station with the gravity shutters open (A) Position of the gravity shutters when fans are on. Check to see if all flips are open. Position of the gravity shutters when fans are stopped. Make sure that all flips are down. Remove foreign matters (if any) from the flips. Rev. 00 - 30/09/2013 63/73 SUNWAY STATION LS/LC INSTALLATION, OPERATION AND MAINTENANCE GUIDE 10.7. Checking the Tightening of all the Connection Terminals of the AC and DC Power Cables DANGER Danger of death from electrocution and burns due to contact with live components of the AC and DC Low Voltage grid, Medium Voltage grid and UPS. Before carrying out any operation, open all the switches that cut off the Sunway Station input voltage (LV and MV). Make sure that no voltage is applied prior to start operating. Check the correct tightening of the power cables coming from the outside of the station or that interconnect the cabinets in the station: • Incoming cables to the Auxiliary Cabinet (AC – low voltage from MV/LV transformer or from an external source) • Cables coming from the PV field (DC – low voltage) • Cables connecting the DC-Parallel cabinets to the inverters (DC – low voltage) • Cables connecting the inverters to the MV/LV transformer (AC – low voltage) • Cables connecting the MV/LV transformer to the MV cabinet (AC – medium voltage) • Cables coming from external MV cabinet (AC – medium voltage) Pay particular attention to any colour variations or anomalies affecting the isolating cables or the terminals. Replace any damaged connections or corroded contact elements. The correct tightening torques are given in the user Manuals of the cabinets installed in the Sunway Station. 64/73 Rev. 00 - 30/09/2013 INSTALLATION, OPERATION AND MAINTENANCE GUIDE 10.8. SUNWAY STATION LS/LC Checking the Emergency Stop DANGER Danger of death from electrocution and burns due to contact with live components of the AC- and DC Low Voltage grid, Medium Voltage grid and UPS. • Cut off power supply by setting both inverters to stop • Make sure that voltage is applied to the Sunway Station • Open the cover and remove the safe crash glass from the emergency push-button, thus activating the button itself • Check to see if the master switch in the MV cabinet as well as the DC/AC switches in the inverter compartments have been released • On completion of this activity, restore the emergency button and all the tripped switches. Rev. 00 - 30/09/2013 65/73 SUNWAY STATION LS/LC INSTALLATION, OPERATION AND MAINTENANCE GUIDE 10.9. Checking the Anticondensation Heater in the MV/LV Transformer Compartment The anticondenstion heater (A) installed in the MV/LV transformer compartment is 3 550W-rated and is equipped with a 45m /h fan. To activate the anticondensation heater, force relay 36KA12 installed inside the Auxiliary Cabinet. To obtain the relay switching without powering on the coil, bring the relay lever in upright position. Replace the lever in horizontal position when the activity is over. Check the warm air flow as per the figure on the left. Put back the lever to horizontal position when the activity is over. 66/73 Rev. 00 - 30/09/2013 INSTALLATION, OPERATION AND MAINTENANCE GUIDE SUNWAY STATION LS/LC 10.10. Checking the Foundations Check the presence of water, dirt, animals. Check to see if the foundations are damaged. The lower compartment where cables are held shall be dry and clean. Make sure that no animal can enter the cable compartment. Take the necessary (if any) corrective actions. Remove the floor panels to gain access to the tank: • Remove the screws (A) from each panel • Lift the panel on one side and pull it out • After checking the cable compartment, put the panel(s) and the screws back to place Rev. 00 - 30/09/2013 67/73 SUNWAY STATION LS/LC INSTALLATION, OPERATION AND MAINTENANCE GUIDE 10.11. Checking the Lighting System Where the lighting system complete with emergency circuit is fitted, periodically perform a full discharge/recharge cycle of the battery to ensure maximum efficiency. DANGER Before performing any maintenance activities, remove voltage from the whole equipment, including the battery. • Replace the battery when the equipment endurance is weaker, in any case after 4 years from installation and approx 500 discharge/recharge cycles. The performance of the emergency system is ensured only when using the same batteries (brand and model) as the batteries supplied with the equipment • The date of fabrication of the battery is made up of 4 digits: the first two digits stand for the year of fabrication, whilst the last two digits stand for the week of fabrication: e.g. 0008: year 2000, week 08 • The battery must be collected separately as electrical and electronic waste according to local and currently valid legislation. 68/73 Rev. 00 - 30/09/2013 INSTALLATION, OPERATION AND MAINTENANCE GUIDE SUNWAY STATION LS/LC 11. TECHNICAL DATA Main Specifications Inverter Number of MPPT voltage independent (1) range (V) MPPTs Inverter efficiency LV side (3) Maximum / EU / CEC Rated power of MV transformer (kVA) Station auxiliary consumptions (kVA) Station dimensions (WxHxD) (m) Station weight (Kg) SUNWAY STATION 420 800V LS 2x SUNWAY TG240 800V TE 415 – 760 2 98.4% / 97.8 % / 97.5% 400 3 6.5x3.2x2.4 15000 SUNWAY STATION 520 800V LS 2x SUNWAY TG310 800V TE 415 – 760 2 98.4% / 97.9 % / 97.5% 500 4 7.5x3.2x2.4 16000 SUNWAY STATION 620 800V LS 2x SUNWAY TG385 800V TE 415 – 760 2 98.4% / 97.9 % / 97.5% 630 4.2 7.5x3.2x2.4 16000 SUNWAY STATION 820 800V LS 2x SUNWAY TG485 800V TE 415 – 760 2 98.4% / 98.0 % / 97.5% 800 6.5 8.5x3.2x2.4 21000 SUNWAY STATION 1020 800V LS 2x SUNWAY TG610 800V TE 415 – 760 2 98.5% / 98.0 % / 97.5% 1000 7.1 8.5x3.2x2.4 22000 SUNWAY STATION 1220 800V LS 2x SUNWAY TG730 800V TE 415 – 760 2 98.5% / 98.0 % / 97.5% 1250 7.2 8.5x3.2x2.4 22500 SUNWAY STATION 710 1000V LS 1x SUNWAY TG610 1000V TE - 340 STD 525 - 820 1 98.5% / 98.1 % / 98.0% 650 4.5 6.5x3.2x2.4 16000 SUNWAY STATION 711 1000V LS 1x SUNWAY TG610 1000V TE - 360 STD 550 - 820 1 98.5% / 98.2 % / 98.0% 700 4.5 6.5x3.2x2.4 16500 SUNWAY STATION 810 1000V LS 1x SUNWAY TG750 1000V TE - 320 STD 495 - 820 1 98.5% / 98.2 % / 98.0% 700 4.5 6.5x3.2x2.4 16500 SUNWAY STATION 811 1000V LS 1x SUNWAY TG750 1000V TE - 340 STD 525 - 820 1 98.5% / 98.2 % / 98.0% 750 4.5 6.5x3.2x2.4 16500 SUNWAY STATION 812 1000V LS 1x SUNWAY TG750 1000V TE - 360 STD 550 - 820 1 98.5% / 98.2 % / 98.0% 800 4.5 6.5x3.2x2.4 16500 SUNWAY STATION 910 1000V LS 1x SUNWAY TG760 1000V TE - 340 STD 525 - 820 1 98.6% / 98.3 % / 98.0% 800 5.1 6.5x3.2x2.4 16500 SUNWAY STATION 911 1000V LS 1x SUNWAY TG760 1000V TE - 360 STD 550 - 820 1 98.6% / 98.3 % / 98.0% 900 5.1 6.5x3.2x2.4 16500 SUNWAY STATION 912 1000V LS 1x SUNWAY TG760 1000V TE - 380 STD 580 - 820 1 98.6% / 98.3 % / 98.0% 900 5.1 6.5x3.2x2.4 16500 SUNWAY STATION 1120 1000V LS 2x SUNWAY TG610 1000V TE - 340 STD 525 - 820 2 98.5% / 98.1 % / 98.0% 1250 7.4 8.5x3.2x2.4 23000 SUNWAY STATION 1320 1000V LS 2x SUNWAY TG610 1000V TE - 360 STD 550 - 820 2 98.5% / 98.2 % / 98.0% 1350 7.4 8.5x3.2x2.4 23000 SUNWAY STATION 1350 1000V LS 2x SUNWAY TG750 1000V TE - 320 STD 495 - 820 2 98.5% / 98.2 % / 98.0% 1400 7.4 8.5x3.2x2.4 23000 SUNWAY STATION 1420 1000V LS 2x SUNWAY TG750 1000V TE - 340 STD 525 - 820 2 98.5% / 98.2 % / 98.0% 1500 7.4 8.5x3.2x2.4 23500 SUNWAY STATION 1520 1000V LS 2x SUNWAY TG750 1000V TE - 360 STD 550 - 820 2 98.5% / 98.2 % / 98.0% 1650 7.4 8.5x3.2x2.4 25000 SUNWAY STATION 1550 1000V LS 2x SUNWAY TG760 1000V TE - 340 STD 525 - 820 2 98.6% / 98.3 % / 98.0% 1600 8.6 8.5x3.2x2.4 25000 SUNWAY STATION 1620 1000V LS 2x SUNWAY TG760 1000V TE - 360 STD 550 - 820 2 98.6% / 98.3 % / 98.0% 1700 8.9 9.5x3.2x2.4 26000 SUNWAY STATION 1720 1000V LS 2x SUNWAY TG760 1000V TE - 380 STD 580 - 820 2 98.6% / 98.3 % / 98.0% 1800 8.9 9.5x3.2x2.4 26000 (1) With rated Vac and power factor=1 (2) Conversion efficiency is calculated without including auxiliary consumptions Rev. 00 - 30/09/2013 69/73 INSTALLATION, OPERATION AND MAINTENANCE GUIDE SUNWAY STATION LS/LC General Specifications All models (1) Rated output frequency Power factor at rated power Degree of protection 50Hz 1-0.9 lead/lag IP33 Maximum operating altitude (1) 4000m asl Maximum relative humidity 100% condensing No derating up to 1000 m asl Input Ratings Maximum number of DC inputs with safety fuse Maximum input short-circuit current (A) <1 % 2x 8 408 <1 % 2x 10 660 608 <1 % 2x 10 660 880 772 <1 % 2x 16 1250 880 964 <1 % 2x 16 1250 SUNWAY STATION 1220 800V LS 880 1156 <1 % 2x 16 1250 SUNWAY STATION 710 1000V LS 1000 608 <1 % 1x 16 1500 SUNWAY STATION 711 1000V LS 1000 644 <1 % 1x 16 1500 SUNWAY STATION 810 1000V LS 1000 685 <1 % 1x 16 1500 SUNWAY STATION 811 1000V LS 1000 728 <1 % 1x 16 1500 SUNWAY STATION 812 1000V LS 1000 772 <1 % 1x 16 1500 SUNWAY STATION 910 1000V LS 1000 779 <1 % 1x 16 1500 SUNWAY STATION 911 1000V LS 1000 824 <1 % 1x 16 1500 SUNWAY STATION 912 1000V LS 1000 871 <1 % 1x 16 1500 SUNWAY STATION 913 1000V LS 1100 917 <1 % 1x 16 1500 SUNWAY STATION 1120 1000V LS 1000 1216 <1 % 2x 16 1500 SUNWAY STATION 1320 1000V LS 1000 1288 <1 % 2x 16 1500 SUNWAY STATION 1350 1000V LS 1000 1370 <1 % 2x 16 1500 SUNWAY STATION 1420 1000V LS 1000 1456 <1 % 2x 16 1500 SUNWAY STATION 1520 1000V LS 1000 1544 <1 % 2x 16 1500 SUNWAY STATION 1550 1000V LS 1000 1558 <1 % 2x 16 1500 SUNWAY STATION 1620 1000V LS 1000 1648 <1 % 2x 16 1500 SUNWAY STATION 1720 1000V LS 1000 1742 <1 % 2x 16 1500 SUNWAY STATION 1820 1000V LS 1100 1834 <1 % 2x 16 1500 Max open-circuit voltage (V) Rated input power (kW) PV ripple voltage PV SUNWAY STATION 420 800V LS 880 376 SUNWAY STATION 520 800V LS 880 492 SUNWAY STATION 620 800V LS 880 SUNWAY STATION 820 800V LS SUNWAY STATION 1020 800V LS 70/73 Rev. 00 - 30/09/2013 INSTALLATION, OPERATION AND MAINTENANCE GUIDE SUNWAY STATION LS/LC Output Ratings Rated output current, LV side (V) Rated output voltage, LV side (kW) SUNWAY STATION 420 800V LS 781.4 376 SUNWAY STATION 520 800V LS 1020.6 492 SUNWAY STATION 620 800V LS 1259.8 608 SUNWAY STATION 820 800V LS 1600.6 772 SUNWAY STATION 1020 800V LS 2000.8 964 SUNWAY STATION 1220 800V LS 2400 1156 SUNWAY STATION 710 1000V LS 1000 608 SUNWAY STATION 711 1000V LS 1000 644 SUNWAY STATION 810 1000V LS 1200 685 SUNWAY STATION 811 1000V LS 1200 728 SUNWAY STATION 812 1000V LS 1200 772 SUNWAY STATION 910 1000V LS 1283 779 SUNWAY STATION 911 1000V LS 1283 824 SUNWAY STATION 912 1000V LS 1283 871 SUNWAY STATION 913 1000V LS 1283 917 SUNWAY STATION 1120 1000V LS 2000 1216 SUNWAY STATION 1320 1000V LS 2000 1288 SUNWAY STATION 1350 1000V LS 2400 1370 SUNWAY STATION 1420 1000V LS 2400 1456 SUNWAY STATION 1520 1000V LS 2400 1544 SUNWAY STATION 1550 1000V LS 2566 1558 SUNWAY STATION 1620 1000V LS 2566 1648 SUNWAY STATION 1720 1000V LS 2566 1742 SUNWAY STATION 1820 1000V LS 2566 1834 (1) (2) (3) (4) Power Threshold AC Current Total Distortion Rated AC Voltage, MV side Connection Phases, MV side < 1% of the inverter AC rated output power ≤3 % 6 to 24 kV (up to 30 kV on demand) 3 With rated Vac and power factor=1 No derating up to 1000 m asl Conversion efficiency is calculated without including auxiliary consumptions Dimensions and weights not applicable to Sunway Station LC fully made of reinforced concrete Rev. 00 - 30/09/2013 71/73 INSTALLATION, OPERATION AND MAINTENANCE GUIDE SUNWAY STATION LS/LC Sunway Station LC – Mechanical Data Mechanical data SUNWAY STATION 820 800V SUNWAY STATION 1020 800V SUNWAY STATION 1220 800V SUNWAY STATION 1350 900V SUNWAY STATION 1120 1000V SUNWAY STATION 1420 1000V SUNWAY STATION 1620 1000V Mechanical data of the structure Station dimensions (WxHxD) Station weight 8.4x2.7x2.4m 8.4x2.7x2.4m 8.4x2.7x2.4m 8.4x2.7x2.4m 8.4x2.7x2.4m 8.4x2.7x2.4m 8.4x2.7x2.4m 21500 kg 21500 kg 21500 kg 21500 kg 21500 kg 21500 kg 21500 kg Mechanical data of the foundations tank Dimensions of the foundations tank (WxHxD) Weight of the foundations tanks 11.1. 8.4x0.6x2.4m 8.4x0.6x2.4m 8.4x0.6x2.4m 8.4x0.6x2.4m 8.4x0.6x2.4m 8.4x0.6x2.4m 8.4x0.6x2.4m 9518 kg 9518 kg 9518 kg 9518 kg 9518 kg 9518 kg 9518 kg Electrical Specifications of the Cabinets Please refer to the Installation Guides of the cabinets installed in the Sunway Station for details. 11.2. Specifications of the UPS and Additional Batteries Please refer to the Installation Guide of the Auxiliary Cabinet for details on the UPS and additional batteries. Station consumptions for UPS 270 W UPS endurance referred to station loads without UPS additional batteries 15 minutes UPS endurance referred to station loads including UPS additional batteries 5 hours 72/73 Rev. 00 - 30/09/2013 INSTALLATION, OPERATION AND MAINTENANCE GUIDE SUNWAY STATION LS/LC 12. REFERENCE REGULATIONS CEI 0-16 Reference technical rules for the connection of active and passive consumers to the HV and MV electrical networks of distribution Company CEI 11-1 Power installations exceeding 1 kV a.c. CEI 11-35 Guida per l’esecuzione di cabine elettriche MT/BT del cliente/utente finale (Guidelines for the construction of MV/LV electrical substations of the customer/end user) CEI 20-22/2 Tests on electric cables under fire conditions Part 2: Fire propagation CEI 64-8 Electrical installations with rated voltage not exceeding 1000V AC and 1500V DC CEI EN 60529 (CEI 70-1) Degrees of protection provided by enclosures (IP Code) IEC 60076-1 Power transformers – Part 1 General IEC 60076-11 Power transformers – Part 11 Dry-type transformers IEC 61439-1 Low-voltage switchgear and controlgear assemblies – Part 1: General rules IEC 62271-200 AC metal-enclosed switchgear and controlgear for rated voltages above 1 kV and up to and including 52 kV Rev. 00 - 30/09/2013 73/73