1
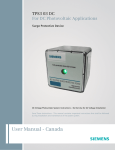
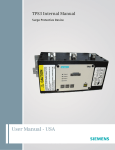
TPS3 09
Surge Protective Device
User Manual - Canada
V WARNING - Hazardous Voltage & Shock Hazard
Failure to Follow These Instructions Could Result in Death or Serious Injury
•
•
•
•
•
•
Only qualified licensed electricians should install or service SPDs
Hazardous voltages exist within SPDs
SPDs should never be installed or serviced when energized
Use appropriate safety precautions including Personal Protection Equipment
Failure to follow these instructions can result in death, serious injury, and/or equipment damage
This manual shall be read in entirety prior to installing
Bonding and Grounding Hazard
Verify that the neutral conductor in the service entrance equipment is bonded to ground in accordance with the National
Electrical Code (NEC®) and all applicable codes.
Verify that the neutral terminal (XO) on the secondary side of distribution transformers are grounded to the system ground
in accordance with the NEC® and all applicable codes.
During installation into an electrical system the SPD must not be energized until the electrical system is completely installed,
inspected and tested. All conductors must be connected and functional including the neutral (if required). The voltage
rating of the SPD and system must be verified before energizing the SPD.
Failure to follow these guidelines can lead to abnormally high voltages at the SPD. This may cause the SPD to fail. The
warranty is voided if the SPD is incorrectly installed and/or if the neutral conductor in the service entrance equipment or
downstream of separately derived systems is not bonded to ground in accordance with the NEC®.
Do Not Hi-Pot Test SPDs
Any factory or on-site testing of power distribution equipment that exceeds normal operating voltage such as
high-potential insulation testing, or any other tests where the suppression components will be subjected to higher voltage
than their rated Maximum Continuous Operating Voltage (MCOV) must be conducted with the SPD disconnected from the
power source. For 4-wire systems, the neutral connection at the SPD must also be disconnected prior to performing highpotential testing and then reconnected after test completion.
Failure to disconnect SPD and associated components during elevated voltage testing will damage the SPD and will void
the warranty.
Introduction
Thank you for choosing the Siemens TPS3 09 Surge Protective Device
(SPD). TPS3 09 is a high quality, high energy surge suppressor designed
to protect sensitive equipment from damaging transient overvoltages.
The TPS3 09 is parallel connected such that circuit ampacity is
unlimited. Proper installation is important to maximize performance.
Please follow steps outlined herein. These instructions are not intended
to replace national or local codes. Follow all applicable electrical codes
to ensure compliance.
Figure 1: SPD Types
2008 NEC Art 285 & UL 1449-3
SPD Types: Types 1, 2, 3, & 4
Based on Location within electrical distribution system
(also coincides with ANSI/IEEE C62.41.2 - 2002 Categories C, B &A)
VWARNING - Hazardous Voltage & Shock Hazard
•
•
•
•
•
•
Only qualified licensed electricians should install or service
SPDs
SPDs should never be installed or serviced when energized
or during electrical storms
Use appropriate safety precautions including Personal
Protection Equipment
Failure to follow these instructions can result in death,
serious injury, and/or equipment damage
When used in outdoor applications, customer must seal
the conduit nipple using watertight fittings (not included)
to ensure a watertight connection
Read this manual in entirety prior to installing
Industry Standards Changes - 2009
UL 1449 Third Edition and 2008 NEC® Article 285 generated substantial
changes.
•
•
•
•
The term TVSS changed to SPD
Types 1, 2, 3 & 4 SPDs are created
UL 1449 clamping voltage performance testing changed from
500A to 3,000A
UL 1449 added new I nominal testing (In), which consists of more
rigorous duty-cycle testing
The SPD Type category is important to understand before installing
any SPD. Type 1 and 2 SPDs are fully UL Listed devices whereas Type
4 SPDs are UL Recognized devices.
Type 1 – Installed on line or load side of the Main Overcurrent
Protection (OCP), similar to what you knew as SSA, except now includes
rigorous safety testing. Includes all OCP & safety disconnectors inside
the SPD
Type 2 – Installed on load side of the Main OCP, similar to what you
know as hardwired SPD, and it may require external OCP.
Type 3 – Point of Utilization, direct plug in type devices, similar to what
you know as surge strips. Theses devices are intended for installation
10 meters from the panel (rational based on IEEE Cat. A location).
Type 4 – Surge suppression components, could be a basic component
or a complete module. Type 4 components can be tested for Type 1,
Type 2 or Type 3 applications.
For further information, please review latest editions of NEC® Art. 285,
UL 1449, contact your local Siemens sales office or contact Siemens
Technical Support at 1.888.333.3545.
The TPS3 09 is a Type 1 SPD Type 2 cUL). Type 1 SPDs are evaluated
more rigorously by UL 1449 for 2008 NEC® Article 285 compliance. Type 1 SPDs and their connecting leads have been evaluated for line
side applications without need for supplemental overcurrent protection. Type 1 SPDs include internal overcurrent protection. As a generalization,
there are practical maintenance reasons for installing on the load
side of the main overcurrent device (i.e. Type 2 installation). When
connected on load side of main disconnect, a 30A circuit breaker is
recommended due to 10 AWG conductors. The circuit breaker serves
as a disconnecting device and provides NEC® imposed short circuit
protection to the conductors in Type 2 or 4 applications. Simplified Explanation of Operation
SPDs sense overvoltage and create a momentary short circuit to redirect
harmful surge energy to earth ground. SPD’s are not a one time device. They reset automatically and wait for the next surge. SPDs are capable
of repeating this function thousands of times.
Parts List and Inspection
Items included in the package consist of the following:
• 1 TPS3 09 SPD including 3’ (1~m) conductors
• 1 User’s Manual (this document)
If the Flush Mount Kit was ordered , additional parts are supplied as
follows:
• 1 Flush Mount Plate
• 4 Mounting Screws
Carefully inspect each item in the package for signs of damage. If damage
is found, please contact Siemens Technical Support: 1.888.333.3545.
For more information about this product or other Siemens products,
visit www.purgethesurge.ca.
Figure 2: Dimensions and Weight
3.00
1.50
1.08
Phase Indicators
CAUTION
On-Full Protection
Off-No Proection
DANGER
HAZARDOUS VOLTAGE
Disconnect all power supplying this equipment before replacing.
Failure to do so will result in death or serious injury.
Voltage Rating & Application
Before installing SPD, verify the nameplate voltage has the same
voltage rating as the power distribution system. If unsure, call
Siemens Technical Support at 1.888.333.3545 before proceeding. The
SPDs specifier or user should be familiar with the configuration and
arrangement of the power distribution system. The system is defined
by how the secondary windings of the transformer supplying the
service entrance main or load are conFigured. This includes whether or
not the transformer windings are referenced to earth via a grounding
conductor. The system configuration is not based on how any specific
load or equipment is connected to a particular power distribution
system. SPDs should be installed per the distribution system, not per
a load or motor’s wiring connection. For example, suppose a 480V three phase motor appears to be
connected as a 480V Delta. In actuality, the serving distribution
system might be a 480Y/277V grounded Wye, with or without a
neutral pulled to the motor or MCC. The system is still a 480Y/277V
Wye, even though the load is connected as a Delta. A grounded Wye
has a defined reference to ground (i.e., neutral is bonded to ground). In contrast, some Delta systems are ungrounded, which have no
reference to ground. Table 2: Model Number Decoder
Model
TPS3 09’s have demonstrated 200kA Short Circuit Current Ratings
(SCCR) including leads (120/240V Split phase models have 100kA
SCCRs). See UL Label markings on SPD or see Data Sheet for specs for
verification. Supplemental overcurrent protection is not required to
protect this SPD. However, NEC® convention requires that connecting
conductors have overcurrent protection in Type 2 or 4 applications.
Follow applicable codes.
This device features internal overcurrent and overtemperature
protection that will disconnect effected surge suppression components
at the end of their useful life, but will maintain power to the load – now
unprotected. If this situation is undesirable for the application, follow
these instructions for replacing the device. TPS3 09 is ultrasonically
welded closed and contains no user serviceable parts.
Table 2: Specifications
Specifications
Temperature Operating
-40oC (-40oF) to 60oC (+140oF)
Temperature Storage
-55oC (-67oF) to 65oC (+149oF)
Wire Size & Installation Torque
10 AWG; 18 inch-pounds
Appropriate Circuit Breaker
based on conductor size
30A (SPD includes internal OCP)
NEMA 250 Enclosure Rating
Type 4X with appropriate
sealing & sealing condulets
TPS3A09
TPS3B09
TPS3C09
TPS3D09
TPS3E09
TPS3F09
TPS3G09
TPS3K09
TPS3L09
TPS3S09
Voltage
Code
A
B
C
D
E
F
G
K
L
S
Service Voltage
240/120V 1Ø, 3W Plus Ground,
240/120V 3Ø, 4W Plus Ground High Leg Delta
208Y/120V 3Ø, 4W Plus Ground
240V 3Ø, 3W Plus Ground
480Y/277V 3Ø, 4W Plus Ground
480V 3Ø, 3W Plus Ground
600V 3Ø, 3W Plus Ground
380Y/220V 3Ø, 4W Plus Ground
600Y/347V 3Ø, 4W Plus Ground
400Y/230V 3Ø, 4W Plus Ground
SPDs on Ungrounded Systems
Caution – Ungrounded systems are inherently unstable and can
produce excessively high line-to-ground voltages during certain fault
conditions. During these fault conditions, any electrical equipment
including an SPD, may be subjected to voltages which exceed their
designed ratings. This information is being provided to the user so
that an informed decision can be made before installing any electrical
equipment on an ungrounded power system.
V DANGER
V CAUTION
Hazardous voltage.
Will cause death or serious injury.
CONDUCTING DIELECTRIC AND/OR
HI-POTENTIAL TESTING WILL CAUSE
INTERNAL DAMAGE TO SPD UNIT.
Keep Out.
Qualified personnel only.
Disconnect and lock off all power before
working on this equipment.
Do not perform dielectric or high potential
tests with the SPD unit installed.
TPS3 09 Installation Instructions
Pre-Plan your installation. You need to accomplish the following:
•
•
•
•
•
•
•
•
Meet all National and Local codes (NEC Article 285 and UL
1449 address SPDs)
Confirm System voltage to SPD voltage (120V SPD will fail
instantly on 240V, 277V, etc.)
Mount SPD as close to panel or equipment as possible to keep
leads short (long leads hurt performance substantially)
Ensure leads are as short and straight as possible, including
neutral and ground. If using a breaker, use a breaker position
that is close to the SPD and the panel’s neutral & ground
If using a breaker, recommended breaker size is 30A due to
10 AWG conductor
Make sure system is grounded per NEC® and clear of faults
before energizing SPD (inadvertent system problem may fail
SPD).
Never Hi-Pot test Any SPD (will prematurely fail SPD)
Do not install the TPS3 09 through the bottom of a NEMA
3R panel. Dripping water will prematurely fail the SPD.
A
B
• Use closest breaker to SPD
• Locate SPD close to intended
breaker
C
®
• Keep Leads Short as Possible
• Avoid Sharp Bends
BREAKER
N
G
Figure 4: Typical Flush Mount Installation
Mounting Surface
1. Use voltmeter to check voltages and ensure correct SPD. See Data
Sheet for specs & wire-outs
2. Determine Mounting location – weather resistant equipment
may be required
3. If SPD has optional Dry Contact and Flush Mount Kit, pre-plan
their installation. See Figures 4&6. (If flush mounting, be careful
to not drop SPD into wall)
4. Remove power from panel/source. Confirm panel/source is
deenergized.
5. Identify breaker location and SPD location. Position SPD such that
LEDs are best visible.
6. Mount SPD – weather resistant applications require additional
sealing, o-rings, etc. (not included)
-- Remove an appropriately sized knockout from panel.
-- Connect conductors as appropriate – short and straight as possible
(Hi-Legs are Phase B)
-- Note that the metallic connection hub is not grounded within the SPD
and proper grounding requires connection of the green conductor
ground.
7. Label or mark conductors as appropriate (neutral: white, ground:
green, energized: black, hi-leg: orange)
8. Make sure system is bonded per NEC® and is clear of hazards or
faults before energizing (N-G bonding not per NEC® will fail SPDs:
#1 cause of SPD failures)
9. Energize and confirm proper operation of green LED indicators
and/or options.
Mounting Screws
(4 places, through mountingplate into mounting
surface, screws not provided)
Removed Material
SPD
Flush Mount Plate
Flush Mount Kit Screws
(8-32 x 5/8” Thread Cutting, 4 places, through
plate into SPD)
Phase, Ground,
and Neutral Wires
Figure 5: Lead Lengths
Leads: Short & Straight
Cut Excess; Do Not Coil or Loop
X
Not
Good
P
Good
•
•
•
CUT OFF EXCESS
LENGTH
DO NOT LOOP OR
COIL
SHORT &
STRAIGHT
Connecting Optional Form C Dry Contact & Audible Alarm
(“D” suffix near end of model number)
CONNECTING TO OPTIONAL REMOTE INDICATOR IF EQUIPPED
(“E” SUFFIX NEAR END OF MODEL NUMBER)
Three (3) 3’ (~1m) 18 AWG wires are included through the nipple with
this option. (These are smaller than the 10 AWG SPD conductors.) Gray is Common, Red is Normally Open and Blue is Normally Closed. (We generally recommend the Normally Closed configuration because
it detects disconnected or failed wiring whereas normally open does
not.)
This option includes a supplemental diagnostic LED that can be
mounted in a conspicuous location. For example, assume that the
SPD is mounted such that it is not readily visible. A Remote Indicator
can provide visual indication of correct operation.
If the dry contacts are not utilized, insulate lead ends, coil and secure.
Audible alarm will still function correctly.
The contact is rated 250V, 5A. Higher energy applications require
supplemental relaying. This option monitors suppression element
condition and is not intended for use as phase loss or phase detection
monitoring. Normal Operation
Green LED Indicators
Each phase’s LED Indicator illuminates when the SPD is energized
and operating correctly. Every suppression element is monitored and
connected by logic to the LED. Should any suppression element fail,
the green LED will extinguish.
Form C Dry Contact and Audible Alarm Option
Similar to the Green LEDs above, the dry contact will change state and
the audible alarm will sound upon suppression element failure. The
audible alarm may be silenced by removing power to the SPD.
Figure 6: Dry Contact
•
•
Normally Closed (suggested): Use Gray and Blue
Normally Open: Use Gray and Red
Blue
6
Normally Closed
Common
Red
Normally Opened
Pre-Plan the installation per normal Installation Instructions. Note that
the LED assembly and butt-splice connectors are not weather resistant
and should be protected accordingly.
Mount the LED assembly in an appropriate conspicuous location. Drill
a 1/4” diameter hole at the mounting location. Remove the hex nut
from the back side of the LED assembly and feed the LED indicator
wires through the hole. Install the hex nut.
Butt-splice the wires (polarity does not matter) from the LED wiring
assembly to the yellow SPD wires by inserting one end of each LED
wiring assembly lead into the butt-splice (supplied). Squeeze the metal
contact of the butt-splice downward. Ensure the wires cannot be pulled
out of the butt-splice. Fold the cover of the butt-splice over the metal
contact until the cover of the butt-splice latches to the bottom portion
of the butt-splice.
After installation, test the Green LED by energizing, then deenergizing
the SPD, and verifying that the LED turns on and off appropriately. An
alternate test is to deenergize just one phase.
Dry Contact Leads
Gray
The Green LED assembly includes two pre-attached wires and two
butt-splice connectors. The SPD includes two yellow 18 AWG wired,
pre-wired through the SPD’s nipple mounting connection.
The enclosed label should be placed under the LED for reference. Plan
your installation for adequate label space.
Power Leads
Blue
Operation is straightforward: Green LED On = SPD is OK. If the LED is
out, the SPD has failed; power is not present, or one or more phases
are not energized.
Grey
Red
V DANGER
V CAUTION
Hazardous voltage.
Will cause death or serious injury.
CONDUCTING DIELECTRIC AND/OR
HI-POTENTIAL TESTING WILL CAUSE
INTERNAL DAMAGE TO SPD UNIT.
Keep Out.
Qualified personnel only.
Disconnect and lock off all power before
working on this equipment.
Do not perform dielectric or high potential
tests with the SPD unit installed.
Maintenance
Warranty and Customer Service
SPDs require minimal maintenance. Periodic inspection of diagnostic
indicators is recommended to ensure proper operation. Limited Warranty
Troubleshooting & Service
Please contact us for any service related issues. Quality SPDs withstand severe duty and attempt to protect the
load until failure. There are electrical anomalies that SPDs cannot
protect against. These are generally Sustained Overvoltages also
known as Temporary Overvoltages (TOVs). In this context, Sustained
Overvoltages may be only a few cycles. Failed SPDs tend to be
symptoms, not root causes. A failed SPD is usually a sign of other
problems within the electrical distribution system. As a generalization,
the single largest cause of SPD failures is reference to ground issues. If the SPD shows problems on startup, there is reasonable chance of
bonding/grounding/misapplication issue. This permanently damages
the unit. If not corrected, it will happen again.
Siemens warrants its AC Panel protection products against defective
workmanship and materials for 10 years. Liability is limited to the repair
or replacement of the defective product at Siemens’ option. A Return
Material Authorization number (RA#) must be given by the company
prior to the return of any product. Returned products must be sent
to the factory with the transportation charges prepaid. In addition,
the company also warranties unlimited replacement of modular and
component parts within the warranty period previously described.
The company specifically disclaims all other warranties, expressed or
implied. Additionally, the company is not be responsible for incidental
or consequential damages resulting from any defect in any product or
component thereof.
The sales contract contains the entire obligation of Siemens. This
instruction manual shall not become part of or modify any prior existing
agreement, commitment or relationship.
Technical Support
1.888.333.3545
Prior to calling Siemens Technical Support for assistance or ordering
parts, please have the following information available:
SPD model number: ________________________________
Manufacture date: _________________________________
Date of Purchase: ___________________________________
Your order number: _______________________________
Return Shipment Address:
Siemens - Attn: RA #___________
14550 58th Street North
Clearwater, FL 33760
Clearwater, FL 33760
7
Siemens Canada Limited
1577 North Service Road East
Oakville, ON L6H 0H6
SPD Hotline: 888.333.3545 [email protected]
4.11.13 #8227