1
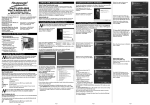
Motor System
for Satellite Receiver
EN
DE
PL
RU
Model ID: MH1
User manual
Bedienungsanleitung
Instrukcja obsługi
Руководство пользователя
6/2010 jp
Contents
1.
2.
3.
4.
5.
5.1.
5.2.
5.3.
5.4.
5.5.
5.6.
6.
6.1.
6.2.
7.
8.
9.
9.1.
9.2.
10.
11.
12.
13.
Safety precautions ............................................................................................................................................................................ 1
Environment protection ................................................................................................................................................................... 3
Features ............................................................................................................................................................................................ 4
Operating notes ................................................................................................................................................................................ 4
Installation........................................................................................................................................................................................ 5
Assemble the motor ................................................................................................................................................................. 5
Cable connections .................................................................................................................................................................... 5
Preliminary antenna pointing ................................................................................................................................................... 6
Setting elevation angle of the motor. ....................................................................................................................................... 6
Setting declination angle of the dish ......................................................................................................................................... 7
Checking and final adjusting ..................................................................................................................................................... 7
Quick installation (receiver with Goto X function recommended): .................................................................................................. 8
Driving the motor to reference satellite position ...................................................................................................................... 8
Precision tuning ........................................................................................................................................................................ 8
Using DiSEqC 1.2 ............................................................................................................................................................................... 8
Using Goto X function....................................................................................................................................................................... 9
Hardware reset ................................................................................................................................................................................. 9
Reset by receiver ...................................................................................................................................................................... 9
Reset by DiSEqC motor ............................................................................................................................................................. 9
Troubleshooting.............................................................................................................................................................................. 10
Elevation and declination angle table............................................................................................................................................. 11
Satellites longitude table ................................................................................................................................................................ 12
Technical specification .................................................................................................................................................................... 13
User manual
1. Safety precautions
CAUTION:
The
lightning
flash
with
arrowhead symbol, within an
equilateral triangle, is intended
to alert the user to "dangerous
voltage" and to prevent from a
risk of electric shock.
Warning:
The exclamation point within an
To reduce the risk of electric
shock, don't open the cabinet.
Refer servicing to qualified
personnel only.
equilateral triangle is intended to
alert the user to important
operating
and
maintenance
(servicing).
WARNING: Do not use this STB where contact with or immersion in water is a possibility. Do not use near
flower vase, washbowls, kitchen sinks, laundry tubs, swimming pools, etc.
WARNING: Do not put the candle or lamp stand on the cabinet; otherwise, there is the danger of fire.
WARNING: The unit should be connected to a power supply only of the type described in the operating
instructions or as marked on the unit. If you are not sure of the type of power supply (for example, 120 or
230 V) to your home, consult your local dealer or local power company.
WARNING: This product install diodes. Do not open the cabinet or touch any parts in the inner
mechanism. Consult your local dealer for technical service if the opening is required.
Note: To ensure proper use of this product, please read this User manual carefully and retain for further
reference.
Note: This product install diodes. Do not open the cabinet to avoid the unit direct exposure to radiation.
Unit Cleaning: After the unit power is turned off, you can clean the cabinet, panel and remote control with
a soft cloth lightly moistened with a mild detergent solution.
Attachments: Never add any attachments and/or equipment without the manufacturer consent; as such
additions may result in the risk of fire, electric shock, or other personal injury.
1
User manual
Locating: Slots and openings in the cabinet are provided for ventilation to protect it from overheating. Do
not block these openings or allow them to be blocked by placing the STB on a bed, sofa, or other similar
surface, nor should it be placed over a radiator or heat register.
Power-Cord Protection: Place the power-supply cord out of the way, where it will not be walked on.
Please take special attentions to cords at plugs, convenience receptacles, and the point where they exit
from the unit.
Object and Liquid Entry: Never put objects of any kind into this STB through openings, as they may touch
dangerous voltage points or short-out parts that could result in a fire or electric shock. Never spill any
liquid on the STB.
Note: Moisture may be formed on the lens In the following conditions:
when the unit is suddenly moved from a cold environment or an air-condition room to a warm place.
immediately after a heater has been turned on.
in a steamy or very humid room.
If the moisture forms inside the unit, it may not operate properly. To correct this problem, turn on the
power and wait about two hours for the moisture to evaporate.
Parts Replacement: When the unit parts need to be replaced, user should make sure the service
technician use the replacement parts specified by the manufacturer or having the same characteristics as
the original part. Unauthorized replacement may put the unit In the risk of fire, electric shock or other
hazards.
Safety Check: After all the maintenances and repairs are done, user is required to request the service
technician to conduct the overall safety check to ensure the machine is In the proper condition.
2
User manual
2. Environment protection
Attention!
Your product Is marked with this symbol. It means that used electrical and electronic products should not
be mixed with general household waste. There is a separate collection system for these products.
Information on Disposal for Users (private households) in the European Union
Used electrical and electronic equipment must be treated separately and In accordance with legislation
that requires proper treatment, recovery and recycling of used electrical and electronic equipment.
Following the implementation by member states, private households within the EU states may return
their used electrical and electronic equipment to designated collection facilities free of charge*. In some
countries* your local retailer may also take back your old product free of charge if you purchase a similar
new one. *) Please contact your local authority for further details.
If your used electrical or electronic equipment has batteries or accumulators, please dispose of these
separately beforehand according to local requirements.
By disposing of this product correctly you will help ensure that the waste undergoes the necessary
treatment, recovery and recycling and thus prevent potential negative effects on the environment and
human health which could otherwise arise due to inappropriate waste handling.
Information on Disposal for Business Users
In the European Union
If the product is used for business purposes and you want to discard It:
Please contact your dealer who will inform you about the take-back of the product. You might be charged
for the costs arising from take-back and recycling Small products (and small amounts) might be taken back
by your local collection facilities,
In other Countries outside the EU
If you wish to discard of this product, please contact your local authorities and ask for the correct method
of disposal.
3
User manual
3. Features
•
Compatible with DiSEqC 1.2/1.3 Receivers
•
East/West Hardware Limits
•
One Coaxial Cable for Controlling
•
Indicating LED for Easy Trouble Shooting
•
Manual button for easy installation
•
SMT Processed PCB
•
Compact, Powerful and Quiet
•
For Dish up to 1,2m
•
Go to X function
4. Operating notes
•
Only a specialist can guarantee a correct internal mechanical installation.
•
The motor must not be mounted upside-down
•
For mounting, all screws and nuts contained in the kit must be used. The absence of one screw
•
The motor has been tested for resistance in wind conditions. However, care must be taken in
choosing the supporting pole and its anchorage, If possible, installation should be carried out
in a place sheltered from wind (flat rooftops are never advisable).
•
The use of dishes with larger diameter than that indicated in the specifications for each motor
•
The motor, being a mechanical rotating instrument, must be installed out of reach of people.
or nut may cause instability or the fall off the equipment.
is strictly prohibited.
•
The motor must not be used for purposes other than those indicated by us.
•
The motor has been designed to be supplied by a sat receiver or by our positioner. Any other
type of supply is strictly prohibited and may cause damage or serious injury.
•
Some receivers have anti-disturbance system linked to the body of the conector F. This may
provoke a slight electric shock not dangerous for the user. In particular conditions (e.g. on a
roof or on staircase) it may cause falls or injuries. Each time the motor is handled the receiver
must be disconnected from the outlet.
4
User manual
5. Installation
5.1.
5.2.
Assemble the motor
•
Assemble the motor as the following figures
•
Make sure the mounting pole is exactly vertical before installation
•
Fix the motor onto the mounting pole
•
Fix the dish onto the motor. The clamps should be mounted at center of motor’s tube. Pole,
motor and LNB must be mounted in line.
Cable connections
Connect motor using coaxial cable (RG-6/U recommended) like on picture below:
5
User manual
LED indicators on the bottom of motor describes device status:
Color
Status
Indication
Green
On
Power on, stand by mode
Orange
Blink
Receiving DiSEqC 1.2/1.3 commands / reset
mode
Orange
On
Error – overcurrent or reach hardware limit.
Buttons on the bottom of motor enables manual moving of dish – WEST and EAST.
5.3.
Preliminary antenna pointing
Rotate motor with antenna locked together on pole. Turn it to true south direction. To get the true south,
use a compas to determine the magnetic south. Magnetic south direction is approximated true south
direction because of deviation between (see A and B below). Depending on location, deviation can be
about +/- 10°
5.4.
Setting elevation angle of the motor.
Adjust the motor elevation angle (depend of local latitude) via inclinometer or the elevation/latitude
scale on both sides of the motor. You can find approximate angle on table of angles. Adjustment
components are showed on picture below:
6
User manual
5.5.
Setting declination angle of the dish
On the antenna holder, You can adjust dish bracket angle. You can find approximate angle on table of
angles. Adjustment components are showed on picture below (antenna bracket can be different,
depending on used dish set):
5.6.
Checking and final adjusting
Rotate antenna to west / east using buttons on bottom of motor or by receiver to test signal from few
satellites. If there’s no signal or signal is very weak, You should try to adjust azimuth, elevation or
declination angle.
7
User manual
If motor set receives signal of central satellites very well, but during rotating to left or right, signal from
another satellites is weaker, even not available at all, (or in reverse situation) it probably means that
elevation to declination angles proportion is wrong. Then additional adjusting is needed – try to reduce
elevation and increase declination angle to (or reversed).
6. Quick installation (receiver with Goto X function
recommended):
•
Attach the antenna dish to the motor. Make sure it is at the center of the mounting tube.
Rotate the motor together with the antenna toward TRUE SOUTH.
•
Set the elevation and declination angles.
6.1.
Driving the motor to reference satellite position
According to your longitude and the position of the wanted satellite, drive the motor to the right position.
For example, an user in Berlin (longitude is 13.3°E) wants to aim the HELLAS SAT2 (39.0oE). Just drive the
motor to 25.7°E (39.0 – 13.3) via the manual button.
If the receiver has Go to X function, just input the longitude and wanted satellite, the receiver can
calculate and drive the motor to right angle automatically.
6.2.
Precision tuning
If needed, rotate slightly the whole unit around the pole to find the strongest signal from the wanted
satellite. Finally tighten every mechanical connections. The installation is finished.
7. Using DiSEqC 1.2
The DiSEqC motor is designed for DiSEqC 1.2 receiver. The commands of the receivers might be different,
but similar. Please refer to the manual of the DiSEqC receiver.
−
Go east/west: Rotates the antenna to east/west.
−
Fine tune east/west: Rotates the antenna east/west for one step.
−
Store nn: Store satellites position nn (01~60).
−
Goto nn: Rotates motor to satellite position nn (01~60).
−
Goto reference: Rotates the motor to 0° as a reference point.
−
Re-synchronize / Shift:
To work with motor in DiSEqC 1.2 mode:
•
Rotate the motor to a position by Goto command.
•
Rotate the motor east/west to a better position.
•
Send Re-synchronize commands to the motor. The original position will be shifted to the new
position. All the other satellite position are also changed.
8
User manual
8. Using Goto X function
•
See your receiver manual and select the type of installation In Goto X mode.
•
Fill In the empty space in the receiver’s menu with the Latitude and Longitude values. When
the values have been correctly received, the receiver drive the motor to the calculated
position.
•
Rotate the locked together antenna and motor slightly clockwise or anticlockwise until you find
an image on the TV-screen connected to the receiver or the signal and quality, and then tighten
the fixing screws.
9. Hardware reset
9.1.
Reset by receiver
•
Execute the command: Go to reference (Go to 0)
•
Then, the receiver rewrites the satellite table to initial one and corrects the “0”
9.2.
Reset by DiSEqC motor
•
Cut off the Power by disconnecting the coaxial cable.
•
Press and hold both EAST/WEST buttons and reconnect the coaxial cable at the same time.
•
LED blinks for 6 seconds and the LED turned green, then loosen both EAST/WEST buttons.
9
User manual
10.Troubleshooting
Symptoms
The
manual
Check points
button
−
Connect the motor to the receiver via coaxial cable first and make
sure the receiver power is on.
don’t work.
−
Ensure all cables and power are connected well.
−
Check whether the dish is too heavy.
The mount stops at
−
Disable the software limits and move the motor again.
some positions
can’t go farther.
and
−
Make sure the mount or antenna are not interfered with any other
item.
The
runs
−
Make sure the antenna is not too heavy or too large.
−
Check if the cable quality is good enough. Try a better RG-6U cable.
−
Check whether the output power of the receiver is higher than
350mA.
The
motor
runs
sometimes fast and
sometimes slowly.
−
The speed of the mount varies with receiver output voltage (13/18V
DC)
All satellite positions
−
Correct this problem via the “Goto 0” function, the mount will go to 0
The
mount
doesn’t
work.
mount
intermittently.
degree as a reference point.
are not correct.
OR
−
Goto a satellite position via receiver. Wait for about 30 seconds until
the motor stops.
−
Drive the antenna east or west until the reception of this satellite is
clear.
−
Use “Recalculate/Shift” function to correct position.
10
User manual
11.Elevation and declination angle table
Your Site
Latitude
Elevation
angle
Declination
angle
Your Site
Latitude
Elevation
angle
Declination
angle
0
1
2
3
4
5
6
7
8
9
10
11
12
13
14
15
16
17
18
19
20
21
22
23
24
25
26
27
28
29
30
31
32
33
90
89
88
87
86
85
84
83
82
81
80
79
78
77
76
75
74
73
72
71
70
69
68
67
66
65
64
63
62
61
60
59
58
57
0
0,178
0,355
0,533
0,71
0,887
1,063
1,239
1,415
1,589
1,763
1,936
2,108
2,279
2,449
2,618
2,786
2,952
3,117
3,28
3,442
3,603
3,761
3,918
4,073
4,226
4,377
4,526
4,674
4,819
4,961
5,102
5,241
5,377
34
35
36
37
38
39
40
41
42
43
44
45
46
47
48
49
50
51
52
53
54
56
58
60
62
64
66
68
70
72
74
76
78
80
56
55
54
53
52
51
50
49
48
47
46
45
44
43
42
41
40
39
38
37
36
34
32
30
28
26
24
22
20
18
16
14
12
10
5,51
5,641
5,77
5,897
5,966
6,142
6,26
6,376
6,489
6,6
6,708
6,813
6,799
7,015
7,112
7,205
7,296
7,385
7,47
7,552
7,632
7,782
7,792
8,047
8,162
8,265
8,357
8,437
8,505
8,562
8,608
8,643
8,666
8,678
11
User manual
12.Satellites longitude table
Longitude
Satellite name
Longitude
Satellite name
90.0°E
Yamal 201
19.2°E
Astra 1L
80.0°E
75.0°E
70.5°E
68.5°E
Express AM2
ABS 1
Eutelsat W5
15.8°E
Astra 1M
Eutelsat Sesat 1
Eurobird 16
13.0°E
62.0°E
Intelsat 7
Intelsat 10
Intelsat 902
Eutelsat W2M
Hot Bird 6
Hot Bird 8
60.0°E
57.0°E
53.0°E
45.0°E
42.0°E
Intelsat 904
NSS 12
Express AM22
Intelsat 12
Türksat 2A
40.0°E
39.0°E
36.0°E
Türksat 3A
Express AM1
Hellas Sat 2
Eutelsat W4
Eutelsat W7
Eurobird 3
4.0°W
33.0°E
Amos 2
Amos 3
Intelsat 802
Astra 2C
Eurobird 1
5.0°W
7.0°W
Atlantic Bird 3
Nilesat 101
Nilesat 102
31.5°E
28.2°E
26.0°E
25.5°E
23.5°E
21.6°E
19.2°E
10.0°E
9.0°E
7.0°E
4.8°E
0.8°W
Hot Bird 9
Eutelsat W2A
Eurobird 9A
Eutelsat W3A
Sirius 4
Thor 3
Thor 5
Thor 6
Intelsat 10-02
Astra 2A
Astra 2B
8.0°W
Atlantic Bird 4A
Telecom 2D (incl. 3.7°)
Astra 2D
Badr 4
11.0°W
Atlantic Bird 2
Express AM44
Badr 6
Eurobird 2
Astra 1E
Astra 1G
12.5°W
15.0°W
18.0°W
22.0°W
Atlantic Bird 1
Telstar 12
Intelsat 901
NSS 7
Astra 3A
Eutelsat W6
Astra 1H
24.5°W
27.5°W
30.0°W
Intelsat 905
Intelsat 907
Hispasat 1C
Astra 1KR
Hispasat 1D
12
User manual
13.Technical specification
Protocol:
DiSEqC 1.3
Compatible Receiver:
DiSEqC 1.2/1.3 Receiver
Antenna Size:
120 cm max.
Speed:
1.9° / sec (at 13V) ; 2.5° / sec (at 18V)
Azimuth Angle:
75° East ~ 75° West ( 150° )
Elevation Angle:
10~90°
Tube for antenna:
ø45 x 160L mm
Diameter of stand – mast:
ø35-65mm
Input voltage:
13/18 VDC
Output voltage:
13/18 VDC (according to input)
Power Consumption:
40 mA (standby)
200mA (normal)
350mA (max.)
Satellite Positions:
60 positions
Goto 0 position function:
Yes ( Go to 0°)
Recalculation function:
Yes
Goto X function:
Yes
Manual East/West Buttons:
Yes (Build-in on the bottom of the Mount)
Indicating LED:
Yes (2 colours)
Weight and dimensions are not absolutely exact values.
Specifications are subject to change (by manufacturer) without notice.
13