1
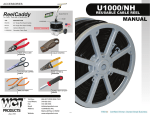
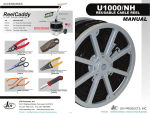
4. How to use the Optional Brake
Brake Kit (model RCB1) Includes:
(1) Brake
(1) Plastic flat washer
RCBI
BRAKE
KIT
SPOOL ROD
BRAKE KNOB
BRAKE
HEX BOLTS
PISTON
FLAT PLASTIC
WASHER
BRAKE
ANY TYPE OF
CABLE REEL
RC01L
FLAT PLASTIC WASHER
(COMES WITH REELCADDY)
FLAT PLASTIC
WASHER
RC01S
Instructions on how to use Brake Kit RCB1:
A. The ReelCaddy Series comes standard with a “flat” plastic washer.
Keep this flat washer at the bottom of the spool rod.
B. Load cable reel onto ReelCaddy. (Follow steps on page 3 for
proper loading technique.)
C. In upright position and with T-handle off, slide Brake (model RCB1) over
spool rod with the piston side down facing the cable reel.
D. Push brake against cable reel and apply pressure so that the piston is
slightly depressed. (Make sure to loosen the brake knob.)
E. Tighten brake to spool rod by tightening both hex bolts.
F. Add the T-handle and put the ReelCaddy in dispensing position.
G. Finger- tighten the “brake knob” to set friction against the cable reel
for preventing backlash. (The more you tighten the brake knob, the more
friction it provides against the cable reel.)
H. Now, you are ready to dispense the wire.
Toll-Free:
Local Phone:
Fax:
Email:
Address:
Website:
800-WCT-PROD (928-7763)
310-822-5212
310-306-9343
[email protected]
13309 Beach Ave.
Marina del Rey, CA 90292
www.wctproducts.com
PATENT PENDING
A-15929
U1000 reusable cable
reel and RBC1 brake kit
sold separately.
(Wire Not Included)
3. How to properly load/unload a cable reel using proper technique
1. Get familiar with the parts of the ReelCaddy
A. Base - has wheels already attached
B. Spool Rod
• 24” for RC01S
• 36” for RC01L
C. T-Handle w/ attached ball-pin
D. Foot Grip Pad
E. Wheels
F. Front Flange
• prevents from digging into soft ground
G. Built-In Handle
A. Detach the T-handle by removing the ball
pin from the ReelCaddy
C
B. Lift cable reel on its side so that the inner hole
of the reel is off the ground
B
Note:
ReelCaddy accomodates reels up to 23” diameter,
up to 30” in height, and weights up to 300 lbs
depending on the model.
H
Optional Parts
H. Brake Kit (Brake and Washer)
D
E
H
G
F
A
2. How to assemble the ReelCaddy
Washer
C. In dispensing position at ground level, slide
the spool rod through the cable reel’s I.D. (inner diameter) as far as you can so that the
cable reel is at the bottom of the spool rod towards the base of the unit.
(The flat plastic washer needs to be between
base and bottom of cable reel)
A. With the handle off, insert the spool rod into base and
finger tighten the spool rod clockwise to get it started. Slip
flat plastic washer over spool rod.
D. With the cable reel at the base of the unit, place
your foot on the foot pad for secure grip and use
the spool rod as a lever to lift up the cable reel in an
upright position. This technique prevents the operator
from heavy lifting while loading.
B. Slide the T-handle over the spool rod and insert the
ball pin through the handle to secure it in place.
(*If using optional brake, please refer to section 4)
C. Use the T-handle as a “wrench” to tighten
the spool rod to the base of the unit. (There
may be extra “thread” showing on spool rod, which
is okay). Once tightened, the T-handle must be on
the same side as the footpad. If it’s not and
you cannot turn the spool rod any further,
simply remove the ball pin, turn the T-handle
180 degrees, and insert ball pin.
D. The T-handle is now in the
correct position; on the same
side as the foot grip pad.
E. Attach the T-handle and secure it with the ball pin.
F. You are ready to start using the ReelCaddy
G. To unload a cable reel, reverse the procedure: in
dispensing position, remove T-handle (and optional
brake), and slide the spool rod away from the cable
reel.