1
RF wireless LED remote controller
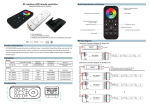
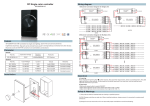
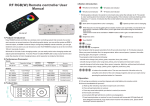
Brief introduction of buttons
Model:SR-2819S-CCT with SR-1009Fxx
Indicator: indicate the state of
remote control
Brightness button
Color temperature wheel
4 zones: each zone can save
3 color or modes
25% Brightness
50% Brightness
ON/OFF of all zones
75% Brightness
100% Brightness
S1
Save button
Four zones/areas
Press-button color temperature dimmer
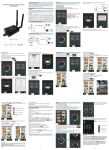
Receivers work with WIFI-RF converter to be controlled by smart phone
S2
S3
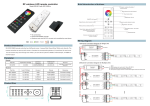
Wiring diagram
1)Receiver Connection Diagram for Single Unit
N
N
Power Supply
12-36VDC
110V-230VAC
110V-230VAC
L
L
Power Supply
12-36VDC
SR-2819S-CCT
3.6VDC
434MHz/868MHz
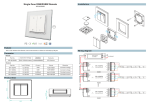
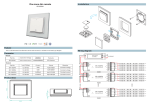
48x140x16
load 3pcs 7 AAA (1.5V)
batteries
Iuput Voltage
Current
Output
Remarks
SR-1009FA
12-36VDC
4x5A
4x(60-180)W
Constant voltage
SR-1009EA
12-36VDC
4x8A
4x(96-288)W
Constant voltage
SR-1009FA3
12-36VDC
4x350mA
4x(4.2-12.6)W
Constant current
4x700mA
4x(8.4-25.2)W
CCT LED Strip
2x10A
4x5A
2)Receiver Connection Diagram for Multiple Units
Power Supply
12-36VDC
Constant current
110V-230VAC
L
12-36VDC
LED CONTROLLER
CCT LED Strip
N
Part No.
2
SR-1009FA
Learning Key
CCT LED Strip
Receiver
SR-1009FA7
LED CONTROLLER
white
Learning Key
3
Remarks
4
DIMENSIONS
ø/h (mm)
white
Operation
Frequency
3
Operation Voltage
2
SR-1009FA
Part No.
4
Remote
1
1
Parameter
1
Product Size
Note:
One receiver can work with 1-8pcs SR-2819S
One SR-2819S control multiple receivers
The power supply chosen must be 20% higher than the actual load
CCT LED Strip
2
SR-1009FA
LED CONTROLLER
3
Learning Key
4
white
CCT LED Strip
1
4x5A
CCT LED Strip
2
LED CONTROLLER
3
55.0
SR-1009FA
Learning Key
4
white
CCT LED Strip
1
17.0
4x5A
CCT LED Strip
2
SR-1009FA
3
LED CONTROLLER
CCT LED Strip
4x5A
4
Learning Key
white
120.0
Operation
Warranty Agreement
Learning (matching)
a. Do wiring according to connection diagram
b. Wake up the remote control by touching ON/OFF button.
c. Press learning button on receiver.
d. Touch any zone button on remote control.
e. Then touch color temperature wheel.
f. Connected LED light will blink to confirm zone designation.
g. Press at learning button on receiver over 5 seconds until LED light flash, then delete the learned ID.
1) We provide lifelong technical assistance with this product:
3-year warranty. We print date on every products, for example :1125 means year 2011,week 25.The
warranty is for free repair or replacement and covers manufacturing faults only.
For faults beyond the 3-year warranty we reserve the right to charge for time and parts.
2) Limited Warrenty
Any defects caused by wrong operation.
Note 1: To choose a master from slaves by jumper for each zone.
Short circuit for master.
Open circuit for slave.
Each zone only can set one master controller. After a period of time, the master will do synchronization
operation to keep the same color or mode of all slaves in one zone.
Any damages caused by negligence, inappropriate storing at high temperatures and humidity or near
harmful chemicals.
Color Temperature wheel
Product has been updated
Choose zone number
for example,
and
, then touch
, choose the color temperature
you want, zone 1 and 3 will indicate corresponding color temperature as we touched.
Brightness Up & Down Button
Long Press button
to dim down/up brightness, the dimming direction will change every time after pressing
switch. For example, the first long press is brightness up, it will be dimmed down when long press again.
Brightness level button
Select zone from
. Press
, the corresponding zones will be 25% brightness. Press
the corresponding zones will be 50% brightness. Press
, the corresponding zones will be 75%
brightness. Press
, the corresponding zones will be 100% brightness.
Save and recall button
a.Save Color temperature:
LED lighting flash twice
indicate save successful
Any damages due to transportation, vibration etc. after purchase.
Any damages caused by earthquake, fire, lightning, pollution and abnormal voltage.
Note 2: Each remote control 4 zones (areas) receivers, each area can be learned as many receivers as
we can.
Each receiver maximally can be controlled by 8 different remote controllers.
select zones from
Any damages caused by unauthorized removal, maintenance, modifying, incorrect connection and
replacement of chips.
adjust the color temperature
and brightness
from
long press one save button
S3 for 2-3 second
S1
S2
b. Recall: select zone button which we want recall from
then short press save button S1
S3
S2
,
Safety & Warnings
1) The product shall be installed and serviced by a qualified person.
2) IP20.Please avoid the sun and rain. When installed outdoors, please ensure it is mounted in a water proof
enclosure.
3) Always be sure to mount this unit in an area with proper ventilation to avoid overheating.
4) Please check if the output voltage of any LED power supplies used comply with the working voltage of the
product.
5) Never connect any cables while power is on and always assure correct connections to avoid short circuits
before switching on.
6) Please ensure that the cable is secured tightly in the connector
7) For update information please consult your supplier.
,
3) Repair or replacement as provided under this warranty is the exclusive remedy to the customer.