1
www.hyundaipower.ca
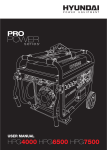
USER MANUAL
Licensed by Hyundai Corporation, Korea
Thank you for purchasing a Hyundai Portable generator. Please register
your product in order for us to ensure your continuous satisfaction with
our product.
EN
PREFACE
This manual covers the safety, operation and maintenance procedures for the HHD3500, HHD6250 and HHD7250 models.
All information in this publication is based on the latest product
information available at the time of approval for printing.
No part of this publication may be reproduced without written
permission.
If a problem should arise, please contact us by using the contact
information at the end of this manual.
It is important that this manual be read and fully understood before
operating the generator set. Failure to do so may cause serious
injuries or equipment damage.
1.
EN
CONTENTS
1. SAFETY PRECAUTIONS
1.1) Safety Labels............................................................................................ 3
1.2) Operations Safety................................................................................... 3
1.3) AC Safety Guidelines............................................................................. 4
1.4) Maintenance Safety............................................................................... 5
1.5) Other Safety Hazards............................................................................ 5
2. IDENTIFICATION OF COMPONENTS.................................................... 6
3. PRE-OPERATION INSPECTION................................................................ 14
4. OPERATION
4.1) Mounting Instructions.......................................................................... 18
4.2) Starting the Generator Set................................................................. 23
4.3) Using the Generator Set...................................................................... 29
4.4) Stopping the Generator Set............................................................... 32
2.
5. MAINTENANCE
5.1) Importance of Maintenance.............................................................. 33
5.2) Maintanance Schedule......................................................................... 33
5.3) General Inspection................................................................................ 35
5.4) Air Filter Service...................................................................................... 35
5.5) Sediment Cup Service.......................................................................... 36
5.6) Changing Engine Oil............................................................................ 37
5.7) Spark Plug Service.................................................................................. 38
5.8) Handling and Storage........................................................................... 39
6. TROUBLESHOOTING.................................................................................. 42
7. SPECIFICATIONS AND DATA................................................................... 44
8. WIRING DIAGRAMS.................................................................................... 46
9.WARRANTY.................................................................................................... 49
10. GLOSSARY................................................................................................... 52
11. QUESTIONNAIRE...................................................................................... 54
12. NOTES.......................................................................................................... 57
1.1) Safety Labels
EN
1. SAFETY PRECAUTIONS
DANGER
This symbol warns of hazards which can result in severe or
lethal personal injury.
WARNING
This symbol refers to a hazardous or unsafe practice which
has the potential to result in personal injury or product /
property damage.
CAUTION
This symbol warns of immediate hazards which will result in
severe or lethal personal injury.
1.2) Operations Safety
• Always perform a pre-operation check before starting the
engine.
• Properly clean and maintain the equipment.
• Operate the generator according to instructions for safe and
dependable service.
• Before operating the generator, read the user manual carefully. Otherwise, it may result in personal injuries or equipment damage.
• Never run the generator in an enclosed area to avoid harm
from exhaust emissions of a poisonous carbon monoxide gas.
• Be careful not to touch the exhaust system during operation
because it can cause burns.
• Pay attention to the warning labels because the engine
exhaust system will become heated during operation and
remain hot immediately after the engine is stopped.
3.
EN
4.
• Gasoline is a highly flammable and explosive liquid. Refuel
in a well ventilated area with the engine stopped.
• When refueling the generator, keep it away from cigarette,
open flames, smoke and/or sparks.
• Connections for standby power to a building’s electrical
system must be done by a qualified electrician and must
comply with all applicable laws and electrical codes. Improper connections may cause serious injuries to electrical
workers during power outage, and when the utility power
is restored, the generator may explode or cause fires.
• Place the generator at least 3ft away from buildings or
other equipment during operation.
• Run the generator on a level surface. If the generator tilts,
fuel spillage may result.
• Know how to stop the generator quickly and understand
operation of all the controls. Never permit anyone to operate the generator without proper instructions.
• Keep children, pets and rotating parts away from the generator during operation.
• Do not operate the generator in rain or snow.
• Do not allow any moisture to come in contact with the
generator.
• Do not touch the spark plug while the generator is operating and shortly after the generator has been shut down
1.3) AC Safety Guidlines
Before connecting the generator to an electrical device or power
cord:
• Make sure that everything is in right working order. Faulty
devices or power cords can lead to an electrical shock.
• Turn off the generator immediately if the device begins
to operate abnormally. Then disconnect the device and
investigate the problem.
• Make sure that the electrical rating of the device does
not exceed that of the generator. If the power level of the
device is between the maximum output power and the
running power of the generator, the generator should not
be used for more than 30 minutes.
• The connections from the generator to the household power supply should be done by professional electrical technicians. Improper connections may lead to a fire hazard or
1.4) Maintenance Safety
• After any maintenance is performed, wash your body immediately using soap and clean water because repeated exposure to
lubricant may cause skin irritation.
• Do not clean the filter element with flammable liquids like
gasoline because explosion may occur.
• Turn off the generator set before performing any maintenance. Otherwise it can cause severe personal injury or
death
• Allow the generator set to cool down before performing
any maintenance.
• Always wear safety glasses when cleaning the generator
set with air.
• Do not clean the generator set with a pressure washer
because it can cause damage to the generator set.
• Before working with batteries, ventilate the area, wear
safety glasses, do not smoke and always disconnect the
negative cable first and reconnect it last.
• Use rubber gloves when coming into contact with engine
oil.
• Always stop the generator set before removing the oil filler
cap.
• Only qualified maintenance personnel with knowledge of
fuels, electricity, and machinery hazards should perform
maintenance procedures.
1.5) Other Safety Hazards
• To avoid breathing in poisonous carbon monoxide from the
exhaust gases, adequate ventilation should be provided if
the generator set is running in a partially enclosed space.
• If the generator set is stored outdoors, check all the electrical components on the control panel before each use.
Moisture can damage the generator and can lead to an
electric shock.
EN
damages to the generator set.
5.
EN
2. IDENTIFICATION OF COMPONENTS
HHD3500
Fuel gauge
Fuel tank
Choke lever
Air filter
6.
Fuel valve
Recoil starter handle
Oil Dipstick
Front panel
EN
HHD3500
Spark plug
7.
Carburetor
Exhaust cover
EN
HHD3500
Engine switch
Low oil light
120V AC Receptacle (2)
Ground terminal
Voltage selector
switch
120/240V twistlock
receptacle
Master breaker
switch
HHD6250
8.
Master breaker switch
Engine switch
120V AC Receptacle (4)
Low oil light
Ground terminal 120/240V AC twistlock
receptacle
EN
HHD7250
Master breaker
switch
Engine switch
120V AC Receptacle (2)
Low Oil Light
120/240 AC twistlock
receptacle
Ground Terminal
9.
EN
LABEL PLACEMENT
HHD3500/6250/7250
10.
(7250 only!)
CHOKE
OPEN
CLOSED
FUEL
ON
OFF
HHD3500/6250/7250
EN
LABEL PLACEMENT
11.
EN
HHD6250/7250
Fuel gauge
Fuel tank
Choke lever
Air filter
12.
Fuel valve
Battery (for
7250 only)
Recoil starter handle
Oil Dipstick
Front panel
EN
HHD6250/7250
Spark plug
13.
Carburator
Exhaust cover
EN
3. PRE-OPERATION INSPECTION
WARNING
Exhaust gas contains poisonous carbon monoxide. Never
run the generator in an enclosed area. Be sure to provide
adequate ventilation
Operate the generator on a level surface. If the generator is
tilted, fuel spillage may result
Keep away from rotating parts while the generator is running.
CAUTION
14.
The generator is air-cooled and may be damaged if ventilation is inadequate
1.Ensure the generator is on a level surface
2.Inspect engine oil:
CAUTION
Engine oil is a major factor affecting engine performance and
service life. Non-detergent or vegetable oils are not recommended.
• Take out the oil filler cap and clean the dipstick.
• Check the oil level by reinserting the oil filler cap without rotatCAUTION
ing it. Remove the oil filler cap and examine the oil level. If the
oil level
is at or below
the lower level,
refillcause
the oilserious
to the upper
Running
the engine
with insufficient
oil can
limit
mark. (15W40 Oil for all three models)
engine
damage.
• Reinsert the oil filler cap and tighten securely. (Refer to Fig.
3.0)
EN
Fig. 3.0
Dipstick
Upper level
CAUTION
Engine oil is a major factor affecting engine performance and
service life. Non-detergent or vegetable oilsLower
are not
recomlevel
mended.
CAUTION
Running the engine with insufficient oil can cause serious
engine damage.
3. Fuel level check
Fig. 3.1
• Check the fuel level by reading the gauge or removing the fuel
tank cap to visually check the level.
• Refuel if level is too low. Tighten the fuel tank cap securely
after filling. (Refer to Fig. 3.1)
High
Low
15.
EN
WARNING
Gasoline is highly flammable and explosive under certain
conditions. Refuel in a well-ventilated area with the engine
stopped
Do not smoke or allow open flames or sparks in the area
where the generator is refueled or where gasoline is stored
Do not overfill the tank
Be careful not to spill fuel when refueling. Wipe up any spilt
gasoline and let the area dry before starting the engine.
CAUTION
16.
Gasoline substitutes, such as gasohol etc., are not recommended, they may be harmful to the fuel system components.
NOTICE
When the oil level is low, the low oil light on the control panel
will flash and the engine will automatically shut down. Then
take off the oil dipstick to check the oil level
4.Check the air filter
1. Loosen the knob and remove the air filter cover. Re-
move the air filter element and observe for cleanliness
(Refer to Fig. 3.2)
Filter cover
EN
Filter element
Knob
Fig. 3.2
2. Clean the air filter element with soap and water or solvent. Squeeze dry and then soak in clean engine oil.
3. Squeeze out all excess oil and reinstall.
Replace the element if it is damaged.
17.
EN
4. OPERATION
CAUTION
Do not connect the generator to a household electrical circuit. This could cause an overload and seriously damage the
generator.
Do not exceed the current limit specified for any one receptacle
Be sure that devices do not exceed the generator’s running
power for more than 30 minutes and that they never exceed
the maximum power output of the generator. Substantial overloading will switch off the circuit breaker. Marginal
overloading may not switch off the circuit breaker, but it will
shorten the service life of the generator.
18.
Be sure that all devices are in good working order before
connecting them to the generator. If a device begins to
operate abnormally, becomes sluggish, or stops suddenly,
turn off the circuit breaker and the generator engine switch
immediately. Then disconnect the device and examine it for
signs of malfunction.
4.1) Mounting Instruction
HHD3500 (Fig 4.1)
1. Attach the handle bar to the upper frame of the generator. Tighten
the bolts (14) and nuts (7) to the upper frame of the generator.
2. Attach the two peg stands to the bottom of the frame of the generator. Tighten the two bolts (6) and two nuts (7) to the lower frame of the
generator.
3. Place the two wheels (5) on the wheel axle (4) and then secure the
wheels using the washer (8) and split pin (9) to the wheel axle (4).
4. Attach the wheel axle (4) to the bottom of the generator frame. Align
EN
the bolts (6) with the holes on the bottom of the generator and fasten
tightly with the nuts (7) provided. Refer to Fig. 4.1
Fig. 4.1
19.
EN
20.
Parts list for HHD3500
Part Number
Description
Quantity
1
Cushion
2
2
Hand Sleeve
1
3
Bolt M6 x 10
2
4
Wheel Axle
1
5
Wheel
2
6
Bolt M8 x 16
8
7
Nut M8
11
8
Washer
2
9
Split Pin
2
10
Axle Holder
1
11
Stand
2
12
Connecting Block
1
13
Handle
1
14
Bolt M8 x 45
3
For HHD6250/HHD7250:
1. Attach the handle bars to the middle of the generator frame where
specified in (figure 4.1). Tighten the bolts (14) and nuts (7) to the upper
frame of the generator.
2. Attach the two peg stands at the bottom of the frame of the generator. Tighten the two bolts (6) and two nuts (7) to the lower frame of the
generator.
3. Place the two wheels (5) on the wheel axle (4) and then secure the
washer (8) using the split pin (9) to the wheel axle (4).
4. Attach the wheel axle (4) to the bottom of the generator frame.
Align the bolts (6) with the holes on the bottom of the generator and
fasten tightly with the nuts (7) provided. Refer to Fig. 4.2
EN
Fig. 4.2
21.
EN
22.
Parts List for HHD6250/HHD7250
Part Number
Description
Quantity
1
Cushion
2
2
Hand Sleeve
2
3
Bolt M6 x 10
2
4
Wheel Axle
1
5
Wheel
2
6
Bolt M8 x 16
8
7
Nut M8
14
8
Washer
2
9
Split Pin
2
10
Axle Holder
1
11
Stand
2
12
Connecting Block
2
13
Handle
2
14
Bolt M8 x 45
6
GROUND TERMINAL (For HHD3500, HHD6250 and HHD7250)
EN
4.2) Starting the Generator Set
WARNING
To prevent electrical shock from faulty appliances the generator should be grounded. Connect a length of heavy wire
between the ground source and the terminal at the rear of
the control box.
Before using generator, a ground wire must be connected to the
ground terminal.
Before using the ground terminal consult a qualified electrician.
Ground Terminal Symbol:
23.
For HHD3500/HHD6250/HHD7250 (Recoil Start)
1. Before starting the engine, do not connect the generator to
the device
2. Rotate the fuel valve to ON position. (Vertical position).
Refer to Fig. 4.3
Valve Lever
OFF
ON
Fig. 4.3
EN
3. If the engine is cold:
For HHD3500, move the choke lever to the left side to
close the choke. For HHD6250 or HHD7250, pull the
choke lever out to close the choke (Refer to Fig. 4.4 for
HHD6250/HHD7250 and Fig. 4.5 for HHD3500)
Choke
Open
Close
24.
Fig. 4.4
To Run (Choke Closed)
Choke Lever
Fig. 4.5
To Start (Choke Open)
EN
4. For HHD3500 press the engine switch to the “ON” position.
Refer to Fig. 4.6b. For HHD6250, press the engine switch to
the “ON” position. Refer to Fig. 4.6a. For HHD7250, press
the engine swicth to “RUN” position. Refer to Fig. 4.6a
ON
RUN
OFF
Fig. 4.6a
ON
OFF
Fig. 4.6b
5. Grasp the recoil starter handle and pull it until the engine
starts. Refer to Fig. 4.7
25.
EN
Fig. 4.7
CAUTION
26.
Do not allow the starter grip to snap back. Return it slowly by
hand.
6. After the engine warms up, push the choke lever back to the
OPEN position.
NOTE:
Do not use the choke if the engine is warm or if the air temperature is
high (above 50oF)
For HHD7250 (2nd option: Electric Start)
WARNING
Batteries produce explosive gases. Keep sparks, flames, and
cigarettes away from the battery. To prevent the possibility
of creating a spark near the battery, connect charging cables
first to the battery, then to the generator, and disconnect
cables at the generator first
1. Connect the positive terminal (red) of the cable with the
positive terminal (red) of battery and connect the negative
EN
terminal (black) of the cable with the negative terminal
(black) of battery. Ensure the connection is secured by using
the fasteners provided. Refer to Fig. 4.8
Postive Terminal
(Red)
Negative Terminal
(Black)
Fig. 4.8
CAUTION
Do not reverse the polarity of the terminals when charging a
battery. Serious damage to the generator and/or battery may
occur.
NOTE:
The D.C. terminals on the battery must not be used while the A.C. outlet
is in use.
2. Before starting the engine, do not connect the generator to the device
3. Rotate the fuel valve to ON position. (Vertical position).
Refer to Fig. 4.9
27.
EN
Valve Lever
OFF
ON
Fig. 4.9
4. If the engine is cold, pull the choke lever out to close
the choke. Refer to Fig. 4.10
28.
Choke
Open
Close
Fig. 4.10
5. Turn the engine switch to the ON position, and hold it until
started, but the start time cannot be more than 5 seconds,
otherwise the alternator might be damaged. Refer to Fig.
4.6
6. Push the choke lever to the OPEN position as engine warms
EN
up. The choke is used to provide the proper mixture when
the engine is cold. It can be opened and closed by operating the choke lever manually, move the lever to the closed
position to enrich the mixture for the cold starting.
NOTE:
Do not use the choke if the engine is warm or if the air temperature is
high (above 50oF)
4.3) Using the Generator Set
For HHD3500
1. Turn off the switches of the device before connecting to the
generator
2. Select the receptacles to be used by using the AC Voltage
Selector. Refer to Fig. 4.11
29.
Fig. 4.11
3. Start the generator
4. If the 120V option of the selector switch is chosen, insert the
plug of the device into the 120V 20A receptacle. Refer to
Fig. 4.12
EN
Fig. 4.12
If the 120V/240V option of the selector switch is chosen, insert the plug
of the device into the 120V/240V receptacle. Refer to Fig. 4.13
30.
Fig. 4.13
5. Turn the Master Breaker to ON and turn on the device. Refer
to Fig. 4.14
EN
Fig. 4.14
For HHD6250/7250:
1. Turn off the switches of the device before connecting to the
generator
2. Start the generator
3. Insert the plug of the device into the receptacle based on
the voltage requirement of the device. Refer to Fig. 4.15
31.
Fig. 4.15
4. Turn the Master Breaker switch to ON position and turn on
the device. Refer to Fig. 4.14
EN
NOTE:
To stop the engine in an emergency, turn the engine switch
“OFF”
In order to maintain generator’s performance:
• Always connect the generator to the ground terminal to
prevent electrical shock
• Add the watt ratings of all the loads that the generator set
will be powering at the same time. Make sure that total
wattage will not exceed the generator rating.
EXAMPLE:
A generator set rated 5000W can power two 1500W heaters, a 900 W
circular saw, a 500W drill and a 100 W light at the same time (4500 W
combined). However, to operate a second 900W saw, it will be necessary to disconnect one of the 1500 W heaters.
4.4) Stopping the Generator Set
32.
For HHD3500
1. Turn off all the connected devices
2. Allow the generator set run for a few minutes to cool
down.
3. Stop the generator set by pressing the On/Off switch to
the OFF position until the generator set stops.
4. Rotate the fuel valve back to the OFF position (horizontal position)
For HHD6250/HHD7250
1. Turn off all the connected devices
2. Allow the generator set run for a few minutes to cool
down.
3. Stop the generator set by pressing and holding the
engine switch in the OFF position until the generator set
stops.
4. Rotate the fuel valve back to the OFF position (horizontal position)
EN
5. MAINTENANCE
5.1) Importance of Maintenance
Proper maintenance is important because it will ensure safe, economical and trouble-free operation. It will also reduce air pollution.
Improper maintenance may cause the generator to malfunction
and can lead to serious injuries or death.
5.2) Maintenance Schedule
WARNING
Shut off the engine before performing any maintenance.
When the engine is running, make sure the area is well ventilated. The exhaust contains poisonous carbon monoxide
gas.
33.
NOTE:
Some of these maintenance techniques can be dangerous and
should be performed by a qualified technician
For HHD 3500/HHD6250/HHD7250:
In order to maintain good performance and extending the service life
of the generator, period inspection and adjustments should be done
based on the following maintenance schedule:
EN
1
2
3
4
5
Each using time
1st
month
or 20Hr
Each
quarter or
50 Hr
Every
6 months
or
100Hrs
Every
year
or
300Hrs
Maintenance
Item
1
2
3
4
5
General
Inspection
Lubricants
of gasoline
engine
Air
Cleaner
34.
Sediment
bowl
Spark
Plug
Valve
Clearance
Inspection of oil level
Replacement
Inspection
Cleaning
Cleaning
Inspection & cleaning
Replacement
Inspection & adjusting
Combustion Inspection & adjusting
chamber
Fuel tank
and strainer
Fuel line
Cleaning
Every two months (if necessary, please replace it)
NOTICE:
Service more frequently when used in dusty environments.
These items must be performed by a trained and experi-
enced mechanic
1. Look for fuel leaks around the fuel tank, fuel hose, fuel
EN
5.3) General Inspection
valve and carburetor. Close the fuel valve and repair
leaks immediately.
2. Look and listen for exhaust leaks while the engine is running. Have all the leaks repaired before continuing operation.
3. Check for dirt and debris and clean as necessary
4. Check the engine oil level and add oil as necessary.
5.4) Air Filter Service
WARNING
Do not use gasoline or low flash point solvents for cleaning.
They are flammable and explosive under certain conditions
1. Rotate the knob counterclockwise to release
2. Lift the air filter cover to remove from the air filter unit
3. Remove the foam filter element. Refer to Fig. 5.0
Filter cover
Filter element
Knob
Fig. 5.0
4 If the foam filter element is dirty, clean it in warm soapy
water, rinse, and allow it to dry thoroughly, or clean in
35.
EN
nonflammable solvent and allow to dry
5. Drip the foam filter element in clean engine oil, then
squeeze out all excess oil. The engine will smoke when
started if too much oil is left in the filter.
6. Wipe dirt from the air filter unit and cover using a moist
rag. Refer to Fig. 5.1
36.
Fig. 5.1
5.5) Sediment Cup Service
1. Rotate the fuel valve to “OFF” position
2. Remove sediment cup and O ring
3. Wash the cup with non-flammable solvent
4. After fully dried, remount the parts
5. Rotate the fuel valve to “ON” and check for leakage.
Fig. 5.2
Fuel Valve
Filter
Sediment Cup
O Ring
EN
WARNING
After installing the sediment cup, be sure to tighten the “o” ring
securely. Check for fuel leaks and remove any spilled fuel
prior to starting
5.6) Changing Engine Oil
1. Place the generator is placed on a flat, level surface
2. Start engine and run until it gets warm
3. Stop engine
4. Place oil pan or other container underneath the generator
for holding oil
5. Keep oil filler cap to avoid oil spray
6. Use a wrench to remove the drain bolt and sealing washer
7. Slowly unscrew and remove the oil filler cap
8. Allow oil to completely drain into oil pan or container
9. Use clean cloth to wipe around oil fill and drain plug to
clean any dirt and debris
10. Reinstall sealing washer and drain plug bolt
11. Pour new engine oil into oil fill hole
12. Check oil level
13. Reinstall oil filler cap (Refer to Fig. 5.3 and Fig. 3.0)
CAUTION
Used motor oil may cause skin cancer if repeatedly left in
contact with the skin for prolonged periods. Wash your hands
with soap and water as soon as possible after handling
used oil.
37.
EN
Oil Filler Cap
Oil Drain Plug
Fig. 5.3
5.7) Spark Plug Service
38.
1. Remove the spark plug cap
2. Clean any dirt and debris from around the spark plug
base
3. Use a wrench to remove the spark plug. Refer to
Fig. 5.4
Spark plug cap
Spark wrench
Spark plug
Fig. 5.4
EN
4. Visually inspect the spark plug. Discard it if the insula-
tor is cracked or chipped. Clean the spark plug with a
brush if it is to be reused.
5. Measure the plug gap with a feeler gauge. The gap should
be 0.7 to 0.8 mm (0.028 to 0.031 inch). Correct as necessary
by carefully bending the side electrode. Refer to Fig. 5.5
39.
Fig. 5.5
6. Install the correctly gapped spark plug back into the
original position.
CAUTION
The spark plug must be securely tightened. An improperly
tightened plug can damage the generator.
5.8) Handling & Storage
WARNING
When transporting the generator, shut off the fuel valve and
keep the generator level to prevent fuel spillage. Fuel vapor
or spilled fuel may ignite.
EN
Handling
1. Turn off the engine switch and the fuel valve when
transporting the generator set.
2. Do not touch the generator until the fuel choke is in the
OPEN position because the engine is warm
3. Keep the generator at a level position in order to prevent spillage
Storage
Before storing the generator set for an extended period:
1. Ensure that the storage area is free of excessive humidity and dust
2. Drain the fuel tank and the carburetor
40.
Draining the fuel tank
1.Turn the engine switch off
2. Remove the fuel tank cap and the debris screen under
the cap
3. Empty the fuel tank using a siphon and an approved
gasoline container
Draining the carburetor
1.Turn the engine switch OFF
2. Turn the fuel valve ON
3. Position a suitable container under the carburetor drain
screw to catch fuel; loosen the screw
4. Allow fuel to drain completely into container
5. Retighten drain screw. Refer to Fig. 5.6
EN
Drain screw
Carburetor
Fig. 5.6
3. Store the battery in a dry place and recharge it once a
month. Do not store the battery in an excessively warm
or cold place. (for HHD7250 only)
41.
EN
6. TROUBLESHOOTING
The following table is a troubleshooting guide for diagnosing the
generator set. If these recommendations cannot solve the problem, please contact our service center.
WARNING
Many troubleshooting procedures present hazards which
can result in severe personal injury or death. Only trained
and experienced service personnel with knowledge of fuels,
electricity, and machinery hazards should perform service
procedures. Review Safety Precautions.
A hot generator can cause severe burns. Always allow the
generator set to cool before performing any maintenance
service.
42.
Engine
cranks
slowly
Engine not
starting
Black
Exhaust
Engine
Stops
Engine has
difficulty
idling
Cause
Recommended Action
Engine oil is too heavy
Replace with recommended oil
Load is connected
Disconnect load while starting
No fuel
Refill the fuel tank
Fuel valve closed
Fully open fuel valve
Fouled spark plug
Remove, clean or replace spark plug
Not enough oil
Add more oil
Choke stuck in closed
position
Open choke
Dirty air cleaner
Clean air cleaner
Rich fuel mixture
Contact our service center
No fuel
Refill fuel tank
Not enough oil
Add more oil
Loose spark plug cable
Reconnect or repair the cable
Faulty spark plug
Remove, clean or replace spark plug
Generator set not level
Move generator to level surface
Dirty fuel filter
Replace the filter
No AC
output
Tripped AC
circuit breaker
Remove all loads, reset breaker, and
check loads for defects. Do not
exceed generator rating
No DC
output
Tripped DC
circuit breaker
Disconnect battery, reset breaker and
have battery tested for shorts
No Battery
charge DC
output
[HHD 7250
Only]
Corroded battery posts
Clean battery posts
Battery cable is bad
Replace cable
Battery is defective
Check condition; replace if defective
Receptacle is bad
Contact an authorized service facility
EN
Problem
43.
EN
7. SPECIFICATIONS & DATA
HHD3500
60Hz
GENERATOR
Rated frequency (Hz)
3.0
Rated AC Output Power (kW)
Max AC Output Power (kW)
3.5
1-Phase Rated AC Voltage (V)
120
Power Factor
1.0
6.5 HP, Single cylinder, forced air
cooling, 4-stroke OHV 25 deg tilt
Type
196cc
ENGINE
Displacement (cm3)
Ignition model
Non-contact transistor
Starting model
Recoil Start
Max. Output (kW/rpm)
4.3/3600
Fuel tank capacity (L)
17
0.6 (15W40)
Oil capacity (L)
9
Duration of Runs (Hours)
44.
L x W x H (mm)
615 x 455 x 470
Dry Weight (Kg)
54
HHD6250
GENERATOR
Rated frequency (Hz)
5.5
Max AC Output Power (kW)
6.25
1-Phase Rated AC Voltage (V)
120
Power Factor
1.0
Type
Displacement (cm3)
ENGINE
60Hz
Rated AC Output Power (kW)
11 HP, Single cylinder, forced air
cooling, 4-stroke, OHV 25 deg tilt
337cc
Ignition model
Non-contact transistor
Starting model
Recoil Start
Max. Output (kW/rpm)
Fuel tank capacity (L)
Oil capacity (L)
Duration of Runs (Hours)
7.2/3600
28
1.1 (15W40)
9
L x W x H (mm)
715 x 545 x 585
Dry Weight (Kg)
97
EN
HHD7250
GENERATOR
Rated frequency (Hz)
6.0
Max AC Output Power (kW)
7.25
1-Phase Rated AC Voltage (V)
120
Power Factor
1.0
Type
Displacement (cm3)
ENGINE
60Hz
Rated AC Output Power (kW)
13 HP, Single cylinder, forced air
cooling, 4-stroke, OHV 25 deg tilt
389cc
Ignition model
Non-contact transistor
Starting model
Recoil Start or Electric Start
Max. Output (kW/rpm)
Fuel tank capacity (L)
Oil capacity (L)
Duration of Runs (Hours)
8.5/3600
28
1.1 (15W40)
8
L x W x H (mm)
715 x 545 x 585
Dry Weight (Kg)
99
45.
EN
8. WIRING DIAGRAMS
For HHD3500
46.
EN
For HHD6250
47.
EN
48.
For HHD7250:
EN
9. WARRANTY
Canadian distribution of Hyundai portable generators are distributed
in Canada by:
Midland International
26 Huddersfield Rd.
Unit #2
M9W-5Z6 Canada
This product is warranted to be free of defects in material and workmanship for two years from date of purchase. This warranty guarantees that any defective parts will be repaired or replaced at no cost,
including diagnosis and replacement parts.
Limited Warranty periods:
Recreational/residential use: 2 years limited. 1st year, parts and labor.
2nd year parts only.
Commercial use: 6 months limited, parts and labor
This limited warranty begins at the initial time of retail purchase and
covers manufacturer’s defects caused by a defect in components or
workmanship during the two (2) Year period. The warranty coverage
is continual from the initial date of purchase and does not restart at
anytime under any circumstances. This limited warranty is valid for
residential or recreational applications only and only when the generator receives all necessary preventative maintenance as described in
the Hyundai Generators “Operation Manual. The repair or replacement
of a generator will take place within a reasonable period of time during normal business hours.
All repair and replacement parts shall be warranted for (90) days after
the initial date of installation or purchase.
Limitation of Remedies and Disclaimers
Midland International Inc. disclaims any responsibility for loss of time
or use of the generator in a recreational vehicle or any vehicle in
which the generator is installed, transportation, commercial loss, or
any other incidental or consequential damage. Any implied warranties
are limited to the duration of this written warranty. THE FOREGOING
LIMITED WARRANTY IS EXCLUSIVE OF AND IN LIEU OF ALL OTHER
49.
EN
WARRANTIES OF MERCHANTABILITY, FITNESS FOR A PARTICULAR
PURPOSE AND OF ANY OTHER WARRANTY WHETHER EXPRESS OR
IMPLIED.
Consumable parts, such as oil or fuel filters, fuel cut off valve, brushes,
fuel injection nozzle valve, lubricant, or ignition plug, are not covered under this warranty. All expenses incurred in maintaining and
replacing parts for generator shall fall on the purchaser. This warranty
coverage does not include parts affected by accident and/or collision,
corrosion or rust, normal wear, incorrect fuel type or fuel contamination, use in an application for which the product was not intended,
unauthorized service, or any other misuse, neglect, incorporation or
use of unsuitable attachments or parts Damage to voltage regulators caused by failure to ground, shorting or overloading will not be
covered under this warranty. Under this Warranty, we do not have the
obligation to bear any transportation fees of any product to/from an
authorized Warranty Center. Unauthorized alteration, installation or
any cause other than defects in material or workmanship of the product will not be covered under the warranty.
50.
Exclusions
Not Covered by this Limited Warranty:
1) Normal engine/alternator wear;
2) Damage caused by lack of maintenance as described in the Hyundai manuals, or negligence by using improper or impure motor oil,
coolant, or fuel;
3) Damage caused by accidents, improper installation or storage;
4) Damage caused by water ingestion, submersion, or external water
damage;
5) Damage or non-performance caused by operation of the generator
set in a marine application;
6) Damage caused by operation with improper fuel, or at speeds,
loads, conditions, or modifications contrary to published specifications.
7) Items not supplied by Hyundai, including, but not limited to; starting batteries, battery cables, external wiring, fuel lines, filters, etc;(refer
to exclusions)
8) Repairs made during the warranty period, without first obtaining a
case number from Hyundai
Batteries supplied with any generator product should be considered
a bonus item and not covered by warranty. Batteries can be damaged
by shock, shorting terminals, heat, acid spillage and a number of other
EN
factors that cannot be controlled after they have left our facility. It
is the customer’s responsibility to take great care when handling a
battery so no spillage of acid will occur and cause corrosion; damage caused by battery acid is not covered under this warranty.
Product Registration
Product registration is required for product support and warranty
coverage.
The owner’s registration found in the user manual can be completed
and mailed. You can also register Online at www.hyundaipower.ca.
You should keep your receipt for proof of purchase.
Warranty Claim Procedure:
Warranty service must be performed by one of our authorized
service dealers. If you feel your generator is malfunctioning due to
a defect or misuse, simply contact our customer support center for
technical advice, a warranty claim or general information.
Do not return your generator to the place of purchase for repair.
MIDLAND INTERNATIONAL INC. SHOULD BE CONTACTED TO PROVIDE A CASE NUMBER BEFORE WARRANTY WORK CAN BEGIN.
To obtain warranty service:
Contact our customer support centre:
Toll free: 1-877-528-3772
E-mail: [email protected]
Website: Hyundaipower.ca
51.
EN
10. GLOSSARY
Air Filter- It removes dust from engine intake air.
Carburetor- A device used to properly mix fuel and air in the correct
proportions and delivering the mixture into the engine’s combustion
chamber.
Choke Lever- It is used to provide proper starting mixture when the
engine is cold. The choke lever must be pulled out to ON position when
starting a cold engine.
Circuit Breaker- It protects circuits from being damaged due to overload
or short circuit by stopping the flow of electricity between the generator and device.
Dipstick- It seals off engine oil fill hole and is used for indicating the
engine oil level.
52.
Drain Plug- A plug that can be removed to allow the fluid contents of
the engine to be drained off.
Earth Ground Lug- It connects generator to ground wire for grounding
protection.
Fuel Cock- A tap which can allow or restrict the flow of gasoline from
the gas tank to the carburetor.
Fuel Valve- It controls flow of fuel from fuel tank to carburetor.
Pilot light- A small flame used to ignite gas at a burner.
Recoil Starter- A pull cord is attached to the engine and you pull the
T-handle attached to the starter cord assembly to spin the flywheel and
start the engine.
Reset Switch- A switch which puts the configuration of a component
back to its standard setting.
Sediment Cup- A cup for storing sediments
Selector Switch- A switch that is used to select among alternatives.
Spark Plug- A device screwed into the combustion chamber of a spark
EN
ignition engine. The plug supplied the spark that ignites the air/fuel
mixture so the combustion can occur.
53.
EN
Please complete and mail the form below,
or register online by visiting our website:
www.Hyundaipower.ca
Personal Information
First name:
Last name:
Address:
Postal code:
City:
Province:
Product Information
54.
Model name:
Serial number:
Date of purchase:
Y
M
D
Questionnaire
Store name and number:
Purchase price:
Why our generator?
Price
Ease of use
Power rating
Brand
Portability
Appearance
EN
Questionnaire
How did you find
out about us
In-Store
Internet
Print
Radio/TV
Store flyer
Word of mouth
Recreational
Emergency
Tools
Primary usage
Primary location
of usage
55.
Home
Work
Male
Female
Married
Single
Gender
Martial status
Date of birth
Y
M
D
EN
Questionnaire
Number of people
in household
Primary residence
1
2
3
4
5
other
Own
Rent
Partial
Secondary
Full
Secondary
University
Online
TV
Education
56.
College
Household income
(thousand)
Primary method of
purchasing items
In-Store
Mail order
Please Mail to:
Midland International
26 Huddersfield Rd.
Unit #2
Etobicoke, Ontario
M9W 5Z6 Canada
Online registration at:
www.Hyundaipower.ca
EN
NOTES
57.
EN
58.
NOTES
EN
NOTES
59.
EN
60.
NOTES