1
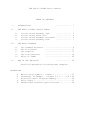
M0400-1
T H E
M U S I C
S Y S T E M
User's Manual
Musical Arrangements
by
Jon Bokelman
(C) 1977 Software Technology Corporation
All Rights Reserved
Software Technology Corporation
P. O. Box 5260 San Mateo, CA 94402
(415) 349-8080
IMPORTANT NOTICE
This copyrighted software product is distributed on an individual
sale basis for the personal use of the original purchaser only.
No license is granted herein to copy, duplicate, sell or
otherwise distribute to any other person, firm or entity. This
software product is copyrighted and all rights are reserved.
THREE MONTH LIMITED WARRANTY
Software Technology Corporation warrants this product to be free
from defects in material and workmanship for a period of three
months from the date of original purchase.
This warranty is made in lieu of any other warranty expressed or
implied including but not limited to the merchantability or
fitness of this product for a particular purpose, and indirect or
consequential damages. This warranty is limited in any case to
the repair or replacement of the defective part, at the option of
Software Technology Corporation, transportation and handling
charges excluded.
To obtain service under the terms of this warranty, the defective
part must be returned, along with a copy of the original bill of
sale, to Software Technology Corporation within the warranty
period.
The warranty herein extends only to the original purchaser and is
not assignable or transferable and shall not apply to any
software product which has been repaired by anyone other than
Software Technology Corporation or any product which may have
been subject to alterations, misuse, negligence, or accident, or
any unit which may have had the name altered, defaced or removed.
THE MUSIC SYSTEM User's Manual
TABLE OF CONTENTS
I.
II.
INTRODUCTION
Circuit
Circuit
Circuit
Circuit
Board
Board
Board
Board
..............
..............
..............
..............
3
4
5
7
........................
........................
........................
........................
........................
8
11
12
18
20
Assembly Tips
Parts List
Assembly Procedure
Assembly Aids
THE MUSIC PROGRAM
A.
B.
C.
D.
E.
IV.
1
THE MUSIC SYSTEM CIRCUIT BOARD
A.
B.
C.
D.
III.
..............
The Command Processor
The File Editor
The Compiler
The Tone Generator
Rules of Thumb
HOW TO USE THE MUSIC
.............
22
Detailed explanation including many examples
APPENDICES
A
B
C
D
E
Musical Note Symbols - Figure 1.................27
Sarabande, an example - Figures 2 & 3......28 & 29
High Level Music Language Summary...............30
Error Codes.....................................33
SOLOS/CUTER Interface Specifications............34
I.
INTRODUCTION
Perhaps you have a computer and have been wondering: "What else
can I do with it?"
Perhaps you are a musician and would like to investigate computer
generated music.
Perhaps you would like to play a concert.
The Software Technology Music System provides these capabilities
and more. We just call it "The Music System".
The Music System is an integrated package containing this manual,
a circuit board kit, and a cassette containing the Music Program
itself. The primary element of the system is the Music Program
itself which performs the actual synthesis of notes being played.
All that is needed in addition to the Music System is: an 8080
based system with at least 4K of memory (8K or more, however, is
recommended), SOLOS, CUTER or other compatible interface (a
SOLOS/CUTER surrogate can easily be implemented), some I/O device
(keyboard, display or other ASCII type terminal), an amplifier,
stereo or other sound system including all interconnecting
cables.
The Music Program is composed of four functional sections:
The Command Processor
What the Music Program does is controlled
by user COMMANDS. The Command Processor
determines what to do next.
The File Editor
The music is transcribed into a high
level language which is easily understood
by the human and the computer. The File
Editor provides the means by which a
score can be entered and altered.
The High Level Music Language Compiler
Although the high level music language is
easily understood by the computer, it
must be converted into an internal
computer code before it can be played.
The Compiler analyzes the music language
and produces an internal computer code
which describes the tones to be played.
1
I.
INTRODUCTION (cont.)
The Tone Generating Subroutines
Once a score has been entered into a file and
converted into an internal computer code, the
music can be played. The Tone-Generating Subroutines produce the waveforms dictated by the
internal computer code.
2
II.
THE MUSIC SYSTEM CIRCUIT BOARD
This section describes the hardware interface required by the
Software Technology Music System. The hardware interface is
provided in kit form as an integral part of the Music System, and
the kit is S-100 Bus compatible.
A. Circuit Board Assembly Tips
1. Read through this section before you begin to assemble your
Music System circuit board.
2. In assembling this circuit board, you will be following a
step-by-step assembly procedure. Follow the instructions in
the order given. Check off each step as you complete it.
This will minimize the chance of omitting a step or a
component.
3. When installing components, make use of the assembly aids
which are a part of the circuit board as well as the assembly
drawing. The circuit reference (R1, C2, for example) for
each component is on the circuit board at the location of its
installation.
4. To simplify reading resistor values after installation,
install resistors so that the color codes read from
left-to-right and top-to-bottom as appropriate.
5. Install components as close to the board as possible.
6. All components are installed and soldered on the same side of
the circuit board--the side with the traces and legends.
7. Soldering tips: use a low wattage iron (25 watts maximum);
solder neatly and as quickly as possible; DO NOT press the
tip of the iron onto a pad or trace. To do so may cause the
pad or trace to "lift" off the board causing permanent
damage.
Be sure to heat the joint to be soldered so that the solder
will flow and form a good mechanical and electrical
connection.
8. Never install or remove a circuit board while the power is
on. To do so could cause serious damage.
9. Before applying power, make sure that the circuit board is
installed properly. The front side of the board contains all
legend traces and soldered components. It should be
installed in your computer with the front located as other
circuit boards and not backwards or upside down. If you are
at all unsure, please check with your dealer.
3
II.
THE MUSIC SYSTEM CIRCUIT BOARD (cont.)
10. In addition to the parts supplied, the following tools and
materials are recommended for assembling this circuit
board:
a.
b.
c.
d.
B.
soldering iron, 25 watts
diagonal cutters
needlenose pliers
a suitable cable to allow connection of the
circuit board with your amplifier, stereo
system or tape machine.
Circuit Board Parts List
Check off parts received against this list.
Quantity
Description
Circuit
Reference
Resistors
( )
( )
( )
1
1
1
1K Ohm,1/4 watt,10% brown/black/red
10K Ohm,1/4 watt,10% brown/black/orange
100 Ohm,1/4 watt,10% brown/black/brown
2
.1uf Ceramic Disc
R1
R2
R3
Capacitors
( )
C1 and C2
Miscellaneous
( )
1
Circuit Board (#B0400)
( )
2
Cable ties
( )
1
Length of Solder
Please follow the assembly instructions in the order specified.
4
II.
C.
THE MUSIC SYSTEM CIRCUIT BOARD (cont.)
Circuit Board Assembly Procedure
CAUTION:
Mount and solder all components on the front side of
the circuit board. The front side of the circuit board
contains the traces and legends.
( ) STEP 1
Make sure the board is properly oriented. The legends
on the board should be facing you. All components will
be mounted and soldered on this side of the board.
( ) STEP 2
Install resistors (R1, R2 and R3 - see parts list) in
the indicated locations. Bend the leads to fit the
distance between the mounting holes, insert the leads,
pull the resistor down snug to the board, solder (on
the same side of the board as the resistor) and trim
the excess leads from the back of the board.
SAVE the excess leads for the jumper wire in Step 4.
( ) STEP 3
Install capacitors (C1 and C2 - see parts list) in the
indicated locations. Bend the leads to fit the
distance between mounting holes, insert the leads, pull
the capacitor down snug to the board, solder (on the
same side of the board as the capacitor) and trim the
excess leads from the back of the board.
Disc capacitor leads may be coated with wax during the
manufacturing process. Be sure to remove any wax prior
to inserting the leads.
( ) STEP 4
A piece of an excess resistor lead from Step 2 will now
be used as a jumper. The output level is jumper
selectable to be either "HI" (for an auxilliary input
to an amplifier or tape machine) or "LO" (for the MIC
input of a tape machine). This jumper is usually made
to select the "HI" level output. Insert the jumper
between the indicated mounting holes, solder (on the
same side of the board as the jumper wire itself) and
trim the excess from the back of the board.
5
II.
THE MUSIC SYSTEM CIRCUIT BOARD (cont.)
( ) STEP 5
The output of the Music System circuit board may be
connected to most amplifiers, stereo systems or tape
machines. Select the connecting cable best suited to
your needs and solder one end of this cable to the
output mounting holes on the circuit board. Two
mounting holes (+) and (GND) are provided for this
purpose.
( ) STEP 6
Two cable ties are provided to secure the output cable
as well as to provide easier access to the circuit
board when mounted within your computer. Two holes are
provided (one on each upper corner of the circuit
board) for this purpose.
( ) STEP 7
Install the Music System circuit board in your computer
and connect the output cable to your amplifier, stereo
system or tape machine.
CAUTION:
6
An improperly assembled circuit board or an improperly
installed circuit board may damage your computer,
amplifier, stereo system or tape machine. Check with
your dealer if you have any doubts regarding the
assembled board or proper installation procedure for
your computer.
II.
D.
THE MUSIC SYSTEM CIRCUIT BOARD (cont.)
Circuit Board Assembly Aids
Parts Layout
Schematic
7
III.
A.
THE MUSIC PROGRAM
The Command Processor
The Command Processor communicates with the system input/output
devices via the SOLOS/CUTER interface, a description of which is
included here as an appendix. Characters from the system input
device are collected in a 72 byte line buffer observing the usual
conventions, i.e., the input string is terminated by a carriage
return, 'DEL' or 'RUBOUT' erases the last character entered into
the buffer, and input beyond the 72 byte limit is lost. A 'NUL'
(CTL-@ or CTL/shift/P on a TTY or 'MODE' on a Sol) will erase an
entire line.
Upon receiving a carriage return, the first character (if any) in
the buffer is examined. If it is numeric, the whole line is
assumed to be a line of source text and is passed to the File
Editor for insertion in the current file. If it is alphabetic,
the line is further examined to determine the command and operand
fields.
Operands are optional; when they are present they are separated
from the command and from each other by one or more spaces. The
command may be any number of characters; however, only the first
is significant. Operands which denote addresses are one to four
hexadecimal digits, and those that denote line numbers are one to
four decimal digits. No operand may have the value of zero
because a value of zero indicates an omitted operand.
The Commands
Only the first letter of a COMMAND is significant
The following are the various commands that are processed by the
Music System.
Command List: [( ) indicates optional operand]
NEW (addr1)
Establishes a new text file residing in memory beginning
at 'addr1'. If the operand is omitted, 'addr1' defaults
to the first available address following the Music System
program. If a file already exists at 'addr1', it will be
lost. The beginning and ending addresses of the file are
set to the same value and are displayed. 'NEW' is auto–
matically performed when the program is first executed.
8
III.
THE MUSIC PROGRAM - Commands (cont.)
Examples:
NEW
This destroys any file that was existing
at the current file address. The current
file address is set to the default.
NEW F00
A new file is defined to begin at location
F00 (hex). Any data previously there will
be destroyed.
FILE (addr1)
This validates the file beginning at 'addr1'.
If the operand is omitted, 'addr1' defaults to
the current file location. The file structure
is verified until an 'end of file' marker is
found. The beginning and ending addresses of
the file are established, then displayed.
Examples:
FILE
Beginning at the current file address,
memory is verified to be a valid file. If
no error is detected, the beginning and
ending addresses are displayed.
FILE C00
This address (C00 hex) becomes the current
file beginning address. This file is then
verified and, if no errors are detected,
the beginning and ending addresses are
displayed.
LIST (line1 (line2))
This displays the lines in the current file with
line numbers between 'line1' and 'line2' inclusive.
If the second operand is omitted, only the line
numbered 'line1' (if it exists) is displayed. If
both operands are omitted, the entire file is
displayed.
Pressing the space bar during a listing will
temporarily pause the listing until any other key
is pressed, whereupon the listing is resumed. A
listing may be terminated at any time by entering a
'NUL' (CTL-@ or CTL/shift P on a TTY or 'MODE' on a
Sol).
9
III.
THE MUSIC PROGRAM - Commands (cont.)
Examples:
LIST
The entire current file is displayed to
the current SOLOS/CUTER output device.
LIST 123
Only line number 123 of the current file
is displayed.
LIST 10 55
All lines beginning with line 10 and
ending with any line greater than or
equal to 55 are displayed.
DELETE line1 (line2)
This command is used to delete one or more lines
from a file. If only 'line1' is specified, then
only that line will be deleted. If both operands
are specified, all lines between 'line1' and
'line2' inclusive will be deleted.
Examples:
DEL 10
Line 10 is deleted.
DEL 12 15
All lines from 12 to 15 inclusive are
deleted.
SCORE (addrl)
The current file is compiled, and the resulting
binary object code is entered into memory beginning
at address 1. If 'addr1' is omitted, the address
defaults to be the first address after the current
file. The beginning and ending addresses of the
binary code are displayed after compilation.
Examples:
10
SCORE
The current source file is compiled and
the binary object code is stored in memory
beginning at the location just following
the end of the source.
SCORE 2100
The current source file is compiled and
the binary object code is stored in memory
beginning at location 2100 hex.
III.
THE MUSIC PROGRAM - Commands (cont.)
PLAY (addrl)
(This command causes the music to be
played . . . )
This command generates musical tones according to
the binary code at 'addr1'. If the operand is
omitted, 'addr1' defaults to the same address as
that in the last 'SCORE' or 'PLAY' command.
Examples:
PLAY
The previously SCOREd binary object code
will now be played. The address of the
binary object code is determined from the
most recent SCORE or PLAY.
PLAY 2100
The binary object code residing at memory
location 2100 hex will now be played. If
there is not valid binary object code at
the specified address for the Music System,
the results can be unusual.
RESERVE addr1
RETURN
*with an operand*
*with NO operand*
'addr1' marks the end of the memory space to be
used by the Music System. The system's initial
boundary is the address of SOLOS/CUTER as supplied
by SOLOS/CUTER. If the operand is omitted,
'RETURN' is executed as follows:
Exit by jumping to the 'RETURN' entry point (displacement 4) in the SOLOS/CUTER jump table.
Note: Since "R" represents two different commands, the
operand is required when "RESERVE" is to be executed.
Otherwise, "RETURN" is executed.
Examples:
B.
RET
Control is returned to SOLOS/CUTER.
RES 4000
Memory address 4000
the highest memory
the Music System.
RES for a 16K SOLOS
(hex) is reserved as
address to be used by
This would be a valid
system.
The File Editor
The File Editor provides the means of entering and altering a
musical score in symbolic notation for compilation by the
11
III.
THE MUSIC PROGRAM - File Editor (cont.)
Music Compiler. The file structure used by the Editor
is the same as that used by Processor Technology's ALS-8
and Software Package #1.
All lines should begin with a four digit decimal line
number followed by at least one space and terminated by
a carriage return. The Editor maintains all lines in
numeric line number sequence regardless of the order in
which they are entered. If a line number just entered
already exists, the new line just entered will replace
the previous line.
The following must be observed if you intend to use the
Music System in conjunction with one of the many
compatible editors such as ALS-8:
1. Use the 'FILE' command to establish or reestablish
the internal file limits when entering the Music
System after creating or altering a file with
another editor.
2. Use the appropriate command (such as 'FCHK' for
ALS-8) to establish or re-establish the internal
file limits when entering an external editor after
creating or altering a file with the Music
Program.
3. The File Editor supports from 1 to 4 digit
hexadecimal line numbers. Because some other
editors do not, it is recommended that the user
always enter lines with exactly four decimal
digits. If this practice is maintained, the
files created by the File Editor will actually be
compatible with other editors and not just
logically compatible.
Remember, each editor acts independently and maintains its
own internal file pointers which must be updated whenever
the file is altered.
C.
The Compiler
The Compiler converts the symbolic musical score, the high
level Music language, in the current editor file to the
binary form required by the tone generator subroutines.
Although it is not necessary to be able to 'read' music to
use the Music Compiler, some familiarity with standard
musical notation will be helpful.
12
III.
THE MUSIC PROGRAM - The Compiler (cont.)
Entering a musical score into the music System is little
more than a matter of transcription. Virtually everything
on a page of sheet music can be represented in the high
level music language of the Compiler. Rather than launch
into a long list of symbols and their meanings at this
point, let's consider the information--explicit and
implied-contained in a typical musical score and see how it
is transcribed for the computer.
Figure 2 is a piano arrangement of a Sarabande by Johann
Jakob de Neufville. Figure 3 is the high level music
language arrangement of the same piece. It doesn't look
very musical; however, there is nothing intrinsically
"musical" about Figure 2 either except our prior knowledge
of what written music is supposed to look like. With one or
two exceptions (ornamentation has been omitted for clarity,
and some editing has been done to meet the computer's three
voice limit), both figures contain the same information.
In Figure 3, each line begins with a four digit line number
followed by a space. This is required by the File Editor so
as to properly order the lines and has no other bearing on
how the music is compiled. For the most part, the Compiler
treats the file as one long character string and ignores
line numbers, line boundaries and spaces. There are
(always) exceptions. The following references to line
numbers refer to Figure 3.
A slash (/) indicates comments, and the rest of the line is
ignored. The contents of Lines 10 through 40 are selfexplanatory. Line 50 defines transposition. This symbol
does not correspond to anything in Figure 2. Its meaning
and purpose will be described later. Line 60 defines the
key signature. In this case, it is two flats (& = flat, # =
sharp). The number of sharps or flats in the key signature
is sufficient to define the key. The Compiler knows the key
and which notes are affected.
Line 70 defines the time signature and tempo. The Sarabande
is in three-quarter time, i.e., three beats to a measure and
one beat to each quarter note. The Compiler does not worry
about the number of beats in a measure. It leaves it to you
to define the notes in each measure. "NQ" correlates the
length of a quarter note to the length of a beat (H = half
note; Q = quarter note; I = eighth note; S = sixteenth
note). "=50" equates the length of a beat to 50 iterations of one of the many loops in the tone generating subroutines. The actual number has to be determined by trial
13
III.
THE MUSIC PROGRAM - The Compiler (cont.)
and error as is the case when determining the correct
metronome setting for a particular piece.
The music is subdivided into parts, measures and voices. A
part defines one or more measures that are to be played at
the same tempo and usually corresponds to a section of the
piece that may be repeated, i.e., a phrase, verse, stanza,
refrain, chorus, etc. Each part is identified by a letter
(A - Z). Up to 26 parts may be defined, in any order, but
they are always played in alphabetic sequence. Line 80
marks the beginning of Part "A" which includes the first
eight measures of the piece. Part "B" is defined in Line
170 as a repeat of Part "A". Part "C", in Line 180,
includes the remainder of the piece except for the last
measure. Although it is not specified in the music, the
last measure will be played second ending style. Part "D"
contains the last measure as written (the first ending)
followed by Part "E" which is a repeat of Part "C". A
slightly modified last measure (the last note held an extra
beat) is defined as Part "F" (the second ending), and it is
played a little slower at 68 counts per beat.
Measures are indicated by the letter "M" followed by a
number and at least one space. This is one of the few
instances when a space is required by the Compiler. The
measure numbers themselves have no meaning to the Compiler
and serve only as a reference between the lines of text and
the printed musical score. This is quite handy, however,
when you attempt to "debug" the music!
A voice is a separate "strand" of music, in harmony or
counterpoint, as in a three voice fugue. Voices are often
called "parts", as in three part harmony, but voices should
not be confused with the meaning of "part" in the context of
this Compiler. Up to three voices may be defined in a
measure. They are identified as V1, V2 and V3 (see Line 90)
and may appear in any order. As a convenience, V1 is always
assumed at the beginning of every measure. It is helpful if
a convention is followed in assigning notes to voices. V1
usually carries the melody or highest notes, V3 carries the
bass, and V2 fills in the middle. For reasons too
complicated to go into here, the music will sound better if
the voices conform to the natural flow of the various
threads of notes rather than jumping about. This is
especially important when arranging fugues where the voices
often cross over one another or disappear for a measure or
two.
14
III.
THE MUSIC PROGRAM - The Compiler (cont.)
Each of the symbols that represent a note in Figure 2 convey
two pieces of information:
1. Its position on the staff along with the key
signature and the interpretation of the clef it
belongs to defines the note to be played.
2. Its shape, along with the time signature, defines
how long (relative to a beat) the note is to be
held.
The Music System uses two symbols to convey the same information. A single letter defines the length of the note or notes
that follow it (W = whole; H = half; Q = quarter;
I = eighth; S = sixteenth; T = thirty-second; X = sixty-fourth).
Dotted notes are indicated by a period (.) after the letter.
A colon (:) indicates triplets, and these note length modifiers
(. and :) must immediately follow the letter identifying the
primary note length. "Q.:" means the notes following are played
as dotted quarter notes in triplet time, i.e., three such notes
would equal a dotted half note. The combination, "Q:.", is not
allowed.
The staff position of a note is defined by its relation to
Middle C. Middle C is always zero and every other note is a
positive or negative displacement from it. Notes above
Middle C are plus and those below are minus (see Figure 1).
The displacement is counted from 0 to 9 and A to F where
A=10; B=11; C=12; D=13; E=14; and F=15--in a word,
hexadecimal. A dollar sign ($) defines a rest.
Since most notes in the treble clef are above Middle C and most
notes in the bass clef are below it, specifying the clef ahead
of time eliminates the need for a lot of +'s and -'s. An
asterisk (*) declares the treble clef, and all notes following
are assumed to be "+" unless otherwise indicated. Similarly,
an 'at' sign (@) declares the bass clef, and all notes
following are assumed to be "-" unless otherwise indicated.
Finally, accidentals are indicated with the sign immediately
following the note to be modified (# = sharp; & = flat; % =
natural). Accidentals stay in effect until the end of the
measure or are altered by another accidental. Double sharps or
flats are not supported.
You should now be able to decipher all the symbols in Line 90
and relate them to Measure #1 of the musical score in Figure 2.
15
III.
THE MUSIC PROGRAM - The Compiler (cont.)
Line 90 contains many extra spaces. For demonstration
purposes, a space has been inserted between every symbol
or symbol group. Since each extra space requires an
additional key stroke plus one byte of memory and is not
required by the Compiler, they should be used only where
necessary to improve the readability of the score. Line
100 illustrates the preferred coding style. The bass clef
declaration (@) after V3 is redundant, but it eliminates
any ambiguity in the interpretation of the notes in V3.
Compare it with Line 130 which has no extra spaces or
redundant symbols. "V38" at the end of the line will be
compiled, correctly, as "[email protected]" because the clef and note
duration declared in V2 of that measure are still in
effect, but the line is very difficult to read. Keep in
mind, this is a very simple piece of music. The Compiler
can accommodate up to 32 notes per voice per measure, and
some Frescobaldi toccatas reach the limit!
There are a few more items of interest in this piece.
Measure #5 presents a very common problem. More than
three notes are to be played at once. The wiggley line
indicates the four notes in the treble clef are to be
played as an arpeggiated chord. One possible solution is
to play it as a long slur similar to the one in the
following measure. The same is true in Measure #16.
Measures 22 and 24 both define four voices. In these
cases, the lower voice in the treble clef can be dropped
without serious damage to the music. Measures #8 and 28
define five voices. An experienced musician will probably
solve these problems without much difficulty. For others,
it will be a matter of blind luck or painstaking trial and
error. Ultimately, the "right" solution is the one that
sounds best.
The third and fourth notes in the treble clef of Measure
#11 illustrate an item of fine tuning. The two notes are
tied which means they are to be played as one note. Since
the computer always plays "legato", tied notes usually do
not present much of a problem. However, a very soft,
almost inaudible "sh" sound is produced by the tone
generating routines whenever a new note is started.
Ordinarily the sound is masked by the changing note, but
it may be noticed in the high treble. Line 210 gets
around this anomaly by coding the tied 1/32 - 1/16 pair as
a dotted 1/16--an equivalent time value.
16
III.
THE MUSIC PROGRAM - The Compiler (cont.)
The situation in Measure #6 is just the reverse. The last
two notes in the treble clef are not tied and should be
played as two distinct notes. The quote (") defines a
long articulation which is played as a short rest equal to
about two-thirds of a sixty-fourth note. A short articulation, defined by an apostrophe (') and just half as
long, is preferred in some situations. The staccato,
defined by a comma (,), is very much like an articulation
except the rest added is equal to half the value of the
note. In all cases, the duration of the note preceding is
reduced to compensate for the added rest. Articulations
and staccato affect only the note they follow.
In Line 330, note that the articulation comes after the
accidental. Compare V2 in that line with V2 in Line 310.
The same notes, only one is defined as bass clef and the
other as treble clef.
The length of a measure is equal to the length of the
longest voice defined in it. Shorter or undefined voices
are filled with rests. In Line 220, the quarter note
rest in V3 is optional.
Now for Line 50. For many reasons--mostly having to do
with the speed and architecture of the 8080--some of the
notes generated by the Music System are not as well
tempered as others. On the other hand, being able to play
three notes at a time on a computer without special
hardware is quite an accomplishment. It is not uncommon
for a piece of music to be transposed as it is transcribed
from one instrument to another. It is the case with the
computer. The trick, as with any instrument, is to find
the key which sounds the best. The character " < " or
" > " , followed by a number, defines the direction and
number of semitones the piece is to be transposed (< =
down; > = up). Any note falling outside the computer's
four octave range as a result of transposition will be
played at the nearest octave within the range.
The assumption thus far has been that the music being
transcribed is in piano or similar type score, i.e.,
treble and/or bass clef. To take advantage of the wide
variety of music published for other instruments in
different clefs (soprano, alto, tenor, etc.), each voice
may be defined as belonging to a different clef. A clef
definition consists of a voice declaration followed by an
up arrow (↑) and a number that is the displacement from
Middle C in the clef being defined to Middle C in the
treble clef.
17
III.
THE MUSIC PROGRAM - The Compiler (cont.)
For example, the clef definition for a trio might be:
V1 ↑-2 V2 ↑-6 V3 ↑-8
where voices 1, 2 and 3 are written in soprano, alto and
tenor clef respectively. Because cleft are defined
relative to the treble clef, a bass clef declaration (a)
cannot be used with a voice that has a clef definition.
Another example:
V2 ↑-6 V3 ↑-C
where voices 1, 2 and 3 are written in treble, alto and
bass clefs. By redefining the bass clef this way, all
clef symbols are eliminated and all notes are transcribed
as if they were in a treble clef. (The clef definition
need appear only once at the beginning of the score.)
An interesting by-product of clef definition is the ability
to play in any mode. Modes are defined like clefs except
the displacement is the distance from Middle C to the
"final" note of the mode. Clef displacements may be
positive or negative, and multiple displacements can be
added algebraically prior to the definition.
Example:
Voice 1, transcribed from alto clef (-6), to be
played in mixolydian mode (+4), one octave higher
(+7) = V1 ↑+5.
D.
The Tone Generator
The tone generating subroutines convert the binary output
of the Compiler into music by manipulating a train of
squarewave pulses on one of the 8080 status lines. The
tempo of the piece can be preset or dynamic depending on
the setting of the sense switches (input port 255).
If the switches are all zero, each part will be played at
the tempo specified when the piece was compiled. If
non-zero, the hexadecimal value of the switches is used,
dynamically, as the tempo of each part. The zero/non-zero
determination is made at the beginning of each part and
determines the mode (preset/dynamic) for the entire part.
18
III.
THE MUSIC PROGRAM - The Tone Generator (cont.)
Once the correct tempo of a part has been determined by
experimentation, the switch setting (hexadecimal) can be
entered into the score to be used when the piece is
played in concert. Tempo settings below 40 can cause a
frequency shift and should be avoided. If necessary, use
a smaller note to define the time signature. "NI=80"
will be played as fast as "NQ=40".
'Reset' is the only way to stop playing a piece once
started. What happens after a 'Reset' depends on the
hardware. Most 8080 systems will begin execution at
location 0, which is the one (and only) entry point in the
Music System, and the Command Processor will gain control.
If resets are vectored to a ROM resident monitor, enter the
appropriate command to get back to location 0.
Because the waveforms are generated by software, the
frequency produced for a given note will depend on the
speed of the micro-processor. Not all 8080 systems are
alike. The program, as supplied, has been optimized for
either an Intel 8080A (running at a 500 nanosecond cycle
time and no wait states) or the Sol which runs 2% faster.
The frequency tables have been tuned as well as possible to
produce an equally tempered scale at A=440. In order to
accommodate the wide range of 8080 compatible CPU's and
musical tastes, the following tuning information is
provided.
There are seven bytes, hexadecimal locations 699 to 69F,
inclusive, that serve as adjustable time wasters. By
substituting faster or slower instruction in these locations, the speed of the primary control loop can be varied
over a wide range. Not just any instruction will do,
however. Only those instructions that do nothing to alter
the state of the various flags and registers should be
used.
The standard 500NS 8080 setting is as follows:
32 F4 07
F6 00
F6 00
STA
ORI
ORI
07F4H
0
0
13
7
7
27 cycles total
19
III.
THE MUSIC PROGRAM - The Tone Generator (cont.)
The standard setting for the Sol (2% faster) is as follows:
32 F4 07
STA
07F4H
13
00
NOP
4
00
NOP
4
00
NOP
4
00
NOP
4
29 cycles total
Any instruction or instruction group in the following list
may be used. Instructions not listed are not recommended.
OPCODE (HEX)
00
F6
3C
C3
32
22
34
E3
00
3D
A0
F4
F4
35
E3
06
07
07
B7
MNEMONIC(S)
NOP
ORI
0
INR
A;DCR A
JMP
06AOH
STA
07F4H
SHLD 07F4H
INR
M;DCR M;ORA A
XTHL;XTHL
CYCLES (8080A)
4
7
10
10
13
16
24
36
The shortest total delay possible is 10 cycles, and the
longest is 108 cycles which nearly doubles the total loop
time.
The note/frequency table begins at Location 703 (hex).
The first entry defines the lowest note (C) two octaves
below Middle C. Each entry is an eight bit, unsigned,
binary value that represents a loop count to be reduced to
zero between each squarewave cycle for every semitone in
the defined range. The last entry at 735 (hex) represents
the highest note (D) two octaves above Middle C. The
total range is four octaves plus two semitones.
E.
Rules of Thumb
One minute of music typically requires about one K of
memory. The size of the binary object code produced by
the Compiler tends to be about as big as the source file
being compiled.
20
III.
THE MUSIC PROGRAM - Rules of Thumb (cont.)
When a piece of music is very large, or memory is very
short, it will be necessary to compile 'in place'. That
is, the object code is written over the source file as the
compilation proceeds. To do this successfully, the
Compiler needs a head start of about 600 bytes. For this
reason, it is suggested that large files be started at
about F00 (e.g., "FILE F00") to leave enough headway when
compiling in place (e.g., "SCORE 900").
IMPORTANT NOTE: Please don't forget to save the
source file on tape or other
media before compiling in place
or it will be lost forever.
Source files and the compiled object code are both
relocatable; that is, once saved on tape or other media
they may be reloaded at any location.
IMPORTANT NOTE: Please don't forget that the tempo can
be dynamically controlled by the sense
switches (port 255). These sense
switches must be zero for a piece to be
played at the tempo specified in the
source file when the piece was scored.
21
IV.
HOW TO USE THE MUSIC SYSTEM
After reading this manual, the best way to learn to use the
Music System is to play the selections provided with it.
These selections will be enjoyed, and they serve as an example
of how to transcribe or compose music yourself.
The Music System is distributed on cassette tape. Side 1 is
recorded at 1200 Baud CUTS format, and Side 2 is recorded at
300 Baud Kansas City Standard format. The format of the data
is described in the SOLOS/CUTER interface specification
included here as an Appendix.
The tape consists of the following files:
File
No.
1
Address (in hex)
End of End of
Load Source Object
File
Name
MUSIC
The Music Program in object form0000
must be loaded and executed at
location zero. Memory is used
up to and including 08D2(hex).
This must be executed under
the control of SOLOS, CUTER or
compatible surrogate.
Music Scores in Source Form
Selection
2
PRELD
3
4
ALLEG
SARAB
5
6
BOURE
AIR
7
CHORL
Prelude in C Major by J. S.
Bach
Allegro by W. F. Bach
Sarabande by Johann Jakob
deNeufville (Score as
example-Appendix B)
Bouree by G. F. Handel
Air with Variations (The Harmonious Blacksmith)
by G. F. Handel
Chorale (Jesus, Joy of Man's
Desiring) by J. S. Bach
END
Arrangements by Jon Bokelman
22
08D3
1280
1B87
08D3
08D3
0BA4
0E71
0DC2
1299
08D3
08D3
0D07
15C9
0FED
2381
08D3
1186
17CA
IV.
HOW TO USE THE MUSIC SYSTEM (cont.)
The following are examples of what you need to enter via
the keyboard in order to play some of the selections
included with the Music System. These examples assume:
1.
The Music System Circuit Board was assembled
and is properly installed and connected to an
amplifier.
2.
For convenience, the examples show only what
you would key in to SOLOS.
3.
Adequate memory, beginning at location zero,
is operational.
4.
The Music System cassette is rewound and placed
into a cassette player. The cassette player
must be turned on and set for "PLAY".
A.
Loading the Music Program with SOLOS
Enter:
or:
B.
GET
Tells SOLOS to load the next (or
first) file on the tape.
GET MUSIC
Tells SOLOS to look for the file
"MUSIC" and then load it.
Loading and executing the Music Program with SOLOS
Enter:
XEQ
Tells SOLOS to load the next file and
then execute it.
or:
XEQ MUSIC
"
"
"
"
or:
GET
EXEC 0
See above.
Then we tell SOLOS to execute it.
or:
GET MUSIC
EXEC 0
See above.
See above.
23
IV.
C.
HOW TO USE THE MUSIC SYSTEM (cont.)
Loading and executing the Music Program and playing the
Prelude in C Major.
Enter:
D.
Loads and executes the, Music Program.
RET
Enter this to the Music Program to
return control to SOLOS.
GET PRELD
Tells SOLOS to read in the Prelude.
EXEC 0
After Prelude is read in, places
the Music Program in control.
FILE
Tells Music Program to verify the file
limits of the file just gotten from
tape.
LIST
Look at this file.
SCORE
Compile this file.
PLAY
And finally play it.
Playing the Allegro after the Prelude in example (C)
above.
Enter:
24
XEQ MUSIC
RET
Returns control to SOLOS.
GET ALLEG
Read the Allegro into memory.
EXEC 0
Returns control to the Music Program.
FILE
Verifies the new file just read in.
LIST
Looks at this file.
SCORE
Compiles it.
PLAY
And plays it.
IV.
E.
HOW TO USE THE MUSIC SYSTEM (cont.)
An abbreviated method to play every selection on the
Music System.
Enter:
XE
Load and execute the Music Program.
R
Return to SOLOS
CU MU 0
Define a custom command called "MU"
for "MUSIC".
GE
Get Prelude.
MU
Transfer control to the Music Program.
F
Verify the file.
S
Score it.
P
Play it.
R
Return control to SOLOS.
GE
Get Allegro.
MU
Transfer control to Music Program.
F
Verify file.
S
Score it.
P
Play it.
R
Return control to SOLOS.
GE
MU
F
Sarabande
S
P
R
25
IV.
HOW TO USE THE MUSIC SYSTEM (cont.)
Enter:
GE
MU
F
Bouree
P
R
GE
MU
F
Air
P
R
GE
MU
F
Chorale
P
R
26
. . . and back to SOLOS having played
all six selections.
APPENDIX A
MUSICAL NOTE SYMBOLS
Note Modifier
#
&
%
'
"
,
Name
Accidental Sharp
Accidental Flat
Accidental Natural
Short articulation
Long articulation
Stacatto
Musical Example
none
none
Figure 1
27
Figure 2
28
APPENDIX B
0010
0020
0030
0040
0050
0060
0070
0080
0090
0100
0110
0120
0130
0140
0150
0160
0170
0180
0190
0200
0210
0220
0230
0240
0250
0260
0270
0280
0290
0300
0310
0320
0330
0340
0350
0360
0370
0380
0390
0400
0410
0420
/ SARABANDE
/ BY JOHANN JAKOB DE NEUFVILLE
/ FROM BACH'S "DAS KLEINE KLAVIERBUCH"
/
<4
K2&
NQ=50
PA
M1 V1 * Q. 1 I 2 Q 1 V2 @ H 1 Q 2 V3 @ H 3 Q 4#
M2 *Q.1I2Q1 V2@H1Q2 V3@H3Q4%
M3 *Q.4I654 V2@H1I01 V3@H5Q7
M4 *H.3# [email protected] [email protected]
M5 *X14T6S8Q8I4"[email protected]
M6 *T78S9Q9I4"Q4 V2@H3I32 [email protected]
M7 *Q.1I4Q3# V2@H1Q2 [email protected]
M8 *H.4 V2*I$1H-1 [email protected]
PB RA
PC
M9 *Q8BIA9 V2@H1Q0 V3@H3Q2
M10 *Q8I9876 [email protected] [email protected]
M11 *T89I.AI8765 V2@H0Q+1 V3@H2Q1
M12 *QAI9876 V2@H2Q3 V3@H4Q$
M13 *T9AI.BIA987 V2@Q1 V3@Q5
M14 *QAI987S86 V2@Q1 V3@Q6
M15 *Q.6I765 V2@H+1Q0 [email protected]
M16 *S13Q6Q.6 [email protected] [email protected]&
M17 *Q.8 I4"Q4 V2@H3 V3@H8%
M18 *T78S9Q9I4"Q4 V2@H3 V3@H7
M19 *Q.8I4"Q4 V2@H1% V3@H3
M20 *Q.9I4"Q4 V2@H0 V3@H7
M21 *Q.5&"I5Q4 V2*H2Q1 V3@H0Q1
M22 *Q.7"I7Q6 V2@H0Q+l V3CH2%Q3
M23 *Q.5&"I5Q4 V2@H+2Q+1 V3@H0Q1
M24 *Q7S7T89S87Q6 V2@H0Q+1 V3@H2%Q3
M25 *Q.5& I4 Q9 V2* H.2 [email protected]
M26 *Q.3#I8Q4" V2@H+1Q+1 V3@H0Q1
M27 *Q.4I5Q3# V2@H1Q2 [email protected]
PD
M28A *H.4 V2*I$1H-1 [email protected]
PE RC
PF =68
M28B *W4 V2*I$1H.-1 [email protected]
Note: A more complex arrangement of this piece is distributed
with the Music System.
29
APPENDIX C
High Level Music Language Summary
Input to the Compiler is free form and consists of single
character symbols and multi-character symbol groups. A symbol
group consists of a symbol and one or more symbol modifiers.
With two exceptions, spaces are optional between symbols and
symbol groups. Symbol groups may not contain imbedded blanks and
may not be continued across a line boundary.
All numeric data is interpreted as hexadecimal.
Note Value
Symbol
Musical
Equivalent
W
H
Q
I
S
T
X
Whole note
Half note
Quarter note
Eighth note
Sixteenth note
Thirty-second note
Sixty-fourth note
Note Value
Modifier
30
Name
of Note
Name
Musical
Example
Time Value
Multiplier
.
Dotted note
1-1/2
:
Triplet
$
Rest (The rest is for the duration of
the Note Value Symbol)
2/3
APPENDIX C
Symbol
(cont.)
Modifier
Meaning
/
(None)
All characters on the rest of line
are ignored.
P
Any letter
(A-Z)
Define beginning of a part identified
by the modifier. Any previous part
is ended. If the part was previously
defined, the old definition is lost.
R
Any letter
(A-Z)
Repeat the part named by the modifier.
If the part is not previously defined, error will be posted. This
symbol should be preceded by a part
definition and followed by a tempo
group and/or another part definition.
M
Any character
or characters
Define the beginning of a measure.
Any previous measure is ended. The
modifier is a sequence of characters
and typically is a user defined sequence number. It must be terminated
by a space or carriage return.
V
Digit
(1, 2 or 3)
All the notes following are added to
any previous notes of this measure belonging to the voice named by the
modifier. If a voice is assigned more
than 32 notes, an error is posted.
<
Hex Digit
(0-F)
All the notes following are transposed
down the number of semitones specified by modifier.
>
Hex Digit
(0-F)
All the notes following are transposed
up the number of semitones specified
by the modifier.
*
(None)
Unless otherwise indicated, all notes
following are assumed to be "+"
(treble clef).
@
(None)
Unless otherwise indicated, all notes
following are assumed to be "-"
(bass clef).
↑
Signed Hex
(+ or -) (0-F)
Transpose only those notes following
that belong to the current voice up or
down the number of whole steps indicated
in the modifier.
31
APPENDIX C (cont.)
Symbol
Modifier
Meaning
K
Digit. Char
(0-7)(# or &)
Key signature is defined by number
and type (sharp or flat) specified
in the modifier. If this symbol
group is omitted, the key defaults
to C major (no sharps or flats).
N
Char
(H,Q,I,S)
Correlates the length of the note
type in the modifier to the length
of a beat.
=
2 Digit Hex
(00-FF)
Equates the length of a beat to
the number of internal cycles
specified by the modifier.
32
APPENDIX D
Error Codes
The error routines contained in the software are designed to
detect most honest errors such as incorrect syntax, invalid
operands, etc. Any deliberate attempt to make the System fail
will probably succeed. Whenever an error is detected, a coded
error message is written to the system output device along with
the line or statement containing the error. In most cases, a
question mark (?) is substituted at or near the character that
caused the error. When an error is detected while compiling a
score, the binary object produced should be considered invalid.
Error No.
Meaning
0
A hexadecimal digit was expected at this location but none was found. This is the most
common error, and it often appears when least
expected.
7
The operand is not within the address space
managed by the system, or the assigned memory
space has been exhausted.
2
The file structure is invalid.
3
The 32 notes per voice per measure limit has been
exceeded. (Staccato and articulation count as
two notes.)
4
The voice specification is invalid.
voices are supported.
5
The key specification is invalid. Either the number is greater than seven or a "#" or "&" was
expected but none was found.
6
The time signature is invalid. A note value was
expected (H, Q, I or S), but none was found.
7
The "part" or "repeat" specification is invalid.
A letter, A - Z, was expected but none was found,
or the part to be repeated is not defined.
Only three
33
APPENDIX E
SOLOS/CUTER Interface Specifications
The SOLOS/CUTER interface is based on:
1.
A predefined set of 'pseudo' I/O ports allowing
software compatibility and providing an easy means
of supporting any I/O device.
2.
A well defined set of register usage conventions.
3.
A system jump table of entry points.
4.
A defined tape format including headers and CRC
characters.
Both SOLOS and CUTER observe and support these specifications
such that any program written using this interface will function
(except for specific device dependencies) under the control of
either SOLOS or CUTER. A part of the interface specifications
also allows a user written SOLOS/CUTER surrogate. Such a
surrogate, when properly written, will allow a program written
for SOLOS/CUTER to function with the surrogate.
The first aspect of the interface is that of the pseudo ports.
The basic SOLOS/CUTER interface allows the support of four
'pseudo' I/O ports (0 - 3). These pseudo ports are logical ports
providing a reference for the program only. System input
(keyboard) and output (display) are directed via these pseudo
ports. The STANDARD definition for pseudo ports is:
Pseudo Port
0
1
2
3
Input
Keyboard
Serial input
Parallel input
User defined input
Output
VDM Display
Serial output
Parallel output
User defined output
These pseudo ports allow device independent I/O. Provided that
device dependent character sequences are not used, an I/O
request to pseudo port 0 appears to the requesting program to
be the same as a request to pseudo port 1, 2 or 3. What this
means is that, although four pseudo ports are defined in the
interface specifications, a user written surrogate would not
need to decode pseudo ports.
34
APPENDIX E
(cont.)
The second aspect of the SOLOS/CUTER interface is the defined
register usage. Each of the system entry points has specific
register requirements which will be discussed later.
Whenever a program is executed via SOLOS/CUTER the stack pointer,
the stack, and registers HL are defined as follows:
1. The Stack Pointer (register SP) is valid and offers a
useable stack. The size of this stack is not specified
but should be adequate for at least a few calls. The
executed program is expected to establish its own
stack; however, some stack should be available.
2. The stack itself should be established such that:
(a)
A "REV instruction can be used as an exit
by the executing program.
(b)
The locations at Stack Pointer -1 and -2 in
memory contain the address of the executed
program itself. This information can be
accessed by machine code similar to:
LXI H,-1
DAD SP
MOV A,M
A constant minus one.
HL=SP-1 now.
A=our own high address.
Code such as this can be used to allow a
routine to be made self-relocating to a
256 byte boundary.
3. Registers HL contain the address of the SOLOS/CUTER jump
table. Because this jump table may be located at any
256 byte boundary in memory, register L will be zero.
Register H can then be used to alter the executing
program accordingly. As noted later, the jump table
also provides an indication whether the program is
executing on a Sol or other computer.
The third aspect of the SOLOS/CUTER interface is the jump table.
By making all system requests via this jump table, an executed
program can be made compatible between SOLOS, CUTER or other
properly written surrogate. The jump table is described on the
following page, A more complete description is contained in the
SOLOS/CUTER User's Manual.
35
APPENDIX E (cont.)
SOLOS/CUTER JUMP TABLE
Address
Label
Length
Brief Description
xx00
START
1
This byte allows power-on reset for
SOLOS. It is 00 hex on a Sol; 7F hex
on other than a Sol.
xx01
INIT
3
This is a "JMP" to the power-on reset.
xx04
RETRN
3
Enter at this point to return control
from an executing program.
xx07
FOPEN
3
Byte access file open.
xx0A
FCLOS
3
Byte access file close.
xx0D
RDBYT
3
Byte access read one byte.
xx10
WRBYT
3
Byte access write one byte.
xx13
RDBLK
3
Read an entire file into memory.
xx16
WRBLK
3
Write an entire file from memory.
XX19
SOUT
3
Standard character output routine. This
must be an "LDA" pointing to the byte
containing the current system output
pseudo port value.
xx1C
AOUT
3
Character output to pseudo port specified
in register "A".
xx1F
SINP
3
Standard character input routine. This
must be an "LDA" pointing to the byte
containing the current system input
pseudo port value.
xx22
AINP
3
Character input to pseudo port specified
in register "A".
The most often used routines are: RETRN, SOUT and SINP.
entry points may or may not be used.
36
Other
APPENDIX E (cont.)
JUMP TABLE INPUT ENTRY POINTS
SINP
address xx1F
This entry point will set register "A" to the current
system input pseudo port. This must be an "LDA"
instruction. After loading register "A", this entry
point proceeds by executing "AINP" described below.
AINP
address xx22
This entry point is used to input one character or
status information from any pseudo port. On entry
register "A" indicates the desired pseudo port. Because
this entry point is a combination status/get-character
routine, it is the user's responsibility to interpret
return flags properly. When a character is not
available, the zero flag will be set. When a character
is available, the zero flag will be reset and the
character will be returned in the "A" register.
As an
example, the following code will wait for a character to
be entered:
LOOP CALL
JZ
...
SINP
LOOP
...
get status or the character
status says character not
available yet
character is in register "A"
JUMP TABLE OUTPUT ENTRY POINTS
SOUT
address xx19
This entry point will set register "A" to the current
system output pseudo port. This must be an "LDA"
instruction. After loading register "A", this entry
point proceeds by executing "ROUT" described below.
AOUT
address xx1C
This entry point is used to output the character in
the "B" register to the pseudo port specified by the
value in the "A" register. On return, the PSW and
register "A" are undefined. All other registers are
as they were on entry. A user written output routine
(ROUT surrogate) may buffer or delay the output as
required for the supported device.
37
APPENDIX E (cont.)
The fourth aspect of the SOLOS/CUTER interface is the format in
which the data is recorded on tape. When data is written to tape,
it is referred to logically as a "file". Each file has
its own header which describes the file. On cassette tape, each
header is followed by the file itself. The file itself is
written to tape in segments of 1 to 256 bytes. Each segment
is immediately followed by a Cyclic Redundancy Check character
(the CRC). The following is the general format of one file on
cassette tape:
_
Where:
A.
Preamble
Preceding every file header is a special preamble.
This is a series of at least ten nulls (zeroes)
followed by a one (01 hex). This special sequence,
and only this sequence, indicates a probable file
header follows.
B.
File Header
This is the 16 byte file header.
file header is:
NAME
C.
TYPE
ASC
DB
DB
'ABCDE'
0
'B'+80H
SIZE
ADDR
DW
DW
LENGTH
FROM
XEQ
DW
DS
EXEC
3
The layout of a
A 5 character file name.
Should always be zero.
File type character. If bit
7=1, this is a non-executable
data file.
Number of bytes in file.
Address file is to be read into
or written from.
Execution beginning address.
Space not currently used.
File Header CRC
This is the CRC character for the file header.
If, when reading a file header, the CRC character
is not correct, then the file header is to be
ignored. A search would then be made for a new
preamble (A above).
38
APPENDIX E
D.
(cont.)
File Segment First
This is the first segment of the file itself.
A segment is from 1 to 256 bytes. In this
example, this segment is 256 bytes.
E.
File Segment First CRC
This is the CRC character for the preceding
segment-- in this example, the preceding 256
bytes.
F.
File Segment Last
This is the last segment of the file. In this
example, this is 44 bytes. Therefore, the
length of this file is 256+44=300 bytes.
G.
File Segment Last CRC
This is the CRC character for the preceding
segment--in this example, the preceding 44 bytes.
H.
Interfile GAP
This is a gap between files and is typically a
clear carrier for about five seconds.
CRC Computation
The CRC character is computed for each segment or header.
The following code performs the CRC computation assuming:
Register "A" is the character just written to tape, and
Register "C" is the final CRC. Register C should be set to
zero prior to writing the first character of a segment.
After writing the last character of a segment and executing
this code, Register "C" is the CRC character for this
segment.
An 8080 Subroutine to do CRC Computation
DOCRC
EQU
SUB
MOV
XRA
CMA
SUB
MOV
RET
$
C
C,A
C
A=NEXT character and C=CRC
C
C,A
39