Download User Manual User Manual
Transcript
User Manual
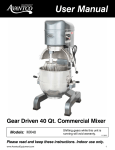
Gear Driven 30 Qt. Commercial Mixer
Models: MX30
Shifting gears while this unit is
running will void warranty.
08/2015
Please read and keep these instructions. Indoor use only.
www.AvantcoEquipment.com1
User Manual
Index
Parts Overview ............................................................... 3
Standard Accessories..................................................... 4
Operation Instructions ................................................... 4
Figure 1: Gear Axle......................................................... 5
Figure 2: Initiative Axle................................................... 6
Figure 3: Fork.................................................................. 7
Figure 4: Change Speed Axle......................................... 8
Figure 5: Turning Plate and Mixing Axle........................ 9
Figure 6: Single Phase Motor Diagram........................ 10
Figure 7: Center Axle.................................................... 11
Maintenance and Protection........................................ 12
Troubleshooting............................................................ 13
Warranty Information.................................................... 13
2www.AvantcoEquipment.com
User Manual
Parts Overview
Descviption
Description
1
Top cover
2
Gear box
3
Safety net(move)
4
Descviption
Description
Qty
12
Centre axle
1
13
Fork
1
14
Stop ring 25
Inner gear
1
15
5
Safety net(fixedly)
1
16
6
Turning plate
1
17
Thread bar
7
Mixing device I
1
18
Key 5*20
8
Mixing device II
1
19
Start switch
9
Mixing device III
1
20
Stop switch
1
Descviption
Qty
Description
Qty
23
Micro-switch
1
24
Micro-switch shelves
1
25
Micro-switch shelves
Big taper gear
1
26
Bearing 6204
1
Descviption
Description
Descviption
Description
Qty
Qty
45
Handwheel axle
1
1
46
Key 5*15
1
Key 6*15
1
34
Sleeve
1
35
Board
1
47
1
36
Gear box cover
1
48
Handwheel
1
Screw
2
37
Gear axle
1
49
Handle sleeve
1
27
Spring
2
38
Initiative axle
1
50
Handle axle
1
1
28
Handle
2
39
Motor
1
51
AC contact device
1
1
29
Gasket
1
40
Stand
1
52
Seat
1
1
30
Screw
1
41
Back board
1
53
Bar
1
1
31
Arm
1
42
Gasket
1
54
Back cover
1
1
1
1
1
10
Bowl
1
21
Change speed axle
1
32
Copper nut
1
43
Small taper gear
1
55
Capacitor
11
Stop ring 52
1
22
Nameplate
1
33
Big belt wheel
1
44
Flange knot
1
56
Electric box
5
www.AvantcoEquipment.com3
STANDARD ACCESSORIES
OPERATION INSTR
User Manual
FIGURE 10
Please ensure power supply m
NEMA 5015P
110V
Please ensure power supply m
110V
OFF
OPERATION INSTRUCTION
STANDARD ACCESSORIES
Standard Accessories
FIGURE 10
NEMA 5015P
110V
110V
OFF
ITEM
DESCRIPTION
Description
1
Spatula
1
2
Dough Hook
1
1
Flat Beater
3
Wisk
1
2
Dough Hook
4
Bowl
1
3
Wire Whip
4
NOTES:
NOTES:
• Any agitator is easily installed by simply raising it onto the mixing axle, and
the rotating it clockwise on the shaft
until into place. To remove, raise the
agitator on the shaft until it clears the
lock and then rotate counter-clockwise
and lower.
FOR CHANGING THE SPEED:
before changing speed in order t
3
MIXING: According to the diff
Choose the different mixing d
MIXING: According to the diff
Dough Hook
1
Please
Wisk ensure power
1 supply matches your machine Choose the different mixing d
4
Bowl ensure power
1 supply matches your machine.
Please
ITEM
1
2
DESCRIPTION
QTY
Spatula
1
A. Be suitable for mix and stir
in speed speed, working time
NOTES:
A
• Any agitator is easily installed by simA. Be suitable for mix and stir
ply raising it onto the mixing axle, and
in speed speed, working time
the rotating it clockwise on the shaft
until into
place.
To remove, raise
theSPEED: Please stop machine firstB. Be suitable for mix and stir
FOR
CHANGING
THE
agitator before
on the shaft
until it clears
changing
speedthein order to avoid
box
work
in middle speed, working
B damage to the gear
lock and then rotate counter-clockwise
and lower.
FOR CHANGING THE SPEED: Please stop machine firstB. Be suitable for mix and stir
work
before changing speed in order to avoid damage to the gear
boin middle speed, working
• All of tools are precisely fitted to the
bowl, rounded corners and easily
removable
for cleaning.
MIXING:
According to the
C. Middle position is suitable fo
different
C mixing material. is less than 30 minutes. Flour/
Choose the different mixing devicews and speed. C. Middle position is suitable fo
SPANISH:
• Any agitator
is easily
installed by simMIXING:
According
to the different mixing material. is less than 30 minutes. Flour/
ply raising it onto the mixing axle, and
Choose the different mixing devicews and speed.
the rotating it clockwise on the shaft
QTY
Item
FOR CHANGING THE SPEED:
before changing speed in order t
Qty
1 raise the
until into place. To remove,
agitator on the shaft until it clears the
A. Be suitable for mix and stir batter, eggs and work with
lock and then rotate counter-clockwise
in speed speed, working time isless than 15 minutes.
and lower.
1
A
OPERATION
INSTRUCTION
Bowl
B
OPERATION INSTRUCTION
OPERATION INSTRUCTION
12
• All of tools are precisely fitted to the
bowl, rounded corners and easily
removable for cleaning.
A. Be suitable
stir batter, eggs and work with
1 for mix andtime
isless than 15 minutes
• All of tools are precisely fitted to the
in speed
speed,
bowl, rounded
corners
andworking
easily
removable for cleaning.
1
B. Be suitable for mix and stir stuffing and raw material, and
work in middle speed, working time is less than 20 mins.
B. Be suitable for mix and stir stuffing and raw material, and
work in middle speed, working time is less than 20 mins.
13
C. Middle position is suitable for mixing dough, working time
is less
thanrotating
30 minutes.itFlour/
water quantity
40%-50%.
• Any agitator is easily installed by simply raising it onto the Cmixing axle, and
the
clockwise
onis the
shaft
Please
ensure
powerthe
supply
matches
machine
is suitable
mixing
dough, counterworking time
C. Middlethe
position
SPANISH:raise
until it locks into place.
To remove,
agitator
on theyour
shaft
until it clears
lock
and for
then
rotate
is less than 30 minutes. Flour/ water quantity is 40%-50%.
• Any agitator is easily installed by simPlease ensure
ensure
supply
clockwise
and lower.Please
ply raising it power
onto the mixing
axle, andmatches your machine.
NEMA 5015P
power
supply
matches your machine
110V
the rotating it clockwise on the shaft
until into place.
To remove,
raise thematches your machine
Please ensure
ensure
power
supply
power
machine.
agitator on the
shaft until
itthe
clearsbowl,
thematches
• All ofNEMA
the5015P
accessoriesPlease
are precisely
fitted
tosupply
have your
rounded
corners, and are easily removed for cleaning.
lock
and
then
rotate
counter-clockwise
110V
110V
Please
ensure
power
supply
matches
your
machine.
and lower.
NEMA 5015P
110V
110V
110V
STANDARD ACCESSORIES
OPERAT
FIGURE 10
• All of tools are precisely fitted to the
bowl, rounded THE
cornersSPEED:
and easily Please stop machine first
FOR CHANGING
removable for cleaning.
before changing speed in order to avoid damage to the gear box
12
13
FOR
CHANGING THE SPEED: Please stop machine first
FOR CHANGING
THE SPEED:
Please
stop machine
first
before
changing speed
order toPlease
avoid damage
to thefirst
gear box
FOR CHANGING
THE in
SPEED:
stop machine
before changing speed in order to avoid damage to the gear bo
beforeCHANGING
changing
order toPlease
avoid
damage
to the
gear box
FOR
THE in
SPEED:
stop machine
first
Please ensure
that
yourspeed
power
supply
matches
your
machine
NEMA 5015P
!
before
changing speed
order toPlease
avoid damage
to thefirst
gear bo
FOR CHANGING
THE in
SPEED:
stop machine
110V
MIXING:
According
to
the
different
mixing
material.
before changing speed in order to avoid damage to the gear bo
Choose
different
mixing devicews
and
speed.
For changing
thethe
speed:
Please
machine
first
before changing speed in order to avoid 110V
MIXING:
According
to thestop
different
mixing
material.
!
MIXING:
According
to
the
different
mixing
material.
damage to Choose
the gearthe
box.
Also make
that the
bowl
is in fully lifted position and the guard is closed.
different
devicews
and
speed.
MIXING:
According
tomixing
thesure
different
mixing
material.
Chooseisthe
different
mixing
devicews
and The
speed.
• Slow Choose
Speed
thedifferent
middle, mixing
dough devicews
hook setting.
knob will be facing forward.
the
and
speed.
MIXING: According to the different mixing material.
• Medium
Speed
is
the
bottom,
flat
beater
setting.
The
Choose
differenttomixing
devicews
and material.
speed.knob will be straight down.
MIXING:the
According
the different
mixing
A. Be suitable
for whisk
mix and
stir batter,
eggs will
andbe
work
with up.
• High Speed
is
the
top,
setting.
The
knob
straight
Choose the different mixing devicews and speed.
in speed speed, working time isless than 15 minutes.
A. Be suitable for mix and stir batter, eggs and work with
A
Mixing:
Always use theA.correct
attachment
thestir
job.
Be suitable
suitable
forworking
mixfor
and
batter,than
eggs15and
and
work with
with
in
speed,
time
minutes.
A. speed
Be
for
mix
and
stir isless
batter,
eggs
work
in
speed
speed,
working
time
isless
than
15
minutes
in speed
speed,
isless
than
minutes.
DESCRIPTION
QTY
A
A.
suitable
forworking
mix andtime
stirmixing
batter,ITEM
eggs15and
A.Be
Wire
Whip:
Suitable
for
liquids
andwork
soft with
ingredients, can work in all speeds. Do not
A
1
Spatula
1
in
speed speed,
isless
minutes
A.
forworking
mix
andtime
stirstuffing
batter,than
eggs
and
work with
B.
for
mix
stir
and 15
raw
material,
and
runBeforsuitable
more than
15 and
minutes.
2 15
Dough
Hook
1
in
speed
speed,speed,
working
time isless
minutes
work
in middle
working
time isthan
less
than
20 mins.
B
B. Be suitable for mix and stir stuffing and
rawWisk
material, and
3
1
B.
Be
suitable
for mix
and stir
stuffing
and
raw material,can
and
B.Be
Flat
Beater:
Suitable
forstuffing
mixing
dry ingredients,
work
insuitable
middle
speed,
working
time
is less
thanmaterial,
20 mins.andwork in low & medium speeds only.
B.
for
mix
and
stir
and
raw
B
work
in
middle
speed,
working
time
is
less
than
20
mins.
4
Bowl
DoBe
not
use in for
high
speed.
Dostuffing
not run
for raw
more
than
15and
minutes.1
work
insuitable
middle
speed,
working
time
is and
less
than
20
mins.
B.
mix
and
stir
material,
B
work
insuitable
middle
speed,
working
time
is less
thanworking
20 mins.
B.
for
mix
and
stirforstuffing
and
raw
material,
and
C. Be
Middle
position
is suitable
mixing
dough,
time
NOTES:
C.
D
ough
Hook:
Suitable
for
mixing
dough,
can
work
in low
medium speeds
work
in
middle
speed,
working
time
is
less
than
20
mins.
is less than 30 minutes. Flour/ water quantity
is 40%-50%.
A only. Do not
• Any agitator
is easily installed
by &
simC
C. Middle
is suitable
forrun
mixing
dough,
working
time
use inposition
high speed,
do not
forplymore
than
20
minutes.
Absorption
ratio
must
be more than
raising working
it onto thetime
mixing axle, and
C.less
Middle
position
is suitable
suitable
for
mixing
dough,
is
than
30
minutes.
Flour/
water
quantity
is
40%-50%.
C.
Middle
position
is
for
mixing
dough,
working
time
50%.
Refer
to
mixer
capacity
chart.
the
rotating
it
clockwise
on
the
shaft
C
is less
less than
than 30
30 minutes.
minutes. Flour/
Flour/ water quantity
quantity is
is 40%-50%.
40%-50%.
is
into place.
To remove,
C.
Middle position
is suitable forwater
mixinguntil
dough,
working
time raise the
C
Operation
Instructions
OFF
OFF
OFF
OFF
agitator on the shaft until it clears the
is
thanposition
30 minutes.
Flour/for
water
quantity
is working
40%-50%.
C.less
Middle
is suitable
mixing
dough,
time
B
lock and then rotate counter-clockwise
4www.AvantcoEquipment.com
is less than 30 minutes. Flour/ water quantity
is
40%-50%.
and lower.
Plea
Plea
FOR
befor
FOR
befor
MIXI
Choo
MIXI
Choo
A. B
in sp
A. B
in sp
B. B
work
B. B
User Manual
Mixer Capacity Chart
Agitator and Speed
Maximum Bowl
Capacity 30 qt.
Bread and Roll Dough -60 % AR
Dough Hook - 1st only
45 lbs.
Heavy Bread Dough -55% AR
Dough Hook - 1st only
30 lbs.
Pizza Dough, Thin -40% AR
Dough Hook - 1st only
14 lbs.
Pizza Dough, Medium -50% AR
Dough Hook - 1st only
20 lbs.
Pizza Dough, Thick -60% AR
Dough Hook - 1st only
40 lbs.
Dough Hook - 1st and 2nd
15 lbs.
Mashed Potatoes
Flat Beater
23 lbs.
Waffle or Hot Cake Batter
Flat Beater
12 qt.
Egg Whites
Wire Whisk
1.5 qt.
Whipped Cream
Wire Whisk
6 qt.
Cake Batter
Flat Beater
30 lbs.
Product
Raised Donut Dough -65% AR
When mixing dough ( pizza, bread or bagels), check your "AR" absorption ratio - water weight divided by flour weight.
Above capacities based on 12% flour moisture at 70°F water temperature. If high gluten flour is used, reduce above
dough batch size by 10%.
Example: If recipe calls for 5 lbs. of water and 10 lbs. of flour, then 5 divided by 10 = 0.50 x 100 = 50 %AR.
• 2nd Speed should never be used on mixtures with less than 50% AR.
• Do not use attachments on hub while mixing.
When calculating the correct size mixer for your application, here are some helpful weights & measures:
• 8.3 lbs. = 1 gallon of water – 2.08 lbs. = 1 Quart.
www.AvantcoEquipment.com5
User Manual
GEAR AXLE
Figure 1
Description
Descviption
Qty
1
Bearing 6203
1
2
Gear axle
1
3
Key 6*18
2
4
High-speed gear
1
5
Sleeve
1
6
Low-speed gear
1
7
Gasket
1
6www.AvantcoEquipment.com
7
User Manual
INITIATIVE AXLE
Figure 2
Description
Descviption
Qty
1
Bearing 6204
1
2
Initiative axle
1
3
Key 6*28
2
4
Bearing 6203
1
5
Gasket
1
De
www.AvantcoEquipment.com7
8
1
Top c
2
Gear
3
Safe
4
Inne
5
Safe
6
Turn
7
Mixin
8
Mixin
9
Mixin
10
Bow
11
Stop
User Manual
FORK
Figure 3
clock-
on. So,
Descviption
Description
Qty
1
Fork axle
1
2
Fork
1
3
Nut
2
4
Spring
2
5
Shaft
2
the
the
ing
to p-
8www.AvantcoEquipment.com
User Manual
CHANGE SPEED AXLE
Figure 4
Descviption
Description
Qty
1
Handle knot
1
2
Handle
1
3
Screw M6*10
1
4
Screw M5*16
4
5
Speed block
1
6
O ring 36.5*1.8
1
7
Spring
4
8
Steel ball
4
9
Stop ring 20*1.2
1
10
O ring 15*2.65
1
11
Change speed axle
1
12
Eccentricity knot
1
13
Pin 3*25
1
www.AvantcoEquipment.com9
User Manual
TURNING PLATE AND MIXING AXLE
Figure 5
Descviption
Description
3
1
4
teadily.
5
6
he gr-
7
2
nal el8
, you
9
Qty
1
Inner gear
1
2
Screw
6
3
Nut M14
1
4
Spring gasket 14
1
5
Gasket 14
1
6
Planetary gear
1
7
Bearing 6204
1
8
Turning plate
1
9
Spring gasket
1
10
Nut
1
11
Safe net
1
12
Bearing 6206
1
13
Oil seal 35*56*12
1
14
Key 6*16
1
15
Mixing axle
1
16
Pin 10*37
1
12
10
13
14
11
15
16
10www.AvantcoEquipment.com
3
4
User Manual
4
SINGLE PHASE MOTOR DIAGRAM
Figure 6
PE2
N
L
K1
KT
K0
K2 K3 K4
1C
2C
K
K1
overload protection switch
1C
2C
AC contact device
The machine must beK2putbowl
in the
and flat ground, and make sure the machine steadily.
lift dry
switch
K3 tosafety
switch
We can use four screws
fix theprotect
bracket,
so the mixer will not shake or slope.
K4 urgency stop switch
Check the power voltage
is suitable for voltage of this mixer or not before using, the grK5 switch
ound wire is firm whether or not.
K
reactor
When the motor of this
equipped
K0 machine
fluctuate is
safety
switchwith 380V, you can ask the professional elKT time relay
ectricians
source. If you find that running direction is not right, you
M to fix the electrical
CA/CB capacitor
can change the two wires,
besides the ground wire.
M
CB
K5
CA
motor
Warning: users must install the shell ground wire.
SPECIFICTION
SPECIFICATIONS
Type
Type
Capacitor
L
Capacity (Qt)
B30FA
MX30
30
30
Power
V
Power Supply
Supply (V)
110
100-120~
Input
W
InputPower
Power (W)
1300
1300
12
516
516
Mixing
Mixing
Speed
Speed
(r.p.m.)
r.p.m
245
245
150
150
MaxCapacity(kg)
Flour
Maxflour
Capacity (kg)
15
7
HP
1.5
2
www.AvantcoEquipment.com11
User Manual
CENTER AXLE
Figure 7
Descviption
Description
Qty
1
Key 8*7*20
1
2
Key 8*7*45
1
3
Centre axle
1
4
Key 8*7*50
1
5
Bearing ring
1
6
Gear
1
7
Gasket
1
8
Bearing 6206
1
9
Oil seal 40*52*10
1
10
O ring 30*1.8
1
11
Sleeve
1
12
Bearing 6205
1
13
Cover
1
14
Roller
5
15
Spring
10
16
Engager
1
17
Gear ring
1
18
Dividing ring
1
19
Gear
1
20
Above bearing ring
1
21
Joint
1
12www.AvantcoEquipment.com
User Manual
Troubleshooting
Trouble
Possible Causes
Solution
The axles can’t work when
operating the machine
Poor contact of the electrical
equipment
Check the Plug
The mixing bowl is out of position
Moving direction is not correct
Change
Leaks oil
Sealing washer is damaged
Change
Difficult to move the bowl up and down
Slideway is rusted
Clean the slideway and lubricate
The motor is overheated
and speed is down
The voltage is not enough, or
incorrect speed
Check the voltage or use
lower speed
Noise and overheating
Poor lubrication
Add or change lubrication
Mixer touches bowl
The mixing device or bowl deformed
Repair or change the bowl
or mixing device
Limited Warranty
All equipment, which is sold under Avantco trademark and used for commercial purpose is warranted against defects
in materials and workmanship. The warranty runs for one year from the date of original installation and is for the benefit
of the original purchaser only. All other Warranties, Expressed or Implied, Statutory or Otherwise, including Without
Limitation any implied Warranty of Merchantability or Fitness for Purposes are excluded. The Seller shall in no event be
liable for direct, indirect or consequential damages in connection with Avantco commercial products.
This warranty is not effective if damage occurs because of accident, carelessness, improper installation, lack of proper
set – up, supervision when required or if the equipment is installed or operated in any manner contrary to the installation and operating instructions. In these cases, repairs will be made at a reasonable cost. Work performed by unauthorized personnel or unauthorized service agencies voids this Warranty.
Items not covered under warranty:
Changing Gears on the Mixers while Unit is Running and Overloading as Determined by an Approved Certified Technician.
This warranty does not apply to, and Avantco is not responsible for, any warranty claims made on products sold or used
outside of the United States.
www.AvantcoEquipment.com13


