Download User Manual - CS
Transcript
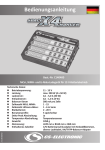
User Manual Power Specs: 120 A/800 A Peak 6 Power-Programs 3 Aktive-Stock-Programs 4 A Mega-BEC 4,8 - 8,4 V 2 LiPo/LiFe Forward/Brake Forward/Brake/Reverse Optimized for: 1:12 Pan Car 4 cells 1:10 Onroad 5 cells 1:10 Offroad 6 cells 1:10 Onroad 6 cells Stock motors NiCd, NiMH, LiPo, LiIo, LiFe and much more Motor Specs: above 2.5 Turn 4.8 - 12.0 V Sensor-Motors Sensorless-Motors Z-C130200AE Order-No. C130200 n etitio g, p m o C in ocket as everyth R S C h The troller s need. n o c speed what racer Content 1. 2. 3. 4. 5. 6. 7. 8. 9. 10. 11. 12. 13. 14. 15. 16. 17. 1. Dear Customer, congratulations for buying your new digital CS-Rocket Competition Brushless speed controller for brushless motors from CS-ELECTRONIC. You can be sure having purchased a product, which was developed on the basis of the newest technical knowledge and constructed as well as optimized for the use in RC-Cars. We have realized several pioneering technologies in this product and are proud to present to you a intelligent high performance speed controller, which has outstanding features in performance, functionality and safety. 2. Range of Application The CS-Rocket Competition Brushleee Speed Controller is conceived for 1/10 RC-cars with an operating voltage from 4.8 V to 8.4 V. It can be used with all current brushless motors with or without sensor in the “540-size”. 2 3. Installation Dear Customer,..................................................................... 2 Range of Application............................................................ 2 Installation........................................................................... 2 Connection of the components............................................. 3 Basic Setting controller/Transmitter-set up........................... 4 Power programs, overview and setting................................. 4 Features .............................................................................. 8 Additional features for the serious racer............................... 8 Diagnostics........................................................................... 8 Reset to factory defauls...................................................... 10 Safety precautions.............................................................. 10 Technical data..................................................................... 11 Accessories......................................................................... 11 24 month guarantee........................................................... 11 Service/returns . ................................................................ 12 CE Conformity Declaration:................................................. 12 Environnemental protection notes..................................... 12 The speed controller must be placed in a cool and crash-protected area in the car. For fastening the speed controller use only two small stripes of double sided adhesive tape in a way, that not the complete cooling area of the bottom is covered. The receiver as well as the receiver antenna must have a distance of more than 3 cm to the speed controller. Current-carrying battery- or motor-cables should not be near the antenna. Avoid direct contact of the antenna to graphite or metal parts. To avoid any interference problems, guide the antenna on the direct way to the top of the car and do not coil up the antenna. If necessary the antenna can be shortened to appr. 35 cm in length. Sufficient cooling openings in the body as well as cases free of dust or dirt increase the efficiency and the life time of electronic components. 4. Connection of the Components Receiver connection: First you connect the receiver cable (BEC) with the white three-pole plug of your CS-Rocket-Seppdcontrollers. Guide strips on the side makes sure the position and the polarity. The black receiver plug is connected to the plug-in place 2 of your receiver. The CS-Rocket Competition is factory equipped with 10-AWG-power cables for the connection to the battery. Please use only suitable high current plugs (i.e. C180712 und C180713) and pay attention to the polarity “+” and “-“. A short circuit or a wrong polarity results in a serious damage of the speed controller. The connection to the motor is done with 12-AWG-power cables marked with “A”, “B” and “C”. These can be soldered directly to the connections of the motor. To change the direction of rotation, just exchange two of the three motor cables. On-/Off Switch A B C Receiver Setupkey Orange - motor Yellow - motor Blue - motor Sensor/ USB – Negative Positive Negative Signal Positive Signal Polarity of the receiver connection: Please observe the polarity as follows:: Red is receiver “+“ Black is receiver “-“ White is receiver “signal” Black - Battery „-“ Red Battery „+“ + Sensor connection: If the brushless motor is used in the sensor mode, the motor must be connected with a sensor cable to the speed controller before you switch on the speed controller. The sensor cable included is equipped with a standardized 6-pole JST-plug for the connection with the mostly used brushless motors. The 8-pole plug is plugged in the sensor jack of the speed controller. Faulty sensor cables must be replaced immediately. A spare cable or cables with different length can be ordered from CSELECTRONIC. 3 Assembly of the air fan: If you use brushless motors with less than 4.5T or if the ambient temperature is high, we recommend the use of the included air fan. The fan is assembled with 4 screws on the cooling surface of the speed controller. To ensure the 6 V power supply the cable of the fan is plugged in a free plug-in place of the receiver. j) Press the setup key for more than 3 seconds until you hear a sound. k) Push the throttle trigger to full throttle - you hear a sound again. l) Now you push the throttle trigger to full brake until you hear a sound again. m) The throttle trigger is now moved back to the neutral position and the basic setup is finished. n) Both LEDs of the speed controller go out and three sounds confirm the correct setup. Please note, this takes appr. 10 seconds. Please wait for the sounds for the confirmation. 5. Basic Setting Controller/Transmitter-Setup Requirements for the basic settings are the following conditions: a) The power cable „A“, „B“ und „C“ of the speed controller must be connected to the motor! b) The controller BEC-cable is connected to the receiver in plug-in place 2! c) The sensor cable is not connected to the Sensor/USB-jack. The jack must be open! d) Now switch on the transmitter and you can begin with the basic set up! e) The direction of rotation of the throttle-function of the transmitter must be set to “NOR“ (normal)! f) Special setting for Futaba transmitters: The direction of rotation must be set to “REV“ (reverse)! g) The end point adjustment of the throttle (EPA) must be set to 100 % and the end point of the brake must be set to 150 % (if possible, otherwise 100 % too). With very cheap transmitters this setting is not be possible, use the standard settings. h) Now connect the battery to the speed controller, take care of the polarity! i) The switch of the CS-Rocketcontrollers is now set to ON! 4 full throttle full brake neutral Check of the basic setup “Speed-Controller-Transmitter-Adjustment”: a) in neutral position of the throttle trigger, both LEDs shine red and yellow, b) at slow acceleration, the red LED goes out, c) at full throttle, the yellow LED goes out and the red LED shines, d) at slow braking, both LEDs go out, e) at full brake, the red LED shines. The speed controller is now calibrated to your transmitter. 6. Power Programs, Overview and Setting The CS-Rocket Competition Brushless comes with 9 power programs, which can be selected for different types of RC-Cars and different handling characteristics. The setting is done with the setup key and the throttle trigger of the transmitter. By moving the throttle trigger to full throttle or full brake the program numbers will be increased and finally saved in the speed controller. Hint: Move the throttle trigger slowly and always to the end point. The table on the next page shows the recommended use of the different programs. PowerPrograms Section Motor Limit Hall-Sensor sensor- Number For- Brake Re- NiMH + less of cells ward MIN verse Lipo Sensor cable Auto Battery Cutt Off Very less grip less grip 1 Modified soft above 2.5T to 7.5T yes recommended 4 to 7 yes 15% no 4,8 / Automatic 8,4V Lipo and 4-7 Cells 2 Modified medium above 2.5T to 7.5T yes recommended 4 to 7 yes 15% no 4,8 / Automatic 8,4V Lipo and 4-7 Cells 3 Modified race above 2.5T to 7.5T yes recommended 4 to 7 yes 15% no 4,8 / Automatic 8,4V Lipo and 4-7 Cells 4 Modified aggressiv above 2.5T to 7.5T yes recommended 4 to 7 yes 15% no 4,8 / Automatic 6,0V Lipo and 4-7 Cells 5 above Modified Reverse after 4,5T full breaking to 7.5T yes recommended 4 to 6 yes 15% yes 4,8 / Automatic 7,2V Lipo and 4-7 Cells X 6 above Modified Reverse after 4,5T to 7.5T full stop yes recommended 4 to 6 yes 15% yes 4,8 / Automatic 7,2V Lipo and 4-7 Cells 7 above erforderlich Sport 8.5T für max. Max. Punch High Speed to 23.5T Leistung no 4 to 6 yes 15% no 8 above erforderlich Sport 8.5T für max. Medium to 23.5T Leistung Punch Super High Speed no 4 to 6 yes 15% 9 above erforderlich Sport für max. Mega Punch 8.5T Mega High to 23.5T Leistung Speed no 4 to 6 yes 15% normal grip high grip X Recommended classes Offroad 2WD, 4WD, 1:12, Pro10 X Saloon cars, Offroad 2WD, 4WD, 1:12, Pro10 X Saloon cars, Offroad , 4WD, 1:12, Pro10 X Saloon cars X X all models + fun classes X X X all models + fun classes 4,8 / Automatic 8,4V Lipo and 4-7 Cells X X X Saloon cars, Offroad 2WD Standard, 1:12 Attention! Adjust gear ratio, check motor temperatur! no 4,8 / Automatic 8,4V Lipo and 4-7 Cells X X Saloon cars, Offroad 2WD Standard, 1:12 Attention! Adjust gear ratio, check motor temperatur! no 4,8 / Automatic 8,4V Lipo and 4-7 Cells X X Saloon cars, Offroad 2WD Standard, 1:12 Attention! Adjust gear ratio 50 % shorter, check motor temperatur! X 5 Selecting Programs Power Program 3 KFirst of all select one of the programs in the overview! KPress the setup-key for more than 3 seconds until you hear a sound. Now you move the throttle trigger from full speed to full brake as much as it corresponds to the number of the program. Please note, that the last movement to the neutral position counts as one. Every movement will be confirmed from the speed controller with a sound, which also refers to the program number. The last movement to the neutral position is also counted as one, but you do not hear a sound for that. 2 full throttle 3 full brake neutral KPress the setup key for more than 3 seconds KThrottle trigger on full speed (speedo cheeps 1x), now full brake (speedo cheeps 1x) and back to the neutral position (3) KController confirms after 10 seconds the power program 3 with 3 sounds. Power Program 4 Power Program 1 1 1 1 neutral Power Program 2 4 full brake full throttle KPress the setup key for more than 3 seconds KThrottle trigger remains in neutral position KController confirms after 10 seconds the power program 1 with 1 sound. OOOOO 2 neutral KPress the setup key for more than 3 seconds KThrottle trigger on full speed (speedo cheeps 1x), now full brake (speedo cheeps 1x), full speed again (speedo cheeps 1x) and back to the neutral position (4) KController confirms after 10 seconds the power program 4 with 4 sounds. Power Program 5 1 2 full throttle neutral KPress the setup key for more than 3 seconds KThrottle trigger on full speed (speedo cheeps 1x) and back to the neutral position (2) KController confirms after 10 seconds the power program 2 with 2 sounds. 6 1 OOOOO 2 full throttle full brake 5 neutral KPress the setup key for more than 3 seconds KThrottle trigger on full speed (1), full brake (2), full speed (3), full brake (4) and back to the neutral position (5) KController confirms after 10 seconds the power program 5 with 5 sounds. Power Program 6 1 Power Program 9 OOOOO 2 6 full brake full throttle neutral KPress the setup key for more than 3 seconds KThrottle trigger on full speed (1), full brake (2), full speed (3), full brake (4), full speed (5) and back to the neutral position (6) KController confirms after 10 seconds the power program 6 with 6 sounds. Power Program 7 1 OOOOO 2 full throttle full brake 9 neutral KPress the setup key for more than 3 seconds KThrottle trigger on full speed (1), full brake (2), full speed (3), full brake (4), full speed (5), full brake (6), full speed (7), full brake (8) and back to the neutral position (9) KController confirms after 10 seconds the power program 9 with 9 sounds. Please note: The timing of the motor must be set to minimum, if possible! Finalizing the Programming 1 OOOOO 2 7 full brake full throttle neutral KPress the setup key for more than 3 seconds KThrottle trigger on full speed (1), full brake (2), full speed (3), full brake (4), full speed (5), full brake (6) and back to the neutral position (7) KController confirms after appr. 10 seconds the power program 7 with 7 sounds. Power Program 8 1 OOOOO 2 full throttle full brake 8 After the selection of the program, the speed controller is ready for use. Please note: After each program selection the gear ratio has to be exactly adjuste and must be checked after a short running time with the temperature of the brushless motor. It is sufficient to strongly grasp the motor with three fingers. If you can hold the motor for appr. 4 seconds tight, it is o.k. If not, the temperature is raised over 65 °C. In this case you have to change the gear ratio immediately by using a smaller pinion to avoid any serious damage or destruction of one of the components. After a new speed controller/transmitter-setup you have to select the power program again. If you do not reselect the power program, the speed controller is using the power program 3! neutral KPress the setup key for more than 3 seconds KThrottle trigger on full speed (1), full brake (2), full speed (3), full brake (4), full speed (5), full brake (6), full speed (7) and back to the neutral position (8) KController confirms after 10 seconds the power program 8 with 8 sounds. 7 7. Features K6 selectable Modified Programs = graded driving profiles for different cars and tracks. K3 selectable Sport Stock Programs with adjustable motortiming = more power and top speed for the serious racer. Attention: the timing of the motor must be set to minimum, if possible. KPower-Programs can be changed quite simple = selectable with the throttle trigger of the transmitter. KAutomatic recognition of sensor and sensorless motors = no setup for different motors necessary. KPDM Precice Digital Drive Mode Technology = exact, sensitive and controllable driving feeling results in constant fast lap times. KAuto Battery Cut Off = automatic recognition and intelligent monitoring of the batteries to avoid deep discharging. KTPI Temperatur monitoring and display = safe protection against thermal damage. KCCD Copper Cool Drive Technology = 8 track conductors of copper for minimized power loss and for low temperature of the speed controller. KPCB Integrierte Powercapacitor = maximum protection without high resistant cables. KDCB Drive Controlled Break Software = rational speed controlled breaking efficiency at all speeds. KRe-Charging = battery will be charged at breaking for more running time and power. KMega BEC System = powerful and stable for interference free operating. KMegaFlex Powercable = high flexible 4,0 mm² und 2,5 mm² LowDrillsilver-stranded wires for maximum power K PC-Interface compatible = more settings for the professional racer. 8 8. Additional Features for the Serious Racer The following settings can be done with the optional PC-interface (# C130208). These settings can be preset at home with an PC/laptop or at the racetrack. KPower-Programs = Display of the different power programs KProfile memory = save user profiles with details about the tracks KLaunch Control = adjustable start automatic for maximum acceleration KCurrent limiter = configure the motor for the track conditions KAutomatic brake = adjustable braking power at neutral throttle for tight corners KBrake MIN. = adjustable minimum braking power when starting braking KBrake MAX. = adjustable maximum braking power at full brake KPower-acceleration curve = selectable from soft/linear/aggressive for an optimized adjustment to track and style of driving KAutomatic-Drive = adjustable minimum acceleration at throttle trigger neutral position KLow battery recocnition = manual adjustable or automatic mode KTransmitter settings = checking of the detailed transmitter signal of full throttle, full brake and neutral 9. Diagnostics It can have several reasons if your CS-Rocket Competition speed controller does not work properly. First check all components connected to the speed controller to exclude other failure sources. If you can not solve the problem, we recommend to perform a reset to the factory settings before you send the speed controller for repair to us. The following table can help you with the diagnostic: Diagnostic Diagnostic Display/failure Reason Correction Display/failure Reason Red LED off Yellow LED off No sound Battery voltage 4,8V Charge battery Plugs dirty or faulty Clean plugs and check connections! Motor cables are mixed Connect the motor up cables properly Red LED flashes 1x or Sound 1x Battery voltage too high! Use battery with correct voltage! Car drives backwards or Dirction of rotation of the motor is wrong at acceleration Red LED flahes 3x or Sound 3x No Motor connected Connect brushlessMotor Motor not properly connected Check motor cables and connect the right way! Motor defect Check motor and exchange Motor does not start but Steeringservo works Motor does not start and Steering Servo does not work Receiver cable is wrong Check connection and or not connected reconnect cable, Receiver plug in place 2 Receiver cable defect Exchange receiver cable Receiver cable of the controller is wrong or not connected Check connections an reconnect: Servo = Receiver plug in place 1 Speed controller = Receiver plug in place 2 Receiver defect Exchange Crystal defect Exchange Transmitter defect Exchange Controller is getting Drive train turns not too hot free or Wrong gear ratio Controller switches off Motor defect Brake too weak Correction Check and make it running smooth Use smaller pinion Exchange motor Permanent operation Break driving and wait for the controller cooling down Gear ratio much too long Use a very much smaller pinion Setting of the end point Set end point at the of the transmitter is not tranmsitter to 100 % high enough and perform a transmitter set up Motor has not enough Gear ratio wrong power Transmitter-Setup or mixed up not enough top speed Motor defect Use a smaller pinion Set end point at the transmitter to 100 % and perform a transmitter set up Exchange motor Too much wear of the motor 9 Diagnostic Display/failure Reason Correction Interference Power of the transmitter too low Check batteries and antenna of the transmitter. Antenna must be fully extended! Antenna in the car is rolled up or shorter than 35 cm Refer to installation Antenna is near the Refer to installation speed controller and/or the battery cables Receiver defect Exchange receiver Crystal defect Exchange crystals Car does not stop Set the trim triggers at the transmitter. Water or humidity damage, send in for repair! 10.Reset to Factory Defauls When performing a reset to the factory defaults, all data of the program will be set to the factory defaults. All setup parameters done are lost. The speed controller is set to all values when you bought it. a) Remove the sensor cable if it is connected. b) Press the setup key and hold it pressed. c) After 3 seconds you hear a sound, hold the setup key pressed until 3 short and 1 long sound can be heard. d) Now let the setup key off e) Both LED´s go off. The controller now deletes all parameters of the selected program. This will be confirmed with additional sounds. At the end , both LED`s go on. This procedure takes some time, please wait! 10 f) Switch off the speed controller now and wait for appr. 2 Seconds. Now switch on the speed controller again and perform a transmitter setup. Please note, that you should set up the transmitter before as described in 5.d to g. g) Select the power program you nee as described above. 11.Safety Precautions - Not for children below 14 years. No toy! - The CE-certificate of this speed controllers does not exempt from the obligation to handle this product with care. - Use only motors from CS-ELECTRONIC which are intended for the used voltage range! - Use only high performance batteries from CS-ELECTRONIC. - Do not leave you RC-model unsupervised as far as a battery is connected. In case of a failure this can be cause fire. - The speed controller and other electronic components should never get in touch with water. The speed controller must be protected against dust, dirt, humidity and vibration. - If the motor is connected to the speed controller, the motor may never be run with an external battery. This destroys the speed controller and the guarantee is lost. - Never reverse connect the polarity of the speed controller. Use a reverse connected protection plug systems. Avoid short circuits and blocked motors. - All cables and connections must be isolated properly. Short circuits can destroy the speed controller. - The speed controller may be only used in battery driven, radio controlled models. Another use of the speed controller is not permitted. The use in a model for carrying of passengers is forbidden! - First check the holdup of your radio control (hold you model tight) before using you model. - It is not allowed to modify the speed controller in another way as described in this manual. - Exclusion of liability: The retention of the assembly and the users-instruction as well as the conditions and methods of installation, operating, use and maintenance can not be supervised by CS-ELECTRONIC. Therefore CS-ELECTRONIC does not take over any liability for losses, damages or costs, which result from a faulty use or operating or are connected in any kind to such conditions. - Only components and spare parts recommended by CS-ELECTRONIC may be used. Use only suitable plugs original from CS-ELECTRONIC. - Please be sure, that your transmitter is working on a free frequency, is switched on and the throttle trigger is in neutral position before connecting the speed controller and using the model. 12.Technical Data Operating voltage: Number of cells NiMH, NiCd: Number of cells LiPo: Constant current (brushless M.) Shorttime current 10s: Pulse current at 25°C: Inner resistance at 20°C appr. Voltage loss at 20A app. Temperature protection: Low voltage protection: BEC-Power: Max. BEC dissipation power: Clock frequency: Dimension in mm incl. capacitor appr.: Weight without cables appr.: Weight with cable appr.: 4,8 - 8,4 V 4-7 2 120 A 250 A 800 A 0,0004 Ω 0,008 V yes automatic/adjustable 5,8 V/short time 4 A 2,5 W 2/4/8/16 kHz 50 x 31 x 27 60 g 95 g 13.Accessories C130201 C130202 C130203 C130204 C130205 C130206 C130207 C130208 C130209 Receiver cable, 5 cm, black Receiver cable, 10 cm Receiver cable, 20 cm Sensor cable, 11 cm black for CS, LRP, GM, Novak Sensor cable, 20 cm black for CS, LRP, GM, Novak Silicone cable Megaflex 11AWG black, 4,0 mm², 1m Silicone cable Megaflex 12AWG black, 2,5 mm², 1m CS-Rocket Competition Interface with USB Adapter Cooling fan for CS-Rocket Competition, 30x30x6, incl. 4 x screws M2,5x8 C130210 Sensor cable adapter 14.24 Month Guarantee CS-ELECTRONIC GmbH, Johann-Karg-Str. 30, D-85540 Haar b. München, Germany guarantees this product for a period of 24 months from date of purchase. This guarantee applies only to such material of operational defects which are present at the time of purchase. Damages due to wear, overloading, incompetent handling are not covered by this guarantee. The users legal rights and claims under guarantee are not affected by this guarantee. Please check the product carefully for defects before you make a claim or send the item back to us, since we are obliged to make a charge of 15,- EUR, if the product is found free of faults. We can opnly handle a guarantee if the used motor is also send to us together with a detailed description of the failure including the used gear ratio and the used battery. 11 15.Service/Returns Freight collect can not be accepted, Please inform us about your complete address for question we maybe will have. Please do not forget to include your telephone number and (if existent) your email-address as well as your mobile number. If you are a registered dealer of us, please give us your customer code. CS-ELECTRONIC GmbH, Johann-Karg-Str. 30, D-85540 Haar b. München, Tel.: +49 89 436 302 99-0, E-Mail: [email protected] In case of questions you can call or email us. 16.CE Conformity Declaration: We hereby declare that the following product CS-Rocket Competition Best.Nr.: C130200 conforms with the essential protective requirements as laid down in the directive for harmonizing the statutory directives of the member states concerning electro-magnetic interference (2004/108/CE) and the low voltage guideline (LVD) (2006/95/CE). This product has been tested for electro-magnetic interference in accordance with the following norms: EN61000-6-1 EN61000-6-3 This declaration was produced by CS-ELECTRONIC GmbH, Johann-KargStrasse 30, 85540 Haar bei München and is valid for the manufacturer/ importer of the product. Norbert Forster 85540 Haar, 30.01.2009 17.Environmental Protection Notes When this product comes to the end of its useful life you must not dispose it in the ordinary domestic waste. The correct method of disposal is to take it to your local collection point for recycling electrical and electronic equipment. Individual markings indicate which material can be recycled. You make an important contribution to the protection of our common environment by recycling the basic materials or recycling redundant materials in other ways. Remove batteries from your device and dispose them at your local collection point for batteries. In case of RC-models you have to remove electronic parts like servos, receivers or speed controllers from the product and these parts must be disposed of with a corresponding collection point for electronic scarp. Please contact your municipal administration for the details of the disposal facility in question. CS-ELECTRONIC GmbH, Johann-Karg-Str.30, D-85540 Haar bei München Telefon: +49-89-43630299-0 , Fax: +49-89-43630299-9 email: [email protected], www.cs-electronic.com, www.cs-shop.de Amtsgericht: München HRB 170180, USt-IdNr. DE252920550, Geschäftsführer: Norbert Forster 12


