1
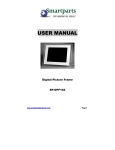
USER MANUAL
Digital Picture Frame
SP-DPF56N
www.smartpartsproducts.com
Page 1
Table of Contents
Overview .................................................................................................... 4
Features ..................................................................................................... 5
Getting Started ...........................................................................................5
a. Unpacking your Digital Picture Frame
5
b. Removing the protective plastic film
5
c. Attaching the Fold Out stand
6
d. Connecting the frame to the Power Supply
6
e. Connecting the frame to a computer
6
f. Connecting the frame to a TV
7
Changing and Adding Pictures ……………………………………….....7
a. View contents on your memory card
7
b. Formatting pictures from your computer
8
c. Using Smartparts website for HELP
8
Product Diagram ………………………………………………………….9
Viewing Pictures …………………………………………………..……..13
a. Turning the frame on
13
b. Selecting the mode
13
c. Picture Preview Mode
14
d. Viewing a picture
14
e. Rotating a picture
14
f. Slideshow mode
14
g. Slide Transition
15
h. Delete a picture
15
i. Zoom Function
15
www.smartpartsproducts.com
Page 2
Special Modes ………………………………………………………..…..16
a. Sleep Timer
16
b. Sleep Mode
16
Video Mode ……………………………………………………………....16
Warranty and Technical Support ……………………………………...17
www.smartpartsproducts.com
Page 3
Overview
¾ The SP-DPF56N Digital Picture Frame lets you view the digital
pictures from memory cards.
¾ You can enjoy or edit your photos any time and anywhere.
¾ The frame is an ideal way to display your digital photographs
¾ The Slide Show mode is a convenient method to display all
your picture in a continuous mode – it offers you many
pre –programmed transitions from slide to slide
¾ Most functions of your digital picture frame can be controlled
from the enclosed Remote Control
¾ The Digital Picture Frame doesn’t require a direct connection
to a computer – the build-in card reader can read memory
cards
¾ It supports most popular types of memory cards and file
formats
¾ The digital picture frame is a digital photo album – that let’s
you display hundreds of pictures – anywhere in your home or
office
¾ It can be connected to a computer and pictures can be uploaded (from computer to memory card) or downloaded (from
memory card to computer)
¾ The frame can also be connected to a TV and pictures can
be viewed on the TV screen
¾ Videos in the AVI format can be played on the Digital Picture
Frame
www.smartpartsproducts.com
Page 4
Features
¾ The SP-DPF56N supports JPEG and AVI files
¾ The resolution of the screen is 960 x 234 (5.6”)
¾ Compatible with: Compact Flash (CF), Secure Digital (SD).
Memory Stick (MS), Smart Media (SM) and Xtreme Digital
(xD) memory cards
¾ USB 1.1 connection – compatible with Windows XP and
Windows 2000
¾ The frame allows user to delete, rotate and/or pan pictures,
play Videos (AVI format), create slide shows and move
pictures between the memory cards and a computer
Getting Started
The following chapter provides step-by-step instructions on setting
up your Digital Picture Frame for the first time.
a. Unpacking your Digital Picture Frame
The box should include:
- SP-DPF 56N digital picture frame
- User Manual
- Remote Control
- Video Cable
- USB cable
- AC Power Adapter
- Fold out stand
- Sliver Color Frame
b. Removing the protective plastic film from the LCD panes
The digital picture frame ships with a protective plastic film on its
LCD panel to protect it from being scratched during the
manufacturing and shipping process.
We suggest you remove the film to improve the quality / clarity of
www.smartpartsproducts.com
Page 5
the picture. Please be advised however that the LCD screen
scratch easily and the film will protect it.
c. Attaching the fold out stand
Pls attach the fold out stand to the back of the frame. The stand is
designed to hold the frame in the viewing angle desired by you.
Simply slide the leg up or down to change the height of the stand
to alter the viewing angle.
d. Connecting the frame to the Power Supply
Use only the supplied AC power supply. Make sure that the
frame’s power switch is in the OFF position before you connect or
disconnect the power supply.
Plug the AC power supply only into a 120 VAC 60 Hz (regular
North American) wall outlets – connecting the frame to a different
power source or wall outlet will harm the unit and void the
warranty.
e. Connecting the frame to your computer (optional)
Use the supplied USB cable and connect the frame to your
computer.
The Hardware wizard will show that you connected a new device
and will recognize it as a disk drive.
No software needs to be installed. Just follow the start menu and
click on “My Computer” – your memory card will be listed under
“Devices with Removable Storage”. You can open it by double
clicking on the icon representing your memory card. Most likely
this device will be named after the manufacturer of your memory
card.
There will be no data available as long as you do not insert a
memory card into your frame.
Once you insert a memory you will see the respective drive on
your computer and you will be able to access your pictures and
the frame can act as a regular card reader.
Please note that the Digital Picture Frame will not display pictures
while it is connected to a computer. Please disconnect the USB
cable to view pictures.
www.smartpartsproducts.com
Page 6
f.
Connecting your digital picture frame to your TV
Please use the supplied Video cable and connect the Digital
Picture Frame to your TV. Use the “Video Out” connection on
your frame and plug the “yellow” connector of the cable into a
Video-In connection on your TV – it should be a yellow plug on
your TV.
Please switch the “Input” selector on your TV to find the source
for the Digital Picture Frame – just like connecting a DVD player
or VCR.
Now you can review the contents of your memory card on your
TV. Please use your remote control to operate the Digital Picture
Frame. In this mode the Digital Picture Frame uses your TV
screen as a display – the display on your frame will go black!
Changing & adding pictures on your memory card
The following chapter provides step-by-step instructions on how to
add and format pictures from your computer onto your memory
card for viewing in your Digital Picture Frame.
TECHNICAL ALERT:
The pictures have to be stored in the correct folder on your
memory for the Digital Picture Frame to display the pictures!
The pictures have to be stored in the right file format with the
correct file naming!
a. View Contents on your memory card
After you connect your frame to your computer you can see your
memory card under “My Computer” as an external drive. By
clicking on the symbol you will get access to the DCIM folder. All
pictures are stores in this folder and all NEW pictures HAVE to be
stored in this folder as well.
www.smartpartsproducts.com
Page 7
b. Formatting the Pictures from your computer
The preferred file format for the Digital Picture Frame is JPEG.
However, there are different variations of the JPEG format and
not all formats can be read by the Digital Picture Frame or your
Digital Camera.
We recommend using standard Microsoft picture editing software
to save your pictures in JPEG format. Even PHOTOSHOP or
PHOTOSHOP ELEMENTS files should be opened in a standard
Microsoft Picture Editor and saved as a JPEG file to the memory
card.
We also recommend naming the pictures without using
underscores or more then 4 number digits in the name.
c. Using Smartparts Website for HELP
We provide a useful tool on our website to help you:
- Save your pictures in the proper and readable
format
- Name your pictures so the Digital Picture Frame
can find and read it
- Save it in the proper resolution – so you can
maximize the space on your memory card and
speed up the functions in your Digital Picture
Frame
Please log on to www.smartpartsproducts.com and click on “My
Photos”.
Please register under your name – your access will be
immediate.
Now you can browse for the pictures on your computer and
upload and preview them in the frame illustrated on our website.
Once the file is uploaded you can just copy drag and drop or by
right – clicking on the picture and saving it into the DCIM file on
your memory card.
www.smartpartsproducts.com
Page 8
Product Diagram
a. Front view
1
2
3
1. LCD Screen
2. IR signal receiver
3. Front frame
b. Back view
The foldout stand is adjustable and can be rotated to use your
Digital Picture Frame to view pictures vertically or horizontally.
4
www.smartpartsproducts.com
5
Page 9
3
c. Left view
6
6. Video Out Port
7. Video In Port
8. USB Port
9. AC Port
7
8
9
d. Right view
10.SM/SD/MS/MMC/xD
card slot
11. CF card slot
10
11
www.smartpartsproducts.com
Page 10
e. Top view
21
12
13
20
14
15
16
17
18
19
12.Power
13. Power Light Indicator
14. Brightness
15. Color
16. Contrast
17. Top Slide Button
18. Page down / Slide
19. Right / 90°Rotate
20. Sleep / Next / Esc.
21. Enter
www.smartpartsproducts.com
Page 11
f.
Remote Control
M ODE
PHOTO/A VI SPEED UP SPEED DN N TSC/PAL
1
2
3
4
5
6
7
8
9
DELETE
FORM A T
Z+
PG UP
Z-
PG DN
SLIDE
EN TER
ESC
10
11
1
13
1
1
W AKE
SLEEP
DIGITAL PHOTO VIEW ER
Rem ote Control
SPR- LT04
www.smartpartsproducts.com
1
1
1
19
1.Mode
2.Speed UP
3.Delete
4.Format
5.Zoom +
6.Page UP
7.Zoom 8.Page Down
9.Slide
10.Speed Down
11.NTSC/PAL
12.Esc.
13.Enter
14.Up
15.Right
16.Left
17.Down
18.Wake
19.Sleep
Page 12
g. Changing The Battery
Note: Before using remote
control, please remove the
protective tab.
“+”Polarity is up
Hold the remote control, push the button right, and pull the button to
the outside. Then put the battery (Model CR2025) into the button with
“+” Polarity facing up, and then push it back to the place.
Viewing Pictures
a. Turning the Frame on
Connect your Digital Picture Frame to the AC adapter. Insert
a memory card into the respective slot.
Turn the power switch on.
b. Selecting the Mode
The first screen you will see are the symbols for the different
types of memory cards. Please select the type that
corresponds with the type of card you are using. Make the
www.smartpartsproducts.com
Page 13
selection by using the ENTER button.
The frame will display one or more folder symbols – you can
navigate from Folder to Folder using the cursor button on
your remote control or the NEXT button on your frame. To
select your folder (DCIM) please press ENTER.
The frame will display the next set of Folders inside your
DCIM folder – again make your selection and press ENTER.
c. Picture Preview
The frame will now preview all the pictures that are on the
card. The frame will display 9 pictures in the preview mode at
a time. You can scroll up and down using the PG UP and PG
DN buttons on your remote control
You can use your cursor button on your remote control or the
NEXT button on the Digital Picture Frame to move from one
picture to another.
d. Viewing a Picture
Once you selected your picture in the preview mode you can
display the full picture by pressing the ENTER button
e. Rotating a picture
If a picture was taken vertically – you can select the picture
and press the ROTATE button on your frame – the frame will
rotate the picture by 90 degrees. Pressing the ROTATE
www.smartpartsproducts.com
Page 14
button repeatedly will allow you to rotate the picture up to 360
degrees.
f.
Slideshow
Select any picture in the preview mode and press ENTER.
The press SLIDE on your remote control or frame.
The frame will display all your pictures in a slide show. It will
show all your pictures continuously.
To return to the PREVIEW mode – just press the ESC button
on your remote control.
g. Faster and Slower transitions from Slide to Slide
During your slide show – press the SPEED UP or SPEED
DOWN button on your remote control to speed up or slow
down the time a single picture is displayed.
h. Delete a Picture
In the preview mode you can choose a picture and delete it
from your memory card. Press the DELETE button on your
remote, followed by the ESC button. A warning will flash on
your screen asking if you want to delete. Confirm the deletion
by pressing the ENTER button
i. ZOOM IN or OUT
In case that the resolution of the picture is higher (1 Mega
pixel or more) then the display capabilities of the Digital
Picture Frame you can select a picture and press the Z +
button on your remote control and zoom in. You can then use
the CURSOR button on your remote control to PAN the
picture (move the picture inside your frame) to review specific
areas in your picture.
Pressing the Z – button on your remote control will bring the
picture back to its normal display mode.
www.smartpartsproducts.com
Page 15
Special Modes
a. Sleep Timer
The frame will go into a Sleep / Stand By mode after a
pre-selected period of time. You can change the time.
Remove all memory cards and press the NEXT button on
your frame.
You can press the button repeatedly to set the Sleep
time in 5 min increments with a maximum time of 60 min.
Press ENTER to confirm your selection.
b. Sleep Mode
By pressing the SLEEP button on your remote control you can
put the frame into the SLEEP / STAND BY mode. Pressing the
WAKE button will put the frame back into operational mode.
.
VIDEO MODE
a. The frame can play digital video in the AVI mode. This is the only
format that can be read.
b. Press the PHOTO / AVI mode button on your remote control and
the frame will look for AVI / Video format files on your memory
card.
c. In the PREVIEW mode you can select your file by pressing
ENTER. The frame will start playing the video.
d. You can PAUSE the video by pressing the ESC button and stop it
by pressing the ESC button twice.
e. You can speed up or slow down the video by pressing the
SPEED UP and / or the SPEED DN buttons on your remote
control.
www.smartpartsproducts.com
Page 16
Warranty and Technical Support
Please refer to our website at www.smartpartsproducts.com for
Technical Support and Warranty information.
www.smartpartsproducts.com
Page 17