1
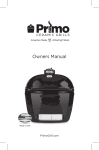
The revolutionary barbecue-grill!
Owner’s Manual
Get the most out of your grill!
COOK-AIR One (1) Year Limited Warranty
U.S., Canada
WARRANTY COVERAGE
EXCLUSIONS AND LIMITATIONS
COOK-AIR warranty obligations are limited to the terms set forth
below: Cata Marketing Inc. (“Cata”) warrants this product
against defects in materials and workmanship for a period of
ONE (1) YEAR from the date of original retail purchase. This guarantee is valid only for the original purchaser of the COOK-AIR
and only if the COOK-AIR is used for domestic purposes (non
commercial). This guarantee is not valid in the following cases: inappropriate use, modifications made to the barbecue-grill,
breakage during transport or if used for purposes others than
those specified in the Owner’s manual. If a defect exists, at its
option Cata will (1) repair the product at no charge, using new
parts, (2) exchange the product with a product that is new or (3)
refund the purchase price of the product. A replacement product/part assumes the remaining warranty of the original product
or ninety (90) days from the date of replacement or repair,
whichever provides longer coverage for you. When a product or
part is exchanged, any replacement item becomes your property
and the replaced item becomes Cata’s property. When a refund
is given, your product becomes Cata’s property.
This Limited Warranty applies only to COOK-AIR products manufactured by or for Cata that can be identified by the “COOKAIR” trademark, trade name, or logo affixed to them. The
Limited Warranty does not apply to any non-COOK-AIR products. COOK-AIR and its Authorized Service Providers are not liable for any damage to or loss of any non-COOK-AIR product or
part not covered by this warranty. This warranty does not apply:
(a) to damage caused by accident, abuse, misuse, misapplication,
or non-COOK-AIR products; (b) to damage caused by commercial
use of this product; (c) to a product or a part that has been modified without the written permission of Cata; or (d) if any COOKAIR serial number has been removed or defaced.
THIS WARRANTY AND REMEDIES SET FORTH ABOVE ARE EXCLUSIVE AND IN LIEU OF ALL OTHER WARRANTIES, REMEDIES
AND CONDITIONS, WHETHER ORAL OR WRITTEN, EXPRESS OR
IMPLIED. CATA SPECIFICALLY DISCLAIMS ANY AND ALL IMPLIED
WARRANTIES, INCLUDING, WITHOUT LIMITATION, WARRANTIES
OF MERCHANTABILITY AND FITNESS FOR A PARTICULAR PURPOSE. IF CATA CANNOT LAWFULLY DISCLAIM IMPLIED WARRANTIES UNDER THIS LIMITED WARRANTY, ALL SUCH
WARRANTIES, INCLUDING WARRANTIES OF MERCHANTABILITY
AND FITNESS FOR A PARTICULAR PURPOSE ARE LIMITED IN DURATION TO THE DURATION OF THIS WARRANTY. No COOK-AIR
reseller, agent, or employee is authorized to make any modification, extension, or addition to this warranty.
OBTAINING WARRANTY SERVICE
If you purchased the product in the U.S. and Canada, send the
product carefully packaged, freight and insurance prepaid to
any COOK-AIR Authorized Service Provider located in U.S. and
Canada. To locate a COOK-AIR Authorized Service Provider refer
to our web site at www.catamarketing.com or call our customer
service. When you contact the COOK-AIR Authorized Service
Provider, you will be asked to furnish your name, address, telephone number, and proof of the original purchase (receipt) containing a description of the product(s), purchase date, and the
appropriate COOK-AIR serial number(s).
CATA MARKETING INC. IS NOT RESPONSIBLE FOR DIRECT, SPECIAL, INCIDENTAL OR CONSEQUENTIAL DAMAGES RESULTING
FROM ANY BREACH OF WARRANTY OR INNAPROPRIATE USE
CONDITION, OR UNDER ANY OTHER LEGAL THEORY, INCLUDING
BUT NOT LIMITED TO LOST PROFITS, DOWNTIME, GOODWILL
DAMAGE. Some states and provinces do not allow the exclusion
or limitation of incidental or consequential damages or exclusions or limitations on the duration of implied warranties or conditions, so the above limitations or exclusions may not apply to
you. This warranty gives you specific legal rights, and you may
also have other rights that vary by state or province.
2
Customer Service
INSTRUCTIONS NOTICE
AVIS
Do not return
this product to the store.
1. Do not attempt to repair or adjust any electrical or
mechanical components of this grill. To do so
would void your warranty.
For any inquiry,
please call Customer Service at ::
2. If you have any inquiries and/or comments regarding this grill or require help using it, please call
1 888 332•CATA (2282) to speak with a Customer
Service Representative.
1 888 332 • CATA (2282)
United States, Canada
3. For reference purposes, please staple or attach
your original sales receipt to this manual. Also,
take the time to write the product information
below. They will be useful when speaking with
one of our Customer Service Representatives.
(9.00 am - 5.00 pm Eastern time)
ORIGINAL PROOF OF PURCHASE
REQUIRED FOR WARRANTY SERVICE
Important information
Model number
Date of purchase
Serial number
Name of store
© 2009 Cata Marketing , Inc. All rights reserved. COOK-AIR and the COOK-AIR logo are trademarks of
Cata Marketing , Inc., registered in the U.S. and Canada.
3
THE
LE GRIL-BARBECUE
REVOLUTIONARY
RÉVOLUTIONNAIRE
COOK-AIR BARBECUE
COOK-AIR
GRILL
Owner’s Manual
Congratulations! A unique experience awaits you thanks to the state-of-the-art COOK-AIR barbecue grill!
Outdoor cooking will never be the same! COOK-AIR is a true little marvel that will never cease to amaze you!
Heat control is not a very common characteristic with barbecue
grills! However, COOK-AIR has a variable speed ventilator that
allows you to control the temperature and cooking time required for each food.
Furthermore, cleaning the unit is also very simple; you just have
to safely dispose of the small quantity of ashes remaining in the
combustion chamber.
Totally revolutionary!
Another great surprise awaits you with COOK-AIR! In addition
to giving you exceptional performance, thanks to its intense dry
cooking heat, COOK-AIR makes it possible to also smoke your
food. This is just one of the many simple techniques you will be
able to use with COOK-AIR… Go ahead and experiment!
To smoke food, you simply have to follow the simple steps provided. A few minutes before cooking is completed, turn off the
fan (OFF button) and replace the lid tightly. The food will absorb
a “barbecue flavor”, which is why it is important to use quality
fuel. You can also add 1 or 2 pieces of bark-covered wood, which
will increase the quantity of smoke. Depending on the kind of
wood you use, such as cherry, apple, hickory, maple, each will
give a unique aroma to your food.
Quick and efficient!
Thanks to a new combustion technology, COOK-AIR quickly
reaches a very high cooking temperature! It easily exceeds
1,000° F. Approximately four to five (4-5) minutes after starting
the unit, you are ready to cook hamburgers, hot dogs, chops,
steaks, sausages, chicken, fish or any food of your choice! Once
you are done cooking, COOK-AIR cools off just as quickly simply
let the fuel residue burn (+/-15 minutes)!
WARNING: Once you are done cooking, you must restart the fan
to allow the wood to burn completely.
The new COOK-AIR barbecue-grill promises culinary experiences
full of great moments. However, since it is a highly revolutionary
product made and designed with advanced technology, it is imperative that you read this user’s manual carefully. Once you
fully understand the features and how it operates, you can make
the most of all it has to offer!
Simple and precise!
No more charcoal bags or heavy gas tanks!
From now on, all you will need is some solid wood fuel and the
COOK-AIR fire starter. It’s simple, clean, easy to store and to use!
Solid wood fuel is a very safe, available and renewable energy
source and therefore contributes to the conservation of our resources.
4
SAFE USE OF THE
COOK-AIR BARBECUE GRILL
(Warnings)
To get the most out of your COOK-AIR, it is essential to understand how it works and to always
follow basic safety standards. Read all the instructions carefully before operating your COOK-AIR
barbecue-grill :
Fig. 1-A
1. Keep the COOK-AIR barbecue-grill out of
reach of the children. Children should not operate this appliance.
2. Never use any form of liquid fuel
or liquid fire starter with your
COOK-AIR. Use as fire starter a
ball of crumpled paper or the
COOK-AIR paper fire starter.
Fig. 1-B
8. To refuel while cooking, tilt and slide the
cooking grid using the handle. Always use
3. Never use charcoal or chemicallytongs to add wood. Do not never attempt to
treated wood as fuel because it produces a lot
remove or lift the cooking grid that has food
of creosote and emits toxic gases. Also, never
on it.
use wood from coniferous trees, such as cedar,
fir, spruce or others. For better results, use the 9. Always remove excess fat from food and
drain marinated meat in order to reduce exCOOK-AIR solid wood fuel. You can also use
cessive flare-ups.
blocks of dry hardwood species as fuel.
4. The combustion chamber should never be 10. The lid on the COOK-AIR should never be tightly closed, except when smoking food. When
filled of wood more than three quarters full.
smoking food, the control button must be in
5. Always use the fan on low speed (level 1) for
the OFF position for a maximum of 5 to 7
ignition (30 to 45 sec.) then on high speed
minutes only, otherwise the heat could move
(level 5).
to the lower section and damage the electrical mechanism. Take note that setting the fan
6. To avoid fire hazards, always put the cooking
control on minimum speed (level 1) or turning
grid properly positioned before pressing the
it off would cause the unit to smoke.
high speed control button (level 5).
11. When you are finished cooking, set the fan
7. To handle your cooking grid safely, always inon medium (level 2 or 3). Fuel residues will
sert the handle (fig. 1-A) in one of the 4 slots
burn safely.
designed for this purpose (fig. 1-B).
5
clothing directly above the grill while the unit
12. After each use of your grill, always make sure
is in use. This could result in serious burns.
the ashes are completely cold before removing
them. Put the ashes or remaining wood in a
19. Never move the appliance while in use or hot.
nonflammable container.
20. Always allow the appliance to cool before
13. Always remove the batteries before transmoving or storing.
porting the unit or storing it for a long period
of time.
21. Always make sure that the vinyl cover is properly placed and that the cord is securely
14. Never use your COOK-AIR indoors or in en(fig. 2-A) below the handle ring (fig. 2B)
closed areas, such as a tent or a garage.
before transporting the unit (fig. 2-C).
15. This appliance should never be left unattended while in use.
16. To avoid burns, never touch the cooking grid
or exterior of your COOK-AIR while in use.
Always use the wood handles or the handle
ring.
Fig. 2-A
17. To avoid burns, always install the warming
rack before grill ignition. Always allow the
grill is completely cold before manipulate or
remove the warming rack.
Fig. 2-B
Fig. 2-C
18. Because of the intense heat produced by
COOK-AIR, never put your face, hands or
ALWAYS BE EXTREMELY CAREFUL WHEN USING
AN APPLIANCE THAT PRODUCES SEVERE HEAT
6
COOK-AIR INSTALLATION AND ASSEMBLY
List of accessories
The COOK-AIR barbecue grill is
fully assembled. Using a screw
driver and a pair of pliers, firmly
install the handle on the lid
(ill. 1). Simply follow the instructions below and it will be ready
to use.
AC adaptor (ill. 2)
Vinyl cover (ill. 6)
Cigarette lighter
adapter (ill. 3)
Tongs (ill. 7)
Cooking grid handle (ill. 8)
Burner brush (ill. 4)
Warming rack (ill. 5)
Ill. 1
Ill. 2
Ill. 3
Ill. 4
Ill. 7
Ill. 5
Ill. 8
Ill. 6
GRILL POWER SUPPLY
2. Remove the cover from the battery compartment.
There are three ways to supply your COOK-AIR with the 12 volts
DC energy source it requires:
3. Insert the batteries, carefully placing them according to the
polarity indicated.
1. “D” alkaline batteries
2. AC COOK-AIR adapter
3. Automobile cigarette lighter adapter
4. Check that the batteries are correctly installed by pressing the
control button (ON); the fan motor should start.
5. Replace the cover on the battery compartment.
Batteries
Once the batteries are installed, COOK-AIR becomes totally
portable. The batteries last up to 20 hours on high speed and
even more on low. For your cooking to be a success, it is important to sear the meat. COOK-AIR is amazing when it comes to
doing this rapidly.
COOK-AIR uses eight (8) “D” alkaline batteries. To install the
batteries in your barbecue grill:
1. Remove the cover and cooking grid and turn the unit upside
down on a flat, level surface.
7
To close the lid with the warming rack inside, remove the rear
clamps from their anchored position on the side of the cooking
grid and pivot them inward (fig. 5-B). Lower the entire rack flat
and insert the 2 side clamps into the side of the cooking grid
(fig. 5-C).
COOK-AIR AC adapter
The AC adapter, supplied with your COOK-AIR, extends battery
life and allows to use the barbecue grill anywhere you have
access to electrical power supply. For safe use, always follow the
following recommendations. To install:
1. Plug the adapter cord into the intended socket (fig. 4-A and
4-B) then plug the other end into an approved electrical
source. The barbecue-grill can now operate normally.
Fig. 5-B
Fig. 5-C
Please take note that you will not be able to tightly close the
grill lid for smoking food when the warming rack is installed.
Fig. 4-A
Fig. 4-B
Control panel
2. Be careful when unplugging the COOK-AIR AC adapter. Never
pull on the cord; you could damage the cord or the grill’s
socket.
The control panel of your COOK-AIR barbecue grill was designed
for easy use (fig. 6). Here is how it works:
Cigarette lighter adapter
The COOK-AIR 12-volt cigarette lighter adapter is very versatile.
It allows for maximum use. Plug it in your car, motor home,
trailer, boat or into any other 12-volt energy source. Using this
adapter will allow you to enjoy your COOK-AIR everywhere
without using your batteries.
Fig. 6
Warming Rack
Your COOK-AIR barbecue
grill is equipped with an
easy to install warming rack
(fig. 5-A). It will be very useful to warm up hot dog or
hamburger buns. If you
wish to install or remove it,
it takes just a few seconds.
Fig. 5-A
ON
(ON) button: starts the fan.
OFF
(OFF) button: stops the fan.
The arrows: set the power level of the fan to the desired
level. The lowest level is (1) and the highest is (5). The
stronger the fan level, the hotter the cooking surface.
8
STARTING YOUR COOK-AIR
Follow these instructions when starting your barbecue grill.
Place the appliance on a flat, level surface at a convenient cooking height.
6. Wait 30 to 45 seconds and then, using the control button, set
the fan on high (level 5).
7. If necessary repeat the first steps to achieve full ignition.
About four or five minutes after ignition and depending on the
ambient temperature, your COOK-AIR should have reached its
cooking temperature. Select the heat output required for the
food you are cooking by varying the fan speed using the control
button.
Fig. 7
CAUTION: Allow a new appliance must to operate for 20
minutes before using it for cooking to burn off any residue on
the metal.
1. Remove the cover and insert the
handle in one of the four slots on
the cooking grid (fig. 7), then remove the cooking grid to be able
to access the combustion chamber.
Wood fuel
2. Place a ½ strip of previously folded
COOK-AIR fire starter paper (fig. 8) Fig. 8
at the bottom of the combustion
chamber. A ball of crumpled news
paper may be used if you do not
have any COOK-AIR fire starter
paper.
COOK-AIR uses an advanced design and patented technology
combustion chamber to reach very high thermal and combustion efficiencies.
Never, under any circumstances, use
lighter fluid, kerosene or any other Fig. 9
flammable liquid on COOK-AIR fire
starter paper or wood fuel.
COOK-AIR was designed to reach the highest combustion efficiency and works best when using COOK-AIR solid wood fuel. It
is therefore to your advantage to choose this source of fuel. All
you need is a lighter!
3. Ignite the COOK-AIR fire starter
using a long handled barbecue
lighter or fireplace match (fig. 9).
However, if you must prepare your own fuel, choose a very dry
hardwood species, such as maple, ash, hickory, apple, cherry or
oak. Each variety of hardwood will give food a unique flavour.
Hardwood chunks should measure no more than 5 cm (2”) by 5
cm (2”) and cannot be more than 7.5 cm (3”) thick. Branches up
to 5 cm (2”) in diameter can also be used if they are cut in
lengths no longer than 7.5 cm (3”).
Use only dry hardwood species as fuel. Green or wet wood can
produce smoke and reduce heat levels. Some softwood can
spark excessively.
4. Once the COOK-AIR fire starter Fig. 10
paper is well ignited, using the
tongs, carefully put a block of dry hardwood species or a
pellet of COOK-AIR solid fuel on it in the bottom of the
combustion chamber. Using the control button, set the fan
on low (level 1).
For greater combustion efficiency, the wood fuel should be piled
in the upper position (similar to a campfire) in the combustion
chamber, which should never be more than three quarters full.
Never, under any circumstances, use charcoal with your COOKAIR grill
5. Put the cooking grid back into place.
9
Cooking
(1,000F and +), COOK-AIR allows you to sear your meat and seal
in its natural juices. For meat 1 to 1.25“ thick (2.5 - 3 cm), you just
have to sear it on high for 1 1/2 minute on each side. For meat
¾ inch thick (2 cm), one minute on each side will suffice.
COOK-AIR is capable of reaching very high temperatures in
record time. You must become familiar with the fan control to
master the intensity of the cooking heat.
Once the meat is seared, given the very high temperature reached by the COOK-AIR, it is advisable to frequently turn the
meat (every 60 seconds) until the desired cooking is reached.
CAUTION: Always remove excess fat from food and drain marinated meat in order to reduce excessive flare-ups.
Contrary to other types of barbecue grills on the market, which
cannot reach the high temperatures required to sear meat
A new cooking experience awaits you if, just before your food
is cooked, you turn the control to OFF and place the lid on the
grill (5-7 minutes maximum). When fully ignited, the wood fuel
produces a smoked wood aroma that is absorbed by the food.
Every variety of wood fuel has its own characteristics and, consequently, produces a unique flavor and unrivalled taste.
To add wood fuel
If you must add wood fuel while cooking, turn the fan control
button to minimum speed (level 1).
Always use the supplied handle to slide the cooking grid. NEVER
PUT THE HOT COOKING GRID DOWN ON ANOTHER SURFACE,
IT COULD DAMAGE IT.
Add wood to the combustion chamber using the tongs provided. Slide back the cooking grid to its place and reset the fan
to the required speed to resume cooking.
The lid must be used only to smoke food that is almost fully
cooked and only for a maximum period of 5 to 7 minutes. The
fan must be completely stopped during this process.
COOK-AIR HINTS AND TIPS
3. Unit care:
• Protect your barbecue from bad weather
Maintenance
As previously mentioned, the COOK-AIR is a high tech appliance.
Minimum and regular maintenance is enough to ensure years
of outdoor cooking enjoyment. To clean the combustion chamber, first wait until the unit is cold, then:
• Carefully dry your barbecue when wet
• Use the vinyl cover when transporting your COOK-AIR and
to protect it in storage
• Store in a cool, dry location
1. First, set the fan on low (level1). Once the cooking grid is removed, loosen ash residues in the combustion chamber using
the supplied brush in a circular motion.
Storage
2. Remove the ashes safely and make sure that there is no
residue left in the chamber. Make sure that the burner holes
inside the combustion chamber are clear of debris. If needed,
clean the holes with an ordinary paperclip.
Before storing your COOK-AIR, clean the combustion chamber as
indicated above. Clean the cooking grid with regular household
cleaner and wipe all stainless steel surfaces with a damp cloth.
Make sure that the unit is in the OFF position to avoid draining
the batteries. For seasonal storing or when transporting, remove
the batteries from the appliance.
10
COOK-AIR PARTS LIST
C-001A Cover handle
Top cover C-001
C-003A Cooking grid handle
C-002 Grille
Cooking grid
C-003 Thermal pan
C-006 Inner casing cone
Combustion chamber C-010A
C-009 Inner casing tube
Bolt (3) C-032
C-011 Air chamber
C-012 Air tube
Disc baffle C-014
C-004 Mid outer housing
Ring handle C-021
C-016 Silicon grommet (3)
Base control housing C-015
C-023 Touch switch board
Air pump C-018
C-022 Circuit board
Base control cover
+ battery casing C-015A
C-032A Nut (3)
Battery door C-015B
C-015C Rubber ring
11
Try it with your favorite dishes and… bon appétit!
© 2009 Cata Marketing , Inc. All rights reserved. COOK-AIR and the COOK-AIR logo are trademarks of
Cata Marketing, Inc., registered in the U.S. and Canada.
Made in China for: CATA Marketing Inc. • Granby (Qc) Canada J2J1E9