1
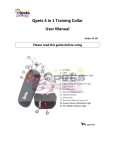
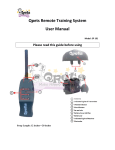
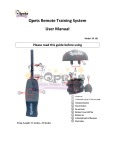
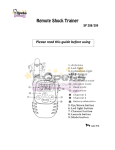
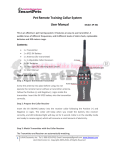
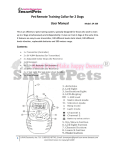
Qpets Rechargeable Remote Training System User Manual Model: SP 109 Please read this guide before using Strap Length: 12 inches---20 inches Thank you for choosing Qpets. Our mission is to make happy pet owners by providing quality pet products, the lasted tools and techniques to successfully train your pet. If you have any questions, please contact the our Customer Care Center at 1-909-923-8743 or visit our website at www.lavasat.com Qpets SP 109 is an effective rechargeable training system for 2 pets. It has 3 different static shock levels and 1 level vibration for both receivers at the same time. Range up to 400 feet. Table of Contents Components……………………………………………………………............2 Quick Start Guide………………..……………………………….……2 Step-1 Prepare the Remote Transmitter……………2 Step-2 Pair transmitter with the collar receiver…2 Step-3 Install the electrodes for the receiver….…3 Step-4 Adjust the collar to fit your pet………………3 How to check the static shock function…………………..…3 How to use the transmitter ………………………………………………..…4 How to charge the receiver…………………………………………….4 Important Tips…………………………………………………………..5 Customer Support Center………………………………………….6 1 Components: 1 x Transmitter with Antenna 2 x Receiver 1 x 9V 6F22 Battery 2 x Adjustable strap 1 x Pair of Rubber Electrodes and 2 x Test Light (for testing Shock Function) 1 x Metal Electrodes (for Receiver) 1 x USB Adapter 1 x User Manual 1 x USA Charge Cable Quick start Guide Step 1: Prepare the Remote Transmitter 1. Screw the antenna into place before using. Do not operate the remote trainer without a transmitter antenna. 2. Follow the Positive (+) and Negative (-) signs inside the transmitter. Insert the 9V 6F22 battery into the transmitter correctly. 2 Step 2: Prepare the Collar Receiver 1. The lithium battery installed in the receiver and can be recharged. Please use the charger that the product offers to charge it. The power indicator light of the receiver will flash when it is being charged. If the charging has be finished the indicated light of receiver will keep on. (Charging usually take 2 – 4 hours). 2. Please charge the receiver at least 8 hours for the first time. Note: Please always install the transmitter’s battery BEFORE install the receiver’s battery because it is a wireless training system. The transmitter has to be power on then the receivers are able to receive the code from transmitter. It might not work if you did not install the batteries correctly or the receiver has not been charged. Step 3: Install the Electrodes for the Receiver. Randomly pick one pair of electrodes and screw for receiver. (Please pick the same size electrodes for the receiver.) Step 4: Adjust the collar to fit your pet. To ensure a proper fit, please follow the steps below: 1. Put the strap on the receiver. 2. With your pet standing, centre the collar receiver where contact points are underneath your pet’s neck, touching the skin. 3. The collar receiver should fit snugly, yet loose enough to allow on finger to fit between the strap and your pet’s neck. If the strap is too long for your pet, cut off the excess length. 4. Allow your pet to wear the collar for several minutes and then re-check the fit. Check the fit again as your pet becomes more comfortable wearing the collar receiver. Note: We recommend you to use the vibration function first before starting the static shock and always start from the lowest level of static shock. 3 How to test the shock function 1. Use the TEST LIGHT attach on the both side of Electrodes (Metal). 2. Press Shock Button, the TEST LIGHT will blink or keeps on. How to use the transmitter Press Vibration Button on the transmitter (located in the middle of the transmitter). The Orange and Red LED indicated light on the transmitter will stay on when you press the button. The Vibration functions for both receivers at the same time. Button 1- 3 is for 3 different levels static shock for Collar 1. (Increase in static shock which the 3 Button is the strongest static shock) Press 1-3 Button the Orange LED indicated light of transmitter will stay on and the receiver will start static shock. Button 4- 6 is for 3 different levels static shock for Collar 2. (Increase in static shock which the 6 Button is the strongest static shock) Press the 4-6 Button the Red LED indicated light of transmitter will stay on and the receiver will start static shock. Vibration Button which in the middle of the transmitter. The Collar will get in the SAVE MODE if you do not use for 2 minutes and there is no LED indicated light on the receiver. Please gently shack it, it will be back to the STANDBY MODE. How to charge the receiver It is important to check the battery regularly by monitoring indicated light to ensure the collar is working properly. If the Receiver LED indicated light does not light up or static shock is weak please recharge the battery of receiver. If the Transmitter indicated light does not light up please replace the battery of transmitter. 4 Important Tips: (Please Read) 1. The valid distance of remote control means the straight-line distance between the transmitter and the receiver without obstacles in between. If there are interference signals or signal screening around, the actual remote control distance may vary. 2. The lifetime of the batteries vary according as how often you use the product. Your first battery may not last as long as you expectation. 3. The vibration function is for both receivers at the same time. 4. This product is for pet training. Good effect can only be achieved after a period of training. 5. This product is a wireless transmitting device; you MUST NOT use the remote control system in places like petrol stations or hospitals where mobile phones are prohibited. Patients using heart pacemaker are forbidden to use this product. 6. The Electrodes have to directly touch pet’s skin as it is very important to effective training. 7. This product is only for Pet Training, It is not a Regular Pet Collar. Please remove it from your pet at least 8 hours out of every 24 hours. 8. The Device does not design only for water resistant, not fully water proof. 9. If you do not use the transmitter please take the battery out from transmitter for saving battery life. 5 Customer Support Center Tel: 1-909-923-8743 Monday – Friday 8:30AM – 5:00 PM Pacific Time Email:[email protected] Add: LAVA Electronics Inc. 2580 E Philadelphia ST #D, Ontario, CA 91761 This product has a limited Manufacturer Warranty. Details of the warranty can be found on www.lavasat.com or by calling our Customer Support Center. Made in China 6 LAVA Electronics Inc 2580 E Philadelphia St #D Ontario, CA 91761, USA 1-909-923-8743 www.lavasat.com Email:[email protected] Copyright © LAVA Electronics Inc. 2010. All rights reserved.