1
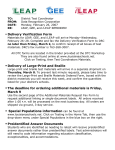
Internet Assessment System
Program Administrator
User Manual
Final Draft
11/11/2002
18
Table of Contents
Section 1: Introduction to Internet Assessment System ............................................. 1
Section 1.1 What is IAS?............................................................................................ 1
Section 1.2 Who Uses IAS?........................................................................................ 1
Section 2: How do Program Administrators Access and Use IAS? ............................ 2
Section 3: Program Administrator Functions ............................................................. 3
Section 3.1: Track Activity/Group Status................................................................... 4
Section 3.1.1: To View Status of an Activity and its Participants........................... 4
Section 3.1.2: To E-mail Participants: ................................................................. 10
Section 3.1.3: To Access an Archived Activity: .................................................... 11
Section 3.2: Journaling .............................................................................................. 12
Section 3.2.1: To Open and View a Journal Entry:.............................................. 12
Section 3.2.2: To Create a Journal Entry:............................................................ 12
Appendix A: Quick Reference Guide....................................................................... 14
Final Draft
11/11/2002
18
Section 1: Introduction to Internet Assessment
System
Section 1.1 What is IAS?
The Internet Assessment System is an online tool to help administer assessments for CCL
Programs. As a Program Administrator you will be able to use IAS to track the status of
your programs and participants. You also have the ability to communicate with CCL and
the participants via E-mail and Journaling.
Some of the functions IAS performs are:
Stores status information about online entry or scanned paper documents in a central
location.
Facilitates the distribution process.
Provides easier access to status information.
Provides avenues for communication.
Section 1.2 Who Uses IAS?
Participants who are registered and confirmed for an event/program.
Raters who have been selected to rate participants.
CCL Administrators (CASG) who have access to IAS administrative functions.
Note: CASG is the Client and Assessment Services Group within CCL. This group
manages participant assessments for all CCL programs.
Program Administrators have access to administrative functions such as:
o
o
o
o
Tracking Program Status
Tracking Participant Status
Communication with participants and CCL
Journaling
Note: Program Administrators do not have access to individual assessment data.
Page 1
Section 2: How do Program Administrators Access
and Use IAS?
You will receive an invitation letter via e-mail with your password. After you have
received this letter you will be able to access the Internet Assessment System using your
Internet browser. Make a note of your password and keep it for future reference. You
will need your password each time you access IAS.
Figure 1 - IAS Home Page
1. Click on the icon on your Desktop or Start Menu to activate your Internet browser.
Your browser is the application that gives you the ability to access the Internet. For
optimum efficiency use Internet Explorer 4.0 or Netscape 4.0 or higher as your
Internet browser.
2. Type the following URL in the address field of your Internet Home Page:
http://ias.ccl.org
3. Type your e-mail address in the E-mail address field. Your e-mail address is your
account identification.
4. Type your password in the Password field. You received your password in your
invitation e-mail.
5. Click LOG-IN.
6. Choose the Program Administrator role.
Page 2
Figure 2 - IAS Lobby
Note: You may have more than one role in IAS. The above screen shows various
access levels. In this manual we will discuss the role of Program Administrator.
Section 3: Program Administrator Functions
If you chose Program Administrator, a menu of administrator functions appears. There
are two functions available to Program Administrators: Track Activity/Group Status and
Journal.
Click on the function you want to use.
We will begin with Track Activity/Group Status.
Page 3
Figure 3 - IAS Program Administrator Function Menu
Section 3.1: Track Activity/Group Status
Tracking Activity/Group status gives you the ability to:
View the list of activities/programs in progress.
View status of returned assessments in each activity/program.
View archive of activities/programs that have occurred in the last 12 months.
Note: Activities/Groups move to archive 7 days after Program Start Date.
Administrators can view activity/group information for one year from the time the
activity is archived.
Communicate with participants and CCL via e-mail.
Click the Track Activity/Group Status option from the menu.
A blue letter links to a list of activities beginning with that letter. For example,
Leadership Development Program would be found by looking under “L”. A black letter
indicates that no activities begin with that letter.
Section 3.1.1: To View Status of an Activity and its Participants.
1. Click on the first letter of the title of the activity/program you want to view.
Page 4
Figure 4 - Activity Search Screen
A list of your company’s activities beginning with the letter you selected appears.
Figure 5 - Detail of Activity Search Screen
2. Click the Session Title you want to view.
The Status Page for the selected activity appears. This screen shows the
automatic notification schedule. On these dates the participants with valid e-mail
addresses will receive an e-mail to remind them of the assessment(s)’ status.
Page 5
Figure 6 - Activity Status Screen
Note: On the Activity Status page, if you mark the Disable Paper/Internet
Changes checkbox, it will prohibit participants from switching between on-line
and paper documents for their assessment forms.
3. Scroll down the page to see the list of participants registered for this program.
The Participant table will show the Participant Name, Test Packet Shipped, Status and
provide the ability to e-mail selected participants.
If the Test Packet Shipped cell displays, “Yes,” the Participant’s assessments have been
released and are available for completion.
The Status cell will display the current status of the assessments. Members of the Client
and Assessment Services Group at CCL enter these statuses. Status types are:
See Journal –Indicates there is a note in the Journal regarding the
participant’s assessments.
Scorable – Indicates the minimum scoring requirements for each
assessment have been met.
Complete – Indicates enough valid forms have been returned for feedback
in every category of each assessment.
4. Click on a participant’s name to view the status of the individual assessments.
The Participant Detail screen displays.
Page 6
Figure 7 – Participant Detail Screen
The Progress cell will display the progress a participant has made on each document
in their packet.
Not Accessed –Indicates the participant has not accessed this document.
In Process – Indicates the participant has accessed the document but has
not yet submitted it back to CCL.
Submitted – Indicates a participant has completed the survey and
submitted it to CCL.
Complete – Indicates that the submitted assessment has been successfully
received in the database.
Canceled – Indicates the form is no longer applicable for the participant to
complete. (This will rarely be seen)
5. Click a document name that is highlighted in blue to view details for returned
rater totals.
The Rater page appears.
Page 7
Figure 8 - Rater Table
The table shows the total number of raters the participant has assigned in each
category and the number of valid rater forms submitted to the Client and
Assessment Services Group at CCL.
6. Click the Previous link on the blue Taskbar to return to the previous screen.
Figure 9 – Participant Detail Screen
There are two (2) blue links in the upper right corner of the Participant Detail screen
that says View Journal Entry and Shipping Information.
7. Click View Journal Entry to see any notes entered for this participant. The
Journal entries for the participant appear.
Page 8
Note: Comments entered here should be specific to the assessment process and
should not include general comments about the program or participant.
Figure 10 - Journal Screen
Note: The Journal Entry screen will display options to View Participant Detail,
Return to Journal Selection, and Add a New Entry. The View Participant Detail
command takes you back to the Participant Detail screen. The Return to Journal
Selection takes you to the Journal Search screen. New Entries will be discussed
in Section 3.2.
8. Click View Participant Detail to return to the Participant Detail screen.
9. Click Shipping Information to view shipping status.
Figure 11 - Shipping Information Screen
10. Click the Previous on the blue Taskbar until you return to the Activity Status
Screen.
Page 9
Figure 12 - Activity Status Screen
Section 3.1.2: To E-mail Participants:
1. Scroll down to the participant list.
2. Mark the checkbox next to each participant you want to e-mail.
3. Click E-mail selected participants to send a custom message to those
participants.
Note: This is a good way to announce changes or send warning messages to
participants who have outstanding assessments.
Figure 13 - Compose E-mail Screen
Page 10
You can also E-mail CCL or E-mail All Participants.
1. Click E-mail all Participants to send an e-mail message to all the participants in
the program.
2. Click on the E-mail CCL button to send an e-mail directly to the Client and
Assessment Services Group at CCL. CCL will respond within one business day.
When you have finished viewing the status of a group:
3. Scroll to the top of the page and click Track Activity/Group Status on the menu
bar to view another group’s status or Click Choose a Function to return to the
main menu.
Section 3.1.3: To Access an Archived Activity:
Figure 14 - Track Activity/Group Status
1. Click Track Activity/Group Status on the menu bar.
2. Click Activity Archive in the column to the left of the alphabet.
3. Click the first letter of the name of the archived event you want to review. The
page showing the event’s details appears.
Note: This section is identical to the section that allows you to view status of
current activities.
4. Click the Previous link on the blue Taskbar to return to the previous screen.
5. Click Events Current in the column to the left of the alphabet to select a current
event or Click Choose a Function on the blue Taskbar to return to the main
menu.
Page 11
Section 3.2: Journaling
Journaling is a way to share information with CCL and other Program Administrators in
your organization.
Journals record notes or comments entered by both Program Administrators and CCL
Administrators.
Participants cannot access Journals.
All entries are automatically time and date stamped.
Once submitted, entries cannot be edited.
You can locate Journal entries by searching for a group or by participant name.
Section 3.2.1: To Open and View a Journal Entry:
1. Click on the Journal menu item on the Administrator Function page.
Figure 15 - Program Administrator Function Screen
2. Click the first letter of the event (activity/group).
Note: You can also search by the first letter of the Participant’s last name.
3. Click an event to open it. The list of participants for the selected group appears.
4. Click a participant’s name to open the Journal. The Journal entries for the
participant appear.
5. Click View Participant Detail to see the status of the participant’s documents as
discussed in Section 3.1.1.
Section 3.2.2: To Create a Journal Entry:
Page 12
1. Select the first letter of the Event or Participant from the Journal Page.
2. Click on the Session Title or Participant Name.
3. Click Add New Entry.
Figure 16 – Add Journal Entry screen
4. Type new Journal entry.
Note: At the end of your comment, please note your name in parentheses.
Journal messages are time and date stamped but do not reflect the name of the
person making the entry (as shown in figure 17).
5. Click Add Entry.
Figure 17 – Completed Journal Entries screen
The new Journal Entry will display on the Journal Entries page.
Page 13
Appendix A: Quick Reference Guide
How Do Program Administrators Access and Use IAS?
1. Click on the icon on your Desktop or Start Menu to activate your Internet browser.
Your browser is the application that gives you the ability to access the Internet. For
optimum efficiency use Internet Explorer 4.0 or Netscape 4.0 or higher as your
Internet browser.
2. Type the following URL in the address field of your Internet Home Page:
http://ias.ccl.org
3. Type your e-mail address in the E-mail address field. Your e-mail address is your
account identification.
4. Type your password in the Password field. You received your password in your
invitation e-mail.
5. Click LOG-IN.
6. Choose the Program Administrator role.
Track Activity/Group Status
To View Status of an Activity and its Participants:
1. Click on the first letter of the title of the activity/program you want to view.
2. Click the Session Title you want to view.
3. Scroll down the page to see the list of participants registered for this program.
The Participant table will show the Participant Name, Test Packet Shipped, Status and
provides the option to e-mail selected participants.
If the Test Packet Shipped cell displays, “Yes”, the Participant’s assessments have been
released and are available for completion.
The “Status” cell will show the current status of the assessments. Status types are:
See Journal –Indicates there is a note in the Journal regarding the
participant’s assessments.
Scorable – Indicates the minimum scoring requirements for each
Page 14
assessment have been met.
Complete – Indicates enough valid forms have been returned for feedback
in every category of each assessment.
4. Click on a participant’s name to view the status of the individual assessments.
The Participant Detail screen appears.
5. Click a document name that is highlighted in blue to view details for returned
rater totals.
6. Click the Previous link on the blue Taskbar to return to the previous screen.
7. Click View Journal Entry to see any notes entered for this participant. The
Journal entries for the participant appear.
8. Click View Participant Detail to return to the Participant Detail screen.
9. Click Shipping Information to view shipping status.
10. Click the Previous link on the blue Taskbar to return to the Activity Status
Screen.
To E-mail Participants:
1. Mark the checkbox next to each participant you want to e-mail.
2. Click E-mail selected participants. Type a subject then compose the message.
To E-mail All Participants or E-mail CCL:
1. Click E-mail All Participants to send a message to all participants in the
program.
2. Click E-mail CCL to ask questions or to request information. A CCL
representative will respond within one business day.
3. Click Send Message when you have finished composing the message. IAS
automatically sends the e-mail to the list.
4. IAS will then return you to the Activity Status Page.
5. Scroll up to the top of the page and click Track Activity/Group Status on the
menu bar to return to the Search screen to choose another activity.
Or
Page 15
6. Click Choose a Function to return to the main menu.
To Access an Archived Activity:
1. Click Track Activity/Group Status on the menu bar.
2. Click Activity Archive in the column to the left of the alphabet.
3. Click the first letter of the name of the archived event you want to review. The
page showing the event’s details appears.
4. Click the Previous link on the blue Taskbar to return to the previous screen.
5. Click Events Current in the column to the left of the alphabet to select a current
event or Click Choose a Function to return to the main menu.
Journaling
To Open and View a Journal Entry:
1. Click on the Journal menu item on the Administrator Function page.
2. Click the first letter of the Activity (Event) name. These letters will be
highlighted in blue. All current activities that begin with the letter you selected are
listed.
3. Click an Activity to open it. The list of Participants for the selected group
appears.
4. Click a participant’s name to open the Journal. The Journal entries for the
participant appear.
5. Click View Participant Detail to see the status of the participant’s documents.
To Create a Journal Entry:
1. Select the first letter of the Event or Participant from the Journal Page
2. Click on the Session Title or Participant Name.
3. Click Add New Entry.
4. Type new Journal entry.
5. Click Add Entry.
Page 16