1
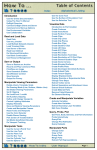
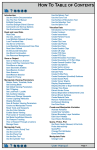
The AI Companion for Kids
iRSP
USER MANUAL
iRSP user manual
TYCHE
iRSP
1.iRsp introduction
1.1. What is iRSP?
iRSP is a robot software platform that helps develop and execute intelligent services required for a variety of
robot systems through a robot system design step and a service integration step
The AI Companion for Kids
1.2. iRSP architecture and features
MANUAL Contents
1. iRSP Introduction
2
1.1. What is iRSP?
2
1.2. iRSP architecture and features
2
1.2.1. iRSP System Architecture
2
1.2.2. iRSP Features
3
1.2.3. iRSP System Requirement
3
2. How to Use iRSP
4
2.1. iRSP Layout
4
2.1.1. iRSP Menu
5
2.1.2. iRSP Toolbar
6
2.2.iRSP View
10
2.2.2. Create a Project
10
2.2.3. Create a Plan
11
3. Print “Hello World”
12
14
3.1.2. Flow Control 2: Sync, Pause
16
3.2. Extension: Script
17 - 18
19
3.2.1. Plan Reuse: Group
19
3.2.2.UPnP Event Monitor
20
3.2.3.How to Use UPnP
21
3.2.4. UPnP Introduction
21
3.3. Practical use of iRSP
22
3.3.1.TYCHE with iRSP
22
3.3.2.TTS + RobotInfo
22
3.3.3. Change Expression + LED
23
3.3.4. Face Detection and Take Picture
23
3.3.5. Music + Sound
24
3.4. FAQ
Contents
13
3.1.1. Flow Control: If
3.1.3. The Control of UPnP Components: UPnP Action, UPnP Event
1
7-9
2.2.1. iRSP Basic
3.1. Declaration and Use of Variables: Variables
1.2.1. iRSP System Architecture
[iRSP System Architecture]
- iRSP consists of Plan Editor, intelligent Robot Control System (iRCS) which executes a plan, and UPnP Component Builder for an UPnP Component running on a robot.
- iRSP Plan Editor provides a Visual Programming Language (VPL) environment, which enables a user to build
robot programs conveniently via Drag-and-Drop. A Plan is a file that is stored in our own format called ‘Robot
Plan Markup Language (RPML)’, and this file is used for executing a robot program.
- iRCS is a runtime module of iRSP, and it executes a plan consists of various components and nodes. It provides ’Execution’, ‘Stop’, and ‘Pause’ functionalities, and all runtime errors can be verified in the plan editor.
- UPnP Component Builder is an Eclipse Plug-in based program which helps a user to develop UPnP components easily. With a component project wizard, a user can build an UPnP interface, and a template code is
generated automatically. A user can program the UPnP component by filling up the template code.
24
iRSP
2
TYCHE
TYCHE
Features
IRSP Layout
2. How to Use iRSP
1.2.2. iRSP Features
2.1. iRSP Layout
Easy to Use
Various
Components
Mobile Device
Environment
- Robot programming via drag-and-drop.
- Intuitive plan representation with nodes and arrows.
- Various components from low-level control components to complex components.
- Provides components for external devices.
- Provides algorithm components such as image processing, voice recognition.
- Identical UI on the mobile device environment with PC.
- Robot programming with iRSP on the mobile device environment.
1.2.3. iRSP System Requirements
The recommended environment of iRSP is as follows.
Item
Recommended
OS
Windows XP/Vista*, Linux, Mac OS X 10.5
CPU
P4 2.0GHz
RAM
1GB
HDD
150MB (With Simulator, 1GB)
Java version
JRE 1.6
[ iRSP Layout ]
* For Windows Vista/7, an administrator rights is required.
3
Features
iRSP Layout
4
TYCHE
TYCHE
iRSP Menu
IRSP Toolbar
2.1.1. iRSP Menu
2.1.2. iRSP Toolbar
Open File: Open the existing Plan File.
Close: Close the current plan editor.
Close All: Close all the plan editors.
Save: Save the current plan.
Save As: Save the current plan with a new file
New Project: Create a new project.
name.
Save All: Save all the open plans.
New Plan: Create a new plan file (.rpml).
Move: Move the selected plan file into anothFile
er project.
Rename: Change the name of a project or
a plan file. Refresh: Clear the results on the
Execution Mode: Choose a target (Robot/Simulator) that a plan will be executed
on.
plan editor.
Print: Print the current plan.
Connect: Connect to the runtime
Switch Workspace: Change the workspace
path, and restart iRSP.
Restart: Restart iRSP.
Deploy: Deploy the .rpml to the runtime
Exit: Terminate iRSP.
Execute: Run the current plan.
Undo Move Element: Reverse the effect of
recent executed job.
Redo: Do the recent canceled job again.
Pause: Stop the running plan temporarily.
Cut: Cut the selected contents.
Copy: Copy the selected contents.
Edit
Paste: Paste the contents of the clipboard.
Stop: Stop the running plan.
Delete: Delete the selected contents.
Select All: Select all contents of the current
Refresh: Clear the results shown on the plan editor.
plan editor.
Setting: Set the directory for the runtime
5
iRSP Menu
iRSP Toolbar
6
TYCHE
TYCHE
IRSP View
IRSP View
2.1.3. iRSP View
Console: Show the result of executing a plan.
Project: Show the all project located in the Workspace
and all plan files of those projects.
Components: A set of tools required for making
a plan. (Selection, Nodes, Comments) A user can
use it via drag-and-drop.
UPnP Explorer: Show the list of all available UPnP
- List of available Group nodes: Show the avail-
Components
able Group nodes. Show the name and input/
output parameters of the Group nodes.
: Refresh the list of UPnP Components
- List of available UPnP nodes: Show the available
: Create new folder for UPnP
UPnP components. Show the name and input/
output parameters of the UPnP components.
: Search for new UPnP
7 iRSP View
iRSP View
8
TYCHE
TYCHE
Components view
IRSP Basic
- Components view
Normal Selection mode.
2.2.1. iRSP Basic
2.2.2. Create a Project
1) Click ‘New Project’ in the iRSP Toolbar.
Select
This mode is for connecting nodes.
2) Specify ‘Project name’ and Click the Next button.
END: Exit the plan.
ASSIGN: Store a value in a variable.
PRINT: Print the contents of the node in the Console View.
PAUSE: Pause the plan for the amount of time specified in the input value
(unit: millisecond).
Node
IF: Branch the plan according to conditions.
SYNC: Only after all control flows that are connected to the node arrive,
the flow can move to the next nodes.
SCRIPT: Use BeanShell script in a plan.
GROUP: Use the existing plan as a Group node.
- You can change the location of workspace.
3) Within this page, you can choose a robot, and can add basic plan files, example plan files.
4) After clicking ‘Finish’ button, you can see that the required files for the project are created successfully.
Text Box: Comment input box in the form of a borderless rectangle.
Rectangle: Comment input box in the form of a bordered rectangle.
Comment
Rounded Rectangle: Comment input box in the form of a rounded rectangle.
Ellipse: Comment input box in the form of an ellipse.
9 Components View
iRSP Basic
10
TYCHE
TYCHE
Create a plan
Print Hello World
2.2.3. Create a Plan
1) Click the ‘New Plan’ button in the iRSP Toolbar.
3. Print ‘Hello World’
1) Adding a ‘Print’ node: Drag a ‘Print’ node from the ‘Component View’, and drop it into the ‘Editor View’.
2) First, choose the project which contains the new plan. Then, specify the name of the plan, and click
the ‘Finish’ button.
2) Entering the value into the ‘Print’ node: Type “Hello World” into the edit box of the ‘Print’ node.
3) Connecting a control flow: Connect the ‘Start’ node, the ‘Print’ node, and ‘End’ node in order. A control
flow is represented as an arrow. You can connect nodes by dragging from the edges of each nodes or
using the chain-shape ‘Connection Tool (
)’.
In the plan, ‘ Inputs’, ‘Local Variables’, ‘Outputs’, ‘Start node’, and ‘End node’ are created. ‘Inputs’ is for the
list of inputs of the plan, ‘Local Variables’ is the list of variables in the plan, ‘Outputs’ is the list of the
outputs of the plan. ‘Start node’ is where the plan starts, and ‘End node’ is the end point of the plan.
4) Execution: You can run the plan with ‘Execute (
)’. You can identify a current control flow with the
highlight of nodes. You will be able to watch the “Hello World”, which you typed in the edit box of the ‘Print’
node, in the Console View.
11
Create a plan
Print Hello World
12
TYCHE
TYCHE
Declaration
Flow Control
3.1. Declaration and Use of Variables: Variables
1) Adding a variable by clicking ‘Add Button (
)’ in the ‘Variables’ box located at the left-top part of the
‘Editor View’.
2) Specify the Type, Name, Initial value of the variable (from the leftmost box).
Declare an int-type variable ‘variable1’, and set the initial value of the variable as 100.
3) To use the new variable, add a ’Print’ node, and type the name of the new variable into the edit box of
the ‘Print’ node. Connect the node with the ‘Start’ node and the ‘End’ node.
4) After you execute the plan, you can verify that the initial value of the variable is shown in the ‘Console
View’.
3.1.1. Flow Control: If
1) Adding an ‘If’ node: Drag an ‘If’ node from the ‘Components View’ located at the right side, and drop
into the ‘Editor View’.
2) Inserting a branch condition: Click the ‘( )’ located at the right-top of the ‘If’ node, and an edit box for
a condition will be added. Then, specify a condition to branch in the edit box. (E.g. ‘num == 0’)
13 Declaration
Flow Control 14
TYCHE
TYCHE
Flow Control
Flow Control 2
3) Connect the nodes that you want to execute when the condition is satisfied like the below figure. You can
connect a next node from the ‘Triangle ( )’ located at the right side of the condition edit box.
3.1.2. Flow Control 2: Sync, Pause
1) Adding a ‘Pause’ Node: Drag a ‘Pause’ node from the ‘Component View’, and drop it into the ‘Editor View’.
The unit of input value is millisecond (ms), and the control flow will be paused as much as you typed in
the ‘Pause’ node.
4) Execution: You can run the plan with ‘Execute ( )’. You can identify a current control flow with the highlight of nodes. The initial value of the variable ‘num’ is 0, and there is no change in the value of the variable.
Therefore, you can watch ‘first condition’ in the ‘Console View’ according to the condition of the ‘If’ node.
2) Adding a ‘Sync’ node: Drag a ‘Sync’ node from the ‘Component View’, and drop it into the ‘Editor View’.
15 Flow Control
Flow Control 2
16
TYCHE
TYCHE
The Control of UPNP Components
The Control of UPNP Components
3) Only after all control flows to the ‘Sync’ node arrives, the control flow moves to the next node of the ‘Sync’
node. For this example, it shows the moment when 1000ms passed after the execution. The upper control
flow executed the 1000ms waiting pause node, and the ‘Sync’ node is waiting for the control flow from the
bottom which is running the ‘Pause’ node which means 2000ms waiting.
2) Search for TycheUPnP
3) Add the UPnP to the Configuration file
3.1.3.The control of UPnP Components: UPnP Action, UPnP Event
1) Create a new folder for UPnP workspace.
17 The Control of UPNP Components
The Control of UPNP Components 18
TYCHE
TYCHE
Extension: Script
UPnP EVENT MONITOR
4) Use the UPnP functions to you plan
3.2.1. Plan Reuse: Group
- iRSP supports a Group node functionality to reuse existing plans in other plans.
1) To use existing plans as a unit node in other plans, drag the plan node from the ‘‘Component View’, and
drop it into the ‘Editor View’.
3.2. Extension: Script
1) Adding an ‘Script’ node: Drag an ‘Script’ node from the ‘Component View’, and drop it into the ‘Editor View’
2) Double click the created ‘Script’ node, and the pop-up window in which you can type ‘BeanShell’ script
will appear. Enter a script in the window. Then, Click the ‘OK’ button.
2) The input/output of the added group node are same as those of the existing plan, respectively.
3) Specify the variables used in the input/output of the existing plans in the input/output of the group
node, respectively.
3.2.2. UPnP Event Monitor
* You can see what inputs are required and outputs you get by hovering over a component function.
19 Extension: Script
UPnP Event Monitor 20
TYCHE
TYCHE
How to Use UPnP
Practical use of iRSP
3.2.3. How to Use UPnP
3.2.4. UPnP Introduction
* UPnP Hierarchical Architecture:
* Universal Plug and Play (UPnP): is a standard that uses Internet and Web protocols to enable devices such
as PCs, peripherals, intelligent appliances, and wireless devices to be plugged into a network and automatically know about each other.
* With UPnP, when a user plugs a device into the network, the device will announce its presence on the
network to other devices.
* For instance, even though iRSP does not know the address of a device, iRSP can access it without any further steps as long as it is on the same network with iRSP.
* UPnP Structure:
A device consists of one or more services, and one service contains one or more actions. An action is what
does several functions. iRSP accesses components using a ‘Control Point’.
0 Level (Address): Control point and device obtain an address to participate in the network.
1 Level (Discovery): Control point finds all devices and device advertises its availability.
2 Level (Description): Control point learns about device capabilities.
3 Level (Control):Control point invokes actions on device.
4 Level (Event notification): Control point listens to state changes of device.
5 Level (Presentation): Control point controls device and/or views device status using an HTML UI.
For more information, visit an UPnP official website (http://www.upnp.org/).
3.3. Practical Use of iRSP
3.3.1. TYCHE with iRSP
3.1.2. TTS + RobotInfo
* This example will program Tyche to tell you in which type of car Tyche is, if it’s in a car, and speak “I am not
connected to a car” if not.
21 How to Use UPnP
UPNP Event Monitor 22
TYCHE
TYCHE
Change Expressions + LED
FAQ
3.2.3. Change Expressions + LED
3.2.5. Music + Sound
* This example will program Tyche to turn on its LED for one second and smile at the same time.
3.2.4. Face Detection and Take picture
3.3. FAQ
Q: Does iRSP support other robots beside EngKey?
A: Yes. iRSP supports various robots such as Silbot2, iRobot Create, AR Drone2, Bonavision Smartphone robot, Sphero, and Romo. Information about other robots will be offered in a component or
manual update.
Q: How can I make an android UPnP Component?
A: A Service class from the UPnP Builder also can be used on the android environment. However, the
code stub that creates a Device needs to be implemented in a different way.
For more detailed explanation, refer to the below Cling Library website.
http://4thline.org/projects/cling/core/manual/cling-core-manual.html#chapter.Android
When Tyche detects a face, it takes a photo.
Q: How can I add additional poses to the ‘PoseDetection’ Component?
A: The PoseDetection component is implemented using openNI Library (http://www.openni.org). To
add other poses, you have to re-implement the component with the library. Currently, the ‘PoseDetection’ components can use only the predefined poses, and it is impossible to define additional poses.
The upgraded version which allows a user to add more poses will be provided in the future update.
Q: Are there any other components for image processing?
A: Image processing components are in a developing process. As soon as they are stabilized, the components will be distributed.
For more questions, please contact us at [email protected] .
23 Change Expressions + LED
FAQ 24
The AI Companion for Kids
iRSP USER MANUAL
Copyright © 2015 Bonavision Inc. All rights reserved
Bonavision Inc. USA
1040 Noel Dr, #100 B & C, Menlo Park, CA 94025
Bonavision Inc. Korea
#2F JungJu Bldg., 20 Banpo-daero Seocho-Gu Seoul, Korea 137-927
www.tyche.club